目录
1、图片懒加载
步骤一:自定义全局指令
步骤二:代码中使用
编辑步骤三:效果查看
步骤四:代码优化
2、封装组件案例-传对象
3、路由配置——tab标签
4、根据tab标签添加面包屑
4.1、实现
4.2、bug:需要手动刷新
4.3、解决方案一
4.4、方案优化:onBeforeRouteUpdate钩子函数
5、修改路由行为
1、图片懒加载
步骤一:自定义全局指令
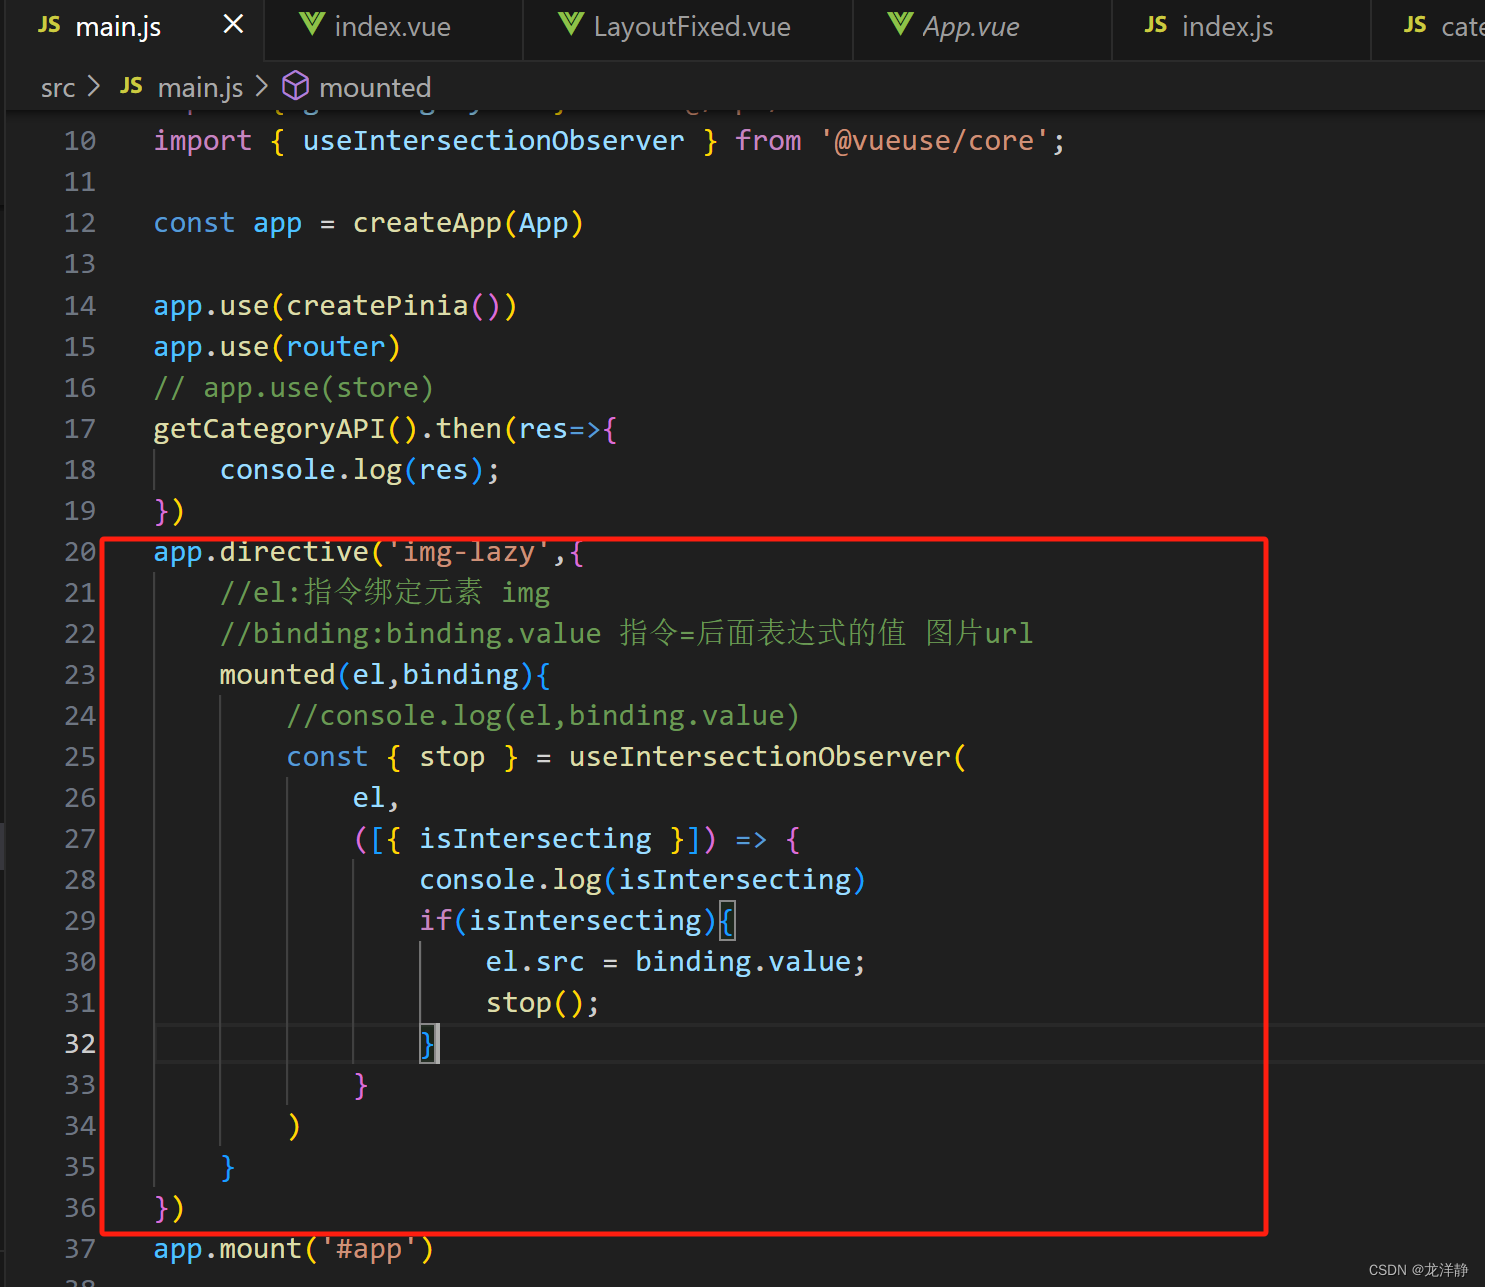
重构main.js文件:
app.directive('img-lazy',{//el:指令绑定元素 img//binding:binding.value 指令=后面表达式的值 图片urlmounted(el,binding){        //console.log(el,binding.value)const { stop } = useIntersectionObserver(el,([{ isIntersecting }]) => {console.log(isIntersecting)if(isIntersecting){el.src = binding.value;stop();}})}
})
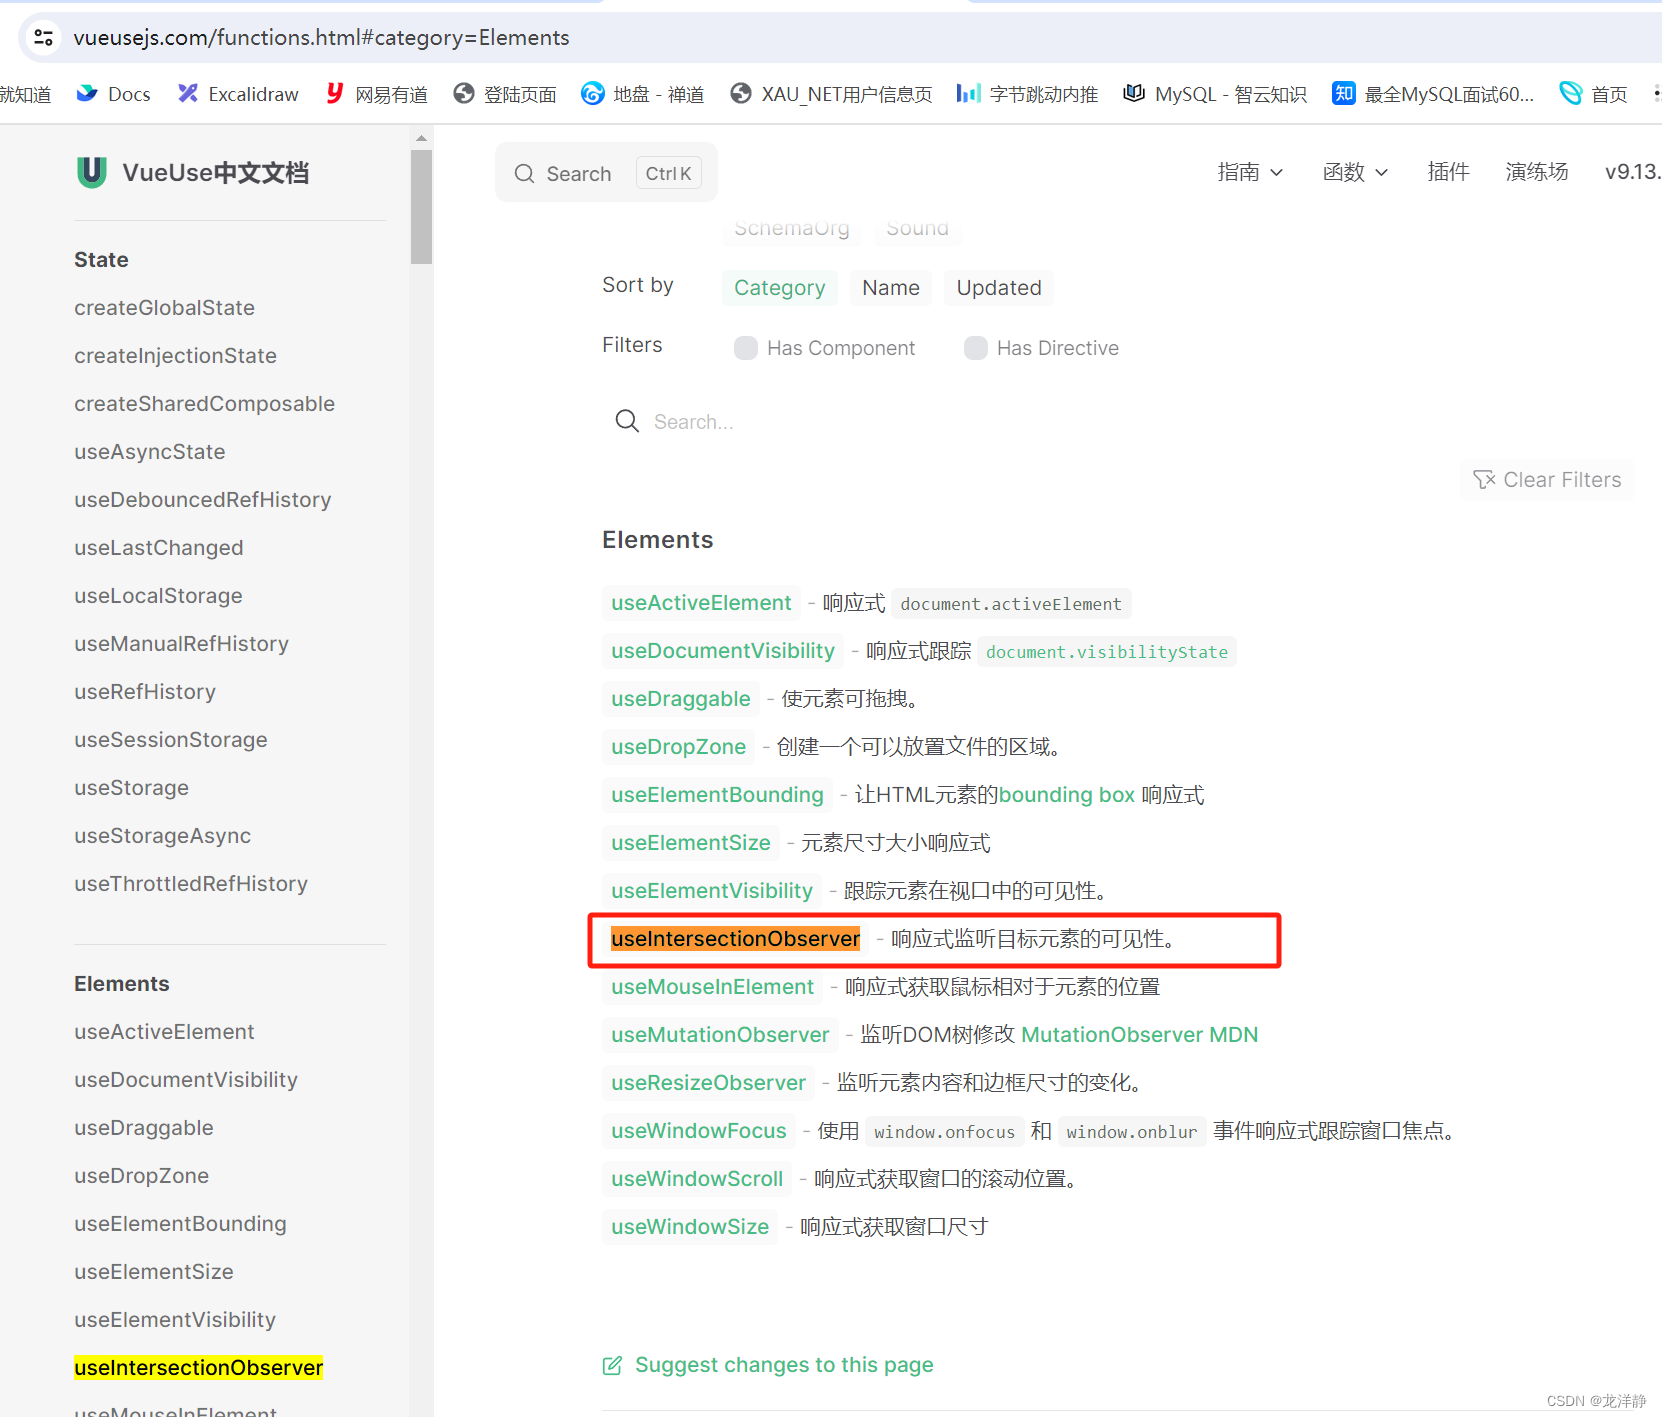
代码解释:
-
app.directive('img-lazy', { ... }):在 Vue 应用中定义一个名为 v-img-lazy的全局指令。 -
mounted(el, binding) { ... }:这是指令的mounted钩子函数,它在被绑定的元素插入到父节点时调用。el:指令所绑定的元素,在这里是一个img标签。binding:一个对象,包含了很多属性,其中binding.value是指令等号后面的值,这里是图片的 URL。
-
const { stop } = useIntersectionObserver(el, callback):使用@vueuse/core的API -
useIntersectionObserver函数来观察el元素是否进入视口。el:要观察的 DOM 元素。callback:一个回调函数,当元素与视口有交集时调用。stop:一个函数,用于停止观察。
-
([{ isIntersecting }]) => { ... }:这是useIntersectionObserver的回调函数。isIntersecting:一个布尔值,表示元素是否进入视口。
-
if(isIntersecting) { ... }:如果isIntersecting为true,说明图片进入了视口。el.src = binding.value;:设置图片元素的src属性为指令的值(图片的 URL),从而开始加载图片。stop();:停止观察,因为图片已经加载,不需要再观察其是否进入视口。
步骤二:代码中使用
<img v-img-lazy="item.picture" alt=""> 步骤三:效果查看

步骤四:代码优化
把这些代码都写在main.js中,main.js中的内容,太过于杂乱了些,我们整理一下,在根目录下创建directives/index.js:
import { useIntersectionObserver } from '@vueuse/core'export const lazyPlugin = {install (app) {// 懒加载指令逻辑app.directive('img-lazy', {mounted (el, binding) {// el: 指令绑定的那个元素 img// binding: binding.value  指令等于号后面绑定的表达式的值  图片urlconsole.log(el, binding.value)const { stop } = useIntersectionObserver(el,([{ isIntersecting }]) => {console.log(isIntersecting)if (isIntersecting) {// 进入视口区域el.src = binding.valuestop()}},)}})}
}
main.js中:

2、封装组件案例-传对象
向组件传值的另一个案例-传普通值,在本系列文章:前端项目,个人笔记(二)【Vue-cli - 引入阿里矢量库图标 + 吸顶交互 + setup语法糖】
调用的地方:

很明显,我们是有一个GoodItem组件,并且我们直接把good的这个对象传过去了
GoodItem组件代码:
<script setup>
defineProps({good: {type: Object,default: () => { }}
})
</script><template><RouterLink to="/" class="goods-item"><img v-img-lazy="good.picture" alt="" /><p class="name ellipsis">{{ good.name }}</p><p class="desc ellipsis">{{ good.desc }}</p><p class="price">¥{{ good.price }}</p></RouterLink>
</template><style scoped lang="scss">
.goods-item {display: block;width: 220px;padding: 20px 30px;text-align: center;transition: all .5s;&:hover {transform: translate3d(0, -3px, 0);box-shadow: 0 3px 8px rgb(0 0 0 / 20%);}img {width: 160px;height: 160px;}p {padding-top: 10px;}.name {font-size: 16px;}.desc {color: #999;height: 29px;}.price {color: $priceColor;font-size: 20px;}
}
</style>可以重点看一下,是如何接收父组件传来的对象的·~
3、路由配置——tab标签
路由配置:


效果:

4、根据tab标签添加面包屑
4.1、实现
效果:

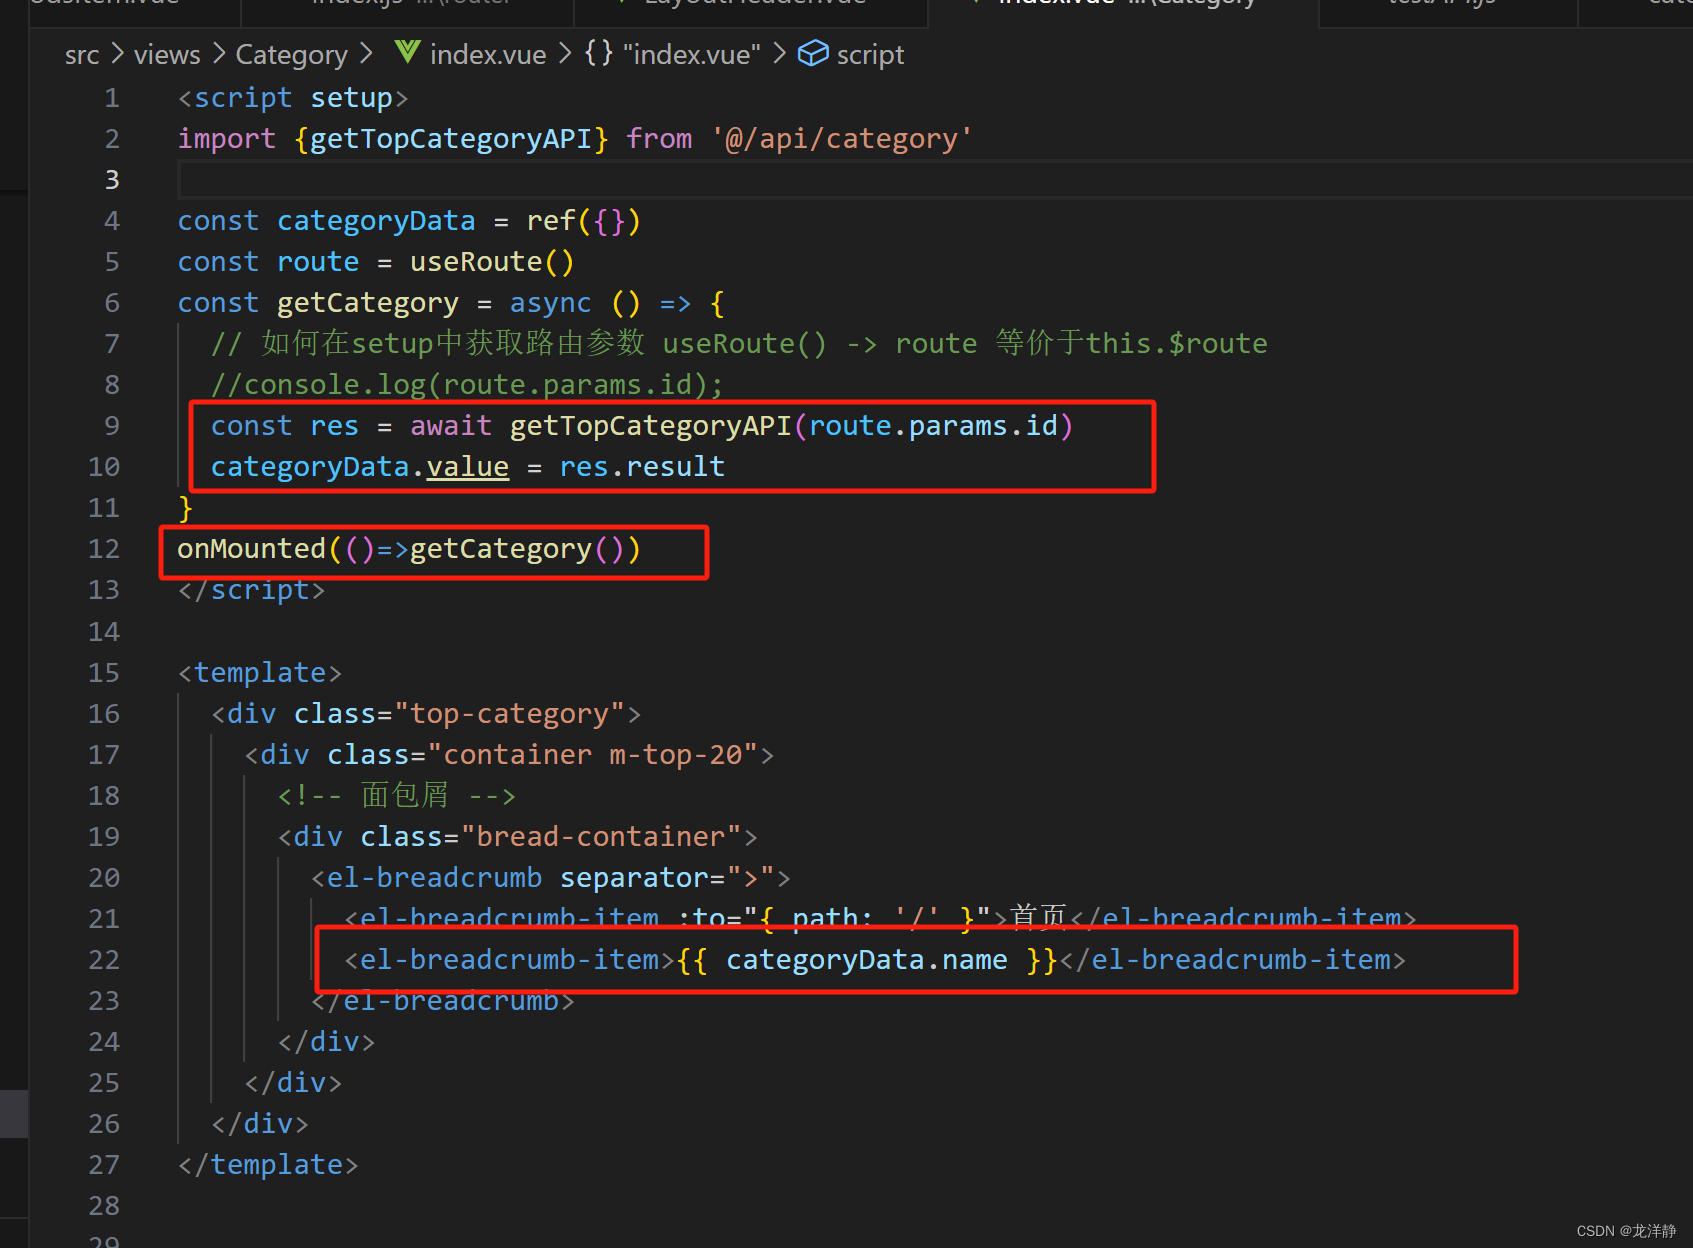
这个值的获取,是根据url中的id查询到tab的name的,因此第一步,我们需要封装一个查询请求:
api/category.js:
import http from "@/utils/http";/*** @description: 根据id获得一级分类对象信息* @param {*} id 分类id* @return {*}*/
export function getTopCategoryAPI(id){return http.get('/category',{params:{id}});
}
使用: Category/index.vue:
<script setup>
import {getTopCategoryAPI} from '@/api/category'
import {useRoute} from "vue-router";
import {onMounted, onUpdated, ref} from "vue";const categoryData = ref({})
const route = useRoute()
const getCategory = async () => {// 如何在setup中获取路由参数 useRoute() -> route 等价于this.$route//console.log(route.params.id);const res = await getTopCategoryAPI(route.params.id)categoryData.value = res.result
}
onMounted(()=>getCategory())
</script><template><div class="top-category"><div class="container m-top-20"><!-- 面包屑 --><div class="bread-container"><el-breadcrumb separator=">"><el-breadcrumb-item :to="{ path: '/' }">首页</el-breadcrumb-item><el-breadcrumb-item>{{ categoryData.name }}</el-breadcrumb-item></el-breadcrumb></div></div></div>
</template><style scoped lang="scss">
.top-category {h3 {font-size: 28px;color: #666;font-weight: normal;text-align: center;line-height: 100px;}.sub-list {margin-top: 20px;background-color: #fff;ul {display: flex;padding: 0 32px;flex-wrap: wrap;li {width: 168px;height: 160px;a {text-align: center;display: block;font-size: 16px;img {width: 100px;height: 100px;}p {line-height: 40px;}&:hover {color: $xtxColor;}}}}}.ref-goods {background-color: #fff;margin-top: 20px;position: relative;.head {.xtx-more {position: absolute;top: 20px;right: 20px;}.tag {text-align: center;color: #999;font-size: 20px;position: relative;top: -20px;}}.body {display: flex;justify-content: space-around;padding: 0 40px 30px;}}.bread-container {padding: 25px 0;}
}
</style>
重点代码:
4.2、bug:需要手动刷新

bug原因:当你在同一个组件内点击时,他会复用之前的组件 ,所以就不会刷新了,需要手动刷新~
4.3、解决方案一
在路由入口处处理:
<RouterView :key="$route.fullPath"/>
方案:将路由入口中的所有组件全部都会重新加载~ 而我们只需要对应的组件刷新即可,因此就有了方案优化:
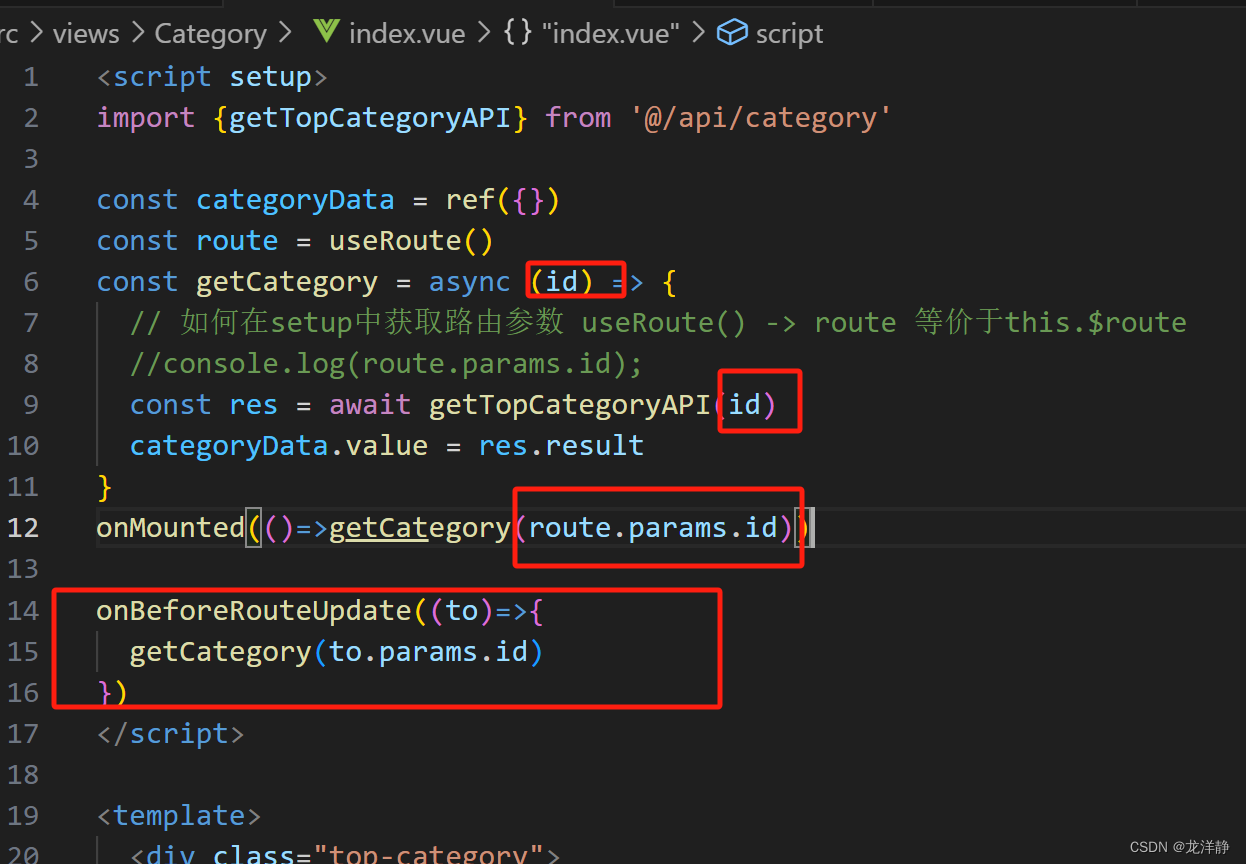
4.4、方案优化:onBeforeRouteUpdate钩子函数
onBeforeRouteUpdate((to)=>{getCategory(to.params.id)
})
5、修改路由行为
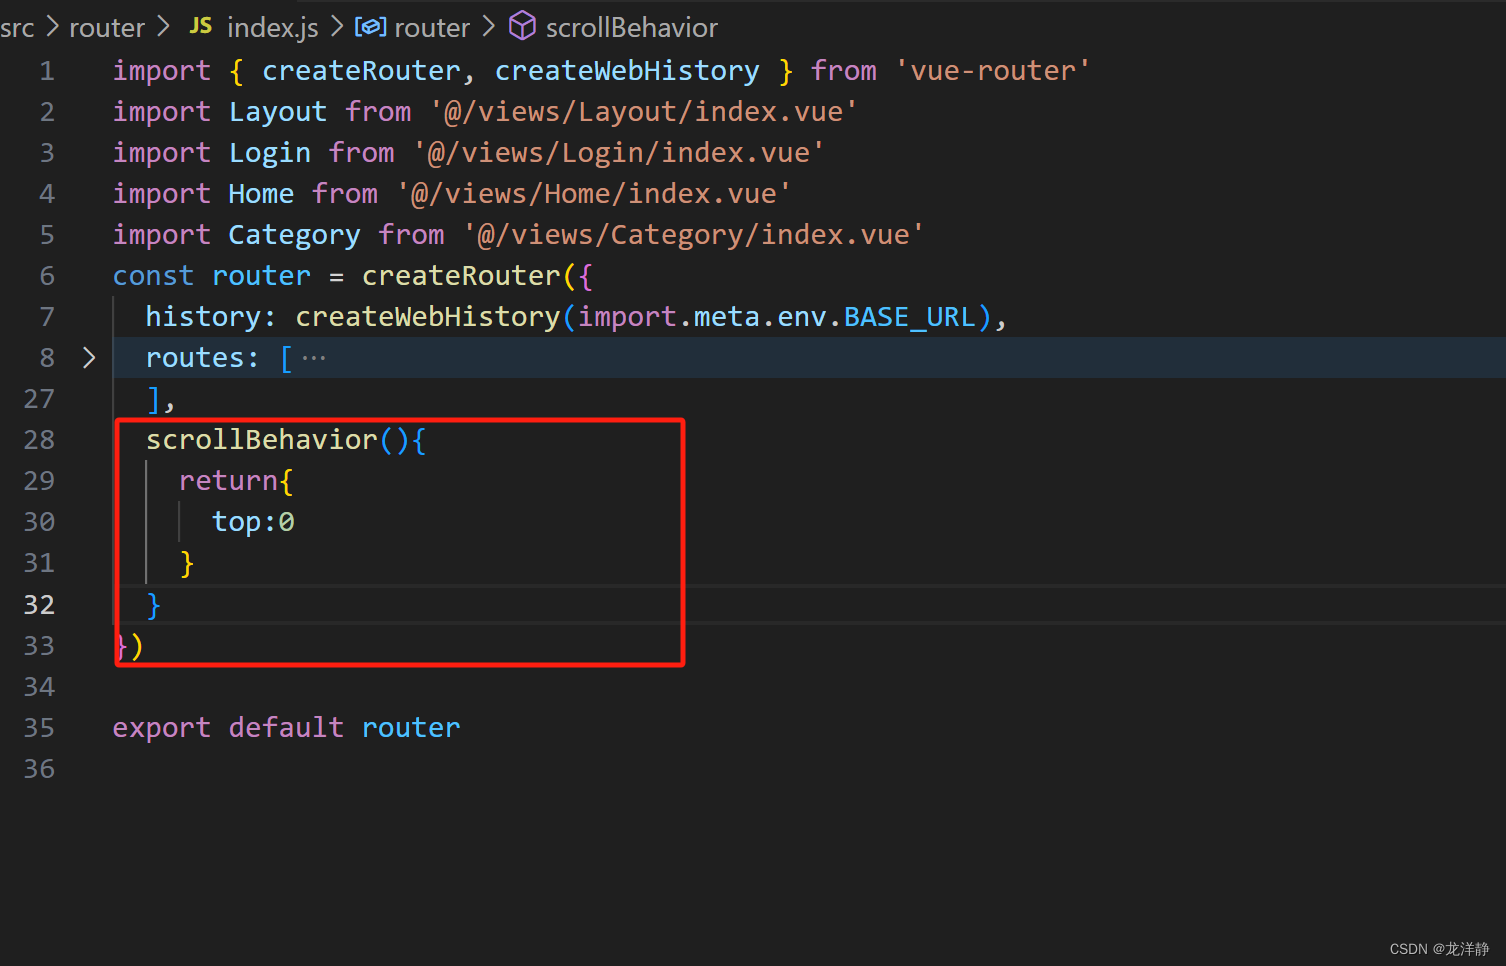
我们会发现当我们在首页时,右侧滚动条可能是在中间,当我们切到美食时,滚动条还是在中间,没有跳到最上面。处理:
scrollBehavior(){return{top:0}
}


中部署项目wordpress(php博客项目,数据库mysql))


)


![[Java、Android面试]_08_强软弱虚四种引用及应用场景](http://pic.xiahunao.cn/[Java、Android面试]_08_强软弱虚四种引用及应用场景)

