一、NoSQL介绍
NoSQL是对 Not Only SQL、非传统关系型数据库的统称。
NoSQL一词诞生于1998年,2009年这个词汇被再次提出指非关系型、分布式、不提供ACID的数据库设计模式。
随着互联网时代的到来,数据爆发式增长,数据库技术发展日新月异,要适应新的业务需求。
而随着移动互联网、物联网的到来,大数据的技术中NoSQL也同样重要。
数据库排名:https://db-engines.com/en/ranking
NOSQL分类:
-
Key-value Store k/v数据库
-
性能好 O(1) , 如: redis、memcached
-
-
Document Store 文档数据库
-
mongodb、CouchDB
-
-
Column Store 列存数据库,Column-Oriented DB
-
HBase、Cassandra,大数据领域应用广泛
-
-
Graph DB 图数据库
-
Neo4j
-
-
Time Series 时序数据库
-
InfluxDB、Prometheus
-
二、Memcached
1、Memcached介绍

Memcached 只支持能序列化的数据类型,不支持持久化,基于Key-Value的内存缓存系统
memcached 虽然没有像redis所具备的数据持久化功能,比如RDB和AOF都没有,但是可以通过做集群同步的方式,让各memcached服务器的数据进行同步,从而实现数据的一致性,即保证各memcached的数据是一样的,即使有任何一台 memcached 发生故障,只要集群中有一台 memcached 可用就不会出现数据丢失,当其他memcached 重新加入到集群的时候,可以自动从有数据的memcached 当中自动获取数据并提供服务
Memcached 借助了操作系统的 libevent 工具做高效的读写。libevent是个程序库,它将Linux的epoll、BSD类操作系统的kqueue等事件处理功能封装成统一的接口。即使对服务器的连接数增加,也能发挥高性能。memcached使用这个libevent库,因此能在Linux、BSD、Solaris等操作系统上发挥其高性能
Memcached 支持最大的内存存储对象为1M,超过1M的数据可以使用客户端压缩或拆分报包放到多个key中,比较大的数据在进行读取的时候需要消耗的时间比较长,memcached 最适合保存用户的session实现session共享
Memcached存储数据时, Memcached会去申请1MB的内存, 把该块内存称为一个slab, 也称为一个page
Memcached 支持多种开发语言,包括:JAVA,C,Python,PHP,C#,Ruby,Perl等
Memcached 官网:http://memcached.org/2、Memcached 和 Redis 比较
| 比较类别 | Redis | memcached |
|---|---|---|
| 支持的数据结构 | 哈希、列表、集合、有序集合 | 纯kev-value |
| 持久化支持 | 有 | 无 |
| 高可用支持 | redis支持集群功能,可以实现主动复制,读写分离官方也提供了sentinel集群管理工具,能够实现主从服务监控,故障自动转移,这一切,对于客户端都是透明的,无需程序改动,也无需人工介入 | 需要二次开发 |
| 存储value容量 | 最大512M | 最大1M |
| 内存分配 | 临时申请空间,可能导致碎片 | 预分配内存池的方式管理内存,能够省去内存分配时间 |
| 虚拟内存使用 | 有自己的VM机制,理论上能够存储比物理内存更多的数据,当数据超量时,会引发swap,把冷数据刷到磁盘上 | 所有的数据存储在物理内存里 |
| 网络类型 | 非阻塞IO复用模型,提供一些非KV存储之外的排序聚合功能,在执行这些功能时,复杂的CPU计算,会阻塞整个IO调度 | 非阻塞IO复用模型 |
| 水平扩展支持 | redis cluster 可以横向扩展 | 暂无 |
| 多线程 | Redis6.0之前是只支持单线程 | Memcached支持多线程,CPU利用方面Memcache优于redis |
| 单机QPS | 约10W | 约60W |
| 源代码可读性 | 代码清爽简洁 | 可能是考虑了太多的扩展性,多系统的兼容性,代码不清爽 |
| 适用场景 | 复杂数据结构、有持久化、高可用需求、value存储内容较大 | 纯KV,数据量非常大,并发量非常大的业务 |
3、Memcached工作机制
1.内存分配机制
应用程序运行需要使用内存存储数据,但对于一个缓存系统来说,申请内存、释放内存将十分频繁,非常容易导致大量内存碎片,最后导致无连续可用内存可用。
Memcached采用了Slab Allocator机制来分配、管理内存。
-
Page:分配给Slab的内存空间,默认为1MB,分配后就得到一个Slab。Slab分配之后内存按照固定字节大小等分成chunk。
-
Chunk:用于缓存记录k/v值的内存空间。Memcached会根据数据大小选择存到哪一个chunk中,假设chunk有128bytes、64bytes等多种,数据只有100bytes存储在128bytes中,存在少许浪费。
-
Chunk最大就是Page的大小,即一个Page中就一个Chunk
-
Slab Class:Slab按照Chunk的大小分组,就组成不同的Slab Class, 第一个Chunk大小为 96B的Slab为Class1,Chunk 120B为Class 2,如果有100bytes要存,那么Memcached会选择下图中Slab Class 2 存储,因为它是120bytes的Chunk。Slab之间的差异可以使用Growth Factor 控制,默认1.25。
根据数据大小分配到合适的盒子里

查看 Slab Class
[root@localhost ~]#memcached -u memcached -f 2 -vv
slab class   1: chunk size        96 perslab   10922
slab class   2: chunk size       192 perslab    5461
slab class   3: chunk size       384 perslab    2730
slab class   4: chunk size       768 perslab    1365
slab class   5: chunk size      1536 perslab     682
slab class   6: chunk size      3072 perslab     341
slab class   7: chunk size      6144 perslab     170
slab class   8: chunk size     12288 perslab      85
slab class   9: chunk size     24576 perslab      42
slab class  10: chunk size     49152 perslab      21
slab class  11: chunk size     98304 perslab      10
slab class  12: chunk size    196608 perslab       5
slab class  13: chunk size    393216 perslab       2
slab class  14: chunk size   1048576 perslab       1
<26 server listening (auto-negotiate)
<27 server listening (auto-negotiate)
<28 send buffer was 212992, now 268435456
<29 send buffer was 212992, now 268435456
<28 server listening (udp)
<29 server listening (udp)2.懒过期Lazy Expiration
memcached不会监视数据是否过期,而是在取数据时才看是否过期,如果过期,把数据有效期限标识为0,并不清除该数据。以后可以覆盖该位置存储其它数据。
3. LRU (最近最少使用算法)
当内存不足时,memcached会使用LRU(Least Recently Used)机制来查找可用空间,分配给新记录使用
4.集群
Memcached集群,称为基于客户端的分布式集群,即由客户端实现集群功能,即Memcached本身不支持集群
Memcached集群内部并不互相通信,一切都需要客户端连接到Memcached服务器后自行组织这些节点,并决定数据存储的节点。
注意:Memcache不支持集群
4、Memcached安装和启动
官方安装说明 https://github.com/memcached/memcached/wiki/Install1.yum安装
[root@localhost ~]#yum info memcached        ##yum源的Memcached版本信息
已加载插件:fastestmirror, langpacks
Loading mirror speeds from cached hostfile* base: mirrors.nju.edu.cn* extras: mirrors.nju.edu.cn* updates: mirrors.nju.edu.cn
可安装的软件包
名称    :memcached
架构    :x86_64
版本    :1.4.15
发布    :10.el7_3.1
大小    :85 k
源    :base/7/x86_64
简介    : High Performance, Distributed Memory Object Cache
网址    :http://www.memcached.org/
协议    : BSD
描述    : memcached is a high-performance, distributed memory object caching: system, generic in nature, but intended for use in speeding up dynamic: web applications by alleviating database load.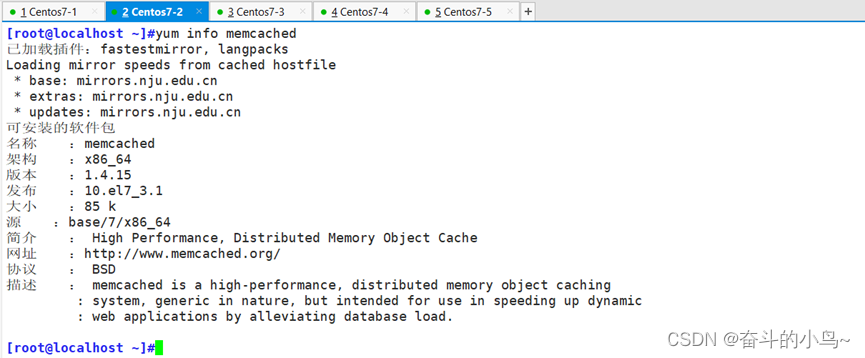
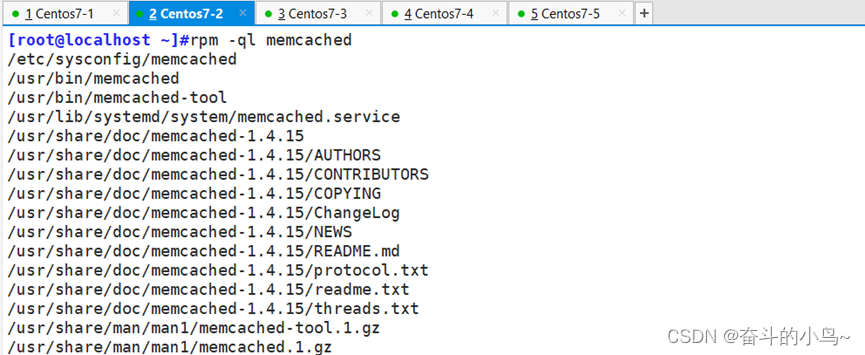
[root@localhost ~]#yum install memcached -y     ###yum安装memcached[root@localhost ~]#rpm -ql memcached
/etc/sysconfig/memcached                        ###主配置文件
/usr/bin/memcached                              ###主进程
/usr/bin/memcached-tool
/usr/lib/systemd/system/memcached.service
/usr/share/doc/memcached-1.4.15
/usr/share/doc/memcached-1.4.15/AUTHORS
/usr/share/doc/memcached-1.4.15/CONTRIBUTORS
/usr/share/doc/memcached-1.4.15/COPYING
/usr/share/doc/memcached-1.4.15/ChangeLog
/usr/share/doc/memcached-1.4.15/NEWS
/usr/share/doc/memcached-1.4.15/README.md
/usr/share/doc/memcached-1.4.15/protocol.txt
/usr/share/doc/memcached-1.4.15/readme.txt
/usr/share/doc/memcached-1.4.15/threads.txt
/usr/share/man/man1/memcached-tool.1.gz
/usr/share/man/man1/memcached.1.gz
[root@localhost ~]#vim /etc/sysconfig/memcached
PORT="11211"     #监听端口
USER="memcached" #启动用户
MAXCONN="1024"   #最大连接数
CACHESIZE="64"   #最大使用内存
OPTIONS=""       #其他选项,监听所有
[root@localhost ~]#id memcached
uid=990(memcached) gid=985(memcached) 组=985(memcached)
#安装Memcache服务后  会自动新建一个用户
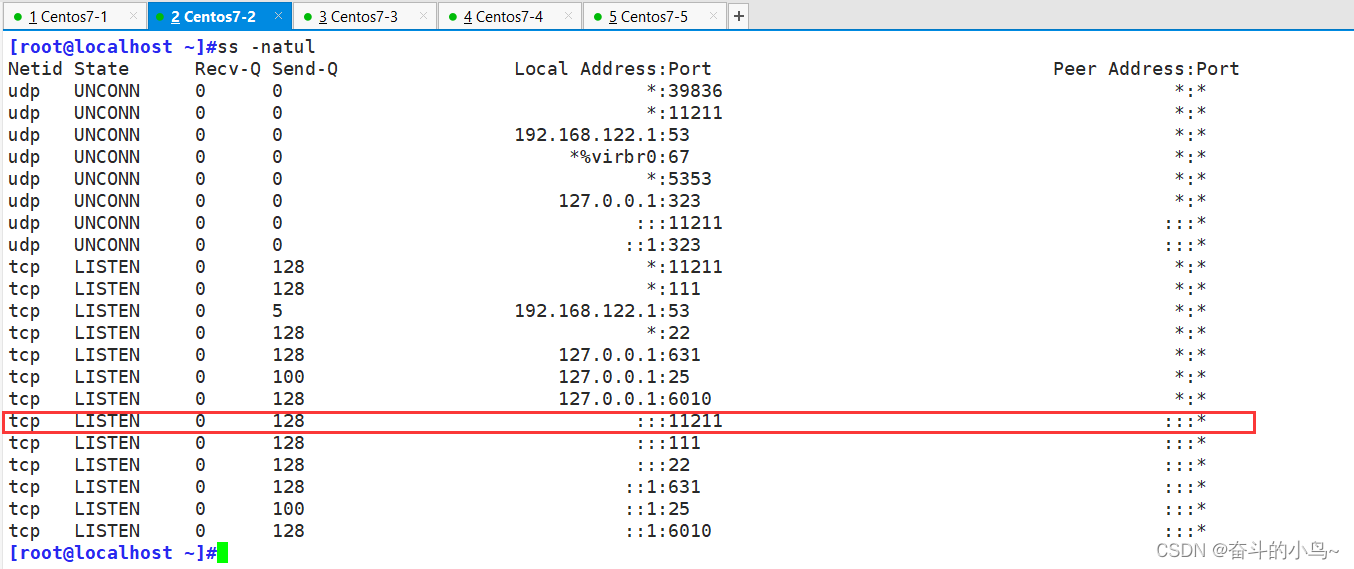
[root@localhost ~]#systemctl start memcached.service   ##开启服务[root@localhost ~]#ss -natl             ###查看监听端口[root@localhost ~]#ss -natul            ###查看监听端口协议
#Memcache服务使用的是TCP协议

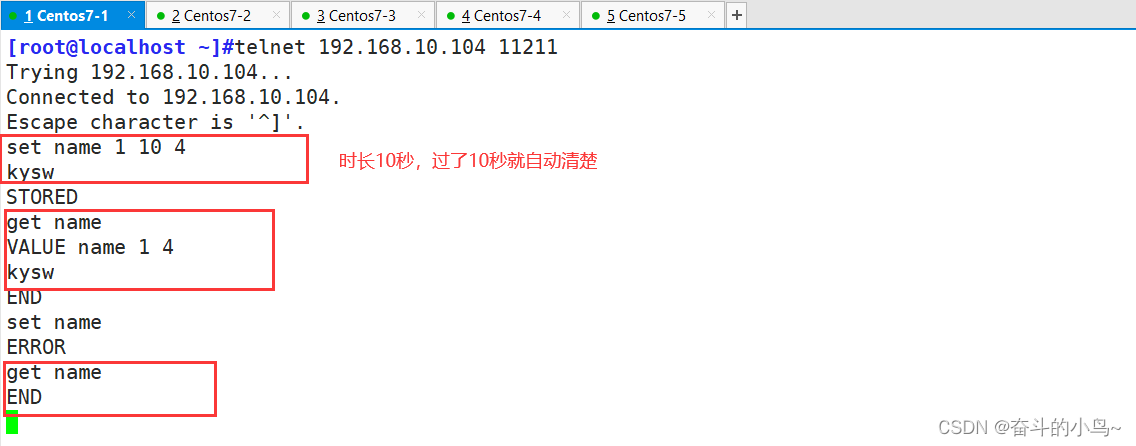
[root@localhost ~]#yum install telnet -y
2.编译安装Memcached
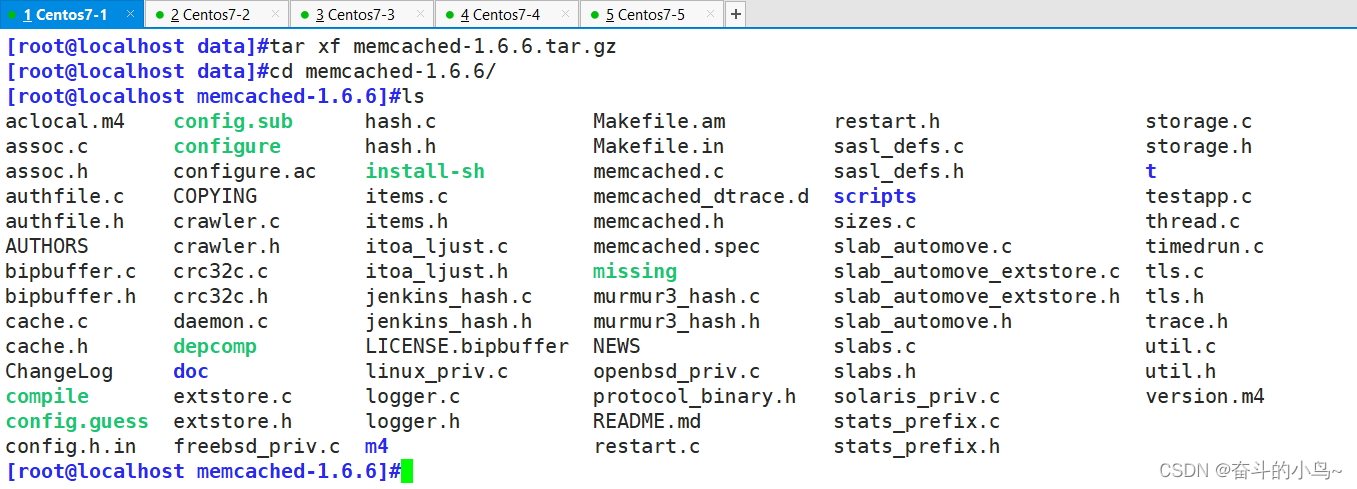
[root@localhost ~]#yum -y install gcc libevent-devel    ###安装依赖包[root@localhost ~]#cd /data[root@localhost data]#wget http://memcached.org/files/memcached-1.6.6.tar.gz    ###下载安装包[root@localhost data]#tar xf memcached-1.6.6.tar.gz     ###解压[root@localhost data]#cd memcached-1.6.6/[root@localhost memcached-1.6.6]#ls[root@localhost memcached-1.6.6]#./configure --prefix=/apps/memcached[root@localhost memcached-1.6.6]#make && make install[root@localhost memcached-1.6.6]#ls /apps/memcached/[root@localhost memcached-1.6.6]#ln -s /apps/memcached/bin/memcached  /usr/bin/[root@localhost memcached-1.6.6]#useradd -r -s /sbin/nologin memcached[root@localhost memcached-1.6.6]#vim /etc/sysconfig/memcached
PORT="11211"
USER="memcached"
MAXCONN="1024"
CACHESIZE="64"
OPTIONS=""



#准备service文件
[root@centos7 ~]#cat  > /lib/systemd/system/memcached.service    << eof
[Unit]
Description=memcached daemon
Before=httpd.service
After=network.target
[Service]
EnvironmentFile=/etc/sysconfig/memcached
ExecStart=/apps/memcached/bin/memcached -p  \${PORT} -u \${USER} -m \${CACHESIZE} -c \${MAXCONN} \$OPTIONS
[Install]
WantedBy=multi-user.target
eof
[root@localhost memcached-1.6.6]#systemctl daemon-reload
[root@localhost memcached-1.6.6]#systemctl start memcached.service
[root@localhost memcached-1.6.6]#systemctl status memcached.service
增长因子的改变
#默认前台执行
[root@centos7 ~]#memcached -u memcached -m 1024 -c 65536 -f 2 -vv #以台方式执行
[root@centos7 ~]#memcached -u memcached -m 1024 -c 65536 -d
3.Memcached启动程序说明
memcached常见的选项:
[root@localhost memcached-1.6.6]#memcached -h
memcached 1.6.6
-p, --port=<num>          TCP port to listen on (default: 11211)
-U, --udp-port=<num>      UDP port to listen on (default: 0, off)
-s, --unix-socket=<file>  UNIX socket to listen on (disables network support)
-a, --unix-mask=<mask>    access mask for UNIX socket, in octal (default: 700)
-A, --enable-shutdown     enable ascii "shutdown" command
-l, --listen=<addr>       interface to listen on (default: INADDR_ANY)
-d, --daemon              run as a daemon
-r, --enable-coredumps    maximize core file limit
-u, --user=<user>         assume identity of <username> (only when run as root)
-m, --memory-limit=<num>  item memory in megabytes (default: 64)
-M, --disable-evictions   return error on memory exhausted instead of evicting
-c, --conn-limit=<num>    max simultaneous connections (default: 1024)
-k, --lock-memory         lock down all paged memory
-v, --verbose             verbose (print errors/warnings while in event loop)
-vv                       very verbose (also print client commands/responses)
-vvv                      extremely verbose (internal state transitions)
-h, --help                print this help and exit
-i, --license             print memcached and libevent license
-V, --version             print version and exit
-P, --pidfile=<file>      save PID in <file>, only used with -d option
-f, --slab-growth-factor=<num> chunk size growth factor (default: 1.25)
-n, --slab-min-size=<bytes> min space used for key+value+flags (default: 48)
-L, --enable-largepages  try to use large memory pages (if available)
-D <char>     Use <char> as the delimiter between key prefixes and IDs.This is used for per-prefix stats reporting. The default is":" (colon). If this option is specified, stats collectionis turned on automatically; if not, then it may be turned onby sending the "stats detail on" command to the server.
-t, --threads=<num>       number of threads to use (default: 4)
-R, --max-reqs-per-event  maximum number of requests per event, limits therequests processed per connection to prevent starvation (default: 20)
-C, --disable-cas         disable use of CAS
-b, --listen-backlog=<num> set the backlog queue limit (default: 1024)
-B, --protocol=<name>     protocol - one of ascii, binary, or auto (default: auto-negotiate)
-I, --max-item-size=<num> adjusts max item size(default: 1m, min: 1k, max: 1024m)
-F, --disable-flush-all   disable flush_all command
-X, --disable-dumping     disable stats cachedump and lru_crawler metadump
-W  --disable-watch       disable watch commands (live logging)
-Y, --auth-file=<file>    (EXPERIMENTAL) enable ASCII protocol authentication. format:user:pass\nuser2:pass2\n
-e, --memory-file=<file>  (EXPERIMENTAL) mmap a file for item memory.use only in ram disks or persistent memory mounts!enables restartable cache (stop with SIGUSR1)
-o, --extended            comma separated list of extended optionsmost options have a 'no_' prefix to disable- maxconns_fast:       immediately close new connections after limit (default: enabled)- hashpower:           an integer multiplier for how large the hashtable should be. normally grows at runtime. (default starts at: 0)set based on "STAT hash_power_level"- tail_repair_time:    time in seconds for how long to wait beforeforcefully killing LRU tail item.disabled by default; very dangerous option.- hash_algorithm:      the hash table algorithmdefault is murmur3 hash. options: jenkins, murmur3- no_lru_crawler:      disable LRU Crawler background thread.- lru_crawler_sleep:   microseconds to sleep between itemsdefault is 100.- lru_crawler_tocrawl: max items to crawl per slab per rundefault is 0 (unlimited)- resp_obj_mem_limit:  limit in megabytes for connection response objects.do not adjust unless you have high (100k+) conn. limits.0 means unlimited (default: 0)- read_buf_mem_limit:  limit in megabytes for connection read buffers.do not adjust unless you have high (100k+) conn. limits.0 means unlimited (default: 0)- no_lru_maintainer:   disable new LRU system + background thread.- hot_lru_pct:         pct of slab memory to reserve for hot lru.(requires lru_maintainer, default pct: 20)- warm_lru_pct:        pct of slab memory to reserve for warm lru.(requires lru_maintainer, default pct: 40)- hot_max_factor:      items idle > cold lru age * drop from hot lru. (default: 0.20)- warm_max_factor:     items idle > cold lru age * this drop from warm. (default: 2.00)- temporary_ttl:       TTL's below get separate LRU, can't be evicted.(requires lru_maintainer, default: 61)- idle_timeout:        timeout for idle connections. (default: 0, no timeout)- slab_chunk_max:      (EXPERIMENTAL) maximum slab size in kilobytes. use extreme care. (default: 512)- watcher_logbuf_size: size in kilobytes of per-watcher write buffer. (default: 256)- worker_logbuf_size:  size in kilobytes of per-worker-thread bufferread by background thread, then written to watchers. (default: 64)- track_sizes:         enable dynamic reports for 'stats sizes' command.- no_hashexpand:       disables hash table expansion (dangerous)- modern:              enables options which will be default in future.currently: nothing- no_modern:           uses defaults of previous major version (1.4.x)- External storage (ext_*) related options (see: https://memcached.org/extstore)- ext_path:            file to write to for external storage.ie: ext_path=/mnt/d1/extstore:1G- ext_page_size:       size in megabytes of storage pages. (default: 64)- ext_wbuf_size:       size in megabytes of page write buffers. (default: 4)- ext_threads:         number of IO threads to run. (default: 1)- ext_item_size:       store items larger than this (bytes, default 512)- ext_item_age:        store items idle at least this long (seconds, default: no age limit)- ext_low_ttl:         consider TTLs lower than this specially (default: 0)- ext_drop_unread:     don't re-write unread values during compaction (default: disabled)- ext_recache_rate:    recache an item every N accesses (default: 2000)- ext_compact_under:   compact when fewer than this many free pages(default: 1/4th of the assigned storage)- ext_drop_under:      drop COLD items when fewer than this many free pages(default: 1/4th of the assigned storage)- ext_max_frag:        max page fragmentation to tolerate (default: 0.80)- slab_automove_freeratio: ratio of memory to hold free as buffer.(see doc/storage.txt for more info, default: 0.010)
修改memcached 运行参数,可以使用下面的选项修改/etc/sysconfig/memcached文件
| 选项 | 含义 |
|---|---|
| -u | username memcached运行的用户身份,必须普通用户 |
| -p | 绑定的端口,默认11211 |
| -m | num 最大内存,单位MB,默认64MB |
| -c | num 最大连接数,缺省1024 |
| -d | daemon 守护进程方式运行 |
| -f | 增长因子Growth Factor,默认1.25 |
| -v | 详细信息,-vv能看到详细信息 |
| -M | 使用内存直到耗尽,不许LRU |
| -U | 设置UDP监听端口,0表示禁用UDP |
5、使用memcached
1.memcached开发库和工具
与memcached通信的不同语言的连接器。libmemcached提供了C库和命令行工具。
#安装工具包
[root@localhost ~]#yum install libmemcached -y 
1.Memping
[root@localhost ~]#memping --help
memping v1.0Ping a server to see if it is aliveCurrent options. A '=' means the option takes a value.--version Display the version of the application and then exit.--help Display this message and then exit.--quiet stderr and stdin will be closed at application startup.--verbose Give more details on the progression of the application.--debug Provide output only useful for debugging.--servers=List which servers you wish to connect to.--expire=Set the expire option for the object.--binary Switch to binary protocol.--username=Username to use for SASL authentication--password=Password to use for SASL authentication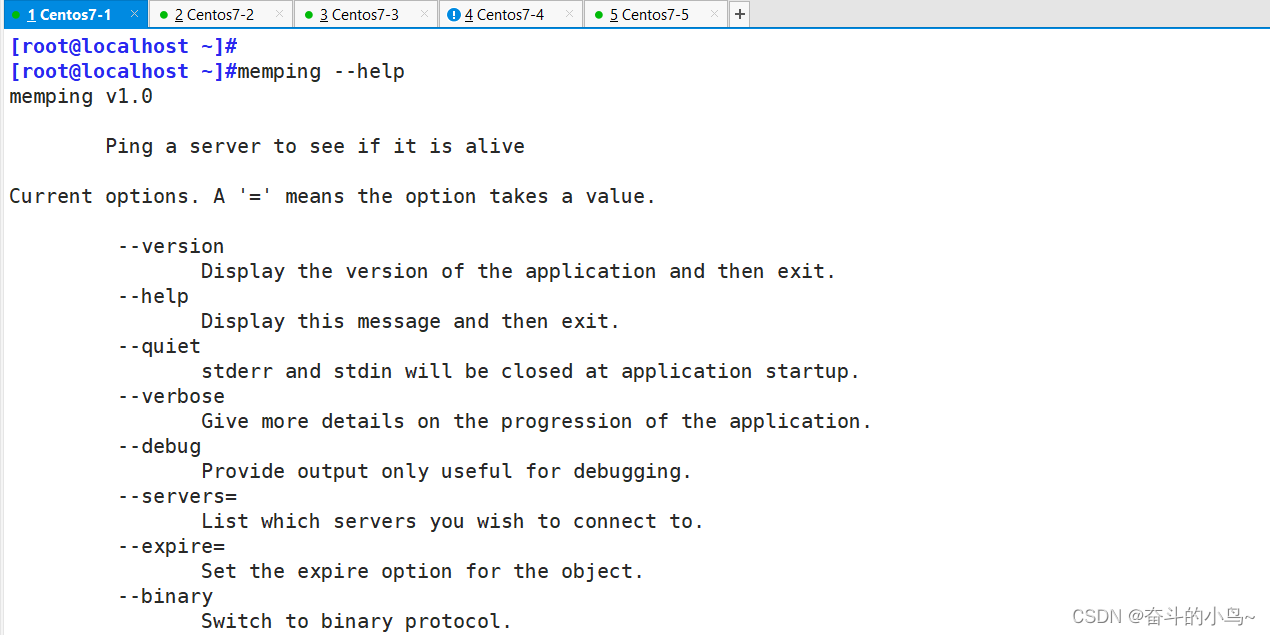
[root@localhost memcached-1.6.6]#memping --servers 192.168.10.101
[root@localhost memcached-1.6.6]#echo $?
0
[root@localhost ~]#systemctl stop memcached.service
[root@localhost memcached-1.6.6]#memping --servers 192.168.10.101
Failed to ping 192.168.10.101:11211 CONNECTION FAILURE
[root@localhost memcached-1.6.6]#echo $?
1
2.Memstat
[root@localhost ~]#memstat --servers 192.168.10.101
Server: 192.168.10.101 (11211)pid: 2643uptime: 52time: 1710430679version: 1.4.15libevent: 2.0.21-stablepointer_size: 64rusage_user: 0.000111rusage_system: 0.004910curr_connections: 10total_connections: 11connection_structures: 11reserved_fds: 20cmd_get: 0cmd_set: 0cmd_flush: 0cmd_touch: 0get_hits: 0get_misses: 0delete_misses: 0delete_hits: 0incr_misses: 0incr_hits: 0decr_misses: 0decr_hits: 0cas_misses: 0cas_hits: 0cas_badval: 0touch_hits: 0touch_misses: 0auth_cmds: 0auth_errors: 0bytes_read: 17bytes_written: 16limit_maxbytes: 67108864accepting_conns: 1listen_disabled_num: 0threads: 4conn_yields: 0hash_power_level: 16hash_bytes: 524288hash_is_expanding: 0bytes: 0curr_items: 0total_items: 0expired_unfetched: 0evicted_unfetched: 0evictions: 0reclaimed: 0
2.Memcached操作命令
[root@localhost ~]#cat /usr/share/doc/memcached-1.4.15/protocol.txt
#操作命令帮助路径
五种基本 memcached 命令执行最简单的操作。这些命令和操作包括:
- set
- add
- flush
- get
- delete
前三个命令是用于操作存储在Memcached中的键值的标准修改命令,都使用如下语法:
command <key> <flags> <expiration time> <bytes><value>
command set/add/replace
- key key 用于查找缓存值
- flags 可以包括键值对的整型参数,客户机使用它存储关于键值对的额外信息
- expiration time 在缓存中保存键值对的时间长度(以秒为单位,0 表示永远)
- bytes 在缓存中存储的字节数
- value 存储的值(始终位于第二行)
add key flags exptime bytes
增加key,过期时间为秒,bytes为存储数据的字节数
[root@localhost ~]#telnet 192.168.10.101 11211
Trying 192.168.10.101...
Connected to 192.168.10.101.
Escape character is '^]'.
add class 1 0 4
kysw
STORED
get class
VALUE class 1 4
kysw
END
set class 1 0 4
kkyy
STORED
get class
VALUE class 1 4
kkyy
END
delete class
DELETED
get class
ENDadd name 1 20 3
cxk
STORED
stats items
#显示各个slab中item的数目和存储市场(最后一次访问距离现在的秒数)STAT items:1:number 1
STAT items:1:age 5
STAT items:1:evicted 0
STAT items:1:evicted_nonzero 0
STAT items:1:evicted_time 0
STAT items:1:outofmemory 0
STAT items:1:tailrepairs 0
STAT items:1:reclaimed 0
STAT items:1:expired_unfetched 0
STAT items:1:evicted_unfetched 0
ENDstats slabs
#显示各个slab的信息,包括chunk的大小、数目、使用情况等STAT 1:chunk_size 96
STAT 1:chunks_per_page 10922
STAT 1:total_pages 1
STAT 1:total_chunks 10922
STAT 1:used_chunks 1
STAT 1:free_chunks 10921
STAT 1:free_chunks_end 0
STAT 1:mem_requested 72
STAT 1:get_hits 1
STAT 1:cmd_set 2
STAT 1:delete_hits 0
STAT 1:incr_hits 0
STAT 1:decr_hits 0
STAT 1:cas_hits 0
STAT 1:cas_badval 0
STAT 1:touch_hits 0
STAT active_slabs 1
STAT total_malloced 1048512
END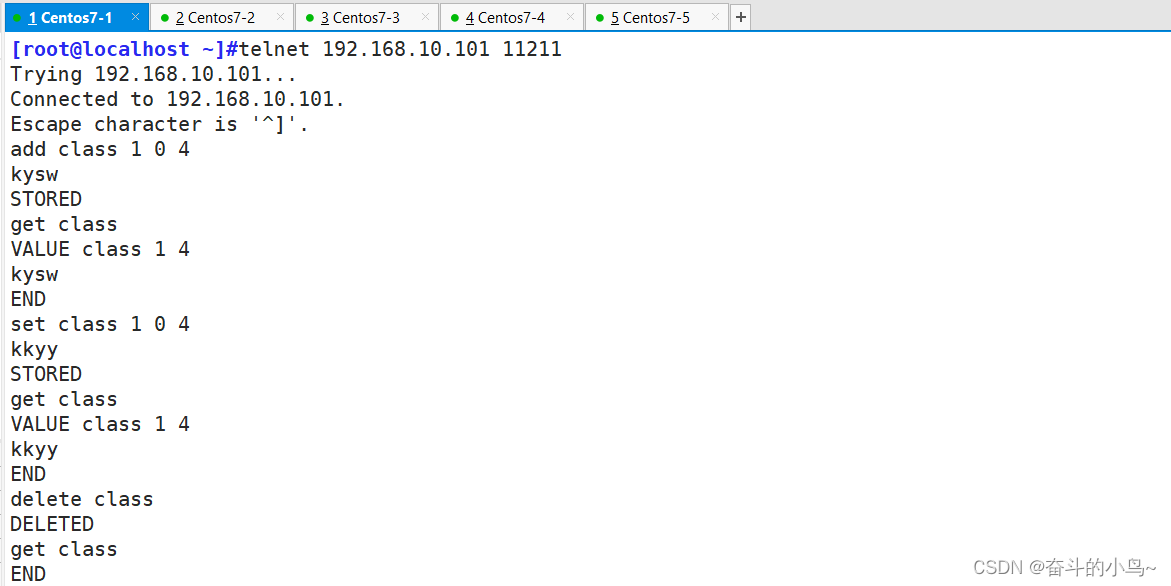
[root@localhost ~]#telnet 192.168.10.101 11211
Trying 192.168.10.101...
Connected to 192.168.10.101.
Escape character is '^]'.
stats                                ###查看服务状态
STAT pid 2643
STAT uptime 885
STAT time 1710431512
STAT version 1.4.15
STAT libevent 2.0.21-stable
STAT pointer_size 64
STAT rusage_user 0.006363
STAT rusage_system 0.038180
STAT curr_connections 10
STAT total_connections 13
STAT connection_structures 11
STAT reserved_fds 20
STAT cmd_get 3
STAT cmd_set 2
STAT cmd_flush 0
STAT cmd_touch 0
STAT get_hits 2
STAT get_misses 1
STAT delete_misses 0
STAT delete_hits 1
STAT incr_misses 0
STAT incr_hits 0
STAT decr_misses 0
STAT decr_hits 0
STAT cas_misses 0
STAT cas_hits 0
STAT cas_badval 0
STAT touch_hits 0
STAT touch_misses 0
STAT auth_cmds 0
STAT auth_errors 0
STAT bytes_read 129
STAT bytes_written 1127
STAT limit_maxbytes 67108864
STAT accepting_conns 1
STAT listen_disabled_num 0
STAT threads 4
STAT conn_yields 0
STAT hash_power_level 16
STAT hash_bytes 524288
STAT hash_is_expanding 0
STAT bytes 0
STAT curr_items 0
STAT total_items 2
STAT expired_unfetched 0
STAT evicted_unfetched 0
STAT evictions 0
STAT reclaimed 0
END
1.add——添加数据
[root@localhost ~]#telnet 192.168.241.11 11211
Trying 192.168.241.11...
Connected to 192.168.241.11.
Escape character is '^]'.
add name 1 0 3
#添加 键名为name的键 flages标志位1 永不超时 3字节的内容
wyb
#具体数据内容
STORED
2.set——修改数据
set name 1 0 3
#修改键名为name的键  flages标志位1 永不超时 3字节长度
cxk
#修改的内容为cxk
STORED
3.get——调用数据
get name
#调用 键名为name的数据
VALUE name 1 3
#name数据的信息
cxk
#具体数据内容  (此处由于set修改之后  所以显示的为set修改后的数据内容)
END
4.delete——删除数据
get name
VALUE name 1 3
cxk
END
delete name
DELETED
get name
#删除之后再调用数据 显示为空
END
5.flush——清空数据
add name 1 0 3
cxk
STORED
add class 1 0 3
wyb
STORED
get name
VALUE name 1 3
cxk
END
get class
VALUE class 1 3
wyb
END
flush_all
OK
get name
END
get class
END
6、Memcached集群部署架构
1.基于Magent的部署架构
Magent是google开发的项目,应用端通过负载均衡服务器连接到magent,然后再由magent代理用户应用请求到memcached处理,底层的memcached为双主结构会自动同步数据,本部署方式存在magent单点问题,因此需要两个magent做高可用。
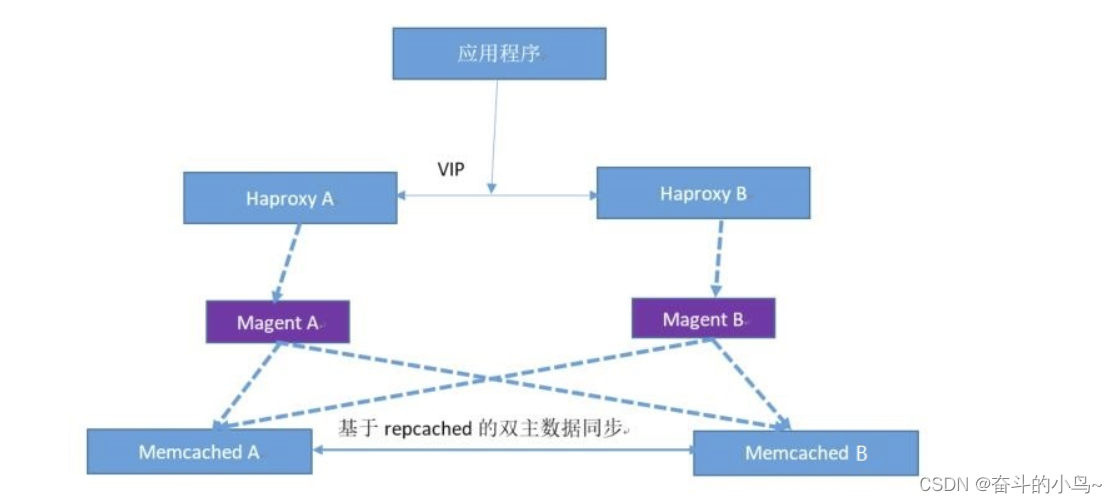
项目站点:https://code.google.com/archive/p/memagent/此项目过于陈旧,且不稳定,当前已经废弃
2.Repcached实现原理
项目站点:http://repcached.sourceforge.net/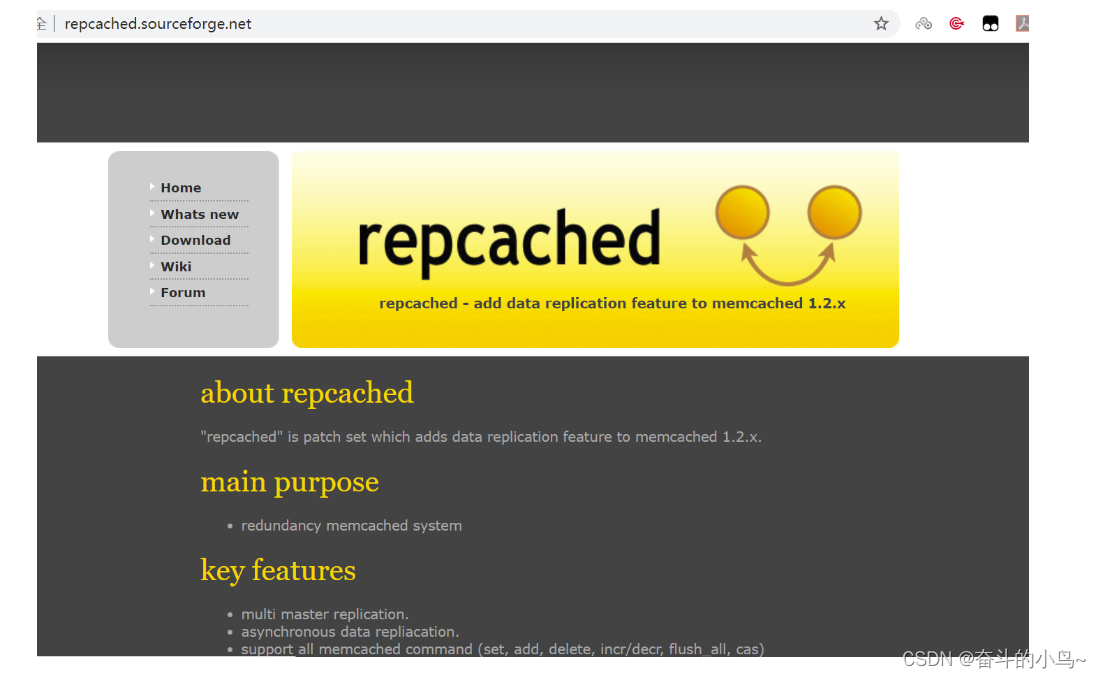

在 master上可以通过 -X 选项指定 replication port(默认为11212/tcp),在 slave上通过 -x 指定复制的master并连接,事实上,如果同时指定了 -x/-X, repcached先会尝试连接对端的master,但如果连接失败,它就会用 -X参数来自己 listen(成为master);如果 master坏掉, slave侦测到连接断了,它会自动 listen而成为 master;而如果 slave坏掉,master也会侦测到连接断开,它就会重新 listen等待新的 slave加入。
从这方案的技术实现来看,其实它是一个单 master单 slave的方案,但它的 master/slave都是可读写的,而且可以相互同步,所以从功能上看,也可以认为它是双机 master-master方案
3.简化后的部署架构
magent已经有很长时间没有更新,因此可以不再使用magent,直接通过负载均衡连接到memcached,仍然有两台memcached做高可用,repcached版本的memcached之间会自动同步数据,以保持数据一致性,即使其中的一台memcached故障也不影响业务正常运行,故障的memcached修复上线后再自动从另外一台同步数据即可保持数据一致性。
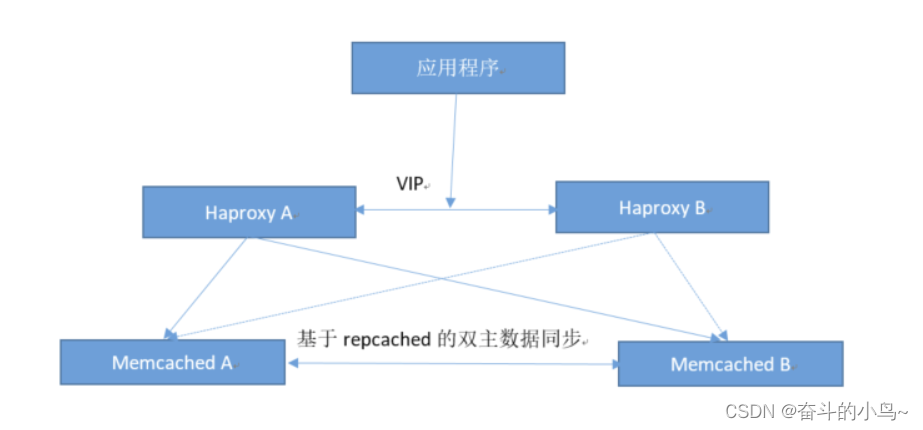
4.部署Repcached
[root@localhost ~]#yum -y install gcc libevent libevent-devel
#安装依赖环境
[root@localhost opt]#ls
[root@localhost opt]#wget  https://jaist.dl.sourceforge.net/project/repcached/repcached/2.2.1-1.2.8/memcached-1.2.8-repcached-2.2.1.tar.gz
[root@localhost opt]#ls
memcached-1.2.8-repcached-2.2.1.tar.gz
[root@localhost opt]#tar xf memcached-1.2.8-repcached-2.2.1.tar.gz
[root@localhost opt]#cd memcached-1.2.8-repcached-2.2.1/
[root@localhost memcached-1.2.8-repcached-2.2.1]#./configure --prefix=/apps/repcached --enable-replication如果直接执行make会出现如下报错
[root@localhost memcached-1.2.8-repcached-2.2.1]#make
make  all-recursive
make[1]: 进入目录“/opt/memcached-1.2.8-repcached-2.2.1”
Making all in doc
make[2]: 进入目录“/opt/memcached-1.2.8-repcached-2.2.1/doc”
make[2]: 对“all”无需做任何事。
make[2]: 离开目录“/opt/memcached-1.2.8-repcached-2.2.1/doc”
make[2]: 进入目录“/opt/memcached-1.2.8-repcached-2.2.1”
gcc -DHAVE_CONFIG_H -I.  -DNDEBUG   -g -O2 -MT memcached-memcached.o -MD -MP -MF .deps/memcached-memcached.Tpo -c -o memcached-memcached.o `test -f 'memcached.c' || echo './'`memcached.c
memcached.c: 在函数‘add_iov’中:
memcached.c:697:30: 错误:‘IOV_MAX’未声明(在此函数内第一次使用)if (m->msg_iovlen == IOV_MAX ||^
memcached.c:697:30: 附注:每个未声明的标识符在其出现的函数内只报告一次
make[2]: *** [memcached-memcached.o] 错误 1
make[2]: 离开目录“/opt/memcached-1.2.8-repcached-2.2.1”
make[1]: *** [all-recursive] 错误 1
make[1]: 离开目录“/opt/memcached-1.2.8-repcached-2.2.1”
make: *** [all] 错误 2解决办法是修改源码配置信息
[root@localhost memcached-1.2.8-repcached-2.2.1]#ls
aclocal.m4           config.status  Makefile.am         scripts
assoc.c              config.sub     Makefile.in         slabs.c
assoc.h              configure      memcached.c         slabs.h
AUTHORS              configure.ac   memcached_dtrace.d  stamp-h1
AUTHORS.repcached    COPYING        memcached_dtrace.h  stats.c
ChangeLog            daemon.c       memcached.h         stats.h
ChangeLog.repcached  depcomp        memcached.spec      t
compile              doc            missing             thread.c
config.guess         install-sh     NEWS                TODO
config.h             items.c        README              t.rep
config.h.in          items.h        replication.c
config.log           Makefile       replication.h
[root@localhost memcached-1.2.8-repcached-2.2.1]#vim memcached.c
[root@localhost memcached-1.2.8-repcached-2.2.1]#sed -n '56,59p' memcached.c
#ifndef IOV_MAX
#if defined(__FreeBSD__) || defined(__APPLE__)
# define IOV_MAX 1024
#endif
[root@localhost memcached-1.2.8-repcached-2.2.1]#sed -n '56,60p' memcached.c
#ifndef IOV_MAX
#if defined(__FreeBSD__) || defined(__APPLE__)
# define IOV_MAX 1024
#endif
#endif
#需要将57和59行删除
[root@localhost memcached-1.2.8-repcached-2.2.1]#vim memcached.c
[root@localhost memcached-1.2.8-repcached-2.2.1]#sed -n '56,58p' memcached.c
#ifndef IOV_MAX
# define IOV_MAX 1024
#endif
#最终56-60行留下这些内容即可
再次编译[root@localhost memcached-1.2.8-repcached-2.2.1]#make && make install
[root@localhost memcached-1.2.8-repcached-2.2.1]#ln -s /apps/repcached/bin/memcached  /usr/bin/
[root@localhost memcached-1.2.8-repcached-2.2.1]#useradd -r -s /sbin/nologin memcached
[root@localhost memcached-1.2.8-repcached-2.2.1]#memcached -d -m 1024 -p 11211 -u memcached -c 2048 -x 192.168.241.22
#-x 192.168.241.22 为远端的192.168.241.22 后台启动
[root@localhost memcached-1.2.8-repcached-2.2.1]#ss -ntlap|grep 11211
LISTEN     0      128          *:11211                    *:*                   users:(("memcached",pid=4848,fd=7))
LISTEN     0      128         :::11211                   :::*                   users:(("memcached",pid=4848,fd=8))
可以使用rsync远程拷贝命令将配置同步到远端
[root@localhost ~]#rsync -a /apps 192.168.10.101:/
The authenticity of host '192.168.10.101 (192.168.10.101)' can't be established.
ECDSA key fingerprint is SHA256:CcASxxV4CvFA+6w68th3aaCYGbGB3UwaAK1xifsM/Pk.
ECDSA key fingerprint is MD5:d6:ee:2e:4d:f6:34:c5:14:0e:ef:99:8c:54:48:c6:be.
Are you sure you want to continue connecting (yes/no)? yes
Warning: Permanently added '192.168.10.101' (ECDSA) to the list of known hosts.
root@192.168.10.101's password:
[root@node2 opt]#ls /
apps boot etc lib media opt root sbin sys usr
bin dev home lib64 mnt proc run srv tmp var
[root@node2 opt]#ln -s /apps/repcached/bin/memcached /usr/bin/
[root@node2 opt]#useradd -r -s /sbin/nologin memcached
[root@node2 ~]#yum -y install gcc libevent libevent-devel
#安装依赖库
[root@node2 opt]#memcached -d -m 1024 -p 11211 -u memcached -c 2048 -x 192.168.10.100
[root@node2 opt]#ss -natpl|grep 11211
LISTEN 0 128 *:11211 *:* users:(("memcached",pid=4211,fd=9))
LISTEN 0 128 :::11211 :::* users:(("memcached",pid=4211,fd=10))
[root@node2 opt]#yum install telnet -y
[root@node2 opt]#telnet 192.168.10.100 11211
Trying 192.168.10.100...
Connected to 192.168.10.100.
Escape character is '^]'.
add name 1 0 3
cxk
STORED
quit
Connection closed by foreign host.查看数据是否同步
[root@node3 ~]#yum install telnet -y
[root@node3 ~]#telnet 192.168.10.101 11211
Trying 192.168.10.101...
Connected to 192.168.10.101.
Escape character is '^]'.
get name
VALUE name 1 3
cxk
END
quit
Connection closed by foreign host.
[root@node3 ~]#telnet 192.168.10.100 11211
Trying 192.168.10.100...
Connected to 192.168.10.100.
Escape character is '^]'.
get name
VALUE name 1 3
cxk
END
quit
Connection closed by foreign host.
5.使用HAproxy高可用部署
[root@node3 ~]#yum install haproxy.x86_64 -y
[root@node3 ~]#systemctl start haproxy.service
[root@node3 ~]#systemctl status haproxy.service
● haproxy.service - HAProxy Load BalancerLoaded: loaded (/usr/lib/systemd/system/haproxy.service; disabled; vendor preset: disabled)Active: active (running) since 四 2024-03-14 14:22:43 CST; 4s agoMain PID: 37006 (haproxy-systemd)CGroup: /system.slice/haproxy.service├─37006 /usr/sbin/haproxy-systemd-wrapper -f /etc/haproxy/haprox...├─37011 /usr/sbin/haproxy -f /etc/haproxy/haproxy.cfg -p /run/ha...└─37012 /usr/sbin/haproxy -f /etc/haproxy/haproxy.cfg -p /run/ha...3月 14 14:22:43 node3.node3 systemd[1]: Started HAProxy Load Balancer.
3月 14 14:22:43 node3.node3 systemd[1]: Starting HAProxy Load Balancer...
3月 14 14:22:44 node3.node3 haproxy-systemd-wrapper[37006]: haproxy-system...
Hint: Some lines were ellipsized, use -l to show in full.
[root@node3 ~]#vim /etc/haproxy/haproxy.cfg
[root@node3 ~]#sed -n '87,91p' /etc/haproxy/haproxy.cfg
listen membind 192.168.10.102:11211mode tcpserver m1 192.168.10.100:11211 checkserver m2 192.168.10.101:11211 check
[root@node3 ~]#systemctl restart haproxy.service
[root@node3 ~]#systemctl status haproxy.service
● haproxy.service - HAProxy Load BalancerLoaded: loaded (/usr/lib/systemd/system/haproxy.service; disabled; vendor prActive: active (running) since 四 2024-03-14 14:40:37 CST; 2s agoMain PID: 37572 (haproxy-systemd)CGroup: /system.slice/haproxy.service├─37572 /usr/sbin/haproxy-systemd-wrapper -f /etc/haproxy/haproxy.cf├─37574 /usr/sbin/haproxy -f /etc/haproxy/haproxy.cfg -p /run/haprox└─37576 /usr/sbin/haproxy -f /etc/haproxy/haproxy.cfg -p /run/haprox3月 14 14:40:37 node3.node3 systemd[1]: Started HAProxy Load Balancer.
3月 14 14:40:37 node3.node3 systemd[1]: Starting HAProxy Load Balancer...
3月 14 14:40:38 node3.node3 haproxy-systemd-wrapper[37572]: haproxy-systemd-wra
3月 14 14:40:38 node3.node3 haproxy-systemd-wrapper[37572]: [WARNING] 073/14403
3月 14 14:40:38 node3.node3 haproxy-systemd-wrapper[37572]: [WARNING] 073/14403
Hint: Some lines were ellipsized, use -l to show in full.
[root@node3 ~]#ss -natpl|grep 11211
LISTEN     0      128    192.168.10.102:11211                    *:*                   users:(("haproxy",pid=37576,fd=7))
#此为HAproxy服务在代为监听
测试:
[root@node3 ~]#telnet 192.168.10.102 11211
Trying 192.168.10.102...
Connected to 192.168.10.102.
Escape character is '^]'.
get name
VALUE name 1 3
cxk
END
add class 1 0 3
wyb
STORED
quit
Connection closed by foreign host.
[root@node2 opt]#telnet 192.168.10.101 11211
Trying 192.168.10.101...
Connected to 192.168.10.101.
Escape character is '^]'.
get name
VALUE name 1 3
cxk
END
get class
VALUE class 1 3
wyb
END
quit
Connection closed by foreign host.


为Excel表格数据)


—— 保存视频流)


