一.词云的介绍
自然语言处理中的词云技术是文本可视化的一种形式,用于展示文本数据中词语的频率分布。以下是词云在自然语言处理中的基本介绍和发展:
起源和发展: 词云的概念最初来源于信息可视化领域,用于将文本中的关键词以视觉方式呈现。在自然语言处理中,词云得到了广泛的应用,特别是在文本分析、舆情分析、关键词提取等任务中。
工作原理: 词云生成的基本原理是通过文本中每个词的频率来确定词语的大小,频率高的词显示更大,频率低的词显示更小。一般来说,生成词云的过程包括文本的分词、词频统计和可视化展示。
文本清洗和预处理: 为了生成有意义的词云,需要对文本进行清洗和预处理。这包括去除停用词、标点符号,进行分词等。清洁的文本有助于更准确地反映文本的主题和关键词。
技术工具: Python中的WordCloud库是一个常用的工具,用于生成词云。此外,其他数据可视化库如Matplotlib、Seaborn等也可以与词云生成库结合使用。
应用领域: 词云技术在自然语言处理中广泛应用于文本可视化、舆情分析、主题分析、关键词提取等任务。它为用户提供了直观、易懂的方式来了解文本数据的重要特征。
发展趋势: 随着自然语言处理和数据可视化技术的不断发展,词云技术也在不断演进。近年来,一些先进的可视化方法和工具被引入,使得生成更具交互性和信息密度的词云成为可能。
总体而言,词云作为一种简单而直观的文本可视化工具,对于初步了解文本数据的关键信息非常有用。然而,在更复杂的文本分析任务中,更先进的自然语言处理技术和可视化方法可能被采用。
二.基本步骤
词云是一种可视化技术,常用于展示文本数据中词语的频率分布。在自然语言处理中,词云生成可以通过以下步骤完成:
1.1 文本数据处理: 首先,需要准备文本数据。这可以是一段文章、评论、新闻等文本内容。确保文本数据已经被清理、分词,并去除了停用词(常见但无实际意义的词语)。
1.2 词频统计: 对处理后的文本进行词频统计,计算每个词语在文本中的出现频率。这可以通过简单的计数或使用专业的自然语言处理库进行。
1.3 生成词云图: 使用词云生成工具或库,将词频统计结果转换为可视化的词云图。常用的工具包括Python中的WordCloud库。
1.4 调整参数: 根据需求,可以调整词云生成的参数,例如字体、颜色、形状等。这有助于生成更具吸引力和表现力的词云图。
1.5 可视化展示: 将生成的词云图进行可视化展示。这可以通过将词云嵌入到网页、报告中,或直接显示在应用程序中。
三.案例分析
相关数据集如下链接
https://download.csdn.net/download/qq_37977007/88767801
# 1.导入模块包
import jieba
from wordcloud import WordCloud
import matplotlib.pyplot as plt
import numpy as np
from PIL import Image
# 2.创建停用词的列表
stopwords = [line.strip() for line in open('english_stopwords.txt', 'r', encoding='utf-8').readlines()]
# 3.对句子进行分词
def seg_sentence(sentence):words_sentence = jieba.cut(sentence.strip())outstr = ''for word_sentence in words_sentence:if word_sentence not in stopwords:if word_sentence != '\t':outstr = outstr + word_sentenceoutstr = outstr + " "return outstr
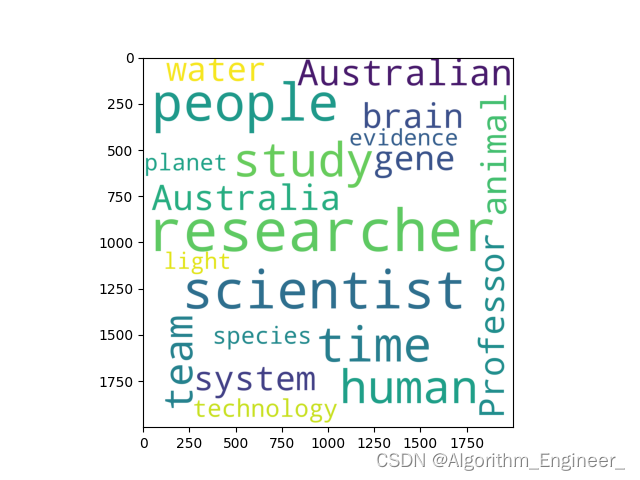
if __name__ == "__main__":# 4.读取文本,对文本的句子进行分词inputs = open('wordcloud.txt', 'r', encoding='utf8')outputs = open('output.txt', 'w')for line in inputs:line_Seg = seg_sentence(line)outputs.write(line_Seg)outputs.close()inputs.close()# 5.调用词云库构建词云,保存结果wordcloud = open('output.txt', 'r')mytext = wordcloud.read()wordcloud = WordCloud(width=2000,height=2000,max_words=20,min_word_length=4, background_color="white").generate(mytext)plt.imshow(wordcloud)plt.show()plt.savefig('result.png')plt.axis('off')
四.词云中的参数介绍
在生成词云时,通常可以设置一些参数来调整词云的外观和生成方式。以下是一些常见的词云参数及其介绍:
width和height:介绍: 指定词云图的宽度和高度。示例: WordCloud(width=800, height=400)background_color:介绍: 指定词云的背景颜色。示例: WordCloud(background_color="white")max_words:介绍: 指定词云中显示的最大单词数量。示例: WordCloud(max_words=100)collocations:介绍: 控制是否考虑词汇搭配(collocations),即词语之间的共现关系。示例: WordCloud(collocations=False)stopwords:介绍: 指定停用词列表,这些词将被排除在词云之外。示例: WordCloud(stopwords={"the", "and", "is"})font_path:介绍: 指定用于词云的字体文件路径。示例: WordCloud(font_path="path/to/font.ttf")max_font_size:介绍: 控制词云中最大字体的大小。示例: WordCloud(max_font_size=50)min_font_size:介绍: 控制词云中最小字体的大小。示例: WordCloud(min_font_size=10)random_state:介绍: 用于控制词云生成的随机性,设置相同的值可以得到相同的输出。示例: WordCloud(random_state=42)mask:介绍: 指定用作词云形状的蒙版图像,词云将在该形状内生成。示例: WordCloud(mask=mask_image)
这只是一些常见的参数,具体使用时可以根据需要调整。不同的词云生成库可能有不同的参数设置,具体参考相应库的文档。
五.词云相关的官方代码如下
# coding=utf-8
# Author: Andreas Christian Mueller <t3kcit@gmail.com>
#
# (c) 2012
# Modified by: Paul Nechifor <paul@nechifor.net>
#
# License: MITfrom __future__ import divisionimport warnings
from random import Random
import io
import os
import re
import base64
import sys
import colorsys
import matplotlib
import numpy as np
from operator import itemgetter
from xml.sax import saxutilsfrom PIL import Image
from PIL import ImageColor
from PIL import ImageDraw
from PIL import ImageFilter
from PIL import ImageFontfrom .query_integral_image import query_integral_image
from .tokenization import unigrams_and_bigrams, process_tokensFILE = os.path.dirname(__file__)
FONT_PATH = os.environ.get('FONT_PATH', os.path.join(FILE, 'DroidSansMono.ttf'))
STOPWORDS = set(map(str.strip, open(os.path.join(FILE, 'stopwords')).readlines()))class IntegralOccupancyMap(object):def __init__(self, height, width, mask):self.height = heightself.width = widthif mask is not None:# the order of the cumsum's is important for speed ?!self.integral = np.cumsum(np.cumsum(255 * mask, axis=1),axis=0).astype(np.uint32)else:self.integral = np.zeros((height, width), dtype=np.uint32)def sample_position(self, size_x, size_y, random_state):return query_integral_image(self.integral, size_x, size_y,random_state)def update(self, img_array, pos_x, pos_y):partial_integral = np.cumsum(np.cumsum(img_array[pos_x:, pos_y:],axis=1), axis=0)# paste recomputed part into old image# if x or y is zero it is a bit annoyingif pos_x > 0:if pos_y > 0:partial_integral += (self.integral[pos_x - 1, pos_y:]- self.integral[pos_x - 1, pos_y - 1])else:partial_integral += self.integral[pos_x - 1, pos_y:]if pos_y > 0:partial_integral += self.integral[pos_x:, pos_y - 1][:, np.newaxis]self.integral[pos_x:, pos_y:] = partial_integraldef random_color_func(word=None, font_size=None, position=None,orientation=None, font_path=None, random_state=None):"""Random hue color generation.Default coloring method. This just picks a random hue with value 80% andlumination 50%.Parameters----------word, font_size, position, orientation  : ignored.random_state : random.Random object or None, (default=None)If a random object is given, this is used for generating randomnumbers."""if random_state is None:random_state = Random()return "hsl(%d, 80%%, 50%%)" % random_state.randint(0, 255)class colormap_color_func(object):"""Color func created from matplotlib colormap.Parameters----------colormap : string or matplotlib colormapColormap to sample fromExample------->>> WordCloud(color_func=colormap_color_func("magma"))"""def __init__(self, colormap):import matplotlib.pyplot as pltself.colormap = plt.cm.get_cmap(colormap)def __call__(self, word, font_size, position, orientation,random_state=None, **kwargs):if random_state is None:random_state = Random()r, g, b, _ = np.maximum(0, 255 * np.array(self.colormap(random_state.uniform(0, 1))))return "rgb({:.0f}, {:.0f}, {:.0f})".format(r, g, b)def get_single_color_func(color):"""Create a color function which returns a single hue and saturation with.different values (HSV). Accepted values are color strings as usable byPIL/Pillow.>>> color_func1 = get_single_color_func('deepskyblue')>>> color_func2 = get_single_color_func('#00b4d2')"""old_r, old_g, old_b = ImageColor.getrgb(color)rgb_max = 255.h, s, v = colorsys.rgb_to_hsv(old_r / rgb_max, old_g / rgb_max,old_b / rgb_max)def single_color_func(word=None, font_size=None, position=None,orientation=None, font_path=None, random_state=None):"""Random color generation.Additional coloring method. It picks a random value with hue andsaturation based on the color given to the generating function.Parameters----------word, font_size, position, orientation  : ignored.random_state : random.Random object or None, (default=None)If a random object is given, this is used for generating randomnumbers."""if random_state is None:random_state = Random()r, g, b = colorsys.hsv_to_rgb(h, s, random_state.uniform(0.2, 1))return 'rgb({:.0f}, {:.0f}, {:.0f})'.format(r * rgb_max, g * rgb_max,b * rgb_max)return single_color_funcclass WordCloud(object):r"""Word cloud object for generating and drawing.Parameters----------font_path : stringFont path to the font that will be used (OTF or TTF).Defaults to DroidSansMono path on a Linux machine. If you are onanother OS or don't have this font, you need to adjust this path.width : int (default=400)Width of the canvas.height : int (default=200)Height of the canvas.prefer_horizontal : float (default=0.90)The ratio of times to try horizontal fitting as opposed to vertical.If prefer_horizontal < 1, the algorithm will try rotating the wordif it doesn't fit. (There is currently no built-in way to get onlyvertical words.)mask : nd-array or None (default=None)If not None, gives a binary mask on where to draw words. If mask is notNone, width and height will be ignored and the shape of mask will beused instead. All white (#FF or #FFFFFF) entries will be considerd"masked out" while other entries will be free to draw on. [Thischanged in the most recent version!]contour_width: float (default=0)If mask is not None and contour_width > 0, draw the mask contour.contour_color: color value (default="black")Mask contour color.scale : float (default=1)Scaling between computation and drawing. For large word-cloud images,using scale instead of larger canvas size is significantly faster, butmight lead to a coarser fit for the words.min_font_size : int (default=4)Smallest font size to use. Will stop when there is no more room in thissize.font_step : int (default=1)Step size for the font. font_step > 1 might speed up computation butgive a worse fit.max_words : number (default=200)The maximum number of words.stopwords : set of strings or NoneThe words that will be eliminated. If None, the build-in STOPWORDSlist will be used. Ignored if using generate_from_frequencies.background_color : color value (default="black")Background color for the word cloud image.max_font_size : int or None (default=None)Maximum font size for the largest word. If None, height of the image isused.mode : string (default="RGB")Transparent background will be generated when mode is "RGBA" andbackground_color is None.relative_scaling : float (default='auto')Importance of relative word frequencies for font-size.  Withrelative_scaling=0, only word-ranks are considered.  Withrelative_scaling=1, a word that is twice as frequent will have twicethe size.  If you want to consider the word frequencies and not onlytheir rank, relative_scaling around .5 often looks good.If 'auto' it will be set to 0.5 unless repeat is true, in whichcase it will be set to 0... versionchanged: 2.0Default is now 'auto'.color_func : callable, default=NoneCallable with parameters word, font_size, position, orientation,font_path, random_state that returns a PIL color for each word.Overwrites "colormap".See colormap for specifying a matplotlib colormap instead.To create a word cloud with a single color, use``color_func=lambda *args, **kwargs: "white"``.The single color can also be specified using RGB code. For example``color_func=lambda *args, **kwargs: (255,0,0)`` sets color to red.regexp : string or None (optional)Regular expression to split the input text into tokens in process_text.If None is specified, ``r"\w[\w']+"`` is used. Ignored if usinggenerate_from_frequencies.collocations : bool, default=TrueWhether to include collocations (bigrams) of two words. Ignored if usinggenerate_from_frequencies... versionadded: 2.0colormap : string or matplotlib colormap, default="viridis"Matplotlib colormap to randomly draw colors from for each word.Ignored if "color_func" is specified... versionadded: 2.0normalize_plurals : bool, default=TrueWhether to remove trailing 's' from words. If True and a wordappears with and without a trailing 's', the one with trailing 's'is removed and its counts are added to the version withouttrailing 's' -- unless the word ends with 'ss'. Ignored if usinggenerate_from_frequencies.repeat : bool, default=FalseWhether to repeat words and phrases until max_words or min_font_sizeis reached.include_numbers : bool, default=FalseWhether to include numbers as phrases or not.min_word_length : int, default=0Minimum number of letters a word must have to be included.collocation_threshold: int, default=30Bigrams must have a Dunning likelihood collocation score greater than thisparameter to be counted as bigrams. Default of 30 is arbitrary.See Manning, C.D., Manning, C.D. and Schütze, H., 1999. Foundations ofStatistical Natural Language Processing. MIT press, p. 162https://nlp.stanford.edu/fsnlp/promo/colloc.pdf#page=22Attributes----------``words_`` : dict of string to floatWord tokens with associated frequency... versionchanged: 2.0``words_`` is now a dictionary``layout_`` : list of tuples ((string, float), int, (int, int), int, color))Encodes the fitted word cloud. For each word, it encodes the string, normalized frequency, font size, position, orientation, and color.The frequencies are normalized by the most commonly occurring word.The color is in the format of 'rgb(R, G, B).'Notes-----Larger canvases make the code significantly slower. If you need alarge word cloud, try a lower canvas size, and set the scale parameter.The algorithm might give more weight to the ranking of the wordsthan their actual frequencies, depending on the ``max_font_size`` and thescaling heuristic."""def __init__(self, font_path=None, width=400, height=200, margin=2,ranks_only=None, prefer_horizontal=.9, mask=None, scale=1,color_func=None, max_words=200, min_font_size=4,stopwords=None, random_state=None, background_color='black',max_font_size=None, font_step=1, mode="RGB",relative_scaling='auto', regexp=None, collocations=True,colormap=None, normalize_plurals=True, contour_width=0,contour_color='black', repeat=False,include_numbers=False, min_word_length=0, collocation_threshold=30):if font_path is None:font_path = FONT_PATHif color_func is None and colormap is None:version = matplotlib.__version__if version[0] < "2" and version[2] < "5":colormap = "hsv"else:colormap = "viridis"self.colormap = colormapself.collocations = collocationsself.font_path = font_pathself.width = widthself.height = heightself.margin = marginself.prefer_horizontal = prefer_horizontalself.mask = maskself.contour_color = contour_colorself.contour_width = contour_widthself.scale = scaleself.color_func = color_func or colormap_color_func(colormap)self.max_words = max_wordsself.stopwords = stopwords if stopwords is not None else STOPWORDSself.min_font_size = min_font_sizeself.font_step = font_stepself.regexp = regexpif isinstance(random_state, int):random_state = Random(random_state)self.random_state = random_stateself.background_color = background_colorself.max_font_size = max_font_sizeself.mode = modeif relative_scaling == "auto":if repeat:relative_scaling = 0else:relative_scaling = .5if relative_scaling < 0 or relative_scaling > 1:raise ValueError("relative_scaling needs to be ""between 0 and 1, got %f." % relative_scaling)self.relative_scaling = relative_scalingif ranks_only is not None:warnings.warn("ranks_only is deprecated and will be removed as"" it had no effect. Look into relative_scaling.",DeprecationWarning)self.normalize_plurals = normalize_pluralsself.repeat = repeatself.include_numbers = include_numbersself.min_word_length = min_word_lengthself.collocation_threshold = collocation_threshold# Override the width and height if there is a maskif mask is not None:self.width = mask.shape[1]self.height = mask.shape[0]def fit_words(self, frequencies):"""Create a word_cloud from words and frequencies.Alias to generate_from_frequencies.Parameters----------frequencies : dict from string to floatA contains words and associated frequency.Returns-------self"""return self.generate_from_frequencies(frequencies)def generate_from_frequencies(self, frequencies, max_font_size=None):  # noqa: C901"""Create a word_cloud from words and frequencies.Parameters----------frequencies : dict from string to floatA contains words and associated frequency.max_font_size : intUse this font-size instead of self.max_font_sizeReturns-------self"""# make sure frequencies are sorted and normalizedfrequencies = sorted(frequencies.items(), key=itemgetter(1), reverse=True)if len(frequencies) <= 0:raise ValueError("We need at least 1 word to plot a word cloud, ""got %d." % len(frequencies))frequencies = frequencies[:self.max_words]# largest entry will be 1max_frequency = float(frequencies[0][1])frequencies = [(word, freq / max_frequency)for word, freq in frequencies]if self.random_state is not None:random_state = self.random_stateelse:random_state = Random()if self.mask is not None:boolean_mask = self._get_bolean_mask(self.mask)width = self.mask.shape[1]height = self.mask.shape[0]else:boolean_mask = Noneheight, width = self.height, self.widthoccupancy = IntegralOccupancyMap(height, width, boolean_mask)# create imageimg_grey = Image.new("L", (width, height))draw = ImageDraw.Draw(img_grey)img_array = np.asarray(img_grey)font_sizes, positions, orientations, colors = [], [], [], []last_freq = 1.if max_font_size is None:# if not provided use default font_sizemax_font_size = self.max_font_sizeif max_font_size is None:# figure out a good font size by trying to draw with# just the first two wordsif len(frequencies) == 1:# we only have one word. We make it big!font_size = self.heightelse:self.generate_from_frequencies(dict(frequencies[:2]),max_font_size=self.height)# find font sizessizes = [x[1] for x in self.layout_]try:font_size = int(2 * sizes[0] * sizes[1]/ (sizes[0] + sizes[1]))# quick fix for if self.layout_ contains less than 2 values# on very small images it can be emptyexcept IndexError:try:font_size = sizes[0]except IndexError:raise ValueError("Couldn't find space to draw. Either the Canvas size"" is too small or too much of the image is masked ""out.")else:font_size = max_font_size# we set self.words_ here because we called generate_from_frequencies# above... hurray for good design?self.words_ = dict(frequencies)if self.repeat and len(frequencies) < self.max_words:# pad frequencies with repeating words.times_extend = int(np.ceil(self.max_words / len(frequencies))) - 1# get smallest frequencyfrequencies_org = list(frequencies)downweight = frequencies[-1][1]for i in range(times_extend):frequencies.extend([(word, freq * downweight ** (i + 1))for word, freq in frequencies_org])# start drawing grey imagefor word, freq in frequencies:if freq == 0:continue# select the font sizers = self.relative_scalingif rs != 0:font_size = int(round((rs * (freq / float(last_freq))+ (1 - rs)) * font_size))if random_state.random() < self.prefer_horizontal:orientation = Noneelse:orientation = Image.ROTATE_90tried_other_orientation = Falsewhile True:# try to find a positionfont = ImageFont.truetype(self.font_path, font_size)# transpose font optionallytransposed_font = ImageFont.TransposedFont(font, orientation=orientation)# get size of resulting textbox_size = draw.textsize(word, font=transposed_font)# find possible places using integral image:result = occupancy.sample_position(box_size[1] + self.margin,box_size[0] + self.margin,random_state)if result is not None or font_size < self.min_font_size:# either we found a place or font-size went too smallbreak# if we didn't find a place, make font smaller# but first try to rotate!if not tried_other_orientation and self.prefer_horizontal < 1:orientation = (Image.ROTATE_90 if orientation is None elseImage.ROTATE_90)tried_other_orientation = Trueelse:font_size -= self.font_steporientation = Noneif font_size < self.min_font_size:# we were unable to draw any morebreakx, y = np.array(result) + self.margin // 2# actually draw the textdraw.text((y, x), word, fill="white", font=transposed_font)positions.append((x, y))orientations.append(orientation)font_sizes.append(font_size)colors.append(self.color_func(word, font_size=font_size,position=(x, y),orientation=orientation,random_state=random_state,font_path=self.font_path))# recompute integral imageif self.mask is None:img_array = np.asarray(img_grey)else:img_array = np.asarray(img_grey) + boolean_mask# recompute bottom right# the order of the cumsum's is important for speed ?!occupancy.update(img_array, x, y)last_freq = freqself.layout_ = list(zip(frequencies, font_sizes, positions,orientations, colors))return selfdef process_text(self, text):"""Splits a long text into words, eliminates the stopwords.Parameters----------text : stringThe text to be processed.Returns-------words : dict (string, int)Word tokens with associated frequency...versionchanged:: 1.2.2Changed return type from list of tuples to dict.Notes-----There are better ways to do word tokenization, but I don't want toinclude all those things."""flags = (re.UNICODE if sys.version < '3' and type(text) is unicode  # noqa: F821else 0)pattern = r"\w[\w']*" if self.min_word_length <= 1 else r"\w[\w']+"regexp = self.regexp if self.regexp is not None else patternwords = re.findall(regexp, text, flags)# remove 'swords = [word[:-2] if word.lower().endswith("'s") else wordfor word in words]# remove numbersif not self.include_numbers:words = [word for word in words if not word.isdigit()]# remove short wordsif self.min_word_length:words = [word for word in words if len(word) >= self.min_word_length]stopwords = set([i.lower() for i in self.stopwords])if self.collocations:word_counts = unigrams_and_bigrams(words, stopwords, self.normalize_plurals, self.collocation_threshold)else:# remove stopwordswords = [word for word in words if word.lower() not in stopwords]word_counts, _ = process_tokens(words, self.normalize_plurals)return word_countsdef generate_from_text(self, text):"""Generate wordcloud from text.The input "text" is expected to be a natural text. If you pass a sortedlist of words, words will appear in your output twice. To remove thisduplication, set ``collocations=False``.Calls process_text and generate_from_frequencies...versionchanged:: 1.2.2Argument of generate_from_frequencies() is not return ofprocess_text() any more.Returns-------self"""words = self.process_text(text)self.generate_from_frequencies(words)return selfdef generate(self, text):"""Generate wordcloud from text.The input "text" is expected to be a natural text. If you pass a sortedlist of words, words will appear in your output twice. To remove thisduplication, set ``collocations=False``.Alias to generate_from_text.Calls process_text and generate_from_frequencies.Returns-------self"""return self.generate_from_text(text)def _check_generated(self):"""Check if ``layout_`` was computed, otherwise raise error."""if not hasattr(self, "layout_"):raise ValueError("WordCloud has not been calculated, call generate"" first.")def to_image(self):self._check_generated()if self.mask is not None:width = self.mask.shape[1]height = self.mask.shape[0]else:height, width = self.height, self.widthimg = Image.new(self.mode, (int(width * self.scale),int(height * self.scale)),self.background_color)draw = ImageDraw.Draw(img)for (word, count), font_size, position, orientation, color in self.layout_:font = ImageFont.truetype(self.font_path,int(font_size * self.scale))transposed_font = ImageFont.TransposedFont(font, orientation=orientation)pos = (int(position[1] * self.scale),int(position[0] * self.scale))draw.text(pos, word, fill=color, font=transposed_font)return self._draw_contour(img=img)def recolor(self, random_state=None, color_func=None, colormap=None):"""Recolor existing layout.Applying a new coloring is much faster than generating the wholewordcloud.Parameters----------random_state : RandomState, int, or None, default=NoneIf not None, a fixed random state is used. If an int is given, thisis used as seed for a random.Random state.color_func : function or None, default=NoneFunction to generate new color from word count, font size, positionand orientation.  If None, self.color_func is used.colormap : string or matplotlib colormap, default=NoneUse this colormap to generate new colors. Ignored if color_funcis specified. If None, self.color_func (or self.color_map) is used.Returns-------self"""if isinstance(random_state, int):random_state = Random(random_state)self._check_generated()if color_func is None:if colormap is None:color_func = self.color_funcelse:color_func = colormap_color_func(colormap)self.layout_ = [(word_freq, font_size, position, orientation,color_func(word=word_freq[0], font_size=font_size,position=position, orientation=orientation,random_state=random_state,font_path=self.font_path))for word_freq, font_size, position, orientation, _in self.layout_]return selfdef to_file(self, filename):"""Export to image file.Parameters----------filename : stringLocation to write to.Returns-------self"""img = self.to_image()img.save(filename, optimize=True)return selfdef to_array(self):"""Convert to numpy array.Returns-------image : nd-array size (width, height, 3)Word cloud image as numpy matrix."""return np.array(self.to_image())def __array__(self):"""Convert to numpy array.Returns-------image : nd-array size (width, height, 3)Word cloud image as numpy matrix."""return self.to_array()def to_svg(self, embed_font=False, optimize_embedded_font=True, embed_image=False):"""Export to SVG.Font is assumed to be available to the SVG reader. Otherwise, textcoordinates may produce artifacts when rendered with replacement font.It is also possible to include a subset of the original font in WOFFformat using ``embed_font`` (requires `fontTools`).Note that some renderers do not handle glyphs the same way, and maydiffer from ``to_image`` result. In particular, Complex Text Layout maynot be supported. In this typesetting, the shape or positioning of agrapheme depends on its relation to other graphemes.Pillow, since version 4.2.0, supports CTL using ``libraqm``. However,due to dependencies, this feature is not always enabled. Hence, thesame rendering differences may appear in ``to_image``. As thisrasterized output is used to compute the layout, this also affects thelayout generation. Use ``PIL.features.check`` to test availability of``raqm``.Consistant rendering is therefore expected if both Pillow and the SVGrenderer have the same support of CTL.Contour drawing is not supported.Parameters----------embed_font : bool, default=FalseWhether to include font inside resulting SVG file.optimize_embedded_font : bool, default=TrueWhether to be aggressive when embedding a font, to reduce size. Inparticular, hinting tables are dropped, which may introduce slightchanges to character shapes (w.r.t. `to_image` baseline).embed_image : bool, default=FalseWhether to include rasterized image inside resulting SVG file.Useful for debugging.Returns-------content : stringWord cloud image as SVG string"""# TODO should add option to specify URL for font (i.e. WOFF file)# Make sure layout is generatedself._check_generated()# Get output size, in pixelsif self.mask is not None:width = self.mask.shape[1]height = self.mask.shape[0]else:height, width = self.height, self.width# Get max font sizeif self.max_font_size is None:max_font_size = max(w[1] for w in self.layout_)else:max_font_size = self.max_font_size# Text bufferresult = []# Get font informationfont = ImageFont.truetype(self.font_path, int(max_font_size * self.scale))raw_font_family, raw_font_style = font.getname()# TODO properly escape/quote this name?font_family = repr(raw_font_family)# TODO better support for uncommon font styles/weights?raw_font_style = raw_font_style.lower()if 'bold' in raw_font_style:font_weight = 'bold'else:font_weight = 'normal'if 'italic' in raw_font_style:font_style = 'italic'elif 'oblique' in raw_font_style:font_style = 'oblique'else:font_style = 'normal'# Add headerresult.append('<svg'' xmlns="http://www.w3.org/2000/svg"'' width="{}"'' height="{}"''>'.format(width * self.scale,height * self.scale))# Embed font, if requestedif embed_font:# Import here, to avoid hard dependency on fonttoolsimport fontToolsimport fontTools.subset# Subset optionsoptions = fontTools.subset.Options(# Small impact on character shapes, but reduce size a lothinting=not optimize_embedded_font,# On small subsets, can improve sizedesubroutinize=optimize_embedded_font,# Try to be lenientignore_missing_glyphs=True,)# Load and subset fontttf = fontTools.subset.load_font(self.font_path, options)subsetter = fontTools.subset.Subsetter(options)characters = {c for item in self.layout_ for c in item[0][0]}text = ''.join(characters)subsetter.populate(text=text)subsetter.subset(ttf)# Export as WOFF# TODO is there a better method, i.e. directly export to WOFF?buffer = io.BytesIO()ttf.saveXML(buffer)buffer.seek(0)woff = fontTools.ttLib.TTFont(flavor='woff')woff.importXML(buffer)# Create stylesheet with embedded font facebuffer = io.BytesIO()woff.save(buffer)data = base64.b64encode(buffer.getbuffer()).decode('ascii')url = 'data:application/font-woff;charset=utf-8;base64,' + dataresult.append('<style>''@font-face{{''font-family:{};''font-weight:{};''font-style:{};''src:url("{}")format("woff");''}}''</style>'.format(font_family,font_weight,font_style,url))# Select global styleresult.append('<style>''text{{''font-family:{};''font-weight:{};''font-style:{};''}}''</style>'.format(font_family,font_weight,font_style))# Add backgroundif self.background_color is not None:result.append('<rect'' width="100%"'' height="100%"'' style="fill:{}"''>''</rect>'.format(self.background_color))# Embed image, useful for debug purposeif embed_image:image = self.to_image()data = io.BytesIO()image.save(data, format='JPEG')data = base64.b64encode(data.getbuffer()).decode('ascii')result.append('<image'' width="100%"'' height="100%"'' href="data:image/jpg;base64,{}"''/>'.format(data))# For each word in layoutfor (word, count), font_size, (y, x), orientation, color in self.layout_:x *= self.scaley *= self.scale# Get text metricsfont = ImageFont.truetype(self.font_path, int(font_size * self.scale))(size_x, size_y), (offset_x, offset_y) = font.font.getsize(word)ascent, descent = font.getmetrics()# Compute text bounding boxmin_x = -offset_xmax_x = size_x - offset_xmax_y = ascent - offset_y# Compute text attributesattributes = {}if orientation == Image.ROTATE_90:x += max_yy += max_x - min_xtransform = 'translate({},{}) rotate(-90)'.format(x, y)else:x += min_xy += max_ytransform = 'translate({},{})'.format(x, y)# Create nodeattributes = ' '.join('{}="{}"'.format(k, v) for k, v in attributes.items())result.append('<text'' transform="{}"'' font-size="{}"'' style="fill:{}"''>''{}''</text>'.format(transform,font_size * self.scale,color,saxutils.escape(word)))# TODO draw contour# Complete SVG fileresult.append('</svg>')return '\n'.join(result)def _get_bolean_mask(self, mask):"""Cast to two dimensional boolean mask."""if mask.dtype.kind == 'f':warnings.warn("mask image should be unsigned byte between 0"" and 255. Got a float array")if mask.ndim == 2:boolean_mask = mask == 255elif mask.ndim == 3:# if all channels are white, mask outboolean_mask = np.all(mask[:, :, :3] == 255, axis=-1)else:raise ValueError("Got mask of invalid shape: %s" % str(mask.shape))return boolean_maskdef _draw_contour(self, img):"""Draw mask contour on a pillow image."""if self.mask is None or self.contour_width == 0:return imgmask = self._get_bolean_mask(self.mask) * 255contour = Image.fromarray(mask.astype(np.uint8))contour = contour.resize(img.size)contour = contour.filter(ImageFilter.FIND_EDGES)contour = np.array(contour)# make sure borders are not drawn before changing widthcontour[[0, -1], :] = 0contour[:, [0, -1]] = 0# use gaussian to change width, divide by 10 to give more resolutionradius = self.contour_width / 10contour = Image.fromarray(contour)contour = contour.filter(ImageFilter.GaussianBlur(radius=radius))contour = np.array(contour) > 0contour = np.dstack((contour, contour, contour))# color the contourret = np.array(img) * np.invert(contour)if self.contour_color != 'black':color = Image.new(img.mode, img.size, self.contour_color)ret += np.array(color) * contourreturn Image.fromarray(ret)


)


fs模块)


)
--sqli)


——explain执行计划、SQL优化)

方法总结)
