大家好,我是若川。最近组织了源码共读活动,感兴趣的可以加我微信 ruochuan12 参与,已进行了三个多月,大家一起交流学习,共同进步。
前言
vue简洁好用体现在很多个地方,比如其内置了32+修饰符,可以很方便我们阻止冒泡、阻止默认事件、鼠标事件处理、系统键盘事件等等,让我们可以快速搞定业务,简直不要太方便噢!!!
耽误您15分钟您可以收获:
32+修饰符(包括事件修饰符、鼠标修饰符、表单修饰符、系统修饰符等等)的含义和使用
如何利用webpack动态注册vue路由,再也不手写路由配置啦!
文章中例子都放在了github源码上,也可以点击直接看例子
如何动态注册路由?
文中的每个修饰符例子都由一个页面承载,聪明的你肯定不想手动引入几十个.vue文件并配置路由.
有什么办法可以帮我们自动完成路由注册呢?
1. 文件目录结构
目录结构(已去除其他文件目录)大概如下
├── package.json
└── src├── App.vue├── main.js├── router.js└── views├── About.vue├── Home.vue└── modifiers├── capture.vue├── once.vue├── order.vue├── passive.vue├── prevent.vue├── self.vue└── stop.vue└── ...
2. 期望的路由配置
最终给到
vue-router的配置大概长下面这个样子,每个配置最重要的部分分别是path、name和component
[{"path": "/home","name": "home","component": {"name": "Home","methods": {},"staticRenderFns": [],"_compiled": true,"_scopeId": "data-v-fae5bece","beforeCreate": [null],"beforeDestroy": [null],"__file": "src/views/Home.vue"}},{"path": "/modifiers/capture","name": "modifiersCapture","component": {"name": "capture","methods": {},"staticRenderFns": [],"_compiled": true,"_scopeId": "data-v-63b4eeee","beforeCreate": [null],"beforeDestroy": [null],"__file": "src/views/modifiers/capture.vue"}},... // 其他路由配置
]
3. require.context实现动态注册路由
借助webpack require.context 的能力,可以非常方便地实现上面目录到路由配置的映射工作,源码如下
const registerRoutes = () => {const contextInfo = require.context('./views', true, /.vue$/)const routes = contextInfo.keys().map((filePath) => {// filePath 形如 ./Home.vue、./modifiers/capture.vue// path我们希望是/home、/modifiers/capture// 所以需要把开头的./和.vue都替换为空const path = filePath.toLowerCase().replace(/^\.|\.vue/g, '')// name的话将/home、/modifiers/capture转成小驼峰即可// 把开头的/先替换掉,再把第一个/后的单词变成大写就可以了const name = path.replace(/^\//, '').replace(/\/(\w)/, ($0, $1) => $1.toUpperCase())// 通过require去读取.vue文件内容const component = require(`./views${filePath.replace(/^\./, '')}`).defaultreturn {path,name,component}})return routes
}
效果
经过上面的简单处理,动态注册路由就完成啦!您也可以点击vue-demos查看效果
事件修饰符
1. 阻止冒泡的两种方式
<template><div class="parent" @click="onClickParent">我是爸爸<div class="child" @click="onClickChild">我是儿子</div></div>
</template>export default {name: 'stop',methods: {onClickParent () {console.log('我是爸爸')},onClickChild () {console.log('我是儿子')}}
}点击子节点的时候因为事件冒泡的缘故不仅会打印出我是儿子还会打印我是爸爸。有什么办法可以阻止子节点的事件冒泡呢?
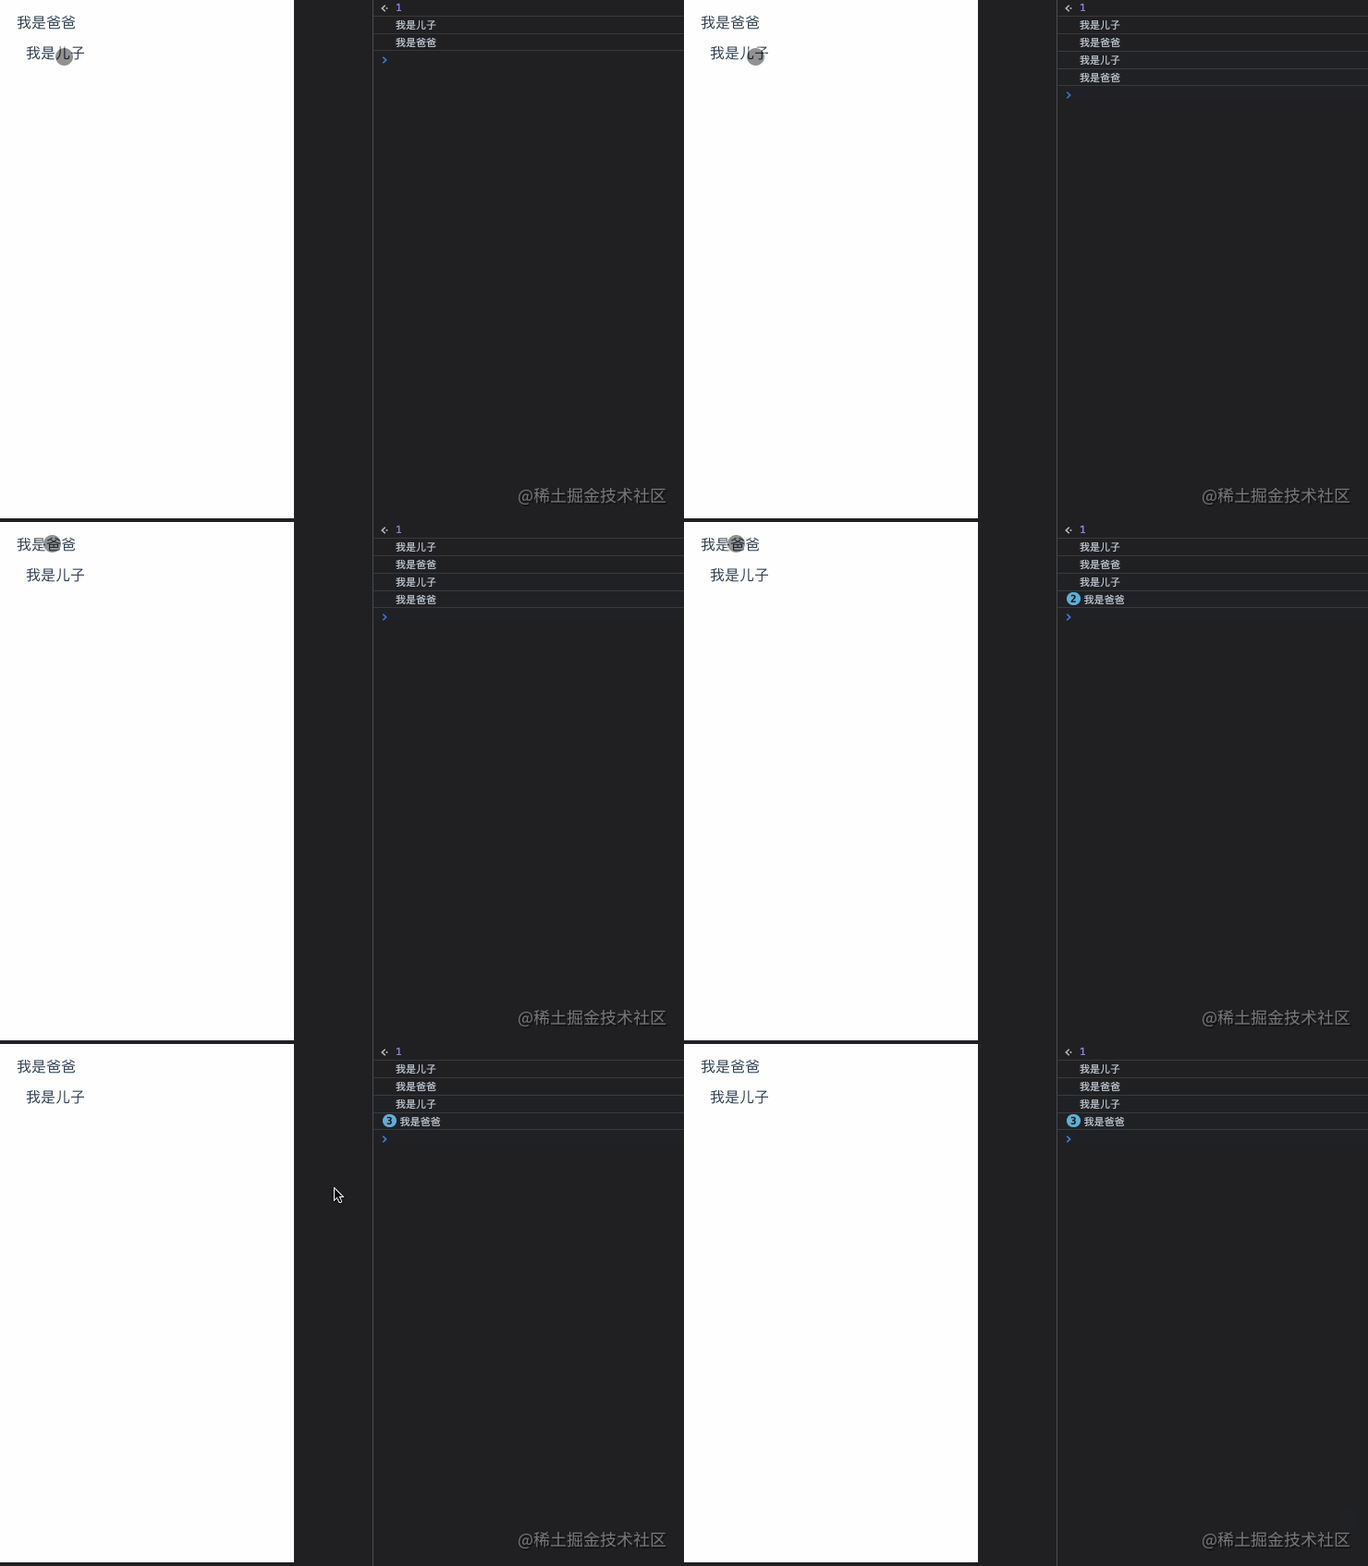
1 .stop
只要加.stop修饰符即可,阻止事件冒泡的及简方式,很方便是不是。
当添加上.stop修饰符时,只会出现我是儿子
<template><div class="parent" @click="onClickParent">我是爸爸<div class="child" @click.stop="onClickChild">我是儿子</div></div>
</template>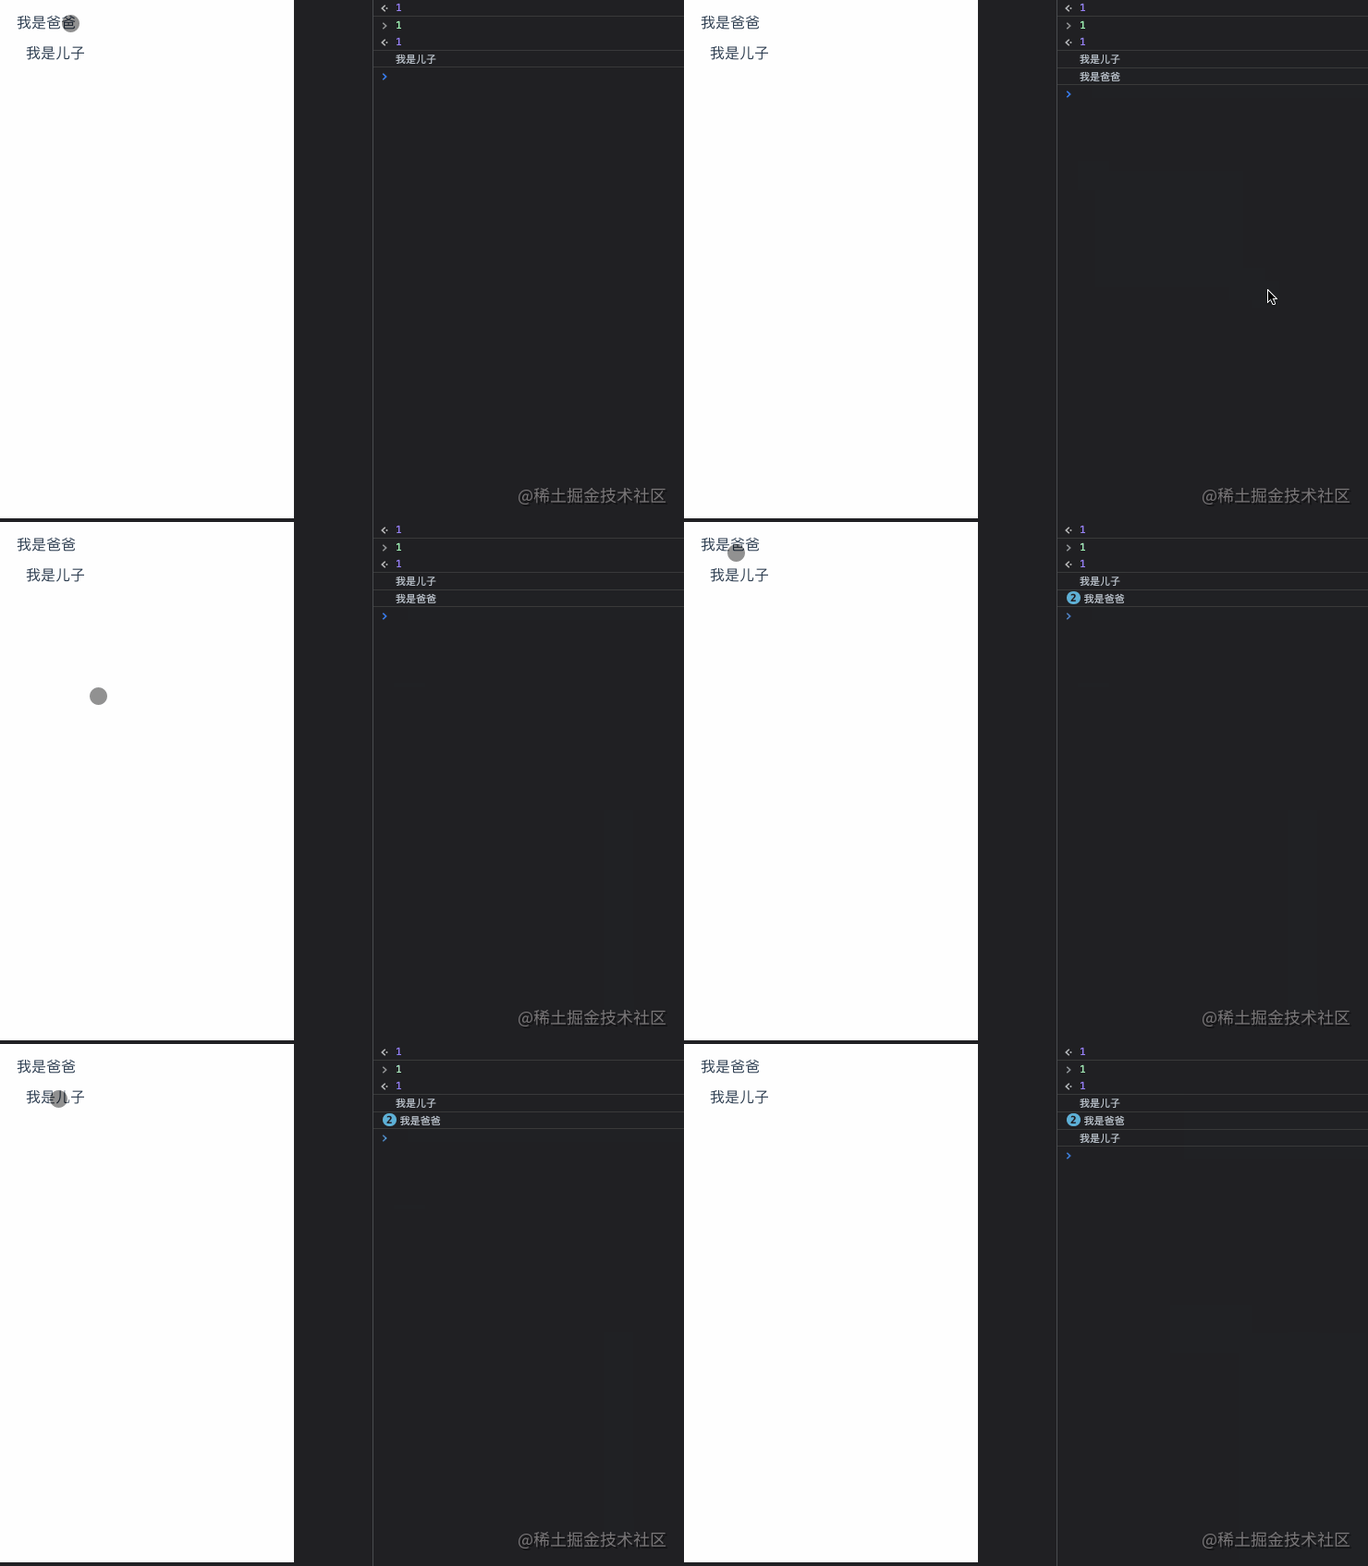
2. event.stopPropagation
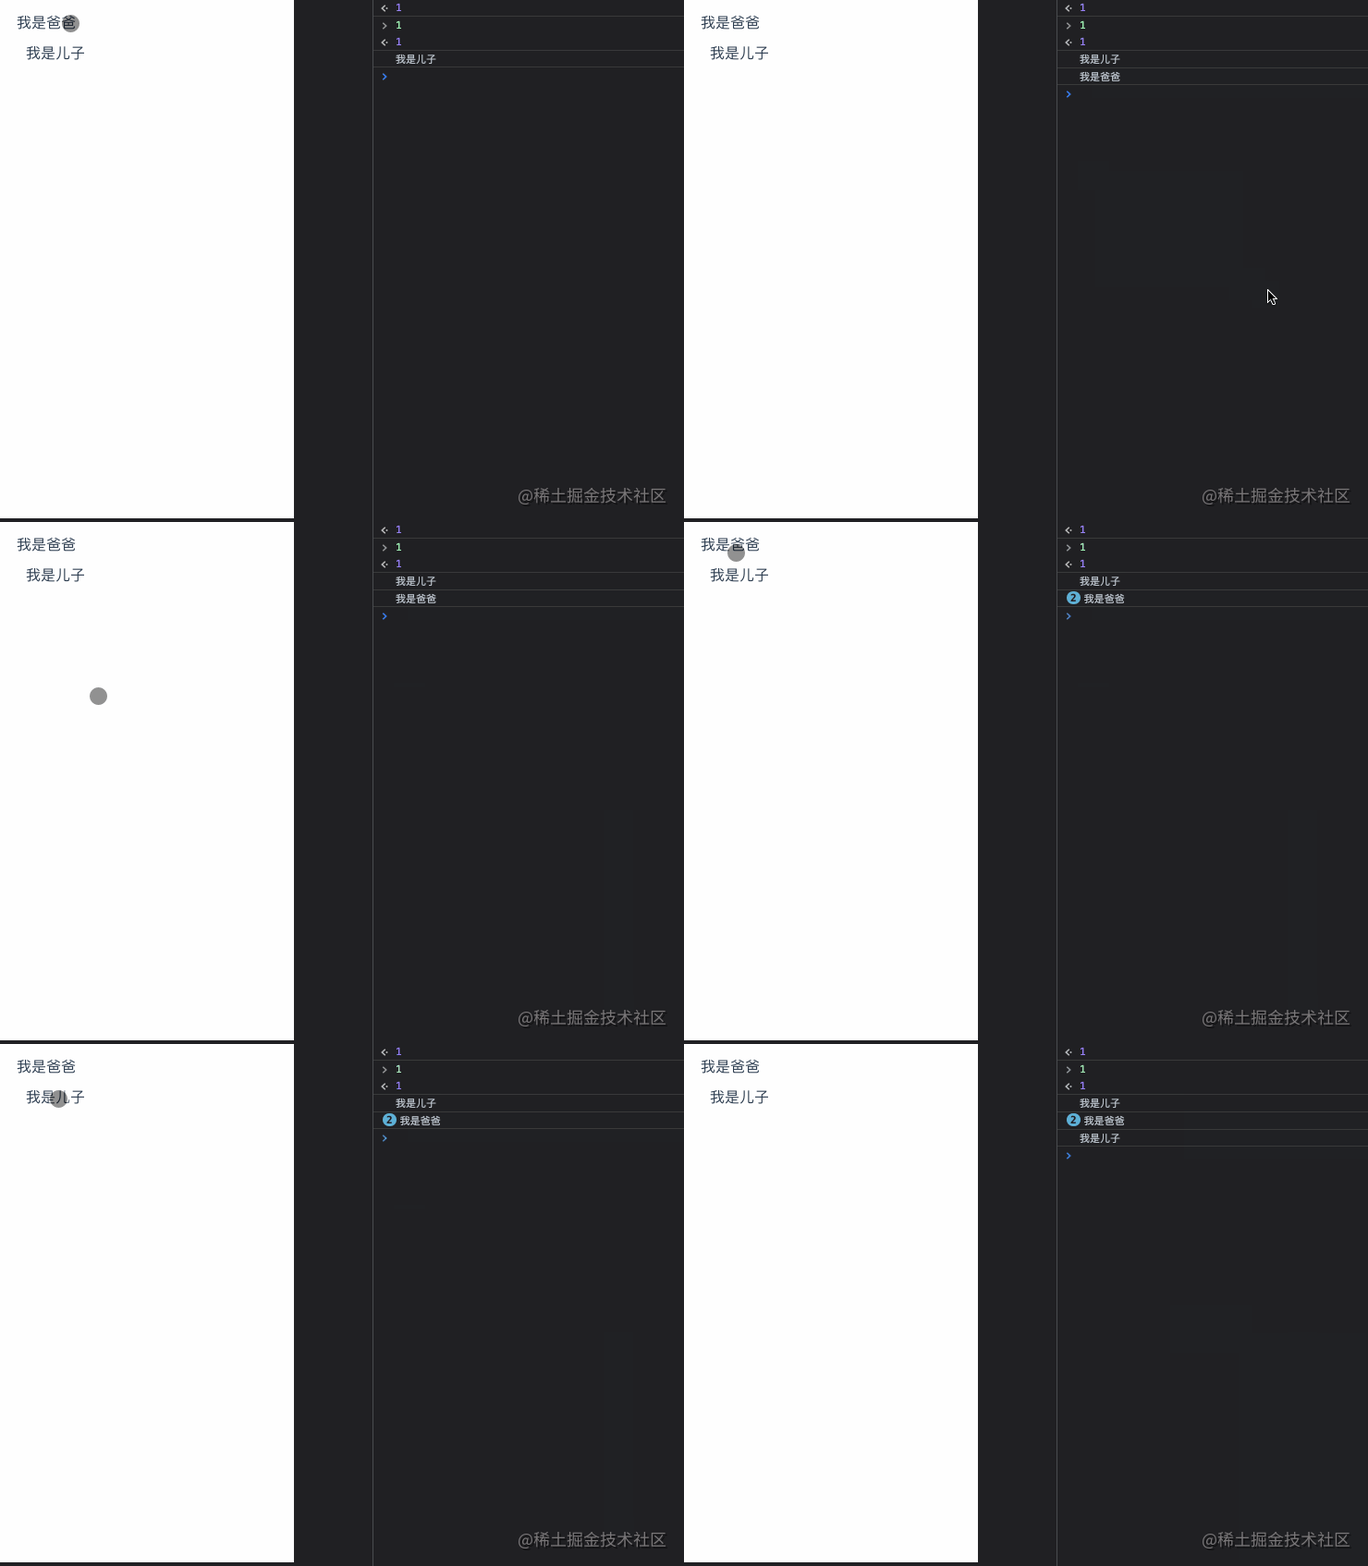
当然了,我们也可以通过调用
event.stopPropagation来阻止冒泡。不过更加推荐修饰符的做法,这样你的函数会更加专注在逻辑处理上,而不用关心DOM事件细节
export default {name: 'stop',methods: {onClickChild (event) {console.log('我是儿子')event.stopPropagation()}}
}
2. 阻止默认事件的两种方式
vue中阻止冒泡有两种方式,那阻止默认事件呢?
1 .prevent
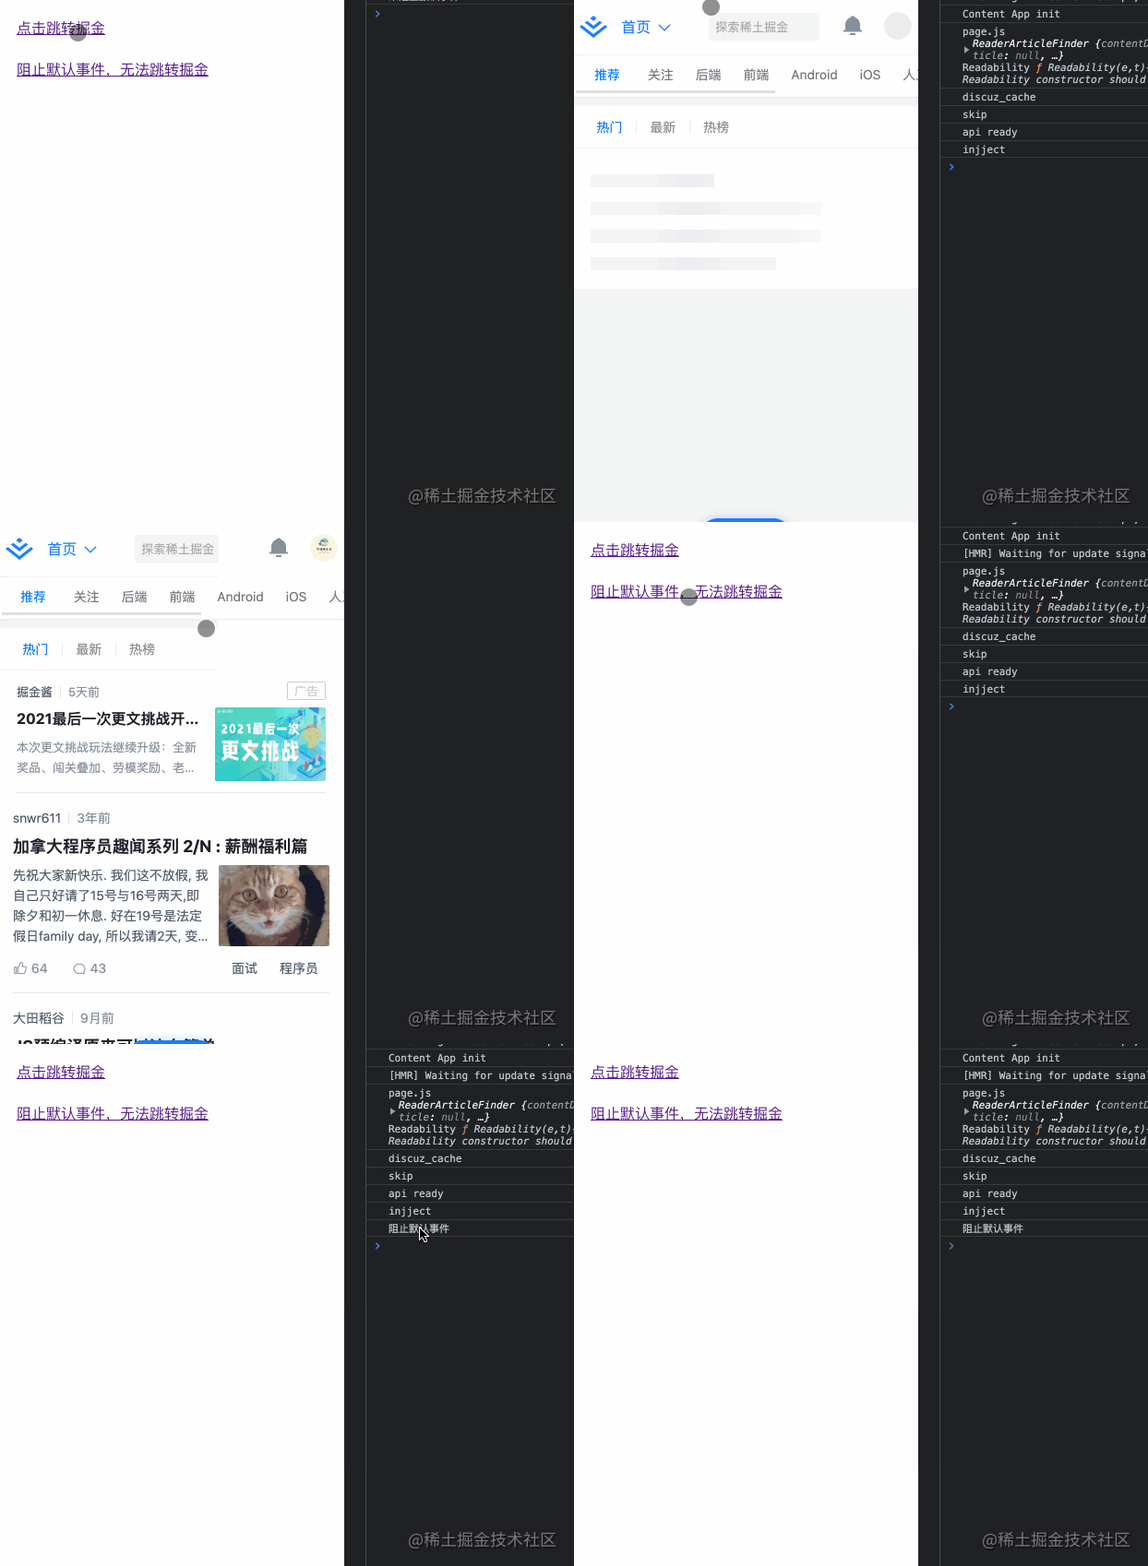
<template><div class="prevent"><a href="https://juejin.cn/" @click="onNoPrevent">点击跳转掘金</a><br /><br /><a href="https://juejin.cn/" @click.prevent="onPrevent">阻止默认事件,无法跳转掘金</a></div>
</template>export default {name: 'prevent',methods: {onNoPrevent () {console.log('未阻止默认事件')},onPrevent () {console.log('阻止默认事件')}}
}只要添加.prevent轻松实现阻止默认事件
2.event.preventDefault()
和阻止冒泡一样,我们也可以通过调用事件对象的
preventDefault方法来阻止默认事件
export default {name: 'prevent',methods: {onPrevent (event) {console.log('阻止默认事件')event.preventDefault()}}
}
3 .capture
默认情况下,事件流是以
冒泡(由里向外)的形式传递的,如果想以捕获(由外向里)的形式应该怎么办呢?
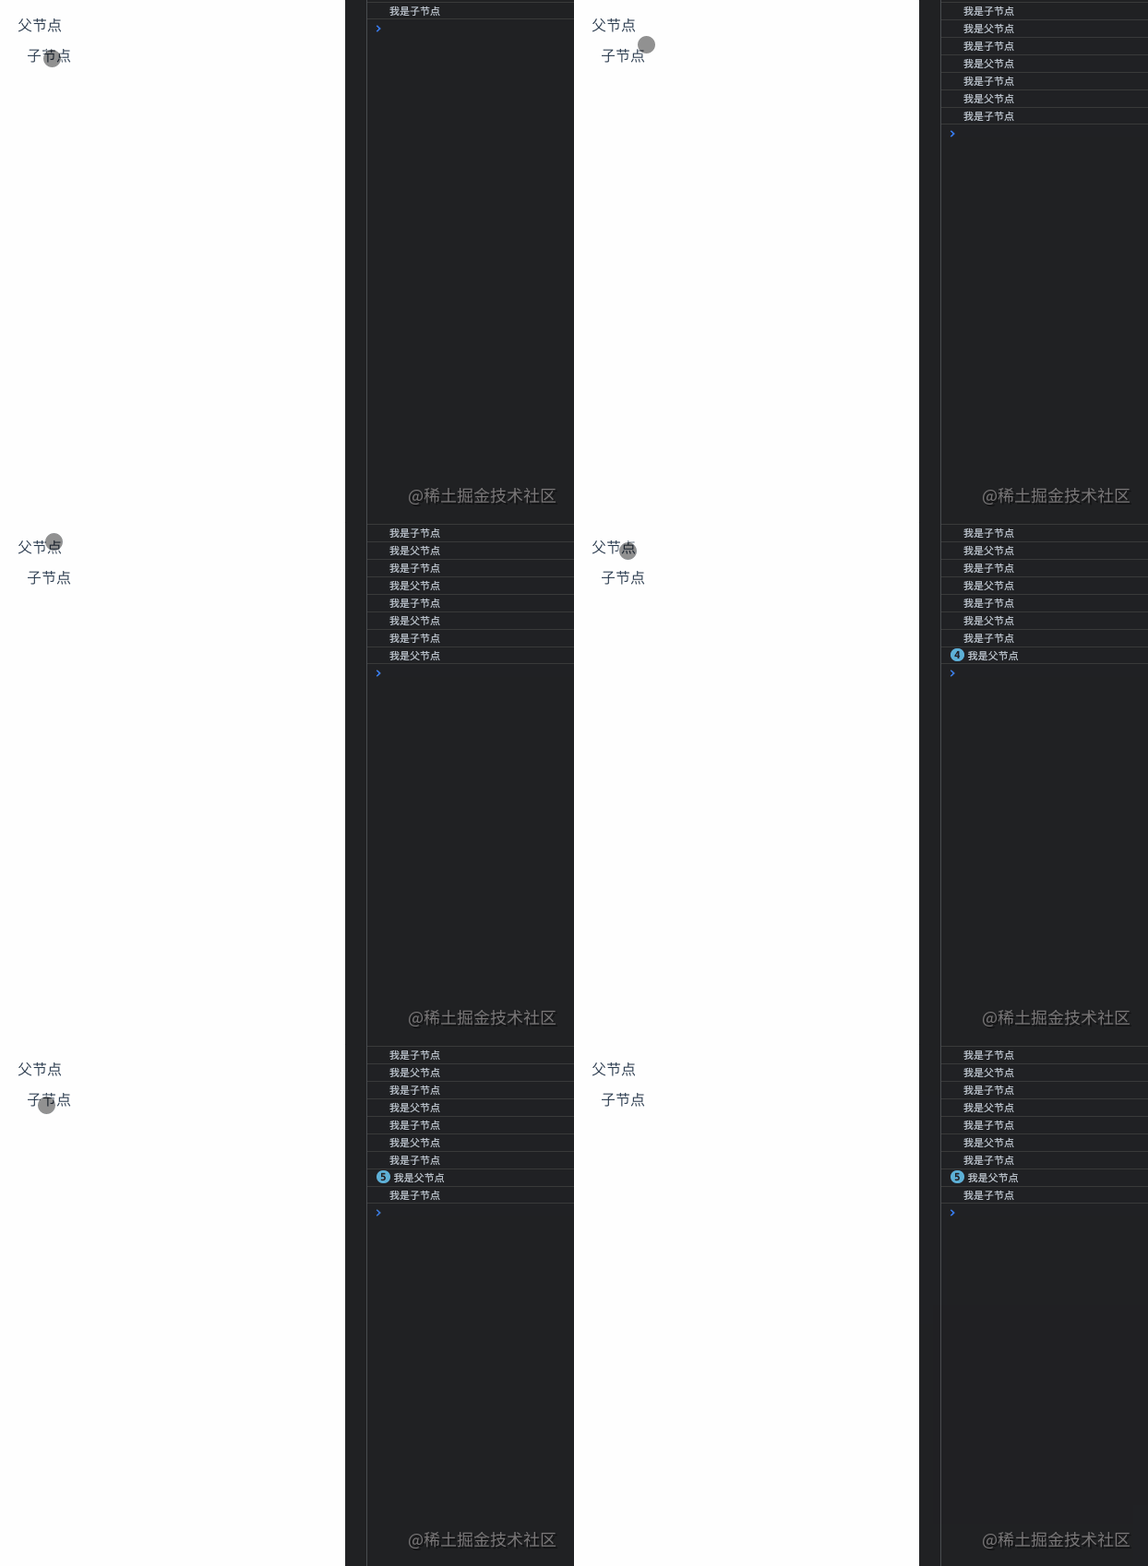
<template><div class="capture parent" @click.capture="onClickParent">父节点<div class="child" @click.capture="onClickChild">自节点</div></div>
</template>export default {name: 'capture',methods: {onClickParent () {console.log('我是父节点')},onClickChild () {console.log('我是子节点')}}
}不加catpture修饰符,点击子节点会陆续打印我是父节点以及我是子节点,加了之后,则是反过来了
4 .self
只有当
event.target是当前元素自身时才会触发事件回调函数
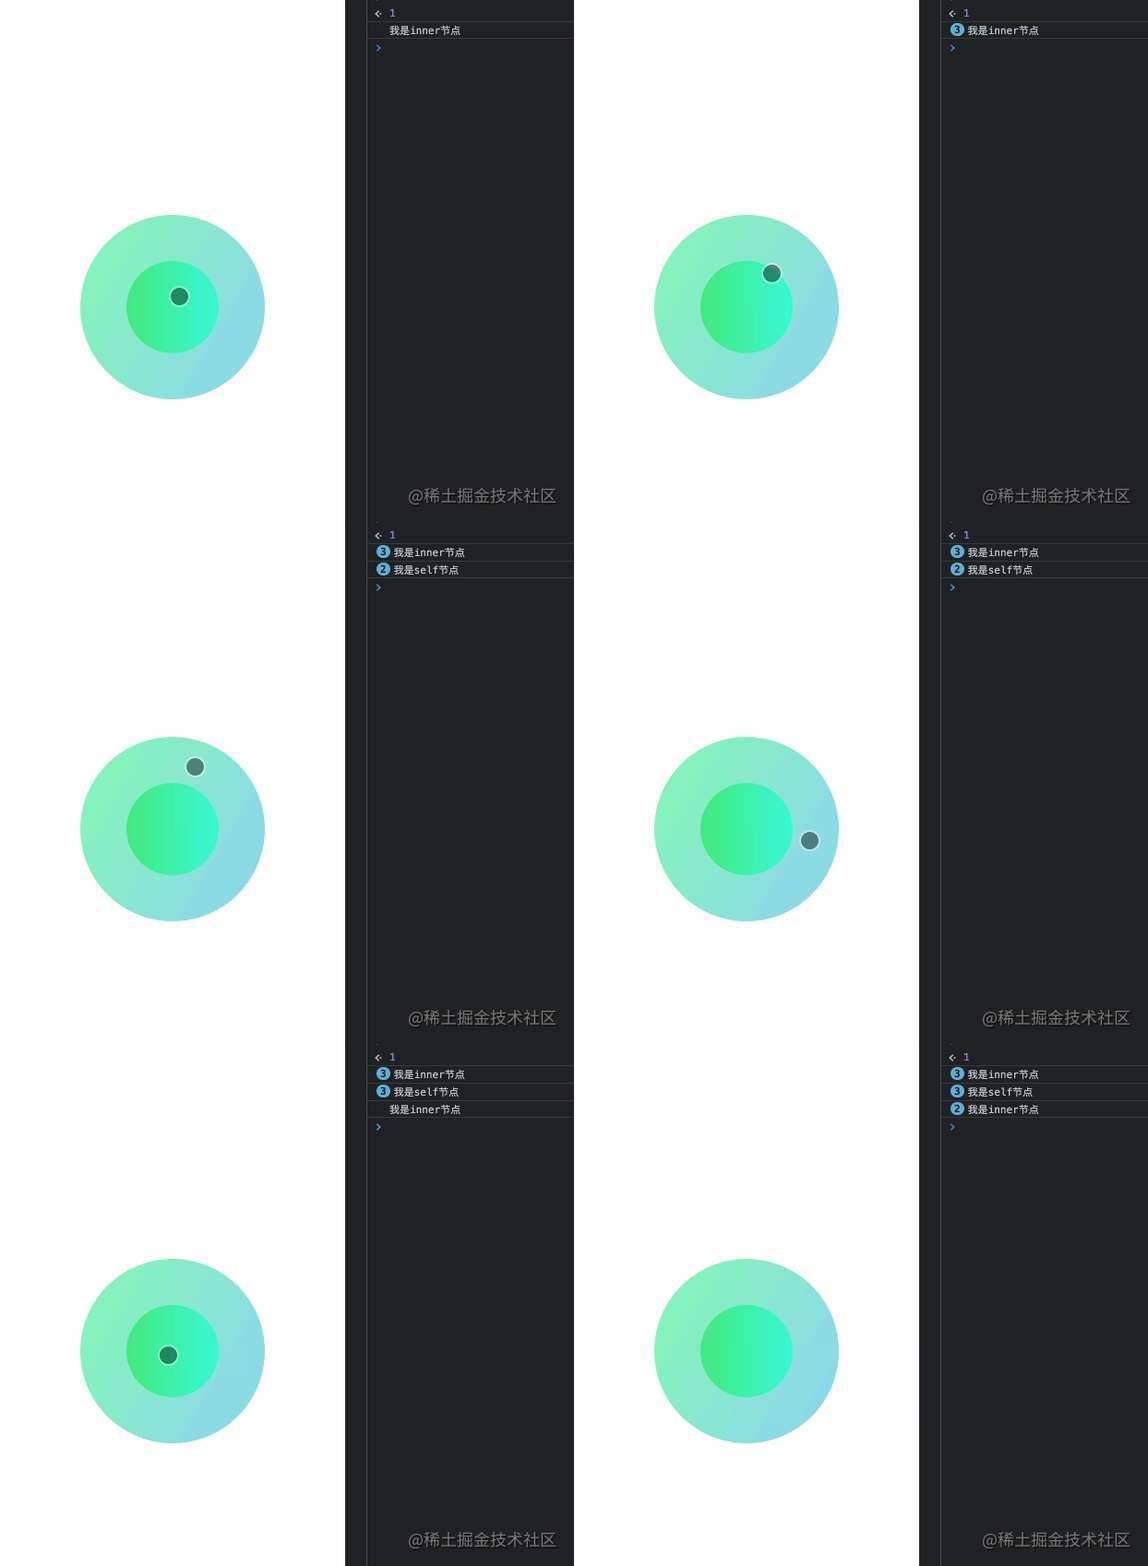
<template><div class="self" @click.self="onClickSelf"><div class="inner" @click="onClickInner"></div></div>
</template>export default {name: 'self',methods: {onClickSelf () {console.log('我是self节点')},onClickInner () {console.log('我是inner节点')}}
}不加self修饰符的话,点击inner节点也会触发self的事件,加了之后只有触发事件的元素本身是self,才会打印出我是self节点
暂停一下:修饰符的顺序如何理解?
已经回顾了4个修饰符,单独使用的时候很容易理解,但是注意官网有这么一句话

怎么理解呢?我们来看两个栗子
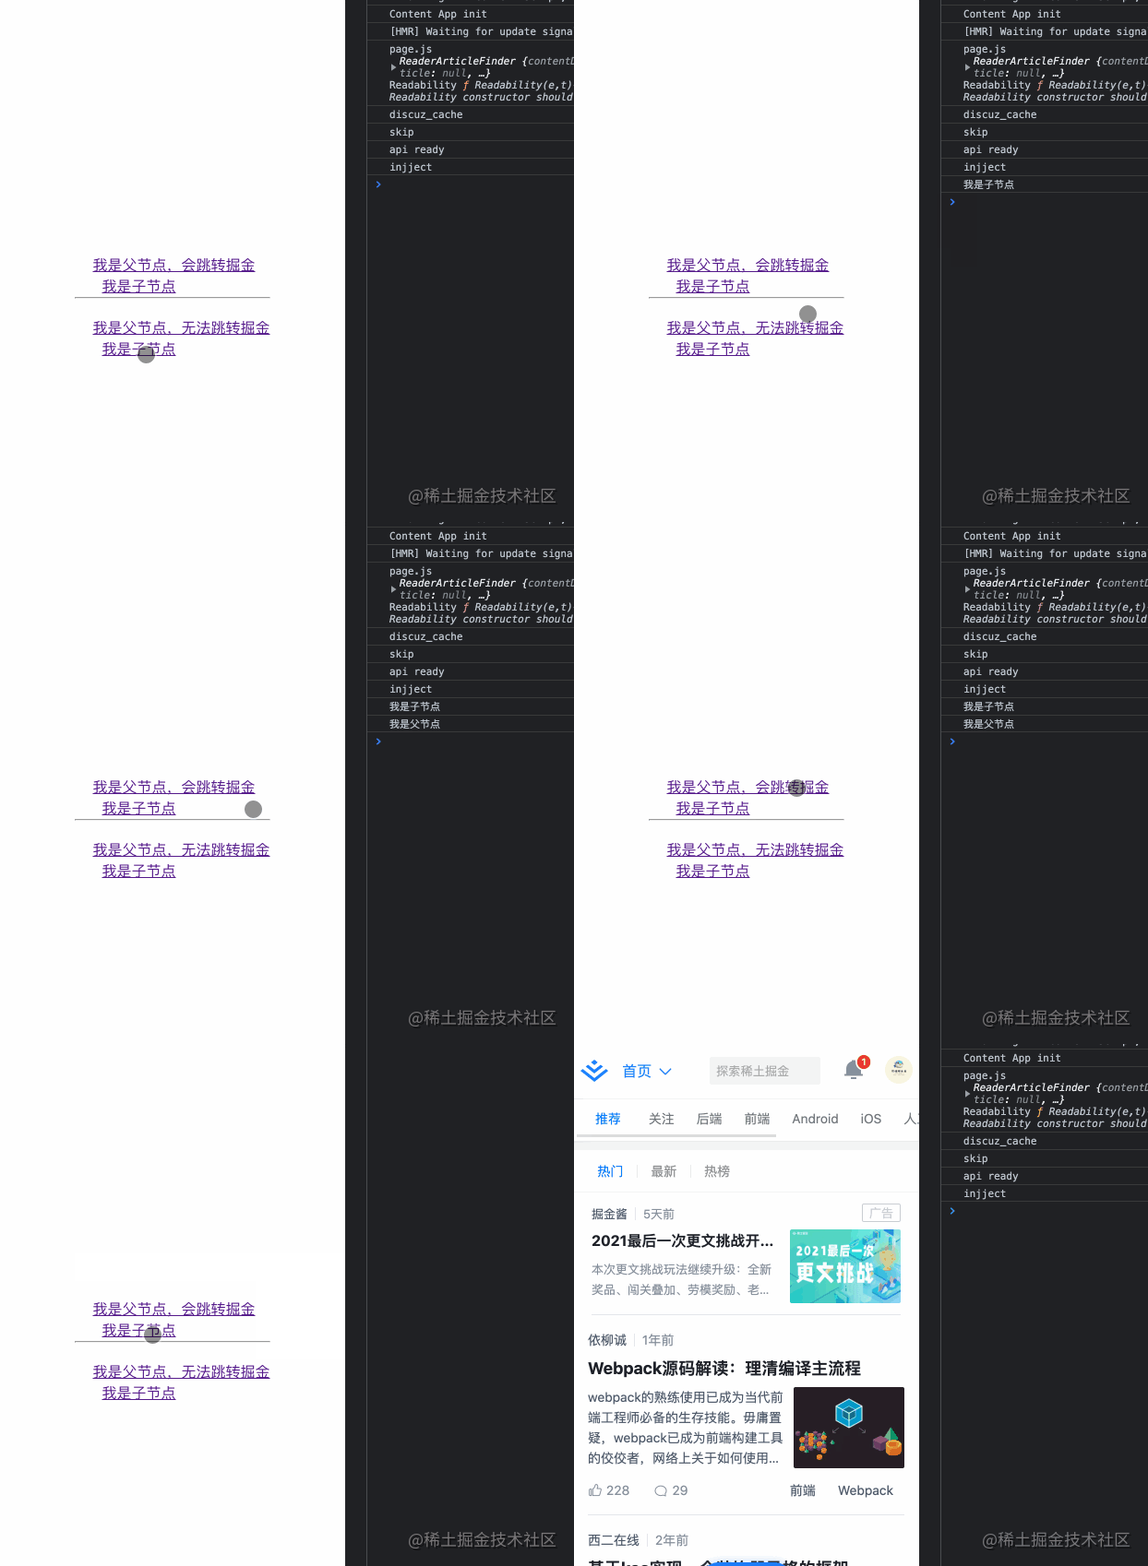
<template><div class="order"><div class="order-0"><a href="https://juejin.cn/" class="order-parent" @click.self.prevent="onClickParent">我是父节点,会跳转掘金<br /><span class="order-child" @click="onClickChild">我是子节点</span></a><hr /></div><div class="order-2"><a href="https://juejin.cn/" class="order-parent" @click.prevent.self="onClickParent">我是父节点,无法跳转掘金<br /><span class="order-child" @click="onClickChild">我是子节点</span></a></div></div>
</template>export default {name: 'order',methods: {onClickParent () {console.log('我是父节点')},onClickChild () {console.log('我是子节点')}}
}
您可以猜一下,上面的代码会发生什么,以下三点是可以明确的?
首先可以明确的是点击上面和下面的子节点都不会触发父节点的点击事件
点击下面的父节点会打印出我是父节点,但是不会跳转掘金
点击上面的父节点会打印出我是父节点,也不会跳转掘金
但是点击上面的子节点,父节点会不会跳转至掘金呢?答案是会
为什么?
a@click.self.prevent="onClickParent"的意思是当点击的元素是a元素本身时,会阻止默认事件(可以解释3,不会发生跳转),并且执行onClickParent回调。
而点击span元素时,由于冒泡的缘故,点击事件会传递给a,但是此时a会判断出该事件不是由自身触发的也就不会阻止默认事件(此时也就发生跳转了),当然也不会触发onClickParent回调
同理来我们分析一下a@click.prevent.self="onClickParent"
不管是子节点还是自身点击,都是先阻止默认事件,只有当触发点击事件是a元素本身时才会执行onClickParent回调函数。
回过头看,你理解事件的顺序含义了吗?

5. once
顾名思义,事件只会触发一次
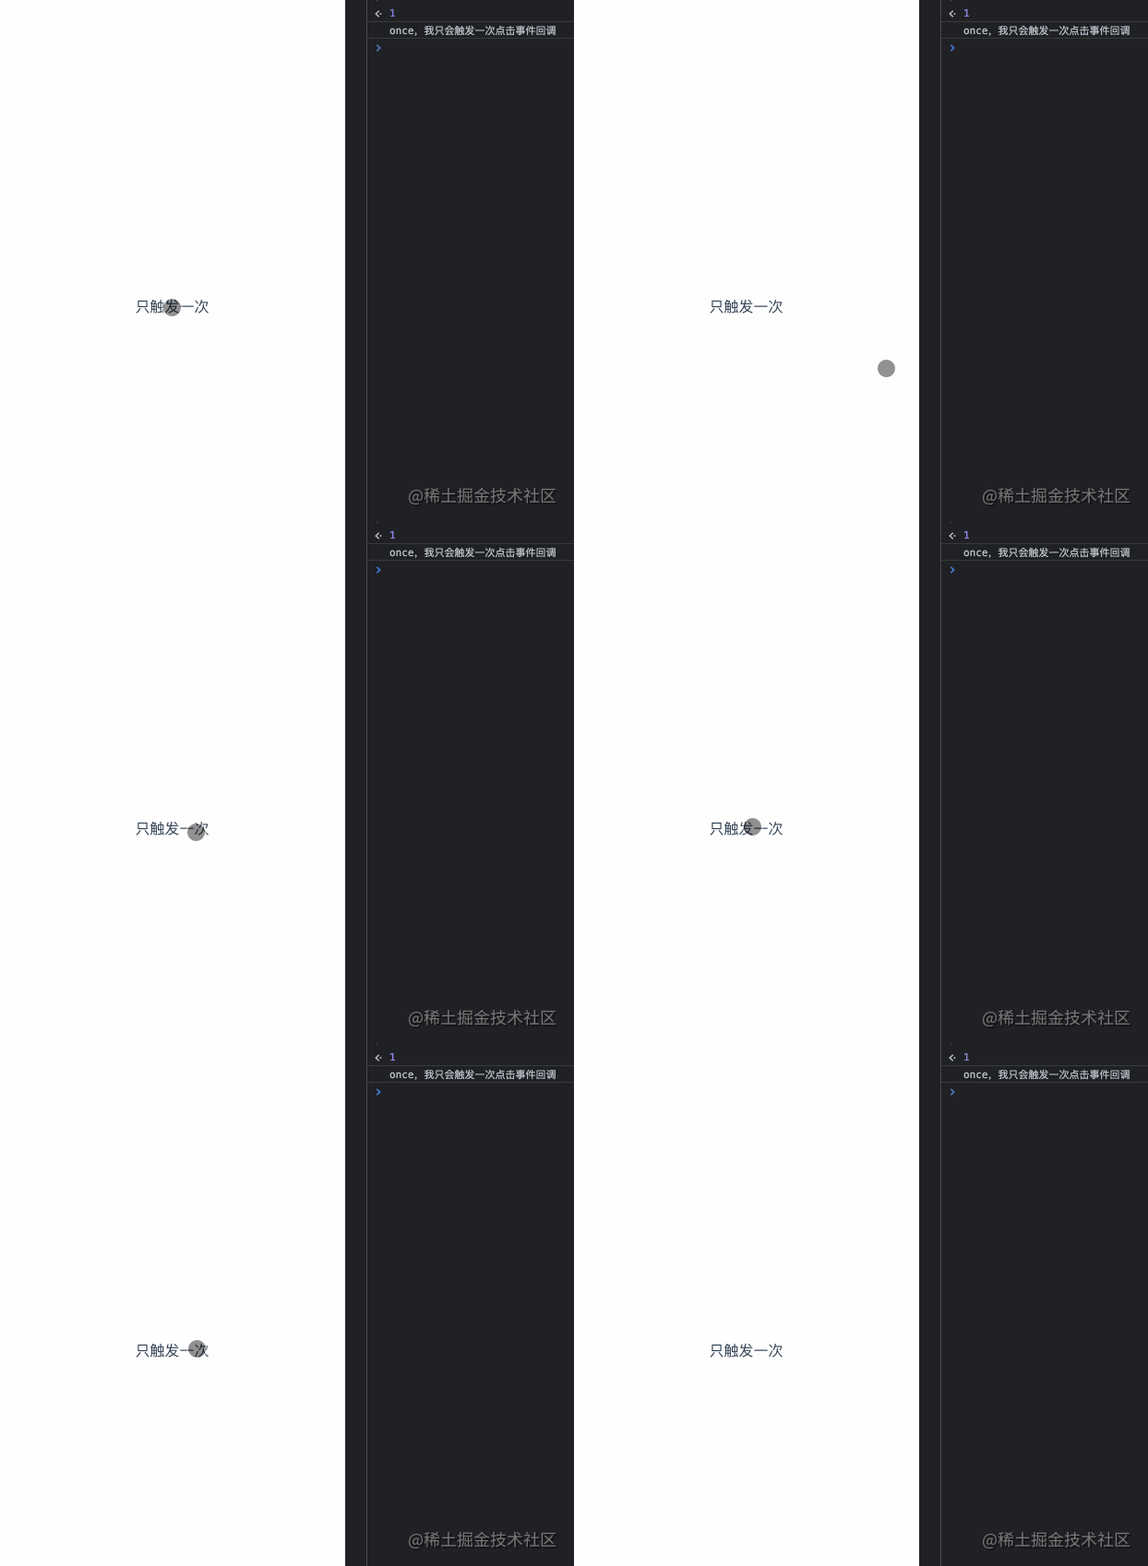
<template><div class="once" @click.once="onClickOnce">只触发一次</div>
</template>export default {name: 'once',methods: {onClickOnce () {console.log('once,我只会触发一次点击事件回调')}}
}
触发一次点击之后,任我再怎么点,回调怎也不会触发了。
6 .native
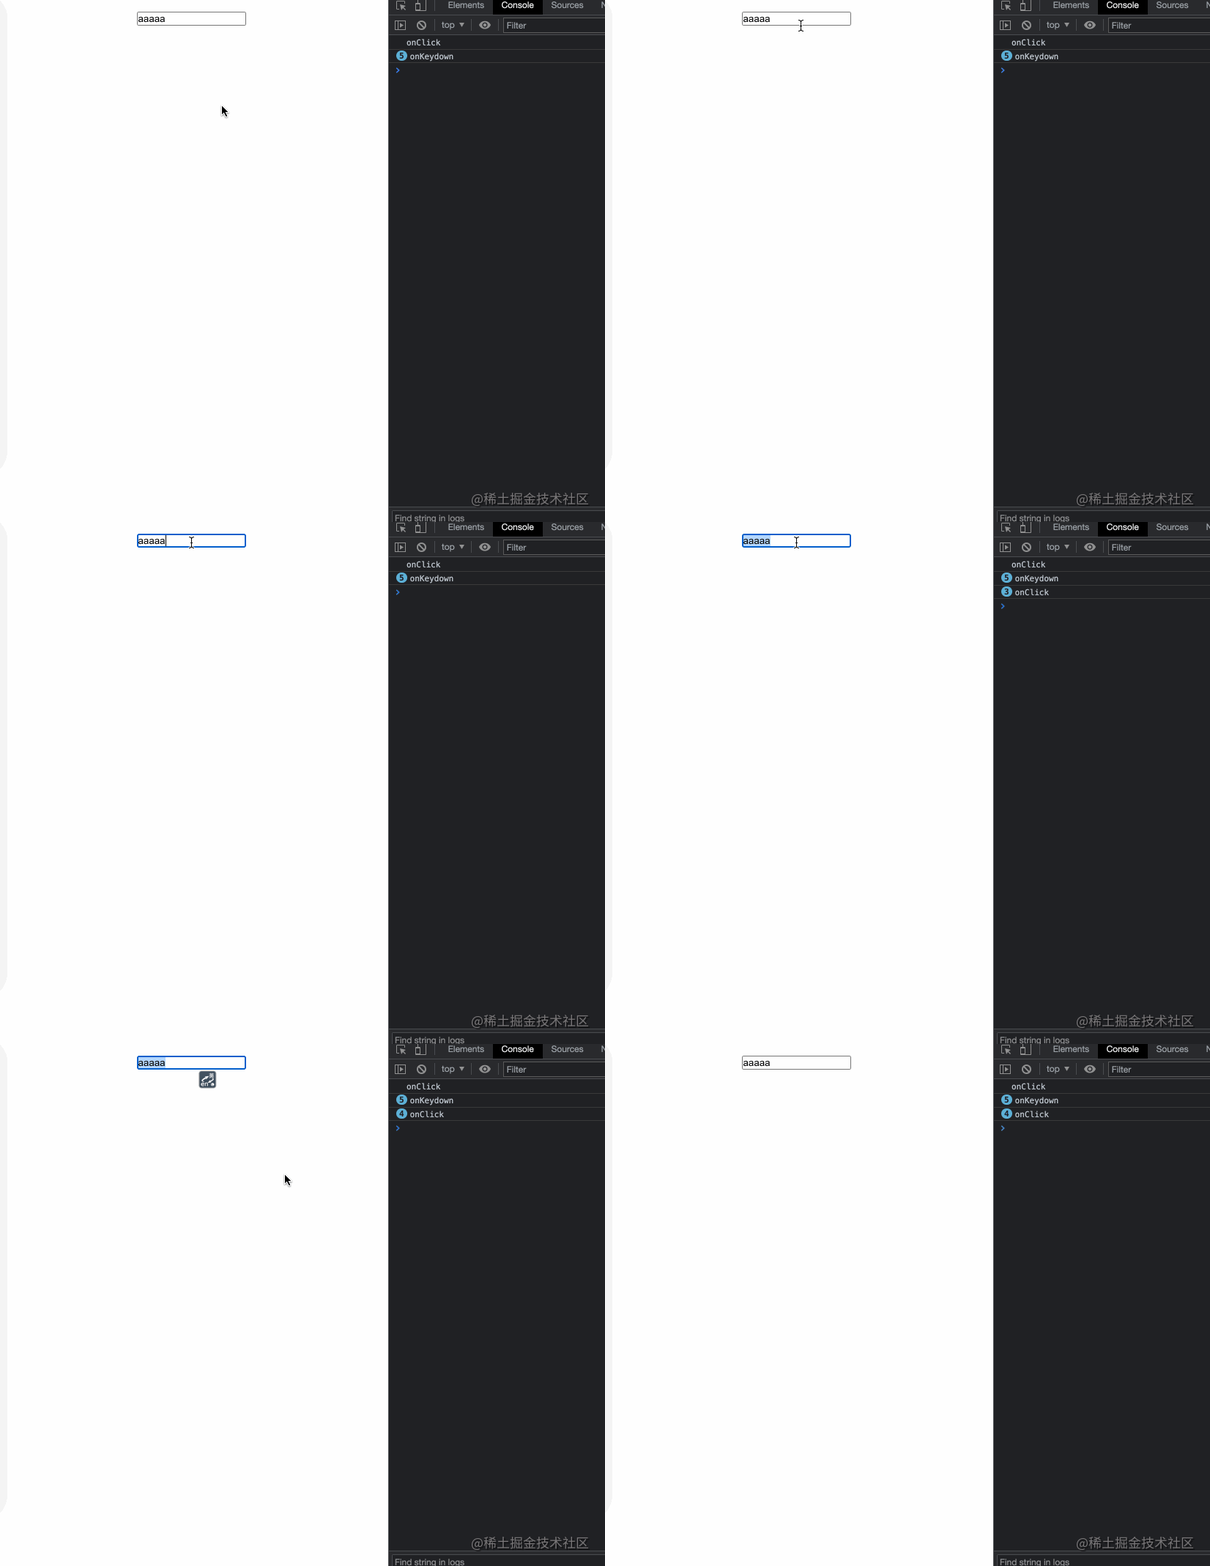
我们知道在自定义组件上,只能监听自定义事件,一些原生事件(比如click)是没有办法直接触发的,但是使用
.native修饰符可以帮我们办到这点
native.vue
<template><div class="native-custom"><input type="text" @keydown="onKeydown"></div>
</template>export default {name: 'nativeCustom',methods: {onKeydown () {this.$emit('onKeydown')}}
}
custom.vue
<template><div class="native"><!-- 加上.native之后原生事件才得以监听成功 --><NativeCustom @onKeydown="onKeydown" @click.native="onClick" /></div>
</template>import NativeCustom from '../../components/native.vue'export default {name: 'native',components: {NativeCustom},methods: {onKeydown () {console.log('onKeydown')},onClick () {console.log('onClick')}}
}
7 .passive
vue对应
addEventListener中的passive选项提供了.passive修饰符
<!-- 滚动事件的默认行为 (即滚动行为) 将会立即触发 -->
<!-- 而不会等待 `onScroll` 完成 -->
<!-- 这其中包含 `event.preventDefault()` 的情况 --> <div v-on:scroll.passive="onScroll">...</div>
这个修饰符对于滚动性能的提升,一直没找到合适的例子,跪求广大掘友有例子啊
这个修饰符对于滚动性能的提升,一直没找到合适的例子,跪求广大掘友有例子啊
这个修饰符对于滚动性能的提升,一直没找到合适的例子,跪求广大掘友有例子啊
v-bind修饰符
8 .sync
当我们想要在
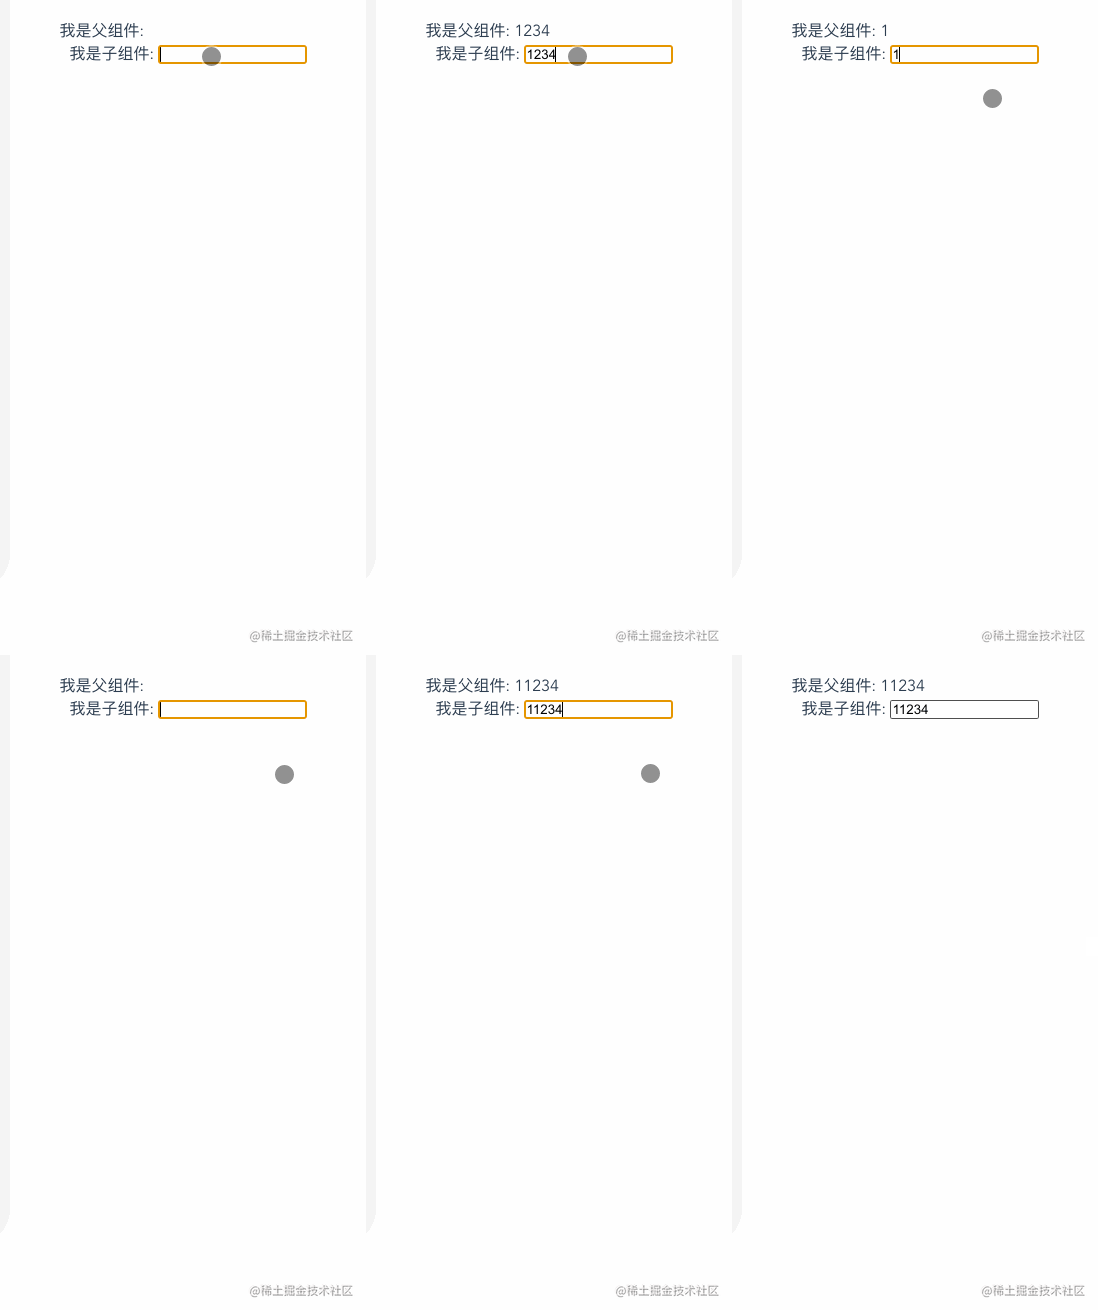
父组件和子组件之间对某个属性值进行双向绑定时,有什么便捷的方式?是的只要.sync修饰符即可办到
父组件
<template><div class="sync-parent">我是父组件: {{ text }}<Child :text.sync="text" /></div>
</template>import Child from './child.vue'export default {name: 'SyncParent',data () {return {text: 'parent'}},components: {Child,}
}
子组件
<template><div class="child">我是子组件: <input type="text" v-model="value" @input="onInput"></div>
</template>export default {name: 'child',props: {text: {type: String}},data () {return {value: this.text}},methods: {onInput () {// 注意这里,必须是update:xxx的形式xxx即属性propthis.$emit('update:text', this.value)}}
}
9 .camel
.camel修饰符允许在使用 DOM 模板时将v-bindproperty 名称驼峰化,例如 SVG 的viewBoxproperty:
<svg :view-box.camel="viewBox"></svg>10 .prop
关于.prop修饰符官网只有这句话
.prop作为一个 DOM property 绑定而不是作为 attribute 绑定。`。
有啥作用?
通过自定义属性存储变量,避免暴露数据
防止污染 HTML 结构
比如有以下代码
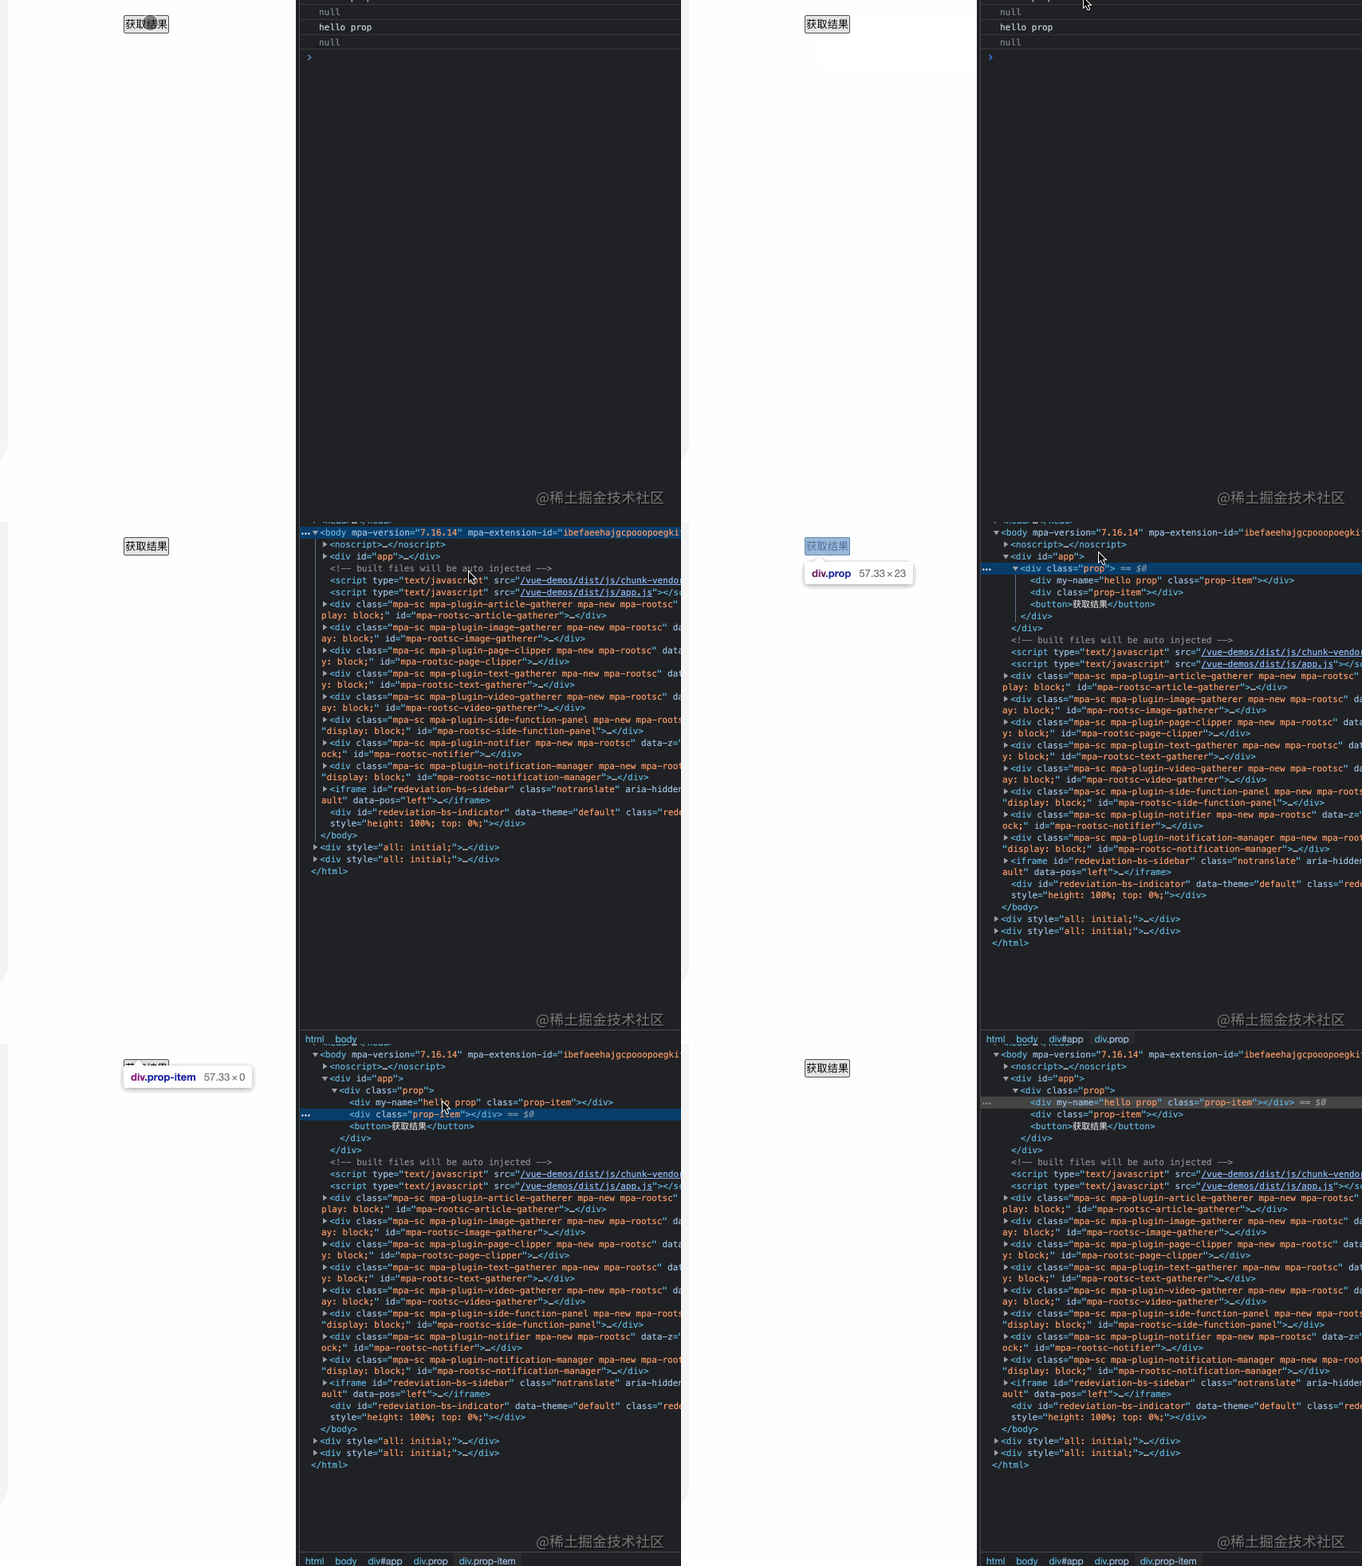
<template><div class="prop"><div class="prop-item" :my-name="prop"></div>// 最终变成了 <div my-name="hello prop" class="prop-item"></div><div class="prop-item" :my-name.prop="prop2"></div>// 最终变成了<div class="prop-item"></div><button @click="onGetResult">获取结果</button></div>
</template>export default {name: 'prop',data () {return {prop: 'hello prop',prop2: 'hello prop2'}},methods: {onGetResult () {const $refProp = this.$refs.propconst $refProp2 = this.$refs.prop2console.log($refProp.getAttribute('my-name')) // hello propconsole.log($refProp2.getAttribute('my-name')) // null}}
}从示例上可以看出未使用.prop修饰符的my-name属性会绑定到dom节点的attribute,从而出现暴露的情况。
鼠标修饰符
当咱们想监听用户点击了
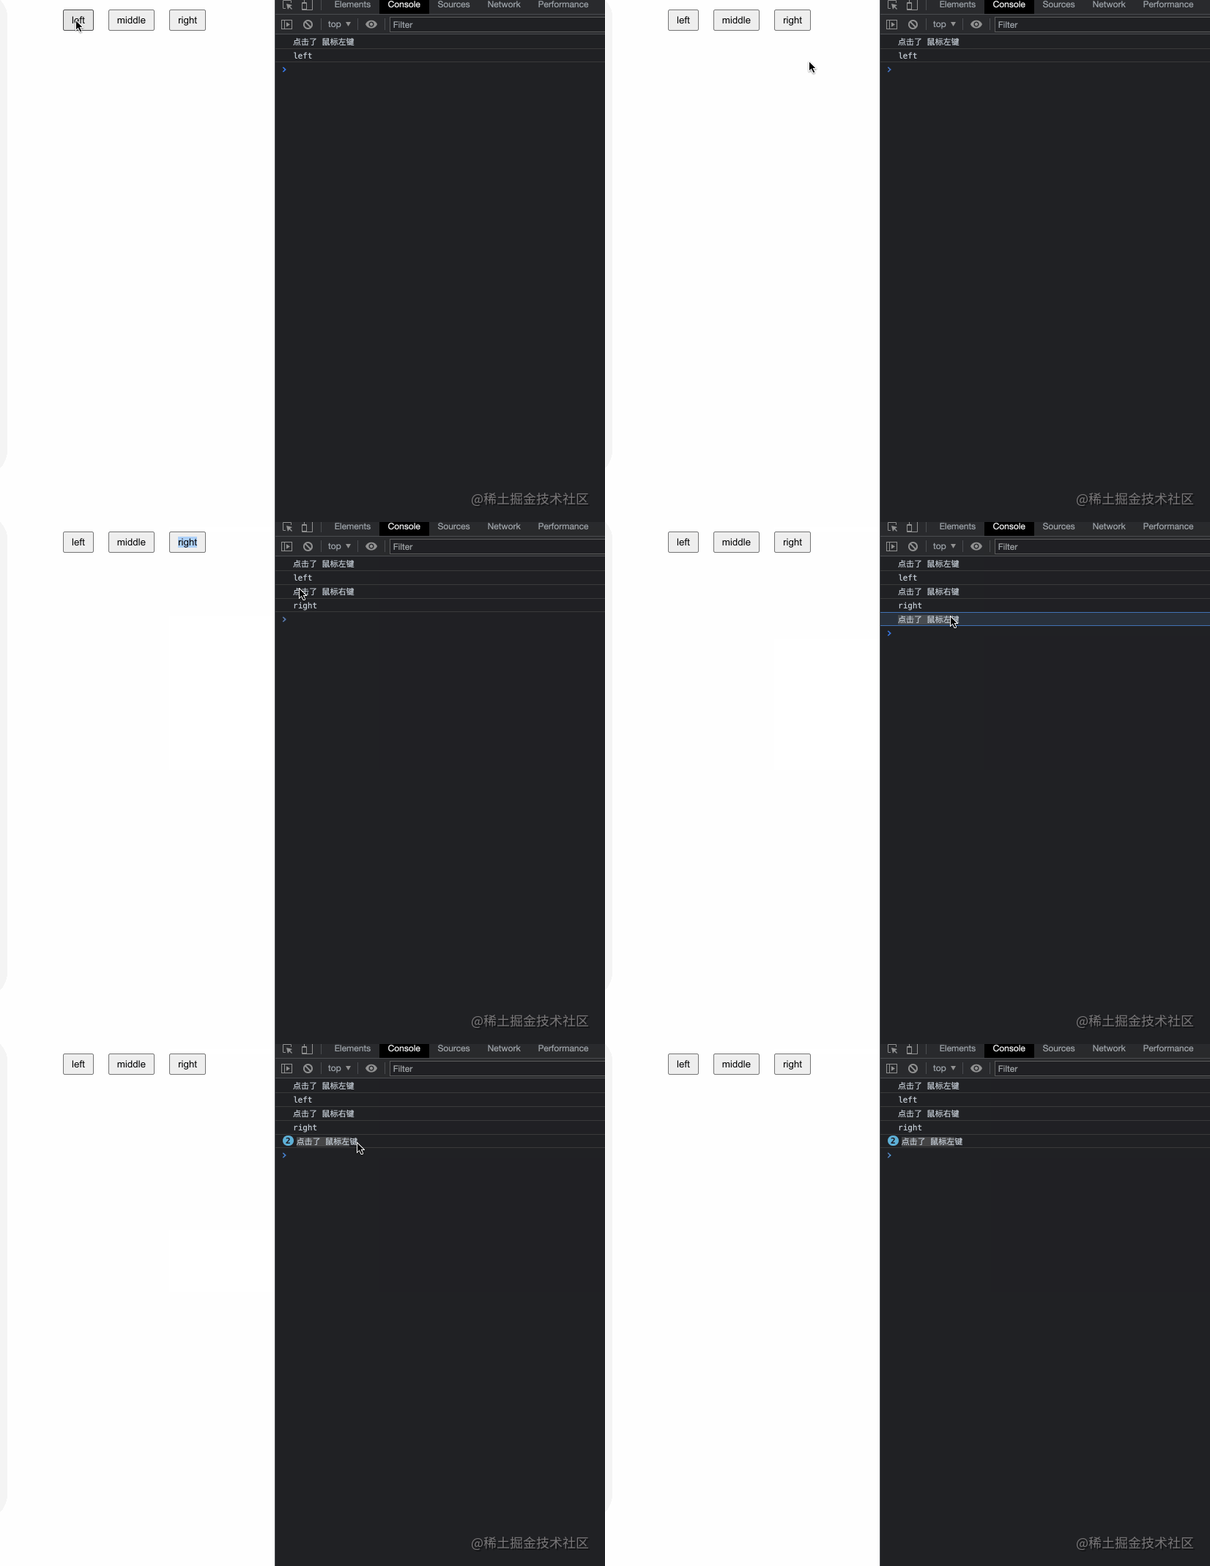
左键、右键或者中键时也有修饰符可以快捷使用,分别是.left、.right、middle,来看个例子试试
根据MDN MouseEvent.button,介绍。
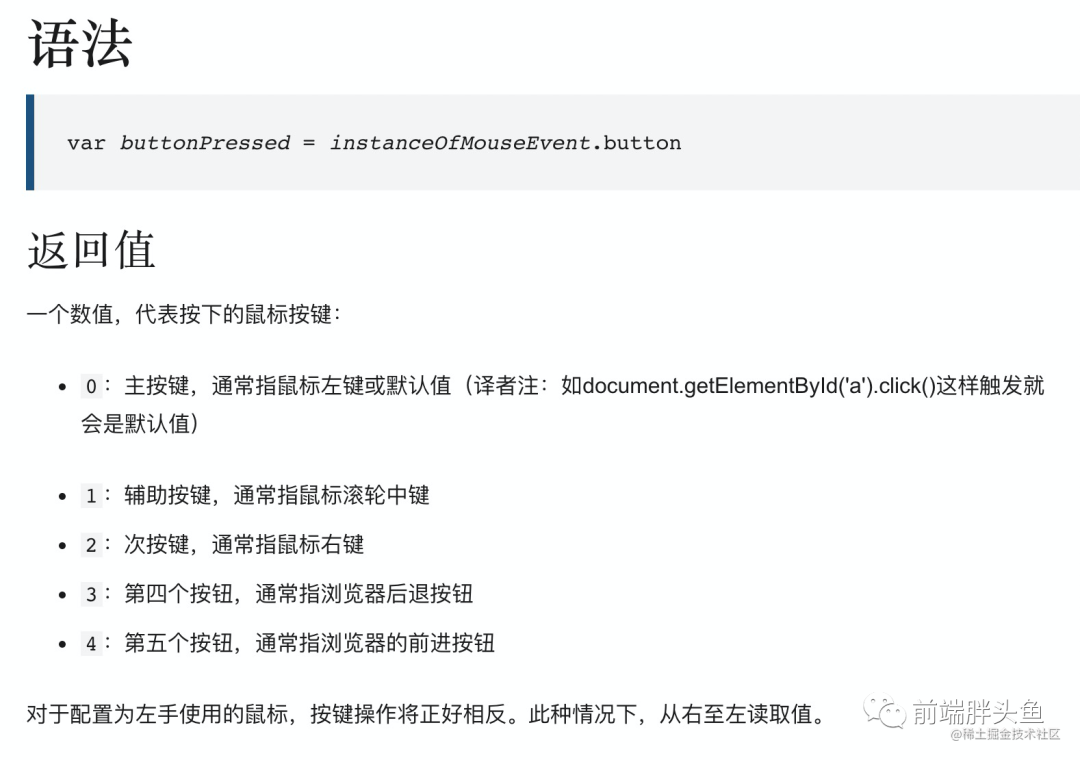
在最外层div.mouse监听mousedown事件,看下用户点击的是鼠标哪个键,三个button分别用三个修饰符快捷方式监听左键、中键、右键并打印出left、middle、right
<template><div class="mouse" @mousedown="onMousedown"><button @click.left="onClickBtn('left')">left</button><button @click.middle="onClickBtn('middle')">middle</button><button @click.right="onClickBtn('right')">right</button></div>
</template>export default {name: 'mouse',mounted () {},methods: {onClickBtn (msg) {console.log(msg)},onMousedown (event) {const mosueMsgMap = {0: '鼠标左键',1: '鼠标中键',2: '鼠标右键'}console.log('点击了', mosueMsgMap[event.button])}}
}
没有带鼠标回来,中键点击暂时不能演示,后续会补上
11 .left
同上例子,监听鼠标左键点击
12 .right
同上例子,监听鼠标右键点击
13 .middle
同上例子,监听鼠标中键点击
表单相关修饰符
14 .trim
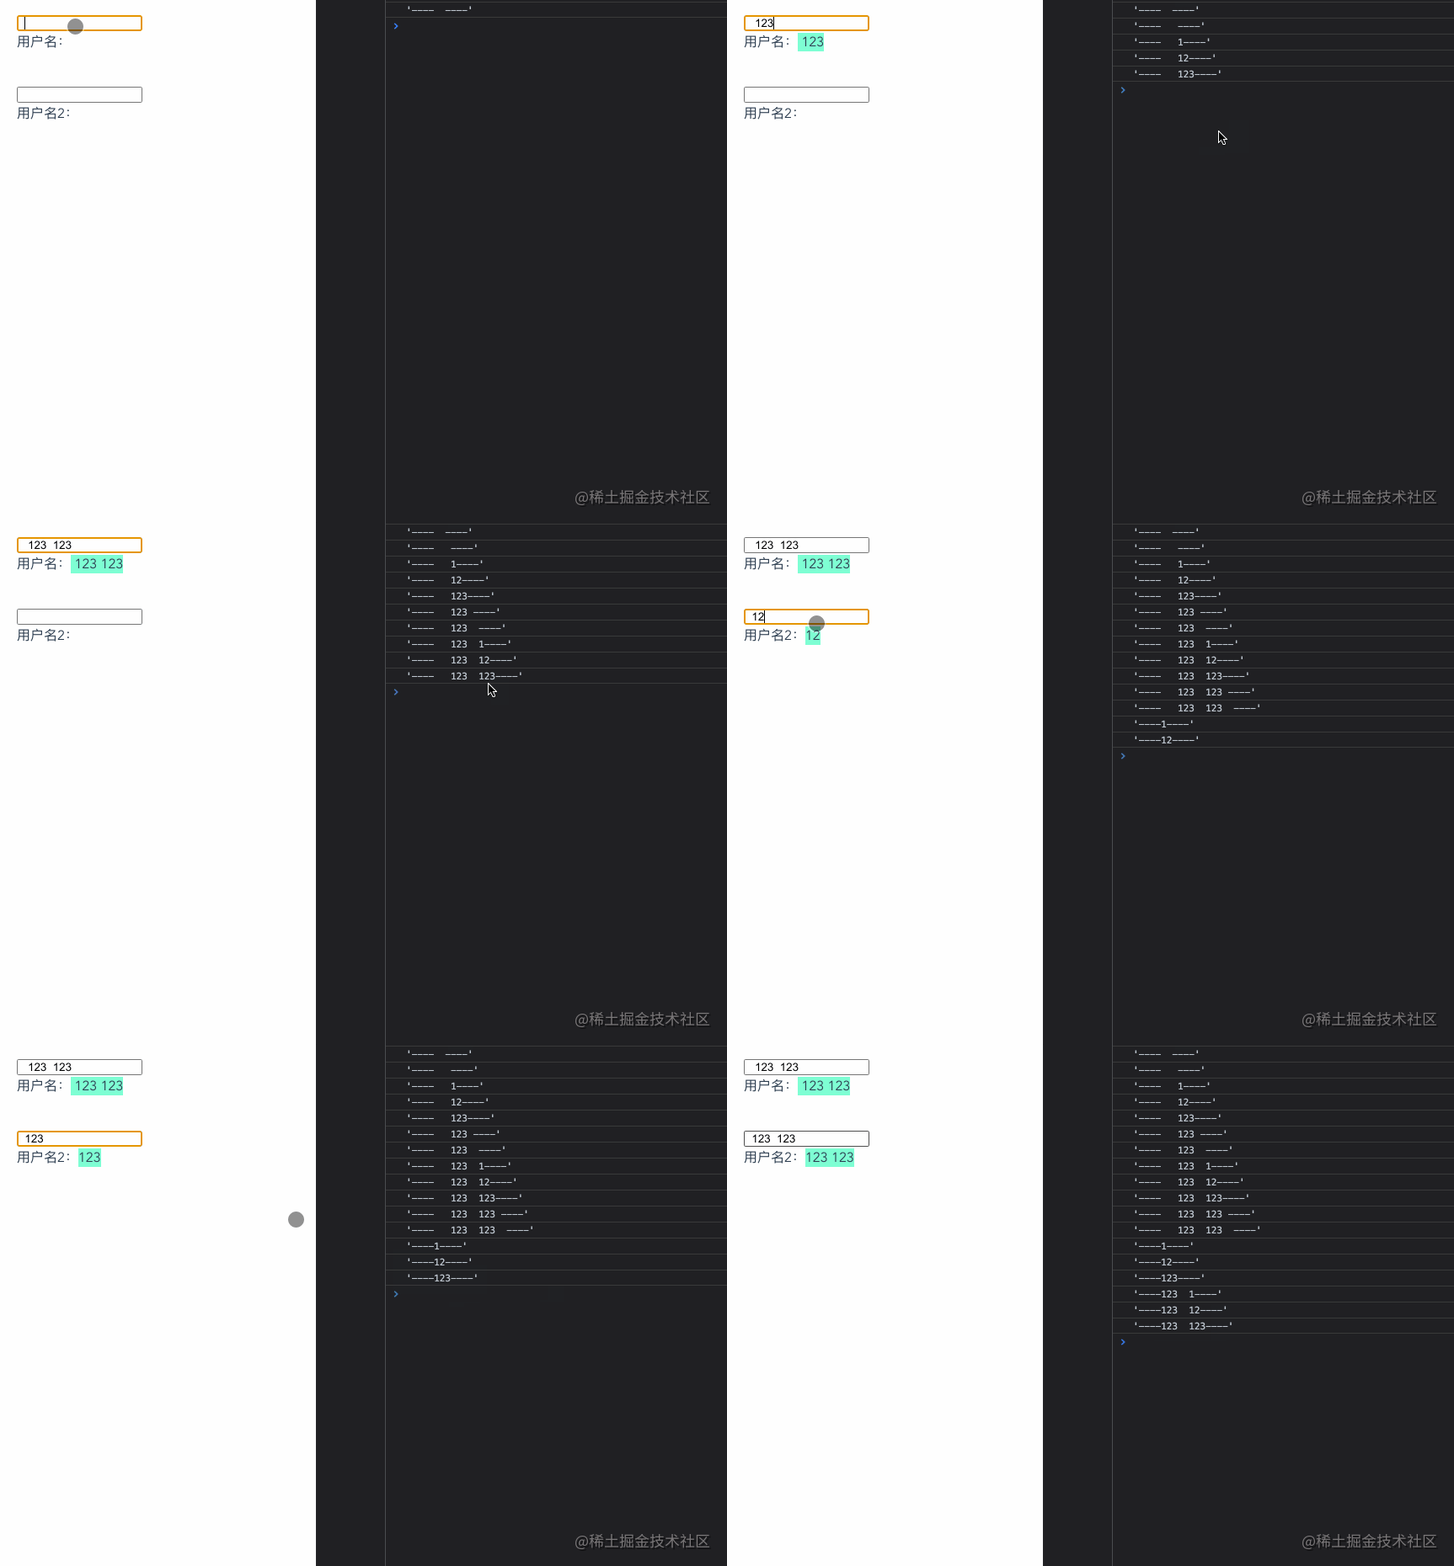
对于输入的内容,希望可以
过滤首尾空格应该怎么做呢?
<template><div class="trim"><div class="trim-item"><input type="text" v-model="name"><p>用户名:<span>{{ name }}</span></p></div><div class="trim-item"><input type="text" v-model.trim="name2"><p>用户名2:<span>{{ name2 }}</span></p></div></div>
</template>export default {name: 'trim',data () {return {name: '',name2: '',}},watch: {name (newVal) {console.log(`'----${newVal}----'`)},name2 (newVal) {console.log(`'----${newVal}----'`)},}
}
.trim修饰符可以很方便做到
15 .lazy
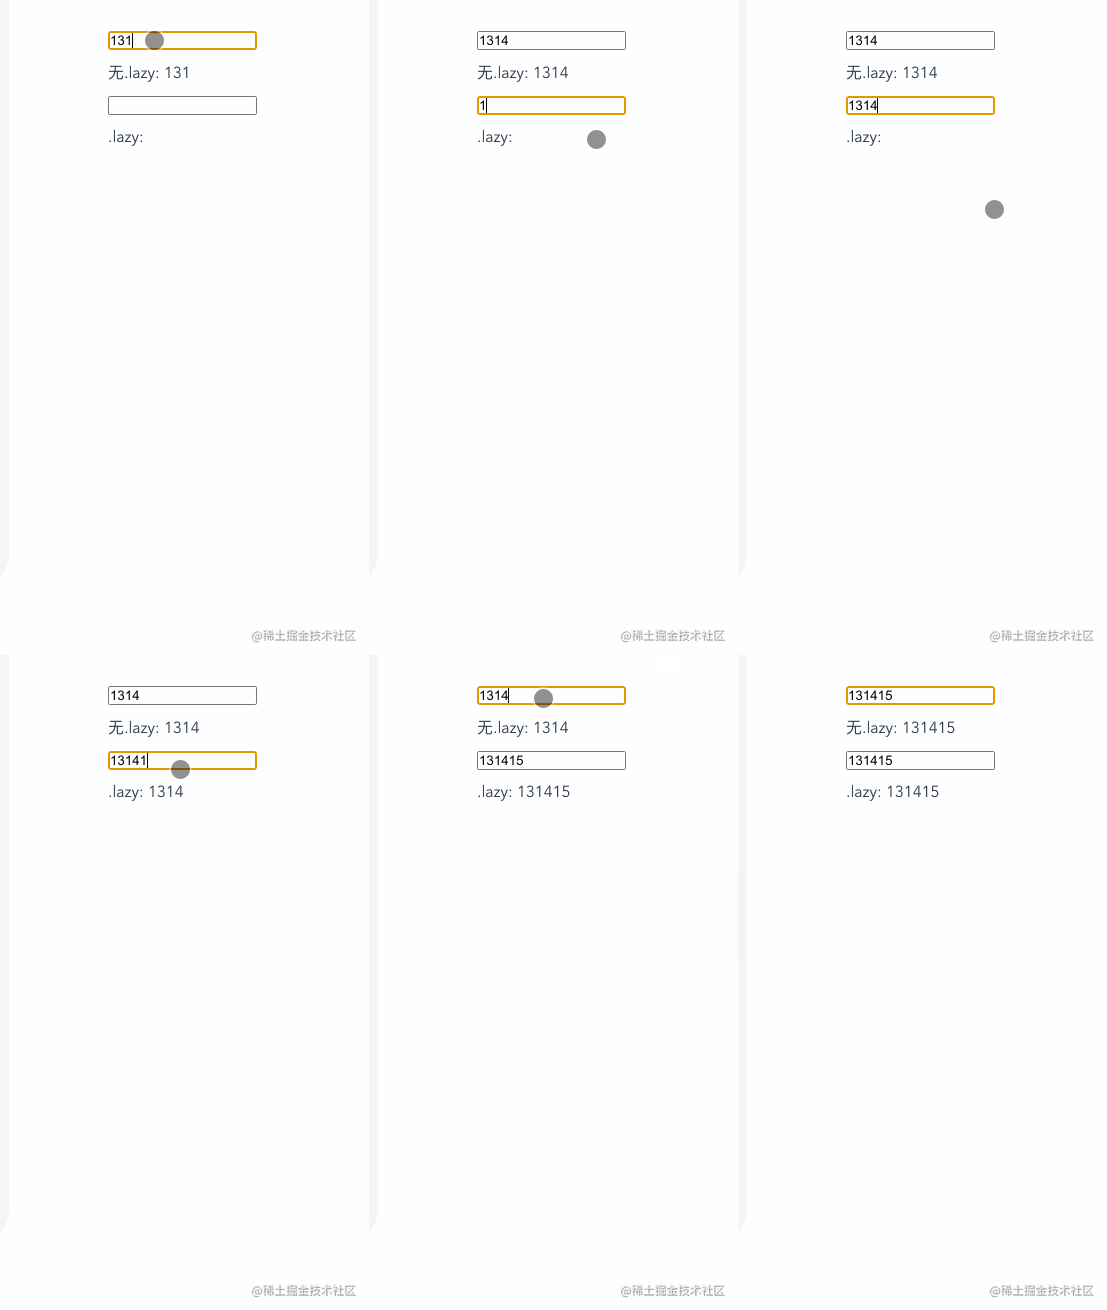
v-model大家都很熟悉,默认情况下,每次input事件触发的时候都会将输入框的值与其绑定的数据进行实时同步。但是如果想要实现光标离开的时候再更新数据如何实现呢?
思路1: 绑定change事件,在事件回调中手动获取target的值
思路2: 直接使用.lazy修饰符即可达到效果
<template><div class="lazy"><div class="lazy-item"><input type="text" v-model="text"><p>无.lazy: {{ text }}</p></div><div class="lazy-item"><input type="text" v-model.lazy="text2"><p>.lazy: {{ text2 }}</p></div></div>
</template>export default {name: 'lazy',data () {return {text: '',text2: ''}}
}可以看到添加了.lazy修饰符之后,第二个输入框输入的值不会实时反应在下面,而是光标离开实,text2的数据才更新了
16 .number
我们知道
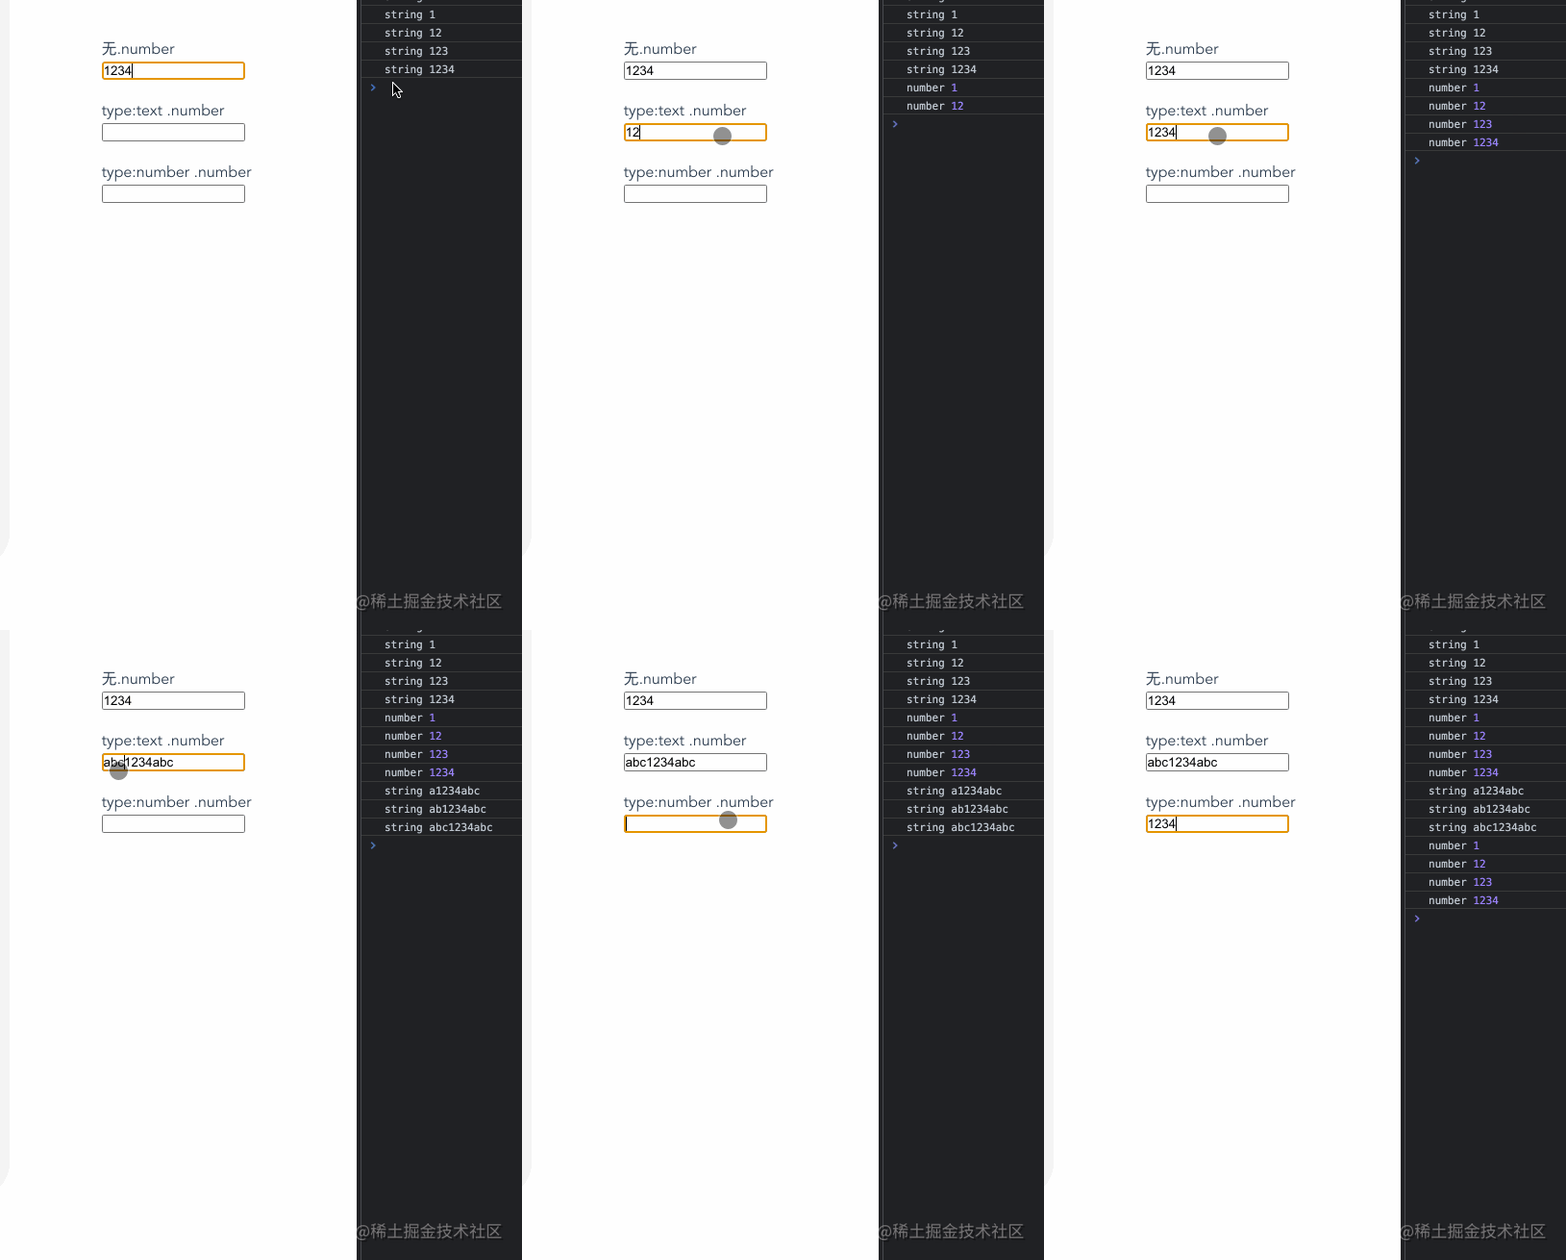
input输入框的type哪怕是number得到的值的类型也是string,如果我们想直接拿到number类型的数据,有不想麻烦的手动转换应该怎么办呢?
<template><div class="number"><div class="number-item"><p>无.number </p><input type="number" v-model="number"></div><div class="number-item"><p>type:text .number </p><input type="text" v-model.number="number1"></div><div class="number-item"><p>type:number .number </p><input type="number" v-model.number="number2"></div></div>
</template>export default {name: 'lazy',data () {return {number: 0,number1: '',number2: '',}},watch: {number (newVal) {console.log(typeof newVal, newVal)},number1 (newVal) {console.log(typeof newVal, newVal)},number2 (newVal) {console.log(typeof newVal, newVal)},}
}
第一个输入框的类型是number,但是得到的值是string
第二个输入框的类型是text,但是添加了number修饰符,得到的值可以是number(如果这个值无法被
parseFloat()解析,则会返回原始的值。)第三个输入框的类型是number,最后得到的值也是number
系统修饰符
当点击事件或者键盘事件需要系统键同时按下才触发时
.ctrl、.alt、.shift、.meta可以帮大忙噢!
如下代码
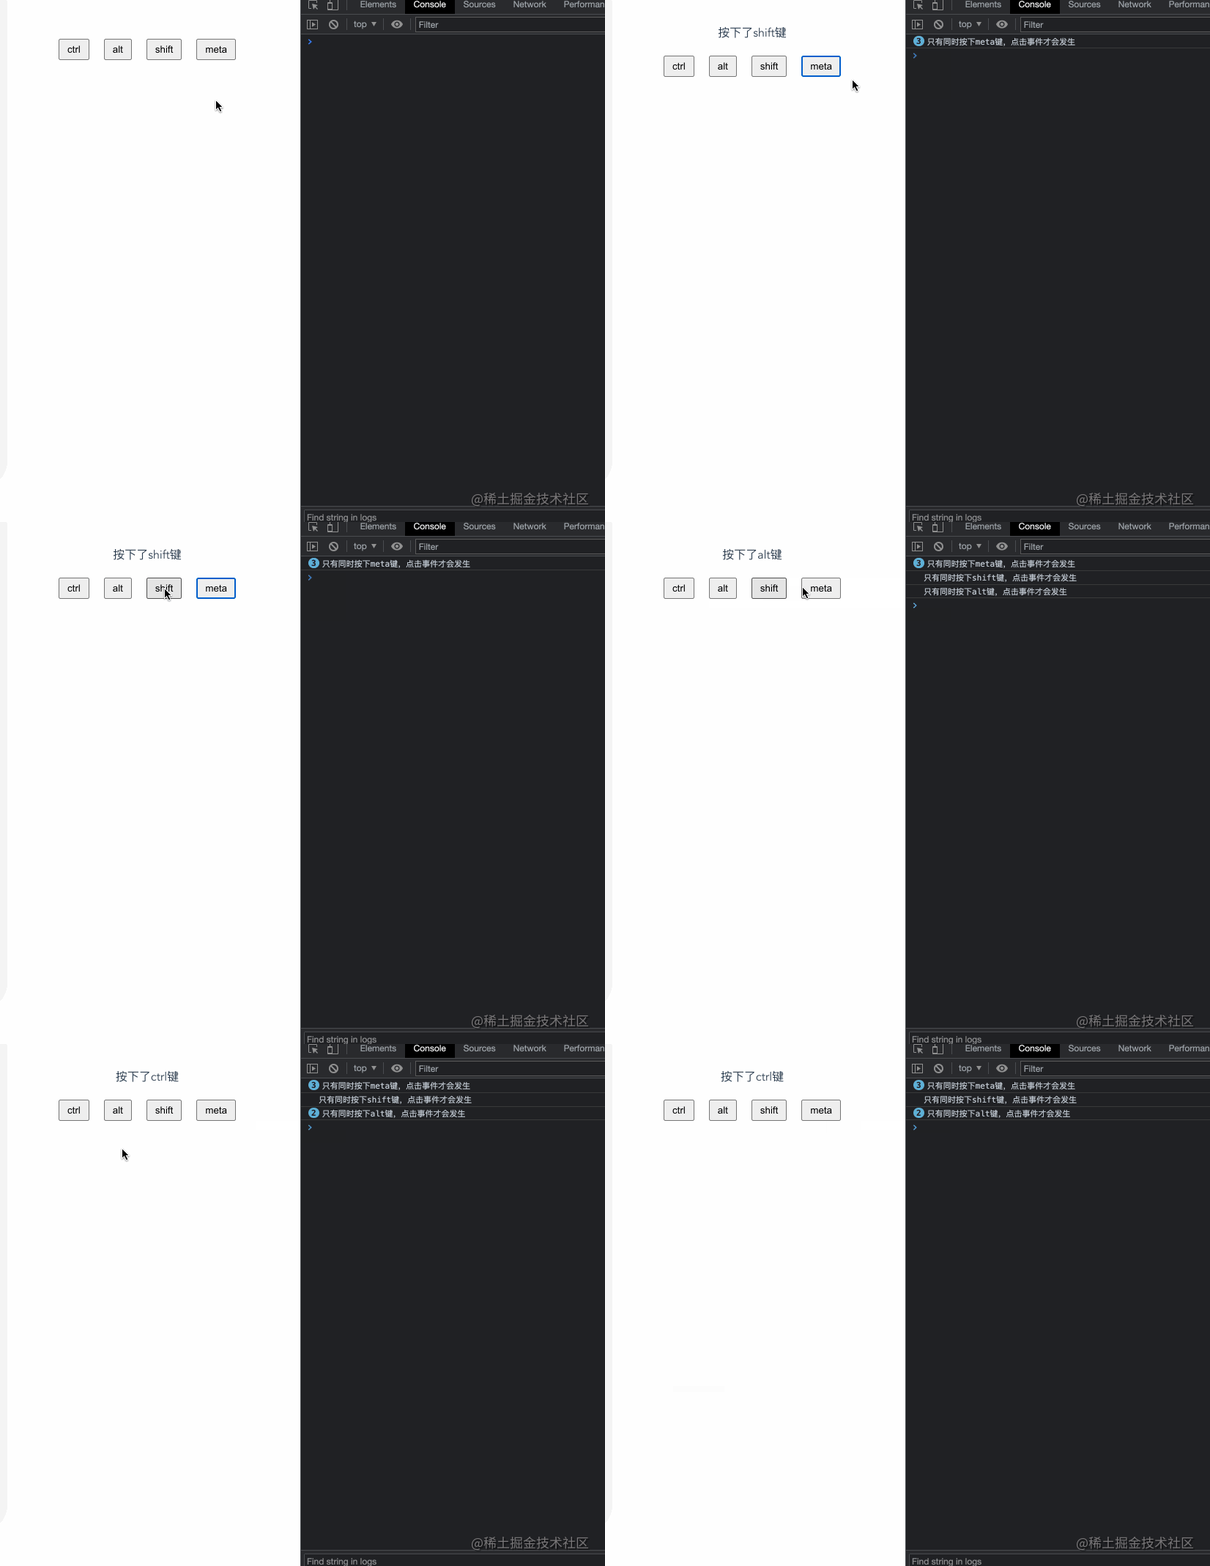
全局监听keydown事件,尝试看
.ctrl、.alt、.shift、.meta是否被按下分别给四个按钮加上
.ctrl、.alt、.shift、.meta修饰符并配合点击事件,验证是否同时按下指定按键,再点击才会生效
注明:电脑ctrl键 + 点击估计和浏览器快捷配置冲突了,导致没触发
<template><div class="system"><p>{{ msg }}</p><div class="buttons"><button @click.ctrl="onClickButon('ctrl')">ctrl</button><button @click.alt="onClickButon('alt')">alt</button><button @click.shift="onClickButon('shift')">shift</button><button @click.meta="onClickButon('meta')">meta</button></div></div>
</template>export default {name: 'system',data () {return {msg: ''}},mounted () {this.onListenSystemKeyDown()},methods: {onListenSystemKeyDown () {document.addEventListener('keydown', (event) => {let msg = '按下了'if (event.ctrlKey) {msg += 'ctrl键'} else if (event.altKey) {msg += 'alt键'} else if (event.shiftKey) {msg += 'shift键'} else if (event.metaKey) {msg += 'meta键'} else {msg += '其他键'}this.msg = msg}, false)},onClickButon (key) {console.log(`只有同时按下${key}键,点击事件才会发生`)}}
}
17 .ctrl
仅在按下ctrl按键时才触发鼠标或键盘事件的监听器,详细例子请看上面
18 .alt
仅在按下alt按键时才触发鼠标或键盘事件的监听器,详细例子请看上面
19 .shift
仅在按下shift按键时才触发鼠标或键盘事件的监听器,详细例子请看上面
20 .meta
仅在按下meta按键时才触发鼠标或键盘事件的监听器,详细例子请看上面
21 .exact
严格来说这
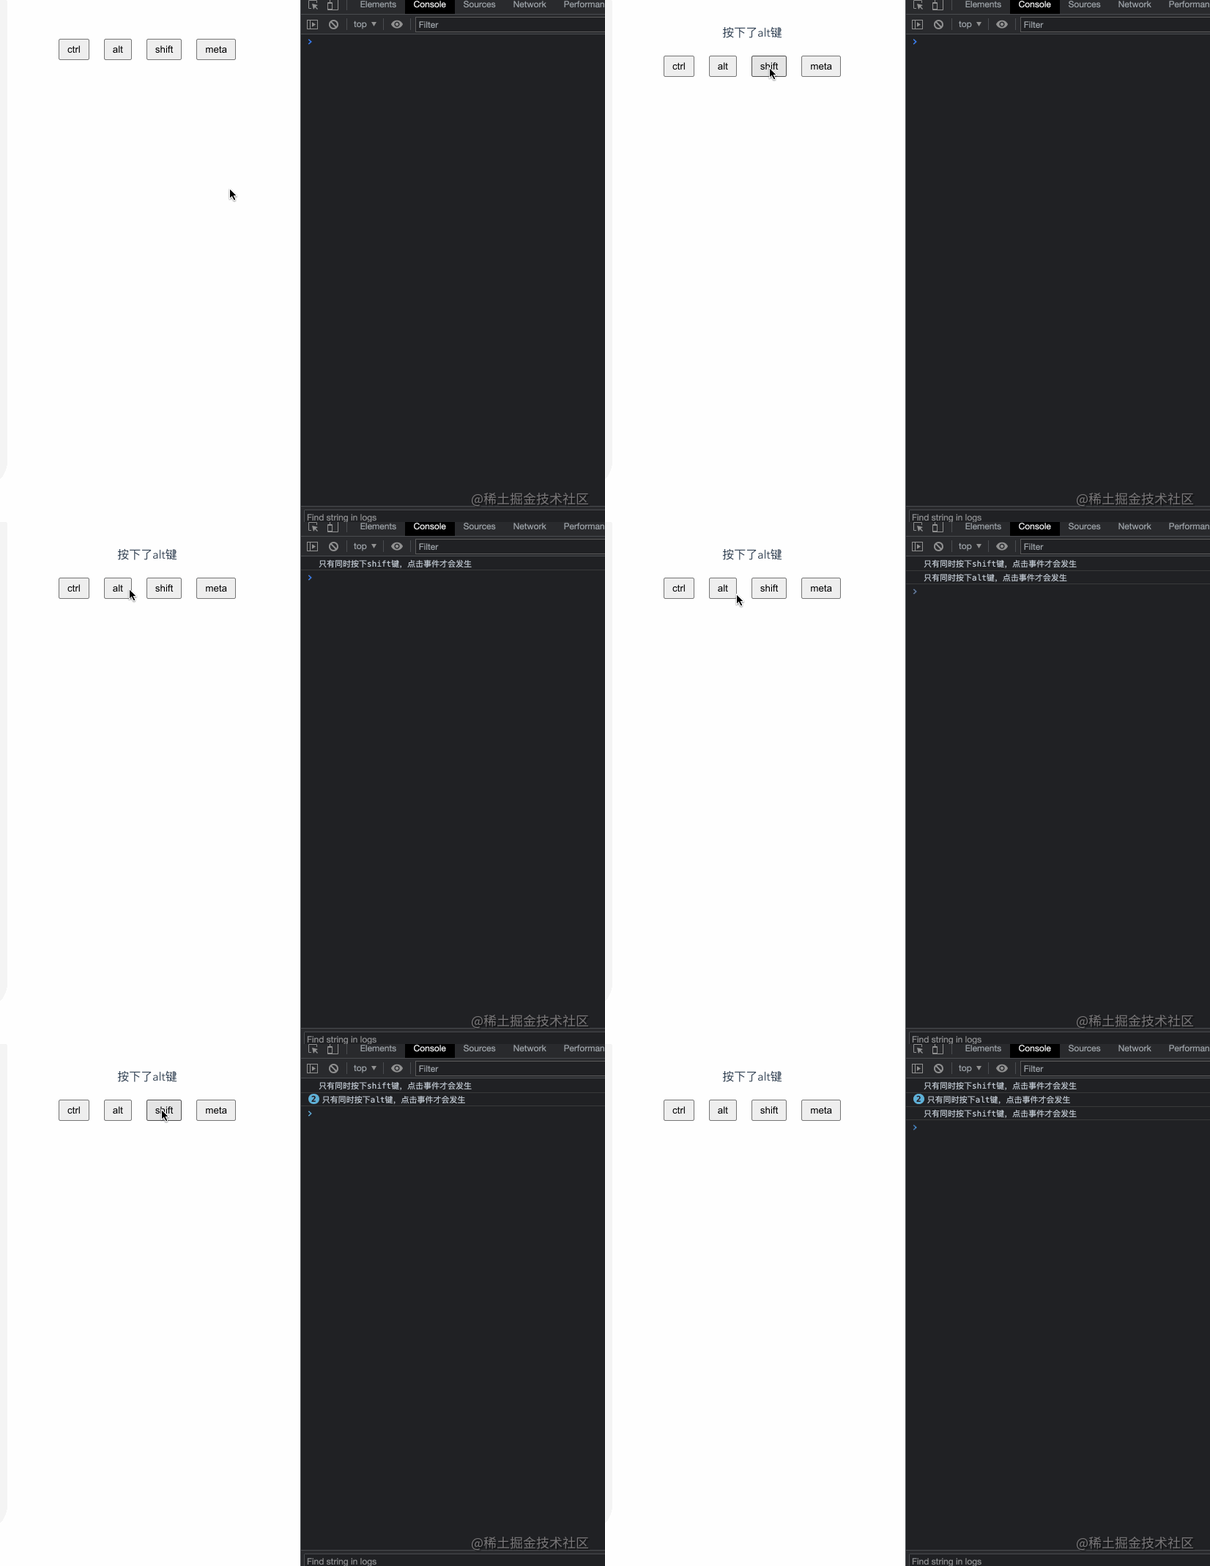
.exact不属于系统修饰符,只是上面例子的写法有一个现象,同时按下几个系统修饰键(例如alt和shift)既可以触发.alt也可以触发.shift。
还是用上面的例子,看一下下面的gif, 此时我同时按下了alt和shift,对应的两个事件都可以触发
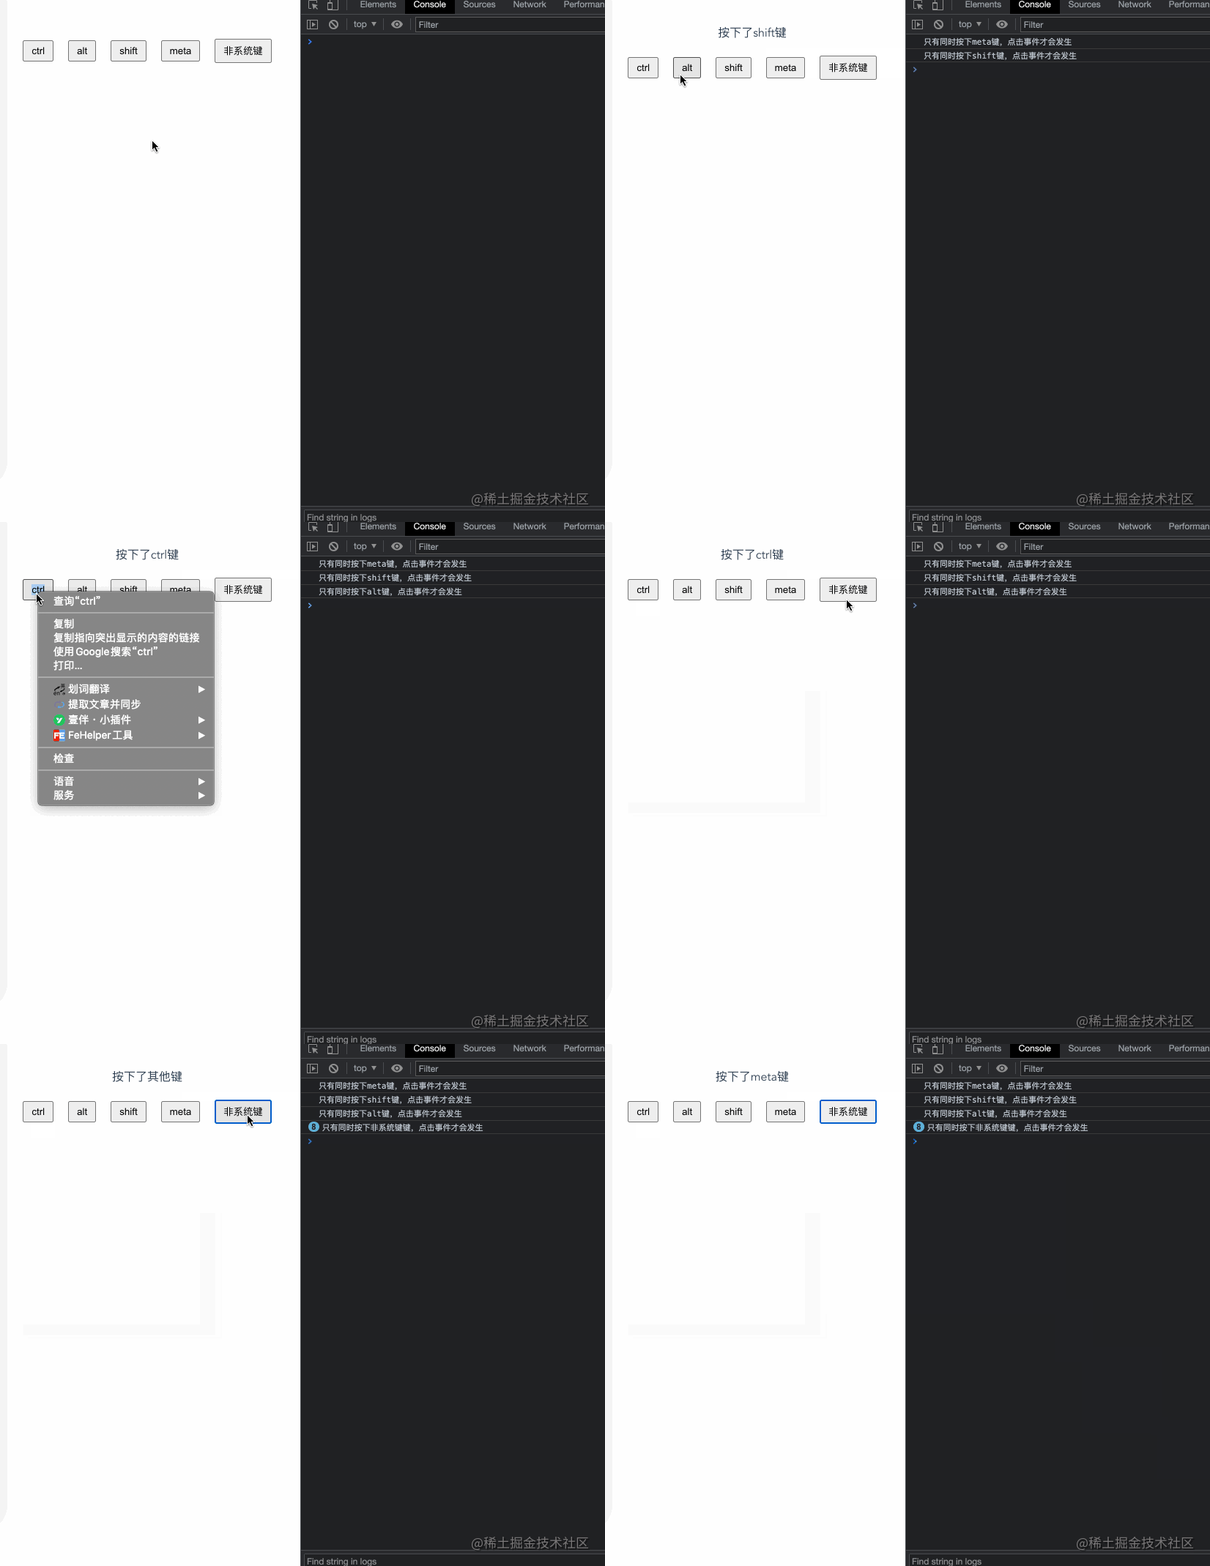
只想某个系统修饰键按下时才触发点击
没有任何系统修饰符被按下的时候才触发点击
要实现上面的需求.exact就派上用场了,用上面的例子稍作改造
<template><div class="extra"><p>{{ msg }}</p><div class="buttons"><button @click.ctrl.exact="onClickButon('ctrl')">ctrl</button><button @click.alt.exact="onClickButon('alt')">alt</button><button @click.shift.exact="onClickButon('shift')">shift</button><button @click.meta.exact="onClickButon('meta')">meta</button><button @click.exact="onClickButon('非系统键')">非系统键</button></div></div>
</template>export default {name: 'extra',data () {return {msg: ''}},mounted () {this.onListenSystemKeyDown()},methods: {onListenSystemKeyDown () {document.addEventListener('keydown', (event) => {let msg = '按下了'if (event.ctrlKey) {msg += 'ctrl键'} else if (event.altKey) {msg += 'alt键'} else if (event.shiftKey) {msg += 'shift键'} else if (event.metaKey) {msg += 'meta键'} else {msg += '其他键'}this.msg = msg}, false)},onClickButon (key) {console.log(`只有同时按下${key}键,点击事件才会发生`)}}
}
按键修饰符
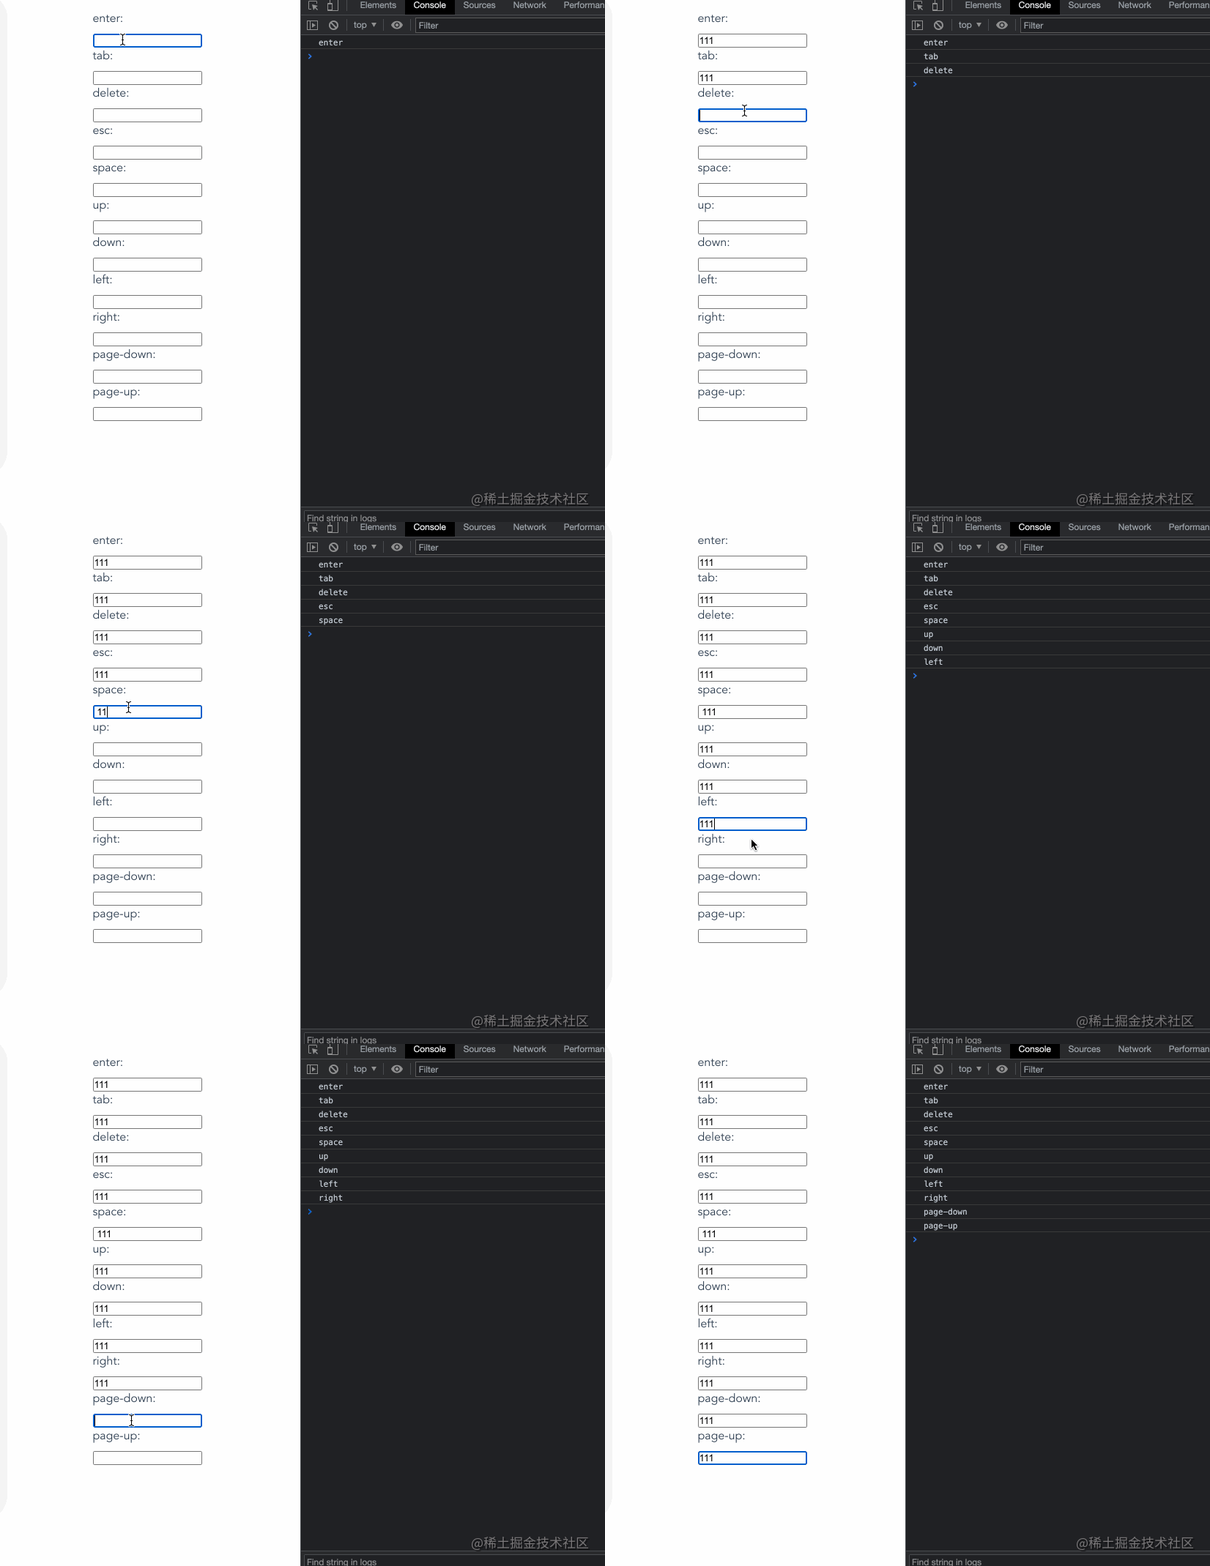
在监听键盘事件时,我们经常需要检查详细的按键再执行对应的逻辑,vue也为我们内置了至少11+的按键修饰符。
如下代码,我们分别给enter、tab、delete等按键指定了keydown事件,当在指定的输入框中按下指定的键盘,会打印出enter、tab、delete等,其他按键在输入框中无法触发该console
<template><div class="key-modifiers"><div class="key-modifiers-item">enter:<input type="text" @keydown.enter="onKeydown('enter')"></div><div class="key-modifiers-item">tab:<input type="text" @keydown.tab="onKeydown('tab')"></div>  <div class="key-modifiers-item">delete:<input type="text" @keydown.delete="onKeydown('delete')"></div>  <div class="key-modifiers-item">esc:<input type="text" @keydown.esc="onKeydown('esc')"></div>  <div class="key-modifiers-item">space:<input type="text" @keydown.space="onKeydown('space')"></div> <div class="key-modifiers-item">up:<input type="text" @keydown.up="onKeydown('up')"></div>  <div class="key-modifiers-item">down:<input type="text" @keydown.down="onKeydown('down')"></div> <div class="key-modifiers-item">left:<input type="text" @keydown.left="onKeydown('left')"></div>  <div class="key-modifiers-item">right:<input type="text" @keydown.right="onKeydown('right')"></div>  <div class="key-modifiers-item">page-down:<input type="text" @keydown.page-down="onKeydown('page-down')"></div>  <div class="key-modifiers-item">page-up:<input type="text" @keydown.page-up="onKeydown('page-up')"></div>  </div>
</template>export default {name: 'keyModifiers',methods: {onKeydown (keyName) {console.log(keyName)}}
}
22 .enter
在按下enter按键时才触发鼠标或键盘事件的监听器,详细例子请看上面
23 .tab
在按下tab按键时才触发鼠标或键盘事件的监听器,详细例子请看上面
24 .delete
在按下delete按键时才触发鼠标或键盘事件的监听器,详细例子请看上面
25 .esc
在按下esc按键时才触发鼠标或键盘事件的监听器,详细例子请看上面
26 .space
在按下space按键时才触发鼠标或键盘事件的监听器,详细例子请看上面
27 .up
在按下up按键时才触发鼠标或键盘事件的监听器,详细例子请看上面
28 .down
在按下down按键时才触发鼠标或键盘事件的监听器,详细例子请看上面
29 .left
在按下left按键时才触发鼠标或键盘事件的监听器,详细例子请看上面
30 .right
在按下right按键时才触发鼠标或键盘事件的监听器,详细例子请看上面
31 .page-down
在按下(fn + down)按键时才触发鼠标或键盘事件的监听器,详细例子请看上面
32 .page-up
在按下(fn + up)按键时才触发鼠标或键盘事件的监听器,详细例子请看上面
如何自定义按键修饰符
vue本身给我们内置了很多实用的按键修饰符,大部分情况下可以满足我们的日常需求了,那么有没有办法可以自定义按键修饰符呢?
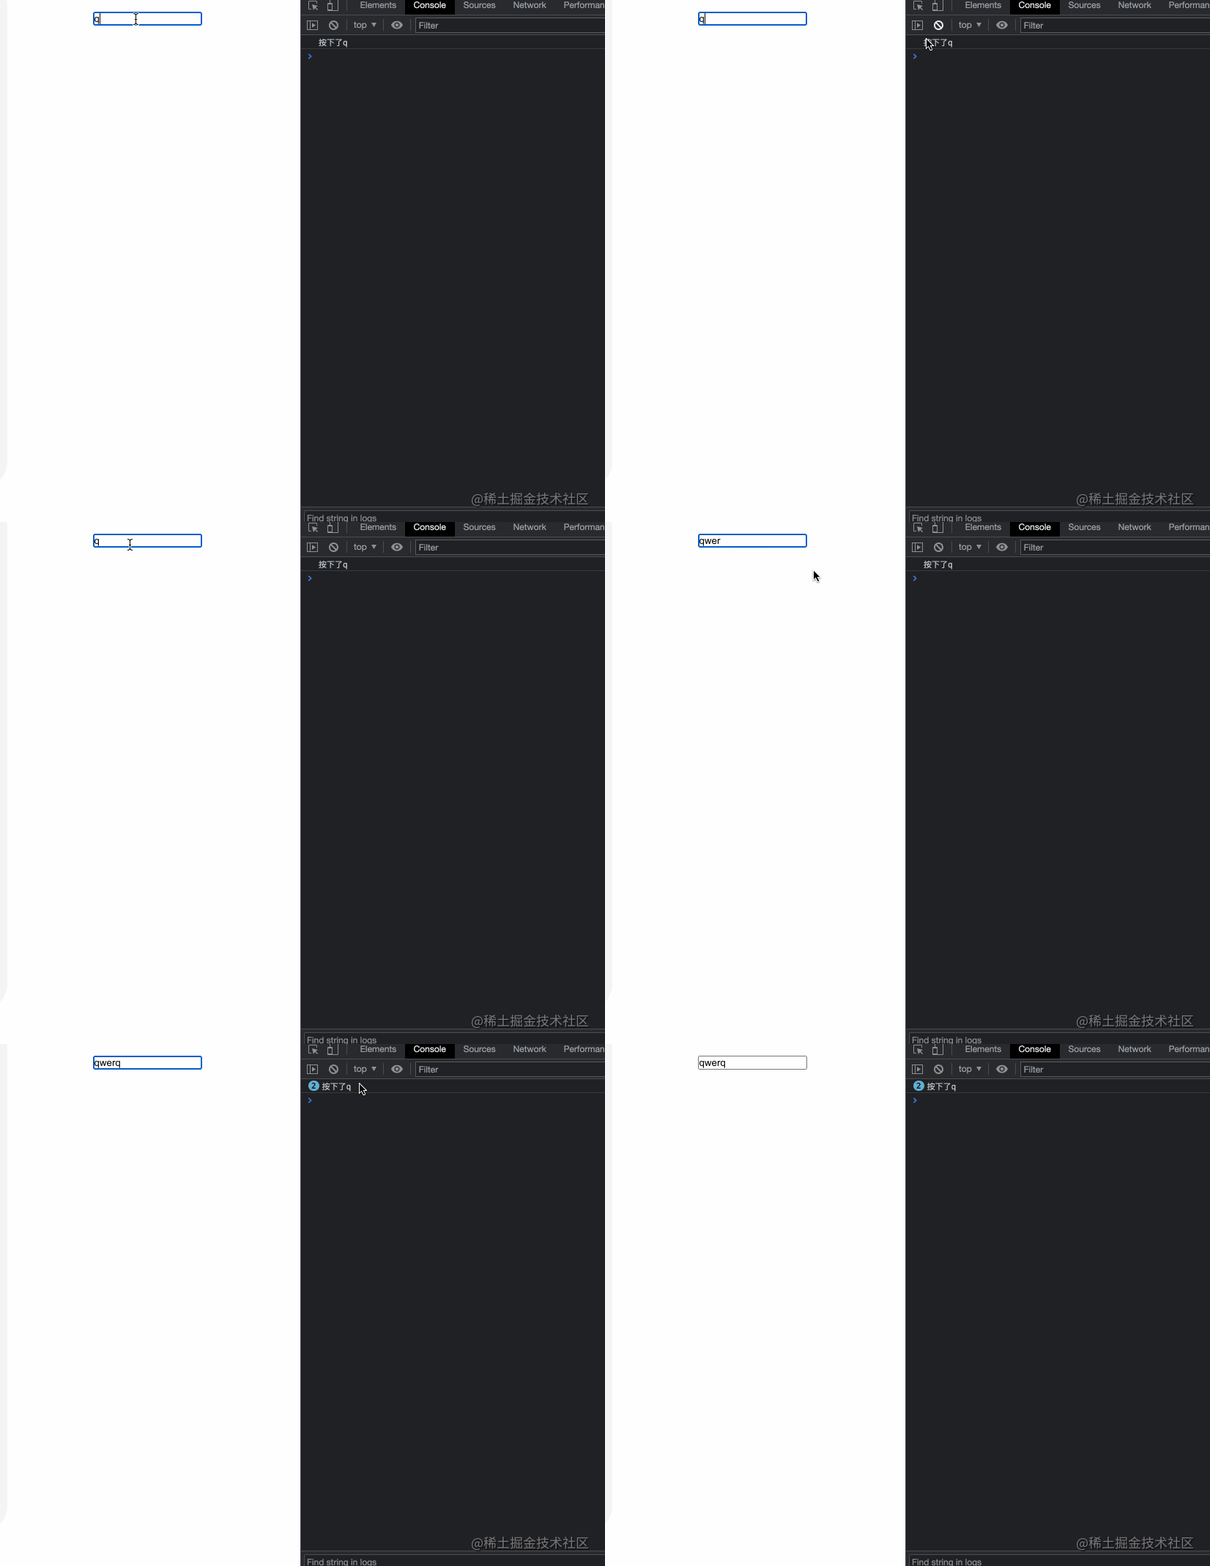
通过以下配置即可定义一个属于我们自己的按键修饰符, 比如我们定义q为按下q的快捷键。
Vue.config.keyCodes = {q: 81
}<div class="custom"><input type="text" @keydown.q="f1Keydown">
</div>export default {name: 'custom',methods: {f1Keydown () {console.log('按下了q')}}
}
最近组建了一个江西人的前端交流群,如果你是江西人可以加我微信 ruochuan12 私信 江西 拉你进群。
推荐阅读
1个月,200+人,一起读了4周源码
我历时3年才写了10余篇源码文章,但收获了100w+阅读
老姚浅谈:怎么学JavaScript?
我在阿里招前端,该怎么帮你(可进面试群)

················· 若川简介 ·················
你好,我是若川,毕业于江西高校。现在是一名前端开发“工程师”。写有《学习源码整体架构系列》10余篇,在知乎、掘金收获超百万阅读。
从2014年起,每年都会写一篇年度总结,已经写了7篇,点击查看年度总结。
同时,最近组织了源码共读活动,帮助1000+前端人学会看源码。公众号愿景:帮助5年内前端人走向前列。

识别上方二维码加我微信、拉你进源码共读群
今日话题
略。欢迎分享、收藏、点赞、在看我的公众号文章~

)


 一些知识点(续2))


和直连交换机(Direct Exchange))