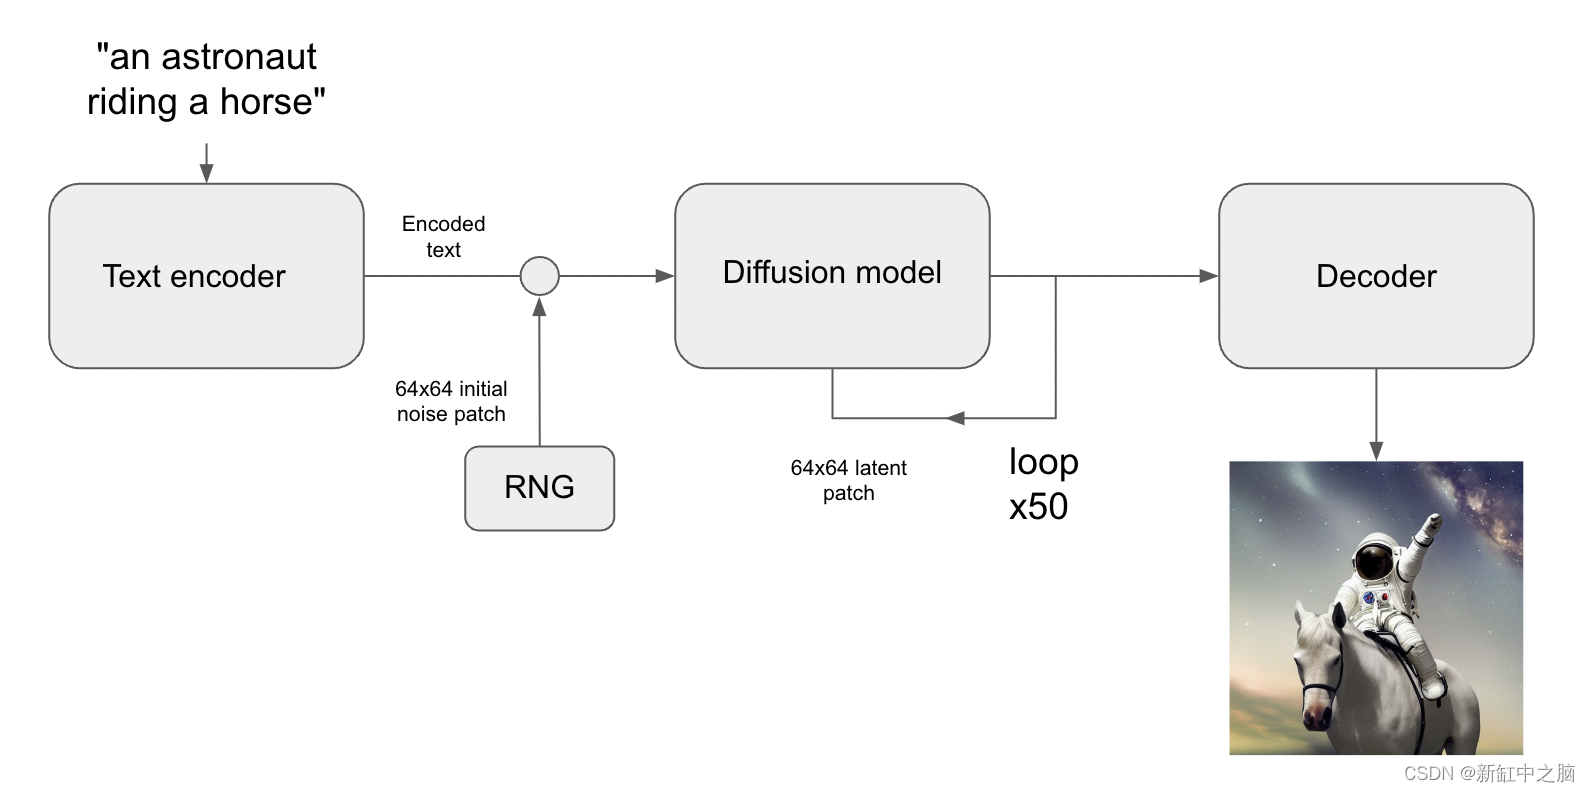
生成图像模型学习视觉世界的“潜在流形”:每个点映射到图像的低维向量空间。 从流形上的这样一个点回到可显示的图像称为“解码”—在稳定扩散模型中,这是由“解码器”模型处理的。
在线工具推荐: Three.js AI纹理开发包 - YOLO合成数据生成器 - GLTF/GLB在线编辑 - 3D模型格式在线转换 - 可编程3D场景编辑器
这种潜在的图像流形是连续的和可插值的,这意味着:
- 在流形上稍微移动只会稍微改变相应的图像(连续性)。
- 对于流形上的任意两点 A 和 B(即任意两个图像),可以通过一条路径从 A 移动到 B,其中每个中间点也在流形上(即也是有效图像)。 中间点被称为两个起始图像之间的“插值”。
不过,稳定扩散不仅仅是一个图像模型,它也是一个自然语言模型。 它有两个潜在空间:训练期间使用的编码器学习的图像表示空间,以及使用预训练和训练时微调相结合学习的提示隐空间(latent space)。
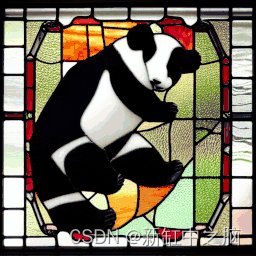
隐空间探索是对隐空间中的点进行采样并逐渐改变潜在表示的过程。 其最常见的应用是生成动画,其中每个采样点都被馈送到解码器并作为最终动画中的帧存储。 对于高质量的潜在表示,这会产生连贯的动画。 这些动画可以提供对潜在空间特征图的洞察,并最终可以改进训练过程。 下面显示了这样一个 GIF:
在本指南中,我们将展示如何利用 KerasCV 中的 Stable Diffusion API 通过 Stable Diffusion 的视觉潜在流形以及文本编码器的潜在流形执行提示插值和循环行走。
首先,我们导入 KerasCV 并使用教程使用稳定扩散生成图像中讨论的优化加载稳定扩散模型。 请注意,如果你使用 M1 Mac GPU 运行,则不应启用混合精度。
!pip install keras-cv --upgrade --quietimport keras_cv
from tensorflow import keras
import matplotlib.pyplot as plt
import tensorflow as tf
import numpy as np
import math
from PIL import Image# Enable mixed precision
# (only do this if you have a recent NVIDIA GPU)
keras.mixed_precision.set_global_policy("mixed_float16")# Instantiate the Stable Diffusion model
model = keras_cv.models.StableDiffusion(jit_compile=True)1、在文本提示之间插值
在稳定扩散中,文本提示首先被编码为向量,并且该编码用于指导扩散过程。 因空间编码向量的形状为 77x768(非常大!),当我们为稳定扩散提供文本提示时,我们仅从潜在流形上的一个这样的点生成图像。
为了探索更多这样的流形,我们可以在两个文本编码之间进行插值,并在这些插值点生成图像:
prompt_1 = "A watercolor painting of a Golden Retriever at the beach"
prompt_2 = "A still life DSLR photo of a bowl of fruit"
interpolation_steps = 5encoding_1 = tf.squeeze(model.encode_text(prompt_1))
encoding_2 = tf.squeeze(model.encode_text(prompt_2))interpolated_encodings = tf.linspace(encoding_1, encoding_2, interpolation_steps)# Show the size of the latent manifold
print(f"Encoding shape: {encoding_1.shape}")
输出结果如下:
Encoding shape: (77, 768)一旦我们插入了编码,我们就可以从每个点生成图像。 请注意,为了保持结果图像之间的稳定性,我们保持图像之间的扩散噪声恒定:
seed = 12345
noise = tf.random.normal((512 // 8, 512 // 8, 4), seed=seed)images = model.generate_image(interpolated_encodings,batch_size=interpolation_steps,diffusion_noise=noise,
)
输出结果如下:
25/25 [==============================] - 50s 340ms/step现在我们已经生成了一些插值图像,让我们来看看它们!
在本教程中,我们将把图像序列导出为 gif,以便可以在一些时间上下文中轻松查看它们。 对于第一个和最后一个图像在概念上不匹配的图像序列,我们用橡皮筋固定 gif。
如果在 Colab 中运行,可以通过运行以下命令查看自己的 GIF:
from IPython.display import Image as IImage
IImage("doggo-and-fruit-5.gif")
def export_as_gif(filename, images, frames_per_second=10, rubber_band=False):if rubber_band:images += images[2:-1][::-1]images[0].save(filename,save_all=True,append_images=images[1:],duration=1000 // frames_per_second,loop=0,)export_as_gif("doggo-and-fruit-5.gif",[Image.fromarray(img) for img in images],frames_per_second=2,rubber_band=True,
)
结果可能看起来令人惊讶。 一般来说,提示之间的插值会产生连贯的图像,并且通常会展示两个提示内容之间渐进的概念转变。 这表明了高质量的表示空间,它密切反映了视觉世界的自然结构。
为了最好地形象化这一点,我们应该使用数百个步骤进行更细粒度的插值。 为了保持较小的批量大小(这样我们就不会 OOM 我们的 GPU),这需要手动批处理我们的插值编码。
interpolation_steps = 150
batch_size = 3
batches = interpolation_steps // batch_sizeinterpolated_encodings = tf.linspace(encoding_1, encoding_2, interpolation_steps)
batched_encodings = tf.split(interpolated_encodings, batches)images = []
for batch in range(batches):images += [Image.fromarray(img)for img in model.generate_image(batched_encodings[batch],batch_size=batch_size,num_steps=25,diffusion_noise=noise,)]export_as_gif("doggo-and-fruit-150.gif", images, rubber_band=True)
结果如下:
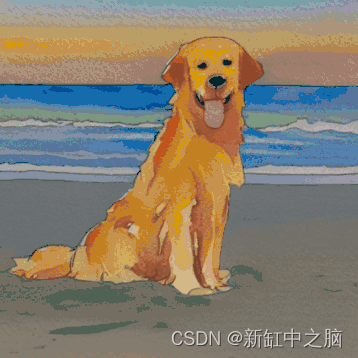
生成的 gif 显示了两个提示之间更清晰、更连贯的转变。 尝试一些你自己的提示并进行实验!
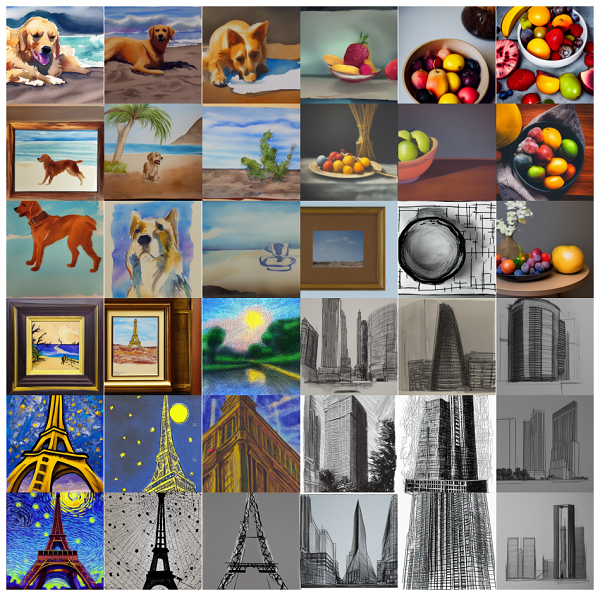
我们甚至可以将这一概念扩展到多个图像。 例如,我们可以在四个提示之间进行插值:
prompt_1 = "A watercolor painting of a Golden Retriever at the beach"
prompt_2 = "A still life DSLR photo of a bowl of fruit"
prompt_3 = "The eiffel tower in the style of starry night"
prompt_4 = "An architectural sketch of a skyscraper"interpolation_steps = 6
batch_size = 3
batches = (interpolation_steps**2) // batch_sizeencoding_1 = tf.squeeze(model.encode_text(prompt_1))
encoding_2 = tf.squeeze(model.encode_text(prompt_2))
encoding_3 = tf.squeeze(model.encode_text(prompt_3))
encoding_4 = tf.squeeze(model.encode_text(prompt_4))interpolated_encodings = tf.linspace(tf.linspace(encoding_1, encoding_2, interpolation_steps),tf.linspace(encoding_3, encoding_4, interpolation_steps),interpolation_steps,
)
interpolated_encodings = tf.reshape(interpolated_encodings, (interpolation_steps**2, 77, 768)
)
batched_encodings = tf.split(interpolated_encodings, batches)images = []
for batch in range(batches):images.append(model.generate_image(batched_encodings[batch],batch_size=batch_size,diffusion_noise=noise,))def plot_grid(images,path,grid_size,scale=2,
):fig = plt.figure(figsize=(grid_size * scale, grid_size * scale))fig.tight_layout()plt.subplots_adjust(wspace=0, hspace=0)plt.margins(x=0, y=0)plt.axis("off")images = images.astype(int)for row in range(grid_size):for col in range(grid_size):index = row * grid_size + colplt.subplot(grid_size, grid_size, index + 1)plt.imshow(images[index].astype("uint8"))plt.axis("off")plt.margins(x=0, y=0)plt.savefig(fname=path,pad_inches=0,bbox_inches="tight",transparent=False,dpi=60,)images = np.concatenate(images)
plot_grid(images, "4-way-interpolation.jpg", interpolation_steps)
结果如下:
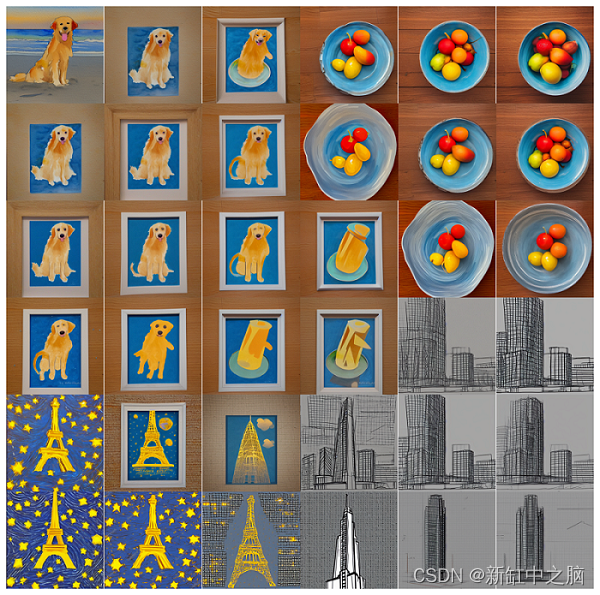
我们还可以通过删除diffusion_noise参数来进行插值,同时允许扩散噪声变化:
images = []
for batch in range(batches):images.append(model.generate_image(batched_encodings[batch], batch_size=batch_size))images = np.concatenate(images)
plot_grid(images, "4-way-interpolation-varying-noise.jpg", interpolation_steps)
结果如下:
接下来—我们去探索隐空间吧!
2、围绕文本提示探索
我们的下一个实验将从特定提示产生的点开始绕潜在流形探索一圈。
walk_steps = 150
batch_size = 3
batches = walk_steps // batch_size
step_size = 0.005encoding = tf.squeeze(model.encode_text("The Eiffel Tower in the style of starry night")
)
# Note that (77, 768) is the shape of the text encoding.
delta = tf.ones_like(encoding) * step_sizewalked_encodings = []
for step_index in range(walk_steps):walked_encodings.append(encoding)encoding += delta
walked_encodings = tf.stack(walked_encodings)
batched_encodings = tf.split(walked_encodings, batches)images = []
for batch in range(batches):images += [Image.fromarray(img)for img in model.generate_image(batched_encodings[batch],batch_size=batch_size,num_steps=25,diffusion_noise=noise,)]export_as_gif("eiffel-tower-starry-night.gif", images, rubber_band=True)
结果如下:
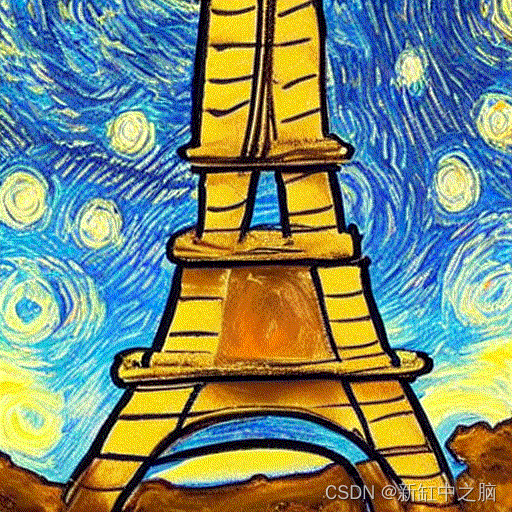
也许并不奇怪,距离编码器的潜在流形太远会产生看起来不连贯的图像。 通过设置自己的提示并调整 step_size 来增加或减少行走的幅度,亲自尝试一下。 请注意,当步长变大时,通常会进入产生极其嘈杂图像的区域。
3、在扩散噪声空间中循环探索
我们的最后一个实验是坚持一个提示,并探索扩散模型可以根据该提示生成的各种图像。 我们通过控制用于传播扩散过程的噪声来做到这一点。
我们创建两个噪声分量 x 和 y,并从 0 到 2π 行走,对 x 分量的余弦和 y 分量的正弦求和以产生噪声。 使用这种方法,我们结束时会到达与我们开始时相同的噪声输入,因此我们得到了“可循环”的结果!
prompt = "An oil paintings of cows in a field next to a windmill in Holland"
encoding = tf.squeeze(model.encode_text(prompt))
walk_steps = 150
batch_size = 3
batches = walk_steps // batch_sizewalk_noise_x = tf.random.normal(noise.shape, dtype=tf.float64)
walk_noise_y = tf.random.normal(noise.shape, dtype=tf.float64)walk_scale_x = tf.cos(tf.linspace(0, 2, walk_steps) * math.pi)
walk_scale_y = tf.sin(tf.linspace(0, 2, walk_steps) * math.pi)
noise_x = tf.tensordot(walk_scale_x, walk_noise_x, axes=0)
noise_y = tf.tensordot(walk_scale_y, walk_noise_y, axes=0)
noise = tf.add(noise_x, noise_y)
batched_noise = tf.split(noise, batches)images = []
for batch in range(batches):images += [Image.fromarray(img)for img in model.generate_image(encoding,batch_size=batch_size,num_steps=25,diffusion_noise=batched_noise[batch],)]export_as_gif("cows.gif", images)
结果如下:
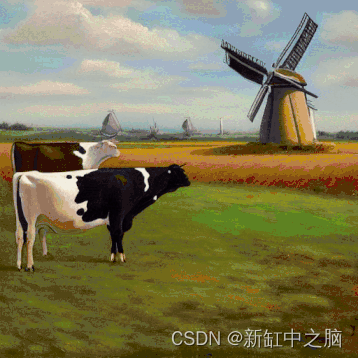
尝试使用自己的提示和不同的 unconditional_guidance_scale 值!
4、结束语
稳定扩散提供的不仅仅是单一文本到图像的生成。 探索文本编码器的潜在流形和扩散模型的噪声空间是体验该模型强大功能的两种有趣方式,KerasCV 让这一切变得简单!
原文链接;稳定扩散隐空间探索 - BimAnt


两数相加)

)


WorkBench控制台)


)


