目录
效果
模型信息
项目
代码
数据集
下载
C# OpenVINO Crack Seg 裂缝分割 裂缝检测
效果
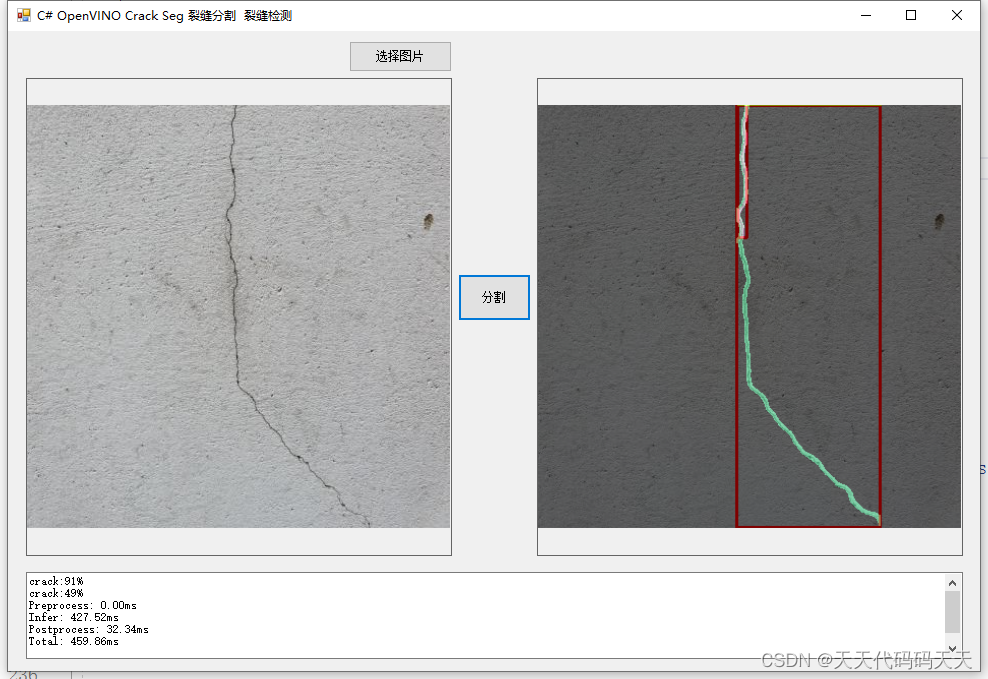
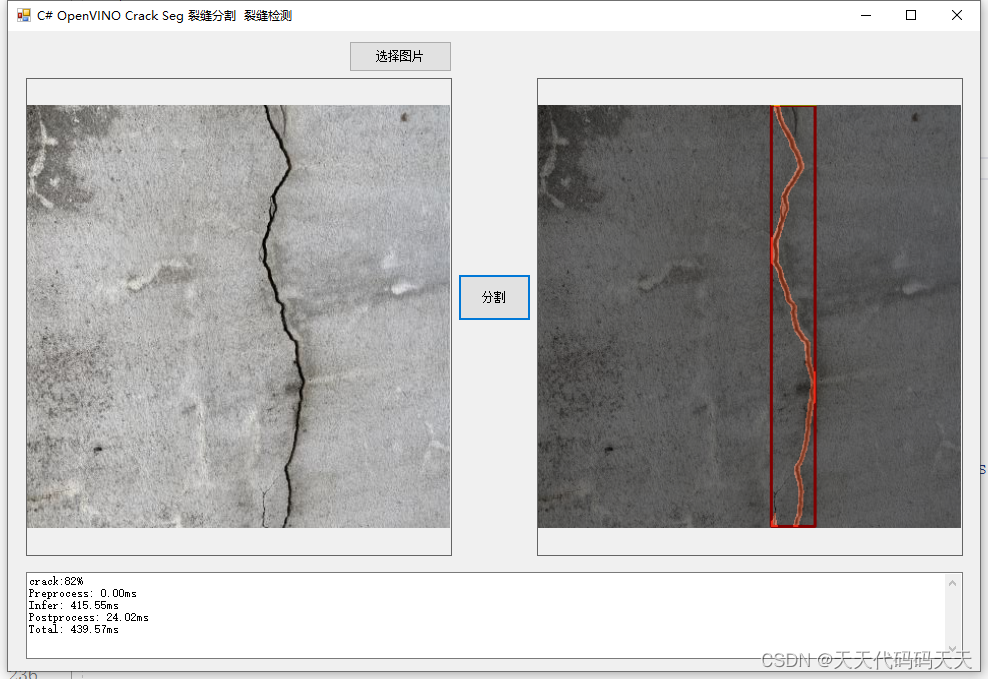
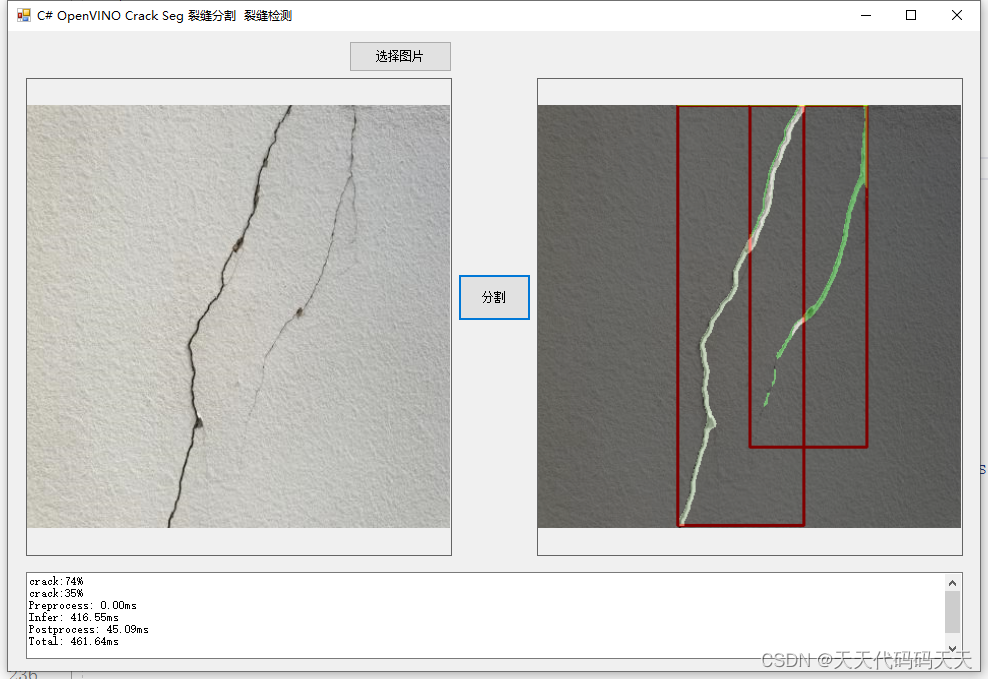
模型信息
Model Properties
-------------------------
date:2024-02-29T16:35:48.364242
author:Ultralytics
task:segment
version:8.1.18
stride:32
batch:1
imgsz:[640, 640]
names:{0: 'crack'}
---------------------------------------------------------------
Inputs
-------------------------
name:images
tensor:Float[1, 3, 640, 640]
---------------------------------------------------------------
Outputs
-------------------------
name:output0
tensor:Float[1, 37, 8400]
name:output1
tensor:Float[1, 32, 160, 160]
---------------------------------------------------------------
项目
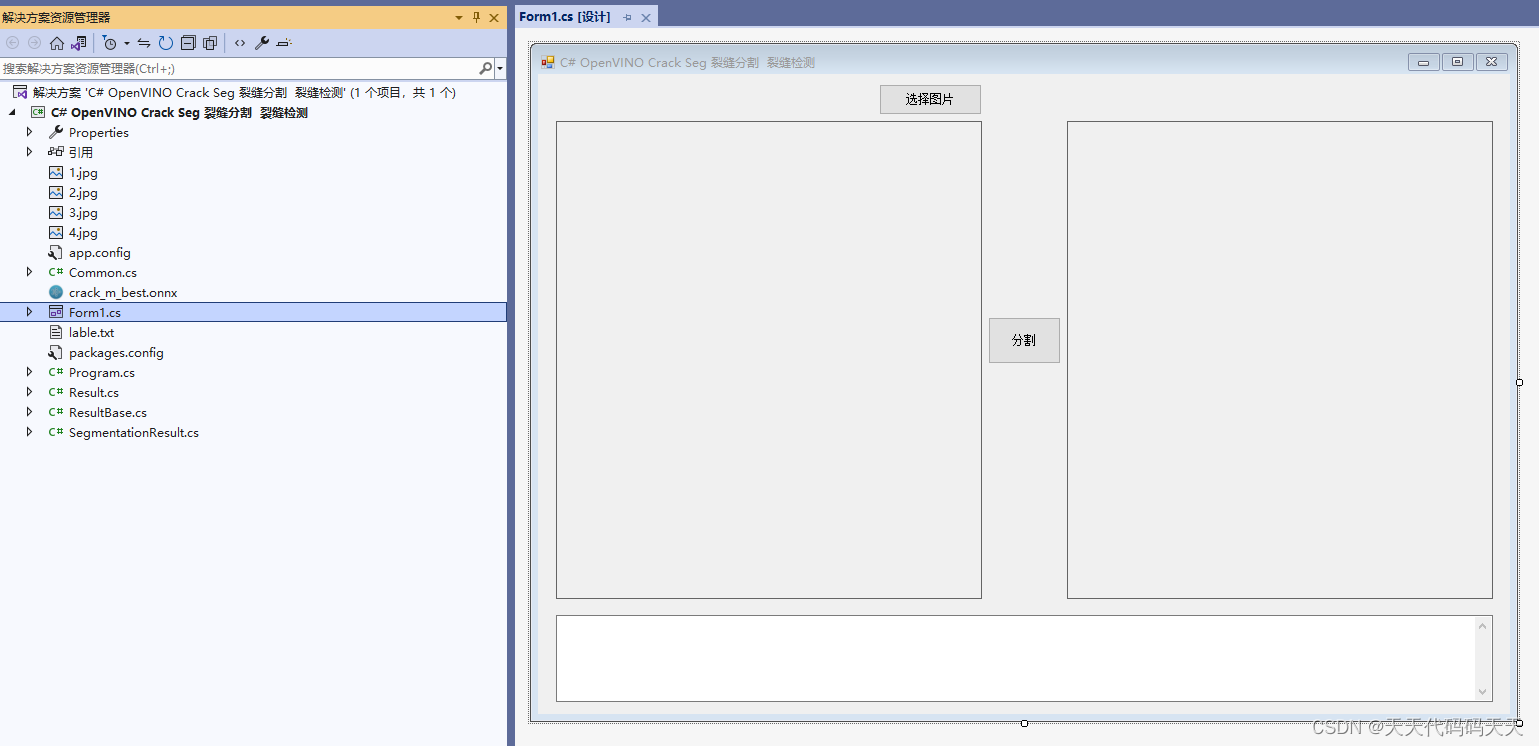
代码
using OpenCvSharp;
using Sdcb.OpenVINO;
using Sdcb.OpenVINO.Natives;
using System;
using System.Collections.Generic;
using System.Diagnostics;
using System.Drawing;
using System.IO;
using System.Text;
using System.Windows.Forms;
namespace OpenVINO_Seg
{
public partial class Form1 : Form
{
public Form1()
{
InitializeComponent();
}
string fileFilter = "*.*|*.bmp;*.jpg;*.jpeg;*.tiff;*.tiff;*.png";
string image_path = "";
string startupPath;
string model_path;
string classer_path;
Mat src;
SegmentationResult result_pro;
Mat result_image;
Result seg_result;
StringBuilder sb = new StringBuilder();
float[] det_result_array = new float[8400 * 37];
float[] proto_result_array = new float[32 * 160 * 160];
// 识别结果类型
public string[] class_names;
private void button1_Click(object sender, EventArgs e)
{
OpenFileDialog ofd = new OpenFileDialog();
ofd.Filter = fileFilter;
if (ofd.ShowDialog() != DialogResult.OK) return;
pictureBox1.Image = null;
image_path = ofd.FileName;
pictureBox1.Image = new Bitmap(image_path);
textBox1.Text = "";
src = new Mat(image_path);
pictureBox2.Image = null;
}
unsafe private void button2_Click(object sender, EventArgs e)
{
if (pictureBox1.Image == null)
{
return;
}
pictureBox2.Image = null;
textBox1.Text = "";
sb.Clear();
src = new Mat(image_path);
Model rawModel = OVCore.Shared.ReadModel(model_path);
PrePostProcessor pp = rawModel.CreatePrePostProcessor();
PreProcessInputInfo inputInfo = pp.Inputs.Primary;
inputInfo.TensorInfo.Layout = Sdcb.OpenVINO.Layout.NHWC;
inputInfo.ModelInfo.Layout = Sdcb.OpenVINO.Layout.NCHW;
Model m = pp.BuildModel();
CompiledModel cm = OVCore.Shared.CompileModel(m, "CPU");
InferRequest ir = cm.CreateInferRequest();
Shape inputShape = m.Inputs[0].Shape;
float[] factors = new float[4];
factors[0] = 1f * src.Width / inputShape[2];
factors[1] = 1f * src.Height / inputShape[1];
factors[2] = src.Rows;
factors[3] = src.Cols;
result_pro = new SegmentationResult(class_names, factors,0.3f,0.5f);
Stopwatch stopwatch = new Stopwatch();
Mat resized = src.Resize(new OpenCvSharp.Size(inputShape[2], inputShape[1]));
Mat f32 = new Mat();
resized.ConvertTo(f32, MatType.CV_32FC3, 1.0 / 255);
using (Tensor input = Tensor.FromRaw(
new ReadOnlySpan<byte>((void*)f32.Data, (int)((long)f32.DataEnd - (long)f32.DataStart)),
new Shape(1, f32.Rows, f32.Cols, 3),
ov_element_type_e.F32))
{
ir.Inputs.Primary = input;
}
double preprocessTime = stopwatch.Elapsed.TotalMilliseconds;
stopwatch.Restart();
ir.Run();
double inferTime = stopwatch.Elapsed.TotalMilliseconds;
stopwatch.Restart();
using (Tensor output_det = ir.Outputs[0])
using (Tensor output_proto = ir.Outputs[1])
{
det_result_array = output_det.GetData<float>().ToArray();
proto_result_array = output_proto.GetData<float>().ToArray();
seg_result = result_pro.process_result(det_result_array, proto_result_array);
double postprocessTime = stopwatch.Elapsed.TotalMilliseconds;
stopwatch.Stop();
double totalTime = preprocessTime + inferTime + postprocessTime;
result_image = src.Clone();
Mat masked_img = new Mat();
// 将识别结果绘制到图片上
for (int i = 0; i < seg_result.length; i++)
{
Cv2.Rectangle(result_image, seg_result.rects[i], new Scalar(0, 0, 255), 2, LineTypes.Link8);
Cv2.Rectangle(result_image, new OpenCvSharp.Point(seg_result.rects[i].TopLeft.X, seg_result.rects[i].TopLeft.Y - 20),
new OpenCvSharp.Point(seg_result.rects[i].BottomRight.X, seg_result.rects[i].TopLeft.Y), new Scalar(0, 255, 255), -1);
Cv2.PutText(result_image, seg_result.classes[i] + "-" + seg_result.scores[i].ToString("0.00"),
new OpenCvSharp.Point(seg_result.rects[i].X, seg_result.rects[i].Y - 5),
HersheyFonts.HersheySimplex, 0.6, new Scalar(0, 0, 0), 1);
Cv2.AddWeighted(result_image, 0.5, seg_result.masks[i], 0.5, 0, masked_img);
sb.AppendLine($"{seg_result.classes[i]}:{seg_result.scores[i]:P0}");
}
if (seg_result.length > 0)
{
if (pictureBox2.Image != null)
{
pictureBox2.Image.Dispose();
}
pictureBox2.Image = new Bitmap(masked_img.ToMemoryStream());
sb.AppendLine($"Preprocess: {preprocessTime:F2}ms");
sb.AppendLine($"Infer: {inferTime:F2}ms");
sb.AppendLine($"Postprocess: {postprocessTime:F2}ms");
sb.AppendLine($"Total: {totalTime:F2}ms");
textBox1.Text = sb.ToString();
}
else
{
textBox1.Text = "无信息";
}
masked_img.Dispose();
result_image.Dispose();
}
}
private void Form1_Load(object sender, EventArgs e)
{
image_path = "1.jpg";
pictureBox1.Image = new Bitmap(image_path);
startupPath = Application.StartupPath;
model_path = startupPath + "\\crack_m_best.onnx";
classer_path = startupPath + "\\lable.txt";
List<string> str = new List<string>();
StreamReader sr = new StreamReader(classer_path);
string line;
while ((line = sr.ReadLine()) != null)
{
str.Add(line);
}
class_names = str.ToArray();
}
}
}
using OpenCvSharp;
using Sdcb.OpenVINO;
using Sdcb.OpenVINO.Natives;
using System;
using System.Collections.Generic;
using System.Diagnostics;
using System.Drawing;
using System.IO;
using System.Text;
using System.Windows.Forms;namespace OpenVINO_Seg
{public partial class Form1 : Form{public Form1(){InitializeComponent();}string fileFilter = "*.*|*.bmp;*.jpg;*.jpeg;*.tiff;*.tiff;*.png";string image_path = "";string startupPath;string model_path;string classer_path;Mat src;SegmentationResult result_pro;Mat result_image;Result seg_result;StringBuilder sb = new StringBuilder();float[] det_result_array = new float[8400 * 37];float[] proto_result_array = new float[32 * 160 * 160];// 识别结果类型public string[] class_names;private void button1_Click(object sender, EventArgs e){OpenFileDialog ofd = new OpenFileDialog();ofd.Filter = fileFilter;if (ofd.ShowDialog() != DialogResult.OK) return;pictureBox1.Image = null;image_path = ofd.FileName;pictureBox1.Image = new Bitmap(image_path);textBox1.Text = "";src = new Mat(image_path);pictureBox2.Image = null;}unsafe private void button2_Click(object sender, EventArgs e){if (pictureBox1.Image == null){return;}pictureBox2.Image = null;textBox1.Text = "";sb.Clear();src = new Mat(image_path);Model rawModel = OVCore.Shared.ReadModel(model_path);PrePostProcessor pp = rawModel.CreatePrePostProcessor();PreProcessInputInfo inputInfo = pp.Inputs.Primary;inputInfo.TensorInfo.Layout = Sdcb.OpenVINO.Layout.NHWC;inputInfo.ModelInfo.Layout = Sdcb.OpenVINO.Layout.NCHW;Model m = pp.BuildModel();CompiledModel cm = OVCore.Shared.CompileModel(m, "CPU");InferRequest ir = cm.CreateInferRequest();Shape inputShape = m.Inputs[0].Shape;float[] factors = new float[4];factors[0] = 1f * src.Width / inputShape[2];factors[1] = 1f * src.Height / inputShape[1];factors[2] = src.Rows;factors[3] = src.Cols;result_pro = new SegmentationResult(class_names, factors,0.3f,0.5f);Stopwatch stopwatch = new Stopwatch();Mat resized = src.Resize(new OpenCvSharp.Size(inputShape[2], inputShape[1]));Mat f32 = new Mat();resized.ConvertTo(f32, MatType.CV_32FC3, 1.0 / 255);using (Tensor input = Tensor.FromRaw(new ReadOnlySpan<byte>((void*)f32.Data, (int)((long)f32.DataEnd - (long)f32.DataStart)),new Shape(1, f32.Rows, f32.Cols, 3),ov_element_type_e.F32)){ir.Inputs.Primary = input;}double preprocessTime = stopwatch.Elapsed.TotalMilliseconds;stopwatch.Restart();ir.Run();double inferTime = stopwatch.Elapsed.TotalMilliseconds;stopwatch.Restart();using (Tensor output_det = ir.Outputs[0])using (Tensor output_proto = ir.Outputs[1]){det_result_array = output_det.GetData<float>().ToArray();proto_result_array = output_proto.GetData<float>().ToArray();seg_result = result_pro.process_result(det_result_array, proto_result_array);double postprocessTime = stopwatch.Elapsed.TotalMilliseconds;stopwatch.Stop();double totalTime = preprocessTime + inferTime + postprocessTime;result_image = src.Clone();Mat masked_img = new Mat();// 将识别结果绘制到图片上for (int i = 0; i < seg_result.length; i++){Cv2.Rectangle(result_image, seg_result.rects[i], new Scalar(0, 0, 255), 2, LineTypes.Link8);Cv2.Rectangle(result_image, new OpenCvSharp.Point(seg_result.rects[i].TopLeft.X, seg_result.rects[i].TopLeft.Y - 20),new OpenCvSharp.Point(seg_result.rects[i].BottomRight.X, seg_result.rects[i].TopLeft.Y), new Scalar(0, 255, 255), -1);Cv2.PutText(result_image, seg_result.classes[i] + "-" + seg_result.scores[i].ToString("0.00"),new OpenCvSharp.Point(seg_result.rects[i].X, seg_result.rects[i].Y - 5),HersheyFonts.HersheySimplex, 0.6, new Scalar(0, 0, 0), 1);Cv2.AddWeighted(result_image, 0.5, seg_result.masks[i], 0.5, 0, masked_img);sb.AppendLine($"{seg_result.classes[i]}:{seg_result.scores[i]:P0}");}if (seg_result.length > 0){if (pictureBox2.Image != null){pictureBox2.Image.Dispose();}pictureBox2.Image = new Bitmap(masked_img.ToMemoryStream());sb.AppendLine($"Preprocess: {preprocessTime:F2}ms");sb.AppendLine($"Infer: {inferTime:F2}ms");sb.AppendLine($"Postprocess: {postprocessTime:F2}ms");sb.AppendLine($"Total: {totalTime:F2}ms");textBox1.Text = sb.ToString();}else{textBox1.Text = "无信息";}masked_img.Dispose();result_image.Dispose();}}private void Form1_Load(object sender, EventArgs e){image_path = "1.jpg";pictureBox1.Image = new Bitmap(image_path);startupPath = Application.StartupPath;model_path = startupPath + "\\crack_m_best.onnx";classer_path = startupPath + "\\lable.txt";List<string> str = new List<string>();StreamReader sr = new StreamReader(classer_path);string line;while ((line = sr.ReadLine()) != null){str.Add(line);}class_names = str.ToArray();}}
}
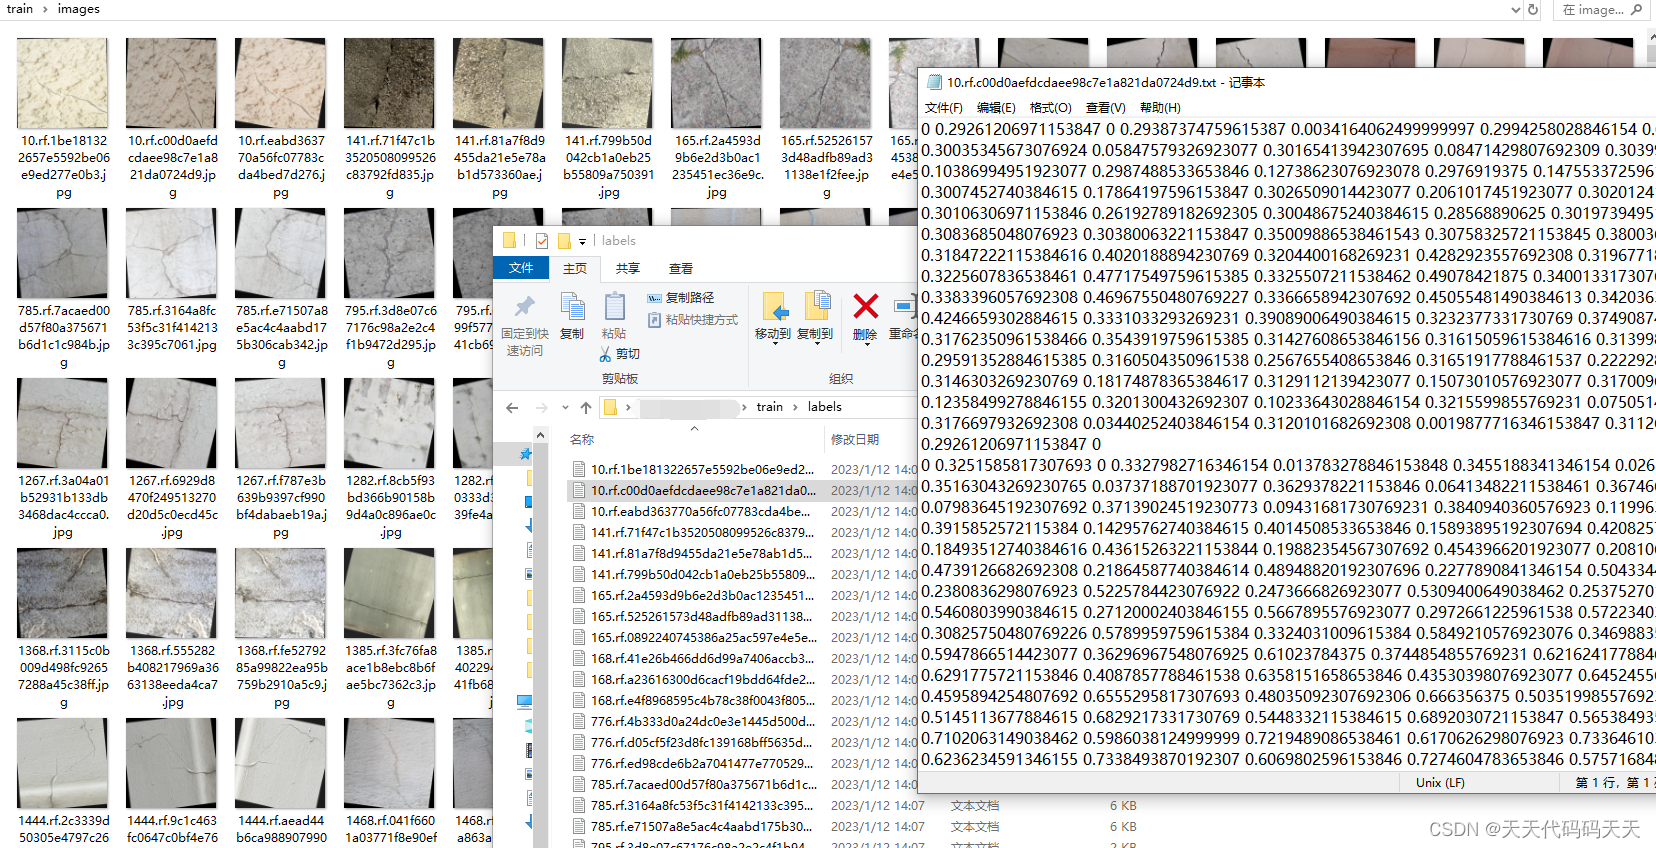
数据集
下载
裂纹数据集带标注信息下载
源码下载

- 对ChatGPT的常见误解)


)


)
