首次接触websocket通信协议,不足之处希望指出一起进步。
简述
websocket是基于tcp协议的一种网络通信协议,分为客户端和服务端,可以实现客户端与服务端的双向通信。
与tcp的不同之处是:
1.客户端与服务端只需要一次握手协议,就可以建立比较持久的网络连接;
2.客户端不需要向服务端发送连接请求。
服务端监听指定的端口之后,客户端只需打开服务端的url,就可建立连接。
简单的项目实例
-
项目简述
在客户端与服务端建立连接的情况下,服务端向客户端发送json字符串,客户端接收到json字符串并显示,客户端一旦收到二进制消息,服务端接收来自客户端的文本消息,并向客户端发送文本消息。 -
项目运行效果图
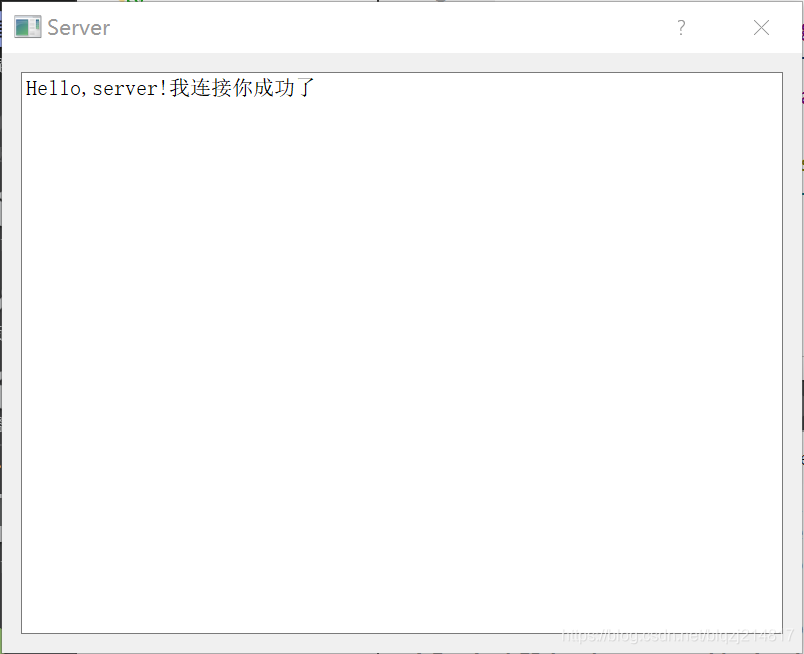
服务端运行效果:
客户端运行效果:

-
项目源码
客户端
main.cpp
#include "dialog.h"#include <QApplication>int main(int argc, char *argv[])
{QApplication a(argc, argv);Dialog w;w.createWebsocket();w.show();return a.exec();
}
dialog.h
#ifndef DIALOG_H
#define DIALOG_H#include <QDialog>
#include <QtWebSockets/QWebSocket>QT_BEGIN_NAMESPACE
namespace Ui { class Dialog; }
QT_END_NAMESPACEclass Dialog : public QDialog
{Q_OBJECTpublic:Dialog(QWidget *parent = nullptr);~Dialog();void createWebsocket();public slots:void slot_onConnected();void slot_onDisconnected();void slot_onTextMsgRecevied(const QString &msg);void slot_onBinaryMessageReceived(const QByteArray &message);void slot_onError(QAbstractSocket::SocketError error);private:Ui::Dialog *ui;QWebSocket *m_client;
};
#endif // DIALOG_H
dialog.cpp
#include "dialog.h"
#include "ui_dialog.h"Dialog::Dialog(QWidget *parent): QDialog(parent), ui(new Ui::Dialog)
{ui->setupUi(this);setWindowTitle(tr("Client"));
}Dialog::~Dialog()
{delete ui;
}void Dialog::createWebsocket()
{m_client = new QWebSocket();m_client->open(QUrl("ws://localhost:6666"));connect(m_client, &QWebSocket::connected, this, &Dialog::slot_onConnected);connect(m_client, &QWebSocket::disconnected, this, &Dialog::slot_onDisconnected);connect(m_client, &QWebSocket::binaryMessageReceived,this, &Dialog::slot_onBinaryMessageReceived);connect(m_client, &QWebSocket::textMessageReceived,this, &Dialog::slot_onTextMsgRecevied);connect(m_client,SIGNAL(error(QAbstractSocket::SocketError)),this,SLOT(slot_onError(QAbstractSocket::SocketError)));
}void Dialog::slot_onConnected()
{
//    connect(m_client, &QWebSocket::binaryMessageReceived,this, Dialog::slot_onTextMsgRecevied);
//    connect(m_client, &QWebSocket::textMessageReceived,this, Dialog::slot_onTextMsgRecevied);m_client->sendTextMessage(QStringLiteral("Hello,server!我连接你成功了"));
}void Dialog::slot_onDisconnected()
{m_client->close();if(m_client != NULL){delete m_client;m_client = NULL;}
}void Dialog::slot_onTextMsgRecevied(const QString &msg)
{ui->plainTextEdit->appendPlainText(msg);
}void Dialog::slot_onBinaryMessageReceived(const QByteArray &message)
{std::string strMsg = message.toStdString();//接收JSON字符串ui->plainTextEdit->appendPlainText(QString::fromStdString(strMsg));
}void Dialog::slot_onError(QAbstractSocket::SocketError error)
{QTextStream(stdout)<<m_client->errorString();
}
ui文件

客户端项目结构

服务端
main.cpp
#include "dialog.h"#include <QApplication>int main(int argc, char *argv[])
{QApplication a(argc, argv);Dialog w;w.createWebServer();w.show();return a.exec();
}
dialog.h
#ifndef DIALOG_H
#define DIALOG_H#include <QDialog>
#include <QtWebSockets/QWebSocketServer>
#include <QtWebSockets/QWebSocket>QT_BEGIN_NAMESPACE
namespace Ui { class Dialog; }
QT_END_NAMESPACEclass Dialog : public QDialog
{Q_OBJECTpublic:Dialog(QWidget *parent = nullptr);~Dialog();void createWebServer();QString getCurrFilePath(QString fileName);QByteArray readJsonConfigFile(QString &fileName);public slots:void slot_onNewConnection();void slot_processMessage(const QString &msg);void slot_socketDisconnected();void slot_binaryMessageReceived(const QByteArray &message);
private:Ui::Dialog *ui;QWebSocketServer *m_serve;QWebSocket *      m_client;
};
#endif // DIALOG_H
dialog.cpp
#include "dialog.h"
#include "ui_dialog.h"
#include <QDebug>
#include <QFile>Dialog::Dialog(QWidget *parent): QDialog(parent), ui(new Ui::Dialog)
{ui->setupUi(this);setWindowTitle(tr("Server"));
}Dialog::~Dialog()
{if(m_serve != NULL){m_serve->close();//设置了父窗口,就不用delete}delete ui;
}void Dialog::createWebServer()
{m_serve = new QWebSocketServer("test1",QWebSocketServer::NonSecureMode,this);//非安全swm_serve->listen(QHostAddress::LocalHost,6666);connect(m_serve, &QWebSocketServer::newConnection, this, &Dialog::slot_onNewConnection);
}void Dialog::slot_onNewConnection()
{m_client = m_serve->nextPendingConnection();QString strFileName = getCurrFilePath("config2.json");QByteArray jsonArray = readJsonConfigFile(strFileName);m_client->sendBinaryMessage(jsonArray);
//    m_client->sendTextMessage("什么??客户端你好!");connect(m_client,&QWebSocket::binaryMessageReceived,this,&Dialog::slot_binaryMessageReceived);connect(m_client, &QWebSocket::textMessageReceived,this, &Dialog::slot_processMessage);connect(m_client, &QWebSocket::disconnected,this, &Dialog::slot_socketDisconnected);
}void Dialog::slot_processMessage(const QString &msg)
{//   m_client->sendTextMessage("客户端,你收到消息了?");ui->textEdit->append(msg);m_client->sendTextMessage("客户端,我收到你的消息了");
}void Dialog::slot_socketDisconnected()
{m_client->close();
}void Dialog::slot_binaryMessageReceived(const QByteArray &message)
{ui->textEdit->append(QString::fromLocal8Bit(message));
}QString Dialog::getCurrFilePath(QString fileName)
{QString strFileName =  QCoreApplication::applicationDirPath();//获取可执行文件的路径strFileName += "/" + fileName;return strFileName;
}QByteArray Dialog::readJsonConfigFile(QString &fileName)
{QByteArray allData;qDebug()<<"文件路径及名称:"<<fileName;QFile file(fileName);if (!file.open(QIODevice::ReadOnly)){qDebug()<<"json配置文件读取失败!";return allData;}allData = file.readAll();file.close();qDebug()<<"json文件内容:"<<allData;return allData;
}
ui文件

服务端项目结构

5. 总结
websocket在通信的过程中服务端的步骤:
(1)创建QWebSocketServer对象或着指向QWebSocketServer的指针,创建时需指明服务器的名称,sslmode(即安全模式还是非安全模式,一般非SSL的情况下,采用的时非安全模式),另外还可以指明父窗口;
(2)监听IP和端口;
(3)绑定信号与槽函数,涉及到的常用信号与槽的绑定有:
@1 newConnection(),与客户端建立新的连接后触发这个信号;
@2 serverError(QWebSocketProtocol::CloseCode closeCode),服务器发生错误时触发该信号;
@3 可以在客户端建立连接后,服务端绑定客户端收到消息后的信号;
@4 可以在客户端建立连接后,服务端绑定客户端断开连接的信号;
(4)关闭服务端连接。
websocket在通信的过程中客户端的步骤:
(1)创建QWebSocket对象或着指向QWebSocket的指针;
(2)打开服务端的url;
(3)绑定信号与槽函数,常用的信号与槽函数的绑定如下:
@1 connected(),与服务端连接建立之后,信号被触发;
@2 disconnected(),与服务端连接断开之后,信号被触发;
@3 textMessageReceived(const QString &message),有文本消息到来的时候,信号被触发;
@4 binaryMessageReceived(const QByteArray &message),有二进制消息到来的时候,信号被触发;
@5 error(QAbstractSocket::SocketError error),发生错误的时候信号被触发;
6. 注意事项
(1).pro文件中添加QT += websockets,需加头文件#include <QtWebSockets/QWebSocket>和#include <QtWebSockets/QWebSocketServer>。

)


