day03 - jQuery
学习目标:
能够说出4种常见的注册事件
能够说出 on 绑定事件的优势
能够说出 jQuery 事件委派的优点以及方式
能够说出绑定事件与解绑事件
能够说出 jQuery 对象的拷贝方法
能够说出 jQuery 多库共存的2种方法
能够使用 jQuery 插件
1.1. jQuery 事件注册
jQuery 为我们提供了方便的事件注册机制,是开发人员抑郁操作优缺点如下:
- 优点: 操作简单,且不用担心事件覆盖等问题。
- 缺点: 普通的事件注册不能做事件委托,且无法实现事件解绑,需要借助其他方法。
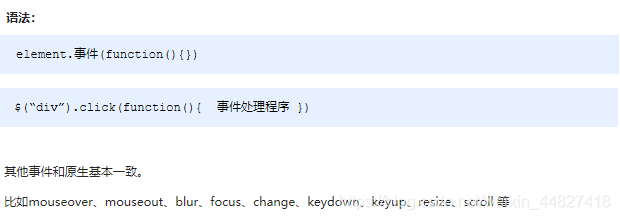
语法

演示代码
<body><div></div><script>$(function() {// 1. 单个事件注册$("div").click(function() {$(this).css("background", "purple");});$("div").mouseenter(function() {$(this).css("background", "skyblue");});})</script>
</body>
1.2. jQuery 事件处理
因为普通注册事件方法的不足,jQuery又开发了多个处理方法,重点讲解如下:
- on(): 用于事件绑定,目前最好用的事件绑定方法
- off(): 事件解绑
- trigger() / triggerHandler(): 事件触发
1.2.1 事件处理 on() 绑定事件
因为普通注册事件方法的不足,jQuery又创建了多个新的事件绑定方法bind() / live() / delegate() / on()等,其中最好用的是: on()
语法
![[外链图片转存失败,源站可能有防盗链机制,建议将图片保存下来直接上传(img-m8MphJuy-1592183621336)(images/on1.png)]](https://img-blog.csdnimg.cn/20200615091555132.png?x-oss-process=image/watermark,type_ZmFuZ3poZW5naGVpdGk,shadow_10,text_aHR0cHM6Ly9ibG9nLmNzZG4ubmV0L3dlaXhpbl80NDgyNzQxOA==,size_16,color_FFFFFF,t_70)
![[外链图片转存失败,源站可能有防盗链机制,建议将图片保存下来直接上传(img-l6eivlYN-1592183621338)(images/on2.png)]](https://img-blog.csdnimg.cn/20200615091604180.png?x-oss-process=image/watermark,type_ZmFuZ3poZW5naGVpdGk,shadow_10,text_aHR0cHM6Ly9ibG9nLmNzZG4ubmV0L3dlaXhpbl80NDgyNzQxOA==,size_16,color_FFFFFF,t_70)
![[外链图片转存失败,源站可能有防盗链机制,建议将图片保存下来直接上传(img-r1T68tEN-1592183621340)(images/on3.png)]](https://img-blog.csdnimg.cn/20200615091612355.png?x-oss-process=image/watermark,type_ZmFuZ3poZW5naGVpdGk,shadow_10,text_aHR0cHM6Ly9ibG9nLmNzZG4ubmV0L3dlaXhpbl80NDgyNzQxOA==,size_16,color_FFFFFF,t_70)
演示代码
<body><div></div><ul><li>我们都是好孩子</li><li>我们都是好孩子</li><li>我们都是好孩子</li></ul><ol></ol><script>$(function() {// (1) on可以绑定1个或者多个事件处理程序// $("div").on({//     mouseenter: function() {//         $(this).css("background", "skyblue");//     },//     click: function() {//         $(this).css("background", "purple");//     }// });$("div").on("mouseenter mouseleave", function() {$(this).toggleClass("current");});// (2) on可以实现事件委托(委派)// click 是绑定在ul 身上的,但是 触发的对象是 ul 里面的小li// $("ul li").click();$("ul").on("click", "li", function() {alert(11);});// (3) on可以给未来动态创建的元素绑定事件$("ol").on("click", "li", function() {alert(11);})var li = $("<li>我是后来创建的</li>");$("ol").append(li);})</script>
</body>
1.2.2. 案例:发布微博案例
1.点击发布按钮, 动态创建一个小li,放入文本框的内容和删除按钮, 并且添加到ul 中。
2.点击的删除按钮,可以删除当前的微博留言。
代码实现略。(详情参考源代码)
1.2.3. 事件处理 off() 解绑事件
当某个事件上面的逻辑,在特定需求下不需要的时候,可以把该事件上的逻辑移除,这个过程我们称为事件解绑。jQuery 为我们提供 了多种事件解绑方法:die() / undelegate() / off() 等,甚至还有只触发一次的事件绑定方法 one(),在这里我们重点讲解一下 off() ;
语法
![[外链图片转存失败,源站可能有防盗链机制,建议将图片保存下来直接上传(img-Gz4tPl6k-1592183621341)(images/off.png)]](https://img-blog.csdnimg.cn/2020061509162877.png?x-oss-process=image/watermark,type_ZmFuZ3poZW5naGVpdGk,shadow_10,text_aHR0cHM6Ly9ibG9nLmNzZG4ubmV0L3dlaXhpbl80NDgyNzQxOA==,size_16,color_FFFFFF,t_70)
演示代码
<body><div></div><ul><li>我们都是好孩子</li><li>我们都是好孩子</li><li>我们都是好孩子</li></ul><p>我是一个P标签</p><script>$(function() {// 事件绑定$("div").on({click: function() {console.log("我点击了");},mouseover: function() {console.log('我鼠标经过了');}});$("ul").on("click", "li", function() {alert(11);});// 1. 事件解绑 off // $("div").off();  // 这个是解除了div身上的所有事件$("div").off("click"); // 这个是解除了div身上的点击事件$("ul").off("click", "li");// 2. one() 但是它只能触发事件一次$("p").one("click", function() {alert(11);})})</script>
</body>
1.2.4. 事件处理 trigger() 自动触发事件
有些时候,在某些特定的条件下,我们希望某些事件能够自动触发, 比如轮播图自动播放功能跟点击右侧按钮一致。可以利用定时器自动触发右侧按钮点击事件,不必鼠标点击触发。由此 jQuery 为我们提供了两个自动触发事件 trigger() 和 triggerHandler() ;
语法
![[外链图片转存失败,源站可能有防盗链机制,建议将图片保存下来直接上传(img-JA1BtBhh-1592183621343)(images/t1.png)]](https://img-blog.csdnimg.cn/20200615091641488.png)
![[外链图片转存失败,源站可能有防盗链机制,建议将图片保存下来直接上传(img-sJgWOT4o-1592183621344)(images/t2.png)]](https://img-blog.csdnimg.cn/20200615091650577.png)
演示代码
<body><div></div><input type="text"><script>$(function() {// 绑定事件$("div").on("click", function() {alert(11);});// 自动触发事件// 1. 元素.事件()// $("div").click();会触发元素的默认行为// 2. 元素.trigger("事件")// $("div").trigger("click");会触发元素的默认行为$("input").trigger("focus");// 3. 元素.triggerHandler("事件") 就是不会触发元素的默认行为$("input").on("focus", function() {$(this).val("你好吗");});// 一个会获取焦点,一个不会$("div").triggerHandler("click");// $("input").triggerHandler("focus");});</script>
</body>
1.3. jQuery 事件对象
jQuery 对DOM中的事件对象 event 进行了封装,兼容性更好,获取更方便,使用变化不大。事件被触发,就会有事件对象的产生。
语法
![[外链图片转存失败,源站可能有防盗链机制,建议将图片保存下来直接上传(img-w0iDKO8p-1592183621345)(images/event.png)]](https://img-blog.csdnimg.cn/20200615091707112.png)
演示代码
<body><div></div><script>$(function() {$(document).on("click", function() {console.log("点击了document");})$("div").on("click", function(event) {// console.log(event);console.log("点击了div");event.stopPropagation();})})</script>
</body>
注意:jQuery中的 event 对象使用,可以借鉴 API 和 DOM 中的 event 。
1.4. jQuery 拷贝对象
jQuery中分别为我们提供了两套快速获取和设置元素尺寸和位置的API,方便易用,内容如下。
语法
![[外链图片转存失败,源站可能有防盗链机制,建议将图片保存下来直接上传(img-OuuK566D-1592183621346)(images/extend.png)]](https://img-blog.csdnimg.cn/2020061509171829.png?x-oss-process=image/watermark,type_ZmFuZ3poZW5naGVpdGk,shadow_10,text_aHR0cHM6Ly9ibG9nLmNzZG4ubmV0L3dlaXhpbl80NDgyNzQxOA==,size_16,color_FFFFFF,t_70)
演示代码
<script>$(function() {// 1.合并数据var targetObj = {};var obj = {id: 1,name: "andy"};// $.extend(target, obj);$.extend(targetObj, obj);console.log(targetObj);// 2. 会覆盖 targetObj 里面原来的数据var targetObj = {id: 0};var obj = {id: 1,name: "andy"};// $.extend(target, obj);$.extend(targetObj, obj);console.log(targetObj); })</script>
1.5. jQuery 多库共存
实际开发中,很多项目连续开发十多年,jQuery版本不断更新,最初的 jQuery 版本无法满足需求,这时就需要保证在旧有版本正常运行的情况下,新的功能使用新的jQuery版本实现,这种情况被称为,jQuery 多库共存。
语法
![[外链图片转存失败,源站可能有防盗链机制,建议将图片保存下来直接上传(img-sQNlbN0H-1592183621347)(images/noconfig.png)]](https://img-blog.csdnimg.cn/20200615091728202.png)
演示代码
<script>$(function() {// 让jquery 释放对$ 控制权 让用自己决定var suibian = jQuery.noConflict();console.log(suibian("span"));})
</script>
1.6. jQuery 插件
补充:
1.自定义jQuery插件:
$ .extend()拓展工具方法,可以通过$.xxx() $.yyy()来调用
$ .fn.extend()拓展j0uery方法,可以通过$().xxx() $().yyy()来调用
j0uery插件方法,如果我们想要给J0新增函数,通过上述两个插件方法拓展函数库。
$.extend({aaa:function() {alert("这是一个工具方法");}})$.fn.extend({aaa:function() {alert("这是一个jQuery方法");}

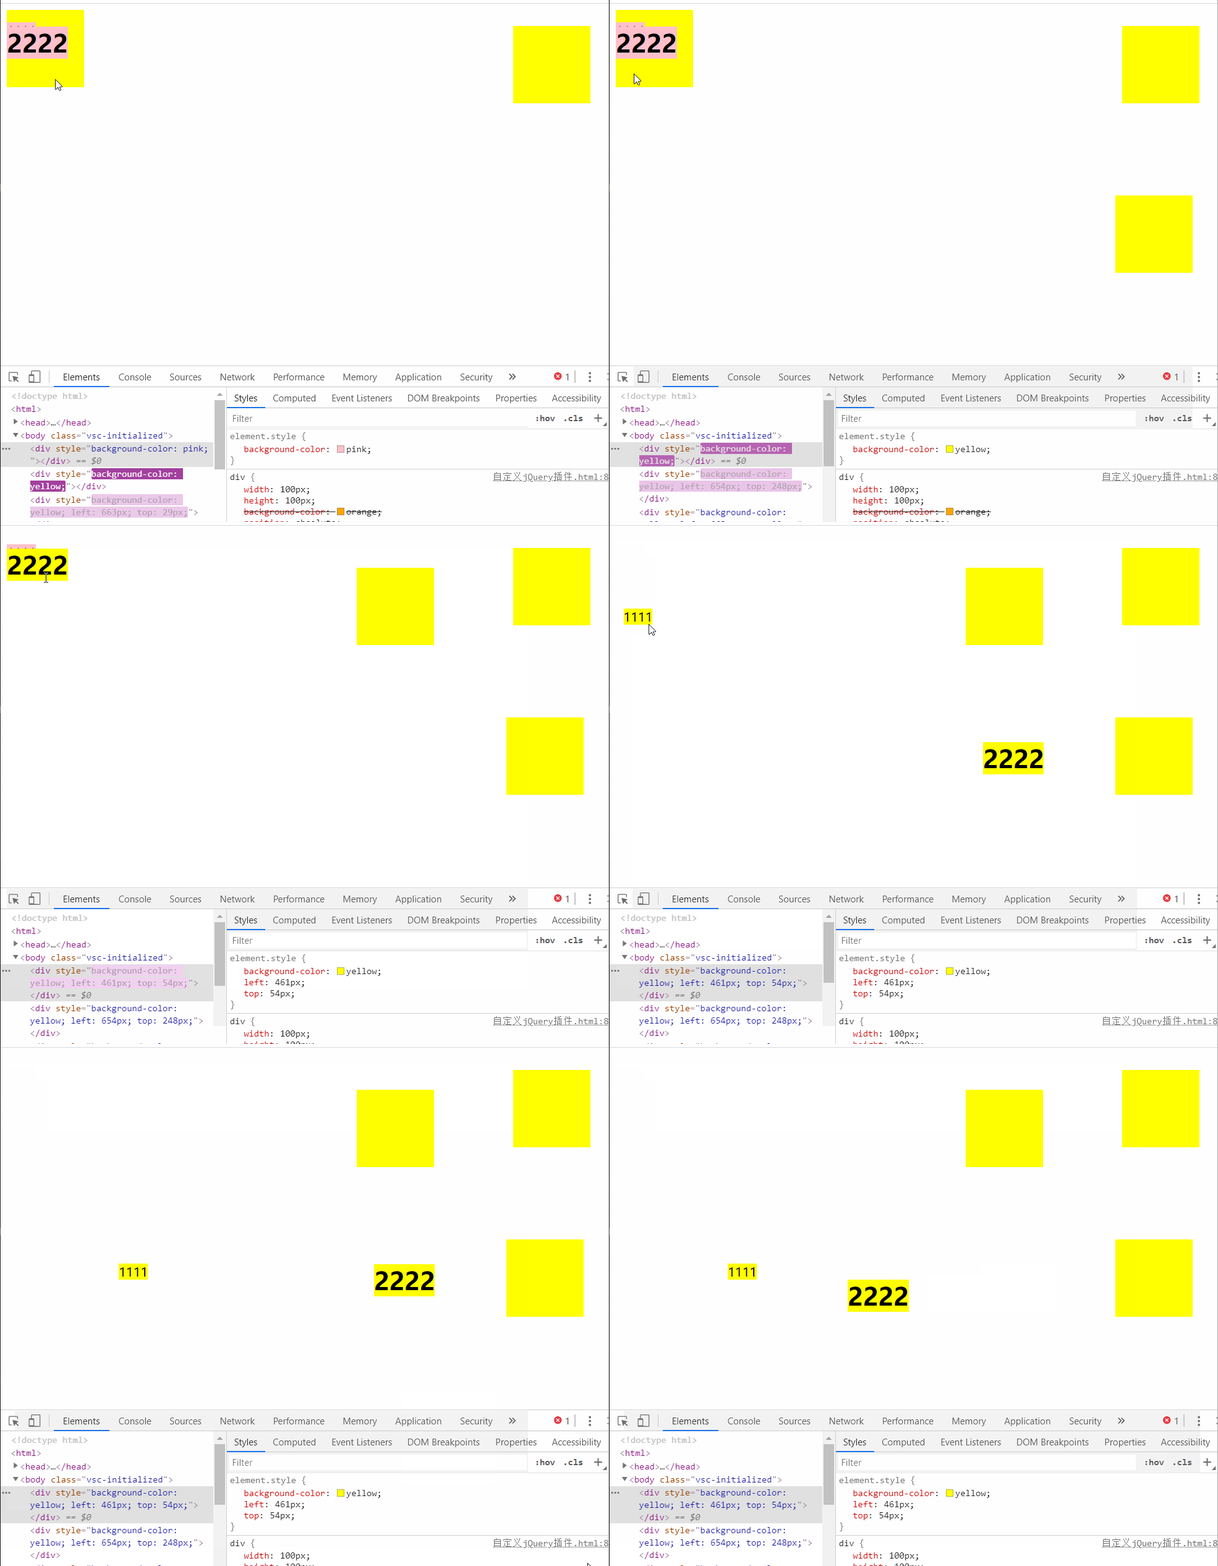
案例:自定义drag()插件方法,实现鼠标拖拽元素
<!DOCTYPE html>
<html><head><meta charset="utf-8"><script src="./js/jquery-3.5.0.js"></script><title></title><style type="text/css">div {width: 100px;height: 100px;background-color: orange;position: absolute;}p,h1 {position: absolute;}</style><script type="text/javascript">$.extend({aaa:function() {alert("这是一个工具方法");}})$.fn.extend({aaa:function() {alert("这是一个jQuery方法");},drag:function() {// this 谁调用this,this就指向谁// this = $("div")// 鼠标按下事件mousedown$(this).mousedown(function(e) {var offsetX = e.clientX - $(this).offset().left;var offsetY = e.clientY - $(this).offset().top;var _this = this;// 用_this变量来暂时保存this// 添加鼠标移动事件$(document).mousemove(function(e) {$(_this).css({left:e.clientX - offsetX,top:e.clientY - offsetY})})	})// 鼠标松开时,取消鼠标移动事件$(document).mouseup(function() {$(document).off("mousemove");})return this;// 加上这句话就可以实现链式调用了}})$(function() {// $("div").aaa();// $.aaa();$('div,p,h1').drag().css("background-color",'pink').mouseover(function() {//鼠标移入时变成黄色$(this).css("background-color","yellow");});})</script></head><body><div></div><div></div><div></div><p>1111</p><h1>2222</h1></body>
</html>
2. JS自执行函数:
(function(){//这里为调用的其它代码
})();
- Jquery立即执行函数:
$(function(){//这里为要调用的其它代码
})
区别:第一个(JS自执行函数)为顺序执行,即如果要调用其它的js方法,则需要置于代码末尾。否则无法调用。
第二个(Jquery立即执行函数)可以为全部代码加载后再执行,因此,如果第一个放在代码末尾,两者功能一样。
案例2: 自定义bgColor插件
bgColor插件.html文件:
<!DOCTYPE html>
<html><head><meta charset="utf-8"><title></title><script src="js/jquery-3.5.0.js"></script><script src="js/bgColor.js"></script><script src="js/jQuery-add.js"></script><script type="text/javascript">$(function() {// $('div').width(100).height(100).css('background-color','red');// 自己封装一个bgColor方法// $('div').width(100).height(100).bgColor('red');$('div').bgColor('green').width(100).height(100);// 1. 如何自己封装插件:// 1.1  给jQuery的原型添加方法// 1.2  给jQuery直接添加方法console.log($.add(10,20));})</script></head><body><div></div><p></p></body>
</html>
bgColor.js文件:
// (function ($){
// 	// 需要给jQuery的原型添加方法
// 	$.fn.bgColor = function(yanse) {
// 		console.log(this); // this是调用这个bgColor方法的jQuery对象
// 		this.css('background-color',yanse);// 		// 返回调用这个方法的jQuery本身
// 		return this;
// 	}
// })(jQuery);$(function() {// 需要给jQuery的原型添加方法$.fn.bgColor = function(yanse) {console.log(this); // this是调用这个bgColor方法的jQuery对象this.css('background-color', yanse);// 返回调用这个方法的jQuery本身return this;}
})
jQuery-add.js文件:
// $(function() {
// 	// 直接给$添加方法
// 	$.add = function(num1,num2) {
// 		return num1 + num2;
// 	}
// })(function($) {// 直接给$添加方法$.add = function(num1,num2) {return num1 + num2;}
})(jQuery)

案例3 自定义表格插件table.js:
<!DOCTYPE html>
<html><head><meta charset="utf-8"><title>table 插件</title><style type="text/css">#c {height: 500px;}table{text-align: center;border-collapse: collapse;}th {background-color: deepskyblue;color: #fff;}#c table td,#c table th {width: 100px;border: 1px solid black;}</style><script src="js/jquery-3.5.0.js"></script><script src="js/jQuery-table.js"></script><script type="text/javascript">$(function() {$('#c').table(['序号','姓名','年龄','工资'],[{name:"zep",age:30,salary:4000},{name:"Tom",age:22,salary:2000},{name:"Lily",age:18,salary:8000}])})	</script></head><body><div id="c"></div></body>
</html>
(function($) {// 给$的原型添加方法// arrTableHead 生成表头的数组// arrTableBody 生成表格主体部分的数组$.fn.table = function(arrTableHead,arrTableBody) {// console.log(this); // 这里的this是一个jQuery对象,是调用这个table方法的jQuery对象var list = [];list.push('<table>');// 生成表头list.push('<thead>');list.push('<tr>');for(var i=0;i<arrTableHead.length;i++) {list.push('<th>');list.push(arrTableHead[i]);list.push('</th>');}list.push('</tr>');list.push('</thead>');// 生成表格主体部分for(var j=0;j<arrTableBody.length;j++) {list.push('<tr>');//生成一个序号tdlist.push('<td>'+(j+1)+ '</td>');// 遍历arrTableBody的一个个对象for(var key in arrTableBody[j] ) {list.push('<td>');list.push(arrTableBody[j][key]);list.push('</td>');}list.push('</tr>');}list.push('</table>');console.log(list.join("")); //join方法可以用符不同的分隔符来构建这个字串。join方法值接受一个参数,即用作分隔符的字符串,然后返回所有数组项的字符串。this.html(list.join(""));}
})(window.jQuery)
jQuery 功能比较有限,想要更复杂的特效效果,可以借助于 jQuery 插件完成。 这些插件也是依赖于jQuery来完成的,所以必须要先引入jQuery文件,因此也称为 jQuery 插件。
jQuery 插件常用的网站:
- jQuery 插件库 http://www.jq22.com/
- jQuery 之家 http://www.htmleaf.com/
jQuery 插件使用步骤:
- 引入相关文件。(jQuery 文件 和 插件文件)
- 复制相关html、css、js (调用插件)。
1.4.1. 瀑布流插件(重点讲解)
我们学习的第一个插件是jQuery之家的开源插件,瀑布流。我们将重点详细讲解,从找到插件所在网页,然后点击下载代码,到插件的使用等,后面的插件使用可参考瀑布流插件的使用。
下载位置
![[外链图片转存失败,源站可能有防盗链机制,建议将图片保存下来直接上传(img-kzkmDLwM-1592183621347)(images/water.png)]](https://img-blog.csdnimg.cn/20200615091804124.png?x-oss-process=image/watermark,type_ZmFuZ3poZW5naGVpdGk,shadow_10,text_aHR0cHM6Ly9ibG9nLmNzZG4ubmV0L3dlaXhpbl80NDgyNzQxOA==,size_16,color_FFFFFF,t_70)
![[外链图片转存失败,源站可能有防盗链机制,建议将图片保存下来直接上传(img-NmSJx8K9-1592183621348)(images/download.png)]](https://img-blog.csdnimg.cn/20200615091813504.png)
代码演示
插件的使用三点: 1. 引入css. 2.引入JS 3.引入html。 (有的简单插件只需引入html和js,甚至有的只需引入js)
- 1.引入css.
<link rel="stylesheet" href="css/normalize.css">
<link rel="stylesheet" type="text/css" href="css/default.css"><!-- 下面的样式代码为页面布局,可以引入,也可以自己写,自己设计页面样式,一般为直接引入,方便 -->
<style type="text/css">#gallery-wrapper {position: relative;max-width: 75%;width: 75%;margin: 50px auto;}img.thumb {width: 100%;max-width: 100%;height: auto;}.white-panel {position: absolute;background: white;border-radius: 5px;box-shadow: 0px 1px 2px rgba(0, 0, 0, 0.3);padding: 10px;}.white-panel h1 {font-size: 1em;}.white-panel h1 a {color: #A92733;}.white-panel:hover {box-shadow: 1px 1px 10px rgba(0, 0, 0, 0.5);margin-top: -5px;-webkit-transition: all 0.3s ease-in-out;-moz-transition: all 0.3s ease-in-out;-o-transition: all 0.3s ease-in-out;transition: all 0.3s ease-in-out;}
</style>
- 2.引入js.
<!-- 前两个必须引入 -->
<script src="js/jquery-1.11.0.min.js"></script>
<script src="js/pinterest_grid.js"></script>
<!-- 下面的为启动瀑布流代码,参数可调节属性,具体功能可参考readme.html -->
<script type="text/javascript">$(function() {$("#gallery-wrapper").pinterest_grid({no_columns: 5,padding_x: 15,padding_y: 10,margin_bottom: 50,single_column_breakpoint: 700});});
</script>
- 3.引入html.
<!-- html结构一般为事先写好,很难修改结构,但可以修改内容及图片的多少(article标签) --><section id="gallery-wrapper"><article class="white-panel"><img src="images/P_000.jpg" class="thumb"><h1><a href="#">我是轮播图片1</a></h1><p>里面很精彩哦</p></article><article class="white-panel"><img src="images/P_005.jpg" class="thumb"><h1><a href="#">我是轮播图片1</a></h1><p>里面很精彩哦</p></article><article class="white-panel"><img src="images/P_006.jpg" class="thumb"><h1><a href="#">我是轮播图片1</a></h1><p>里面很精彩哦</p></article><article class="white-panel"><img src="images/P_007.jpg" class="thumb"><h1><a href="#">我是轮播图片1</a></h1><p>里面很精彩哦</p></article></section>
总结:jQuery插件就是引入别人写好的:html 、css、js (有时也可以只引入一部分,读懂后也可以修改部分内容)
1.4.2. 图片懒加载插件
图片的懒加载就是:当页面滑动到有图片的位置,图片才进行加载,用以提升页面打开的速度及用户体验。(下载略)
代码演示
懒加载只需引入html 和 js操作 即可,此插件不涉及css。
- 1.引入js
<script src="js/EasyLazyload.min.js"></script>
<script>lazyLoadInit({showTime: 1100,onLoadBackEnd: function(i, e) {console.log("onLoadBackEnd:" + i);},onLoadBackStart: function(i, e) {console.log("onLoadBackStart:" + i);}});
</script>
- 2.引入html
<img data-lazy-src="upload/floor-1-3.png" alt="">
1.4.3. 全屏滚动插件
全屏滚动插件比较大,所以,一般大型插件都会有帮助文档,或者网站。全屏滚动插件介绍比较详细的网站为:
http://www.dowebok.com/demo/2014/77/
代码演示
全屏滚动因为有多重形式,所以不一样的风格html和css也不一样,但是 js 变化不大。所以下面只演示js的引入,html和css引入根据自己实际
项目需要使用哪种风格引入对应的HTML和CSS。
<script src="js/jquery.min.js"></script>
<script src="js/fullpage.min.js"></script>
<script>$(function() {$('#dowebok').fullpage({sectionsColor: ['pink', '#4BBFC3', '#7BAABE', '#f90'],navigation: true});});
</script>
注意:实际开发,一般复制文件,然后在文件中进行修改和添加功能。
1.4.4. bootstrap组件
Bootstrap是 Twitter 公司设计的基于HTML、CSS、JavaScript开发的简洁、直观、强悍的前端开发框架,他依靠jQuery实现,且支持响应式
布局,使得 Web 开发更加方便快捷。
凡是在软件开发中用到了软件的复用,被复用的部分都可以称为组件,凡是在应用程序中已经预留接口的组件就是插件。Bootstrap组件使
用非常方便: 1.引入bootstrap相关css和js 2.去官网复制html
代码演示
- 引入bootstrap相关css和js
<link rel="stylesheet" href="bootstrap/css/bootstrap.min.css">
<script src="bootstrap/js/jquery.min.js"></script>
<script src="bootstrap/js/bootstrap.min.js"></script>
- 去官网复制html的功能模块
<div class="container"><!-- Single button --><div class="btn-group"><button type="button" class="btn btn-default dropdown-toggle" data-toggle="dropdown" aria-haspopup="true" aria-expanded="false">Action <span class="caret"></span></button><ul class="dropdown-menu"><li><a href="#">Action</a></li><li><a href="#">Another action</a></li><li><a href="#">Something else here</a></li><li role="separator" class="divider"></li><li><a href="#">Separated link</a></li></ul></div></div>
1.4.5. bootstrap插件(JS)
bootstrap中的js插件其实也是组件的一部分,只不过是需要js调用功能的组件,所以一般bootstrap的js插件一般会伴随着js代码(有的也可以
省略js,用属性实现)。
步骤: 1.引入bootstrap相关css和js 2.去官网复制html 3.复制js代码,启动js插件。
模态框的用法:

代码演示
- 引入bootstrap相关css和js
<link rel="stylesheet" href="bootstrap/css/bootstrap.min.css">
<script src="bootstrap/js/jquery.min.js"></script>
<script src="bootstrap/js/bootstrap.min.js"></script>
- 去官网复制html的功能模块
<!-- 模态框 -->
<!-- Large modal -->
<button type="button" class="btn btn-primary" data-toggle="modal" data-target=".bs-example-modal-lg">Large modal</button>
<div class="modal fade bs-example-modal-lg" tabindex="-1" role="dialog" aria-labelledby="myLargeModalLabel"><div class="modal-dialog modal-lg" role="document"><div class="modal-content">里面就是模态框</div></div>
</div>
- 复制js代码,启动js插件。
<script>// 当我们点击了自己定义的按钮,就弹出模态框$(".myBtn").on("click", function() {// alert(11);$('#btn').modal()})
</script>
完整代码演示:
<!DOCTYPE html>
<html><head><meta charset="utf-8" /><!--要求当前网页使用IE浏览器最高版本的内核来渲染--><meta http-equiv="X-UA-Compatible" content="IE=edge"><!--视口的设置:视口的宽度和设备一致,默认的缩放比例和PC端一致,用户不能自行缩放--><meta name="viewport" content="width=device-width, initial-scale=1, user-scalable=0"><!--[if lt IE 9]><!--解决ie9以下浏览器对html5新增标签的不识别,并导致CSS不起作用的问题--><script src="https://oss.maxcdn.com/html5shiv/3.7.2/html5shiv.min.js"></script><!--解决ie9以下浏览器对 css3 Media Query 的不识别 --><script src="https://oss.maxcdn.com/respond/1.4.2/respond.min.js"></script><!--[endif]--><!-- Bootstrap 核心样式--><link rel="stylesheet" href="bootstrap/css/bootstrap.min.css"><!-- jQuery (Bootstrap 的所有 JavaScript 插件都依赖 jQuery,所以必须放在前边) --><!--<script src="https://cdn.jsdelivr.net/npm/jquery@1.12.4/dist/jquery.min.js"></script> --><script src="./js/jquery-3.5.0.js"></script><!-- 加载 Bootstrap 的所有 JavaScript 插件。你也可以根据需要只加载单个插件。 --><!-- <script src="https://cdn.jsdelivr.net/npm/bootstrap@3.3.7/dist/js/bootstrap.min.js"></script> --><script src="./bootstrap/js/bootstrap.min.js"></script><title>js插件的使用</title><style type="text/css"></style></head><body><div class="container"><!-- Split button --><div class="btn-group"><button type="button" class="btn btn-danger">Action</button><button type="button" class="btn btn-danger dropdown-toggle" data-toggle="dropdown" aria-haspopup="true"aria-expanded="false"><span class="caret"></span><span class="sr-only">Toggle Dropdown</span></button><ul class="dropdown-menu"><li><a href="#">Action</a></li><li><a href="#">Another action</a></li><li><a href="#">Something else here</a></li><li role="separator" class="divider"></li><li><a href="#">Separated link</a></li></ul></div><!-- // 导航栏组件 --><nav class="navbar navbar-default"><div class="container-fluid"><!-- Brand and toggle get grouped for better mobile display --><div class="navbar-header"><button type="button" class="navbar-toggle collapsed" data-toggle="collapse" data-target="#bs-example-navbar-collapse-1"aria-expanded="false"><span class="sr-only">Toggle navigation</span><span class="icon-bar"></span><span class="icon-bar"></span><span class="icon-bar"></span></button><a class="navbar-brand" href="#">Brand</a></div><!-- Collect the nav links, forms, and other content for toggling --><div class="collapse navbar-collapse" id="bs-example-navbar-collapse-1"><ul class="nav navbar-nav"><li class="active"><a href="#">首页 <span class="sr-only">(current)</span></a></li><li><a href="#">公司简介</a></li><li class="dropdown"><a href="#" class="dropdown-toggle" data-toggle="dropdown" role="button" aria-haspopup="true" aria-expanded="false">Dropdown<span class="caret"></span></a><ul class="dropdown-menu"><li><a href="#">Action</a></li><li><a href="#">Another action</a></li><li><a href="#">Something else here</a></li><li role="separator" class="divider"></li><li><a href="#">Separated link</a></li><li role="separator" class="divider"></li><li><a href="#">One more separated link</a></li></ul></li></ul><form class="navbar-form navbar-left"><div class="form-group"><input type="text" class="form-control" placeholder="Search"></div><button type="submit" class="btn btn-default">搜索</button></form><ul class="nav navbar-nav navbar-right"><li><a href="#">Link</a></li><li class="dropdown"><a href="#" class="dropdown-toggle" data-toggle="dropdown" role="button" aria-haspopup="true" aria-expanded="false">Dropdown<span class="caret"></span></a><ul class="dropdown-menu"><li><a href="#">Action</a></li><li><a href="#">Another action</a></li><li><a href="#">Something else here</a></li><li role="separator" class="divider"></li><li><a href="#">Separated link</a></li></ul></li></ul></div><!-- /.navbar-collapse --></div><!-- /.container-fluid --></nav><!-- 大模态框 --><!-- Large modal --><button type="button" class="btn btn-primary" data-toggle="modal" data-target=".bs-example-modal-lg">Large modal</button><div class="modal fade bs-example-modal-lg" tabindex="-1" role="dialog" aria-labelledby="myLargeModalLabel"><div class="modal-dialog modal-lg" role="document"><div class="modal-content">大模态框</div></div></div><!-- 自己定义模态框 通过data属性调用--><button data-toggle="modal" data-target="#myModal">点击显示模态框(通过data属性调用)</button><div class="modal fade" tabindex="-1" role="dialog" id="myModal"><div class="modal-dialog" role="document"><div class="modal-content"><div class="modal-header"><button type="button" class="close" data-dismiss="modal" aria-label="Close"><span aria-hidden="true">×</span></button><h4 class="modal-title">Modal title</h4></div><div class="modal-body"><p>One fine body…</p></div><div class="modal-footer"><button type="button" class="btn btn-default" data-dismiss="modal">Close</button><button type="button" class="btn btn-primary">Save changes</button></div></div><!-- /.modal-content --></div><!-- /.modal-dialog --></div><!-- /.modal --><!-- 自己定义模态框 通过JavaScript调用--><button type="button" class="myBtn">点击显示模态框(通过JavaScript调用)</button><!-- tab栏切换 --><div><!-- Nav tabs --><ul class="nav nav-tabs" role="tablist"><li role="presentation" class="active"><a href="#home" aria-controls="home" role="tab" data-toggle="tab">手机</a></li><li role="presentation"><a href="#profile" aria-controls="profile" role="tab" data-toggle="tab">电视</a></li></ul><!-- Tab panes --><div class="tab-content"><div role="tabpanel" class="tab-pane active" id="home">手机相关的内容</div><div role="tabpanel" class="tab-pane" id="profile">电视相关的内容</div></div></div><!-- 轮播图 --><div id="carousel-example-generic" class="carousel slide" data-ride="carousel"><!-- Indicators --><ol class="carousel-indicators"><li data-target="#carousel-example-generic" data-slide-to="0" class="active"></li><li data-target="#carousel-example-generic" data-slide-to="1"></li><li data-target="#carousel-example-generic" data-slide-to="2"></li></ol><!-- Wrapper for slides --><div class="carousel-inner" role="listbox"><div class="item active"><img src="..." alt="..."><div class="carousel-caption">...</div></div><div class="item"><img src="..." alt="..."><div class="carousel-caption">...</div></div>...</div><!-- Controls --><a class="left carousel-control" href="#carousel-example-generic" role="button" data-slide="prev"><span class="glyphicon glyphicon-chevron-left" aria-hidden="true"></span><span class="sr-only">Previous</span></a><a class="right carousel-control" href="#carousel-example-generic" role="button" data-slide="next"><span class="glyphicon glyphicon-chevron-right" aria-hidden="true"></span><span class="sr-only">Next</span></a></div></div><script type="text/javascript">// 当我们点击了自己定义的按钮,就弹出模态框$('.myBtn').on("click", function() {// alert(111);$('#myModal').modal();})</script></body>
</html>
1.4.6. bootstrap案例-阿里百秀
1.通过调用组件实现导航栏
2.通过调用插件实现登录
3.通过调用插件标签页实现 tab 栏
代码实现略。(详情参考源代码)
1.7. 综合案例: toDoList案例分析(代码略)
1.7.1 案例:案例介绍
// 1. 文本框里面输入内容,按下回车,就可以生成待办事项。
// 2. 点击待办事项复选框,就可以把当前数据添加到已完成事项里面。
// 3. 点击已完成事项复选框,就可以把当前数据添加到待办事项里面。
// 4. 但是本页面内容刷新页面不会丢失。
1.7.2 案例:toDoList 分析
// 1. 刷新页面不会丢失数据,因此需要用到本地存储 localStorage
// 2. 核心思路: 不管按下回车,还是点击复选框,都是把本地存储的数据加载到页面中,这样保证刷新关闭页面不会丢失数据
// 3. 存储的数据格式:var todolist =  [{ title : ‘xxx’, done: false}]
// 4. 注意点1: 本地存储 localStorage 里面只能存储字符串格式 ,因此需要把对象转换为字符串 JSON.stringify(data)。
// 5. 注意点2: 获取本地存储数据,需要把里面的字符串转换为对象格式JSON.parse() 我们才能使用里面的数据。
1.7.3 案例:toDoList 按下回车把新数据添加到本地存储里面
// 1.切记: 页面中的数据,都要从本地存储里面获取,这样刷新页面不会丢失数据,所以先要把数据保存到本地存储里面。
// 2.利用事件对象.keyCode判断用户按下回车键(13)。
// 3.声明一个数组,保存数据。
// 4.先要读取本地存储原来的数据(声明函数 getData()),放到这个数组里面。
// 5.之后把最新从表单获取过来的数据,追加到数组里面。
// 6.最后把数组存储给本地存储 (声明函数 savaDate())
1.7.4 案例:toDoList 本地存储数据渲染加载到页面
// 1.因为后面也会经常渲染加载操作,所以声明一个函数 load,方便后面调用
// 2.先要读取本地存储数据。(数据不要忘记转换为对象格式)
// 3.之后遍历这个数据($.each()),有几条数据,就生成几个小li 添加到 ol 里面。
// 4.每次渲染之前,先把原先里面 ol 的内容清空,然后渲染加载最新的数据。
1.7.5 案例:toDoList 删除操作
// 1.点击里面的a链接,不是删除的li,而是删除本地存储对应的数据。
// 2.核心原理:先获取本地存储数据,删除对应的数据,保存给本地存储,重新渲染列表li
// 3.我们可以给链接自定义属性记录当前的索引号
// 4.根据这个索引号删除相关的数据----数组的splice(i, 1)方法
// 5.存储修改后的数据,然后存储给本地存储
// 6.重新渲染加载数据列表
// 7.因为a是动态创建的,我们使用on方法绑定事件
1.7.6 案例:toDoList 正在进行和已完成选项操作
// 1.当我们点击了小的复选框,修改本地存储数据,再重新渲染数据列表。
// 2.点击之后,获取本地存储数据。
// 3.修改对应数据属性 done 为当前复选框的checked状态。
// 4.之后保存数据到本地存储
// 5.重新渲染加载数据列表
// 6.load 加载函数里面,新增一个条件,如果当前数据的done为true 就是已经完成的,就把列表渲染加载到 ul 里面
// 7.如果当前数据的done 为false, 则是待办事项,就把列表渲染加载到 ol 里面
1.7.7 案例:toDoList 统计正在进行个数和已经完成个数
// 1.在我们load 函数里面操作
// 2.声明2个变量 :todoCount 待办个数  doneCount 已完成个数
// 3.当进行遍历本地存储数据的时候, 如果 数据done为 false, 则 todoCount++, 否则 doneCount++
// 4.最后修改相应的元素 text()
1.8. 今日总结
![[外链图片转存失败,源站可能有防盗链机制,建议将图片保存下来直接上传(img-Sg8JNcjP-1592183621348)(images/总结.png)]](https://img-blog.csdnimg.cn/20200615091857166.png?x-oss-process=image/watermark,type_ZmFuZ3poZW5naGVpdGk,shadow_10,text_aHR0cHM6Ly9ibG9nLmNzZG4ubmV0L3dlaXhpbl80NDgyNzQxOA==,size_16,color_FFFFFF,t_70)
)
![BZOJ4068 : [Ctsc2015]app](http://pic.xiahunao.cn/BZOJ4068 : [Ctsc2015]app)

)
——堆栈寻址(详解))
)
)


)


)

)


)