cmake作为一个跨平台的构建工具,在开源社区得到了广泛运用,并且在项目中被大量采用,但是cmake作为一个类脚本的语言,基本上没有编辑器很好的支持代码自动补全和提示,所有在我们往往需要边查cmake文档边写cmake模块,这是痛苦的过程。由于缺乏完整的语法的高亮显示,我们往往还需要对cmake代码进行排版,尤其是一些涉及到条件判断的部分,如果不进行缩进排版,不仅仅看起来不美观,日后改起来也是一个非常痛苦的事情。所以一个cmake代码的格式化工具就显得很重要了。
__________________________________________
以上是分割线,我们废话不多说直接进入正题,这里以vscode为例,下面展示如何在vscode中使用cmake-format插件:
1.对于linux用户,在vscode的扩展中搜索cmake-format插件安装,然后还要在系统中单独安装cmake-format,按照cmake-format官方文档,其是支持pip安装的,所以我们可以直接执行pip install cmake_format 即可,更多其他安装方法和说明可以参考官方文档https://cmake-format.readthedocs.io/en/latest/installation.html,然后Ctrl+shift+p打开vscode控制台,执行open settings打开json配置文件,找到cmakeFormat.exePath一项,将cmake-format的安装路径填入即可,一般是/usr/local/bin/cmake-format,不正确的自己去核对。
2.对于windows用户,通过查阅cmake-format的官方文档后并没有找到其对windows系统的任何支持,但好在cmake-format是一个开源的项目,在github上的能找到其开源的项目代码,这一看才知道其没有windows的支持是不足为怪的,因为这个项目原生采用python编写的。既然源码都开源了,那就有办法了,查阅了其源码后发现只要把其封装成一个可供windows执行的可执行文件就可以了。
首先我们需要安装python,我这里安装的是python3.8,然后在python中安装pyinstaller包,这个包可以帮我们把python项目打包发布到windows上。然后在python中安装cmake-format包,同样我们也可以通过pip来安装,然后在python的包目录下我们可以找到安装好的cmake-format包,我这里的文件地址为D:python-3.8Libsite-packagescmake_format,根据你的python安装位置会有所不同,之后我们将其用pyinstaller打包成exe就好了,这里直接打包是不行的,会遗漏很多模块,所以我们需要自己配置spec文件:
# -*- mode: python ; coding: utf-8 -*-
import sys
sys.setrecursionlimit(1024)
block_cipher = None
a = Analysis(['__main__.py',
'common.py',
'configuration.py',
'config_util.py',
'formatter.py',
'lexer.py',
'markup.py'],
pathex=['D:python-3.8Libsite-packagescmake_format'],
binaries=[],
datas=[],
hiddenimports=['cmake_format.parse_funs.add_executable',
'cmake_format.parse_funs.add_xxx',
'cmake_format.parse_funs.deprecated',
'cmake_format.parse_funs.break',
'cmake_format.parse_funs.external_project',
'cmake_format.parse_funs.fetch_content',
'cmake_format.parse_funs.file',
'cmake_format.parse_funs.foreach',
'cmake_format.parse_funs.install',
'cmake_format.parse_funs.list',
'cmake_format.parse_funs.miscellaneous',
'cmake_format.parse_funs.random',
'cmake_format.parse_funs.set',
'cmake_format.parse_funs.set_target_properties',
'cmake_format.parse_funs.standard_builtins',
'cmake_format.parse_funs.standard_funs',
'cmake_format.parse_funs.standard_modules',
'cmake_format.parse_funs.add_library'],
hookspath=[],
runtime_hooks=[],
excludes=[],
win_no_prefer_redirects=False,
win_private_assemblies=False,
cipher=block_cipher,
noarchive=False)
pyz = PYZ(a.pure, a.zipped_data,
cipher=block_cipher)
exe = EXE(pyz,
a.scripts,
a.binaries,
a.zipfiles,
a.datas,
[],
name='cmake-format',
debug=False,
bootloader_ignore_signals=False,
strip=False,
upx=True,
upx_exclude=[],
runtime_tmpdir=None,
console=True )
其中根据你自己的python安装路径,需要对一些绝对路径进行修改。
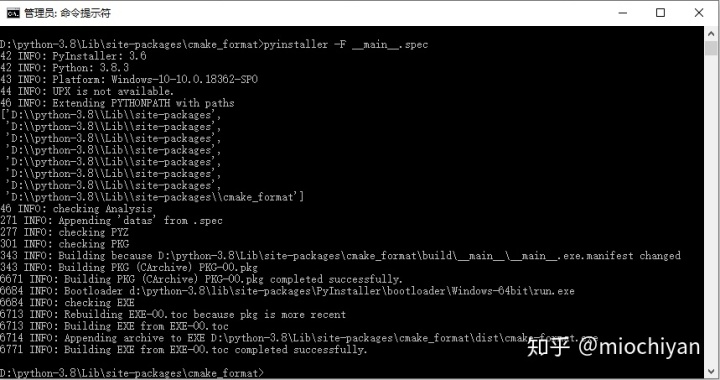
配置好之后直接打包就好了,命令行执行 pyinstaller -F _main__.spec等待打包完成就好了,这里是我的执行结果:

然后在dist目录中我们可以看到打包完成的cmake-format.exe,将这个文件拷贝到其他你需要的目录,然后将其路径填入vscode的cmake-format插件的cmakeFormat.exePath设置项中就大功告成了,最后尽情的在你的cmake项目中使用alt+shift+F吧。另外直接使用cmake-format的源码应该也是可以打包的,我这里没进行尝试,大家可以尝试一下。
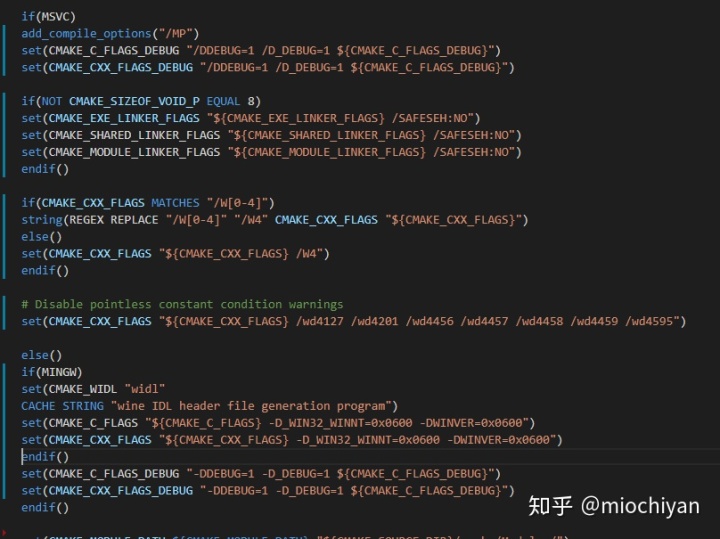
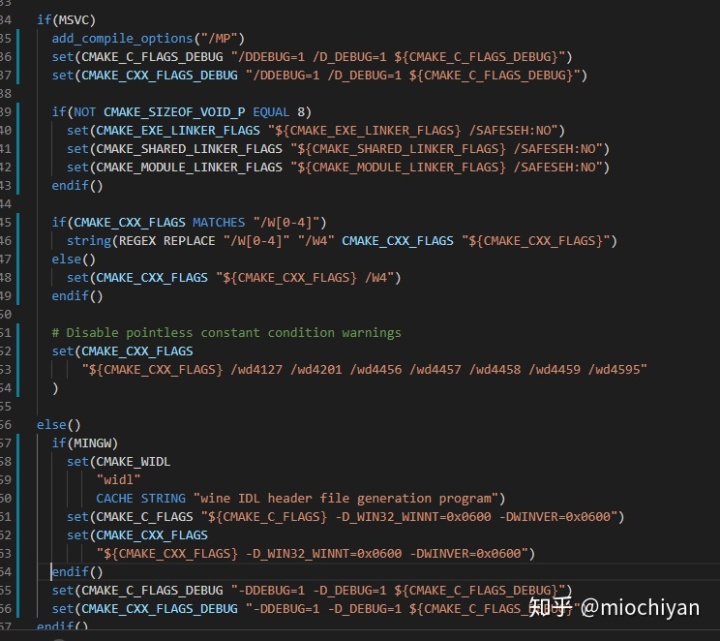
最后附上cmake-format的使用效果
before:

after:


:添加查找头文件的路径)
![[iOS] 建立与使用Framework](http://pic.xiahunao.cn/[iOS] 建立与使用Framework)


