作者:xfk
https://www.cnblogs.com/xfk1999/p/11347793.html
一直想在springboot上集成带缓存的redis,终于成功了。网上有1000种写法,想找到一篇合适的还真不容易?。走下流程,加深下印象。
环境:
springboot版本:2.1.7
orm框架:mybatis
实现?:
在serviceImpl层方法上加注解@Cacheable和@CachEvict。
@Cacheable把数据放进redis,下一次需要数据直接在缓存中取;@CacheEvict使redis中的缓存失效。
关于注解的更多详细可以参考https://www.cnblogs.com/fashflying/p/6908028.html写得很详细。
准备工作:
pom.xml?:
org.springframework.bootspring-boot-starter-parent2.1.7.RELEASEorg.springframework.bootspring-boot-starter-weborg.springframework.bootspring-boot-starter-testtestjavax.servletjavax.servlet-apijavax.servletjstlorg.apache.tomcat.embedtomcat-embed-jasperorg.springframework.bootspring-boot-devtoolstruemysqlmysql-connector-java5.1.21org.mybatis.spring.bootmybatis-spring-boot-starter1.1.1org.mybatis.generatormybatis-generator-core1.3.7com.fasterxml.jackson.datatypejackson-datatype-jsr310org.springframework.bootspring-boot-starter-data-redisapplication.properties文件?:
#mvcspring.mvc.view.prefix=/WEB-INF/jsp/spring.mvc.view.suffix=.jsp#mysqlspring.datasource.url=jdbc:mysql://localhost:3306/common?characterEncoding=utf-8spring.datasource.username=xfkspring.datasource.password=123456spring.datasource.driver-class-name=com.mysql.jdbc.Driver#mybatismybatis.mapper-locations=classpath:/mapper/*.xmlmybatis.type-aliases-package=com.xfk.sb.pojo#redisspring.redis.database=0spring.redis.host=127.0.0.1spring.redis.port=6379spring.redis.password=spring.redis.timeout=5000书写:
一,允许使用缓存:
?在springboot的主启动类上添加注解@EnableCaching
SbApplication.java
package com.xfk.sb;import org.springframework.boot.SpringApplication;import org.springframework.boot.autoconfigure.SpringBootApplication;import org.springframework.cache.annotation.EnableCaching;@SpringBootApplication@EnableCachingpublic class SbApplication {public static void main(String[] args) { SpringApplication.run(SbApplication.class, args); }}二,redis配置类:
?这里一个重要的点就是Serializer。RedisCache默认使用的是JdkSerializationRedisSerializer,我们要实现json格式的数据在redis上的存储。利用Jackson2JsonRedisSerializer或GenericJackson2JsonRedisSerializer,其优点是存储的长度小。在这里我们用GenericJackson2JsonRedisSerializerJackson2JsonRedisSerializer
?cacheManager方法是用作注解@Cacheable和@CacheEvict执行service实现层方法缓存数据的,另外就是定义一个redisTemplate,哪个controller需要就在哪个controller中注入,灵活使用。
RedisConfig.java
package com.xfk.sb.config;import org.springframework.cache.annotation.CachingConfigurerSupport;import org.springframework.cache.annotation.EnableCaching;import org.springframework.context.annotation.Bean;import org.springframework.context.annotation.Configuration;import org.springframework.data.redis.cache.RedisCacheConfiguration;import org.springframework.data.redis.cache.RedisCacheManager;import org.springframework.data.redis.connection.RedisConnectionFactory;import org.springframework.data.redis.core.RedisTemplate;import org.springframework.data.redis.serializer.*;import java.time.Duration;@Configuration@EnableCachingpublic class RedisConfig extends CachingConfigurerSupport {// 过期时间private Duration timeToLive = Duration.ofHours(12);@Beanpublic RedisCacheManager cacheManager(RedisConnectionFactory connectionFactory) { RedisCacheConfiguration config = RedisCacheConfiguration.defaultCacheConfig() .entryTtl(this.timeToLive) .serializeKeysWith(RedisSerializationContext.SerializationPair.fromSerializer(keySerializer())) .serializeValuesWith(RedisSerializationContext.SerializationPair.fromSerializer(valueSerializer())) .disableCachingNullValues();return RedisCacheManager.builder(connectionFactory) .cacheDefaults(config) .transactionAware() .build(); } @Bean(name = "redisTemplate")public RedisTemplate redisTemplate(RedisConnectionFactory redisConnectionFactory) { RedisTemplate redisTemplate = new RedisTemplate<>(); redisTemplate.setConnectionFactory(redisConnectionFactory); redisTemplate.setKeySerializer(keySerializer()); redisTemplate.setHashKeySerializer(keySerializer()); redisTemplate.setValueSerializer(valueSerializer()); redisTemplate.setHashValueSerializer(valueSerializer());return redisTemplate; }private RedisSerializer keySerializer() {return new StringRedisSerializer(); }private RedisSerializer valueSerializer() {return new GenericJackson2JsonRedisSerializer(); }}三,增删改查Demo:
简单的pojo类,Student.java
package com.xfk.sb.pojo;public class Student {private int id;private String name;private int age;public Student() { }public int getId() {return id; }public void setId(int id) {this.id = id; }public String getName() {return name; }public void setName(String name) {this.name = name; }public int getAge() {return age; }public void setAge(int age) {this.age = age; }@Overridepublic String toString() {return "Student{" +"id=" + id +", name='" + name + '\'' +", age=" + age +'}'; }}?我使用的是mybatis的注解方式,简单的几个增删改查方法。
xml文件,studentMapper.xml
<?xml version="1.0" encoding="UTF-8"?>/span> PUBLIC "-//mybatis.org//DTD Mapper 3.0//EN" "http://mybatis.org/dtd/mybatis-3-mapper.dtd"> select * from student delete from student where id = #{id} insert into student(id, name, age) values(null, #{student.name}, #{student.age}) update student set name=#{student.name}, age=#{student.age} where id = #{student.id} select * from student where id = #{id} limit 1mapper接口,StudentMapper.java
package com.xfk.sb.mapper;import com.xfk.sb.pojo.Student;import org.apache.ibatis.annotations.Mapper;import org.apache.ibatis.annotations.Param;import org.springframework.stereotype.Component;import java.util.List;@Mapper@Componentpublic interface StudentMapper {List selectStudent();int deleteStudent(@Param("id")int id);int createStudent(@Param("student")Student student);int updateStudent(@Param("student")Student student);Student selectStudentByPrimaryKey(@Param("id")int id);}service层接口,StudentService.java
package com.xfk.sb.service;import com.xfk.sb.pojo.Student;import java.util.List;public interface StudentService {List selectStudent();int deleteStudent(int id);int createStudent(Student student);int updateStudent(Student student);Student selectStudentByPrimaryKey(int id);}service实现层,StudentServiceImpl.java
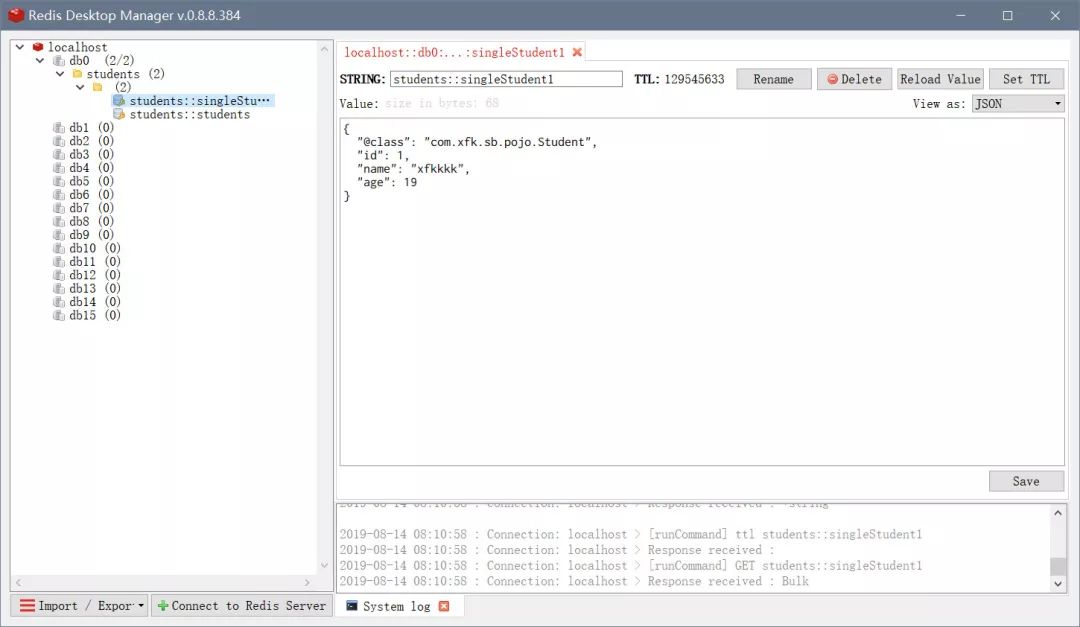
package com.xfk.sb.service.implement;import com.xfk.sb.mapper.StudentMapper;import com.xfk.sb.pojo.Student;import com.xfk.sb.service.StudentService;import org.springframework.beans.factory.annotation.Autowired;import org.springframework.cache.annotation.CacheConfig;import org.springframework.cache.annotation.CacheEvict;import org.springframework.cache.annotation.Cacheable;import org.springframework.cache.annotation.Caching;import org.springframework.stereotype.Service;import java.util.List;@Service@CacheConfig(cacheNames="students")public class StudentServiceImpl implements StudentService {private final StudentMapper studentMapper;@Autowiredpublic StudentServiceImpl(StudentMapper studentMapper) {this.studentMapper = studentMapper; }@Cacheable(key="'students'")@Overridepublic List selectStudent() { System.out.println("从数据库中取selectStudent");return studentMapper.selectStudent(); }@Override@Caching(evict={ @CacheEvict(key="'singleStudent'+#id"),@CacheEvict(key="'students'"), })public int deleteStudent(int id) { System.out.println("从数据库中删除deleteStudent");return studentMapper.deleteStudent(id); }@Override@Caching(evict={ @CacheEvict(key="'singleStudent'+#student.id"),@CacheEvict(key="'students'"), })public int createStudent(Student student) { System.out.println("从数据库中创建createStudent");return studentMapper.createStudent(student); }@Caching(evict={ @CacheEvict(key="'singleStudent'+#student.id"),@CacheEvict(key="'students'"), })@Overridepublic int updateStudent(Student student) { System.out.println("从数据库中更新updateStudent");return studentMapper.updateStudent(student); }@Cacheable(key="'singleStudent'+#p0")@Overridepublic Student selectStudentByPrimaryKey(int id) { System.out.println("从数据库中取一个selectStudentByPrimaryKey");return studentMapper.selectStudentByPrimaryKey(id); }}?使用@CacheConfig注解,相当于在redis数据库下建一个文件夹,以cacheNames作为文件夹的名字,统一管理这个实现层缓存的数据。正如在Redis Desktop Manager下看到的目录结构,db0下有一个students文件夹。

?使用@Cacheable注解使缓存生效,以实现层的selectStudentByPrimaryKey()方法为例,从数据库中根据id查询一个Student对象。
使用@Cacheable(key="'singleStudent'+#p0"),#p0就是形参parameter0,多个参数就是#p1,#p2,,,也可以写成#id,注意singleStudent字符串一定要用单引号扩上,然后使用字符串的拼接模式,这个变量的规则是spring的EL表达式,一定要用加上#符号,如果是一个对象则可以直接用"."引用属性,参考createStudent()方法中的#student.id 。
属性key相当于在students文件夹下的文件夹创建一条以singleStudent+#p0为名字的一条缓存数据,在Redis Desktop Manager可以看到,由于students文件夹下的文件夹没有名字,所以成功缓存数据的命名是students::singleStudent1,两个引号之间为空。这就相当以这个命名空间下的唯一key,可以根据唯一key准确的失效缓存数据。
?@CacheEvict注解使缓存失效,根据需求要保证数据库与缓存的一致性,所以操作数据库之后要同步缓存。
在更新,删除和增加后要使缓存失效,不能返回过时的信息。在这里使用@Caching的目的是使多条缓存失效,它集合了@Cacheable,@CacheEvict,@CachePut,可以很直观的管理生效与失效。还可以直接使用@CacheEvict(allEntries=true)使这个命名空间下的所有缓存失效。
到这里核心工作完成得差不多了,就还差controller返回视图层了。
controller层,StudentController.java
package com.xfk.sb.web;import com.xfk.sb.pojo.Student;import com.xfk.sb.service.StudentService;import org.springframework.beans.factory.annotation.Autowired;import org.springframework.data.redis.core.StringRedisTemplate;import org.springframework.stereotype.Controller;import org.springframework.ui.Model;import org.springframework.web.bind.annotation.*;import java.util.List;@Controllerpublic class StudentController {private final StudentService studentService;private final StringRedisTemplate redis;@Autowiredpublic StudentController(StudentService studentService, StringRedisTemplate redis) {this.studentService = studentService;this.redis = redis; }@GetMapping("/students")public String listStudent(Model model){ List students = studentService.selectStudent(); model.addAttribute("students", students);return "listStudent"; }@DeleteMapping("/students/{id}")public String deleteStudent(@PathVariable("id")int id) throws Exception{ studentService.deleteStudent(id);return "redirect:/students"; }@PutMapping("/students")public String updateStudent(Student student){ studentService.updateStudent(student);return "redirect:/students"; }@PostMapping("/students")public String createStudent(Student student){ studentService.createStudent(student);return "redirect:/students"; }@GetMapping("/students/{id}")public String editStudent(@PathVariable("id")int id, Model model){ Student s = studentService.selectStudentByPrimaryKey(id); model.addAttribute("student", s);return "editStudent"; }@RequestMapping("/test")public String test(Model model){ List students = studentService.selectStudent(); model.addAttribute("students", students);return "test"; }@RequestMapping("/getOne")public String getOne(Model model){ // 获取id为1的Student对象到test.jsp Student student = studentService.selectStudentByPrimaryKey(1); model.addAttribute("student", student);return "test"; }}?使用的restful风格,返回的jsp页面,/test和/getOne用来验证缓存是否生效。
小贴一下jsp:
listStudent.jsp
students 增加: name: idnameage编辑删除${each.id}${each.name}${each.age}修改删除editStudent.jsp
editStudent name: age :返回主页test.jsp
test${each.id}, ${each.name}, ${each.age}得到一个Student${student.id}, ${student.name}, ${student.age}四,验证测试:
?步骤:
1,/getOne
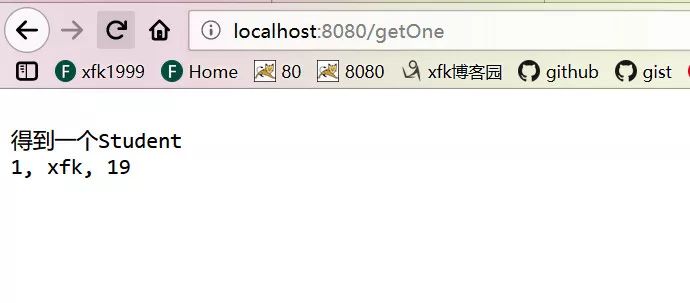
由于StudentServiceImpl.java中的System.out.println("从数据库中取一个selectStudentByPrimaryKey"); 查看后台控制台,可以知道这条数据是从数据库中获取的。
/getOne获取的Student的id为1,所以会在Redis Desktop Manager中看到一条singleStudent1的缓存记录。
http://localhost:8080/getOne

2,更改Redis Desktop Manager中的记录
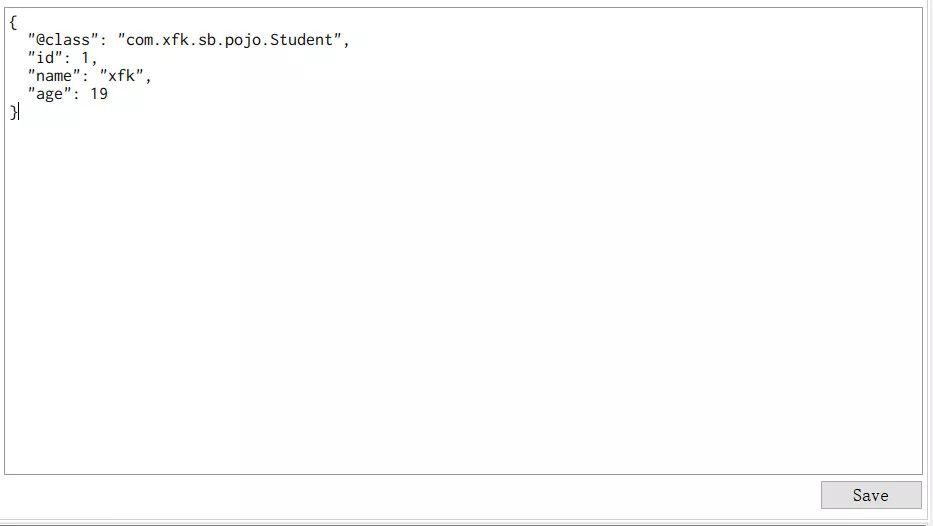
?比如redis库中原来的数据是

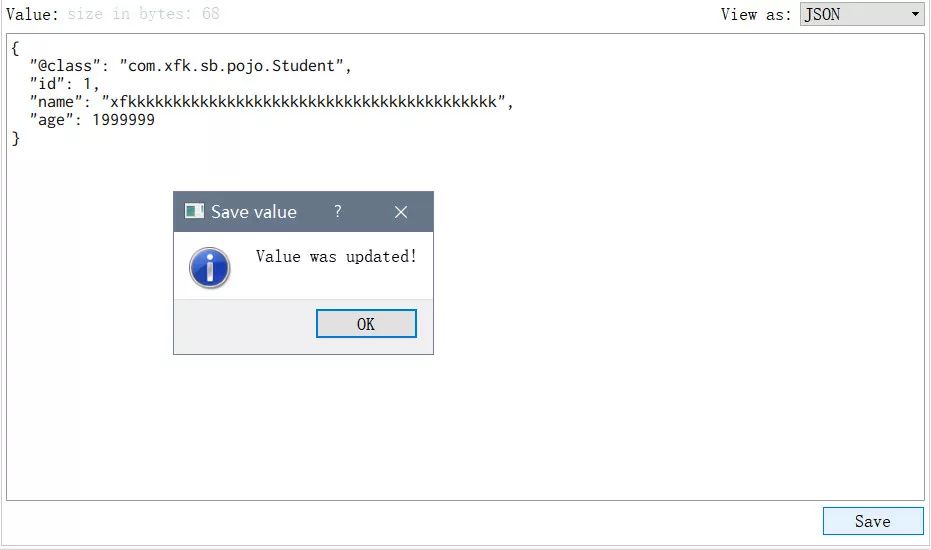
?更改数据,因为这里改的数据是redis的,mysql里的数据还是没变,这样就知道了是从缓存中读取的数据

?点击save之后,刷新http://localhost:8080/getOne

成功!????? 然后@CacheEvict是一样的逻辑,指定失效的key就好了
在看不好意思,那就点个赞吧


![[模板]LIS(最长上升子序列)](http://pic.xiahunao.cn/[模板]LIS(最长上升子序列))


在Eclipse中用TODO标签管理任务(Task))


