2019独角兽企业重金招聘Python工程师标准>>> 
本文转载至:今日头条技术博客 
众所周知,React的单向数据流模式导致状态只能一级一级的由父组件传递到子组件,在大中型应用中较为繁琐不好管理,通常我们需要使用Redux来帮助我们进行管理,然而随着React 16.3的发布,新context api成为了新的选择。
一、Redux的简介以及缺陷
Redux来源于Flux并借鉴了Elm的思想,主要原理如下图所示: 
可以看到,Redux的数据流其实非常简单,外部事件通过actionCreator函数调用dipsatch发布action到reducers中,然后各自的reducer根据action的类型(action.type) 来按需更新整个应用的state。
redux设计有以下几个要点:
1.state是单例模式且不可变的,单例模式避免了不同store之间的数据交换的复杂性,而不可变数据提供了十分快捷的撤销重做、“时光旅行”等功能。
2.state只能通过reducer来更新,不可以直接修改
3.reducer必须是纯函数,形如(state,action) => newState
redux本身是个非常纯粹的状态管理库,需要通过react-redux这个库的帮助来管理react的状态。react-redux主要包含两个部分。
1.Provider组件:可以将store注入到子组件的cotext中,所以一般放在应用的最顶层。
2.connect函数: 返回一个高阶函数,把context中由Provider注入的store取出来然后通过props传递到子组件中,这样子组件就能顺利获取到store了。
虽然redux在React项目中得到了普遍的认可与使用率,然而在现实项目中redux还是存在着很多缺点:
1.样板代码过多:增加一个action往往需要同时定义相应的actionType然后再写N个相关的reducer。例如当添加一个异步加载事件时,需要同时定义加载中、加载失败以及加载完成三个actionType,需要一个相对应的reducer通过switch分支来处理对应的actionType,冗余代码过多。
2.更新效率问题:由于使用不可变数据模式,每次更新state都需要拷贝一份完整的state造成了内存的浪费以及性能的损耗。
3.数据传递效率问题:由于react-redux采用的旧版context API,context的传递存在着效率问题。
其中,第一个问题目前已经存在着非常多的解决方案,诸如dva、rematch以及mirror等等,笔者也造过一个类似的轮子restated这里不做过多阐述。
第二个问题首先redux以及react-redux中已经做了非常详尽的优化了,其次擅用shouldComponentUpdate方法也可以避免很多不必要的更新,最后,也可以使用一些不可变数据结构如immutable、Immr等来从根本上解决拷贝开销问题。
第三个问题属于React自身API的局限,从第三方库的角度上来说,能做的很有限。
二、Context API
context API主要用来解决跨组件传参泛滥的问题(prop drilling),旧的context API的语法形式如下:
 // 传递者,生成数据并放入context中class DeliverComponent extends Component {  getChildContext() {    return { color: "purple" };render() {    return <MidComponent /> }
}
DeliverComponent.childContextTypes = {  color: PropTypes.string
};// 中间与context无关的组件
const MidComponent = (props) => <ReceiverComponent />;// 接收者,需要用到context中的数据const ReceiverComponent = (props, context) =>  <div style={{ color: context.color }}> Hello, this is receiver.
</div>;
ReceiverComponent.contextTypes = {  color: PropTypes.string
};ReactDOM.render(  <DeliverComponent><MidComponent><ReceiverComponent /></MidComponent></DeliverComponent>, document.getElementById('root'));
可以看到,使用context api可以把DeliverComponent中的参数color直接跨越MidComponent传递到ReceiverComponent中,不需要冗余的使用props参数传递,特别是ReceiverComponent层级特别深的时候,使用context api能够很大程度上节省重复代码避免bug。
旧Context API的缺陷
旧的context api主要存在如下的缺陷:
1.代码冗余:提供context的组件要定义childContextTypes与getChildContext才能把context传下去。同时接收context的也要先定义contextTypes才能正确拿到数据。
2.传递效率:虽然功能上context可以跨层级传递,但是本质上context也是同props一样一层一层的往下传递的,当层级过深的时候还是会出现效率问题。
3.shouldComponentUpdate:由于context的传递也是一层一层传递,因此它也会受到shouldComponent的阻断。换句话说,当传递组件的context变化时,如果其下面某一个中间组件的shouldComponentUpdate方法返回false,那么之后的接收组件将不会受到任何context变化。
为了解决旧版本的shouldComponentUpdate问题,保证所有的组件都能收到store的变化,react-redux只能传递一个getState方法给各个组件用于获取最新的state(直接传递state可能会被阻断,后面的组件将接收不到state的变化),然后每个connect组件都需要直接或间接监听state的变化,当state发生改变时,通过内部notifyNestedSubs方法从上往下依次触发各个子组件通过getState方法获取最新的state更新视图。这种方式效率较低而且比较hack。
三、新Context API
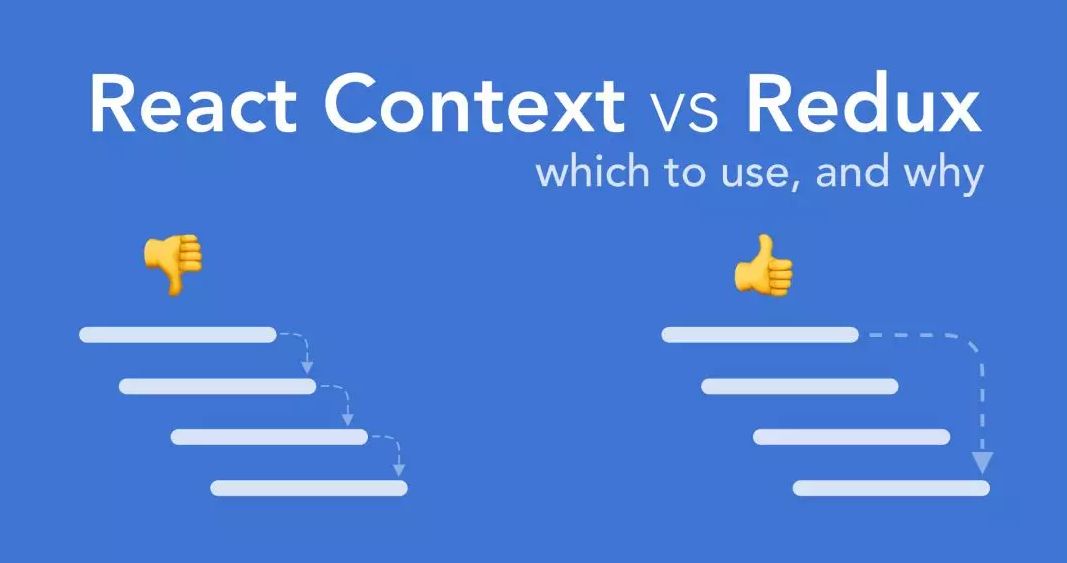
React自16.3开始提供了一个新的context api,彻底解决了旧Context API存在的种种问题。 下面是新context api(右)与使用旧context api的react-redux(左)数据流的比较: 
可以看到,新的context api可以直接将context数据传递到传递到子组件中而不需要像旧context api那样级联传递。因此也可以突破shouldComponentUpdate的限制。新版的context api的定义如下:
type Context<T> = {  Provider: Provider<T>,Consumer: Consumer<T>,
};interface React {  createContext<T>(defaultValue: T): Context<T>;
}
type Provider<T> = React.Component<{  value: T,  children?: React.Node,
}>;type Consumer<T> = React.Component<{  children: (value: T) => React.Node,
}>;
下面是一个比较简单的应用示例:
import React, { Component, createContext } from 'react';const DEFAULT_STATE = {color: 'red'};  const { Provider, Consumer } = createContext(DEFAULT_STATE);// 传递者,生成数据并放入context中class DeliverComponent extends Component {  state = { color: "purple" };render() {    return (      <Provider value={this.state}><MidComponent /></Provider>)}
}// 中间与context无关的组件const MidComponent = (props) => <ReceiverComponent />;// 接收者,需要用到context中的数据
const ReceiverComponent = (props) => (  <Consumer>{context => (<div style={{ color: context.color }}> Hello, this is receiver. </div>)}</Consumer>
);ReactDOM.render(  <DeliverComponent><MidComponent><ReceiverComponent /></MidComponent></DeliverComponent>, document.getElementById('root'));
可以看到新的context api主要包含一个Provider和Consumer对,在Provider输入的数据可以在Consumer中获得。 新context api的要点如下:
1.Provider和 Consumer必须来自同一次 React.createContext调用。也就是说 NameContext.Provider和 AgeContext.Consumer是无法搭配使用的。
2.React.createContext方法接收一个默认值作为参数。当 Consumer外层没有对应的 Provider时就会使用该默认值。
3.Provider 组件的 valueprop 值发生变更时,其内部组件树中对应的 Consumer组件会接收到新值并重新执行 children函数。此过程不受 shouldComponentUpdete 方法的影响。
4.Provider组件利用 Object.is 检测 value prop 的值是否有更新。注意 Object.is和 === 的行为不完全相同。
5.Consumer组件接收一个函数作为 children prop 并利用该函数的返回值生成组件树的模式被称为 Render Props 模式。
四、新Context API的应用
新的Context API大大简化了react状态传递的问题,也出现了一些基于它的状态管理库,诸如:unstated、react-waterfall等等。下面我们主要尝试使用新context api来造一个react-redux的轮子。 1.Provider
由于新的context api传递过程中不会被shouldComponentUpdate阻断,所以我们只需要在Provider里面监听store变化即可:
import React, { PureComponent, Children } from 'react';  import { IContext, IStore } from '../helpers/types';  import { Provider } from '../context';interface IProviderProps {  store: IStore;
}export default class EnhancedProvider extends PureComponent<IProviderProps, IContext> {  constructor(props: IProviderProps) {   super(props);    const { store } = props;    if (store == null) {      throw new Error(`Store should not omit in <Provider/>`);}   this.state = {      // 得到当前的statestate: store.getState(),dispatch: store.dispatch,}store.subscribe(() => {      // 单纯的store.getState函数是不变的,需要得到其结果state才能触发组件更新。this.setState({ state: store.getState() });})}render() {    return <Provider value={this.state}>    {Children.only(this.props.children)}</Provider>;}
};
2 connect
相比较于react-redux,connect中的高阶组件逻辑就简单的多,不需要监听store变化,直接获得Provider传入的state然后再传递给子组件即可:
import React, { Component, PureComponent } from 'react'; import { IState, Dispatch, IContext } from './helpers/types'; import { isFunction } from './helpers/common'; import { Consumer } from './context';export default (mapStateToProps: (state: IState) => any, mapDispatchToProps: (dispatch: Dispatch) => any) => (WrappedComponent: React.ComponentClass) => class ConnectedComponent extends Component<any>{render() { return <Consumer>{(context: IContext) => {const { dispatch, state } = context;const filterProps = {};if (isFunction(mapStateToProps)) {Object.assign(filterProps, mapStateToProps(state));}if (isFunction(mapDispatchToProps)) {Object.assign(filterProps, mapDispatchToProps(dispatch));}return <WrappedComponent{...this.props}{...filterProps}/>}}</Consumer>}};
好了,至此整个React-redux的接口和功能都已经基本cover了,下面继续介绍一些比较重要的性能优化。
3.性能优化 - 减少重复渲染
性能优化最大的一部分就是要减少无意义的重复渲染,当WrappedComponent的参数值没有变化时我们应该阻止其重新渲染。可以通过手写shouldComponentUpdate方法实现,也可以直接通过PureComponent组件来达到我们的目标:
render() {  return <Consumer>{(context: IContext) => {      const { dispatch, state } = context;      const filterProps = {};     if (isFunction(mapStateToProps)) {Object.assign(filterProps, mapStateToProps(state));}      if (isFunction(mapDispatchToProps)) {   // mapDispatchToProps 返回值始终不变,可以memorythis.dpMemory = this.dpMemory  || mapDispatchToProps(dispatch);Object.assign(filterProps, this.dpMemory);}return <PreventcombinedProps={{ ...this.props, ...filterProps }}WrappedComponent={WrappedComponent} />}}</Consumer>
}// PureComponent内部自动实现了前后参数的浅比较class Prevent extends PureComponent<any> {  render() {    const { combinedProps, WrappedComponent } = this.props;    return <WrappedComponent {...combinedProps} />;}
}
这里需要注意的是,本示例的mapDispatchToProps未支持ownProps参数,因此可以把它的返回值看成是不变的,否则每次调用它返回的action函数都是新创建的,从而导致Prevent接收到的参数始终是不同的,达不到预期效果。更为复杂的情况请参考react-redux源码中selector相关的部分。
4.性能优化 - 减少层级嵌套
性能优化另一个要点就是减少组件的层级嵌套,新context api在获取context值的时候需要嵌套一层Consumer组件,这也是其比旧context api劣势的地方。除此之外,我们应该尽量减少层级的嵌套。因此在前一个性能优化中我们不应该再次嵌套一个PureComponent,取而代之的是,我们可以直接在Cunsumer中实现一个memory机制,实现代码如下:
private shallowEqual(prev: any, next: any) {  const nextKeys = Object.keys(next);    const prevKeys = Object.keys(prev);    if (nextKeys.length !== prevKeys.length) return false;        for (const key of nextKeys) {        if (next[key] !== prev[key]) { return false;}}    return true;
}
render() {  return <Consumer>{(context: IContext) => {      const { dispatch, state } = context;     const filterProps = {};  if (isFunction(mapStateToProps)) {Object.assign(filterProps, mapStateToProps(state));}     if (isFunction(mapDispatchToProps)) {        // mapDispatchToProps 返回值始终不变this.dpMemory = this.dpMemory || mapDispatchToProps(dispatch);Object.assign(filterProps, this.dpMemory);}      const combinedProps = { ...this.props, ...filterProps };      if (this.prevProps && this.shallowEqual(this.prevProps, combinedProps)) {        // 如果props一致,那么直接返回缓存之前的结果return this.prevComponent;} else {        this.prevProps = combinedProps;  // 对当前的子节点进行缓存this.prevComponent = <WrappedComponent {...combinedProps} />;        return this.prevComponent;}}}</Consumer>
}
下面是前后chrome开发人员工具中组件层级的对比,可以看到嵌套层级成功减少了一层,两层嵌套是新context api的局限,如果要保持react-redux的接口模式则无法再精简了。
公众号ID:Miaovclass
关注妙味订阅号:“妙味前端”,为您带来优质前端技术干货;


)
![【洛谷算法题】P1046-[NOIP2005 普及组] 陶陶摘苹果【入门2分支结构】Java题解](http://pic.xiahunao.cn/【洛谷算法题】P1046-[NOIP2005 普及组] 陶陶摘苹果【入门2分支结构】Java题解)
)


