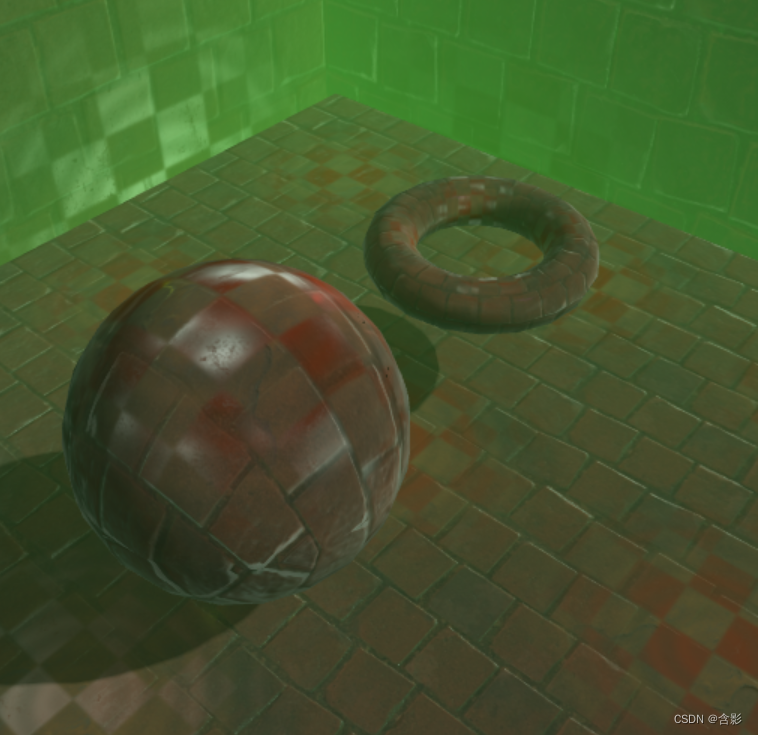
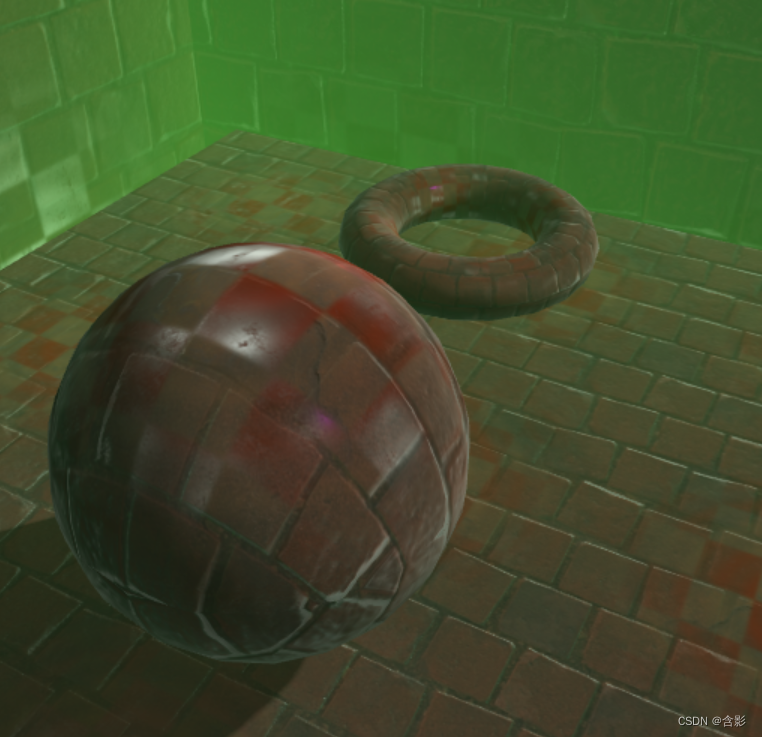
当前示例源码github地址:
https://github.com/vilyLei/voxwebgpu/blob/feature/material/src/voxgpu/sample/MultiLightsShading.ts
当前示例运行效果:


此示例基于此渲染系统实现,当前示例TypeScript源码如下:
export class MultiLightsShading {private mRscene = new RendererScene();initialize(): void {this.mRscene.initialize({canvasWith: 512,canvasHeight: 512,mtplEnabled: true,rpassparam:{multisampled: true}});this.initScene();this.initEvent();}private hdrEnvtex = new SpecularEnvBrnTexture();private createMaskTextures(ns: string, maskns = 'displacement_01.jpg'): WGTextureDataDescriptor[] {const albedoTex = { albedo: { url: `static/assets/pbr/${ns}/albedo.jpg` } };const normalTex = { normal: { url: `static/assets/pbr/${ns}/normal.jpg` } };const aoTex = { ao: { url: `static/assets/pbr/${ns}/ao.jpg` } };const roughnessTex = { roughness: { url: `static/assets/pbr/${ns}/roughness.jpg` } };const metallicTex = { metallic: { url: `static/assets/pbr/${ns}/metallic.jpg` } };// mask textureconst opacityTex = { opacity: { url: `static/assets/${maskns}` } };let textures = [this.hdrEnvtex,albedoTex,normalTex,aoTex,roughnessTex,metallicTex,opacityTex] as WGTextureDataDescriptor[];return textures;}private createBaseTextures(): WGTextureDataDescriptor[] {const albedoTex = { albedo: { url: `static/assets/pbrtex/rough_plaster_broken_diff_1k.jpg` } };const normalTex = { normal: { url: `static/assets/pbrtex/rough_plaster_broken_nor_1k.jpg` } };const armTex = { arm: { url: `static/assets/pbrtex/rough_plaster_broken_arm_1k.jpg` } };let textures = [this.hdrEnvtex,albedoTex,normalTex,armTex] as WGTextureDataDescriptor[];return textures;}private createLightData(): MtLightDataDescriptor {let ld = { pointLights: [], directionLights: [] } as MtLightDataDescriptor;let pLight = new PointLight({ color: [20, 0, 0], position: [0, 200, 0] });ld.pointLights.push(pLight);pLight = new PointLight({ color: [10, 10, 0], position: [-150, 200, 150] });ld.pointLights.push(pLight);let dLight = new DirectionLight({ color: [2, 0, 2], direction: [-1, -1, 0] });ld.directionLights.push(dLight);return ld;}private initScene(): void {let rc = this.mRscene;let mtpl = rc.renderer.mtpl;mtpl.light.lightData = this.createLightData();mtpl.shadow.param.direction = [1, 1, 0];mtpl.shadow.param.intensity = 0.5;mtpl.shadow.param.radius = 6;mtpl.fog.fogColor.value = [0.3, 0.7, 0.2];let position = [0, 50, 180];let materials = this.createMaterials(true);let sphere = new SphereEntity({radius: 150.0,materials,transform: { position }});rc.addEntity(sphere);position = [0, 50, -180];materials = this.createMaterials(true, true, 'back', [4, 1]);let torus = new TorusEntity({axisType: 1,materials,transform: { position }});rc.addEntity(torus);position = [0, -110, 0];materials = this.createMaterials(true, false, 'back', [3, 3]);let plane = new PlaneEntity({axisType: 1,materials,extent: [-600, -600, 1200, 1200],transform: { position }});rc.addEntity(plane);position = [0, 0, 0];materials = this.createMaterials(false, false, 'front', [2, 2]);let envBox = new CubeEntity({cubeSize: 2050.0,normalScale: -1.0,materials,transform: { position }});rc.addEntity(envBox);}private createMaterials(shadowReceived = false, shadow = true, faceCullMode = 'back', uvParam?: number[]): BaseMaterial[] {let textures0 = this.createBaseTextures();let textures1 = this.createMaskTextures("plastic");let textures2 = this.createMaskTextures("wall", 'circleWave_disp.png');let material0 = this.createMaterial(textures0, ["solid"], 'less', faceCullMode);this.applyMaterialPPt(material0, shadowReceived, shadow);let material1 = this.createMaterial(textures1, ["transparent"], 'less-equal', faceCullMode);material1.property.inverseMask = false;this.applyMaterialPPt(material1, shadowReceived, shadow);let material2 = this.createMaterial(textures2, ["transparent"], 'less-equal', faceCullMode);material2.property.inverseMask = true;this.applyMaterialPPt(material2, shadowReceived, shadow);let list = [material0, material1, material2];if (uvParam) {for (let i = 0; i < list.length; ++i) {list[i].property.uvParam.value = uvParam;}}return list;}private applyMaterialPPt(material: BaseMaterial, shadowReceived = false, shadow = true): void {let ppt = material.property;ppt.ambient.value = [0.0, 0.2, 0.2];ppt.albedo.value = [0.7, 0.7, 0.3];ppt.arms.roughness = 0.8;ppt.armsBase.value = [0, 0, 0];ppt.param.scatterIntensity = 4;ppt.shadow = shadow;ppt.lighting = true;ppt.shadowReceived = shadowReceived;ppt.exp2Fogging = true;}private createMaterial(textures: WGTextureDataDescriptor[], blendModes: string[], depthCompare = 'less', faceCullMode = 'back'): BaseMaterial {let pipelineDefParam = {depthWriteEnabled: true,faceCullMode,blendModes,depthCompare};let material = new BaseMaterial({ pipelineDefParam });material.addTextures(textures);return material;}private initEvent(): void {const rc = this.mRscene;rc.addEventListener(MouseEvent.MOUSE_DOWN, this.mouseDown);new MouseInteraction().initialize(rc, 0, false).setAutoRunning(true);}private mouseDown = (evt: MouseEvent): void => { };run(): void {this.mRscene.run();}
}

|347.前 K 个高频元素 (一刷至少需要理解思路))


含训练代码)


)

搭建项目)