一、SSH远程管理
1.SSH的简介
SSH远程管理是一种通过 SSH 协议安全地管理远程计算机的方法。允许管理员通过加密的连接从本地计算机或其他远程位置连接到远程计算机,并执行管理任务、配置设置、故障排除等操作。
远程链接的两种方法:SSH 、Telnet
SSH和Telnet的区别
ssh 密文 22
telnet 明文 23
检查是否开启开机自启👇
systemctl is-enabled ssh
#如果服务已设置为开机自启动,会输出enabled;如果没有设置为开机自启动,会输出disabled
2.Openssh

- 服务名称:sshd
- 服务端主程序:/usr/sbin/sshd
- 服务端配置文件:/etc/ssh/sshd_config
- 客户端配置文件:/etc/ssh/ssh_config
二、SSH客户端应用的使用
ssh 远程登录
ssh [-p 端口] 用户名@目标主机IP
ssh [-p 端口] 用户名@目标主机IP  命令
ssh用户名@目标主机ip
[root@localhost ssh]# ssh root@192.168.80.101
The authenticity of host '192.168.80.101 (192.168.80.101)' can't be established.
ECDSA key fingerprint is SHA256:iezFA+FtBjT2mCewIjyJw3DamCnoqZPfWkuBbyLVM2Y.
ECDSA key fingerprint is MD5:e9:cc:01:db:d5:1f:7c:63:47:29:b4:53:a3:0b:1d:e3.
Are you sure you want to continue connecting (yes/no)? yes
Warning: Permanently added '192.168.80.101' (ECDSA) to the list of known hosts.
root@192.168.80.101's password:
Last login: Mon Apr 29 00:12:12 2024
[root@localhost ~]# packet_write_wait: Connection to 192.168.80.101 port 22: Broken pipe
[root@localhost ssh]#
ssh -p 指定端口 用户名@目标主机IP地址
[root@localhost ssh]# ssh -p 2345 root@192.168.80.101
root@192.168.80.101's password:
Last login: Mon Apr 29 00:29:32 2024 from 192.168.80.1
[root@localhost ~]# ifconfig
ens33: flags=4163<UP,BROADCAST,RUNNING,MULTICAST>  mtu 1500inet 192.168.80.101  netmask 255.255.255.0  broadcast 192.168.80.255inet6 fe80::bf02:a62d:1392:4bda  prefixlen 64  scopeid 0x20<link>ether 00:0c:29:a2:14:2b  txqueuelen 1000  (Ethernet)RX packets 334  bytes 35066 (34.2 KiB)RX errors 0  dropped 0  overruns 0  frame 0TX packets 415  bytes 53541 (52.2 KiB)TX errors 0  dropped 0 overruns 0  carrier 0  collisions 0lo: flags=73<UP,LOOPBACK,RUNNING>  mtu 65536inet 127.0.0.1  netmask 255.0.0.0inet6 ::1  prefixlen 128  scopeid 0x10<host>loop  txqueuelen 1000  (Local Loopback)RX packets 728  bytes 63144 (61.6 KiB)RX errors 0  dropped 0  overruns 0  frame 0TX packets 728  bytes 63144 (61.6 KiB)TX errors 0  dropped 0 overruns 0  carrier 0  collisions 0virbr0: flags=4099<UP,BROADCAST,MULTICAST>  mtu 1500inet 192.168.122.1  netmask 255.255.255.0  broadcast 192.168.122.255ether 52:54:00:e0:76:be  txqueuelen 1000  (Ethernet)RX packets 0  bytes 0 (0.0 B)RX errors 0  dropped 0  overruns 0  frame 0TX packets 0  bytes 0 (0.0 B)TX errors 0  dropped 0 overruns 0  carrier 0  collisions 0
scp-远程复制
将目标主机的文件/目录复制到本机
scp [-P 端口] (-r 复制目录情况下)用户@目标主机ip:目标路径文件 指定存放路径
做个实验
在本机的/opt的目录中新建一个baba.txt的文件,并在其输入ababa,然后通过scp远程复制给IP192.168.101主机的root用户的/opt目录中
[root@localhost ssh]# cd /opt/
[root@localhost opt]# ls
rh
[root@localhost opt]# echo ababa > baba.txt
[root@localhost opt]# ls
aaaa.txt  baba.txt  rh
[root@localhost ~]# scp -P 2345 root@192.168.80.101:/opt/baba.txt /opt
root@192.168.80.101's password:
baba.txt
sftp-文件传输
sftp -P 端口 用户名@目标主机IP
>get put cd ls做个实验使用
get baba.txt命令从远程主机下载了baba.txt文件到本地主机的当前工作目录中,并且文件成功下载。
[root@localhost opt]# sftp -P 2345 root@192.168.80.101
root@192.168.80.101's password:
Connected to 192.168.80.101.
sftp> ls
anaconda-ks.cfg        initial-setup-ks.cfg   下载                 公共                 图片                 文档                 桌面                 模板                 视频
音乐
sftp> cd /opt
sftp> ls
baba.txt
sftp> get baba.txt
Fetching /opt/baba.txt to baba.txt
/opt/baba.txt
三、SSH的验证方式
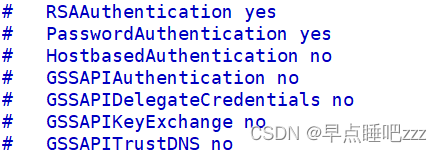
1.密码验证:使用账号和密码进行验证
PasswordAuthentication yes
使用(vim /etc/ssh/ssh_config )
密钥对验证
密钥对验证:使用客户端创建的密钥对进行验证
PubkeyAuthentication yes
AuthorizedKeysFile .ssh/authorized_keys #服务端的公钥文件默认保存路径
vim /etc/ssh/sshd_config
PasswordAuthentication yes                      #开启密码验证
PubkeyAuthentication yes                        #开启使用密钥对验证
AuthorizedKeysFile .ssh/authorized_keys         #指定公钥库文件
[root@localhost ssh]# ssh-keygen -t rsa -P '' -f ~/.ssh/id_rsa#生成了一个 RSA 密钥对,私钥文件名为 'id_rsa',公钥文件名为 'id_rsa.pub'Generating public/private rsa key pair. Created directory '/root/.ssh'. Your identification has been saved in /root/.ssh/id_rsa. Your public key has been saved in /root/.ssh/id_rsa.pub. The key fingerprint is: SHA256:KYEozYZHuHnbWxn/U8Nh/ZA6JwVj6z4ncRaAagawY84 root@localhost.localdomain The key's randomart image is: +---[RSA 2048]----+ | .. .. . | |.= . o. . = | |oo* = .. . . * . | |o+.+ ...+. + * | | . oE .*S + + + | | . . o.. X + .| | o . o O | | . o + . | | . + | +----[SHA256]-----+
上传公钥至服务端
ssh-copy-id [-i 公钥文件] 用户名@目标主机IP #公钥信息会自动保存到服务端的 ~/.ssh/authorized_keys 文件里
[root@localhost ssh]# ssh-copy-id -i id_rsa.pub root@192.168.80.100/usr/bin/ssh-copy-id: INFO: Source of key(s) to be installed: "id_rsa.pub"
The authenticity of host '192.168.80.100 (192.168.80.100)' can't be established.
ECDSA key fingerprint is SHA256:I6OYY2CvnKXi1ka6D5JqIGc1SlgZkiplUnLT7TUYZk4.
ECDSA key fingerprint is MD5:93:27:ec:d1:d0:6f:eb:2c:7e:6a:2a:db:e4:d6:f2:b4.
Are you sure you want to continue connecting (yes/no)? yes
/usr/bin/ssh-copy-id: INFO: attempting to log in with the new key(s), to filter out any that are already installed
/usr/bin/ssh-copy-id: INFO: 1 key(s) remain to be installed -- if you are prompted now it is to install the new keys
root@192.168.80.100's password: Number of key(s) added: 1Now try logging into the machine, with:   "ssh 'root@192.168.80.100'"
and check to make sure that only the key(s) you wanted were added.[root@localhost ssh]#[root@localhost ssh]# ls -A
anaconda-ks.cfg  .bashrc  .dbus                 .local    .Xauthority  图片  桌面
.bash_history    .cache   .esd_auth             .ssh      公共         文档
.bash_logout     .config  .ICEauthority         .tcshrc   模板         下载
.bash_profile    .cshrc   initial-setup-ks.cfg  .viminfo  视频         音乐
[root@localhost ssh]# cd .ssh/
[root@localhost ssh]# ls
authorized_keys
[root@localhost ssh]# cat authorized_keys
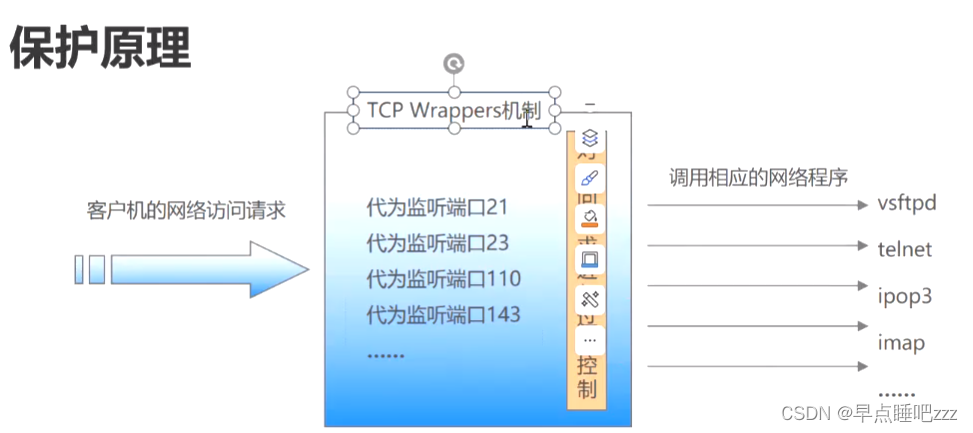
四、TCP Wrappers访问控制
TCP Wrappers简介
TCP Wrappers 是一种基于主机的访问控制方法,它通过在 TCP 服务程序和客户端之间插入一个安全层,来增加对网络服务的访问控制和安全性。TCP Wrappers 的工作方式是在服务程序启动之前对连接请求进行检查,以确定是否允许连接到服务。

如何判断是否支持 TCP Wrappers:执行命令 ldd $(which c程序名称) | grep libwrap
$()作用:提取括号内命令的结果
TCP Wrappers 机制的访问原则
1.首先检查/etc/hosts.allow文件,如果找到相匹配的策略,则允许访问;
否则继续检查/etc/hosts.deny文件,如果找到相匹配的策略,则拒绝访问;
如果检查上述两个文件都找不到相匹配的策略,则允许访问。
[root@localhost ~]# ldd $(which sshd) | grep libwraplibwrap.so.0 => /lib64/libwrap.so.0 (0x00007f9cbe054000)
[root@localhost ~]#


多态)


)


)


Scikit-learn机器学习(一))

