1.创建项目
1.1 引入依赖
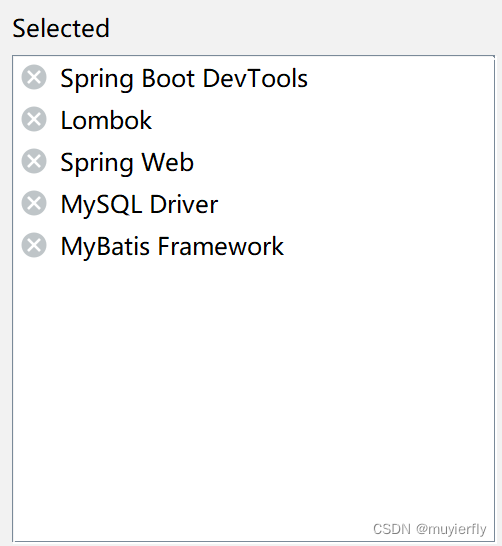
1.2 yml相关配置
application.yml
spring:profiles:active: prod
mybatis:mapper-locations: classpath:mapper/**Mapper.xmlconfiguration:map-underscore-to-camel-case: true #配置驼峰⾃动转换log-impl: org.apache.ibatis.logging.stdout.StdOutImpl #打印sql语句
# 设置⽇志⽂件的⽂件名
logging:file:name: spring-book.log
application-dev.yml
spring:datasource:url: jdbc:mysql://127.0.0.1:3306/数据库名称?characterEncoding=utf8&useusername: rootpassword: 买的服务器的数据库密码driver-class-name: com.mysql.cj.jdbc.Driverapplication-prod.yml
spring:datasource:url: jdbc:mysql://127.0.0.1:3306/数据库名称?characterEncoding=utf8&useusername: rootpassword: 本机数据库密码driver-class-name: com.mysql.cj.jdbc.Driver先看项目是否创建成功!!!
启动项目
http://127.0.0.1:8080/login.html
 项目创建成功
2.项目前端页面展示
2.1 login.html登陆界面

2.2 音乐播放列表收藏界面list.html

2.3 上传界面upload.html

1.4 喜欢的音乐列表界面love Music.html

3.数据准备
3.1 数据库准备
根据前端界面,我们需要准备三张表
两张实体表,一张关系表
创建数据库
-- 数据库
drop database if exists `musicvideoserver`;
create database if not exists `musicvideoserver` character set utf8;
-- 使用数据库
use `musicvideoserver`;
创建表user
DROP TABLE IF EXISTS `user`;
CREATE TABLE `user` (
`user_id` INT PRIMARY KEY AUTO_INCREMENT,
`username` varchar(20) NOT NULL,
`password` varchar(255) NOT NULL
);
INSERT INTO user(username,password)
VALUES("bit","123456");
创建表music
DROP TABLE IF EXISTS `music`;
CREATE TABLE `music` (
`music_id` int PRIMARY KEY AUTO_INCREMENT,
`title` varchar(50) NOT NULL,
`singer` varchar(30) NOT NULL,
`time` DATETIME DEFAULT now(),
`url` varchar(1000) NOT NULL,
`user_id` int(11) NOT NULL
);
url为歌曲存放路径
创建中间表(关系表)lovemusic
DROP TABLE IF EXISTS `lovemusic`;
CREATE TABLE `lovemusic` (
`id` int PRIMARY KEY AUTO_INCREMENT,
`user_id` int(11) NOT NULL,
`music_id` int(11) NOT NULL
);
完成

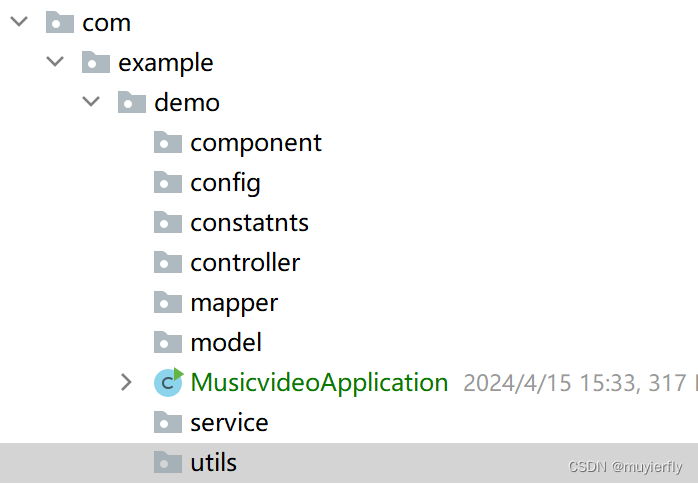
3.2 建包
4.实体类(Model包)
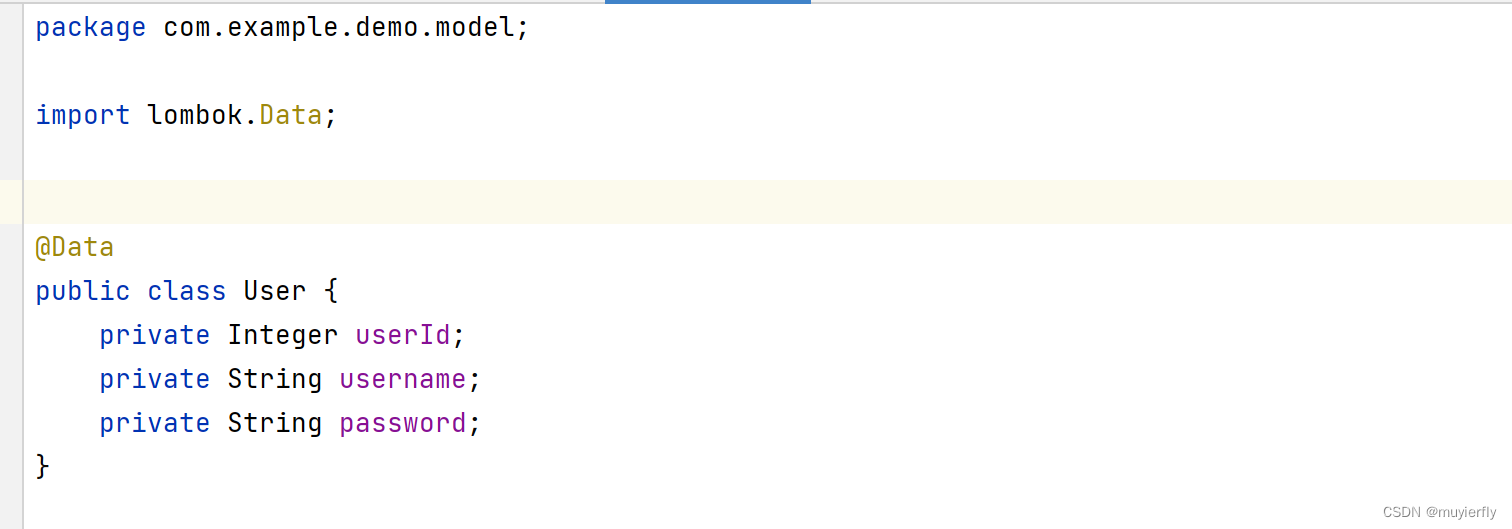
需要与数据库的字节一一对应
user类
music类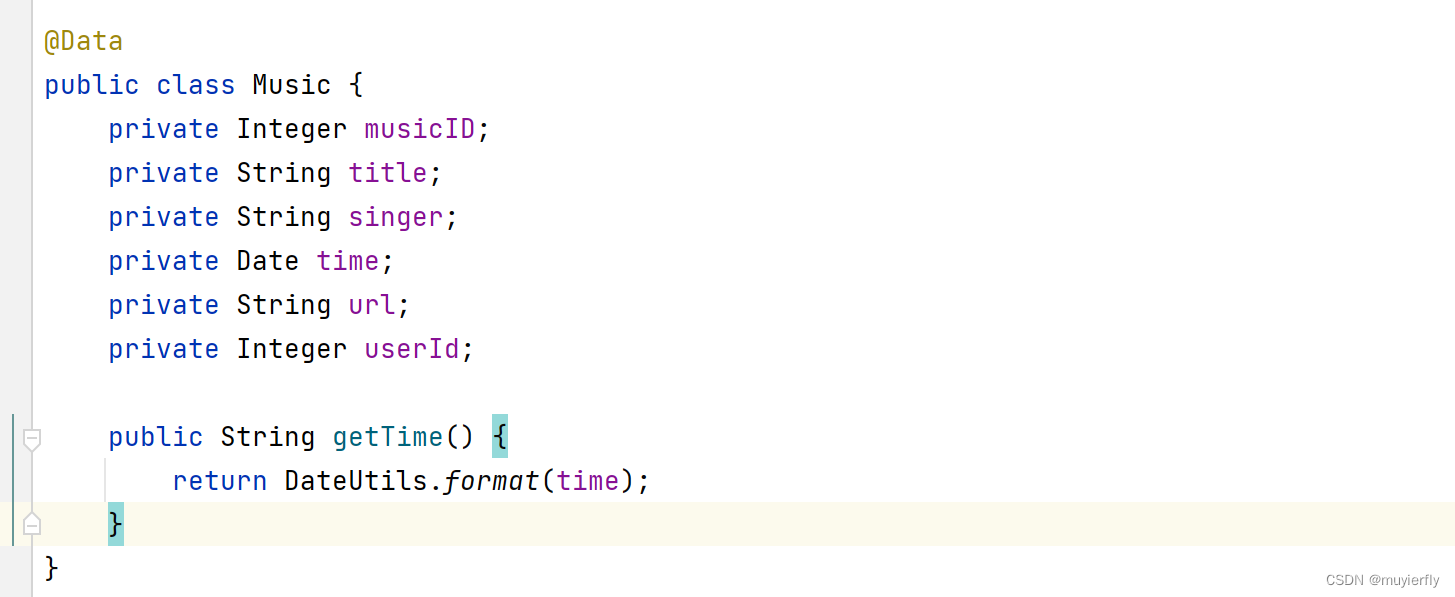
Util,Util通常来说是我们找不到合适的名字的时候的选择,Util就是工具,在做项目的时候我们总会遇到一些奇奇怪怪的小功能或者重复的代码需要提取。像是URL编码或者解码(当然这个类库通常会提供,不过就以 .NET Framework 为例,提供这个方法的类型名称叫做HttpUtility),或是自创的加密签名算法等等。
lovemusic类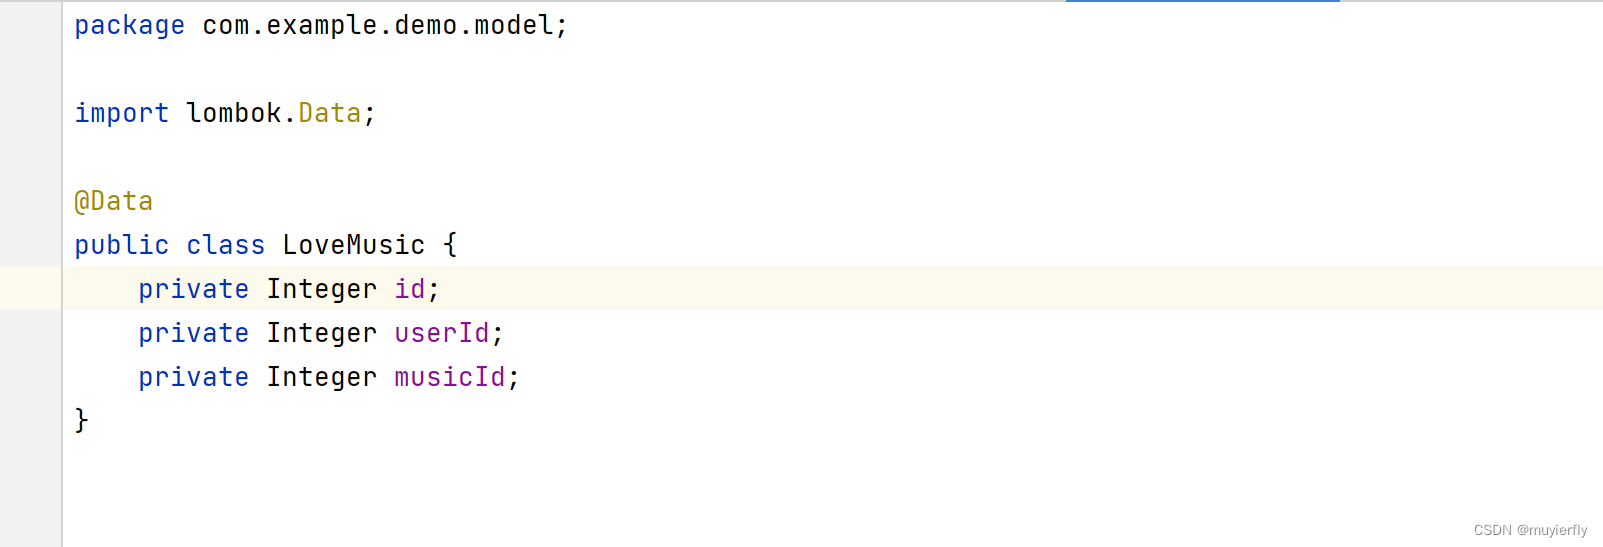
5.Result类统一返回

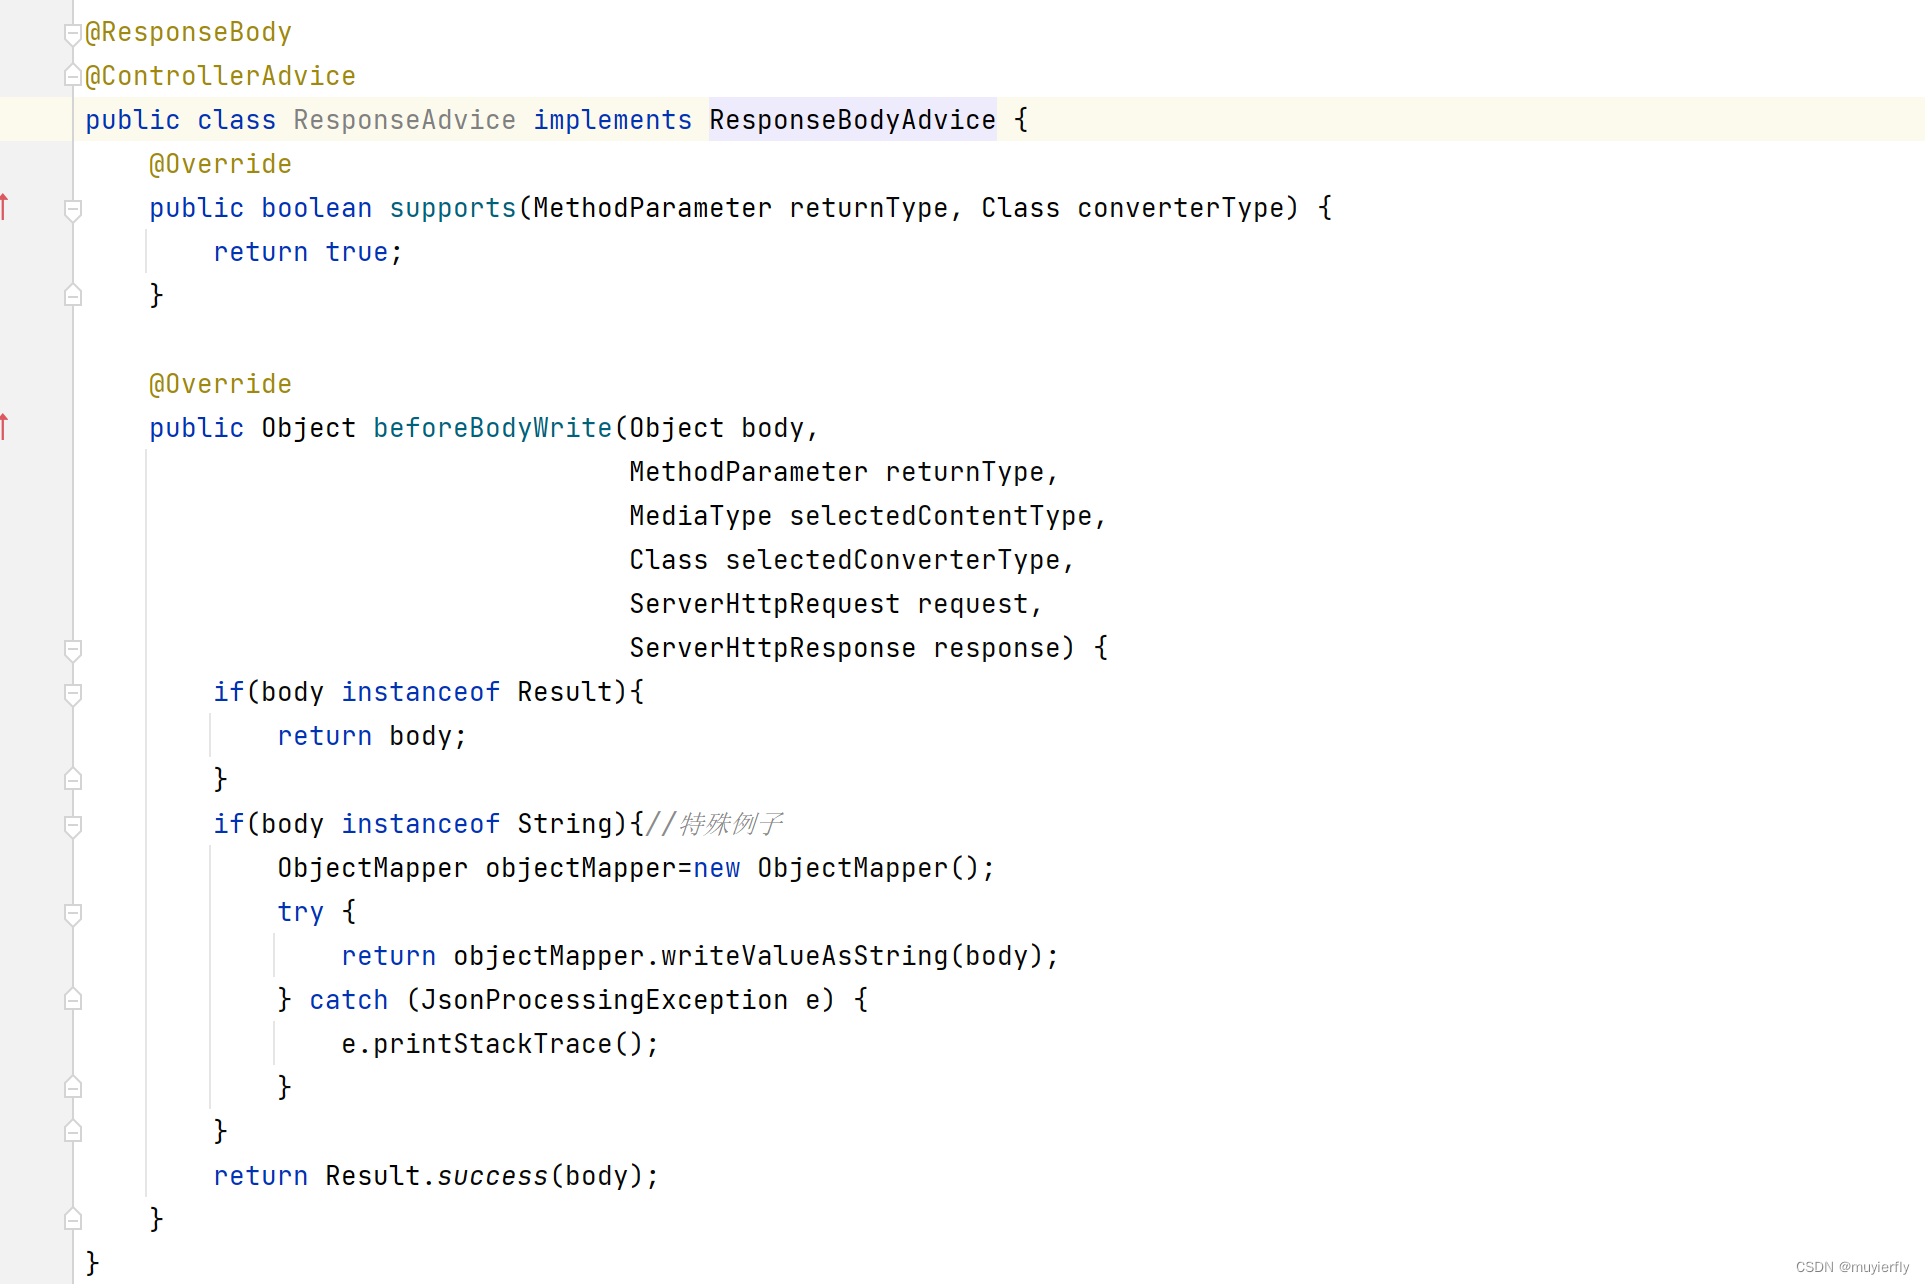
5.2 返回成功
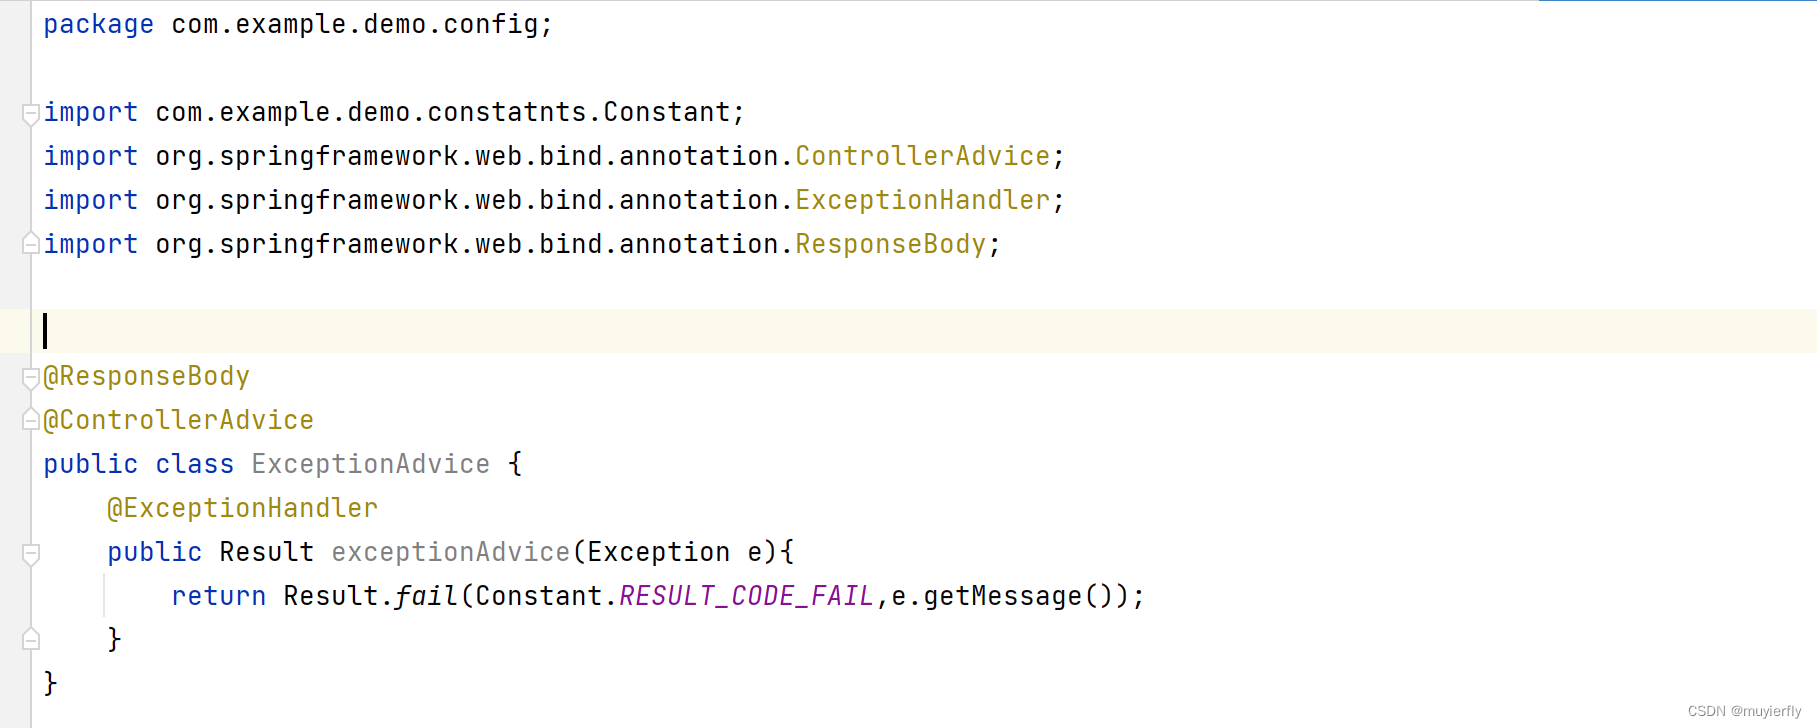
5.3 异常返回
6.登录界面的实现
6.0 接口定义
请求:
{
post,
/user/login
data:{username,password}
}
响应:
{
"status": 0,
"message": "登录成功",
"data": {
"id": xxxxx,
"username": xxxxxx,
"password": xxxxxxxx
}
}
6.1 Mapper层

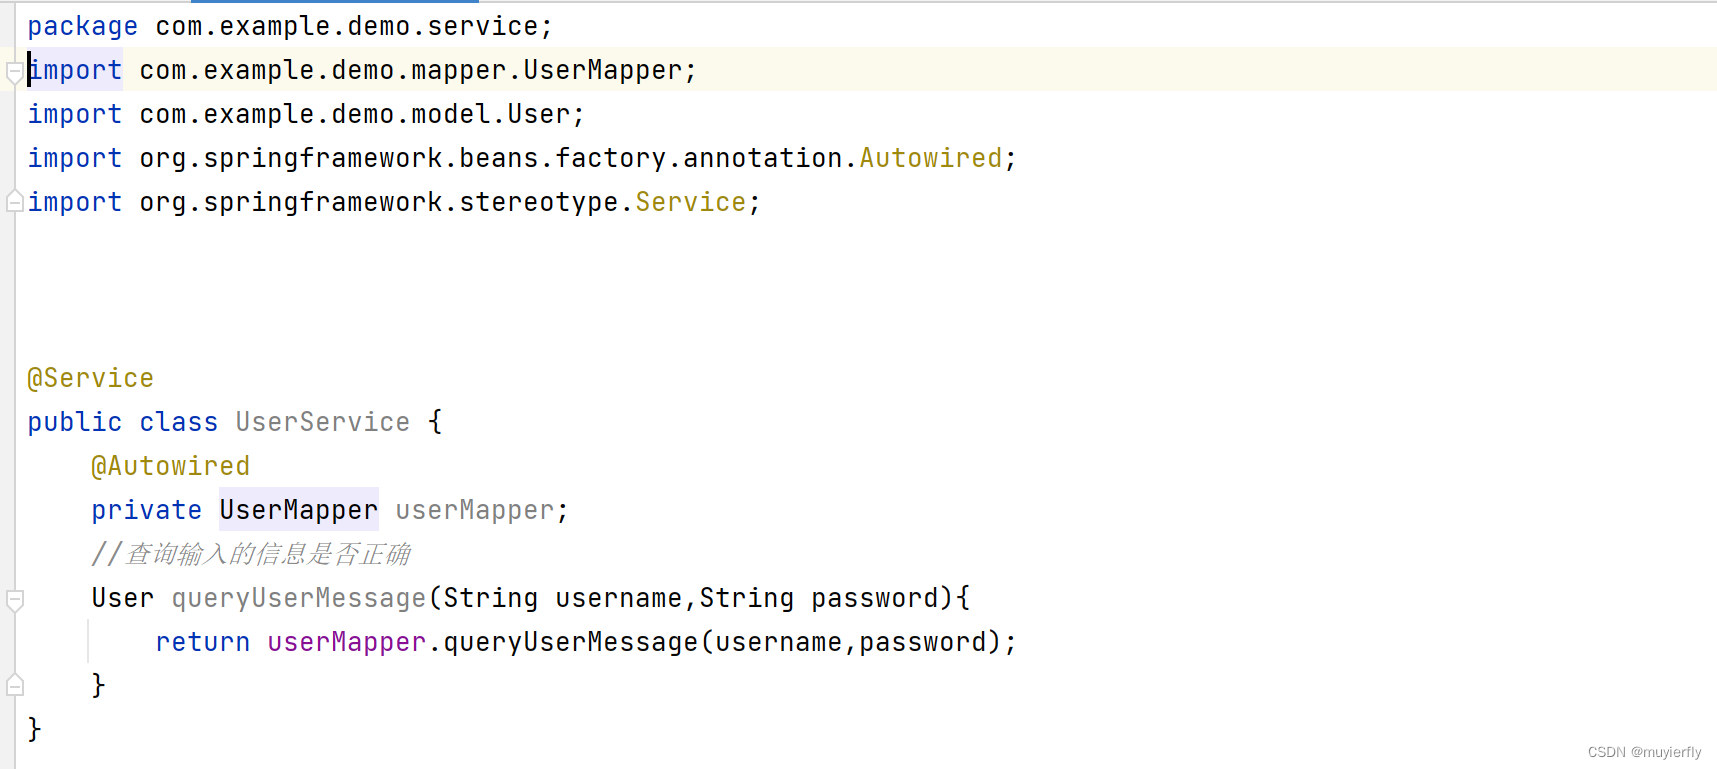
6.2 Service层
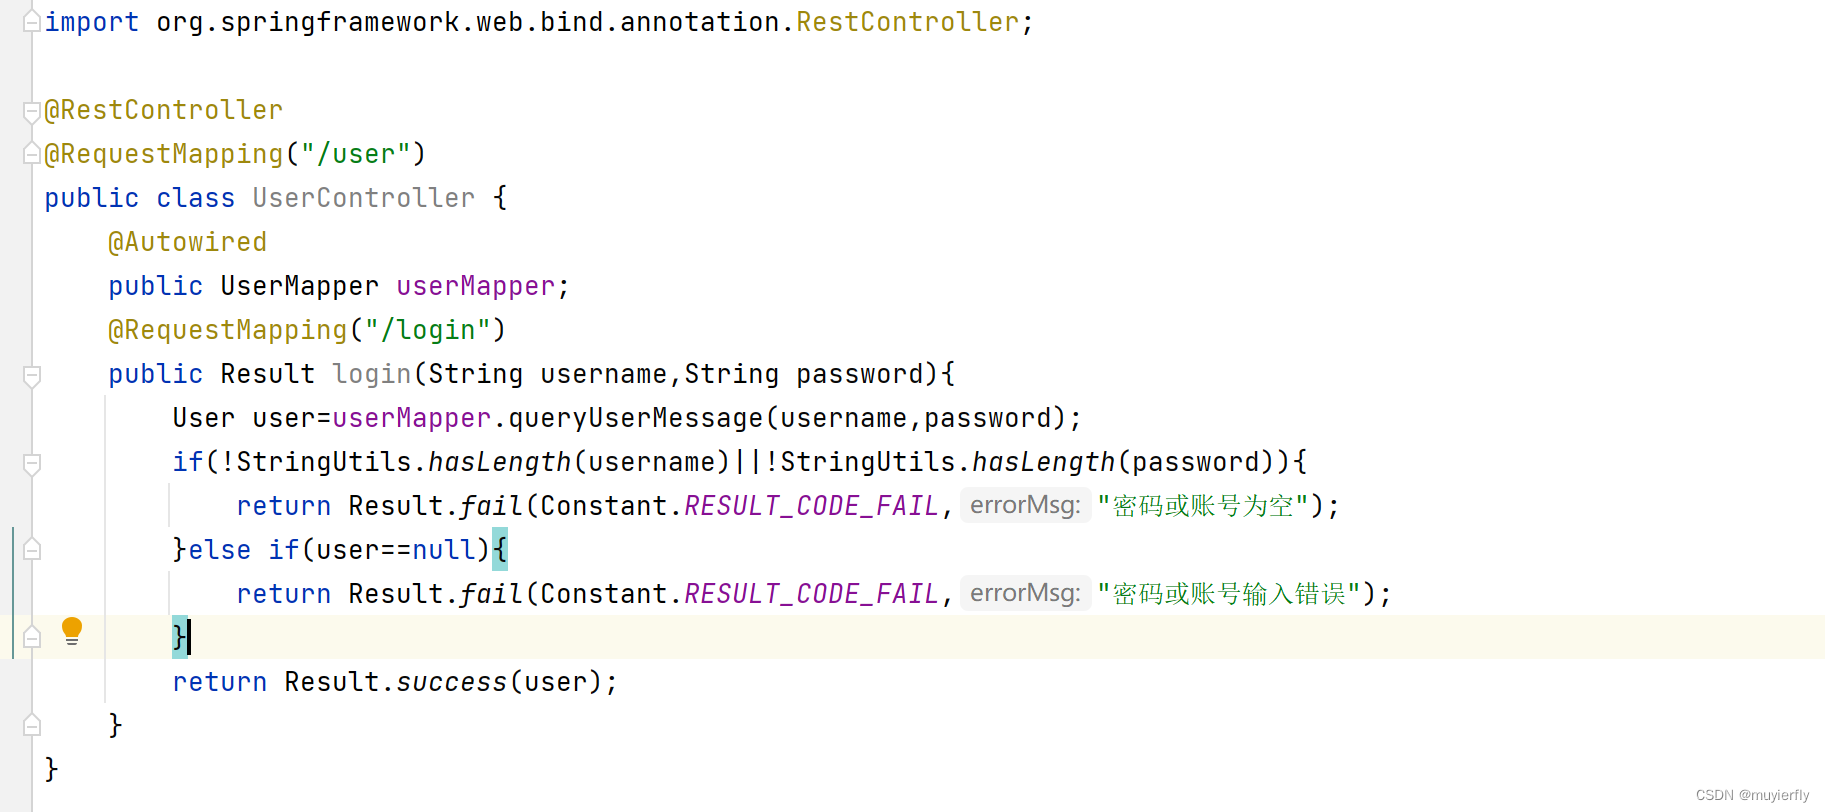
6.3 Controller层
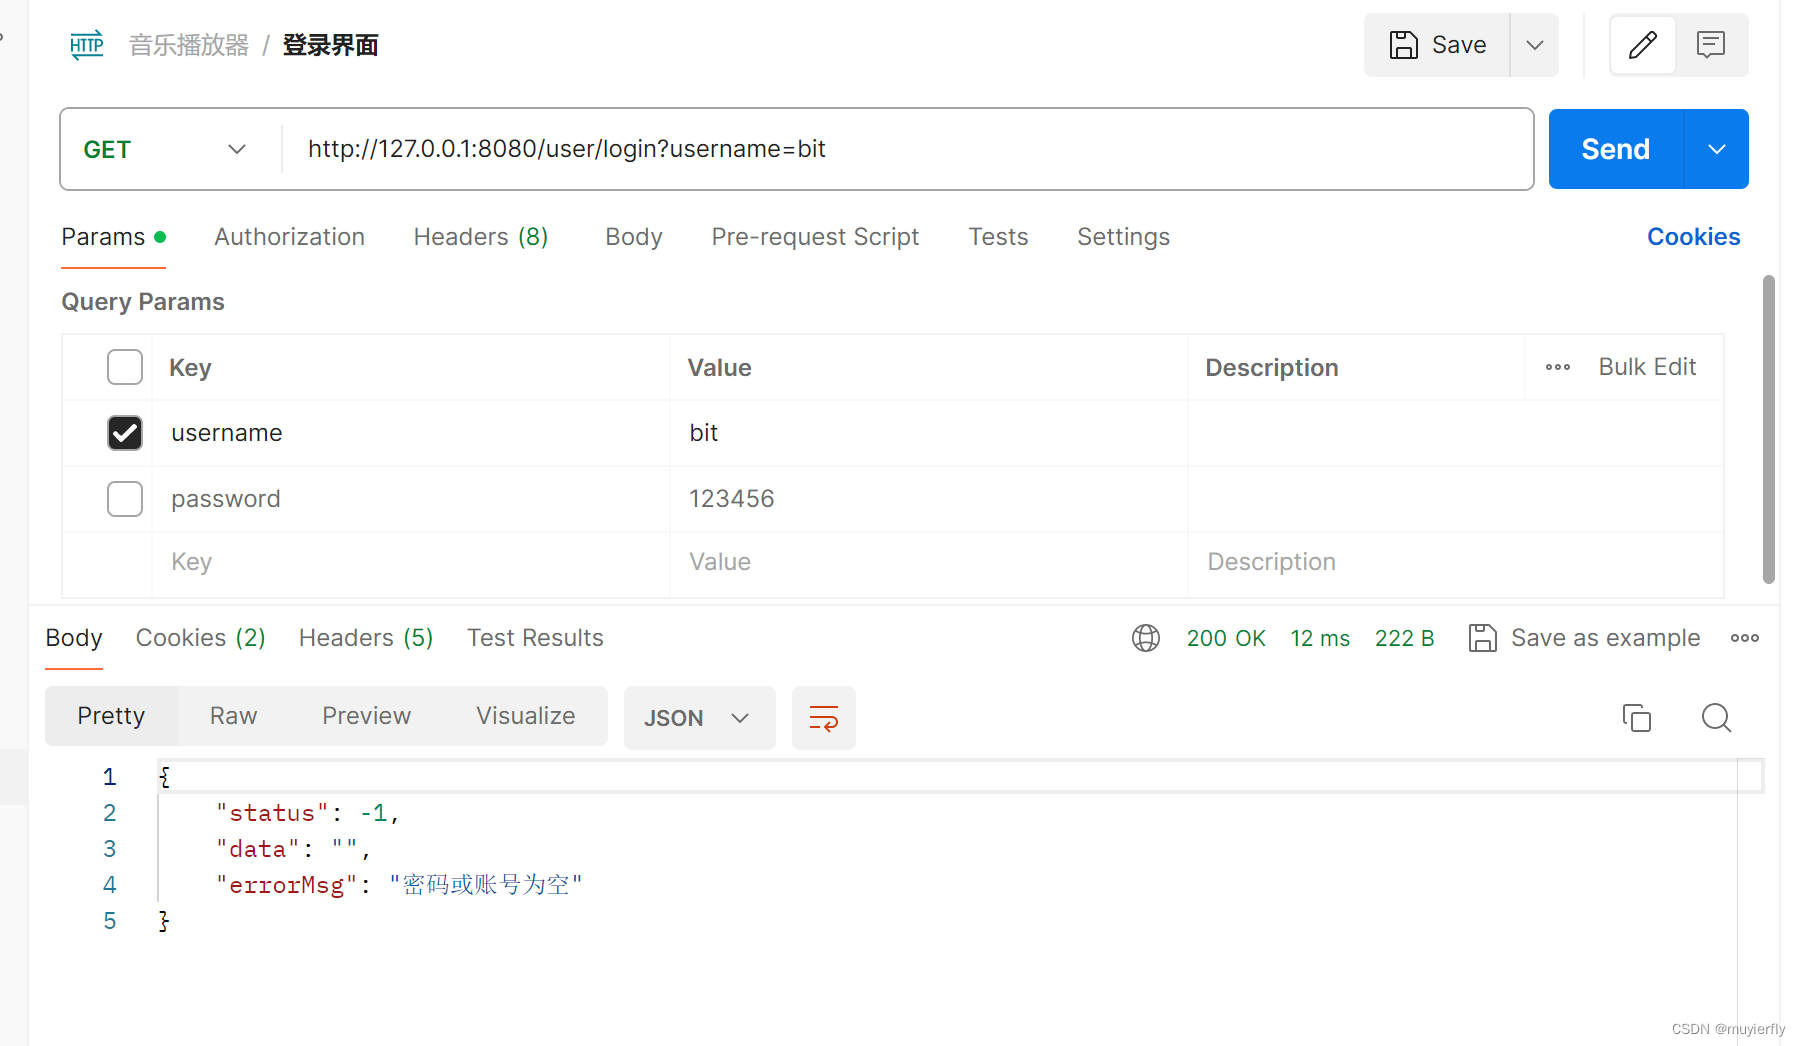
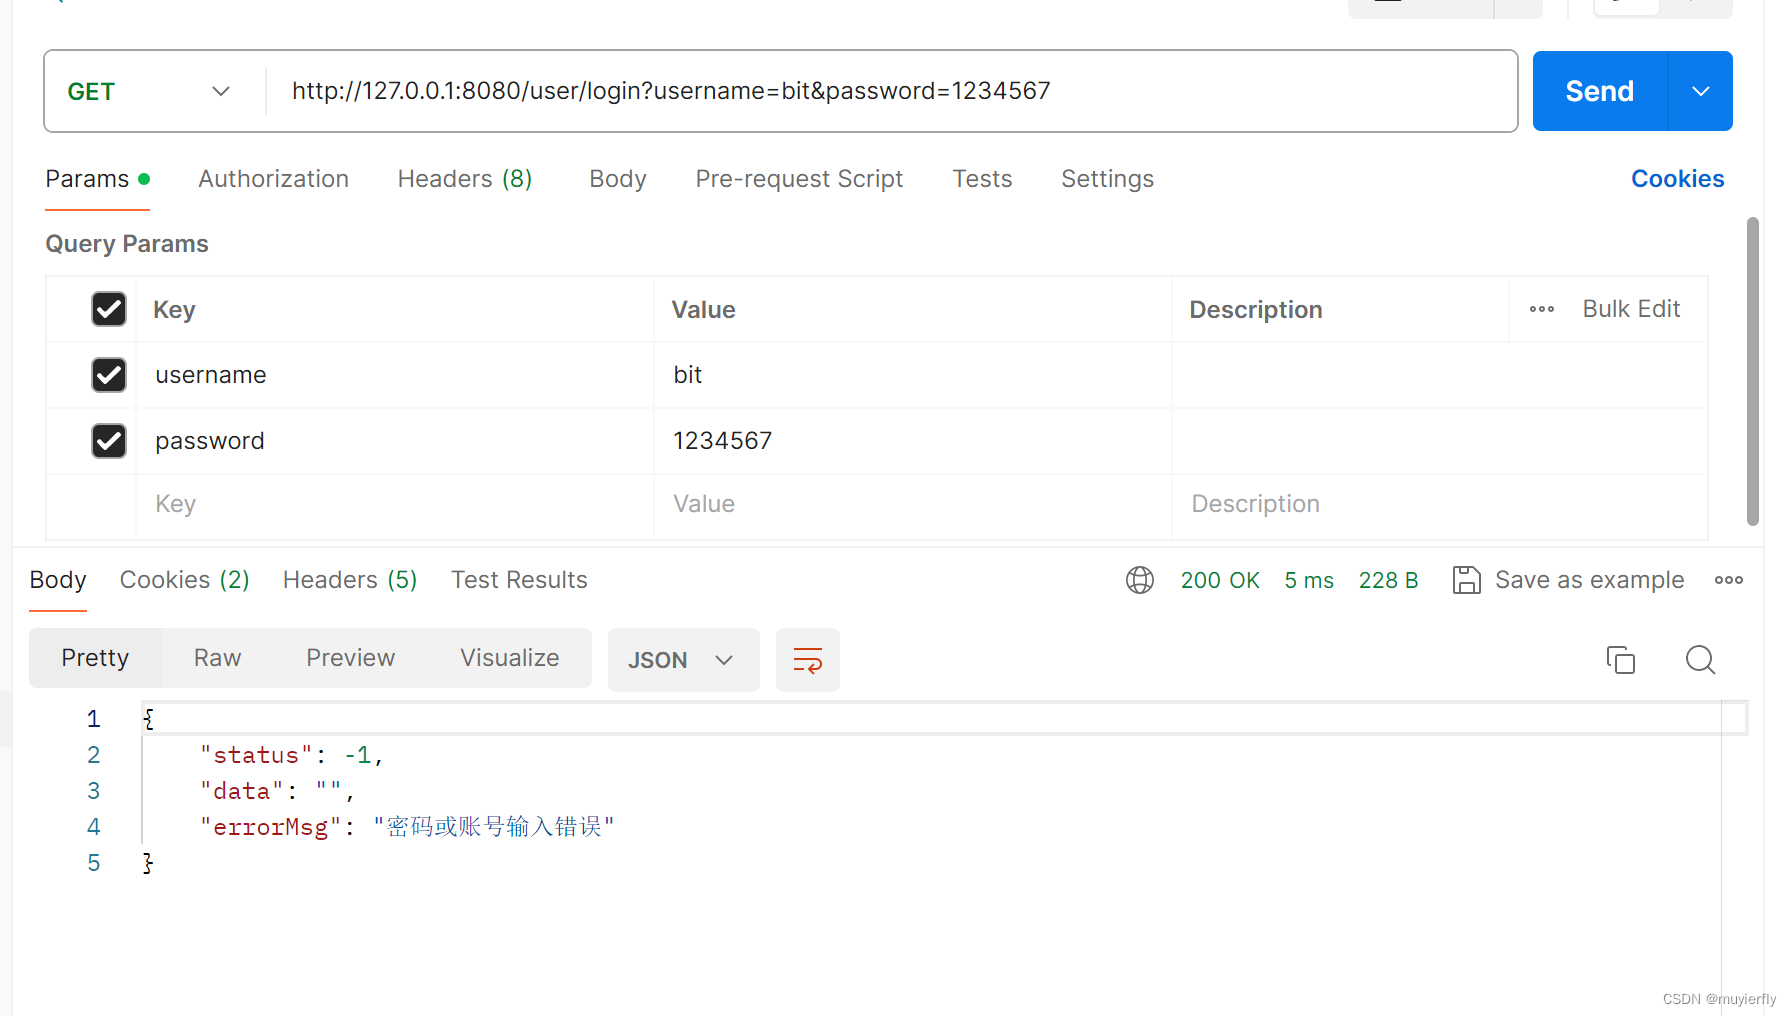
6.4 后端接口测试

6.5 前后端交互
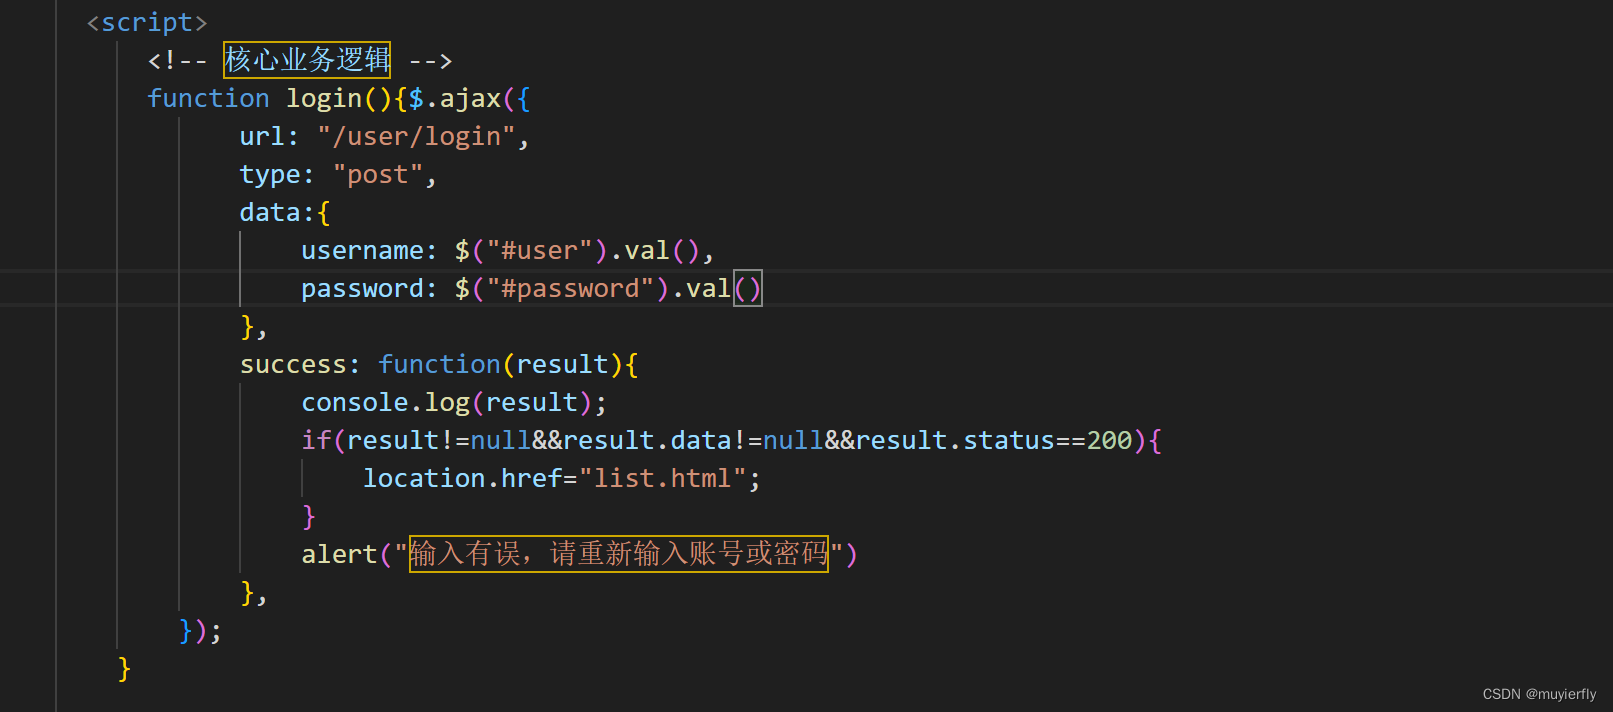
6.6 前端界面测试
成功!!!
6.7 BCrypt加密
Bcrypt就是一款加密工具,可以比较方便地实现数据的加密工作。你也可以简单理解为它内部自己实现了随机加盐处理 。我们使用MD5加密,每次加密后的密文其实都是一样的,这样就方便了MD5通过大数据的方式进行破解。Bcrypt生成的密文是60位的。而MD5的是32位的。Bcrypt破解难度更大。
6.7.1 引入依赖
<!-- security依赖包 (加密)-->
<dependency>
<groupId>org.springframework.security</groupId>
<artifactId>spring-security-web</artifactId>
</dependency>
<dependency>
<groupId>org.springframework.security</groupId>
<artifactId>spring-security-config</artifactId>
</dependency>
6.7.2 在springboot启动类添加
@SpringBootApplication(exclude ={org.springframework.boot.autoconfigure.security.servlet.SecurityAutoConfiguration.class})
因为我们用的是依赖包下的某一类
public class BCryptTest {public static void main(String[] args) {
//模拟从前端获得的密码String password = "123456";BCryptPasswordEncoder bCryptPasswordEncoder = new BCryptPasswordEncoder();String newPassword = bCryptPasswordEncoder.encode(password);System.out.println("加密的密码为: "+newPassword);
//使用matches方法进行密码的校验boolean same_password_result = bCryptPasswordEncoder.matches(password,newPassword);
//返回trueSystem.out.println("加密的密码和正确密码对比结果: "+same_password_result);boolean other_password_result = bCryptPasswordEncoder.matches("987654",newPassword);
//返回falseSystem.out.println("加密的密码和错误的密码对比结果: " + other_password_result);}
}
encode方法:对用户密码进行加密
matches方法:参数一,待检验的未加密的密码 。参数二:从数据库中查询出的加密后密码 。
总结:
1. 密码学的应用安全,是建立在破解所要付出的成本远超出能得到的利益上的 。
2. 使用BCrypt相比于MD5加密更好的一点在于,破解的难度上加大
3. BCrypt的破解成本增加了,导致系统的运行成本也会大大的增加 。
4. 回到本质的问题,你的数据库中的数据价值如何?如果你是银行类型的,那么使用BCrypt是不错的,一般情况使用MD5加盐,已经够用了。
6.8 登陆界面实现BCrypt加密
@Autowired//在自动装配之前,需要完成注入,我们再AppConfig中进行注入
private BCryptPasswordEncoder bCryptPasswordEncoder;(需要@Bean进行管理)
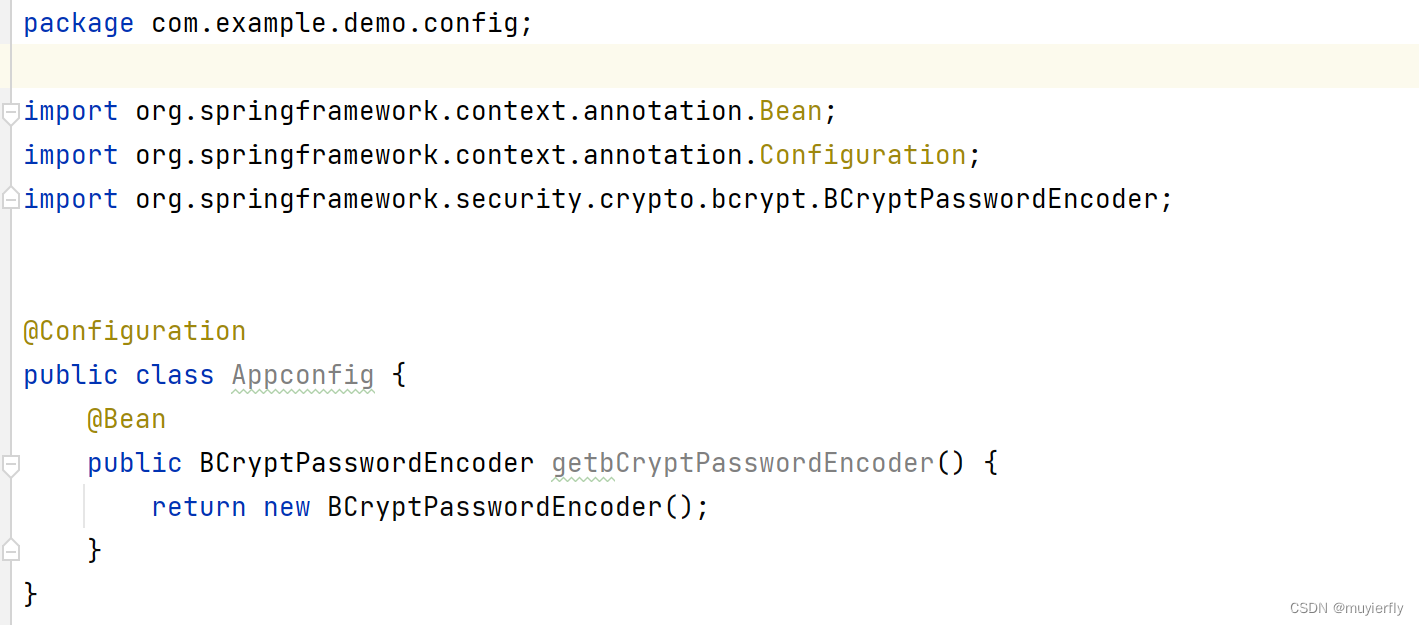 由于我们并没有登录接口,我们只能mock一下。
INSERT INTO user(username,password)
VALUES("bit","$2a$10$4ScPiSgTJo8MZgtrYJ2h3.wYbi/dEhwDigT/ZHGwjoVCND8kBBUDO");//123456bit,123456
muyier,123
lay,123
设定账户名称为唯一值
DROP TABLE IF EXISTS `user`;
CREATE TABLE `user` (
`user_id` INT PRIMARY KEY AUTO_INCREMENT,
`username` varchar(20) UNIQUE NOT NULL,
`password` varchar(255) NOT NULL
);
INSERT INTO user(username,password)
VALUES("bit","$2a$10$4ScPiSgTJo8MZgtrYJ2h3.wYbi/dEhwDigT/ZHGwjoVCND8kBBUDO");
INSERT INTO user(username,password)
VALUES("lay","$2a$10$.BvcAndeb2JlhAdFwQjlBezi9GsTqrV4oAu6c6bBoFG0fNxzdYYiq");
INSERT INTO user(username,password)
VALUES("muyierf","$2a$10$.BvcAndeb2JlhAdFwQjlBezi9GsTqrV4oAu6c6bBoFG0fNxzdYYiq");
修改接口

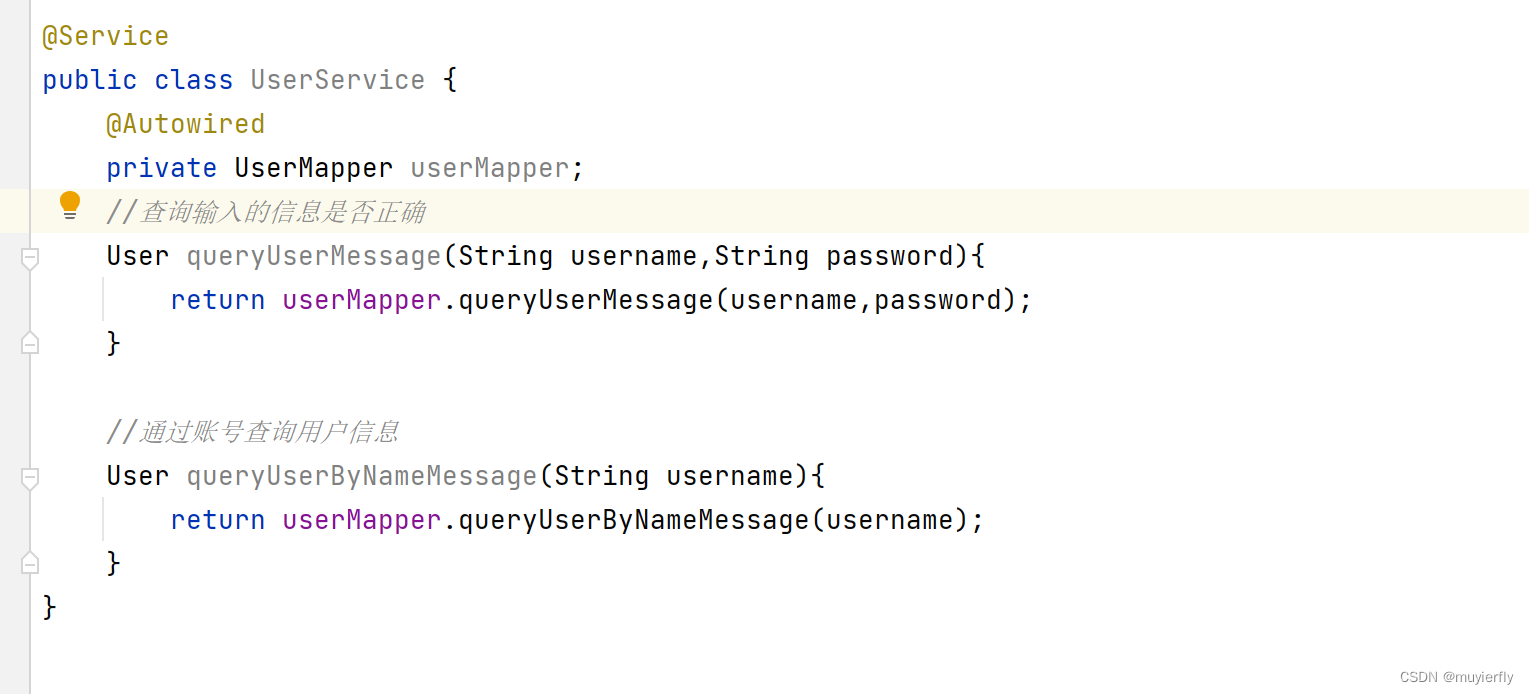
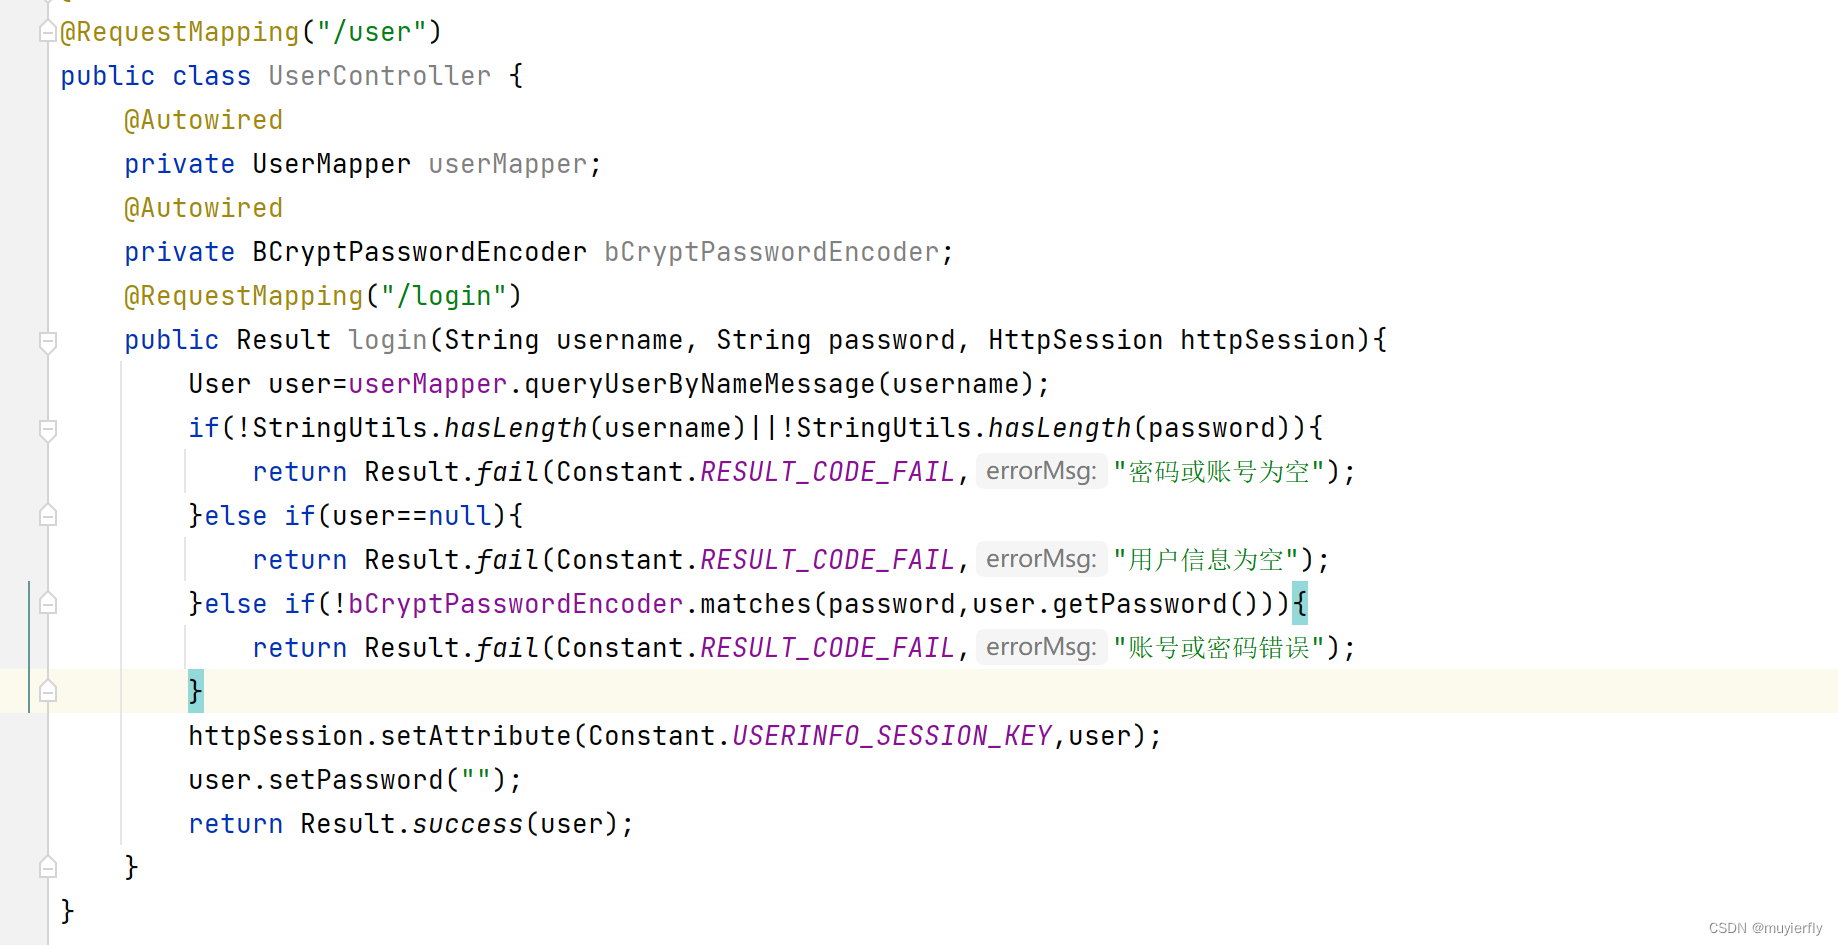 和加密后的数据进行比较
重新测试!!!
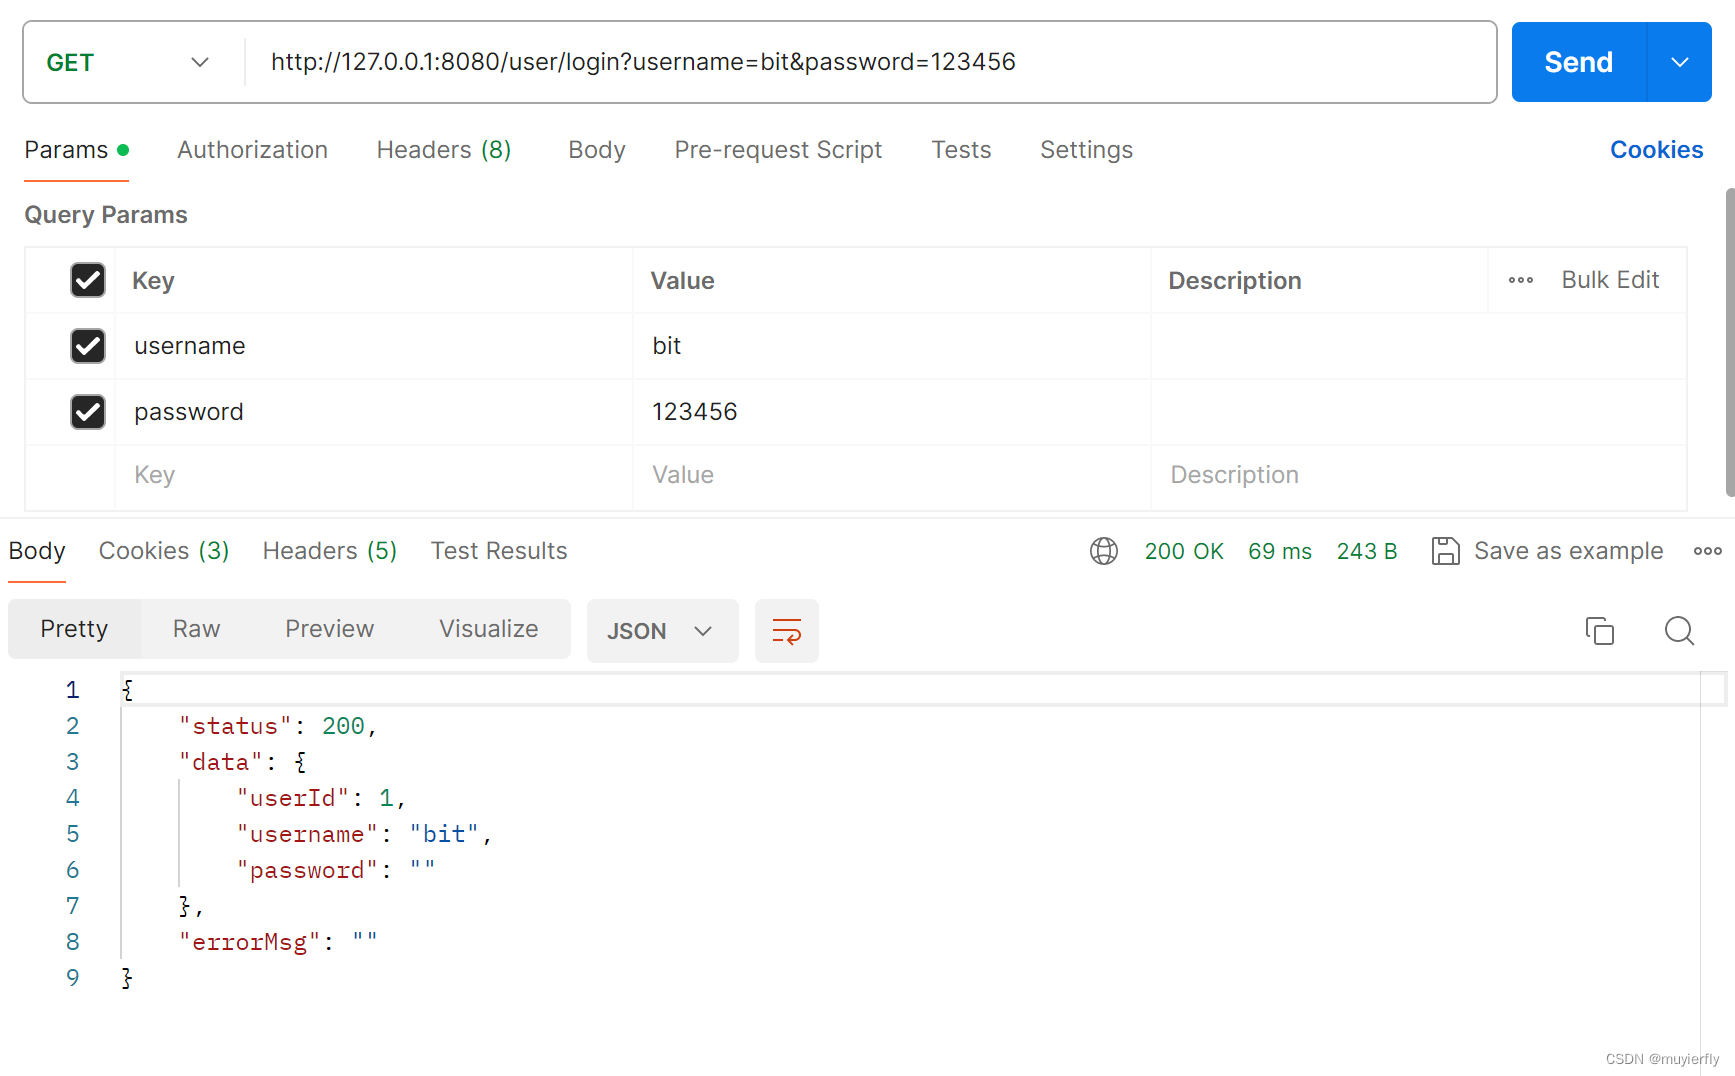
成功!!!


)
)

)


搞懂了赛场上拿下就稳了)
)
