文章目录 1.拦截器 1.基本介绍 2.应用实例 1.去掉Thymeleaf案例中使用session进行权限验证的部分 2.编写自定义拦截器 LoginInterceptor.java 实现HandlerInterceptor接口的三个方法 3.注册拦截器 1.第一种方式 配置类直接实现WebMvcConfigurer接口,重写addInterceptors方法 2.第二种方式 注入一个WebMvcConfigurer接口类型的bean,使用匿名内部类实现接口的方法 3.注册拦截器方式小结 3.注意事项和细节 2.文件上传 1.需求分析 2.具体实现 1.编写upload.html 2.编写UploadController.java 可以请求转发到upload.html 3.编写Controller来将上传的文件保存到D:\temp_upload 4.升级版,将上传的文件保存到动态创建的目录(常用) 5.测试 3.注意事项和细节 1.文件上传的限制 1.MultipartProperties 2.修改文件上传的限制大小 application.yml 2.同名文件覆盖问题 3.分目录存放
package com. sun. springboot. interceptor ; import org. springframework. web. servlet. HandlerInterceptor ;
import org. springframework. web. servlet. ModelAndView ; import javax. servlet. http. HttpServletRequest ;
import javax. servlet. http. HttpServletResponse ;
import javax. servlet. http. HttpSession ;
public class LoginInterceptor implements HandlerInterceptor { @Override public boolean preHandle ( HttpServletRequest request, HttpServletResponse response, Object handler) throws Exception { System . out. println ( "uri=" + request. getRequestURI ( ) ) ; HttpSession session = request. getSession ( ) ; if ( session. getAttribute ( "LoginAdmin" ) != null ) { return true ; } else { request. setAttribute ( "msg" , "登录失败,请重新登录" ) ; request. getRequestDispatcher ( "/" ) . forward ( request, response) ; return false ; } } @Override public void postHandle ( HttpServletRequest request, HttpServletResponse response, Object handler, ModelAndView modelAndView) throws Exception { System . out. println ( "postHandle被调用" ) ; } @Override public void afterCompletion ( HttpServletRequest request, HttpServletResponse response, Object handler, Exception ex) throws Exception { System . out. println ( "afterCompletion被调用" ) ; }
} package com. sun. springboot. config ; import com. sun. springboot. interceptor. LoginInterceptor ;
import org. springframework. context. annotation. Configuration ;
import org. springframework. web. servlet. config. annotation. InterceptorRegistry ;
import org. springframework. web. servlet. config. annotation. WebMvcConfigurer ; @Configuration
public class WebConfig implements WebMvcConfigurer { @Override public void addInterceptors ( InterceptorRegistry registry) { registry. addInterceptor ( new LoginInterceptor ( ) ) . addPathPatterns ( "/**" ) . excludePathPatterns ( "/" , "/login" , "/images" ) ; }
} package com. sun. springboot. config ; import com. sun. springboot. interceptor. LoginInterceptor ;
import org. springframework. context. annotation. Bean ;
import org. springframework. context. annotation. Configuration ;
import org. springframework. web. servlet. config. annotation. InterceptorRegistry ;
import org. springframework. web. servlet. config. annotation. WebMvcConfigurer ;
@Configuration
public class WebConfig02 { @Bean public WebMvcConfigurer webMvcConfigurer ( ) { return new WebMvcConfigurer ( ) { @Override public void addInterceptors ( InterceptorRegistry registry) { registry. addInterceptor ( new LoginInterceptor ( ) ) . addPathPatterns ( "/**" ) . excludePathPatterns ( "/" , "/login" , "/images" ) ; } } ; }
} 第一种方式是配置类实现WebMvcConfigurer接口,利用配置类的特性来注入bean 第二种方式是在配置类中注入一个bean,是WebMvcConfigurer接口类型的 他们的共通点就是:都向容器中注入了一个实现了WebMvcConfigurer接口的bean 如果不放行,则在第一次进入登录界面时,还会向服务器申请图片资源,此时会被拦截 图片资源路径的设置是按照设置的访问路径,默认是http://localhost:8080/下的资源 uri就是服务器内部的路径/代表的是服务器根路径 url是浏览器地址栏的路径
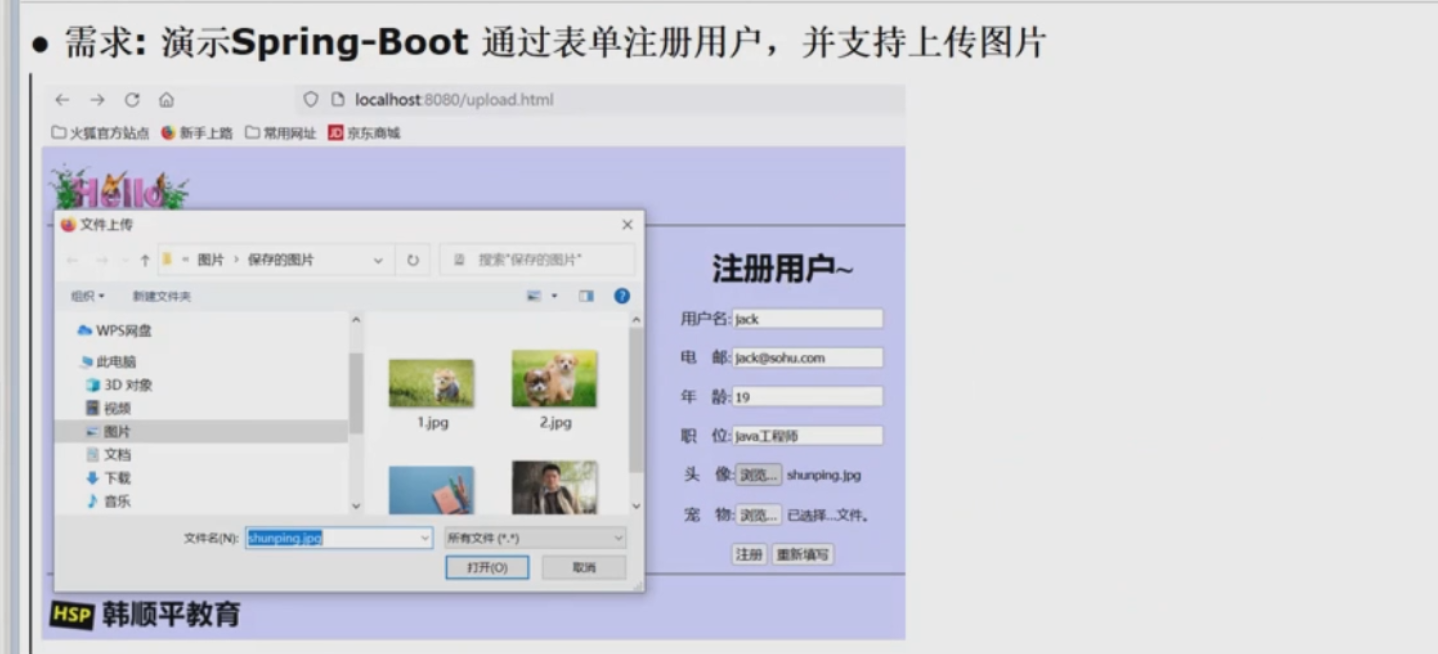
<! DOCTYPE html > < htmllang = " en" xmlns: th= " http://www.thymeleaf.org" > < head> < metacharset = " UTF-8" > < title> </ title> </ head> < bodybgcolor = " #CED3FE" > < imgsrc = " images/1.GIF" /> < hr/> < divstyle = " text-align : center" > < h1> </ h1> < formaction = " #" method = " post" th: action= " @{/upload}" enctype = " multipart/form-data" > < inputtype = " text" style = " width : 150px" name = " name" /> < br/> < br/> < inputtype = " text" style = " width : 150px" name = " email" /> < br/> < br/> < inputtype = " text" style = " width : 150px" name = " age" /> < br/> < br/> < inputtype = " text" style = " width : 150px" name = " job" /> < br/> < br/> < inputtype = " file" style = " width : 150px" name = " header" > < br/> < br/> < inputtype = " file" style = " width : 150px" name = " photos" multiple > < br/> < br/> < inputtype = " submit" value = " 注册" /> < inputtype = " reset" value = " 重新填写" /> </ form> </ div> < hr/> < imgsrc = " images/logo.png" /> </ body> </ html> package com. sun. springboot. controller ; import lombok. extern. slf4j. Slf4j ;
import org. springframework. stereotype. Controller ;
import org. springframework. web. bind. annotation. GetMapping ;
@Controller
@Slf4j
public class UploadController { @GetMapping ( "/upload.html" ) public String uploadPage ( ) { return "upload" ; }
} @ResponseBody @PostMapping ( "/upload" ) public String upload ( @RequestParam ( "name" ) String name, @RequestParam ( "email" ) String email, @RequestParam ( "age" ) Integer age, @RequestParam ( "job" ) String job, @RequestParam ( "header" ) MultipartFile header, @RequestParam ( "photos" ) MultipartFile [ ] photos) throws IOException { log. info ( "name={} email={} age={} job={} header={} photos={}" , name, email, age, job, header, photos) ; if ( ! header. isEmpty ( ) ) { String originalFilename = header. getOriginalFilename ( ) ; header. transferTo ( new File ( "D:\\temp_upload\\" + originalFilename) ) ; } if ( photos. length > 0 ) { for ( MultipartFile photo : photos) { String originalFilename = photo. getOriginalFilename ( ) ; if ( ! photo. isEmpty ( ) ) { photo. transferTo ( new File ( "D:\\temp_upload\\" + originalFilename) ) ; } } } return "文件上传成功!" ; }
@ResponseBody @PostMapping ( "/upload" ) public String upload ( @RequestParam ( "name" ) String name, @RequestParam ( "email" ) String email, @RequestParam ( "age" ) Integer age, @RequestParam ( "job" ) String job, @RequestParam ( "header" ) MultipartFile header, @RequestParam ( "photos" ) MultipartFile [ ] photos) throws IOException { if ( ! header. isEmpty ( ) ) { String originalFilename = header. getOriginalFilename ( ) ; String classPath = ResourceUtils . getURL ( "classpath:" ) . getPath ( ) ; File targetFile = new File ( classPath + "static\\upload\\" ) ; if ( ! targetFile. exists ( ) ) { targetFile. mkdirs ( ) ; } String targetAbsolutePath = targetFile. getAbsolutePath ( ) ; header. transferTo ( new File ( targetAbsolutePath + "\\" + originalFilename) ) ; } if ( photos. length > 0 ) { for ( MultipartFile photo : photos) { String originalFilename = photo. getOriginalFilename ( ) ; if ( ! photo. isEmpty ( ) ) { photo. transferTo ( new File ( "D:\\temp_upload\\" + originalFilename) ) ; } } } return "文件上传成功!" ; }
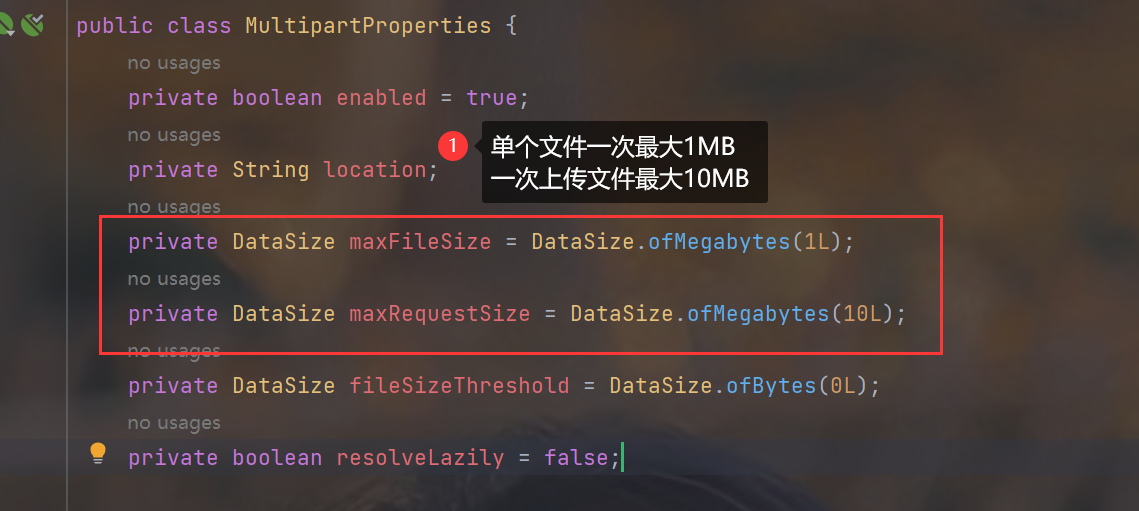
spring : servlet : multipart : max-file-size : 10MB max-request-size : 50MB
package com. sun. springboot. utils ; import java. text. SimpleDateFormat ;
import java. util. Date ;
import java. util. Stack ;
public class WebUtils { public static String UPLOAD_FILE_DIRECTORY = "static\\upload\\" ; public static String getUploadFileDirectory ( ) { return UPLOAD_FILE_DIRECTORY + new SimpleDateFormat ( "yyyy\\MM\\dd" ) . format ( new Date ( ) ) + "\\" ; } }


—— 认识C++语言)
)


)


)


变量与常量,作用域)