一、简易版主页
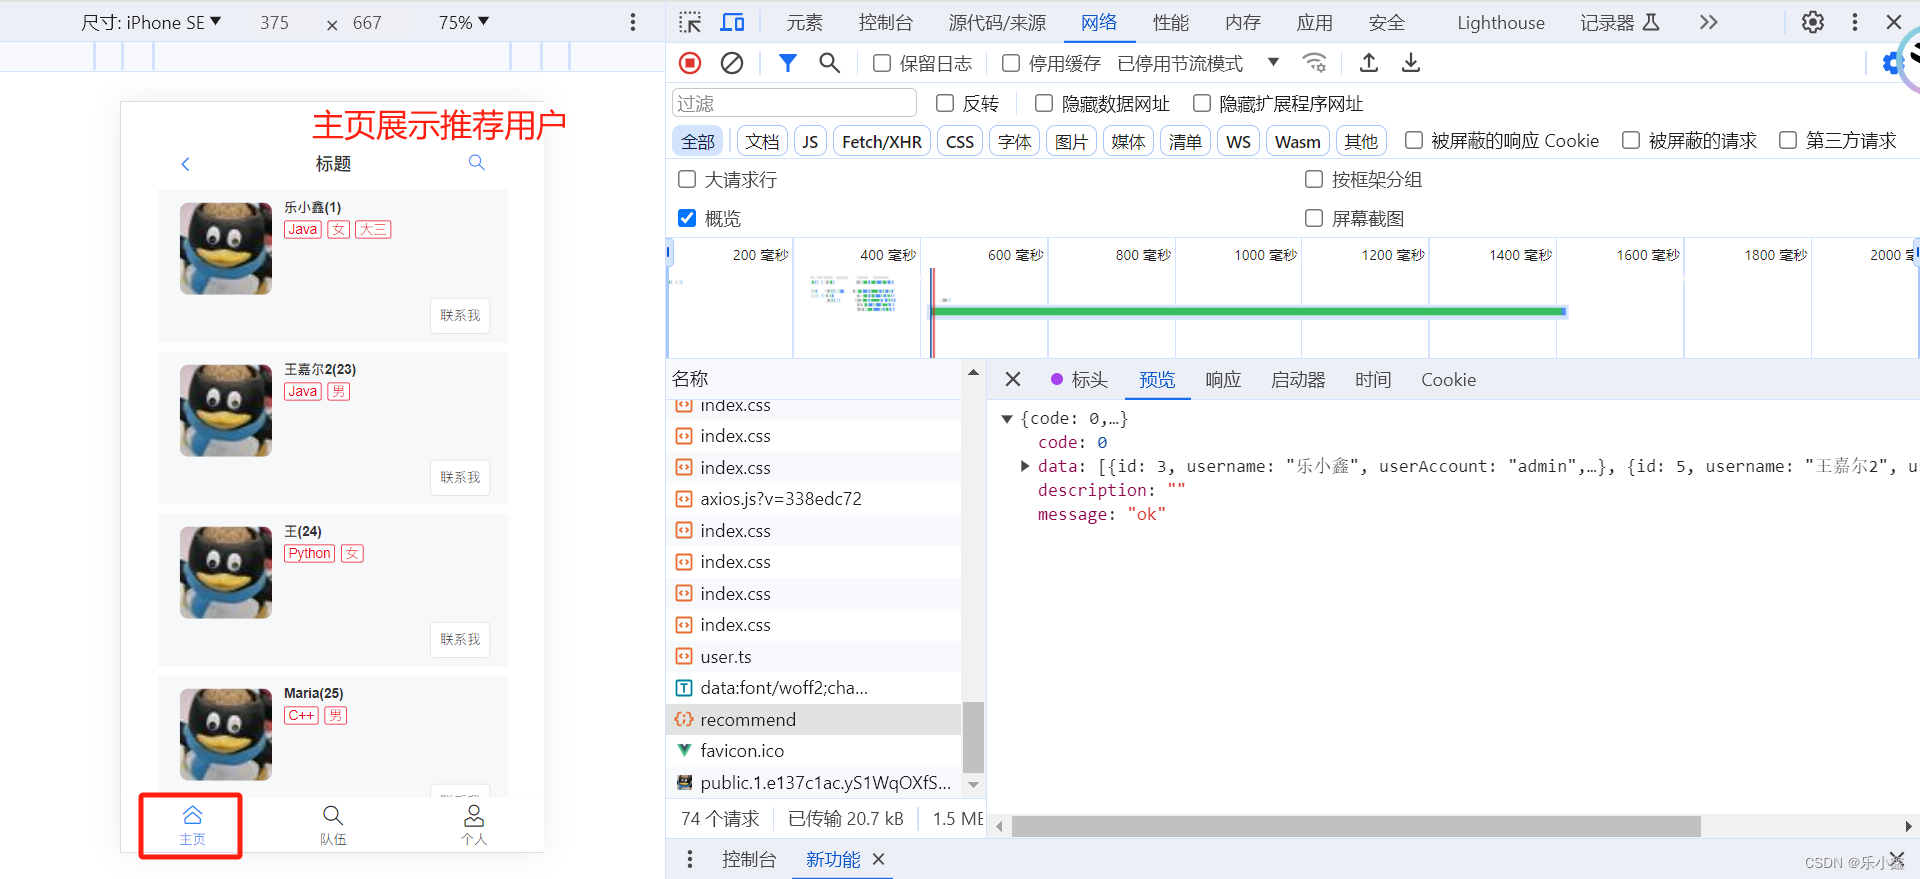
1. 主页展示用户列表
<template><!--推荐用户列表--><van-cardv-for="user in userList":desc="user.profile":title="`${user.username}(${user.planetCode})`":thumb="user.avatarUrl"><template #tags><van-tag plain type="danger" v-for="tag in user.tags" style="margin-right: 5px; margin-top: 3px">{{ tag }}</van-tag></template><template #footer><van-button size="small">联系我</van-button></template></van-card><van-empty v-if="!userList || userList.length < 1" description="结果为空" /></template><script setup lang="ts">
import { useRoute } from'vue-router'
import {onMounted, ref} from "vue";
import myAxios from "/src/plugins/myAxios.js";
import qs from 'qs';
import type {UserType} from "@/models/user";const route = useRoute();
const { tags } = route.query;
const userList = ref([]);onMounted( async () => {const userListData: UserType[] = await myAxios.get('/user/recommend', {params: {tagNameList: tags,},paramsSerializer: params => {return qs.stringify(params, {indices: false})}}).then(function (response) {// handle successconsole.log("/user/recommend succeed", response);return response.data;}).catch(function (error) {console.log("/user/recommend error", error);})if(userListData) {userListData.forEach(user => {if(user.tags) {user.tags = JSON.parse(user.tags);}});userList.value = userListData;}
})</script><style scoped></style>
2. 抽取卡片组件
- 搜索结果页和主页的组件重复,提取出 Card 卡片组件,方便后续统一修改样式等操作
- 注意抽取出来的组件用到了哪些变量:将变量转化为属性,再通过父组件传递属性
- 使用 withDefaults 添加默认值:增强健壮性(userList 为空时也能正常运行)
<template><!--推荐用户列表--><user-card-list :user-list="userList"/><van-empty v-if="!userList || userList.length < 1" description="结果为空" />
</template>
<template><!--推荐用户列表--><van-cardv-for="user in userList":desc="user.profile":title="`${user.username}(${user.planetCode})`":thumb="user.avatarUrl"><template #tags><van-tag plain type="danger" v-for="tag in user.tags" style="margin-right: 5px; margin-top: 3px">{{ tag }}</van-tag></template><template #footer><van-button size="small">联系我</van-button></template></van-card>
</template><script setup lang="ts">
import type {UserType} from "@/models/user";interface UserCardListProps {userList: UserType[];
}const props = withDefaults(defineProps<UserCardListProps>(), {userList: [],
})</script><style scoped></style>
3. 后端返回所有用户
/*** 用户推荐* @param request* @return 用户列表*/@GetMapping("/recommend")public BaseResponse<List<User>> recommendUsers(HttpServletRequest request) {log.info("推荐用户列表");QueryWrapper<User> queryWrapper = new QueryWrapper<>();List<User> userList = userService.list(queryWrapper);// 查询所有用户// 返回脱敏后的用户数据List<User> list = userList.stream().map(user -> userService.getSafetyUser(user)).collect(Collectors.toList());return ResultUtils.success(list);}
4. 查看页面效果

二、批量导入数据的几种方式
1. 用可视化界面

2. 执行 SQL 语句
3. 编写程序控制导入
- for 循环,建议分批,要保证可控、幂等性,注意线上数据库和测试数据库有区别
- 一次性任务:在程序入口使用 @EnableScheduling 开启 SpringBoot 框架对定时任务的支持
- 执行任务
- 不能使用 main 方法来执行:SpringBoot 还没有加载这个 Bean,会报空指针异常
- 使用定时任务框架:在定时任务上使用 @Scheduled 注解设置定时
- initialDelay:第一次延时执行
- fixedRate:下一次执行任务的延时时间(设置为 Long.MAX_VALUE 可视为只执行一次)
package com.example.usercenter.once;import com.example.usercenter.mapper.UserMapper;
import com.example.usercenter.model.domain.User;
import org.springframework.scheduling.annotation.Scheduled;
import org.springframework.stereotype.Component;
import org.springframework.util.StopWatch;import javax.annotation.Resource;/*** 导入用户任务* @author Ghost* @version 1.0*/
@Component
public class InsertUsers {@Resourceprivate UserMapper userMapper;/*** 批量插入用户*/
//    @Scheduled(initialDelay = 5000, fixedRate = Long.MAX_VALUE)public void doInsertUsers() {StopWatch stopWatch = new StopWatch();System.out.println("goodgoodgood");stopWatch.start();final int INSERT_NUM = 1000;for (int i = 0; i < INSERT_NUM; i++) {User user = new User();user.setUsername("假用户");user.setUserAccount("fakeghost");user.setAvatarUrl("https://636f-codenav-8grj8px727565176-1256524210.tcb.qcloud.la/img/logo.png");user.setGender(0);user.setUserPassword("12345678");user.setPhone("123");user.setEmail("123@qq.com");user.setTags("[]");user.setUserStatus(0);user.setUserRole(0);user.setPlanetCode("11111111");userMapper.insert(user);}stopWatch.stop();System.out.println(stopWatch.getTotalTimeMillis());}
}
- for 循环的缺点
- 建立和释放数据库连接==>>批量插入解决
- for 循环是绝对线性的==>>并发执行
- 批量插入用户:使用 Mybatis-plus 提供的批量插入 saveBatch 方法,现将要插入的用户存储到一个集合里,再将集合批量插入到数据库
package com.example.usercenter.once;import com.example.usercenter.model.domain.User;
import com.example.usercenter.service.UserService;
import org.springframework.stereotype.Component;
import org.springframework.util.StopWatch;import javax.annotation.Resource;
import java.util.ArrayList;
import java.util.List;/*** 导入用户任务* @author Ghost* @version 1.0*/
@Component
public class InsertUsers {@Resourceprivate UserService userService;/*** 批量插入用户*/public void doInsertUsers() {StopWatch stopWatch = new StopWatch();stopWatch.start();final int INSERT_NUM = 1000;List<User> userList = new ArrayList<>();for (int i = 0; i < INSERT_NUM; i++) {User user = new User();user.setUsername("假用户");user.setUserAccount("fakeghost");user.setAvatarUrl("https://636f-codenav-8grj8px727565176-1256524210.tcb.qcloud.la/img/logo.png");user.setGender(0);user.setUserPassword("12345678");user.setPhone("123");user.setEmail("123@qq.com");user.setTags("[]");user.setUserStatus(0);user.setUserRole(0);user.setPlanetCode("11111111");userList.add(user);}// 20 秒 10 万条userService.saveBatch(userList, 10000);stopWatch.stop();System.out.println(stopWatch.getTotalTimeMillis());}
}
- 并发执行:将数据分成多组,开启多线程并发执行
- 注意:插入数据的顺序对应用没有影响才使用并发;不要用不支持并发的集合
/*** 并发批量插入用户*/@Testpublic void doConcurrencyInsertUsersTest() {StopWatch stopWatch = new StopWatch();stopWatch.start();// 分十组int batchSize = 5000;int j = 0;List<CompletableFuture<Void>> futureList = new ArrayList<>();for (int i = 0; i < 20; i++) {List<User> userList = new ArrayList<>();while (true) {j++;User user = new User();user.setUsername("假用户");user.setUserAccount("fakeghost");user.setAvatarUrl("https://636f-codenav-8grj8px727565176-1256524210.tcb.qcloud.la/img/logo.png");user.setGender(0);user.setUserPassword("12345678");user.setPhone("123");user.setEmail("123@qq.com");user.setTags("[]");user.setUserStatus(0);user.setUserRole(0);user.setPlanetCode("11111111");userList.add(user);if (j % batchSize == 0) {break;}}// 异步执行CompletableFuture<Void> future = CompletableFuture.runAsync(() -> {System.out.println("threadName: " + Thread.currentThread().getName());userService.saveBatch(userList, batchSize);}, executorService);futureList.add(future);}CompletableFuture.allOf(futureList.toArray(new CompletableFuture[]{})).join();// 20 秒 10 万条stopWatch.stop();System.out.println(stopWatch.getTotalTimeMillis());}
三、分页查询
1. 开启分页
/*** 用户推荐* @param request* @return 用户列表*/@GetMapping("/recommend")public BaseResponse<Page<User>> recommendUsers(long pageSize, long pageNum, HttpServletRequest request) {log.info("推荐用户列表");QueryWrapper<User> queryWrapper = new QueryWrapper<>();Page<User> userList = userService.page(new Page<>((pageNum - 1) * pageSize, pageSize), queryWrapper);// 查询所有用户return ResultUtils.success(userList);}
2. 开启 Mybatis-plus 分页配置
/*** MyBatisPlus 配置* @author 乐小鑫* @version 1.0*/
@Configuration
@MapperScan("com.example.usercenter.mapper")
public class MybatisPlusConfig {/*** 新的分页插件,一缓和二缓遵循 mybatis 的规则,需要设置 MybatisConfiguration#useDeprecatedExecutor = false 避免缓存出现问题(该属性会在旧插件移除后一同移除)*/@Beanpublic MybatisPlusInterceptor mybatisPlusInterceptor() {MybatisPlusInterceptor interceptor = new MybatisPlusInterceptor();interceptor.addInnerInterceptor(new PaginationInnerInterceptor(DbType.MYSQL));return interceptor;}
}
四、查看页面效果
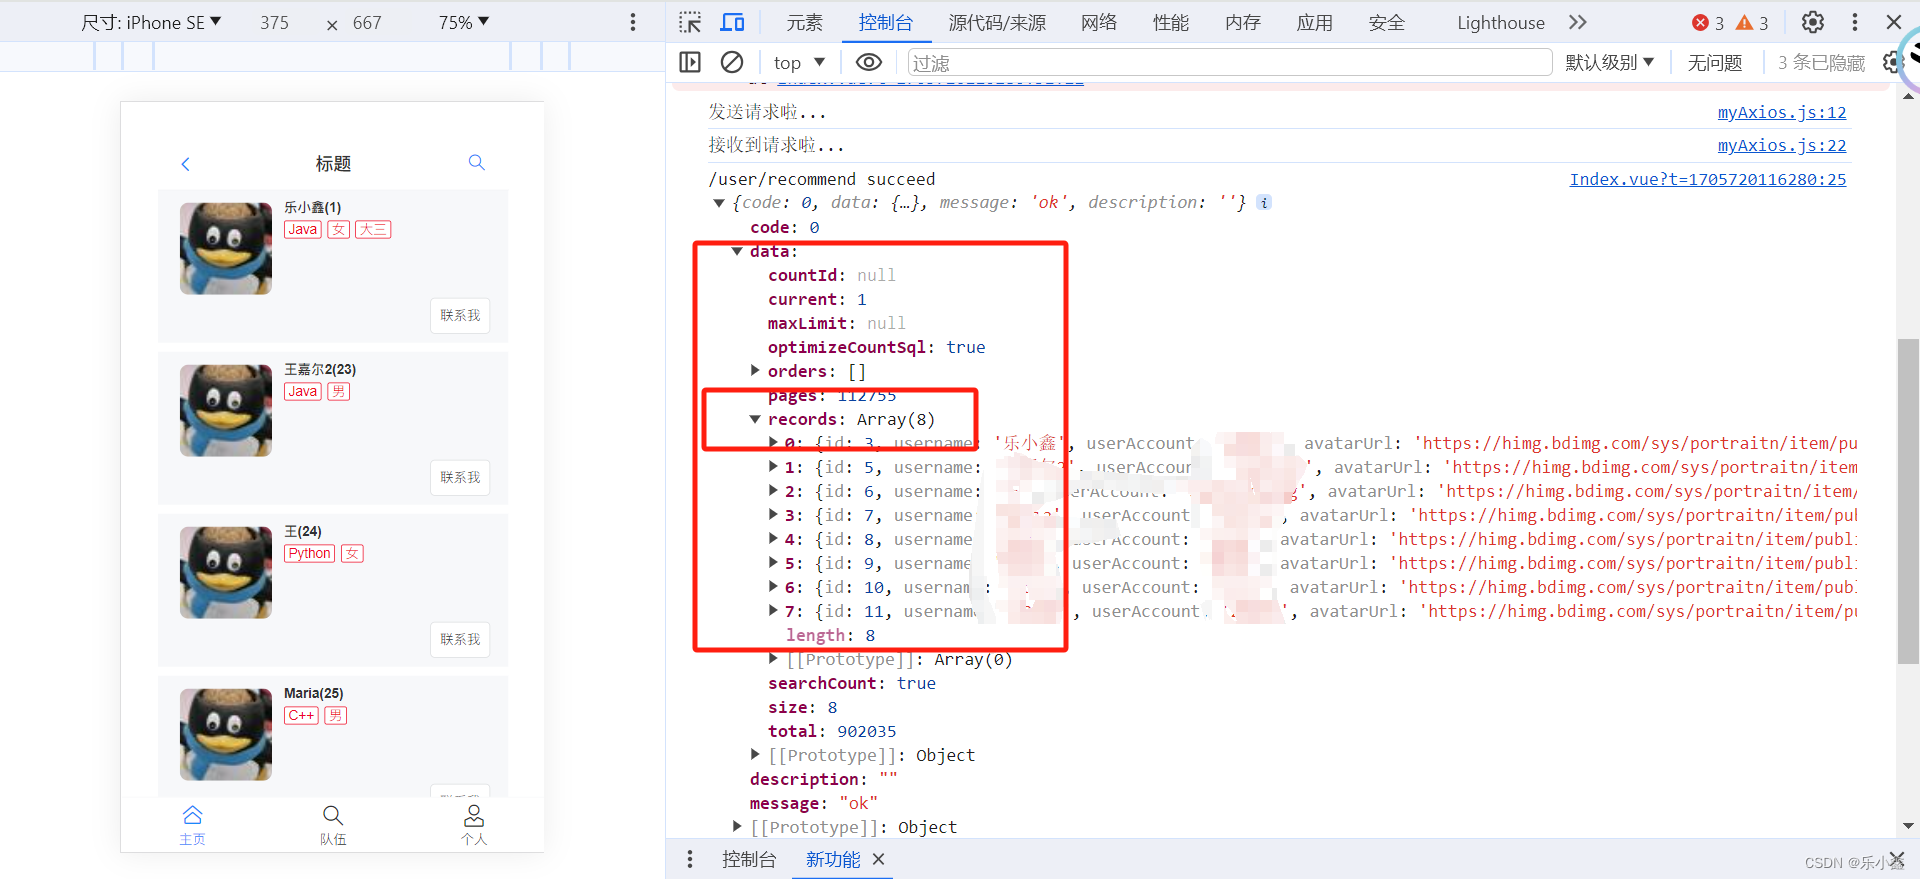
- 开启分页后后端响应封装到了 Page 中,前端接收时需要取出 response 中的 records


 —— 第十二章 计算学习理论)
 日志类型)

带你了解他的前世今生)
)

)


“校内选拔赛 H卯酉东海道)
实现)


