摘要
接上一篇,我们继续实现另外一个比较常见的组件。轮播图,在一些官网的页面中,这个组件是非常常见的。
如果你是第一次看到这一篇文章, 建议先看一下第一节内容:
从零实现一套低代码(保姆级教程) — 【1】初始化项目,实现左侧组件列表
那如果你是从基础开始学前端的,那么轮播图组件也是一个作为入门实现的组件。那我们现在要把这个组件,加入到我们的低代码项目中,来进行实现。

1.组件子节点的类型控制
在实现之前,我们先考虑一个问题。就是容器下都应该可以放置什么节点。
如果我在Form表单组件里面,放一个卡片。当然,代码是可以实现的,但是我们没有必要这么做,所以我们需要给子节点一些类型的控制。比如Form表单下就应该只有一些输入框之类的。
那我们可以在mainPart中新建一个staticUtils,然后在里面将容器的子节点类型存储起来。
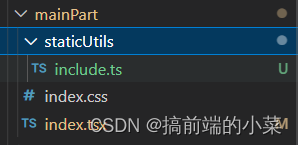
在includes.ts中,我们根据容器类型,来确定它的子节点的类型。
我这里举个例子,读者可根据自己的情况进行修改。
const includesList: {[key: string]: string[] } = {Form: ['Input', 'Checkbox', 'Radio', 'Rate', 'Switch'],Card: ['Input', 'Checkbox', 'Radio', 'Rate', 'Switch', 'Button','Icon','Alert','Progress','Avatar','QrCode','Tag'],Badge: ['Button','Avatar']
}export {includesList
}
因为我们现在只实现了三个容器,所以我们这里不会有很多的代码,OK,增加好了规则后,我们就要到onDropContainer方法中,进行修改了。
我们知道,拖拽到容器中有两个逻辑:
- 从左侧组件列表拖拽
- 从画布区进行拖拽
针对于这两种情况,我们分别做出对应的处理:
if(!includesList[com.comType].includes(dragCom?.comType)) {e.stopPropagation()message.error('该容器下不支持拖拽该类型组件');return;}
if(!includesList[com.comType].includes(nowCom)) {e.stopPropagation()message.error('该容器下不支持拖拽该类型组件');return;}
这个时候,我们会发现,onDropContainer这个方法有点太大了,而且我不确定后期还会不会再继续添加代码,所以我们看看能不能给它拆开,并且给它移出去。(当然你不干这个也行,主要这么做代码会好看一些)
const onDropContainer = (com: ComJson) => {return (e: any) => {const dragCom = getComById(dragComId, comList)if(Object.keys(includesList).includes(com.comType)) {// 如果是画布区的拖拽要先将节点从comList中删除掉if(dragCom && dragCom !== com) {mainDropContainer(e, com, dragCom, comList);setDragComId('')return;}else if(dragCom){// 拖拽的是容器本身return;}// 从左侧列表进行拖拽leftDropContainer(e, com, nowCom, componentTextMap, comList);}}}
XinBuilder2\src\pages\builder\mainPart\staticUtils\include.ts
import { ComJson } from "..";
import { message } from 'antd';
import Store from "../../../../store";
import { ComponentTextMap } from "../../leftPart/staticUtil/iconList";
let num = 1;const includesList: {[key: string]: string[] } = {Form: ['Input', 'Checkbox', 'Radio', 'Rate', 'Switch'],Card: ['Input', 'Checkbox', 'Radio', 'Rate', 'Switch', 'Button','Icon','Alert','Progress','Avatar','QrCode','Tag'],Badge: ['Button','Avatar']
}const mainDropContainer = (e: any, com: ComJson, dragCom: ComJson, comList: ComJson[]) => {if(!includesList[com.comType].includes(dragCom?.comType)) {e.stopPropagation()message.error('该容器下不支持拖拽该类型组件');}else{const index = comList.findIndex((item: any) => item.comId === dragCom?.comId);if(index > -1) {comList.splice(index, 1)}if(!com.childList) {com.childList = []}delete dragCom.stylecom.childList.push(dragCom);Store.dispatch({type: 'changeComList', value: comList})e.stopPropagation()}
}const leftDropContainer = (e: any, com: ComJson, nowCom: string, componentTextMap: ComponentTextMap, comList: ComJson[]) => {if(!includesList[com.comType].includes(nowCom)) {e.stopPropagation()message.error('该容器下不支持拖拽该类型组件');}else{let comId = `comId_${Date.now()}`const comNode = {comType: nowCom,comId,caption: componentTextMap[nowCom] + num++}if(!com.childList) {com.childList = []}com.childList.push(comNode);Store.dispatch({type: 'changeComList', value: comList})e.stopPropagation()}
}export {includesList,mainDropContainer,leftDropContainer
}
这样我们就把。从画布区拖拽到容器里,和从左侧列表拖拽到容器里的方法,拆分出来了。
相关的代码提交在github上:
https://github.com/TeacherXin/XinBuilder2
commit: 第十五节: 增加容器子节点的类型控制
2.增加轮播图组件
这个添加组件的过程我就不重复说了,要记得吧把includes里面补充一下:
const includesList: {[key: string]: string[] } = {Form: ['Input', 'Checkbox', 'Radio', 'Rate', 'Switch'],Card: ['Input', 'Checkbox', 'Radio', 'Rate', 'Switch', 'Button','Icon','Alert','Progress','Avatar','QrCode','Tag'],Badge: ['Button','Avatar'],Carousel: ['Button']
}
这里我就在轮播图里面只能拖入Button组件了。
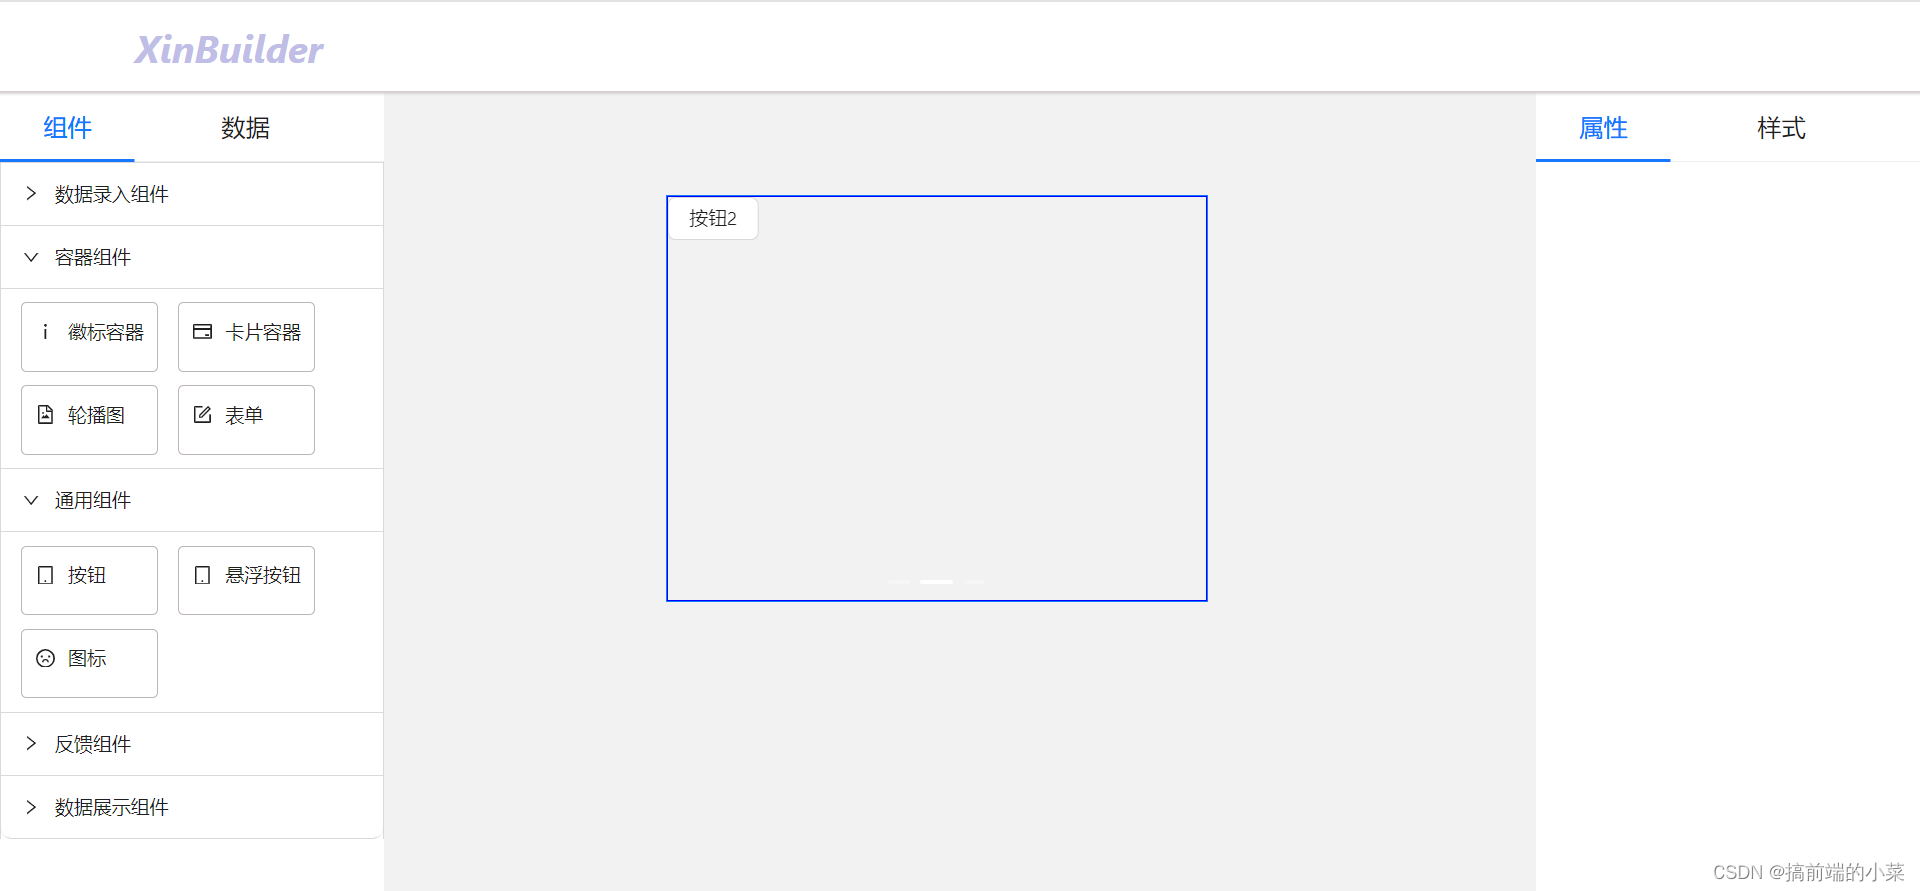
3.补充轮播图组件的属性和样式
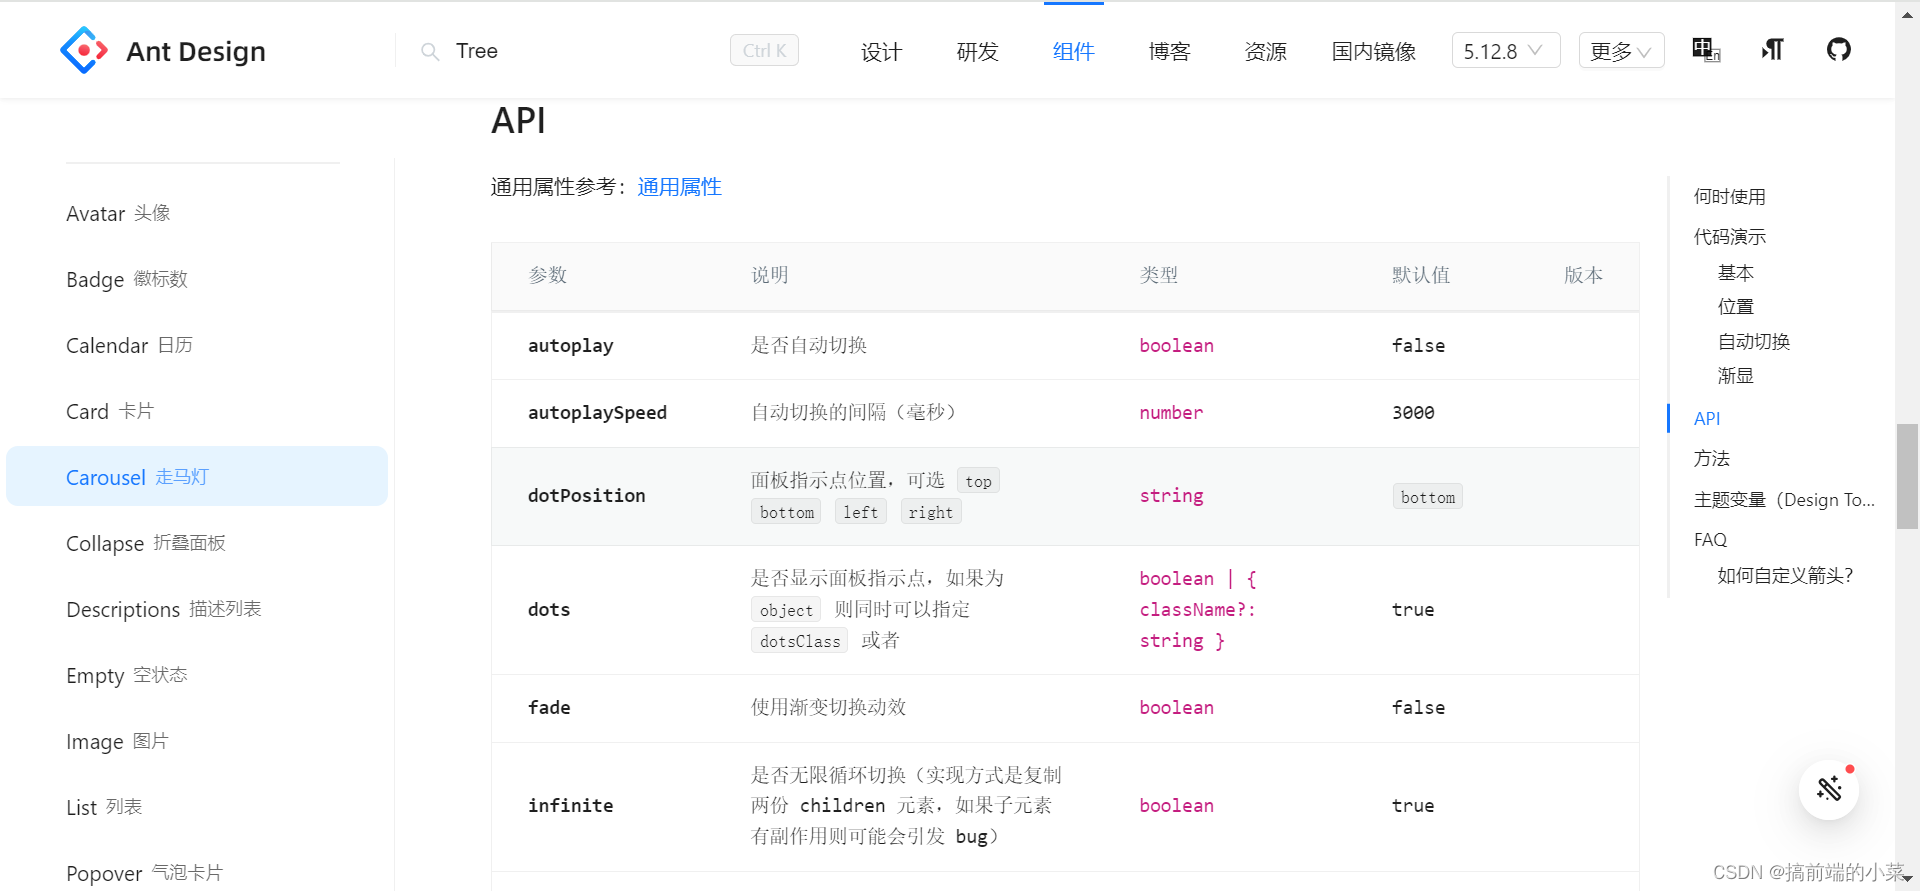
依旧根据antD文档的组件进行补充:
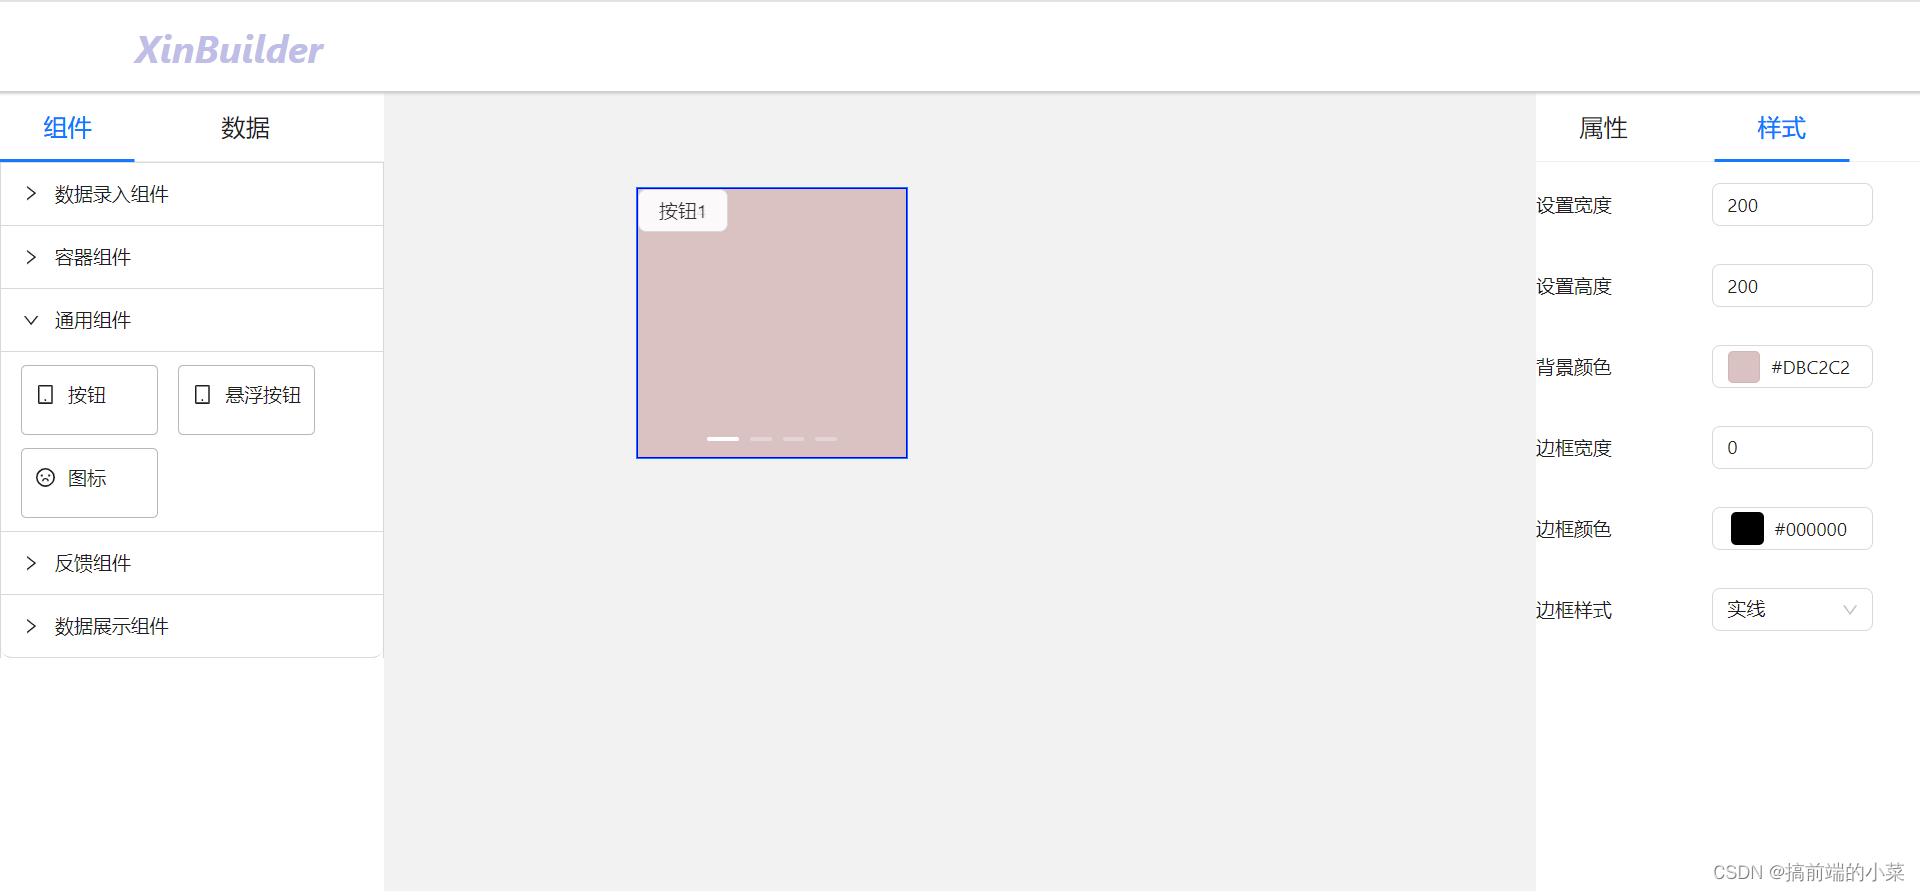
相关的代码提交在github上:
https://github.com/TeacherXin/XinBuilder2
commit: 第十六节: 增加轮播图组件


)

)

:取已包含在其他对象中的公式的方法,额外保存属性)


》认证模拟实验上机试题)