看微信公众号的时候时常会想退出去回复消息,但又不想放弃已经阅读一半的文章,因为回复信息后再从公众号找到该篇文章之间有不必要的时间花费,微信悬浮窗的出现解决了这个烦恼,回复完消息之后只需要点击悬浮窗就可以回到之前在阅读的文章中。在对比多篇公众号文章的时候悬浮窗也使得在不同文章之间的切换更方便。悬浮窗的出现主要是为了省去用户在不同页面之间频繁切换时不必要的时间和精力的开销,这个组件小细节比较多,完整复刻估计需要分成三或四部分来讲,这篇文章主要讲述的是悬浮窗在点击前的按钮形态的实现,下一篇文章讲解按钮在不同形态之间切换,动起来。
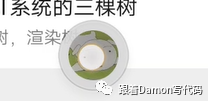
先上最终效果对比图:
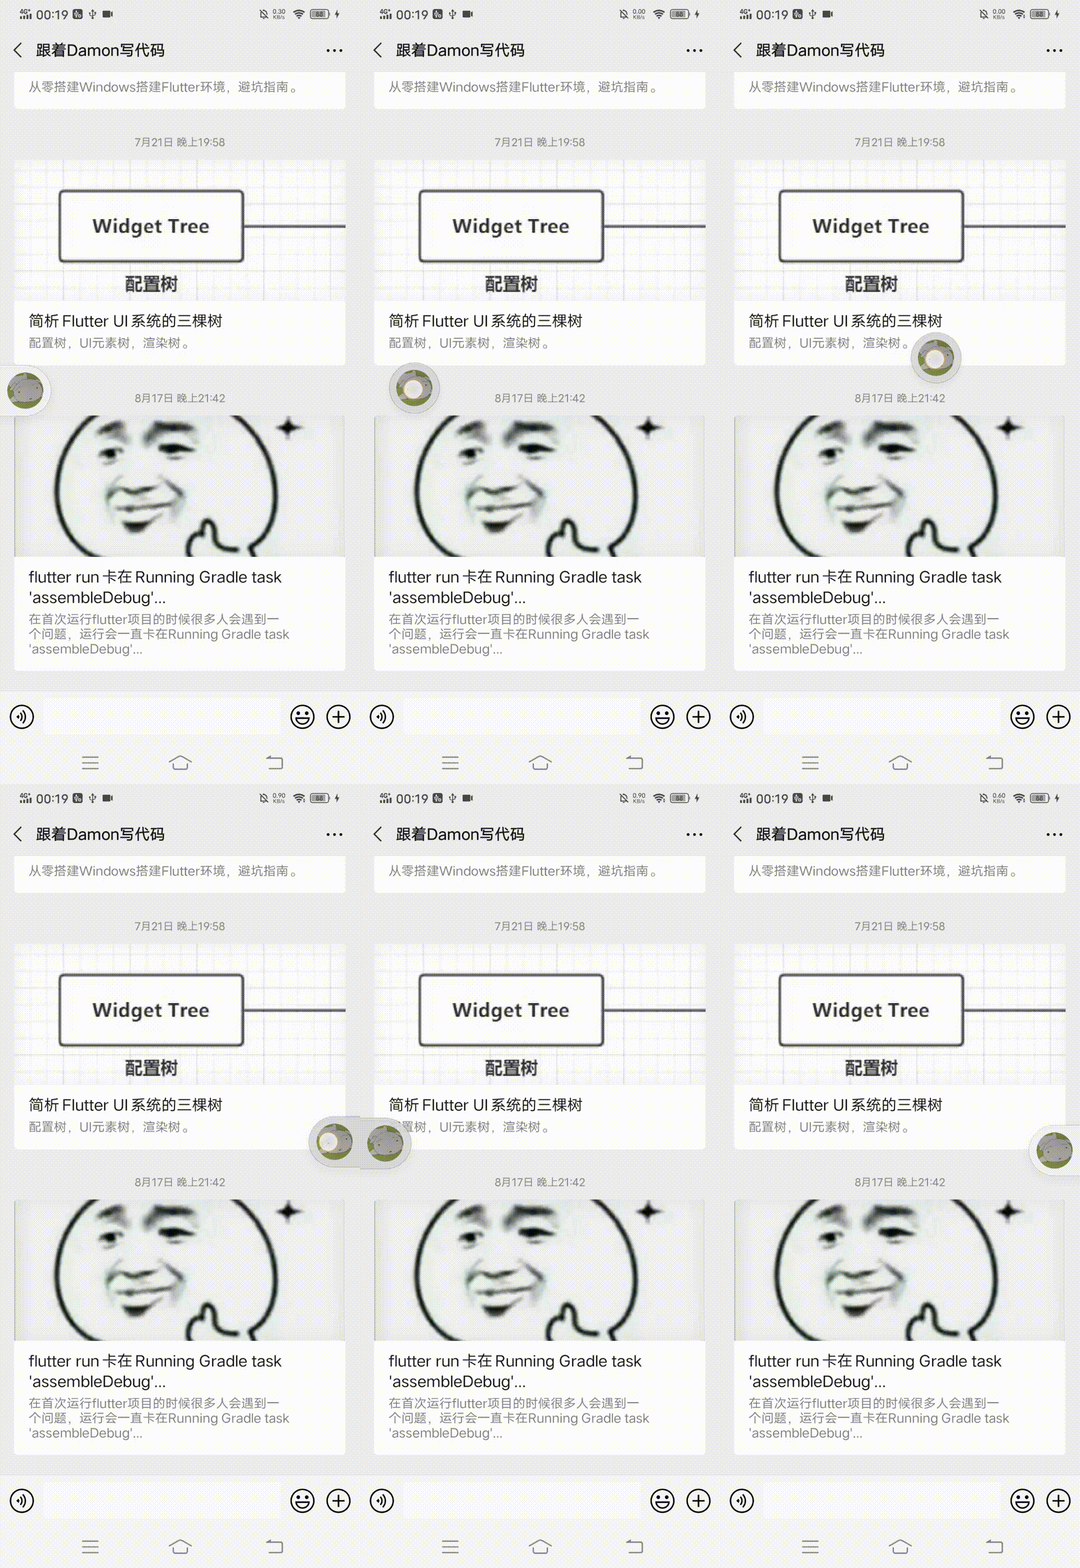
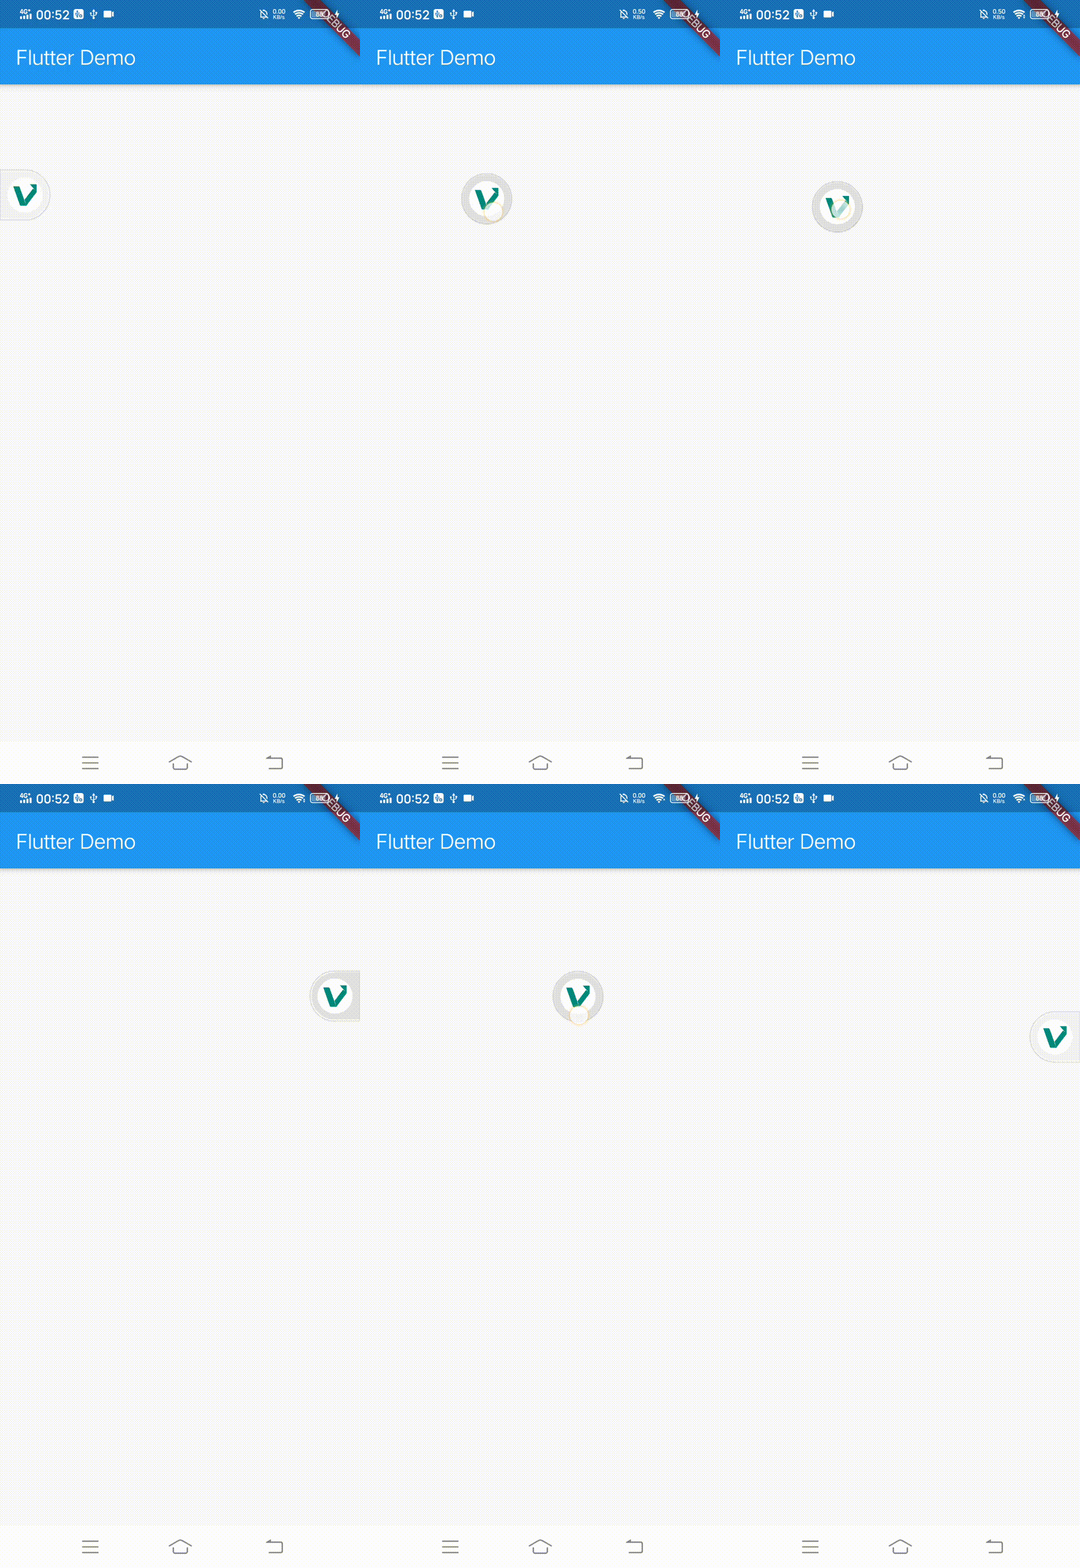
实现思路
通过观察可得,悬浮按钮处于边缘的时候是属于不规则形状。属于官方的UI库中是不存在的不规则图形,也无法通过组合已有组件实现。这时候就需要用到Flutter提供的CustomPaint和CustomPainter来实现自绘组件,但具体的绘制工作是由Canvas类和Paint类进行的。
按钮图解
对微信的悬浮按钮进行分析后,发现微信悬浮按钮主要有三种形态:左边缘按钮形态,中心按钮形态,和右边缘按钮形态,而每一个形态在按下的时候会有一个阴影,表示已选中,松开的时候阴影消失,表示未选中。具体形态图解如下(按画布大小为50x50设计):
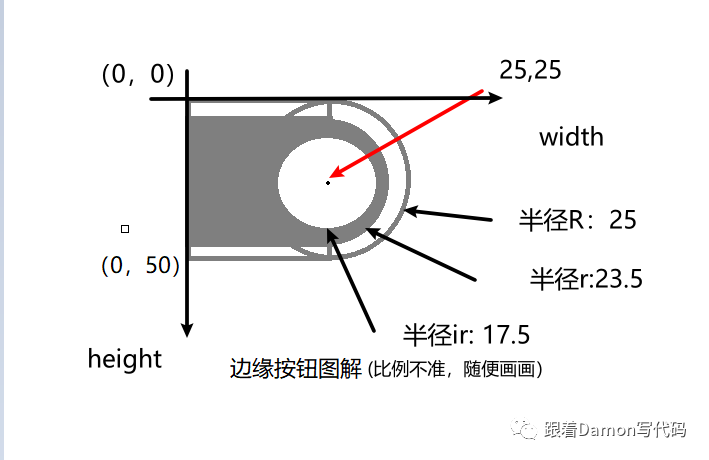
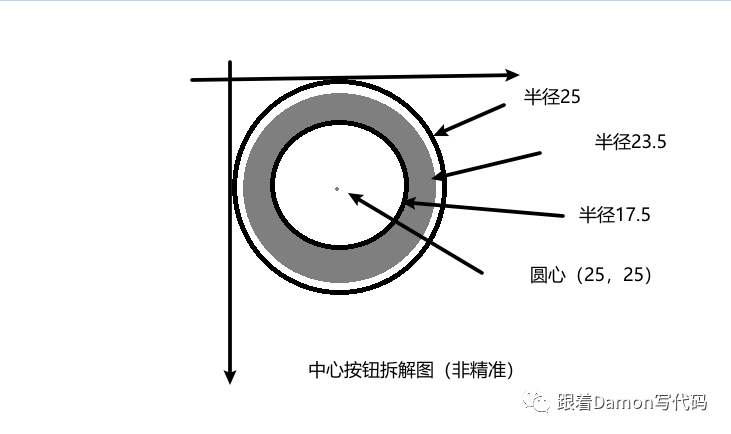
图解非一步到位,只是对原组件进行分析后大概画一下,在绘图的过程中再进行一些细微的调整达到较好的视觉效果(并非专业UI设计师,随便画画)。进行分析图解后,便可以着手对每一个形态进行绘制了。
使用到的类
在着手开始绘制前,我们需要了解我们绘制使用到的几个类:
CustomPaint
构造函数如下:
CustomPaint({
  Key key,
  this.painter,  //背景画笔
  this.foregroundPainter, //前景画笔
  this.size = Size.zero,  //画布即绘制区域的大小
  this.isComplex = false,  //是否为复杂绘制,若是Flutter则会启用一些缓存策略减少绘制的开销
  this.willChange = false, //和isComplex配合使用,当启用缓存,表示下一帧中绘制是否会改变
  Widget child, //子节点,可以为空
})
CustomPainter
CustomPainter中定义的虚函数paint,主要的绘制工作都是在这个函数中完成,主要定义如下:
void paint(Canvas canvas, Size size);
size: 表示绘制区域的大小,传递自CustomPaint中的size
canvas: 画布,其内封装了大量的绘制方法,此处列举本文中用到方法:
| API名称 | 功能 |
|---|---|
| drawCircle | 绘制圆形 |
| drawPath | 绘制路径 |
| drawImageRect | 根据给出的图片及原矩形(src)和目标矩形(dst)绘制图片 |
| clipRRect | 根据给出的圆角矩形对画布进行剪裁(超出区域不绘制) |
| drawShadow | 绘制阴影 |
| drawColor | 根据模式绘制颜色(本文用于绘制图片背景填充颜色) |
Paint
如果说Canvas是画布,那么Paint就是画笔。Canvas中封装的很多绘制方法都需要一个画笔参数去进行绘制。画笔Paint中定义了一些画笔的基本属性,如画笔宽度,画笔颜色,笔触类型等,例子如下:
Paint _paint = Paint()
    ..color = Colors.blue //画笔颜色,此处为蓝色
    ..strokeCap = StrokeCap.round //画笔笔触类型
    ..isAntiAlias = true //是否启动抗锯齿
    ..blendMode = BlendMode.exclusion //颜色混合模式
    ..style = PaintingStyle.fill //绘画风格,默认为填充
    ..colorFilter = ColorFilter.mode(Colors.blueAccent,
        BlendMode.exclusion) //颜色渲染模式
    ..maskFilter = MaskFilter.blur(BlurStyle.inner, 3.0) //模糊遮罩效果
    ..filterQuality = FilterQuality.high //颜色渲染模式的质量
    ..strokeWidth = 15.0; //画笔的宽度
我们在实际使用中根据需要去选择相应的属性,并不需要全部初始化。
Path
路径,使用drawPath中绘制不规则图形可以通过函数或者点间连线、曲线等表示。本文用到的方法如下:
| API名称 | 功能 |
|---|---|
| moveTo | 将路径起点移动到指定位置 |
| lineTo | 从当前位置连线到指定位置 |
| arcTo | 曲线 |
开始绘制
对于工程其他的文件和布局不做讨论,主要讨论如何实现继承CustomPainter实现paint方法的绘制,对于如何使用这个Painter,可以参考《Flutter实战》(https://book.flutterchina.club/chapter10/custom_paint.html)。
边缘按钮的绘制
由于左右边缘按钮的图形绘制方法类似,因此我们主要讨论 左边缘按钮 的实现。由图解可知左边缘按钮是不规则的形状。我们的画布的尺寸为50x50,我们可以把这个形状看作一个圆形和一个正方形的重合,这是一种思路。
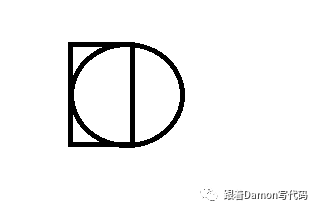
但我写的是另一种思路:看作是三条直线和一段圆弧所组成路径,以边缘按钮内层的具体代码实现为例:
//edgePath: 按钮外边缘路径,黑色线条
    var edgePath = new Path() ..moveTo(size.width / 2, size.height); //移动去x轴中点(25,0)
    edgePath.lineTo(0.0, size.height); //第一条直线
    edgePath.lineTo(0.0, 0.0);//第二条直线
    edgePath.lineTo(size.width / 2,0.0);//第三条直线
    //圆弧在圆心在(25,25),半径为25的圆上
    Rect rect1 = Rect.fromCircle(center:Offset(size.width / 2,size.height / 2),radius: 25);
    edgePath.arcTo(rect1,pi * 1.5,pi,true); //右半圆,从 3/2 Π处起步 经过Π 个角度。

    var paint = new Paint()
      ..isAntiAlias = true //画曲线时抗锯齿看起来更圆润
      ..strokeWidth = 0.75 //
      ..strokeCap = StrokeCap.round
      ..maskFilter = MaskFilter.blur(BlurStyle.normal,0.25) //线条模糊
      ..style = PaintingStyle.stroke //线条,不填充
      ..color = Color.fromRGBO(0xCF, 0xCF, 0xCF, 1);

    canvas.drawPath(edgePath, paint);//绘制路径
效果如下:
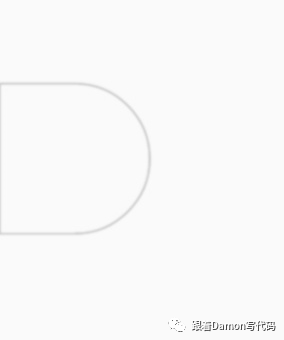
同理绘制内层阴影部分为:
 //绘制按钮内层
    var paint = Paint()
      ..isAntiAlias = false
      ..style = PaintingStyle.fill
      ..color = Color.fromRGBO(0xF3, 0xF3, 0xF3, 0.9);
    //..color = Color.fromRGBO(0xDA,0xDA,0xDA,0.9);

    //path : 按钮内边缘路径
    var path = new Path() ..moveTo(size.width / 2 , size.height - 1.5);
    path.lineTo(0.0, size.height - 1.5);
    path.lineTo(0.0, 1.5);
    path.lineTo(size.width / 2 ,1.5);
    Rect rect = Rect.fromCircle(center:Offset(size.width / 2,size.height / 2),radius: 23.5);
    path.arcTo(rect,pi * 1.5,pi,true);
    canvas.drawPath(path, paint);
合起来效果为:
最重点是中间图标logo的绘制。
此处有踩坑点,canvas中绘制图片的方法
void drawImageRect(Image image, Rect src, Rect dst, Paint paint)
参数image的类型Image并不是我们日常使用到的Image类型,而是封装在ui库中的一个官方私有类,只能通过监听图片流返回一个Future,再通过FutureBuilder把image传递给CustomPainter的子类。详情看 ui.Image加载探索(https://cloud.tencent.com/developer/article/1622733)这篇博客。具体内容在下一篇文章中再解释,本文暂时不涉及,不需要理解。
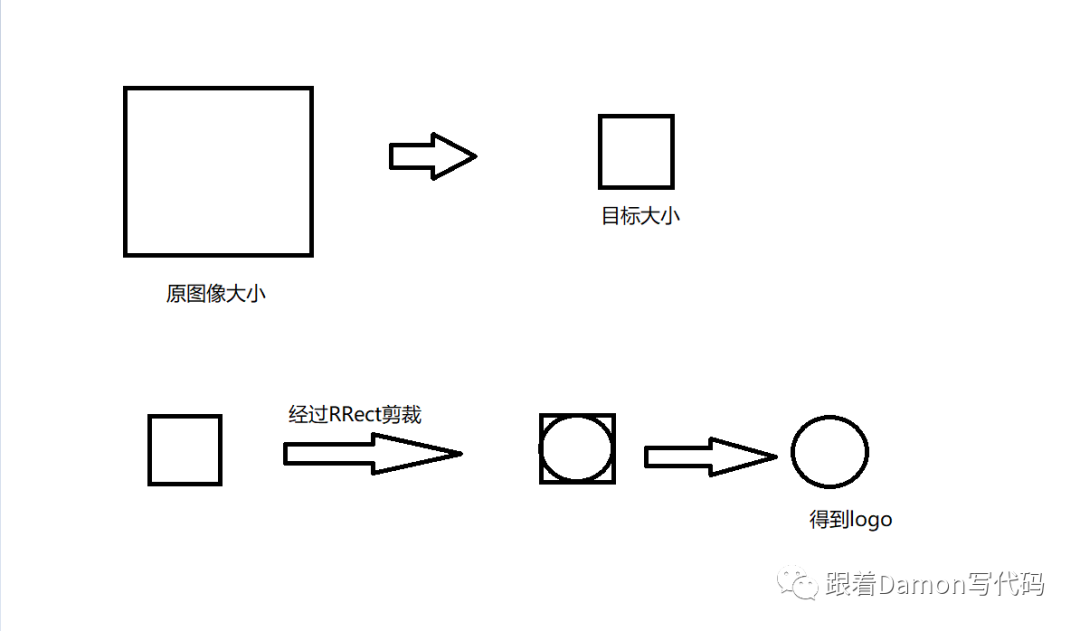
先讲绘制。对于中间logo的绘制,我们将原图片的大小输出为目标区域的大小。其次,区域为矩形,而我们需要输出的logo是圆形区域,因此需要对画布进行剪裁,示意图如下:
具体实现代码如下:
//绘制中间图标
    paint = new Paint();
    canvas.save(); //剪裁前保存图层
    RRect imageRRect = RRect.fromRectAndRadius(Rect.fromLTWH(size.width / 2  - 17.5,size.width / 2 - 17.5, 35, 35),Radius.circular(17.5));
    canvas.clipRRect(imageRRect);//图片为圆形,圆形剪裁
    canvas.drawColor(Colors.white, BlendMode.srcOver); //设置填充颜色为白色
    Rect srcRect = Rect.fromLTWH(0.0, 0.0, buttonImage.width.toDouble(), buttonImage.height.toDouble());
    Rect dstRect = Rect.fromLTWH(size.width / 2 - 17.5, size.height / 2 - 17.5, 35, 35);
    canvas.drawImageRect(buttonImage, srcRect, dstRect, paint);
    canvas.restore();//图片绘制完毕恢复图层
完整的左边缘按钮绘制代码:
 //绘制左边界悬浮按钮
  void paintLeftEdgeButton(Canvas canvas,Size size,bool isPress)
  {
    //绘制按钮内层
    var paint = Paint()
      ..isAntiAlias = false
      ..style = PaintingStyle.fill
      ..color = Color.fromRGBO(0xF3, 0xF3, 0xF3, 0.9);
    //..color = Color.fromRGBO(0xDA,0xDA,0xDA,0.9);

    //path : 按钮内边缘路径
    var path = new Path() ..moveTo(size.width / 2 , size.height - 1.5);
    path.lineTo(0.0, size.height - 1.5);
    path.lineTo(0.0, 1.5);
    path.lineTo(size.width / 2 ,1.5);
    Rect rect = Rect.fromCircle(center:Offset(size.width / 2,size.height / 2),radius: 23.5);
    path.arcTo(rect,pi * 1.5,pi,true);
    canvas.drawPath(path, paint);


    //edgePath: 按钮外边缘路径,黑色线条
    var edgePath = new Path() ..moveTo(size.width / 2, size.height);
    edgePath.lineTo(0.0, size.height);
    edgePath.lineTo(0.0, 0.0);
    edgePath.lineTo(size.width / 2,0.0);
    Rect rect1 = Rect.fromCircle(center:Offset(size.width / 2,size.height / 2),radius: 25);
    edgePath.arcTo(rect1,pi * 1.5,pi,true);

    paint
      ..isAntiAlias = true
      ..strokeWidth = 0.75
      ..strokeCap = StrokeCap.round
      ..maskFilter = MaskFilter.blur(BlurStyle.normal,0.25) //线条模糊
      ..style = PaintingStyle.stroke
      ..color = Color.fromRGBO(0xCF, 0xCF, 0xCF, 1);
    canvas.drawPath(edgePath, paint);

    //按下则画阴影,表示选中
    if(isPress) canvas.drawShadow(edgePath, Color.fromRGBO(0xDA, 0xDA, 0xDA, 0.3), 0, false);

    //绘制中间图标
    paint = new Paint();
    canvas.save(); //剪裁前保存图层
    RRect imageRRect = RRect.fromRectAndRadius(Rect.fromLTWH(size.width / 2  - 17.5,size.width / 2 - 17.5, 35, 35),Radius.circular(17.5));
    canvas.clipRRect(imageRRect);//图片为圆形,圆形剪裁
    canvas.drawColor(Colors.white, BlendMode.srcOver); //设置填充颜色为白色
    Rect srcRect = Rect.fromLTWH(0.0, 0.0, buttonImage.width.toDouble(), buttonImage.height.toDouble());
    Rect dstRect = Rect.fromLTWH(size.width / 2 - 17.5, size.height / 2 - 17.5, 35, 35);
    canvas.drawImageRect(buttonImage, srcRect, dstRect, paint);
    canvas.restore();//图片绘制完毕恢复图层
  }
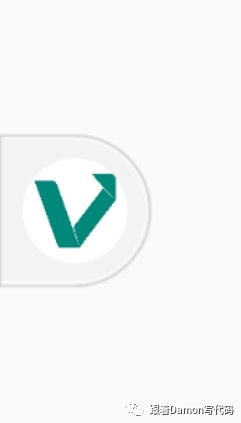
效果图:
同理,右边缘按钮的绘制为:
//绘制右边界按钮
  void paintRightEdgeButton(Canvas canvas,Size size){

    var paint = Paint()
        ..isAntiAlias = false
        ..style = PaintingStyle.fill
        ..color = Color.fromRGBO(0xF3, 0xF3, 0xF3, 0.9);

    var path = Path() ..moveTo(size.width / 2, 1.5);
    path.lineTo(size.width,1.5);
    path.lineTo(size.width, size.height - 1.5);
    path.lineTo(size.width / 2, size.height - 1.5);

    Rect rect = Rect.fromCircle(center: Offset(size.width / 2,size.height / 2),radius: 23.5);
    path.arcTo(rect, pi * 0.5, pi, true);

    canvas.drawPath(path, paint);//绘制


    //edgePath: 按钮外边缘路径
    var edgePath = Path() ..moveTo(size.width / 2,0.0);
    edgePath.lineTo(size.width,0.0);
    edgePath.lineTo(size.width, size.height);
    edgePath.lineTo(size.width / 2, size.height);
    Rect edgeRect = Rect.fromCircle(center: Offset(size.width / 2,size.height / 2),radius: 25);
    edgePath.arcTo(edgeRect, pi * 0.5, pi, true);

    paint
      ..isAntiAlias = true
      ..strokeWidth = 0.75
      ..strokeCap = StrokeCap.round
      ..maskFilter = MaskFilter.blur(BlurStyle.normal,0.25)
      ..style = PaintingStyle.stroke
      ..color = Color.fromRGBO(0xCF, 0xCF, 0xCF, 1);
    canvas.drawPath(edgePath, paint);

    //如果按下则绘制阴影
    if(isPress)
      canvas.drawShadow(path, Color.fromRGBO(0xDA, 0xDA, 0xDA, 0.3), 0, false);

    //绘制中间图标
    paint = new Paint();
    canvas.save(); //剪裁前保存图层
    RRect imageRRect = RRect.fromRectAndRadius(Rect.fromLTWH(size.width / 2  - 17.5,size.width / 2 - 17.5, 35, 35),Radius.circular(17.5));
    canvas.clipRRect(imageRRect);//图片为圆形,圆形剪裁
    canvas.drawColor(Colors.white, BlendMode.srcOver); //设置填充颜色为白色
    Rect srcRect = Rect.fromLTWH(0.0, 0.0, buttonImage.width.toDouble(), buttonImage.height.toDouble());
    Rect dstRect = Rect.fromLTWH(size.width / 2 - 17.5, size.height / 2 - 17.5, 35, 35);
    canvas.drawImageRect(buttonImage, srcRect, dstRect, paint);
    canvas.restore();//图片绘制完毕恢复图层

  }
中心按钮的绘制
中心按钮为规则的两个圆型+中间的logo,因此绘制很简单,具体代码如下:
 //绘制中心按钮
  void paintCenterButton(Canvas canvas,Size size)
  {
    //绘制按钮内层
    var paint = new Paint()
        ..isAntiAlias = false
        ..style = PaintingStyle.fill
        ..color = Color.fromRGBO(0xF3, 0xF3, 0xF3, 0.9);
    canvas.drawCircle(Offset(size.width / 2,size.height / 2), 23.5, paint);

    //绘制按钮外层边线
    paint
      ..isAntiAlias = true
      ..style = PaintingStyle.stroke
      ..strokeWidth = 0.75
      ..maskFilter = MaskFilter.blur(BlurStyle.normal,0.25)
      ..color = Color.fromRGBO(0xCF, 0xCF, 0xCF, 1);
    canvas.drawCircle(Offset(size.width / 2,size.height / 2), 25, paint);

    //如果按下则绘制阴影
    if(isPress){
      var circleRect = Rect.fromCircle(center: Offset(size.width / 2,size.height / 2),radius: 25);
      var circlePath = new Path() ..moveTo(size.width / 2, size.height / 2);
      circlePath.arcTo(circleRect, 0, 2 * 3.14, true);
      canvas.drawShadow(circlePath, Color.fromRGBO(0xCF, 0xCF, 0xCF, 0.3), 0.5, false);
    }

    //绘制中间图标
    paint = new Paint();
    canvas.save(); //图片剪裁前保存图层
    RRect imageRRect = RRect.fromRectAndRadius(Rect.fromLTWH(size.width / 2  - 17.5,size.width / 2 - 17.5, 35, 35),Radius.circular(35));
    canvas.clipRRect(imageRRect);//图片为圆形,圆形剪裁
    canvas.drawColor(Colors.white, BlendMode.srcOver); //设置填充颜色为白色
    Rect srcRect = Rect.fromLTWH(0.0, 0.0, buttonImage.width.toDouble(), buttonImage.height.toDouble());
    Rect dstRect = Rect.fromLTWH(size.width / 2 - 17.5, size.height / 2 - 17.5, 35, 35);
    canvas.drawImageRect(buttonImage, srcRect, dstRect, paint);
    canvas.restore();//恢复剪裁前的图层

  }
如何选择绘制
细心的你可能发现了一个变量isPress,他代表着什么呢,代表着的是否手指按下悬浮按钮,若按下则绘制表示选中的阴影部分。当你有了边缘按钮和中心按钮,组件的绘制是一帧一帧的画面,paint(Canvas canvas,Size size)绘制的是一帧的画面,而如何判断这一帧时选择绘制左边缘按钮还是右边缘按钮,中心按钮?因此,在FloatingButtonPainter中还应该定义几个判断的变量。
FloatingButtonPainter({
    Key key,
    @required this.isLeft,
    @required this.isEdge,
    @required this.isPress,
    @required this.buttonImage
  });

  //按钮是否在屏幕左侧,屏幕宽度中线为准
  final bool isLeft;
  //按钮是否在屏幕边界,左/右边界
  final bool isEdge;
  //按钮是否被按下
  final bool isPress;
  //内按钮logo ui.image
  final ui.Image buttonImage;
在paint方法中进行判断
@overridevoid paint(Canvas canvas, Size size) {// TODO: implement paint  //按钮是否在边缘  if(isEdge){//按钮在屏幕左边或右边    if(isLeft)
      paintLeftEdgeButton(canvas, size);//绘制左边缘按钮    else      paintRightEdgeButton(canvas, size);//绘制右边缘按钮  }else{
    paintCenterButton(canvas, size);//绘制中心按钮  }
}
完整代码
FloatingButtonPainter完整代码:
import 'package:flutter/material.dart';
import 'dart:math';
import 'dart:ui' as ui;

class FloatingButtonPainter extends CustomPainter
{
  FloatingButtonPainter({
    Key key,
    @required this.isLeft,
    @required this.isEdge,
    @required this.isPress,
    @required this.buttonImage
  });

  //按钮是否在屏幕左侧,屏幕宽度 / 2
  final bool isLeft;
  //按钮是否在屏幕边界,左/右边界
  final bool isEdge;
  //按钮是否被按下
  final bool isPress;
  //内按钮图片 ui.image
  final ui.Image buttonImage;
  @override
  void paint(Canvas canvas, Size size) {
    // TODO: implement paint
    if(isEdge){
      if(isLeft)
      paintLeftEdgeButton(canvas, size);//绘制左边缘按钮
      else
        paintRightEdgeButton(canvas, size);//绘制右边缘按钮
    }
    else{
      paintCenterButton(canvas, size); //绘制中心按钮
    }
  }

  //绘制左边界悬浮按钮
  void paintLeftEdgeButton(Canvas canvas,Size size)
  {
    //绘制按钮内层
    var paint = Paint()
      ..isAntiAlias = false
      ..style = PaintingStyle.fill
      ..color = Color.fromRGBO(0xF3, 0xF3, 0xF3, 0.9);
    //..color = Color.fromRGBO(0xDA,0xDA,0xDA,0.9);

    //path : 按钮内边缘路径
    var path = new Path() ..moveTo(size.width / 2 , size.height - 1.5);
    path.lineTo(0.0, size.height - 1.5);
    path.lineTo(0.0, 1.5);
    path.lineTo(size.width / 2 ,1.5);
    Rect rect = Rect.fromCircle(center:Offset(size.width / 2,size.height / 2),radius: 23.5);
    path.arcTo(rect,pi * 1.5,pi,true);
    canvas.drawPath(path, paint);


    //edgePath: 按钮外边缘路径,黑色线条
    var edgePath = new Path() ..moveTo(size.width / 2, size.height);
    edgePath.lineTo(0.0, size.height);
    edgePath.lineTo(0.0, 0.0);
    edgePath.lineTo(size.width / 2,0.0);
    Rect rect1 = Rect.fromCircle(center:Offset(size.width / 2,size.height / 2),radius: 25);
    edgePath.arcTo(rect1,pi * 1.5,pi,true);

    paint
      ..isAntiAlias = true
      ..strokeWidth = 0.75
      ..strokeCap = StrokeCap.round
      ..maskFilter = MaskFilter.blur(BlurStyle.normal,0.25) //线条模糊
      ..style = PaintingStyle.stroke
      ..color = Color.fromRGBO(0xCF, 0xCF, 0xCF, 1);
    canvas.drawPath(edgePath, paint);

    //按下则画阴影,表示选中
    if(isPress) canvas.drawShadow(edgePath, Color.fromRGBO(0xDA, 0xDA, 0xDA, 0.3), 0, false);

    //绘制中间图标
    paint = new Paint();
    canvas.save(); //剪裁前保存图层
    RRect imageRRect = RRect.fromRectAndRadius(Rect.fromLTWH(size.width / 2  - 17.5,size.width / 2 - 17.5, 35, 35),Radius.circular(17.5));
    canvas.clipRRect(imageRRect);//图片为圆形,圆形剪裁
    canvas.drawColor(Colors.white, BlendMode.srcOver); //设置填充颜色为白色
    Rect srcRect = Rect.fromLTWH(0.0, 0.0, buttonImage.width.toDouble(), buttonImage.height.toDouble());
    Rect dstRect = Rect.fromLTWH(size.width / 2 - 17.5, size.height / 2 - 17.5, 35, 35);
    canvas.drawImageRect(buttonImage, srcRect, dstRect, paint);
    canvas.restore();//图片绘制完毕恢复图层
  }

  //绘制右边界按钮
  void paintRightEdgeButton(Canvas canvas,Size size){

    var paint = Paint()
        ..isAntiAlias = false
        ..style = PaintingStyle.fill
        ..color = Color.fromRGBO(0xF3, 0xF3, 0xF3, 0.9);

    var path = Path() ..moveTo(size.width / 2, 1.5);
    path.lineTo(size.width,1.5);
    path.lineTo(size.width, size.height - 1.5);
    path.lineTo(size.width / 2, size.height - 1.5);

    Rect rect = Rect.fromCircle(center: Offset(size.width / 2,size.height / 2),radius: 23.5);
    path.arcTo(rect, pi * 0.5, pi, true);

    canvas.drawPath(path, paint);//绘制


    //edgePath: 按钮外边缘路径
    var edgePath = Path() ..moveTo(size.width / 2,0.0);
    edgePath.lineTo(size.width,0.0);
    edgePath.lineTo(size.width, size.height);
    edgePath.lineTo(size.width / 2, size.height);
    Rect edgeRect = Rect.fromCircle(center: Offset(size.width / 2,size.height / 2),radius: 25);
    edgePath.arcTo(edgeRect, pi * 0.5, pi, true);

    paint
      ..isAntiAlias = true
      ..strokeWidth = 0.75
      ..strokeCap = StrokeCap.round
      ..maskFilter = MaskFilter.blur(BlurStyle.normal,0.25)
      ..style = PaintingStyle.stroke
      ..color = Color.fromRGBO(0xCF, 0xCF, 0xCF, 1);
    canvas.drawPath(edgePath, paint);

    //如果按下则绘制阴影
    if(isPress)
      canvas.drawShadow(path, Color.fromRGBO(0xDA, 0xDA, 0xDA, 0.3), 0, false);

    //绘制中间图标
    paint = new Paint();
    canvas.save(); //剪裁前保存图层
    RRect imageRRect = RRect.fromRectAndRadius(Rect.fromLTWH(size.width / 2  - 17.5,size.width / 2 - 17.5, 35, 35),Radius.circular(17.5));
    canvas.clipRRect(imageRRect);//图片为圆形,圆形剪裁
    canvas.drawColor(Colors.white, BlendMode.srcOver); //设置填充颜色为白色
    Rect srcRect = Rect.fromLTWH(0.0, 0.0, buttonImage.width.toDouble(), buttonImage.height.toDouble());
    Rect dstRect = Rect.fromLTWH(size.width / 2 - 17.5, size.height / 2 - 17.5, 35, 35);
    canvas.drawImageRect(buttonImage, srcRect, dstRect, paint);
    canvas.restore();//图片绘制完毕恢复图层

  }

  //绘制中心按钮
  void paintCenterButton(Canvas canvas,Size size)
  {
    //绘制按钮内层
    var paint = new Paint()
        ..isAntiAlias = false
        ..style = PaintingStyle.fill
        ..color = Color.fromRGBO(0xF3, 0xF3, 0xF3, 0.9);
    canvas.drawCircle(Offset(size.width / 2,size.height / 2), 23.5, paint);

    //绘制按钮外层边线
    paint
      ..isAntiAlias = true
      ..style = PaintingStyle.stroke
      ..strokeWidth = 0.75
      ..maskFilter = MaskFilter.blur(BlurStyle.normal,0.25)
      ..color = Color.fromRGBO(0xCF, 0xCF, 0xCF, 1);
    canvas.drawCircle(Offset(size.width / 2,size.height / 2), 25, paint);

    //如果按下则绘制阴影
    if(isPress){
      var circleRect = Rect.fromCircle(center: Offset(size.width / 2,size.height / 2),radius: 25);
      var circlePath = new Path() ..moveTo(size.width / 2, size.height / 2);
      circlePath.arcTo(circleRect, 0, 2 * 3.14, true); //使用pi会出错。
      canvas.drawShadow(circlePath, Color.fromRGBO(0xCF, 0xCF, 0xCF, 0.3), 0.5, false);
    }

    //绘制中间图标
    paint = new Paint();
    canvas.save(); //图片剪裁前保存图层
    RRect imageRRect = RRect.fromRectAndRadius(Rect.fromLTWH(size.width / 2  - 17.5,size.width / 2 - 17.5, 35, 35),Radius.circular(35));
    canvas.clipRRect(imageRRect);//图片为圆形,圆形剪裁
    canvas.drawColor(Colors.white, BlendMode.srcOver); //设置填充颜色为白色
    Rect srcRect = Rect.fromLTWH(0.0, 0.0, buttonImage.width.toDouble(), buttonImage.height.toDouble());
    Rect dstRect = Rect.fromLTWH(size.width / 2 - 17.5, size.height / 2 - 17.5, 35, 35);
    canvas.drawImageRect(buttonImage, srcRect, dstRect, paint);
    canvas.restore();//恢复剪裁前的图层

  }
  //测试绘制
  void paintTest(Canvas canvas,Size size){
    var paint = Paint()
      ..isAntiAlias = false
      ..style = PaintingStyle.fill
      ..color = Color.fromRGBO(0xF3, 0xF3, 0xF3, 0.9);

    var path = Path() ..moveTo(size.width / 2, 1.5);
    path.lineTo(size.width,1.5);
    path.lineTo(size.width, size.height - 1.5);
    path.lineTo(size.width / 2, size.height - 1.5);

    Rect rect = Rect.fromCircle(center: Offset(size.width / 2,size.height / 2),radius: 23.5);
    path.arcTo(rect, pi * 0.5, pi, true);

    canvas.drawPath(path, paint);//绘制


    //edgePath: 按钮外边缘路径
    var edgePath = Path() ..moveTo(size.width / 2,0.0);
    edgePath.lineTo(size.width,0.0);
    edgePath.lineTo(size.width, size.height);
    edgePath.lineTo(size.width / 2, size.height);
    Rect edgeRect = Rect.fromCircle(center: Offset(size.width / 2,size.height / 2),radius: 23.5);
    edgePath.arcTo(edgeRect, pi * 0.5, pi, true);

    paint
      ..isAntiAlias = true
      ..strokeWidth = 0.75
      ..strokeCap = StrokeCap.round
      ..maskFilter = MaskFilter.blur(BlurStyle.normal,0.25)
      ..style = PaintingStyle.stroke
      ..color = Color.fromRGBO(0xCF, 0xCF, 0xCF, 1);
    canvas.drawPath(edgePath, paint);

    //绘制中间图标
    paint = new Paint();
    RRect imageRRect = RRect.fromRectAndRadius(Rect.fromLTWH(size.width / 2  - 20,size.width / 2 - 20, 40, 40),Radius.circular(20));
    canvas.clipRRect(imageRRect);//图片为圆形,圆形剪裁
    canvas.drawColor(Colors.white, BlendMode.srcOver); //设置填充颜色为白色
    Rect srcRect = Rect.fromLTWH(0.0, 0.0, buttonImage.width.toDouble(), buttonImage.height.toDouble());
    Rect dstRect = Rect.fromLTWH(size.width / 2 - 17.5, size.height / 2 - 17.5, 35, 35);
    canvas.drawImageRect(buttonImage, srcRect, dstRect, paint);

    //如果按下则绘制阴影
    if(isPress)
      canvas.drawShadow(path, Color.fromRGBO(0xDA, 0xDA, 0xDA, 0.3), 0, false);
  }
  @override
  bool shouldRepaint(CustomPainter oldDelegate) {
    // TODO: implement shouldRepaint
    return true;
  }
}
总结
写这个的篇幅比我料想中需要的篇幅还多,目前只实现各种形态绘制,实现FloatingButtonPainter类。但如何使用这个类,让它在各个形态之间切换,让它动起来,实现最终效果,在下一篇文章中继续,有兴趣的可以关注,点赞,点个在看。
)


