整个环境的配置请参考我另一篇博客。ubuntu安装python3.5+pycharm+anaconda+opencv+docker+nvidia-docker+tensorflow+pytorch+Cmake3.8_智障变智能-CSDN博客
中文文档:torch - PyTorch中文文档
github简单示例:多卡分布式教程,带有多卡mnist分布式训练和单卡训练
一. 基础知识
pyTorch 使用的是动态图(Dynamic Computational Graphs)的方式,而 TensorFlow 使用的是静态图(Static Computational Graphs)。
所谓动态图,就是每次当我们搭建完一个计算图,然后在反向传播结束之后,整个计算图就在内存中被释放了。如果想再次使用的话,必须从头再搭一遍。而以 TensorFlow 为代表的静态图,每次都先设计好计算图,需要的时候实例化这个图,然后送入各种输入,重复使用,只有当会话结束的时候创建的图才会被释放.
1.tensor
import torch as t
print(t.__version__)# 构建 5x3 矩阵,只是分配了空间,未初始化
x = t.Tensor(5, 3)
# 使用[0,1]均匀分布随机初始化二维数组
x = t.rand(5, 3)
print(x)
print(x.size()) # 查看x的shape
print(x.size(1))![]()
2.view与squeeze:
#通过`tensor.view`方法可以调整tensor的形状,但必须保证调整前后元素总数一致。
# `view`不会修改自身的数据,返回的新tensor与源tensor共享内存,
# 也即更改其中的一个,另外一个也会跟着改变。
# 在实际应用中可能经常需要添加或减少某一维度,
# 这时候`squeeze`和`unsqueeze`两个函数就派上用场了。
a = t.arange(0, 6)
b=a.view(2, 3) #类似reshape
print(a)
print(b)c=b.unsqueeze(-1)
print(c.shape)d=c.squeeze(-1) # 压缩最后一维的“1”
print(d.shape)d=c.squeeze() # 把所有维度为“1”的压缩
print(d.shape)# a修改,b作为view之后的,也会跟着修改
a[1] = 100
print(b)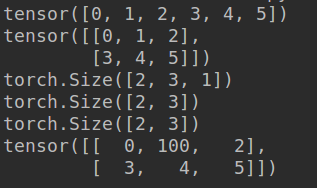
3.加法的三种写法:
y = t.rand(5, 3)
# 加法的第一种写法
print(x + y)
# 加法的第二种写法
z=t.add(x, y)
print(z)
# 加法的第三种写法:指定加法结果的输出目标为result
result = t.Tensor(5, 3) # 预先分配空间
t.add(x, y, out=result) # 输入到result
print(result)
4.add与add_的区别 tensor直接转list
print('x=')
x = t.Tensor([[1,2],[3,4]])
print(x)print('y=')
y = t.Tensor([[1,2],[3,4]])
print(y)print('第二种加法,y的结果')
y.add_(x) # inplace 加法,y变了
print(y)z=y.tolist()
print(z)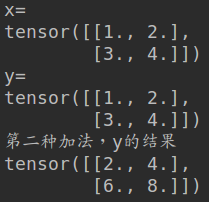
![]()
Tensor还支持很多操作,包括数学运算、线性代数、选择、切片等等,其接口设计与Numpy极为相似。
Tensor和Numpy的数组之间的互操作非常容易且快速。对于Tensor不支持的操作,可以先转为Numpy数组处理,之后再转回Tensor。
5.Tensor -> Numpy
a = t.ones(5) # 新建一个全1的Tensor
print(a)
b = a.numpy() # Tensor -> Numpy
print(b)![]()
6.Numpy->Tensor
import numpy as np
a = np.ones(5)
b = t.from_numpy(a) # Numpy->Tensor
print(a)
print(b)![]()
scalar = b[0]
print(scalar)print('scalar.size()=',scalar.size()) #0-dim
print(scalar.item()) # 使用scalar.item()能从中取出python对象的数值
print(scalar.numpy())tensor = t.tensor([2]) # 注意和scalar的区别
print(tensor)
print('tensor.size()=',tensor.size())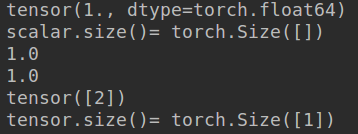
a = torch.rand(1)
print(a)
print(type(a))
print(a.item())
print(type(a.item()))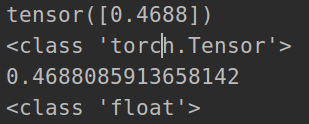
7.利用gpu加速
a = t.ones(5)
b = t.ones(5)
# 在不支持CUDA的机器下,下一步还是在CPU上运行
device = t.device("cuda:0" if t.cuda.is_available() else "cpu")
x = a.to(device)
y = b.to(device)
z = x+y
print(z)
tensor放到gpu上加控制gpu顺序
os.environ["CUDA_VISIBLE_DEVICES"] = '0'
device = torch.device("cuda" if torch.cuda.is_available() else "cpu")
prior_boxes = [[1,2,3,4],[3,4,5,6]]
prior_boxes = torch.FloatTensor(prior_boxes).to(device)
prior_boxes.clamp_(0,1)#防止越界
# print('len(prior_boxes)', len(prior_boxes))
print(prior_boxes)![]()
8.gpu的一些操作 利用pycuda
torch.version.cuda 查看所使用的cuda版本
import torch
import torchvision
import numpy as np
import pandas as pd
from torch import nn
import matplotlib.pyplot as plt
import pycuda.driver as cuda
def test_gpu():cuda.init()print('cuda is:', torch.cuda.is_available())print('current device id:', torch.cuda.current_device())## Get Id of current cuda deviceprint('cuda device count:', cuda.Device.count())num = cuda.Device.count()for i in range(num):print(cuda.Device(i).name(), "(Id: %d)" % i)available, total = cuda.mem_get_info()print("Available: %.2f GB\nTotal:     %.2f GB" % (available / 1e9, total / 1e9))# for i in range(num):#     print('cuda attrib:',cuda.Device(i).get_attributes())print('memory allocate:', torch.cuda.memory_allocated())Mat_cpu = torch.FloatTensor([1., 2.])print('Mat_cpu:', Mat_cpu)Mat_gpu = Mat_cpu.cuda()print('Mat_gpu:', Mat_gpu)if __name__ == '__main__':test_gpu()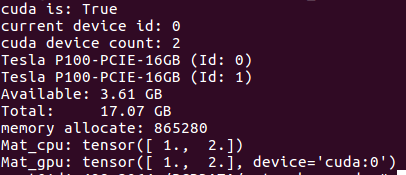
9.注意在求导的时候要梯度清零
x = t.ones(2, 2, requires_grad=True)
print(x)# 上一步等价于
x = t.ones(2,2)
x.requires_grad = True
print(x)y = x.sum()
print(y)
#y.grad_fn
y.backward() # 反向传播,计算梯度
print(x.grad)#注意:`grad`在反向传播过程中是累加的(accumulated),这意味着每一次运行反向传播,梯度都会累加之前的梯度,所以反向传播之前需把梯度清零。
y.backward()
print(x.grad)# 以下划线结束的函数是inplace操作,会修改自身的值,就像add_
x.grad.data.zero_()
y.backward()
print(x.grad)
Autograd实现了反向传播功能,但是直接用来写深度学习的代码在很多情况下还是稍显复杂,torch.nn是专门为神经网络设计的模块化接口。nn构建于 Autograd之上,可用来定义和运行神经网络。nn.Module是nn中最重要的类,可把它看成是一个网络的封装,包含网络各层定义以及forward方法,调用forward(input)方法,可返回前向传播的结果。
10.torch.cat与torch.stack
对于cat会保持维度即可,而stack会增加维度。cat时 dim=0相当于np.vstack dim=1相当于np.hstack
import torch
print(torch.version.cuda)
print(torch.cuda.is_available())
print(torch.__version__)x = torch.tensor([[1, 2, 3]])
print('x=', x)# 按第0维度堆叠,对于矩阵,相当于“竖着”堆
y=torch.cat((x, x, x), 0)
print('y=', y)# 按第1维度堆叠,对于矩阵,相当于“横着”拼
z=torch.cat((x, x, x), 1)
print('z=', z)import numpy as np
x=np.array([[1,2,3]])
print('x=', x)y=np.vstack((x,x,x))
print('y=',y)z = np.hstack((x, x, x))
print('z=', z)
cat和stack对比
reg_mask = torch.tensor([1, 2, 3])
reg_mask_list = []
for i in range(5):reg_mask_list.append(reg_mask)stack_mask = torch.stack(reg_mask_list, dim=0)
print(stack_mask)cat_mask = torch.cat(reg_mask_list, dim=0)
print(cat_mask)
11.tensor.chunk(tensor, chunks, dim=0)切块 数量由chunks决定,返回的是tuple
a = torch.arange(10)
print('a=',a)b=torch.chunk(a, 4,dim=0)
print('b=',b)![]()
将输入映射到N个不同的线性投影中。chunk性能更高
import torch.nn.functional as F
d = 1024
batch = torch.rand((8, d))
layers = nn.Linear(d, 128, bias=False), nn.Linear(d, 128, bias=False), nn.Linear(d, 128, bias=False)out1 = layers[0](batch)
out2 = layers[1](batch)
out3 = layers[2](batch)
print('===out1,shape', out1.shape)
print('===out2,shape', out2.shape)
print('===out3,shape', out3.shape)
print('====方式2===')
one_layer = nn.Linear(d, 128 * 3, bias=False)
out1, out2, out3 = torch.chunk(one_layer(batch), 3, dim=1)
print('===out1,shape', out1.shape)
print('===out1,shape', out1.shape)
print('===out1,shape', out1.shape)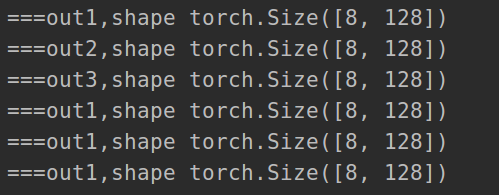
12.tensor.split()返回的是tuple
将输入张量分割成相等形状的chunks(如果可分)。 如果沿指定维的张量形状大小不能被split_size 整分, 则最后一个分块会小于其它分块。
a = torch.arange(10)
print('a=',a)b=torch.chunk(a, 4,dim=0)
print('b=',b)b = torch.split(a, 4, dim=0)
print('b=', b)
13.torch.nn.functional.pairwise_distance计算行向量二范数
x1=torch.tensor([[1],[2]],dtype=torch.float32)
print('x1=',x1)
x2=torch.tensor([[2],[3]],dtype=torch.float32)
y=torch.nn.functional.pairwise_distance(x2, x1)
print('y=',y)x1 = torch.tensor([[1,2]], dtype=torch.float32)
print('x1=', x1)
x2 = torch.tensor([[2,3]], dtype=torch.float32)
y = torch.nn.functional.pairwise_distance(x2, x1)
print('y=', y)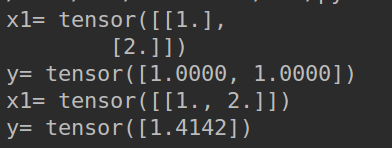
计算cos 自己计算或者使用 F.cosine_similarity
import torch.nn.functional as Foutput1 = torch.tensor([[1, 2],[4, 0]],dtype=torch.float32)
output2 = torch.tensor([[2, 2],[2, 0]], dtype=torch.float32)
dot = torch.sum(output1 * output2, dim=1)
norm = torch.norm(output1, dim=1) * torch.norm(output2, dim=1)
print('dot:', dot)
print(torch.norm(output1, dim=1))
print(torch.norm(output2, dim=1))
print('norm:', norm)
print('cos:', dot/norm)print(F.cosine_similarity(output1, output2, dim=1))
14.计算范数的几种方式
torch.norm
(1)默认计算2范数
a=torch.tensor([[1,2,3,4],[1,3,2,2]],dtype=torch.float32)
print(torch.norm(a))
print(torch.norm(a, dim=1))
print(torch.norm(a, dim=0))
(2)求1范数:绝对值之和
a=torch.tensor([[1,2,3,4],[1,3,2,2]],dtype=torch.float32)# print(torch.norm(a))# print(torch.norm(a, dim=1))print(torch.norm(a, dim=0,p=1))![]()
torch.renorm与F.normalize
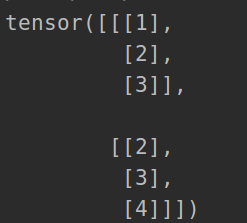
import torch
x = torch.tensor([[1, 1, 1],[3, 4, 5],[4, 5, 6]]).float()
res = x.renorm(2, 0, 1)#行操作
print('==res:', res)res = x.renorm(2, 0, 1e-5).mul(1e5)
print('==res:', res)import torch.nn.functional as F
res = F.normalize(x, p=2, dim=1)#行操作
print('==res:', res)
15.torch.nn.functional.adaptive_avg_pool2d 平均池化
#batch, channel,a = torch.rand(16,128,7,7)out = torch.nn.functional.adaptive_avg_pool2d(a, (1, 1))print(out.shape)print(out.view(a.size(0),-1).shape)
16.nn.RNN
import torch
rnn = torch.nn.RNN(input_size=20,hidden_size=50,num_layers=1)
#sequence batch channels
input = torch.randn(100, 1, 20)#(num_layers, batch, hidden_size)
h_0 =torch.randn(1, 1, 50)output,hn=rnn(input, h_0)print('input:',input.size())
print('output',output.size())
print('hn',hn.size())
17.nn.LSTM
(1)单向lstm
import torch
import torch.nn as nn
lstm = nn.LSTM(input_size=20,hidden_size=50,num_layers=1)
#sequence batch channels
input = torch.randn(100, 1, 20)#(num_layers, batch, hidden_size)
h_0 =torch.randn(1, 1, 50)
c_0 = torch.randn(1, 1, 50)output,(hn_1,c_1)=lstm(input, (h_0,c_0))print('input:',input.size())
print('output',output.size())
print('hn_1:',hn_1.size())
print('c_1:',c_1.size())
(2)双向lstm(输出节点变为双倍)
#test lstmlstm = torch.nn.LSTM(input_size=32, hidden_size=50, bidirectional=True)# (seq_len, batch, input_size):input = torch.randn(64, 16, 32)#(num_layers * num_directions, batch, hidden_size)h0 = torch.randn(2, 16, 50)#(num_layers * num_directions, batch, hidden_size):c0 = torch.randn(2, 16, 50)output, (hn,cn) = lstm(input, (h0, c0))print('========output=============')print(output.size())print('===========hn===============')print(hn.size())print('=========cn=================')print(cn.size())
18.
(1) finetune 方式一
import torch,os,torchvision
import torch.nn as nn
import torch.nn.functional as F
import pandas as pd
import numpy as np
import matplotlib.pyplot as plt
from torch.utils.data import DataLoader, Dataset
from torchvision import datasets, models, transforms
from PIL import Image
from sklearn.model_selection import StratifiedShuffleSplitprint(torch.__version__)
# CUDA=torch.cuda.is_available()
# DEVICE = torch.device("cuda" if CUDA else "cpu")
DEVICE = torch.device("cpu")
model_ft = models.resnet50(pretrained=True) # 这里自动下载官方的预训练模型,并且
# 将所有的参数层进行冻结
for param in model_ft.parameters():param.requires_grad = False
# 这里打印下全连接层的信息
print('=========fc info===================')
print(model_ft.fc)
num_fc_ftr = model_ft.fc.in_features #获取到fc层的输入
print('num_fc_ftr:',num_fc_ftr)
model_ft.fc = nn.Linear(num_fc_ftr, 10) # 定义一个新的FC层model_ft=model_ft.to(DEVICE)# 放到设备中
print('=========after fine tune model=====================')
print(model_ft) # 最后再打印一下新的模型![]()
![]()
(2) finetune 方式二
同时concate了max pooling和average pooling.max pooling更加关注重要的局部特征,而average pooling更加关注全局的特征.
import torch.nn as  nn
import torch
from torchvision.models import resnet18class res18(nn.Module):def __init__(self, num_classes):super(res18, self).__init__()self.base = resnet18(pretrained=True)print('resnet18:', resnet18())self.feature = nn.Sequential(self.base.conv1,self.base.bn1,self.base.relu,self.base.maxpool,self.base.layer1,self.base.layer2,self.base.layer3,self.base.layer4)self.avg_pool = nn.AdaptiveAvgPool2d(1)self.max_pool = nn.AdaptiveMaxPool2d(1)self.reduce_layer = nn.Conv2d(1024, 512, 1)self.fc = nn.Sequential(nn.Dropout(0.5),nn.Linear(512, num_classes))def forward(self, x):bs = x.shape[0]x = self.feature(x)print('feature.shape:', x.shape)print('self.avg_pool(x).shape:', self.avg_pool(x).shape)print('self.max_pool(x).shape:', self.max_pool(x).shape)x = torch.cat([self.avg_pool(x), self.max_pool(x)], dim=1)print('cat x.shape', x.shape)x = self.reduce_layer(x).view(bs, -1)print('reduce x.shape', x.shape)logits = self.fc(x)return logitsdef test_resnet_18():model = res18(2)# print('model:', model)#b,c,h,wx = torch.rand(32, 3, 224, 224)print('input.shape:', x.shape)model(x)
if __name__ == '__main__':test_resnet_18()

(3)改变预训练权重
import torch
from torch import nndef change_shape_of_coco_wt_lstm():load_from = './mixed_second_finetune_acc97p7.pth'save_to = './pretrained_model.pth'weights = torch.load(load_from)print('weights.keys():', weights.keys())for key,values in weights.items():print('key:', key)print(weights['rnn.1.embedding.weight'].shape)print(weights['rnn.1.embedding.bias'].shape)weights['rnn.1.embedding.weight'] = nn.init.kaiming_normal_(torch.empty(5146, 512),mode='fan_in', nonlinearity='relu')weights['rnn.1.embedding.bias'] = torch.rand(5146)torch.save(weights, save_to)
if __name__ == '__main__':change_shape_of_coco_wt_lstm() 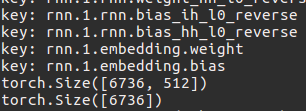
19.三种搭建网络的方式
(1).比较常用的,简洁明了
# Method 1 -----------------------------------------
import torch.nn as nn
import torch.nn.functional as F
import torchclass Net1(nn.Module):def __init__(self):super(Net1, self).__init__()#(w-k+2*p)/s+1self.conv = nn.Conv2d(3, 32, 3, 1, 1)self.dense1 = nn.Linear(32 * 3 * 3, 128)self.dense2 = nn.Linear(128, 10)def forward(self, x):x = F.max_pool2d(F.relu(self.conv(x)), 2)x = x.view(x.size(0), -1)x = F.relu(self.dense1(x))x = self.dense2(x)return xprint("==========Method 1================")
model1 = Net1()
print(model1)     #(B,c,h,w)
input=torch.rand((32,3,6,6))
print('input.size():',input.size())
output=model1(input)
print(output.size())
(2).用nn.Sequential()容器进行快速搭建,模型的各层被顺序添加到容器中。缺点是每层的编号是默认的阿拉伯数字,不易区分。示例还将每个容器的网络结构打印出来.
import torch
import torch.nn as nn
# Method 2 ------------------------------------------
class Net2(nn.Module):def __init__(self):super(Net2, self).__init__()self.conv = nn.Sequential(nn.Conv2d(3, 32, 3, 1, 1),nn.ReLU(),nn.MaxPool2d(2))self.dense = nn.Sequential(nn.Linear(32 * 3 * 3, 128),nn.ReLU(),nn.Linear(128, 10))def forward(self, x):conv_out = self.conv(x)res = conv_out.view(conv_out.size(0), -1)out = self.dense(res)return outprint("==========Method 2================")
model2 = Net2()
print('==model2===\n', model2)  # (B,c,h,w)
input = torch.rand((32, 3, 6, 6))
print('==input.size()==:', input.size())
output = model2(input)
print('==output.size()===:\n', output.size())print('==model2.conv==:\n', model2.conv)
print('==model2.dense===:\n', model2.dense)
(3).对第二种方法的改进:通过add_module()添加每一层,并且为每一层增加了一个单独的名字。
# Method 3 -------------------------------
class Net3(nn.Module):def __init__(self):super(Net3, self).__init__()self.conv=nn.Sequential()self.conv.add_module("conv1",nn.Conv2d(3, 32, 3, 1, 1))self.conv.add_module("relu1",nn.ReLU())self.conv.add_module("pool1",nn.MaxPool2d(2))self.dense = nn.Sequential()self.dense.add_module("dense1",nn.Linear(32 * 3 * 3, 128))self.dense.add_module("relu2",nn.ReLU())self.dense.add_module("dense2",nn.Linear(128, 10))def forward(self, x):conv_out = self.conv(x)res = conv_out.view(conv_out.size(0), -1)out = self.dense(res)return outprint("==========Method 3================")
model3 = Net3()
print(model3)     #(B,c,h,w)
input=torch.rand((32,3,6,6))
print('input.size():',input.size())
output=model3(input)
print(output.size())
20.利用torch summary查看每一层输出
import torch.nn as  nn
import torch
from torchvision.models import resnet18
from torchsummary import summarydef check_output_size():model = resnet18()summary(model, (3, 224, 224))
if __name__ == '__main__':# test_resnet_18()check_output_size()
21.梯度裁剪
import torch.nn as nnoutputs = model(data)
loss= loss_fn(outputs, target)
optimizer.zero_grad()
loss.backward()
nn.utils.clip_grad_norm_(model.parameters(), max_norm=20, norm_type=2)
optimizer.step()
nn.utils.clip_grad_norm_ 的参数:
parameters – 一个基于变量的迭代器,会进行梯度归一化
max_norm – 梯度的最大范数
norm_type – 规定范数的类型,默认为L2
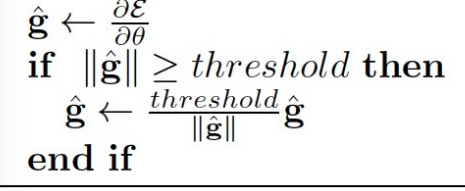
思路:
- 首先设置一个梯度阈值:clip_gradient
- 在后向传播中求出各参数的梯度,这里我们不直接使用梯度进去参数更新,我们求这些梯度的l2范数
- 然后比较梯度的l2范数||g||与clip_gradient的大小
- 如果前者大,求缩放因子clip_gradient/||g||, 由缩放因子可以看出梯度越大,则缩放因子越小,这样便很好地控制了梯度的范围
- 最后将梯度乘上缩放因子便得到最后所需的梯度
22.冻结层
import torch.nn as  nn
import torch
from torchvision.models import resnet18
from torchsummary import summary
import torch.optim as optimdef freeze_parameters():model = resnet18(pretrained=True)for name, value in model.named_parameters():print('name={}, value.requires_grad={}'.format(name, value.requires_grad))#需要冻结的层no_grad = ['conv1.weight','bn1.weight','bn1.bias']for name, value in model.named_parameters():if name in no_grad:value.requires_grad = Falseelse:value.requires_grad = Trueprint('================================')for name, value in model.named_parameters():print('name={}, value.requires_grad={}'.format(name, value.requires_grad))#再定义优化器criterion = nn.CrossEntropyLoss()optimizer = optim.Adam(filter(lambda p: p.requires_grad, model.parameters()), lr=0.01)#...
if __name__ == '__main__':freeze_parameters()

23.nn.conv2d计算输出(带有空洞卷积)与分组卷积计算
pytorch1.0教程 torch.nn · Pytorch 中文文档
1.空洞卷积示例 conv_arithmetic/README.md at master · vdumoulin/conv_arithmetic · GitHub

一般形式 (n-k+2*p)/s+1 也就是dilation为1的时候.
2.分组卷积


分组卷积的极至就是可分离卷积,分组数等于输入通道数
nn.Conv2d(inchannles*expansion, inchannles * expansion, kernel_size=3, padding=1, stride=stride,groups=inchannles * expansion)总结:
标准卷积 :c1*k*k*c2
分组卷积:c1/g*k*k*c2/g*g,是标准卷积的1/g
可分离卷积:k*k*c1+c1*c2 = 1/c2 + 1/k^2 差不多是标准卷积的1/k
24.索引查找 index_select
x = torch.linspace(1, 12, steps=12).reshape(3, 4)print('==x', x)
indices = torch.LongTensor([0, 2])
y = torch.index_select(x, 0, indices)#对行操作
print('==y', y)z = torch.index_select(x, 1, indices)#对列操作
print('==z', z)z = torch.index_select(y, 1, indices)#对列操作
print('==z',z)
25.全连接权重转换成卷积权重
def decimate(tensor, m):"""Decimate a tensor by a factor 'm', i.e. downsample by keeping every 'm'th value.This is used when we convert FC layers to equivalent Convolutional layers, BUT of a smaller size.:param tensor: tensor to be decimated:param m: list of decimation factors for each dimension of the tensor; None if not to be decimated along a dimension:return: decimated tensor"""assert tensor.dim() == len(m)for d in range(tensor.dim()):if m[d] is not None:tensor = tensor.index_select(dim=d,index=torch.arange(start=0, end=tensor.size(d), step=m[d]).long())print('==tensor.shape:', tensor.shape)return tensor
def test_fc_conv():"""fc (4096,25088)-->conv (1024,512,3,3)"""fc_weight_init = torch.rand(4096, 25088)fc_weight = fc_weight_init.reshape(4096, 512, 7, 7)m = [4, None, 3, 3]conv_weight = decimate(fc_weight, m)print('==conv_weight.shape', conv_weight.shape)
26.模型权重初始化
1.方式一,方式二参考另一篇文章resnet系列+mobilenet v2+pytorch代码实现_智障变智能-CSDN博客
class AuxiliaryConvolutions(nn.Module):"继续在vgg基础上添加conv网络"def __init__(self):super(AuxiliaryConvolutions, self).__init__()#调用父类初始化self.conv8_1 = nn.Conv2d(1024, 256, kernel_size=1, stride=1)self.conv8_2 = nn.Conv2d(256, 512, kernel_size=3, stride=2, padding=1)self.conv8_1 = nn.Conv2d(1024, 256, kernel_size=1, stride=1)self.conv8_2 = nn.Conv2d(256, 512, kernel_size=3, stride=2, padding=1)self.conv9_1 = nn.Conv2d(512, 128, kernel_size=1, stride=1)self.conv9_2 = nn.Conv2d(128, 256, kernel_size=3, stride=2, padding=1)self.conv10_1 = nn.Conv2d(256, 128, kernel_size=1, stride=1)self.conv10_2 = nn.Conv2d(128, 256, kernel_size=3, stride=1)self.conv11_1 = nn.Conv2d(256, 128, kernel_size=1, stride=1)self.conv11_2 = nn.Conv2d(128, 256, kernel_size=3, stride=1)self.init_conv2d()def init_conv2d(self):for c in self.children():if isinstance(c, nn.Conv2d):nn.init.xavier_uniform_(c.weight)nn.init.constant_(c.bias,0)def forward(self, input):out = F.relu(self.conv8_1(input))#(B,1024,19,19)out = F.relu(self.conv8_2(out))#(B,256,19,19)conv8_2feats = outout = F.relu(self.conv9_1(out))#(B,512,10,10)out = F.relu(self.conv9_2(out))##(B,256,5,5)conv9_2feats = outout = F.relu(self.conv10_1(out))  # (B,128,5,5)out = F.relu(self.conv10_2(out))  ##(B,256,3,3)conv10_2feats = outout = F.relu(self.conv11_1(out))  # (B,128,3,3)out = F.relu(self.conv11_2(out))  ##(B,256,1,1)conv11_2feats = out# print(out.size())return conv8_2feats, conv9_2feats, conv10_2feats, conv11_2feats
def test_vgg_base():model = VGGbase()x = torch.rand((10, 3, 300, 300))model(x)
def test_AUx_conv():model = AuxiliaryConvolutions()# (B, 1024, 19, 19)x = torch.rand((10, 1024, 19, 19))model(x)
27.torch将(cx,cy,w,h)转换成(xmin,ymin,xmax,ymax)便于加速
def cxcy_to_xy(cxcy):"""Convert bounding boxes from center-size coordinates (c_x, c_y, w, h) to boundary coordinates (x_min, y_min, x_max, y_max).:param cxcy: bounding boxes in center-size coordinates, a tensor of size (n_boxes, 4):return: bounding boxes in boundary coordinates, a tensor of size (n_boxes, 4)"""return torch.cat([cxcy[:, :2] - (cxcy[:, 2:] / 2),  # x_min, y_mincxcy[:, :2] + (cxcy[:, 2:] / 2)], 1)  # x_max, y_maxcxcy = torch.tensor([[3, 3, 6, 6]])
res = cxcy_to_xy(cxcy)
print('==res', res)![]()
28.torch计算IOU便于加速
def find_intersection(set_1, set_2):"""Find the intersection of every box combination between two sets of boxes that are in boundary coordinates.:param set_1: set 1, a tensor of dimensions (n1, 4):param set_2: set 2, a tensor of dimensions (n2, 4):return: intersection of each of the boxes in set 1 with respect to each of the boxes in set 2, a tensor of dimensions (n1, n2)"""# PyTorch auto-broadcasts singleton dimensions# print('set_1[:, :2].unsqueeze(1).shape', set_1[:, :2].unsqueeze(1).shape)# print('set_2[:, :2].unsqueeze(0).shape', set_2[:, :2].unsqueeze(0).shape)lower_bounds = torch.max(set_1[:, :2].unsqueeze(1), set_2[:, :2].unsqueeze(0))  # (n1, n2, 2)# print('lower_bounds', lower_bounds.shape)upper_bounds = torch.min(set_1[:, 2:].unsqueeze(1), set_2[:, 2:].unsqueeze(0))  # (n1, n2, 2)intersection_dims = torch.clamp(upper_bounds - lower_bounds, min=0)  # (n1, n2, 2)return intersection_dims[:, :, 0] * intersection_dims[:, :, 1]  # (n1, n2)def find_jaccard_overlap(set_1, set_2):"""Find the Jaccard Overlap (IoU) of every box combination between two sets of boxes that are in boundary coordinates.:param set_1: set 1, a tensor of dimensions (n1, 4):param set_2: set 2, a tensor of dimensions (n2, 4):return: Jaccard Overlap of each of the boxes in set 1 with respect to each of the boxes in set 2, a tensor of dimensions (n1, n2)"""# Find intersectionsintersection = find_intersection(set_1, set_2)  # (n1, n2)# Find areas of each box in both setsareas_set_1 = (set_1[:, 2] - set_1[:, 0]) * (set_1[:, 3] - set_1[:, 1])  # (n1)areas_set_2 = (set_2[:, 2] - set_2[:, 0]) * (set_2[:, 3] - set_2[:, 1])  # (n2)# Find the union# PyTorch auto-broadcasts singleton dimensionsunion = areas_set_1.unsqueeze(1) + areas_set_2.unsqueeze(0) - intersection  # (n1, n2)return intersection / union  # (n1, n2)objects = 3
box = torch.rand(objects, 4)
priors_xy = torch.rand(8732,4)iou = find_jaccard_overlap(box, priors_xy)
print('==iou.shape:', iou.shape)
29.torch计算检测偏移量

g是ground truth p是预测的
#返回偏移量
def cxcy_to_gcxgcy(cxcy, priors_cxcy):"""输入box [cx,cy,w,h]priors_cxcy [cx,cy,w,h] :return: [dx,dy,dw,dh]"""return torch.cat([(cxcy[:, :2] - priors_cxcy[:, :2]) / (priors_cxcy[:, 2:]),  # g_c_x, g_c_ytorch.log(cxcy[:, 2:] / priors_cxcy[:, 2:])], 1)  # g_w, g_hcxcy = torch.rand((8732, 4))
priors_cxcy = torch.rand((8732, 4))
res = cxcy_to_gcxgcy(cxcy, priors_cxcy)
print('==res:', res.shape)
30.torch.nn.functional.unfold
从输入样本中,提取出滑动的3*3局部区域块成行,其余地方用0 pad,在ctpn中有用到
import torch
from torch.nn import functional as f
import numpy as np
# x = torch.arange(0, 1 * 3 * 15 * 15).float()
a = np.array([[1, 2, 3],[4, 5, 6],[7, 8, 9]]).astype(np.float32)x = torch.from_numpy(a)
x = x.view(1, 1, 3, 3)
print('===input x.shape:', x.shape)
print('==x', x)
height = x.shape[2]
# (h-k+2*p)/s +1
x1 = f.unfold(x, kernel_size=3, dilation=1, stride=1, padding=1)
print('===x1.shape', x1.shape)
print('===x1', x1)x1 = x1.reshape((x1.shape[0], x1.shape[1], height, -1))
print('===final x1.shape', x1.shape)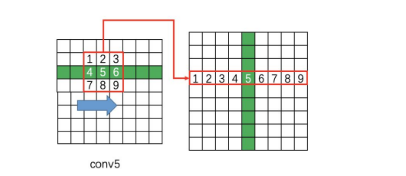

31.torch.scatter生成onehot
scatter(dim, index, src)将src中数据根据index中的索引按照dim的方向进行填充。
y = y.scatter(dim,index,src)#则:
y [ index[i][j] ] [j] = src[i][j] #if dim==0
y[i] [ index[i][j] ]  = src[i][j] #if dim==1
import torchindex = torch.tensor([[1],[2],[0],[3]])
onehot = torch.zeros(4, 4)
onehot.scatter_(1, index, 1)
print('==onehot:', onehot)
data = torch.tensor([1, 2, 3, 4, 5])
index = torch.tensor([0, 1, 4])
values = torch.tensor([-1, -2, -3, -4, -5])
data.scatter_(0, index, values)
print('==data:', data)![]()
data = torch.zeros((4, 4)).float()
index = torch.tensor([[0, 1],[2, 3],[0, 3],[1, 2]
])
values = torch.arange(1, 9).float().view(4, 2)
print('===values:', values)
data.scatter_(1, index, values)
print('===data:', data)
32.内置onehot
import torch.nn.functional as F
import torchtensor = torch.arange(0, 5)
one_hot = F.one_hot(tensor)
print('==one_hot:', one_hot)
33.F.interpolate进行插值, unet上采样可以使用
import torch.nn.functional as F
input = torch.arange(1, 5, dtype=torch.float32).view(1, 1, 2, 2)
print('==input:', input)
print('==input.shape:', input.shape)
x = F.interpolate(input, scale_factor=2, mode='nearest')
print(x)x = F.interpolate(input, size=(4, 4), mode='nearest')
print(x)
上采样图片
import cv2
import numpy as np
from torchvision.transforms.functional import to_tensor, to_pil_image
img = cv2.imread('./111.png')
new_img = to_pil_image(F.interpolate(to_tensor(img).unsqueeze(0),  # batch of size 1mode="bilinear",scale_factor=2.0,align_corners=False).squeeze(0) # remove batch dimension
)
print('==new_img.shape:', np.array(new_img).shape)
cv2.imwrite('./new_img.jpg', np.array(new_img))

34.nn.functional.binary_cross_entropy 采用ohem
基础使用
import numpy as np
import torch
from torch import nn
res = torch.log(torch.tensor(np.exp(1)))
print('==res:', res)gt = np.array([[0.]]).astype(np.float32)
pred = np.array([[1.]]).astype(np.float32)
pred = torch.from_numpy(pred)
gt = torch.from_numpy(gt)
loss = nn.functional.binary_cross_entropy(pred, gt, reduction='none')
print('===loss:', loss)
loss1 = -(1.*(torch.log(torch.tensor(0.)+1e-12))+(1.-1.)*(torch.log(torch.tensor(1.)-torch.tensor(0.)+1e-12)))
print('===loss1:', loss1)
ohem
import numpy as np
import torch
from torch import nngt = np.array([[0, 0, 1],[1, 0, 0],[0, 0, 0]]).astype(np.float32)pred = np.array([[1, 0, 1],[0, 0, 0],[0, 1, 0]]).astype(np.float32)
negative_ratio = 2
pred = torch.from_numpy(pred)
gt = torch.from_numpy(gt)
print('=====pred:', pred)
print('=====gt:', gt)
loss = nn.functional.binary_cross_entropy(pred, gt, reduction='none')
print('=====loss:', loss)positive = (gt).byte()
negative = ((1 - gt)).byte()
print('==positive:', positive)
print('==negative:', negative)positive_count = int(positive.float().sum())
negative_count = min(int(negative.float().sum()), int(positive_count * negative_ratio))
print('==positive_count:', positive_count)
print('==negative_count:', negative_count)positive_loss = loss * positive.float()
negative_loss = loss * negative.float()
print('==positive_loss:', positive_loss)
print('==negative_loss:', negative_loss)
negative_loss, _ = negative_loss.view(-1).topk(negative_count)
print('==negative_loss:', negative_loss)
balance_loss = (positive_loss.sum() + negative_loss.sum()) / (positive_count + negative_count + 1e-8)
print('==balance_loss:', balance_loss)
35.多个像素同一类loss
import torch.nn.functional as F
src_logits = torch.rand((2, 2, 5))#(bs, cls, h*w)
target_classes = torch.tensor([[0, 1, 0, 1, 0], #(bs, h*w)[1, 1, 0, 0, 0]])
loss = F.cross_entropy(src_logits, target_classes)
print('==loss:', loss)soft_x = F.softmax(src_logits, dim=1)
print('==soft_x:', soft_x)
log_soft_out = torch.log(soft_x)
loss = F.nll_loss(log_soft_out, target_classes)
print('==loss:', loss)
35.nn.embedding 将词换成embedding向量
import numpy as np
import torch
import torch.nn as nn# 获取每个词的embedding向量
vocab_size = 6000  # 词汇数
model_dim = 5  # 每个词的embedding维度
# 两个词对应的索引
word_to_ix = {'hello': 0,'world': 1}embedding = nn.Embedding(vocab_size, model_dim)
hello_idx = torch.LongTensor([word_to_ix['hello']])input = torch.LongTensor([[1, 2, 4, 5],[4, 3, 2, 9]])hello_embed = embedding(input)
print('====hello_embed:', hello_embed.shape)
36.将特征模长归一化为1
#将特征模长归一化成1
import torch
feature_list = []
epochs = 2
batch_size = 4
for i in range(epochs):feature = torch.rand(batch_size, 2)feature_list.append(feature)feat = torch.cat(feature_list, 0)#将list特征cat成所有样本的特征
print('==feat.shape:', feat.shape)res = feat.norm(2, 1).unsqueeze(1)#计算范数
print('res:', res.shape)
res = feat.norm(2, 1).unsqueeze(1).repeat(1, 2)#在一维重复2两次并替代原先的值
print('==res:', res.shape)feat = feat/res
print(feat)
print('==feat.shape:', feat.shape)
37.dist与cdist计算距离
import torchx1 = torch.tensor([[1, 1],[2, 2]]).float()x2 = torch.tensor([[1, 3],[2, 3]]).float()res = torch.dist(x1, x2, p=2)#对应位置的元素计算欧式距离
print('==res:', res)res = torch.cdist(x1, x2, p=2)#每个行向量计算欧式距离
print('==res:', res)
38.kl散度计算
p = np.array([0.4, 0.4, 0.2])
q = np.array([0.5, 0.1, 0.4])
kl_np = (p*np.log(p/q)).sum()
print('=kl_np:', kl_np)p = torch.tensor([0.4, 0.4, 0.2])
q = torch.tensor([0.5, 0.1, 0.4])
kl_torch_F = F.kl_div(q.log(), p, reduction='sum')
print('==kl_torch_F:', kl_torch_F)criterion = nn.KLDivLoss(reduction='sum')
kl_torch_nn = criterion(q.log(), p)
print('==kl_torch_nn:', kl_torch_nn)
39.unsqueeze 拓展维度
import torch
ind = torch.tensor([[1, 2, 3],[2, 3, 4]])
dim = 3
print(ind.unsqueeze(2))
40.expand 将tensor广播到新的形状
import torch
ind = torch.tensor([[1, 2, 3],[2, 3, 4]])
dim = 3
print(ind.unsqueeze(2))
ind = ind.unsqueeze(2).expand(ind.size(0), ind.size(1), dim)
print('==ind.shape:', ind.shape)
print('==ind:', ind)
41.gather 根据index在dim方向取值
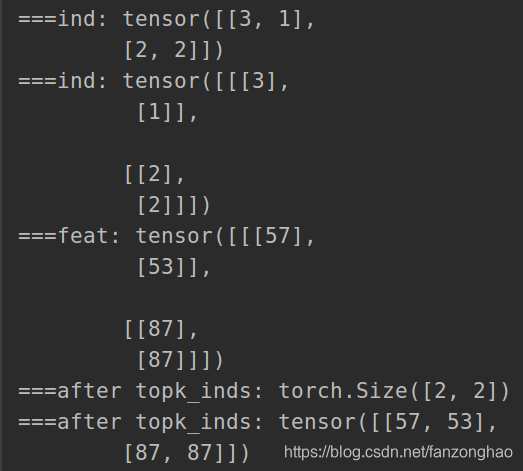
b = torch.Tensor([[1, 2, 3],[4, 5, 6]])print(b)index_2 = torch.LongTensor([[0, 1, 1],#dim为0 表示沿着列方向取值[0, 0, 0]])print('====dim=0', torch.gather(b, dim=0, index=index_2))index_1 = torch.LongTensor([[0, 1],[2, 0]])print('====dim=1', torch.gather(b, dim=1, index=index_1)) #dim为1 表示沿着行方向取值举个栗子1:根据一个batch内每个通道topk,找出一个batch内的topk
def _gather_feat(feat, ind, mask=None):# feat: (bs, C*topk, 1)# ind:  (bs, topk)print('===feat:', feat)print('===ind:', ind)dim = feat.size(2)ind = ind.unsqueeze(2).expand(ind.size(0), ind.size(1), dim)  # (bs, topk, 1)print('===ind:', ind)feat = feat.gather(1, ind)  # (bs, topk, 1)print('===feat:', feat)if mask is not None:mask = mask.unsqueeze(2).expand_as(feat)feat = feat[mask]feat = feat.view(-1, dim)return featimport torch
bs = 2
topk = 2
#(bs, c, topk)
#一个bacth每个通道的topk的索引
topk_inds = torch.randint(1, 100, (bs, 3, topk))
#(bs, topk) 一个bacth内topk的索引
topk_ind = torch.randint(1, 4, (bs, topk))
#目的根据batch内topk的索引找出每个通道相应topk的索引的位置print('===before topk_inds', topk_inds)
print('==before topk_ind', topk_ind)
topk_inds = _gather_feat(topk_inds.view(bs, -1, 1), topk_ind).view(bs, topk)print('===after topk_inds:', topk_inds.shape)
print('===after topk_inds:', topk_inds)

举个栗子2:找到输出相应的点进行回归
import random
import torchdef _gather_feat(feat, ind):# feat: (bs, C*topk, 1)# ind:  (bs, topk)# print('===feat:', feat)# print('===ind:', ind)dim = feat.size(-1)ind = ind.unsqueeze(len(ind.shape)).expand(*ind.shape, dim)  # (bs, topk, 1)print('===ind.shape:', ind.shape)print('===ind:', ind)feat = feat.gather(dim=1, index=ind)  # (bs, topk, 1)# print('===feat:', feat)return feat# 神经网络预测输出 指定相应的位置进行回归
bs = 2
w_h = 4
# (bs, objects, 2)
preds = torch.rand(bs, w_h, 2)
print('==before preds:', preds)
print('===before preds.shape:', preds.shape)max_objs = 5
#
regress_index_list = [] #要回归中心点的索引 为了方便后续用正样本进行回归
regress_index_mask_list = []# 要回归中心点的box记录for i in range(bs):regress_index = torch.zeros(max_objs)  # 要回归中心点的索引 为了方便后续用正样本进行回归regress_index_mask = torch.zeros(max_objs)  # 要回归中心点的box记录for k in range(random.randint(1, 3)):regress_index[k] = random.randint(1, 3)regress_index_mask[k] = 1regress_index_list.append(regress_index)regress_index_mask_list.append(regress_index_mask)regress_indexs = torch.stack(regress_index_list, dim=0).long()
regress_masks = torch.stack(regress_index_mask_list, dim=0)
print('===regress_indexs', regress_indexs)
print('===regress_indexs.shape', regress_indexs.shape)
print('===regress_masks:', regress_masks)
print('===regress_masks.shape', regress_masks.shape)preds = _gather_feat(preds, regress_indexs)
print('==after preds:', preds)
print('===after preds.shape:', preds.shape)regress_masks = regress_masks.unsqueeze(dim=2).expand_as(preds).float()
print('==regress_masks expand:', regress_masks)
real_need_pres = preds * regress_masks
print('==real_need_pres', real_need_pres)
print('-==real_need_pres.shape:', real_need_pres.shape)


42.nn.CrossEntropyLoss()计算loss分析
其默认是取mean,是对贡献loss的正样本取平均,和focal loss区别就在于参与训练的是正样本.
import torch
import torch.nn as nn
import numpy as np
import torch.nn.functional as Fx_input = torch.rand(2, 3)  # 随机生成输入
print('x_input:\n', x_input)y_target = torch.tensor([1, 2])
y_one_hot = F.one_hot(y_target)
print('==y_one_hot:', y_one_hot)crossentropyloss = nn.CrossEntropyLoss()crossentropyloss_output = crossentropyloss(x_input, y_target)
print('=====torch loss:', crossentropyloss_output)softmax_func = nn.Softmax(dim=1)
soft_output = softmax_func(x_input)
print('softmax_output:\n', soft_output)
# 在softmax的基础上取log
logsoft_output = torch.log(soft_output)
print('logsoft_output:\n', logsoft_output)# logsoftmax_func = nn.LogSoftmax(dim=1)
# logsoftmax_output = logsoftmax_func(x_input)
# print('logsoftmax_output:\n', logsoftmax_output)multiply_softmax = (y_one_hot * logsoft_output).numpy()
print('==multiply_softmax:', multiply_softmax)
index_y, index_x = np.nonzero(multiply_softmax)
print(index_y, index_x)
sum_loss = []
for i in range(len(index_y)):sum_loss.append(multiply_softmax[index_y[i]][index_x[i]])
print('===self compute loss:', -sum(sum_loss) / len(sum_loss))gts = y_one_hot
alpha = 0.25
beta = 2
cls_preds = soft_output
pos_inds = (gts == 1.0).float()
print('==pos_inds:', pos_inds)
neg_inds = (gts != 1.0).float()
print('===neg_inds:', neg_inds)
# pos_loss = -pos_inds * alpha * (1.0 - cls_preds) ** beta * torch.log(cls_preds)
# neg_loss = -neg_inds * (1 - alpha) * ((cls_preds) ** beta) * torch.log(1.0 - cls_preds)
pos_loss = -pos_inds * torch.log(cls_preds)
neg_loss = -neg_inds * torch.log(1.0 - cls_preds)
num_pos = pos_inds.float().sum()
print('==num_pos:', num_pos)
print('==pos_loss:', pos_loss)# print('==neg_loss:', neg_loss)
pos_loss = pos_loss.sum()
print('=pos_loss / num_pos:', pos_loss / num_pos)
# neg_loss = neg_loss.sum()
# if num_pos == 0:
#     mean_batch_focal_loss = neg_loss
# else:
#     mean_batch_focal_loss = (pos_loss + neg_loss) / num_pos
# print('==mean_batch_focal_loss:', mean_batch_focal_loss)
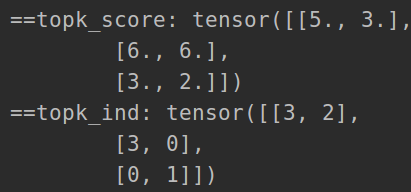
43.torch.topk
a = torch.tensor([[1, 2, 3, 5],[6, 4, 4, 6],[3, 2, 1, 0]]).float()
topk = 2
topk_score, topk_ind = torch.topk(a, topk)
print('==topk_score:', topk_score,)
print('==topk_ind:', topk_ind)
#(B, h*w)
scores = torch.tensor([[1, 2, 3, 5],[6, 4, 4, 6],[3, 2, 1, 0]]).float()
top_k = 2
scores, indexes = torch.topk(scores,top_k,dim=1,largest=True,sorted=True)#(N, topk)#从大到小排序
print('===scores:', scores)
print('===indexes:', indexes)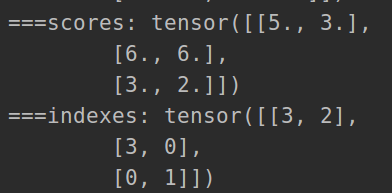
得到前topk框的分数和类别号
#(B, h*w, cls)  4类
per_level_cls_head = torch.tensor([[[0.1, 0.2, 0.3, 1],[0.6, 0.4, 2, 0.5],[0.1, 0.2, 3, 0.5],[0.6, 0.4, 5, 0.6]],[[0.1, 0.2, 0.3, 6],[0.6, 0.4, 4, 0.5],[0.1, 0.2, 4, 0.5],[0.6, 6, 0.6, 0.6]],[[0.1, 0.2, 3, 0.6],[0.6, 2, 0.4, 0.5],[1, 0.2, 0.4, 0.5],[-0.6, 0, -0.6, -0.6]]]).float()
#(B, h*w) (B, h*w)
scores, score_classes = torch.max(per_level_cls_head, dim=2)  # (N, h*w)
print('====scores:====', scores)
print('====score_classes:====', score_classes)top_k = 2 #只取前两
scores, indexes = torch.topk(scores,top_k,dim=1,largest=True,sorted=True)#(N, topk)#从大到小排序
print('===scores:', scores)
print('===indexes:', indexes)
score_classes = torch.gather(score_classes, 1, indexes)#(N, topk)
print('==after score_classes:', score_classes)repeat_indexs = indexes.unsqueeze(-1).repeat(1, 1, 4)
print('===repeat_indexs:', repeat_indexs)
根据score得到对应框
min_score_threshold = 0.8
#(B, h*w, 4)
pred_bboxes = torch.tensor([[[0.1, 0.2, 0.3, 1],[0.6, 0.4, 2, 0.5],[0.1, 0.2, 3, 0.5]],[[0.1, 0.2, 0.3, 6],[0.6, 0.4, 4, 0.5],[0.1, 0.2, 4, 0.5]],[[0.1, 0.2, 3, 0.6],[0.6, 2, 0.4, 0.5],[-0.6, 0, -0.6, -0.6]]])
#(B, h*w)
scores = torch.tensor([[0.88, 0.9, 0.5],[0.6, 0.9, 0.3],[0.1,0.4,0.88]])
#(B, h*w)
score_classes = torch.tensor([[2, 3, 1],[6, 5, 3],[7, 8, 9]])
print('===scores > min_score_threshold===:', scores > min_score_threshold)
score_classes = score_classes[scores > min_score_threshold].float()
print('====score_classes :', score_classes )
pred_bboxes = pred_bboxes[scores > min_score_threshold].float()
print('===pred_bboxes===', pred_bboxes)
44.torch.meshgrid
生成网格点
import torchhs = 3
ws = 2
print(torch.arange(hs))
grid_y, grid_x = torch.meshgrid([torch.arange(hs), torch.arange(ws)])
print('==grid_y', grid_y)
print('==grid_x:', grid_x)
grid_xy = torch.stack([grid_x, grid_y], dim=-1).float()
print('==grid_xy:', grid_xy)
print('==grid_xy.shape:', grid_xy.shape)grid_xy = grid_xy.view(1, hs * ws, 2)
print('==grid_xy:', grid_xy)
4*4 feature map还原到原图

import torch
hs = 4.
ws = 4.
stride = 2.
print(torch.arange(hs))
grid_y, grid_x = torch.meshgrid([torch.arange(hs) + 0.5, torch.arange(ws) + 0.5])
print('==grid_y', grid_y)
print('==grid_x:', grid_x)
grid_xy = torch.stack([grid_x, grid_y], dim=-1).float()
print('==grid_xy:', grid_xy)
print('==grid_xy.shape:', grid_xy.shape)grid_xy *= stride
grid_xy = grid_xy.view(1, int(hs) * int(ws), 2)
print('==grid_xy:', grid_xy)


45.torch.max
求最值和索引
a = torch.tensor([[1, 5, 62, 54],[2, 6, 2, 6],[2, 65, 2, 6]])
values1 = torch.max(a, dim=0).values
print('==values1:', values1)
values2 = torch.max(a, dim=0, keepdim=True).values
print('==values2:', values2)
indices = torch.max(a, dim=0).indices
print('==indices:', indices)
举个栗子:沿着通道取最值
a = torch.rand((2,3,100,100))
values1 = torch.max(a, dim=1, keepdim=True).valuesprint('==values1:', values1)
print(values1.shape)
46.nn.dropout
当模型使用了dropout layer,训练的时候只有占比为 1-p 的隐藏层单元参与训练,那么在预测的时候,如果所有的隐藏层单元都需要参与进来,则得到的结果相比训练时平均要大 1/1-p .故可以在训练的时候直接将dropout后留下的权重扩大 1/1-p 倍,这样就可以使结果的scale保持不变,而在预测的时候也不用做额外的操作了,更方便一些。
Drop = nn.Dropout(0.8)value = torch.tensor([[-1, 2, 1],[3, 4, 3]]).float()
print('==Drop(value):', Drop(value))#对未置为0的等比例变化为x/(1-p)

47.nn.relu
Relu = nn.ReLU()
value = torch.tensor([[-1, 2, 1],[3, 4, 3]]).float()
print('==Relu(value):', Relu(value))
48.nonzero获取非零索引
final_sample_flag = torch.tensor([1, 0, 3, -3])
final_sample_flag = final_sample_flag > 0 #大于0的就是正样本
print('==(final_sample_flag == True):', (final_sample_flag == True))
print('==(final_sample_flag == True).nonzero():',(final_sample_flag == True).nonzero())
positive_index = (final_sample_flag == True).nonzero().squeeze(
dim=-1)
print('==positive_index:', positive_index)
49.不同切片理解
positive_candidates = torch.tensor([[[-1, -2, -3, 0],[1, 2, 3, 0],[1, 2, -1, 0]],[[-1, -2, -3, 0],[1, 5, 3, 0],[1, 9, -1, 0]],])
candidate_indexes = (torch.linspace(1, positive_candidates.shape[0], positive_candidates.shape[0]) - 1).long()
print('===candidate_indexes:', candidate_indexes)
min_index = [1, 2]
final_candidate_reg_gts = positive_candidates[candidate_indexes, min_index, :]
print('===final_candidate_reg_gts:', final_candidate_reg_gts)print('===positive_candidates[:, min_index, :]===', positive_candidates[:, min_index, :])
50-1. nn.Module.register_buffer
将值注入网络并且不需要学习可以调用forward时使用,例如,它可以是一个“权重”参数,它可以缩放损失或一些固定张量,它不会改变,但每次都使用。对于这种情况,请使用nn.Module.register_buffer 方法,它告诉PyTorch将传递给它的值存储在模块中,并将这些值随模块一起移动。如果你初始化你的模块,然后将它移动到GPU,这些值也会自动移动。此外,如果你保存模块的状态,buffers也会被保存!
一旦注册,这些值就可以在forward函数中访问,就像其他模块的属性一样。
class ModuleWithCustomValues(nn.Module):def __init__(self, weights, alpha):super().__init__()self.register_buffer("weights", torch.tensor(weights))self.register_buffer("alpha", torch.tensor(alpha))def forward(self, x):print('===self.weights:', self.weights)print('===self.alpha:', self.alpha)return x * self.weights + self.alphaValueClass = ModuleWithCustomValues(weights=[1.0, 2.0], alpha=1e-4
)
res = ValueClass(torch.tensor([1.23, 4.56]))
print('==res:', res)
50-2.hook函数
hook 函数,其三个参数不能修改(参数名随意),本质上是 PyTorch 内部回调函数
# hook 函数,其三个参数不能修改(参数名随意),本质上是 PyTorch 内部回调函数
# module: 本身对象
# input: 该 module forward 前输入
# output: 该 module forward 后输出
def forward_hook_fn(module, input, output):print('weight:', module.weight.data)print('bias:', module.bias.data)print('input:', input)print('output:', output)class Model(nn.Module):def __init__(self):super(Model, self).__init__()self.fc = nn.Linear(3, 1)self.fc.register_forward_hook(forward_hook_fn)constant_init(self.fc, 1)def forward(self, x):# print('===x.shape', x.shape)o = self.fc(x)return omodel = Model()
x = torch.Tensor([[0.0, 1.0, 2.0]])
y = model(x)

51.torch.masked_select
有时你只需要对输入张量的一部分进行计算。给你一个例子:你想计算的损失只在满足某些条件的张量上。为了做到这一点,你可以使用torch.masked_select,注意,当需要梯度时也可以使用这个操作。
data = torch.rand((3, 3)).requires_grad_()
print('==data:', data)
mask = data > data.mean()
print('==mask:', mask)
data1 = torch.masked_select(data, mask)
print('==data1:', data1)data2 = data[mask]
print('==data2:', data2)
52.torch.where
x = torch.tensor([1.0, 2.0, 3.0, 4.0, 5.0], requires_grad=True)
y = -x
condition_or_mask = x <= 3.0
res = torch.where(condition_or_mask, x, y)
print('=res:', res)
53.make_grid
显示图片
from torchvision.utils import make_grid
from torchvision.transforms.functional import to_tensor, to_pil_image
from PIL import Image
import cv2
import numpy as np
import matplotlib.pyplot as plt
img = cv2.imread("./111.png")
img = to_pil_image(make_grid([to_tensor(i) for i in [img, img, img]],nrow=2,# number of images in single rowpadding=5 # "frame" size)
)
cv2.imwrite('./show_img.jpg', np.array(img))
54.切片将二维tensor划分为窗口
window_size = 5
shift_size = 3
H = 15
W = 15
img_mask = torch.ones((H, W))*0  # 1 H W 1
h_slices = (slice(0, -window_size),slice(-window_size, -shift_size),slice(-shift_size, None))
w_slices = (slice(0, -window_size),slice(-window_size, -shift_size),slice(-shift_size, None))
cnt = 0for h in h_slices:for w in w_slices:img_mask[h, w] = cntcnt += 1print('===img_mask:\n', img_mask)x = img_mask
x = x.view(H // window_size, window_size, W // window_size, window_size)
print(x)
windows = x.permute(0, 2, 1, 3).contiguous().view(-1, window_size, window_size)
print('==windows.shape:', windows.shape)
print('==windows:', windows)


55.获取2*2窗口的相对位置

window_size = [2, 2]
coords_h = torch.arange(window_size[0])
coords_w = torch.arange(window_size[1])
coords = torch.stack(torch.meshgrid([coords_h, coords_w]))  # 2, Wh, Ww
print('==coords:', coords)
coords_flatten = torch.flatten(coords, 1)  # 2, Wh*Ww
print('===coords_flatten:', coords_flatten)
print('===coords_flatten[:, :, None]:', coords_flatten[:, :, None])
print('==coords_flatten[:, None, :]:', coords_flatten[:, None, :])
relative_coords = coords_flatten[:, :, None] - coords_flatten[:, None, :]  # 2, Wh*Ww, Wh*Ww
print('==relative_coords:', relative_coords)
relative_coords = relative_coords.permute(1, 2, 0).contiguous()  # Wh*Ww, Wh*Ww, 2
print('==relative_coords.shape:', relative_coords.shape)
print('==relative_coords:', relative_coords)
56.三维tensor变为四维one hot
def _expand_onehot_labels(labels, label_weights, target_shape, ignore_index):"""Expand onehot labels to match the size of prediction."""bin_labels = labels.new_zeros(target_shape)valid_mask = (labels >= 0) & (labels != ignore_index)print('==valid_mask:', valid_mask)inds = torch.nonzero(valid_mask, as_tuple=True)print('==inds:', inds)if inds[0].numel() > 0:if labels.dim() == 3:bin_labels[inds[0], labels[valid_mask], inds[1], inds[2]] = 1else:bin_labels[inds[0], labels[valid_mask]] = 1valid_mask = valid_mask.unsqueeze(1).expand(target_shape).float()if label_weights is None:bin_label_weights = valid_maskelse:bin_label_weights = label_weights.unsqueeze(1).expand(target_shape)bin_label_weights *= valid_maskreturn bin_labels, bin_label_weightsweight=None
ignore_index = 255
label = torch.tensor([[[255, 0, 1, 255],[255, 2, 3, 255],[255, 4, 5, 255]]
])
pred = F.softmax(torch.rand((1, 10, 3, 4)), dim=1)
label, weight = _expand_onehot_labels(label, weight, pred.shape,ignore_index)
print('=label:', label)
print('=label.shape:', label.shape)
one_hot = label.transpose(1, 2).transpose(2, 3)
print(one_hot.shape)
print('==one_hot:', one_hot)
print('==weight.shape:', weight.shape)
57.多通道输出结果(四维)和三维gt计算acc
def accuracy(pred, target, topk=1, thresh=None):"""Calculate accuracy according to the prediction and target.Args:pred (torch.Tensor): The model prediction, shape (N, num_class, ...)target (torch.Tensor): The target of each prediction, shape (N, , ...)topk (int | tuple[int], optional): If the predictions in ``topk``matches the target, the predictions will be regarded ascorrect ones. Defaults to 1.thresh (float, optional): If not None, predictions with scores underthis threshold are considered incorrect. Default to None.Returns:float | tuple[float]: If the input ``topk`` is a single integer,the function will return a single float as accuracy. If``topk`` is a tuple containing multiple integers, thefunction will return a tuple containing accuracies ofeach ``topk`` number."""assert isinstance(topk, (int, tuple))if isinstance(topk, int):topk = (topk, )return_single = Trueelse:return_single = Falsemaxk = max(topk)if pred.size(0) == 0:accu = [pred.new_tensor(0.) for i in range(len(topk))]return accu[0] if return_single else accuassert pred.ndim == target.ndim + 1assert pred.size(0) == target.size(0)assert maxk <= pred.size(1), \f'maxk {maxk} exceeds pred dimension {pred.size(1)}'pred_value, pred_label = pred.topk(maxk, dim=1) #(b, 1, h, w)# transpose to shape (maxk, N, ...)pred_label = pred_label.transpose(0, 1)#(1, b, h, w)print('==pred_label:', pred_label)print('=target.unsqueeze(0):', target.unsqueeze(0))correct = pred_label.eq(target.unsqueeze(0).expand_as(pred_label))if thresh is not None:# Only prediction values larger than thresh are counted as correctcorrect = correct & (pred_value > thresh).t()res = []for k in topk:correct_k = correct[:k].view(-1).float().sum(0, keepdim=True)res.append(correct_k.mul_(100.0 / target.numel()))return res[0] if return_single else respred = F.softmax(torch.rand((1, 10, 3, 4)), dim=1)
print('==pred.shape:', pred.shape)
#10个通道压缩后的每个通道索引
target = torch.tensor([[[1, 0, 1, 9],[2, 2, 3, 8],[6, 4, 5, 6]]])
acc = accuracy(pred, target, topk=1, thresh=None)
print('==acc:', acc)
58.F.nll_loss 一般用在softmax算-log之后计算loss
import torch.nn.functional as F
a = torch.tensor([[0, 1, 2, 3],[5, 4, 5, 6]], dtype=torch.float32)b = torch.tensor([0, 1]) #-(0+4)/2 = -2
res = F.nll_loss(a, b)
print('==res:', res)a = torch.tensor([[[0, 1],[2, 3],[5, 4],[5, 6]],[[0, 2],[2, 3],[3, 3],[4, 6]]], dtype=torch.float32)
print('=a.shape:', a.shape)
print('==a.transpose(1, 2):', a.transpose(1, 2))
b = torch.tensor([[1, 1],[0, 1]])
res = F.nll_loss(a, b)# -2(2+3+0+3)/4 = -2
print('==res:', res)
59.transforms.Compose
from torchvision import transforms as trans
from PIL import Image
import cv2
train_trans = trans.Compose([trans.ToTensor(),# trans.Resize((h, w)),# trans.Normalize(mean, std),])
img = np.array([[[255, 255, 255],[255, 255, 255],[0, 0, 0]],[[255, 255, 255],[255, 255, 255],[0, 0, 0]]], dtype=np.uint)
print('==img.shape:', img.shape)
cv2.imwrite('./img.jpg', img)
img = cv2.imread('./img.jpg')
print('==img:', img)#(h, w, c)
img = train_trans(Image.fromarray(img))#(c, h, w)
print('==tensor img', img)
60.soft-argmax
#soft argmax
import numpy as np
import torch
import torch.nn.functional as F
heatmap_size = 10
heatmap1d = np.array([[1, 5, 5, 2, 0, 1, 0, 1, 3, 2],[9, 6, 2, 8, 2, 1, 0, 1, 0, 2],[3, 7, 9, 1, 0, 2, 1.3, 2.3, 0, 1]]).astype(np.float32)
print('==np.argmax(heatmap1d):', np.argmax(heatmap1d, axis=1))
heatmap1d = torch.from_numpy(heatmap1d)
heatmap1d = heatmap1d * 10 #乘上10进一步放大差距
heatmap1d = F.softmax(heatmap1d, 1)
print('==heatmap1d:', heatmap1d)
accu = heatmap1d * torch.arange(heatmap_size, dtype=heatmap1d.dtype,device=heatmap1d.device)[None, :]
print('==accu:', accu)
coord = accu.sum(dim=1)
print('==coord:', coord)
61.CAM
import io
import requests
from PIL import Image
from torchvision import models, transforms
from torch.autograd import Variable
from torch.nn import functional as F
import numpy as np
import cv2
import pdb
import json
import os
model_path = './torch_models'
os.environ['TORCH_HOME'] = model_path
os.makedirs(model_path, exist_ok=True)# input image
# LABELS_URL = 'https://s3.amazonaws.com/outcome-blog/imagenet/labels.json'
# IMG_URL = 'http://media.mlive.com/news_impact/photo/9933031-large.jpg'
# 使用本地的图片和下载到本地的labels.json文件
# LABELS_PATH = "labels.json"
# networks such as googlenet, resnet, densenet already use global average pooling at the end, so CAM could be used directly.
model_id = 1
# 选择使用的网络
if model_id == 1:net = models.squeezenet1_1(pretrained=True)finalconv_name = 'features' # this is the last conv layer of the network
elif model_id == 2:net = models.resnet18(pretrained=True)finalconv_name = 'layer4'
elif model_id == 3:net = models.densenet161(pretrained=True)finalconv_name = 'features'
# 有固定参数的作用,如norm的参数
net.eval()
# 获取特定层的feature map
# hook the feature extractor
features_blobs = []
# print('=before net:', net)
def hook_feature(module, input, output):features_blobs.append(output.data.cpu().numpy())finalconv_name = 'features'
#获取finalconv_name层的特征输出
net._modules.get(finalconv_name).register_forward_hook(hook_feature)
print('=after net:', net)
# 得到softmax weight,
params = list(net.parameters())# 将参数变换为列表
# print('==params[-2].shape:', params[-2].shape)
# print('==params[-1].shape:', params[-1].shape)#(1000, 512, 1, 1)
weight_softmax = np.squeeze(params[-2].data.numpy())# 提取softmax 层的参数
# for name, value in net.named_parameters():
#         print('name={}, value.requires_grad={}, value.shape={}'.format(name, value.requires_grad, value.shape))
def returnCAM(feature_conv, weight_softmax, class_idx):# generate the class activation maps upsample to 256x256size_upsample = (256, 256)#1, 512, 13, 13bz, nc, h, w = feature_conv.shape# 获取feature_conv特征的尺寸# import pdb;pdb.set_trace()output_cam = []# class_idx为预测分值较大的类别的数字表示的数组,一张图片中有N类物体则数组中N个元素for idx in class_idx:# weight_softmax中预测为第idx类的参数w乘以feature_map(为了相乘,故reshape了map的形状)cam = weight_softmax[idx].dot(feature_conv.reshape((nc, h*w)))#512,13*13# 将feature_map的形状reshape回去cam = cam.reshape(h, w)#(13, 13)# 归一化操作(最小的值为0,最大的为1)cam = cam - np.min(cam)cam_img = cam / np.max(cam)# 转换为图片的255的数据cam_img = np.uint8(255 * cam_img)# resize 图片尺寸与输入图片一致output_cam.append(cv2.resize(cam_img, size_upsample))return output_cam
# 数据处理,先缩放尺寸到(224*224),再变换数据类型为tensor,最后normalize
normalize = transforms.Normalize(mean=[0.485, 0.456, 0.406],std=[0.229, 0.224, 0.225]
)
preprocess = transforms.Compose([transforms.Resize((224, 224)),transforms.ToTensor(),normalize
])img_pil = Image.open('./cam.png')
img_pil.save('test.jpg')
# 将图片数据处理成所需要的可用的数据
img_tensor = preprocess(img_pil)
# 处理图片为Variable数据
img_variable = Variable(img_tensor.unsqueeze(0))
# 将图片输入网络得到预测类别分值
logit = net(img_variable)
# print('==logit.shape:', logit.shape)
# download the imagenet category list
# 下载imageNet 分类标签列表,并存储在classes中(数字类别,类别名称)
# # 使用本地的 LABELS_PATH
# with open(LABELS_PATH) as f:
# data = json.load(f).items()# classes = {int(key):value for (key, value) in data}
classes = {i : (str(i)) for i in range(0, 1000)}
# 使用softmax打分
h_x = F.softmax(logit, dim=1).data.squeeze()# 分类分值# 对分类的预测类别分值排序,输出预测值和在列表中的位置
probs, idx = h_x.sort(0, True)
# 转换数据类型
probs = probs.numpy()
idx = idx.numpy()
# 输出预测分值排名在前五的五个类别的预测分值和对应类别名称
for i in range(0, 5):print('{:.3f} -> {}'.format(probs[i], classes[idx[i]]))
# generate class activation mapping for the top1 prediction
# 输出与图片尺寸一致的CAM图片
for i in range(len(features_blobs)):print('==features_blobs[{}].shape={}:'.format(i, features_blobs[i].shape))
CAMs = returnCAM(features_blobs[0], weight_softmax, [idx[0]])
# render the CAM and output
print('output CAM.jpg for the top1 prediction: %s'%classes[idx[0]])
# 将图片和CAM拼接在一起展示定位结果结果
img = cv2.imread('test.jpg')
height, width, _ = img.shape
# 生成热度图
heatmap = cv2.applyColorMap(cv2.resize(CAMs[0], (width, height)), cv2.COLORMAP_JET)
result = heatmap * 0.3 + img * 0.5
cv2.imwrite('CAM.jpg', result)
二.例子:对CIFAR10数据集进行训练
import torch as t
import torchvision as tv
import torchvision.transforms as transforms
from torchvision.transforms import ToPILImage
import os
from PIL import Image
import matplotlib.pyplot as plt
import cv2
show = ToPILImage() # 可以把Tensor转成Image,方便可视化# 定义对数据的预处理
transform = transforms.Compose([transforms.ToTensor(), # 转为Tensor 归一化至0~1transforms.Normalize((0.5, 0.5, 0.5), (0.5, 0.5, 0.5)), # 归一化])path='./data'
if not os.path.exists(path):os.mkdir(path)
# 训练集
trainset = tv.datasets.CIFAR10(root=path,train=True,download=True,transform=transform)trainloader = t.utils.data.DataLoader(trainset,batch_size=4,shuffle=True,num_workers=2)# 测试集
testset = tv.datasets.CIFAR10(path,train=False,download=True,transform=transform)testloader = t.utils.data.DataLoader(testset,batch_size=4,shuffle=False,num_workers=2)classes = ('plane', 'car', 'bird', 'cat','deer', 'dog', 'frog', 'horse', 'ship', 'truck')(data, label) = trainset[100]
print(data.shape)
print(classes[label])
def vis_data_cv2():new_data = data.numpy()new_data = (new_data * 0.5 + 0.5) * 255print(new_data.shape)new_data = new_data.transpose((1, 2, 0))new_data = cv2.resize(new_data, (100, 100))new_data = cv2.cvtColor(new_data, cv2.COLOR_RGB2BGR)print(new_data.shape)cv2.imwrite('1.jpg', new_data)def vis_data_mutilpy():dataiter = iter(trainloader)images, labels = dataiter.next()  # 返回4张图片及标签print(' '.join('%11s' % classes[labels[j]] for j in range(4)))img = show(tv.utils.make_grid((images + 1) / 2)).resize((400, 100))import numpy as npimg = np.array(img)img = cv2.cvtColor(img, cv2.COLOR_RGB2BGR)print(img.shape)cv2.imwrite('2.jpg', img)if __name__ == '__main__':# vis_data_cv2()vis_data_mutilpy()
上述可视化结果如下图:


构造LeNet模型如下所示:
import torch.nn as nn
import torch.nn.functional as F
class Net(nn.Module):def __init__(self):super(Net, self).__init__()self.conv1 = nn.Conv2d(3, 6, 5)self.conv2 = nn.Conv2d(6, 16, 5)self.fc1 = nn.Linear(16 * 5 * 5, 120)self.fc2 = nn.Linear(120, 84)self.fc3 = nn.Linear(84, 10)def forward(self, x):x = F.max_pool2d(F.relu(self.conv1(x)), (2, 2))x = F.max_pool2d(F.relu(self.conv2(x)), 2)x = x.view(x.size()[0], -1)x = F.relu(self.fc1(x))x = F.relu(self.fc2(x))x = self.fc3(x)#x = F.softmax(self.fc3(x),dim=1)return x
net = Net()
print(net)
for name, parameters in net.named_parameters():print(name, ':', parameters.size())params = list(net.parameters())
print(len(params))
print('params=',params)from torch import optimcriterion = nn.CrossEntropyLoss()  # 交叉熵损失函数
optimizer = optim.SGD(net.parameters(), lr=0.001, momentum=0.9)t.set_num_threads(8)for epoch in range(1):running_loss = 0.0for i, data in enumerate(trainloader, 0):if i<50:# print(len(data))# print(data[0].size())# 输入数据inputs, labels = data# 梯度清零optimizer.zero_grad()# forward + backwardoutputs = net(inputs)loss = criterion(outputs, labels)# print('loss=',loss)loss.backward()# 更新参数optimizer.step()# 打印log信息# loss 是一个scalar,需要使用loss.item()来获取数值,不能使用loss[0]running_loss += loss.item()if i % 100 == 0:  # 每100个样本打印一下训练状态print('[%d, %5d] loss: %.3f' \% (epoch + 1, i + 1, running_loss / 100))running_loss = 0.0
print('Finished Training')correct = 0  # 预测正确的图片数
total = 0  # 总共的图片数#由于测试的时候不需要求导,可以暂时关闭autograd,提高速度,节约内存
with t.no_grad():for i,data in enumerate(testloader):images, labels = dataoutputs = net(images)_, predicted = t.max(outputs, 1)total += labels.size(0)correct += (predicted == labels).sum()print('10000张测试集中的准确率为: %d %%' % (100 * correct / total))
三.PyTorch-OpCounter统计模型大小和参数量
GitHub - Lyken17/pytorch-OpCounter: Count the MACs / FLOPs of your PyTorch model.
import torch
from torchvision.models import resnet50
from thop import profile
model = resnet50()
input = torch.randn(1, 3, 224, 224)
flops, params = profile(model, inputs=(input, ))print('flops=',flops)
print('params=',params)
![]()
flops计算
对于Eltwise Sum 来讲,两个大小均为 (N, C, H, W) 的 Tensor 相加,计算量就是 N x C x H x W;而对于卷积来说,计算量公式为(乘加各算一次):

参数量: OC*KH*KW*IC
访存量:访存量一般用 Bytes(或者 KB/MB/GB)来表示,即模型计算到底需要存/取多少 Bytes 的数据。
对于 Eltwise Sum 来讲,两个大小均为 (N, C, H, W) 的 Tensor 相加,访存量是 (2 + 1) x N x C x H x W x sizeof(data_type),其中 2 代表读两个 Tensor,1 代表写一个 Tensor;而对于卷积来说,访存量公式为:
 访存量对于模型速度至关重要.
四.模型存储与调用
"""
torch: 0.4
"""
import torch
import matplotlib.pyplot as plt# torch.manual_seed(1)    # reproducibledef train(x,y):# save net1model = torch.nn.Sequential(torch.nn.Linear(1, 10),torch.nn.ReLU(),torch.nn.Linear(10, 1))optimizer = torch.optim.SGD(model.parameters(), lr=0.5)loss_func = torch.nn.MSELoss()for t in range(100):prediction = model(x)loss = loss_func(prediction, y)optimizer.zero_grad()loss.backward()optimizer.step()# plot resultplt.title('train')plt.scatter(x.data.numpy(), y.data.numpy())plt.plot(x.data.numpy(), prediction.data.numpy(), 'r-', lw=5)plt.show()torch.save(model.state_dict(), 'model_params.pth')   # save only the parameters
def inference(x,y):# restore only the parametersmodel = torch.nn.Sequential(torch.nn.Linear(1, 10),torch.nn.ReLU(),torch.nn.Linear(10, 1))# copy net1's parameters into net3model.load_state_dict(torch.load('model_params.pth'))prediction = model(x)plt.title('inference')plt.scatter(x.data.numpy(), y.data.numpy())plt.plot(x.data.numpy(), prediction.data.numpy(), 'r-', lw=5)plt.show()
if __name__ == '__main__':# fake datax = torch.unsqueeze(torch.linspace(-1, 1, 100), dim=1)  # x data (tensor), shape=(100, 1)y = x.pow(2) + 0.2 * torch.rand(x.size())  # noisy y data (tensor), shape=(100, 1)train(x,y)# inference(x,y)

字符识别代码:
import os, sys, glob, shutil, jsonos.environ["CUDA_VISIBLE_DEVICES"] = '0'
import cv2from PIL import Image
import numpy as npfrom tqdm import tqdm, tqdm_notebookimport torchtorch.manual_seed(0)
torch.backends.cudnn.deterministic = False
torch.backends.cudnn.benchmark = Trueimport torchvision.models as models
import torchvision.transforms as transforms
import torchvision.datasets as datasets
import torch.nn as nn
import torch.nn.functional as F
import torch.optim as optim
from torch.autograd import Variable
from torch.utils.data.dataset import Dataset
from model import SVHN_Model1class SVHNDataset(Dataset):def __init__(self, img_path, img_label, transform=None):self.img_path = img_pathself.img_label = img_labelif transform is not None:self.transform = transformelse:self.transform = Nonedef __getitem__(self, index):# print('===index:', index)# print('===self.img_path[index]:', self.img_path[index])img = Image.open(self.img_path[index]).convert('RGB')if self.transform is not None:img = self.transform(img)lbl = np.array(self.img_label[index], dtype=np.int)# print('====lbl:', lbl)# print('===list(lbl):', list(lbl))# print('===(5 - len(lbl)) * [10]:', (5 - len(lbl)) * [10])# 原始SVHN中类别10为数字0lbl = list(lbl) + (5 - len(lbl)) * [10]# print('===lbl:',lbl)return img, torch.from_numpy(np.array(lbl[:5]))def __len__(self):return len(self.img_path)def train_database():train_path = glob.glob('./data/mchar_train/*.png')train_path.sort()train_json = json.load(open('./data/train.json'))train_label = [train_json[x]['label'] for x in train_json]print('=len(train_path):', len(train_path), len(train_label))print('==train_label[:3]:', train_label[:3])train_loader = torch.utils.data.DataLoader(SVHNDataset(train_path, train_label,transforms.Compose([transforms.Resize((64, 128)),transforms.RandomCrop((60, 120)),transforms.ColorJitter(0.3, 0.3, 0.2),transforms.RandomRotation(10),transforms.ToTensor(),transforms.Normalize([0.485, 0.456, 0.406], [0.229, 0.224, 0.225])])),batch_size=64,shuffle=True)# for i, (input, target) in enumerate(train_loader):#     if i<1:#         input = input.cuda()#         target = target.cuda()#         print('==input.shape:', input.shape)#         print('==target:', target)#         breakreturn train_loaderdef val_database():val_path = glob.glob('./data/mchar_val/*.png')val_path.sort()val_json = json.load(open('./data/val.json'))val_label = [val_json[x]['label'] for x in val_json]print(len(val_path), len(val_label))val_loader = torch.utils.data.DataLoader(SVHNDataset(val_path, val_label,transforms.Compose([transforms.Resize((60, 120)),# transforms.ColorJitter(0.3, 0.3, 0.2),# transforms.RandomRotation(5),transforms.ToTensor(),transforms.Normalize([0.485, 0.456, 0.406], [0.229, 0.224, 0.225])])),batch_size=64,shuffle=False,num_workers=0,)# for i, (input, target) in enumerate(val_loader):#     if i<1:#         input = input.cuda()#         target = target.cuda()#         print('==input.shape:', input.shape)#         print('==target:', target)#         breakreturn val_loaderdef train(train_loader, model, criterion, optimizer, epoch):# 切换模型为训练模式model.train()train_loss = []for i, (input, target) in enumerate(train_loader):if use_cuda:input = input.cuda()target = target.cuda()c0, c1, c2, c3, c4 = model(input)loss = criterion(c0, target[:, 0]) + \criterion(c1, target[:, 1]) + \criterion(c2, target[:, 2]) + \criterion(c3, target[:, 3]) + \criterion(c4, target[:, 4])# loss /= 6optimizer.zero_grad()loss.backward()optimizer.step()train_loss.append(loss.item())return np.mean(train_loss)def validate(val_loader, model, criterion):# 切换模型为预测模型model.eval()val_loss = []# 不记录模型梯度信息with torch.no_grad():for i, (input, target) in enumerate(val_loader):if use_cuda:input = input.cuda()target = target.cuda()c0, c1, c2, c3, c4 = model(input)loss = criterion(c0, target[:, 0]) + \criterion(c1, target[:, 1]) + \criterion(c2, target[:, 2]) + \criterion(c3, target[:, 3]) + \criterion(c4, target[:, 4])# loss /= 6val_loss.append(loss.item())return np.mean(val_loss)def predict(test_loader, model, tta=10):model.eval()test_pred_tta = None# TTA 次数for _ in range(tta):test_pred = []with torch.no_grad():for i, (input, target) in enumerate(test_loader):if use_cuda:input = input.cuda()c0, c1, c2, c3, c4 = model(input)if use_cuda:output = np.concatenate([c0.data.cpu().numpy(),c1.data.cpu().numpy(),c2.data.cpu().numpy(),c3.data.cpu().numpy(),c4.data.cpu().numpy()], axis=1)else:output = np.concatenate([c0.data.numpy(),c1.data.numpy(),c2.data.numpy(),c3.data.numpy(),c4.data.numpy()], axis=1)test_pred.append(output)test_pred = np.vstack(test_pred)if test_pred_tta is None:test_pred_tta = test_predelse:test_pred_tta += test_predreturn test_pred_ttaif __name__ == '__main__':train_loader = train_database()val_loader = val_database()model = SVHN_Model1()criterion = nn.CrossEntropyLoss()optimizer = torch.optim.Adam(model.parameters(), 0.001)best_loss = 1000.0use_cuda = Trueif use_cuda:model = model.cuda()for epoch in range(100):print('====start train,epoch={}'.format(epoch+1))train_loss = train(train_loader, model, criterion, optimizer, epoch)val_loss = validate(val_loader, model, criterion)val_label = [''.join(map(str, x)) for x in val_loader.dataset.img_label]val_predict_label = predict(val_loader, model, 1)val_predict_label = np.vstack([val_predict_label[:, :11].argmax(1),val_predict_label[:, 11:22].argmax(1),val_predict_label[:, 22:33].argmax(1),val_predict_label[:, 33:44].argmax(1),val_predict_label[:, 44:55].argmax(1),]).Tval_label_pred = []for x in val_predict_label:val_label_pred.append(''.join(map(str, x[x != 10])))val_char_acc = np.mean(np.array(val_label_pred) == np.array(val_label))print('Epoch: {0}, Train loss: {1} \t Val loss: {2}'.format(epoch, train_loss, val_loss))print('Val Acc', val_char_acc)# 记录下验证集精度if val_loss < best_loss:best_loss = val_loss# print('Find better model in Epoch {0}, saving model.'.format(epoch))torch.save(model.state_dict(), './model.pt')
参考:
GitHub - chenyuntc/pytorch-book: PyTorch tutorials and fun projects including neural talk, neural style, poem writing, anime generation (《深度学习框架PyTorch:入门与实战》)
PyTorch实战指南 - 知乎


