learn from 《Python高性能(第2版)》
类似工具:pycharm profile对函数调用效率进行测试
1. 例子
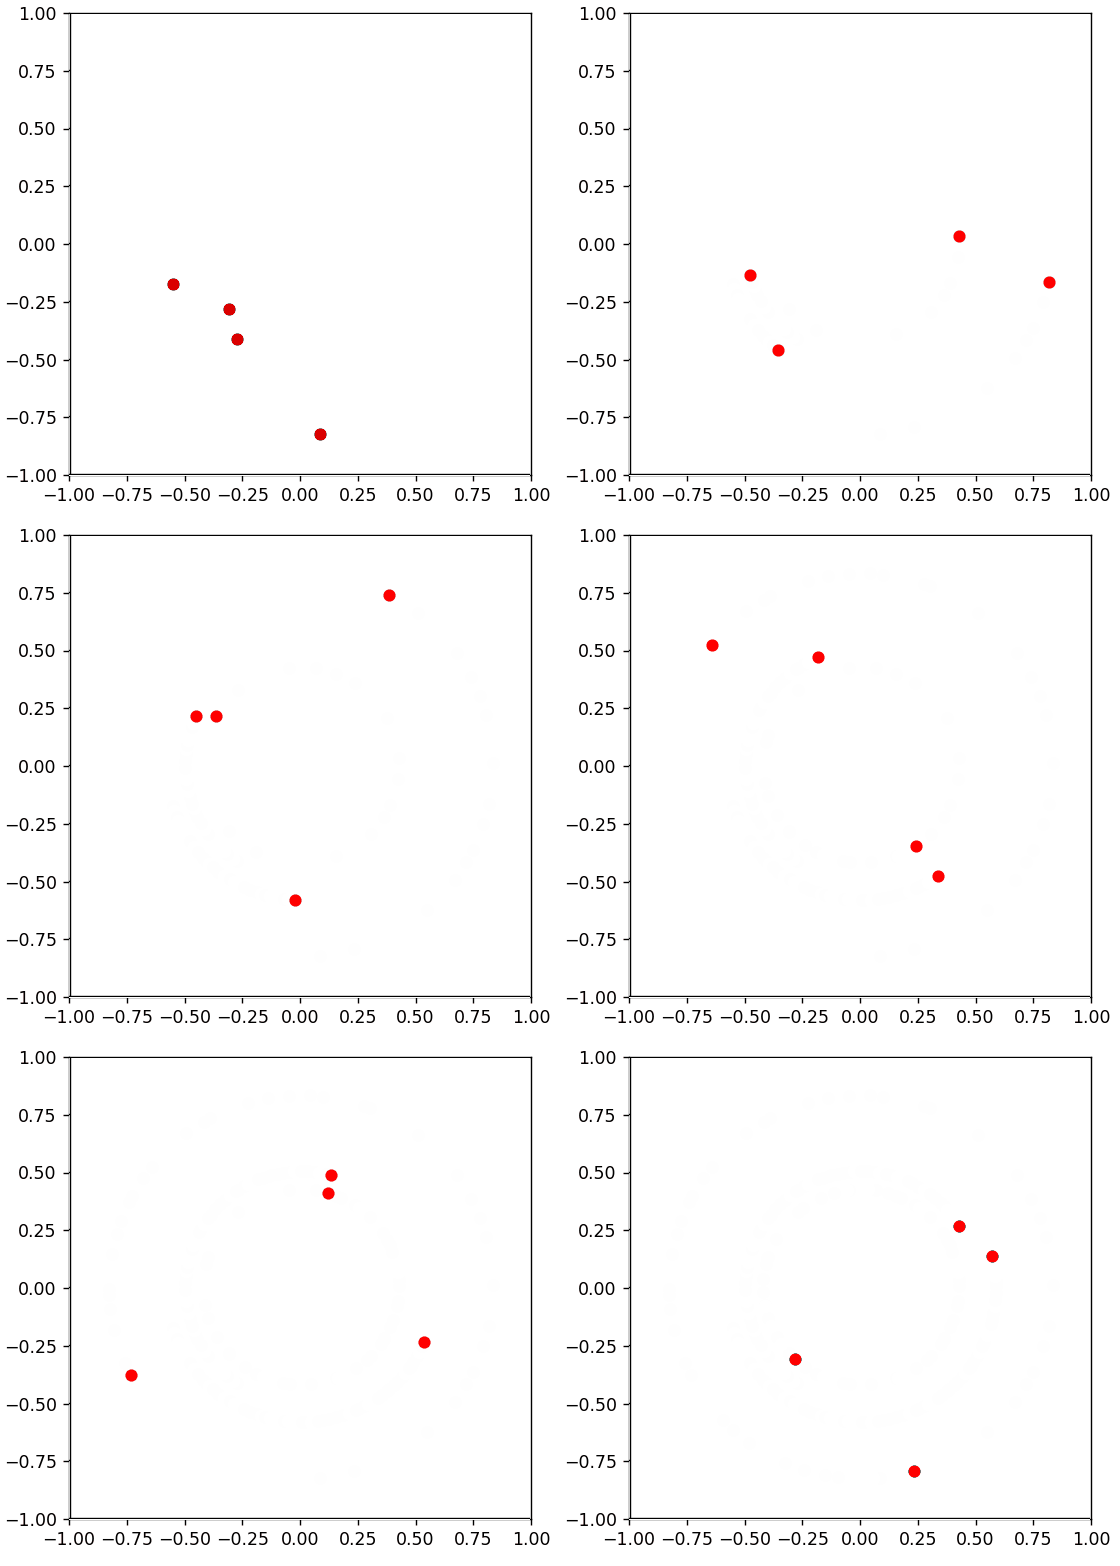
一个圆周运动的动画
from matplotlib import pyplot as plt
from matplotlib import animation
from random import uniform
import timeitclass Particle:__slots__ = ('x', 'y', 'ang_speed')# 声明成员只允许这么多,不能动态添加,当生成大量实例时,可以减少内存占用def __init__(self, x, y, ang_speed):self.x = xself.y = yself.ang_speed = ang_speedclass ParticleSimulator:def __init__(self, particles):self.particles = particlesdef evolve(self, dt):timestep = 0.00001nsteps = int(dt / timestep)for i in range(nsteps):for p in self.particles:norm = (p.x ** 2 + p.y ** 2) ** 0.5v_x = (-p.y) / normv_y = p.x / normd_x = timestep * p.ang_speed * v_xd_y = timestep * p.ang_speed * v_yp.x += d_xp.y += d_ydef visualize(simulator):X = [p.x for p in simulator.particles]Y = [p.y for p in simulator.particles]fig = plt.figure()ax = plt.subplot(111, aspect='equal')line, = ax.plot(X, Y, 'ro')# Axis limitsplt.xlim(-1, 1)plt.ylim(-1, 1)# It will be run when the animation startsdef init():line.set_data([], [])return line,def animate(i):# We let the particle evolve for 0.1 time unitssimulator.evolve(0.01)X = [p.x for p in simulator.particles]Y = [p.y for p in simulator.particles]line.set_data(X, Y)return line,# Call the animate function each 10 msanim = animation.FuncAnimation(fig,animate,init_func=init,blit=True,interval=10)plt.show()def test_visualize():particles = [Particle(0.3, 0.5, +1),Particle(0.0, -0.5, -1),Particle(-0.1, -0.4, +3),Particle(-0.2, -0.8, +3),]simulator = ParticleSimulator(particles)visualize(simulator)if __name__ == '__main__':test_visualize()

2. 运行耗时测试
linux time 命令
def benchmark():particles = [Particle(uniform(-1.0, 1.0),uniform(-1.0, 1.0),uniform(-1.0, 1.0))for i in range(100)]simulator = ParticleSimulator(particles)# visualize(simulator)simulator.evolve(0.1)if __name__ == '__main__':benchmark()
生成100个实例,模拟 0.1 秒
在 linux 中进行测试耗时:
time python my.py
real    0m10.435s  # 进程实际花费时间
user    0m2.078s  # 计算期间 所有CPU花费总时间
sys     0m1.412s  #  执行系统相关任务(内存分配)期间,所有CPU花费总时间
python timeit包
- 指定 循环次数、重复次数
def timing():result = timeit.timeit('benchmark()',setup='from __main__ import benchmark',number=10)# Result is the time it takes to run the whole loopprint(result)result = timeit.repeat('benchmark()',setup='from __main__ import benchmark',number=10,repeat=3)# Result is a list of timesprint(result)
输出:
6.9873279229996115
[6.382431660999828, 6.248147055000118, 6.325469069000064]
pytest、pytest-benchmark
pip install pytest
pip install pytest-benchmark
$ pytest test_simul.py::test_evolve
=================== test session starts ====================platform linux -- Python 3.8.10, pytest-7.1.2, pluggy-1.0.0
benchmark: 3.4.1 (defaults: timer=time.perf_counter disable_gc=False min_rounds=5 min_time=0.000005 max_time=1.0 calibration_precision=10 warmup=False warmup_iterations=100000)
rootdir: /mnt/d/gitcode/Python_learning/Python-High-Performance-Second-Edition-master/Chapter01
plugins: benchmark-3.4.1
collected 1 itemtest_simul.py .                                      [100%]---------------------------------------------- benchmark: 1 tests ---------------------------------------------
Name (time in ms)         Min      Max     Mean  StdDev   Median     IQR  Outliers      OPS  Rounds  Iterations
---------------------------------------------------------------------------------------------------------------
test_evolve           15.9304  42.7975  20.1502  5.6825  18.2795  3.7249       5;5  49.6274      58           1
---------------------------------------------------------------------------------------------------------------Legend:Outliers: 1 Standard Deviation from Mean; 1.5 IQR (InterQuartile Range) from 1st Quartile and 3rd Quartile.OPS: Operations Per Second, computed as 1 / Mean
上面显示,测了58次,用时的最小、最大、均值、方差、中位数等
3. cProfile 找出瓶颈
profile包是 python写的开销比较大,cProfile是C语言编写的,开销小
python -m cProfile simul.py
$ python -m cProfile simul.py2272804 function calls (2258641 primitive calls) in 8.209 secondsOrdered by: standard namencalls tottime percall cumtime percall filename:lineno(function)30 0.000 0.000 0.001 0.000 <__array_function__ internals>:177(any)160 0.000 0.000 0.002 0.000 <__array_function__ internals>:177(column_stack)161 0.000 0.000 0.004 0.000 <__array_function__ internals>:177(concatenate)34 0.000 0.000 0.000 0.000 <__array_function__ internals>:177(copyto)30 0.000 0.000 0.002 0.000 <__array_function__ internals>:177(linspace)30 0.000 0.000 0.000 0.000 <__array_function__ internals>:177(ndim)30 0.000 0.000 0.000 0.000 <__array_function__ internals>:177(result_type)5 0.000 0.000 0.116 0.023 <frozen importlib._bootstrap>:1002(_gcd_import)485/33 0.001 0.000 6.807 0.206 <frozen importlib._bootstrap>:1017(_handle_fromlist)。。。
输出结果非常长
按 tottime 排序 -s tottime,看前几个就是耗时最多的几个
$ python -m cProfile -s tottime simul.py2272784 function calls (2258621 primitive calls) in 7.866 secondsOrdered by: internal timencalls tottime percall cumtime percall filename:lineno(function)1258 2.498 0.002 2.498 0.002 {built-in method posix.stat}273 1.057 0.004 1.057 0.004 {built-in method io.open_code}27 0.874 0.032 0.879 0.033 {built-in method _imp.create_dynamic}1 0.691 0.691 0.691 0.691 simul.py:21(evolve)273 0.464 0.002 0.464 0.002 {method 'read' of '_io.BufferedReader' objects}273 0.432 0.002 1.953 0.007 <frozen importlib._bootstrap_external>:1034(get_data)32045 0.245 0.000 0.411 0.000 inspect.py:625(cleandoc)30 0.171 0.006 0.171 0.006 {built-in method posix.listdir}33 0.151 0.005 0.151 0.005 {built-in method io.open}
或者使用代码
>>> from simul import benchmark
>>> import cProfile
>>> cProfile.run('benchmark()')707 function calls in 0.733 secondsOrdered by: standard namencalls  tottime  percall  cumtime  percall filename:lineno(function)1    0.000    0.000    0.733    0.733 <string>:1(<module>)300    0.000    0.000    0.000    0.000 random.py:415(uniform)100    0.000    0.000    0.000    0.000 simul.py:10(__init__)1    0.000    0.000    0.733    0.733 simul.py:117(benchmark)1    0.000    0.000    0.000    0.000 simul.py:118(<listcomp>)1    0.000    0.000    0.000    0.000 simul.py:18(__init__)1    0.733    0.733    0.733    0.733 simul.py:21(evolve)1    0.000    0.000    0.733    0.733 {built-in method builtins.exec}1    0.000    0.000    0.000    0.000 {method 'disable' of '_lsprof.Profiler' objects}300    0.000    0.000    0.000    0.000 {method 'random' of '_random.Random' objects}
profile 对象开启和关闭之间可以包含任意代码
>>> from simul import benchmark
>>> import cProfile
>>>
>>> pr = cProfile.Profile()
>>> pr.enable()
>>> benchmark()
>>> pr.disable()
>>> pr.print_stats()706 function calls in 0.599 secondsOrdered by: standard namencalls  tottime  percall  cumtime  percall filename:lineno(function)1    0.000    0.000    0.000    0.000 <stdin>:1(<module>)300    0.000    0.000    0.000    0.000 random.py:415(uniform)100    0.000    0.000    0.000    0.000 simul.py:10(__init__)1    0.000    0.000    0.599    0.599 simul.py:117(benchmark)1    0.000    0.000    0.000    0.000 simul.py:118(<listcomp>)1    0.000    0.000    0.000    0.000 simul.py:18(__init__)1    0.599    0.599    0.599    0.599 simul.py:21(evolve)1    0.000    0.000    0.000    0.000 {method 'disable' of '_lsprof.Profiler' objects}300    0.000    0.000    0.000    0.000 {method 'random' of '_random.Random' objects}
tottime不含调用其他函数的时间,cumtime执行函数(包含调用其他函数的时间)的总时间
KCachegrind 图形化分析
KCachegrind - pyprof2calltree - cProfile
sudo apt install kcachegrind
pip install pyprof2calltree
python -m cProfile -o prof.out taylor.py
pyprof2calltree -i prof.out -o prof.calltree
kcachegrind prof.calltree
安装 kcachegrind 失败,没有运行截图
还有其他工具 Gprof2Dot 可以生成调用图
4. line_profiler
它是一个 py 包,安装后,对要监视的函数应用 装饰器 @profile
pip install line_profiler
https://github.com/rkern/line_profiler
kernprof -l -v simul.py
$ kernprof -l -v simul.py
Wrote profile results to simul.py.lprof
Timer unit: 1e-06 sTotal time: 4.39747 s
File: simul.py
Function: evolve at line 21Line #      Hits         Time  Per Hit   % Time  Line Contents
==============================================================21                                               @profile22                                               def evolve(self, dt):23         1          5.0      5.0      0.0          timestep = 0.0000124         1          5.0      5.0      0.0          nsteps = int(dt/timestep)2526     10001       5419.0      0.5      0.1          for i in range(nsteps):27   1010000     454924.0      0.5     10.3              for p in self.particles:2829   1000000     791441.0      0.8     18.0                  norm = (p.x**2 + p.y**2)**0.530   1000000     537019.0      0.5     12.2                  v_x = (-p.y)/norm31   1000000     492304.0      0.5     11.2                  v_y = p.x/norm3233   1000000     525471.0      0.5     11.9                  d_x = timestep * p.ang_speed * v_x34   1000000     521829.0      0.5     11.9                  d_y = timestep * p.ang_speed * v_y3536   1000000     537637.0      0.5     12.2                  p.x += d_x37   1000000     531418.0      0.5     12.1                  p.y += d_y
python -m line_profiler simul.py.lprof
$ python -m line_profiler simul.py.lprof
Timer unit: 1e-06 sTotal time: 5.34553 s
File: simul.py
Function: evolve at line 21Line #      Hits         Time  Per Hit   % Time  Line Contents
==============================================================21                                               @profile22                                               def evolve(self, dt):23         1          3.0      3.0      0.0          timestep = 0.0000124         1          3.0      3.0      0.0          nsteps = int(dt/timestep)2526     10001       6837.0      0.7      0.1          for i in range(nsteps):27   1010000     567894.0      0.6     10.6              for p in self.particles:2829   1000000     953363.0      1.0     17.8                  norm = (p.x**2 + p.y**2)**0.530   1000000     656821.0      0.7     12.3                  v_x = (-p.y)/norm31   1000000     601929.0      0.6     11.3                  v_y = p.x/norm3233   1000000     635255.0      0.6     11.9                  d_x = timestep * p.ang_speed * v_x34   1000000     636091.0      0.6     11.9                  d_y = timestep * p.ang_speed * v_y3536   1000000     651873.0      0.7     12.2                  p.x += d_x37   1000000     635462.0      0.6     11.9                  p.y += d_y
5. 性能优化
- 用更简洁的计算公式
- 预计算不变量
- 减少赋值语句,消除中间变量
注意:细微的优化,速度有所提高,但可能并不显著,还需要保证算法正确
6. dis 模块
该包可以了解代码是如何转换为字节码的, dis 表示 disassemble 反汇编
import dis
dis.dis(函数名)
dis.dis(ParticleSimulator.evolve)22 0 LOAD_CONST 1 (1e-05)2 STORE_FAST 2 (timestep)23 4 LOAD_GLOBAL 0 (int)6 LOAD_FAST 1 (dt)8 LOAD_FAST 2 (timestep)10 BINARY_TRUE_DIVIDE12 CALL_FUNCTION 114 STORE_FAST 3 (nsteps)25 16 LOAD_GLOBAL 1 (range)18 LOAD_FAST 3 (nsteps)20 CALL_FUNCTION 122 GET_ITER>> 24 FOR_ITER 118 (to 144)26 STORE_FAST 4 (i)26 28 LOAD_FAST 0 (self)30 LOAD_ATTR 2 (particles)32 GET_ITER>> 34 FOR_ITER 106 (to 142)36 STORE_FAST 5 (p)28 38 LOAD_FAST 5 (p)40 LOAD_ATTR 3 (x)42 LOAD_CONST 2 (2)44 BINARY_POWER46 LOAD_FAST 5 (p)48 LOAD_ATTR 4 (y)50 LOAD_CONST 2 (2)52 BINARY_POWER54 BINARY_ADD56 LOAD_CONST 3 (0.5)58 BINARY_POWER60 STORE_FAST 6 (norm)29 62 LOAD_FAST 5 (p)64 LOAD_ATTR 4 (y)66 UNARY_NEGATIVE68 LOAD_FAST 6 (norm)70 BINARY_TRUE_DIVIDE72 STORE_FAST 7 (v_x)30 74 LOAD_FAST 5 (p)76 LOAD_ATTR 3 (x)78 LOAD_FAST 6 (norm)80 BINARY_TRUE_DIVIDE82 STORE_FAST 8 (v_y)32 84 LOAD_FAST 2 (timestep)86 LOAD_FAST 5 (p)88 LOAD_ATTR 5 (ang_speed)90 BINARY_MULTIPLY92 LOAD_FAST 7 (v_x)94 BINARY_MULTIPLY96 STORE_FAST 9 (d_x)33 98 LOAD_FAST 2 (timestep)100 LOAD_FAST 5 (p)102 LOAD_ATTR 5 (ang_speed)104 BINARY_MULTIPLY106 LOAD_FAST 8 (v_y)108 BINARY_MULTIPLY110 STORE_FAST 10 (d_y)35 112 LOAD_FAST 5 (p)114 DUP_TOP116 LOAD_ATTR 3 (x)118 LOAD_FAST 9 (d_x)120 INPLACE_ADD122 ROT_TWO124 STORE_ATTR 3 (x)36 126 LOAD_FAST 5 (p)128 DUP_TOP130 LOAD_ATTR 4 (y)132 LOAD_FAST 10 (d_y)134 INPLACE_ADD136 ROT_TWO138 STORE_ATTR 4 (y)140 JUMP_ABSOLUTE 34>> 142 JUMP_ABSOLUTE 24>> 144 LOAD_CONST 0 (None)146 RETURN_VALUE
可以是用该工具了解指令的多少和代码是如何转换的
7. memory_profiler
https://pypi.org/project/memory-profiler/
pip install memory_profiler
pip install psutil
psutil说明
也需要对监视的函数 加装饰器 @profile
python -m memory_profiler simul.py
$ python -m memory_profiler simul.py
Filename: simul.pyLine #    Mem usage    Increment  Occurrences   Line Contents
=============================================================141   67.465 MiB   67.465 MiB           1   @profile142                                         def benchmark_memory():143   84.023 MiB   16.559 MiB      300004       particles = [Particle(uniform(-1.0, 1.0),144   84.023 MiB    0.000 MiB      100000                             uniform(-1.0, 1.0),145   84.023 MiB    0.000 MiB      100000                             uniform(-1.0, 1.0))146   84.023 MiB    0.000 MiB      100001                     for i in range(100000)]147148   84.023 MiB    0.000 MiB           1       simulator = ParticleSimulator(particles)149   84.023 MiB    0.000 MiB           1       simulator.evolve(0.001)
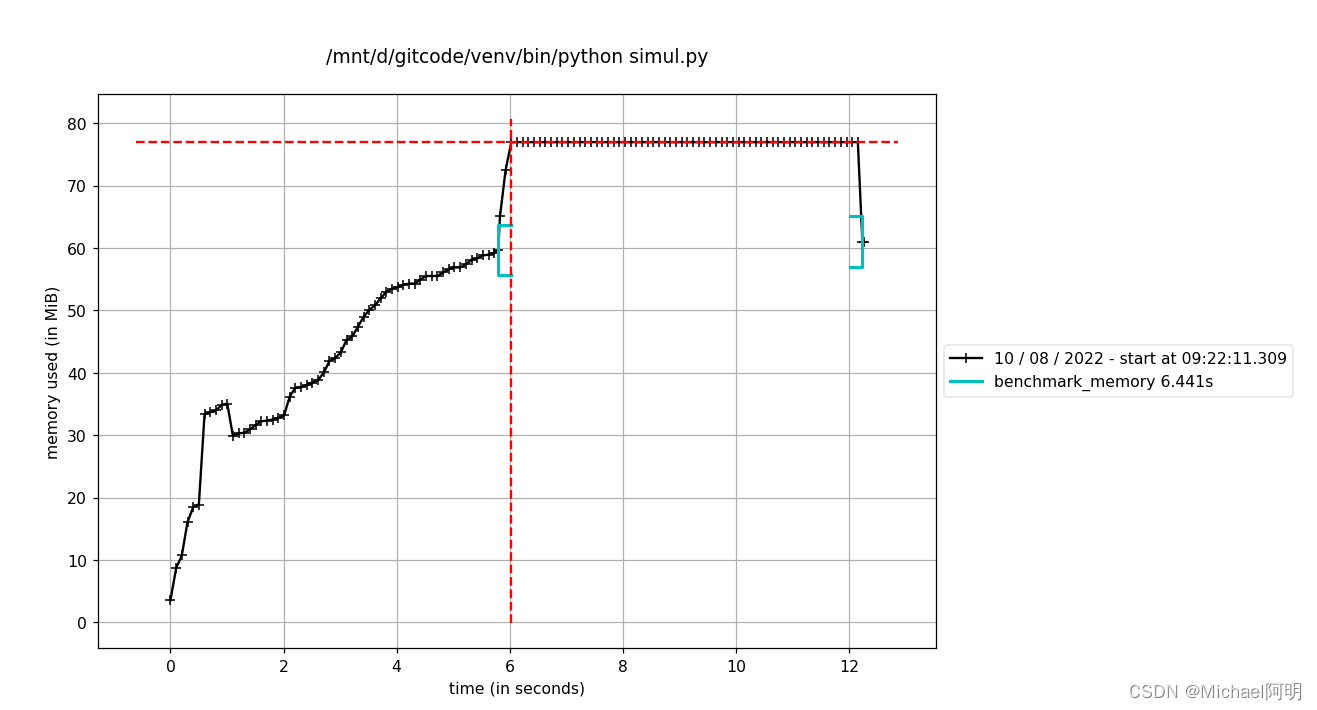
内存使用随时间的变化
$ mprof run simul.py
mprof: Sampling memory every 0.1s
running new process
running as a Python program...
绘制曲线
$ mprof plot


)
)


))


)


