AOP
AOP特点:
- 面向切面编程, 利用AOP对业务逻辑的各个部分进行抽取公共代码, 降低耦合度, 提高代码重用性, 同时提高开发效率.
- 采取横向抽取, 取代传统纵向继承体系重复性代码
- 解决事务管理, 性能监视, 安全检查, 缓存, 日志等问题
- Spring AOP在运行期, 通过反向代理的方式解决类加载, 属性注入
- AspectJ是基于Java的AOP框架, 在Spring使用AspectJ实现AOP
AOP实现机制:
底层采用代理机制实现AOP.
2 种代理机制: 1.采用JDK的的动态代理Proxy; 2.采用CGLIB字节码增强
AOP专业术语:
Target: 目标类 ( 需要被代理的类 )
Joinpoint: 连接点 ( 可能需要使用的目标类方法 )
Advice: 增强代码 ( 对连接点增强的代码 )
PointCut: 切入点 ( 可能需要 Advice 增强的连接点 )
Weaving: 织入 ( 创建代理对象 proxy 执行切入点的方法 )
Aspect: 切面 ( Advice 与 PointCust的结合 )

JDK/CGLIB的AOP实现
下面通过JDK动态代理和CGLIB字节码增强两种方式实现AOP操作
当目标类没有实现接口或者需要更好的性能的时候就需要考虑使用CGLIB实现动态Proxy
JDK动态代理:
1.目标类: Service层
2.切面类: 使用JDK动态代理对Service层代码增强
3.工厂类: 获得proxy对象
//目标类
public interface  UserService {void addUser();void updateUser();void deleteUser();
}
public class UserServiceImpl implements UserService {public void addUser() {System.out.println("add User");}public void updateUser() {System.out.println("update User");}public void deleteUser() {System.out.println("delete User");}
}切面, 增强连接点:
public class MyAspect {public void before(){System.out.println("before");}public void after(){System.out.println("after");}
}静态代理对象工厂:
public class MyProxyBeanFactory {public static UserService createService(){final UserService userService = new UserServiceImpl();final MyAspect myAspect = new MyAspect();//通过userService获得代理对象UserService proxyService = (UserService) Proxy.newProxyInstance(userService.getClass().getClassLoader(),userService.getClass().getInterfaces(),new InvocationHandler(){//Proxy代理对象, method代理类的目标方法, args目标方法参数public Object invoke(Object proxy, Method method,Object[] args) throws Throwable {//织入横向代码myAspect.before();//执行代理类的方法Object obj = method.invoke(userService, args);myAspect.after();//返回执行代理方法的返回值return obj;}});//返回代理对象return proxyService;}
}applicationContext.xml:
<bean id="userService" class="com.f_aop.jdkproxy.MyProxyBeanFactory" factory-method="createService"></bean>测试方法:@Testpublic void f1(){String XMLPATH="com/f_aop/jdkproxy/applicationContext.xml";ApplicationContext applicationContext = new ClassPathXmlApplicationContext(XMLPATH);UserService userService = (UserService) applicationContext.getBean("userService");userService.addUser();userService.updateUser();userService.deleteUser();}
CGLIB字节码增强动态代理:
原理: cglib动态生成一个代理类的子类, 子类重写代理类的所有不是final的方法, 在子类中采用方法拦截技术拦截所有父类的方法调用, 顺势织入切面逻辑, 实现AOP, 它比JDK动态代理要快.
其操作流程与JDK动态代理一致.
下面只给出静态代理工厂的代码:
public class MyProxyBeanFactory {public static UserService createService(){final UserService userService = new UserServiceImpl();final MyAspect myAspect = new MyAspect();//创建代理Enhancer enhancer = new Enhancer();//确定父类enhancer.setSuperclass(userService.getClass());//向代理对象的方法中织入切面代码enhancer.setCallback(new MethodInterceptor() {public Object intercept(Object proxy, Method method, Object[] args,MethodProxy methodProxy) throws Throwable {myAspect.before();//执行目标方法//Object obj = method.invoke(userService, args);//执行目标方法, 效果与method.invoke(userService, args);//一般执行这个方法, 速度要快一些Object obj = methodProxy.invoke(proxy, args);myAspect.after();//返回目标方法返回值return obj;}});//使用enhancer创建代理对象return (UserService) enhancer.create();}
}
cglib的整个流程与JDK的动态代理都是一样的, 就在底层处理接口和加载字节码文件有区别
AOP联盟通知类型
AOP联盟定义Advice规范, 编写Advice代码需实现Advice接口.
Spring按照Advice在目标类中方法的连接点的位置, 分为5类
前置通知: 实现接口: org.springframework.aop.MethodBeforeAdvice只在目标方法前进行代码增强;
后置通知: 实现接口: org.springframework.aop.AfterReturningAdvice只在目标方法后进行代码增强;
环绕通知( 必须手动执行目标方法 ): 实现接口: org.springframework.aop.MethodInterceptor只在目标方法前后进行代码增强; 效果等同于JDK的Proxy/cglib
异常通知: 实现接口: org.springframework.aop.ThrowsAdvice在抛出异常的时候进行代码增强;
引介通知:实现接口: org.springframework.aop.IntroductionInterceptor只在目标类中增添一些新的方法和属性;
AOP联盟的代理实现
- 使用Spring提供的ProxyFactoryBean模拟代理过程, 实现Spring的AOP:
使用环绕型通知进行演示(目标类与前面的一样):
1.导入aop, aopalliance jar包
2.切面类(MyAspect)实现MethodInterceptor接口
3.实现MethodInterceptor中invoke方法, 手动织入横向代码
4.在applicationContext.xml中配置, 使用Spring提供的ProxyFactoryBean对目标类实现代理
演示代码:
切面类:
public class MyAspect implements MethodInterceptor{@Overridepublic Object invoke(MethodInvocation mi) throws Throwable {System.out.println("前");//手动执行目标方法Object obj = mi.proceed();System.out.println("后");//返回目标方法执行的返回值return obj;}
}配置applicationContext.xml:<!-- 获得目标类对象 --><bean id="userService" class="com.f_aop.methodInterceptor.UserServiceImpl"></bean><!-- 创建切面类 --><bean id="myAspect" class="com.f_aop.methodInterceptor.MyAspect"></bean><!-- 创建代理类, 使用Spring配备的代理工厂 --><bean id="proxyService" class="org.springframework.aop.framework.ProxyFactoryBean"><!-- 指定接口 --><property name="interfaces" value="com.f_aop.methodInterceptor.UserService"></property><!-- 确定目标类对象 --><property name="target" ref="userService"></property>
<!-- 确定Aspect, 由于interceptorNames的形参值是String[], 所以使用value, 而非ref --><property name="interceptorNames" value="myAspect"></property><property name="optimize" value="true"></property></bean>测试方法:@Testpublic void f1(){String XMLPATH="com/f_aop/methodInterceptor/applicationContext.xml";ApplicationContext applicationContext = new ClassPathXmlApplicationContext(XMLPATH);//使用proxyService, 而非userService//通过代理对象执行AdviceUserService userService = (UserService) applicationContext.getBean("proxyService");userService.addUser();userService.updateUser();userService.deleteUser();}运行结果:
前
add User
后
前
update User
后
前
delete User
后
applicationContext.xml中创建代理类标签详解
ProxyFactoryBean: Spring的代理工厂,生成代理对象interfaces: 目标类实现的接口, 多个值使用<array><value>确定每个值单个值的时候直接使用valuetarget: 确定目标类interceptorNames: 确定切面类的名称, 类型为String[], 使用value, 切记不使用refoptimize: 强制底层使用cglib当没有设置optimize的值时:Spring自动判断, 没有接口使用cglib, 有接口使用jdk显式设置optimize, 如果声明optimize=true,无论是否有接口,都采用cglib
上面这种代理实现, 是在applicationContext.xml配置文件中模拟代理工厂产生代理对象, 在测试函数中获得是容器产生的代理对象proxyService.
- 利用AspectJ简化Spring中ProxyFactoryBean的配置:
使用环绕型通知进行演示, 编写流程:
1.导入aspectj.weaver jar包.
2.在applicationContext.xml配置文件中添加aop的xmlns和xsi限制
3.在配置文件中配置切面类(MyAspect)的切入点(PointCut), 特殊切面(包含advice与PointCut).首先使用expression表达式配置切入点(PointCut), 即目标类中哪些方法需要增强.然后配置特殊切面, 对配置好的切入点, 使用增强点advice进行增强.
下面使用代码演示, 因为只需修改配置文件与测试类, 只给出配置文件代码:
<?xml version="1.0" encoding="UTF-8"?>
<beans xmlns="http://www.springframework.org/schema/beans"xmlns:xsi="http://www.w3.org/2001/XMLSchema-instance"xmlns:aop="http://www.springframework.org/schema/aop"xsi:schemaLocation="http://www.springframework.org/schema/beans http://www.springframework.org/schema/beans/spring-beans.xsdhttp://www.springframework.org/schema/aop http://www.springframework.org/schema/aop/spring-aop.xsd"><bean id="userService" class="com.f_aop.aspectJ.UserServiceImpl"></bean><!-- 创建切面类 --><bean id="myAspect" class="com.f_aop.aspectJ.MyAspect"></bean><!-- 配置特殊切面 --><!-- proxy-target-class配置是否使用cglib --><aop:config proxy-target-class="true"><aop:pointcut id="myPointCut" expression="execution(* com.f_aop.aspectJ.*.*(..))"/><aop:advisor advice-ref="myAspect" pointcut-ref="myPointCut"/></aop:config>
</beans><!--aop:config: 配置AOPproxy-target-class: 配置是否强行使用cglib, 效果与前面的optimize一样pointcut: 配置切入点.expression:  配置切入点表达式,用于获得目标类中需要增强的目标方法.advisor: 配置切入点与切面类, 指明哪些方法需要增强.advice-ref: 切入类对象引用.pointcut-ref: 切入点引用.
-->
相比于Spring提供的ProxyFactoryBean, AspectJ更加便捷.
AspectJ详解
AspectJ是基于Java的AOP框架, 用于自定义AOP开发.
- 切入点表达式
用于描述目标类中的目标方法, 指定哪些方法可作为切入点.
下面说明切入点表达式写法:
语法: expression = " execution( 修饰符 返回值 包.类.方法名(参数) throws 异常 ) "切入表达式针对每个部分的编写规则如下
修饰符(一般省略):public	公共方法*		任意方法
返回值(不能省略):void	没有返回值String	返回值为字符串*		返回值任意
包(可省略):com.demo				固定包com.demo.*				demo下任意子包,例如:com.demo.aopcom.demo..				demo下所有包(包含自己,也包含多级子包)com.demo.*.service..	demo下任意子包, 子包中包含固定包service,service下所有包
类(可省略):UserServiceImpl	指定类*Impl			以Impl结尾的类User*			以User开头的类*				任意类
方法名(不能省略):addUser	指定方法add*	以add开头的方法*User	以User结尾的方法*		任意方法
参数:()			无参(int)		一个int型参数(int, int)	两个int型参数(..)		任意参数
throws(可省略, 一般不写)下面给出一个例子:
1.execution(* com.demo.*.service..*.*(..))指定com.demo下具有固定service包的任意子包中任意类中的任意方法,方法返回值任意.其他种类的expression表达式:
1.within: 匹配包或子包中的方法.within(com.demo..*) demo下所有包中任意类中任意方法
2.this: 匹配实现接口的类的代理对象中方法:this(com.demo.aop.user.UserDAO) 匹配UserDAO中实现类代理对象任意方法.
3.target: 匹配实现接口的类的目标对象中方法:target(com.demo.aop.user.UserDAO) 匹配UserDAO中实现类目标对象任意方法.
4.args: 匹配参数格式符合标准的方法args(int, int) 匹配形参值类型为int, int的任意方法.
5.bean(id): 匹配指定bean所有方法bean('userService') 匹配userService中所有方法
- AspectJ通知类型
与AOP联盟一样, AspectJ也定义了多种通知类型.
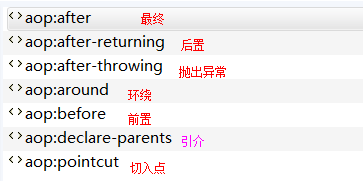
AspectJ总共6中通知类型:
1.before: 前置通知,用于校验数据在目标方法之前执行, 若抛出异常, 组织目标方法运行.
2.afterReturning: 后置通知,常规数据处理目标方法执行后执行, 可获得目标方法的返回值.目标方法出现异常, 方法不执行.
3.around: 环绕通知目标方法前后, 可阻止目标方法执行, 必须手动执行目标方法.
4.afterThrowing: 抛出异常通知目标方法出现异常后执行, 没有出现异常就不执行.
5.after: 最终通知, 资源回收, 类似finally方法方法执行完, 无论方法中是否出现异常, 都将执行.环绕通知与其他通知之间的联系:
try{//前置: before//手动执行目标方法//后置: afterReturning
} catch(){//捕获异常: afterThrowing
} finally{//最终通知: after
}
从上面看出, 完全可以使用环绕通知模拟前置通知, 后置通知, 环绕通知结合AfterThrowing, After实现AOP.
aop标签对应的通知类型种类
使用AOP联盟进行切面类编写, 需要定义通知类型, 切面类必须实现特定接口(MethodInterceptor), 然后为目标方法添加增强代码, 相比于AOP联盟, AspectJ只要定义切面类, 增强代码的使用完全交给配置文件, 避免代码污染, 简化操作.
使用AspectJ实现SpringAOP
基于xml配置通知类型的开发流程:
1.导入AOP联盟, AspectJ, AOP依赖, Aspect规范 jar包.
2.编写目标类: 接口与实现类.
3.编写切面类: 编写AspectJ的通知类型方法, 方法名任意, 无需实现什么接口.
4.配置xml: 配置通知类型.
5.测试.
下面给出演示代码, 代码中已经给出注释加以说明(若有不懂请在评论区留言):
目标类 ( 接口与实现类 ):
public interface UserService {void addUser();void updateUser();void deleteUser();
}
public class UserServiceImpl implements UserService {public void addUser() {System.out.println("add User");}public void updateUser() {System.out.println("update User");}public void deleteUser() {System.out.println("delete User");}
}切面类:
package com.f_aop.aspectJFinal;import org.aspectj.lang.JoinPoint;
import org.aspectj.lang.ProceedingJoinPoint;public class MyAspect{//	测试前置通知与后置通知
//	public void myBefore(JoinPoint jPoint){
//		System.out.println("前置通知"+jPoint.getSignature().getName());
//	}
//
//	public void myAfterReturning(JoinPoint jPoint, Object ret){
//		System.out.println("后置通知"+jPoint.getSignature().getName()+"--"+ret);
//	}public Object myAround(ProceedingJoinPoint joinPoint) throws Throwable{System.out.println("前置通知");//手动执行目标方法Object obj = joinPoint.proceed();
//		环绕通知与抛出异常通知的测试结果:
//		int i = 1/0;
//		前置通知
//		add User
//		抛出异常通知/ by zero
//		最终通知System.out.println("后置通知");return obj;}public void myAfterThrowing(JoinPoint jPoint, Throwable e){System.out.println("抛出异常通知"+e.getMessage());}public void myAfter(JoinPoint jPoint){System.out.println("最终通知");}
}applicationContext.xml:
<?xml version="1.0" encoding="UTF-8"?>
<beans xmlns="http://www.springframework.org/schema/beans"xmlns:xsi="http://www.w3.org/2001/XMLSchema-instance"xmlns:aop="http://www.springframework.org/schema/aop"xsi:schemaLocation="http://www.springframework.org/schema/beans http://www.springframework.org/schema/beans/spring-beans.xsdhttp://www.springframework.org/schema/aop http://www.springframework.org/schema/aop/spring-aop.xsd"><!-- 创建目标类对象 --><bean id="userService" class="com.f_aop.aspectJFinal.UserServiceImpl"></bean><!-- 创建切面类 --><bean id="myAspect" class="com.f_aop.aspectJFinal.MyAspect"></bean><!-- 使用 config 配置AspectJ的AOP --><aop:config><!-- 声明切入面 --><aop:aspect ref="myAspect"><!-- 配置目标方法的切入点 --><aop:pointcut id="myPointCut" expression="execution(* com.f_aop.aspectJFinal.UserServiceImpl.*(..))"/><!-- 配置通知类型的时候, method代表切入类方法, pointcut-ref代表目标类切入点.二者结合的意思就是目标类中哪些切入点需要切入方法进行增强.--><!-- 前置通知 <aop:before method="myBefore" pointcut-ref="myPointCut"/>后置通知, returning用于接收目标方法执行完后的返回值<aop:after-returning method="myAfterReturning" pointcut-ref="myPointCut" returning="ret"/>--><!-- 抛出异常通知要配合环绕通知使用, 环绕通知抛出的异常使用抛出异常通知接收 --><aop:around method="myAround" pointcut-ref="myPointCut"/><!-- 抛出异常, throwing="e" 代表执行目标方法后,可能会抛出的异常通过 e 进行接收 --><aop:after-throwing method="myAfterThrowing" pointcut-ref="myPointCut" throwing="e"/><!-- 最终通知 --><aop:after method="myAfter" pointcut-ref="myPointCut"/></aop:aspect></aop:config>
</beans>测试方法:@Testpublic void f1(){String XMLPATH="com/f_aop/aspectJFinal/applicationContext.xml";ApplicationContext applicationContext = new ClassPathXmlApplicationContext(XMLPATH);UserService userService = (UserService) applicationContext.getBean("userService");//测试AOPuserService.addUser();userService.updateUser();userService.deleteUser();}
基于注解的通知类型开发流程:
1.在刚开始配置注解的时候, 可以按照 xml 中bean, aop的配置信息来给类/属性添加注解, 这样不容易把逻辑搞混.
2.测试, 其实整个开发过程与 xml 配置没什么区别, 都是一样的, 只是形式上有区别.
在给各种类添加注解之间, 一定要牢记:
1.在 xml 配置文件中添加扫描, 扫描注解类:<context:component-scan base-package="com.demo.aspectJAnnotation"></context:component-scan>
2.确定AOP注解生效:<aop:aspectj-autoproxy></aop:aspectj-autoproxy>
AspectJ中通知类型的注解种类:
1.@Aspect 声明切面类, 不需要指定切面类名称.等同于<aop:aspect ref="myAspect">, 一般与 @Component 结合使用, Component代表myAspect对象2.@Pointcut("execution(* com.f_aop.aspectJFinalAnnotation.UserServiceImpl.*(..))")声明公共切入点, 通过"方法名"获得切入点引用.等同于<aop:pointcut id="myPointCut" expression="execution(* com.f_aop.aspectJFinalAnnotation.UserServiceImpl.*(..))"/>2.@Before(value="execution(* com.demo..service.*.*(..))")前置通知, 直接添加在切面类方法前.等同于<aop:before method="myBefore" pointcut-ref="myPointCut"/>或者上面 @Before 也可写做 @Before(value="myPointCut()") myPointCut是方法名此时要先在切面类中声明公共切入点方法: @Pointcut("execution(* com.f_aop.aspectJFinalAnnotation.UserServiceImpl.*(..))")private void myPointCut(){}这样写的作用就是为了少写代码, 避免在多个切面类通知方法前都要加execution=(...).并且如果切入点表达式写错了, 也很难排查问题.(不懂请看下面的演示代码)3.@AfterReturning(value="myPointCut()", returning="ret")后置通知, 直接添加在后置通知方法前.等同于<aop:after-returning method="myAfterReturning" pointcut-ref="myPointCut" returning="ret"/>ret表示接收的返回值名称, 含有与标签中的ret一样.4.@Around("myPointCut()")环绕通知, 添加在环绕方法前面.等同于<aop:around method="myAround" pointcut-ref="myPointCut"/>5.@AfterThrowing(value="myPointCut()", throwing="e")抛出异常通知, 添加在抛出异常通知方法前.等同于<aop:after-throwing method="myAfterThrowing" pointcut-ref="myPointCut" throwing="e"/>6.@After("myPointCut()")最终通知, 添加在最终通知之前.等同于<aop:after method="myAfter" pointcut-ref="myPointCut"/>
接下来给出演示代码:
目标类:
package com.f_aop.aspectJFinalAnnotation;
import org.springframework.stereotype.Service;//生成UserService的bean: userService
@Service("userService")
public class UserServiceImpl implements UserService {public void addUser() {System.out.println("add User");}public void updateUser() {System.out.println("update User");}public void deleteUser() {System.out.println("delete User");}
}xml 配置文件 applicationContext.xml:
<?xml version="1.0" encoding="UTF-8"?>
<beans xmlns="http://www.springframework.org/schema/beans"xmlns:xsi="http://www.w3.org/2001/XMLSchema-instance"xmlns:aop="http://www.springframework.org/schema/aop"xmlns:context="http://www.springframework.org/schema/context"xsi:schemaLocation="http://www.springframework.org/schema/beans http://www.springframework.org/schema/beans/spring-beans.xsdhttp://www.springframework.org/schema/aop http://www.springframework.org/schema/aop/spring-aop.xsdhttp://www.springframework.org/schema/context http://www.springframework.org/schema/context/spring-context.xsd"><!-- 扫描注解类 --><context:component-scan base-package="com.f_aop.aspectJFinalAnnotation"></context:component-scan><!-- 确定AOP注解生效 --><aop:aspectj-autoproxy></aop:aspectj-autoproxy>
</beans>切面类:
package com.f_aop.aspectJFinalAnnotation;import org.aspectj.lang.JoinPoint;
import org.aspectj.lang.ProceedingJoinPoint;
import org.aspectj.lang.annotation.After;
import org.aspectj.lang.annotation.AfterThrowing;
import org.aspectj.lang.annotation.Around;
import org.aspectj.lang.annotation.Aspect;
import org.aspectj.lang.annotation.Pointcut;
import org.springframework.stereotype.Component;//获得切面类Bean
@Component
//声明切面类
@Aspect
//由于二者都修饰同一个类, 所以不加idpublic class MyAspect{//直接设置切入点, 不使用自定义的公共切入点
//	@Before("execution(* com.f_aop.aspectJFinalAnnotation.UserServiceImpl.*(..))")
//	public void myBefore(JoinPoint jPoint){
//		System.out.println("前置通知"+jPoint.getSignature().getName());
//	}//	设置切入点, 通过returning获得返回值
//	@AfterReturning(value="myPointCut()", returning="ret)
//	public void myAfterReturning(JoinPoint jPoint, Object ret){
//		System.out.println("后置通知"+jPoint.getSignature().getName()+"--"+ret);
//	}@Pointcut("execution(* com.f_aop.aspectJFinalAnnotation.UserServiceImpl.*(..))")private void myPointCut(){//配置空方法,用于声明公共切入点}@Around("myPointCut()")public Object myAround(ProceedingJoinPoint joinPoint) throws Throwable{System.out.println("前置通知");//手动执行目标方法Object obj = joinPoint.proceed();int i = 1/0;
//		前置通知
//		add User
//		抛出异常通知/ by zero
//		最终通知System.out.println("后置通知");return obj;}@AfterThrowing(value="myPointCut()", throwing="e")public void myAfterThrowing(JoinPoint jPoint, Throwable e){System.out.println("抛出异常通知"+e.getMessage());}@After("myPointCut()")public void myAfter(JoinPoint jPoint){System.out.println("最终通知");}}
JdbcTemplate
主要是Spring提供操作Jdbc的工具类, 类似于DBUtils, 依赖于连接池DataSource.
开发流程:
1.创建数据库表.
2.导入 C3P0/DBCP连接池, mysql驱动, Spring-jdbc, spring-tx, 等Spring其余核心jar包
3.创建JavaBean, 配置数据源
4.编写DAO层
5.配置applicationContext.xml文件, 使用Spring管理DAO层对象
6.测试.
下面使用C3P0进行测试, DBCP与C3P0是一样的, 只是在配置数据库连接上有所不同.
数据库:create table t_user(id int primary key,name varchar(10);password varchar(10)	);User:
public class User implements Serializable{private Integer id;private String name;private String password;//构造方法, get/set方法
}UserDao:
public class UserDao{//使用Spring提供的JdbcTemplate, 在Spring配置文件中注入private JdbcTemplate jdbcTemplate;public void setJdbcTemplate(JdbcTemplate jdbcTemplate) {this.jdbcTemplate = jdbcTemplate;}//查询所有的Userpublic List<User> findAll(){return jdbcTemplate.query("select * from t_user", ParameterizedBeanPropertyRowMapper.newInstance(User.class));}//演示查询单个Userpublic void find(User user){String sql = "select * from t_user";
//		String sql = "select * from t_user where id=?";
//		Object findUserId = user.getId();//查询条件信息就加Object参数
//		List<Map<String,Object>> queryForList = jdbcTemplate.queryForList(sql, findUserId);//查询所有直接不加参数List<Map<String, Object>> queryForList = jdbcTemplate.queryForList(sql);for (Map<String, Object> map : queryForList) {//一个map中储存着一个学生的信息for (Map.Entry<String, Object> m : map.entrySet()) {System.out.println(m.getKey()+"--"+m.getValue());}}//匿名内部类, 实现RowMapper接口, 自定义查询结果类型/*List<User> queryUsers = jdbcTemplate.query(sql, new RowMapper<User>(){@Overridepublic User mapRow(ResultSet resultSet, int i) throws SQLException {return new User(resultSet.getInt("id"), resultSet.getString("name"), resultSet.getString("password"));}});同理带条件查询, jdbcTemplate.query(sql, rowMapper, i)*/}
//	@Testpublic void insert(User user){String sql = "insert into t_user(id, name, password)values(?, ?, ?)";//Object数组中参数对应sql中"?"的顺序Object[] obj = new Object[]{user.getId(), user.getName(), user.getPassword()};//受影响行数int row = jdbcTemplate.update(sql, obj);System.out.println("受影响行数"+row);}public void update(User user){String sql = "update t_user set name=? where id=?";Object[] obj = new Object[]{user.getName(), user.getId()};//受影响行数int row = jdbcTemplate.update(sql, obj);System.out.println("受影响行数"+row);}public void delete(User user){String sql = "delete from t_user where id=?";Object[] obj = new Object[]{user.getId()};//受影响行数int row = jdbcTemplate.update(sql, obj);System.out.println("受影响行数"+row);}
}applicationContext.xml配置文件:
<?xml version="1.0" encoding="UTF-8"?>
<beans xmlns="http://www.springframework.org/schema/beans"xmlns:xsi="http://www.w3.org/2001/XMLSchema-instance"xmlns:context="http://www.springframework.org/schema/context"xmlns:aop="http://www.springframework.org/schema/aop"xsi:schemaLocation="http://www.springframework.org/schema/beans http://www.springframework.org/schema/beans/spring-beans.xsdhttp://www.springframework.org/schema/aop http://www.springframework.org/schema/aop/spring-aop.xsdhttp://www.springframework.org/schema/context http://www.springframework.org/schema/context/spring-context.xsd"><!-- 创建数据源Bean --><bean id="comboPooledDataSource" class="com.mchange.v2.c3p0.ComboPooledDataSource"><property name="driverClass" value="com.mysql.jdbc.Driver"></property><property name="jdbcUrl" value="jdbc:mysql://localhost:3306/test"></property><property name="user" value="root"></property><property name="password" value="12345"></property></bean><!-- 创建模板Bean, 向JdbcTemplate中注入数据源 --><bean id="jdbcTemplate" class="org.springframework.jdbc.core.JdbcTemplate"><property name="dataSource" ref="comboPooledDataSource"></property></bean><!-- 配置DAO, 向Dao注入JdbcTemplate Bean --><bean id="userDao" class="com.g_jdbc.c3p0.UserDao"><property name="jdbcTemplate" ref="jdbcTemplate"></property></bean></beans>测试方法:
@Testpublic void f1(){String xml = "com/g_jdbc/c3p0/applicationContext.xml";ApplicationContext application = new ClassPathXmlApplicationContext(xml);UserDao bean = (UserDao) application.getBean("userDao");//查询List<User> list = bean.findAll();for (User user : list) {System.out.println(user);}}
这里给出DBCP的配置文件写法, 用于区别C3P0:
二者只有创建数据源有所不同
<!-- 创建数据源 --><bean id="dataSource" class="org.apache.commons.dbcp.BasicDataSource"><property name="driverClassName" value="com.mysql.jdbc.Driver"></property><property name="url" value="jdbc:mysql://localhost:3306/test"></property><property name="username" value="root"></property><property name="password" value="12345"></property></bean>
使用JdbcTemplate还有这种简化写法:
Spring提供JdbcDaoSupport, 用于封装JdbcTemplate, 使得DAO不用关心JdbcTemplate模板的处理.
1.让Dao继承JdbcDaoSupport, 创建模板的过程交给父类处理.
public class UserDao extends JdbcDaoSupport{//使用JdbcDaoSupport通过get方法获得数据源,JdbcTemplate模板public List<User> findAll(){String sql = "select * from t_user";//使用getJdbcTemplate()获取父类创建好的模板, 然后再执行查询操作return this.getJdbcTemplate().query(sql, ParameterizedBeanPropertyRowMapper.newInstance(User.class));}}
2.修改配置文件.
<bean id="comboPooledDataSource" class="com.mchange.v2.c3p0.ComboPooledDataSource"><property name="driverClass" value="com.mysql.jdbc.Driver"></property><property name="jdbcUrl" value="jdbc:mysql://localhost:3306/test"></property><property name="user" value="root"></property><property name="password" value="12345"></property></bean><!-- 配置DAO使用JdbcDaoSupport, 底层已经封装了JdbcTemplate, 只需配置DataSource即可--><bean id="userDao" class="com.g_jdbc.jdbcdaosupport.UserDao"><property name="dataSource" ref="comboPooledDataSource"></property></bean>
3.测试:
//测试方法和C3P0, DBCP的测试方法是一样的
@Testpublic void f1(){String xml = "com/g_jdbc/jdbcdaosupport/applicationContext.xml";ApplicationContext application = new ClassPathXmlApplicationContext(xml);UserDao bean = (UserDao) application.getBean("userDao");List<User> list = bean.findAll();for (User user : list) {System.out.println(user);}}
java多线程之ForkJoinPool)


![Caffe2 的基本数据结构(Basics of Caffe2 - Workspaces, Operators, and Nets)[4]](http://pic.xiahunao.cn/Caffe2 的基本数据结构(Basics of Caffe2 - Workspaces, Operators, and Nets)[4])


)


 可以返回列表、元组、字典、集合、字符串以及 range 对象中元素个数。_学小易找答案...)

C/C++单链表实现)


)

