一、鼠标划过效果
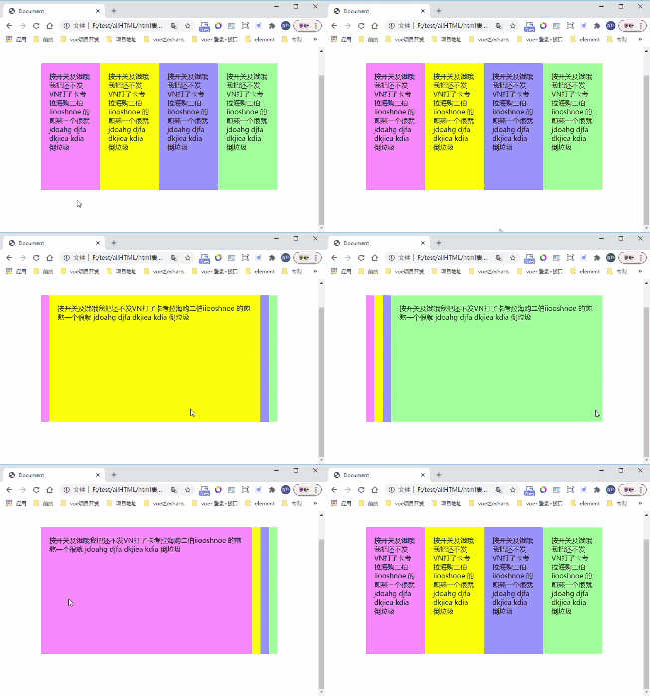
- 1. 类似电子书的图书效果
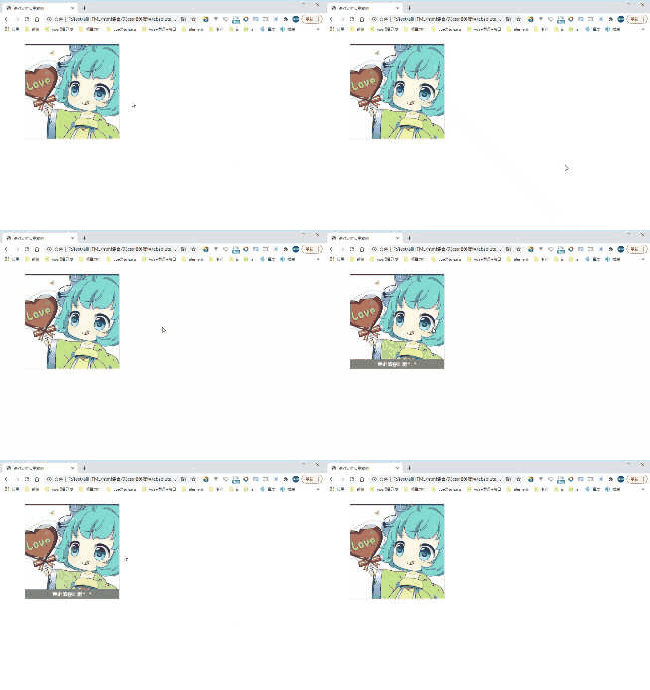
- 2. 绝对定位实用案例
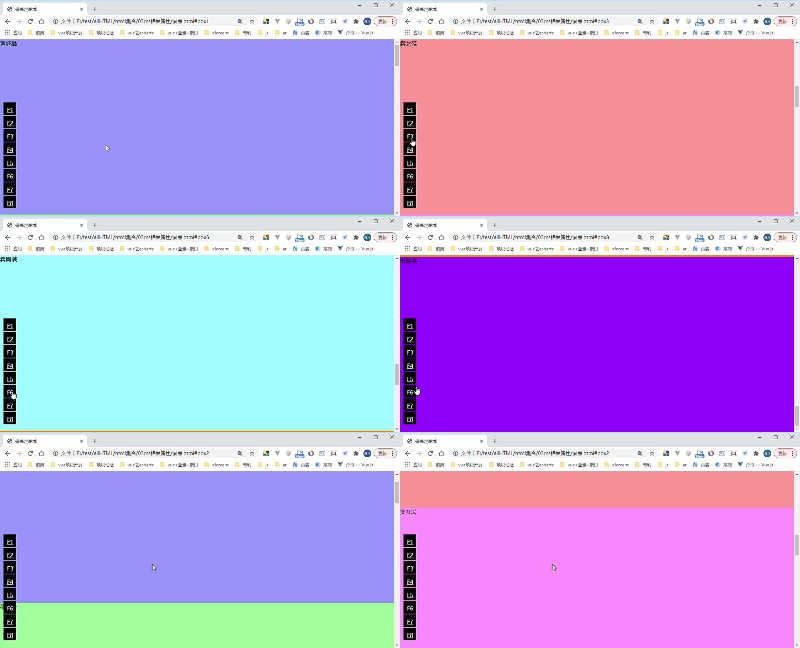
二、锚点的应用
三、css精灵(图片整合)
- 用一张图片写出一串电话号码
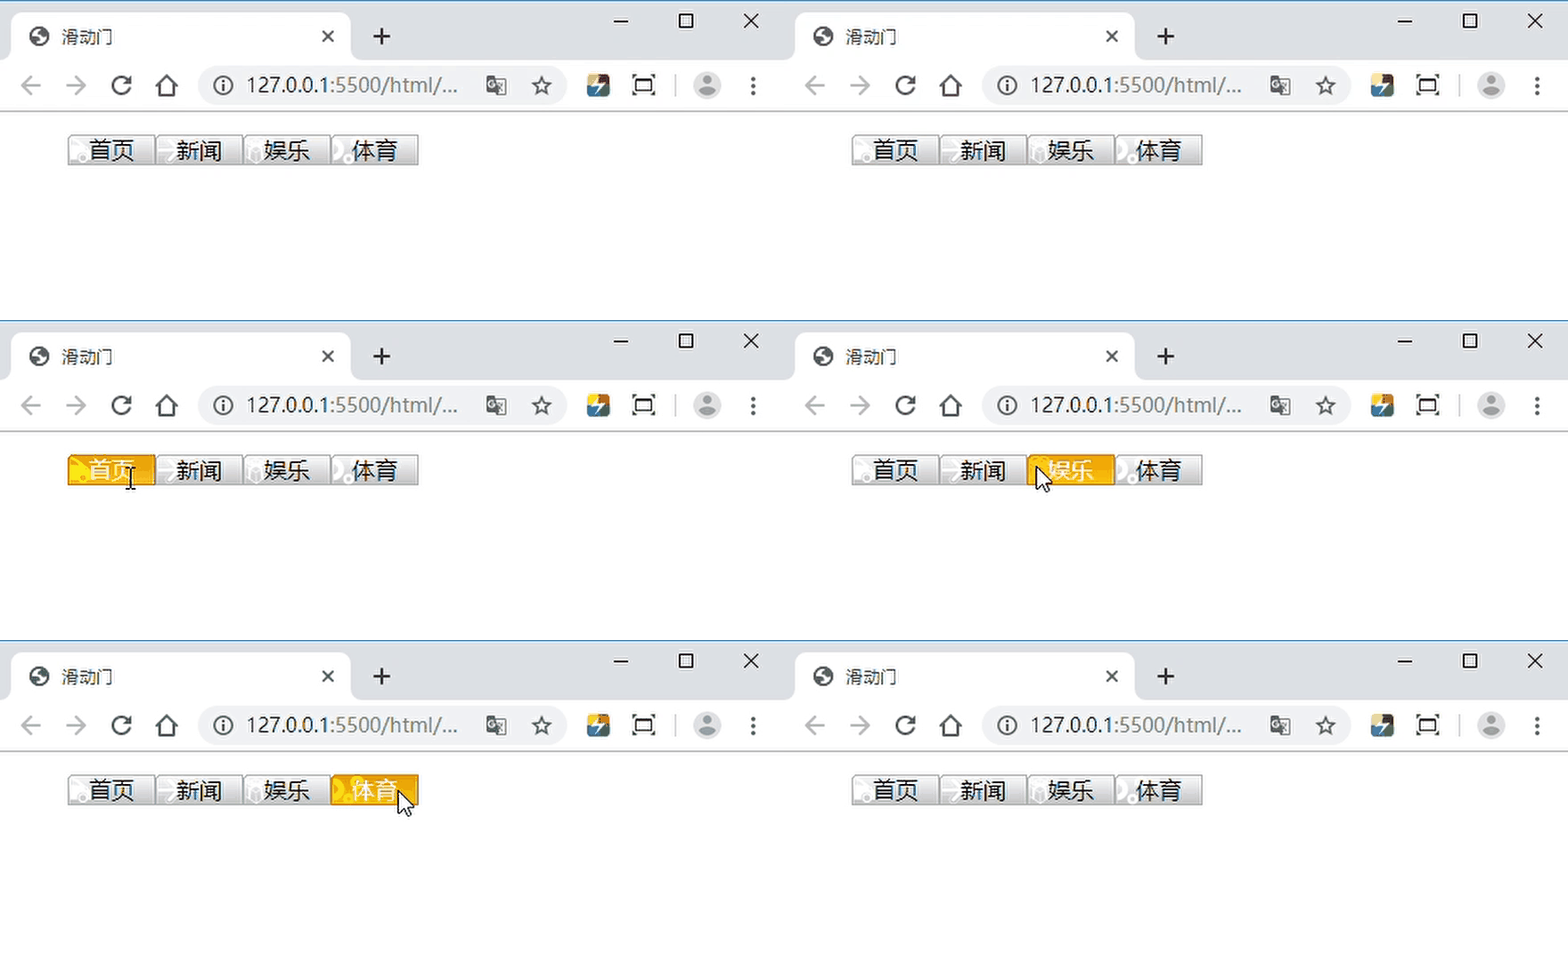
- 用一张图片写出导航栏的滑动效果
四、后台管理布局
- 单飞布局
- 双飞布局
- 后台页面管理布局
五、css3部分
- 在一个div中使用多张背景图
- 用一张 背景图 写成多种效果
- 用伪类元素给一段话的第一个行文字、第一个字添加样式
css重置代码:
<style>@charset "utf-8";
/* CSS Document */body,ol,ul,h1,h2,h3,h4,h5,h6,p,th,td,dl,dd,form,fieldset,legend,input,textarea,select,td,figure{margin:0;padding:0;}body{font:12px  "宋体"; word-wrap:break-word;}a,u,s,del{color:#666;text-decoration:none;} fieldset ,a img,.bor0 {border:0;}i,em,b{font-style:normal;font-weight:100;}li{list-style:none;}img{vertical-align:middle;}table{border-collapse:collapse;}.ind2{text-indent:2em;}/*去掉输入框聚焦时的蓝色边框*/input,textarea{outline:none;}textarea{resize:none;}/*禁止拖动*//*文本溢出隐藏出现省略号*/.over{overflow:hidden;text-overflow:ellipsis;white-space:nowrap;}/* 图片水平垂直居中 */.valign{}.valign img{vertical-align:middle;}.valign:after{content:"";vertical-align:middle;display:inline-block;height:100%;}/*万能清除法*/.clear{zoom:1;/*一条解决ie疑难杂症(浮动)的神奇属性*/}.clear:after{content:"";clear:both;display:block;}.clear:before{content:"";display:table;}/*解决第一个块元素margin-top向上传递问题*/
</style>
一、鼠标划过效果
1. 类似电子书的图书效果

<style type="text/css">*{margin:0; padding:0;}li{list-style:none;}ul{margin:100px auto;width:560px;height: 300px;}ul li{float:left; width: 140px;height: 300px;overflow: hidden;}ul li.li1{background: #f9f;}ul li.li2{background: #ff0;}ul li.li3{background: #99f;}ul li.li4{background: #9f9;}ul li p{padding:20px;}ul:hover li{width:20px;}ul li:hover{width:500px;}
</style>
<body><ul><li class="li1"><p>按开关及饿哦我把还不发VN打了卡考拉海购二伯iiooshnoe 的煎熬一个很就 jdoahg djfa dkjiea kdia 倒垃圾</p></li><li class="li2"><p>按开关及饿哦我把还不发VN打了卡考拉海购二伯iiooshnoe 的煎熬一个很就 jdoahg djfa dkjiea kdia 倒垃圾</p></li><li class="li3"><p>按开关及饿哦我把还不发VN打了卡考拉海购二伯iiooshnoe 的煎熬一个很就 jdoahg djfa dkjiea kdia 倒垃圾</p></li><li class="li4"><p>按开关及饿哦我把还不发VN打了卡考拉海购二伯iiooshnoe 的煎熬一个很就 jdoahg djfa dkjiea kdia 倒垃圾</p></li></ul>
</body>
2. 绝对定位实用案例

<style type="text/css">*{margin:0;padding:0;}div{width: 300px;height: 300px;border: 1px solid #000;text-align: center;margin:30px 80px;position: relative; /*给父级设置 position: relative;*/}div img{display: block;width: 300px;height: 300px;}div p{background-color: grey;color: #fff;width: 100%;height: 30px;line-height: 30px;position: absolute;left: 0;bottom: 0; /*p标签设置了position,p标签脱离文档流*/display: none;}div:hover p{display: block;}
</style>
<body><!-- 常作为兄弟元素,外面套一个父级标签。在父标签上写position: relative; --><div><img src="../imgs/蔡蔡3.jpg" alt=""><p>蔡姬请你吃糖^_^</p></div>
</body>
二、锚点的应用

<style>*{margin:0; padding:0;}div{height: 500px;}#box1{background: #99f;}#box2{background: #9f9;}#box3{background: #f99;}#box4{background: #f9f;}#box5{background: #ff9;}#box6{background: #9ff;}#box7{background: #f80;}#box8{background: #90f;}p{ position: fixed; height: 150px; left:10px; top:0; bottom:0; right: 0;margin: auto;}a{display: block; height: 16px; width: 16px; color:#fff;padding: 10px;margin-top: 2px;background:#000;}
</style>
<body><p><a href="#box1">F1</a><a href="#box2">F2</a><a href="#box3">F3</a><a href="#box4">F4</a><a href="#box5">F5</a><a href="#box6">F6</a><a href="#box7">F7</a><a href="#box8">F8</a></p><div id="box1">奢侈品</div><div id="box2">精品店</div><div id="box3">卖女鞋</div><div id="box4">卖女装</div><div id="box5">卖童装</div><div id="box6">卖男装</div><div id="box7">美食城</div><div id="box8">电影院</div>
</body>
三、css精灵(图片整合)
background-position第二个值若不写,会默认为 center (图的center部分)。
1. 用下面一张图片写出一串电话号码
图片:

代码:
<style>ul{overflow: hidden;}ul li{list-style: none;float:left;width: 100px;height: 100px;border:1px solid #000;margin-right:10px;background:url('../images/position.png') no-repeat;}ul li.num2{background-position:-100px -100px;}ul li.num3{background-position:-100px 0px;}ul li.num4{background-position:0px -100px;}ul li.num5{background-position:-200px -200px;}ul li.num6{background-position:-200px -100px;}ul li.num7{background-position:-200px -200px;}ul li.num9{background-position:0px -200px;}ul li.num10{background-position:-200px -200px;}ul li.num11{background-position:0px -200px;}/*若不写,就会默认数字1的位置*/</style><body><ul><li class="num1"></li><li class="num2"></li><li class="num3"></li><li class="num4"></li><li class="num5"></li><li class="num6"></li><li class="num7"></li><li class="num8"></li><li class="num9"></li><li class="num10"></li><li class="num11"></li></ul>
</body>
效果:

2. 用下面一张图片写出导航的滑动效果
图片:

代码:
<style>ul{overflow: hidden;}ul li{list-style: none;float:left;width: 62px;height: 22px;background:url('../images/bg.gif') no-repeat;text-align: center;}ul li.hover2{background-position:-62px 0px;}ul li.hover3{background-position:-124px 0px;}ul li.hover4{background-position:-186px 0px;}ul li:hover{color:#fff;}ul li.hover1:hover{background-position:0px -22px;}ul li.hover2:hover{background-position:-62px -22px;}ul li.hover3:hover{background-position:-124px -22px;}ul li.hover4:hover{background-position:-186px -22px;}</style><body><ul><li class="hover1">首页</li><li class="hover2">新闻</li><li class="hover3">娱乐</li><li class="hover4">体育</li></ul>
</body>
效果:

四、后台布局
1. 单飞布局:
思路: 让左边的元素不占文档流,可以使用
float:left,position:absolute。

<style>html,body{height:100%;}.left{width:200px;height:100%;background-color: #d3dce6;position:absolute;}.right{height:100%;background: #f9fafc;margin-left:200px;}
</style>
<body><div class="left">左边宽度200</br>高度自适应</div><div class="right">右边完全自适应</div>
</body>
2. 双飞布局-圣杯布局
(1)方案一:使用浮动:
思路: 左边和右边不占文档流,中间占文档流,注意 center 的位置(因为先让左边和右边的元素不占文档流,此时文档流的位置仍然在左上角;若先写center 再写 right,那么 right将会被挤下去)

<style>html,body{height:100%;}.left{width:200px;height:100%;background-color: #d3dce6;position:absolute;}.center{height:100%;background:#99a9bf;margin:0 200px;}.right{width:200px;height:100%;background: #f9fafc;float:right;}
</style>
<body><div class="left">左边宽度固定200</br>高度自适应</div><div class="right">右边宽度固定200</br>高度自适应</div><div class="center">中间宽高度自适应</div>
</body>
(2)方案二:使用弹性盒:
- 对于头部、主体、底部:
弹性盒默认流向是横向的,利用弹性盒的分配剩余空间,分配的是宽度。
因为这里高度未知,所以我们要可以改变弹性盒的流向为纵向,然后再分配剩余空间,此时分配的就是高度。- 对于主体部分:
弹性盒默认特性:若子元素不设置高度,则其高度与父元素一样高;

<style>*{margin:0; padding:0;}html,body{height: 100%;}body{display: flex; flex-direction: column;} /*将弹性盒流向改为纵向*/header, footer{height: 100px;background:#99a9bf;}section{flex:1; margin:20px 0;}section{display: flex;} /*display: flex; 效果只作用于亲儿子*/section article{width: 200px; background: #f80;}section aside{width: 200px; background: #0f0;}section main{flex:1; margin:0 10px; background: #9f9;}
</style>
<body><header>头部高度100px;宽度100%;</header><section><article>左<br/>已知左边宽度是200px,高度=父级section的高度</article><main>中<br/>宽度未知,高度=父级section的高度(分配剩余空间)</main><aside>右<br/>已知右边宽度是200px,高度=父级section的高度</aside></section><footer>底部高度100px;宽度100%;</footer>
</body>
3. 后台页面管理布局
思路: 利用 定位属性 的 left、top、bottom、right 属性达到宽高自适应的效果。

代码:
<style>html,body{height:100%;margin:0;}.top{height: 100px;background:#99a9bf;}.left{width:200px;background:#d3dce6;position:absolute;top:100px;bottom:0;}.right{background:#e5e9f2;position:absolute;top:100px;bottom:0;left:200px;right:0;}
</style>
<body><div class="top">top高度固定,宽度自适应</div><div class="left">left宽度固定,高度自适应</div><div class="right">right宽高自适应</div>
</body>
五、css3部分
1. 在一个div里面使用多张背景图
当
background-image里面有 n 张背景图时,其他 background 的 css 属性,如 :background-repeat,background-position 等,若它们的值的个数没有 n 个,就会按照它现有值的个数按顺序依次循环执行。

<style>div{width:700px;height: 700px;border: 2px solid #000;background-repeat: no-repeat;background-size:40%;background-image: url(../imgs/蔡蔡1.jpg), url(../imgs/蔡蔡2.jpg), url(../imgs/蔡蔡3.jpg);background-position: 0 0, 200px 200px, 400px 400px;}
</style>
<body><div></div>
</body>
2. 用一张 背景图 写成多种效果 border-image:
border-image:,图片边框,谷歌浏览器不兼容。
url(),图片路径;上 右 下 左,4个方向截取背景图片的宽/高度,注意这里是数值,不需要写px;/宽度px,border的宽度;- 平铺方式:
stretch除了不相交部分,其他拉升;round除不相交部分,其他平铺;


代码:
border-image: url(背景图) 上边框粗细 右边框粗细 下边框粗细 左边框粗细/边框粗细 round(平铺)/stretch(拉伸)
<style>div#box{width: 800px;display: flex;}div#box>div{width: 300px;height:100px;margin:0 20px;}div#box>div:nth-of-type(1){border-image: url(../images/border.png) 25 25 25 25/15px round;}div#box>div:nth-of-type(2){border-image: url(../images/border.png) 25 25 25 25/15px stretch;}
</style>
<div id="box"><img src="../images/border.png" alt="原图" /><div></div><div></div></div>
3. 用伪类元素给第一行文字,第一个字添加样式

<style>div{border:1px solid #000;width: 300px;height: 200px;}div:first-line{color:#9f9;}/*给第一行文字添加样式*/div::first-letter{color:#f9f;}/*给第一个字添加样式*/
</style>
<body><div>哈哈啦啦嘻嘻呵呵嘿嘿嗯嗯哦哦啊啊咳咳嗡嗡哈哈啦啦嘻嘻呵呵嘿嘿嗯嗯哦哦啊啊咳咳嗡嗡哈哈啦啦嘻嘻呵呵嘿嘿嗯嗯哦哦啊啊咳咳嗡嗡哈哈啦啦嘻嘻呵呵嘿嘿嗯嗯哦哦啊啊咳咳嗡嗡哈哈啦啦嘻嘻呵呵嘿嘿嗯嗯哦哦啊啊咳咳嗡嗡哈哈啦啦嘻嘻呵呵嘿嘿嗯嗯哦哦啊啊咳咳嗡嗡哈哈啦啦嘻嘻呵呵嘿嘿嗯嗯哦哦啊啊咳咳嗡嗡哈哈啦啦嘻嘻呵呵嘿嘿嗯嗯哦哦啊啊咳咳嗡嗡</div>
</body>
![[LeetCode] Longest Substring Without Repeating Characters 最长无重复字符的子串 C++实现java实现...](http://pic.xiahunao.cn/[LeetCode] Longest Substring Without Repeating Characters 最长无重复字符的子串 C++实现java实现...)


)


遍历)

转)


)
