Gluster的模式及介绍在此不表,这里只记录安装及配置过程。
1.整体环境
server1 : gfs1.cluster.com
server2 : gfs2.cluster.com
Client:
2.安装Gluster
- 下载软件
https://access.redhat.com/downloads/content/186/ver=3/rhel---7/3.4/x86_64/product-software
下载 Red Hat Gluster Storage Server 3.4 on RHEL 7 Installation DVD
安装RHEL 7.6的最小软件安装,将iso文件mount成cdrom, 然后修改yum源
mkdir -p /repo/base
mount /dev/cdrom /repo/base
vi /etc/yum.repos.d/base.repo
[rhel7.6]
name=rhel7.6
baseurl=file:///repo/base/
enabled=1
gpgcheck=0
- 安装
yum install -y redhat-storage-server
systemctl start glusterd
systemctl enable glusterd
systemctl status glusterd验证一下
[root@gfs1 mnt]# systemctl status glusterd
● glusterd.service - GlusterFS, a clustered file-system serverLoaded: loaded (/usr/lib/systemd/system/glusterd.service; enabled; vendor preset: disabled)Active: active (running) since Fri 2019-02-08 16:06:17 CST; 6min agoProcess: 3145 ExecStart=/usr/sbin/glusterd -p /var/run/glusterd.pid --log-level $LOG_LEVEL $GLUSTERD_OPTIONS (code=exited, status=0/SUCCESS)Main PID: 3166 (glusterd)Tasks: 36CGroup: /system.slice/glusterd.service├─3166 /usr/sbin/glusterd -p /var/run/glusterd.pid --log-level INFO├─3640 /usr/sbin/glusterfs -s localhost --volfile-id gluster/glustershd -p /var/run/gluster/glustershd/glustershd.pid -l /var/lo...└─3899 /usr/sbin/glusterfsd -s gfs1.cluster.com --volfile-id gv0.gfs1.cluster.com.data-gluster-gv0 -p /var/run/gluster/vols/gv0/...Feb 08 16:06:06 gfs1.cluster.com systemd[1]: Starting GlusterFS, a clustered file-system server...
Feb 08 16:06:17 gfs1.cluster.com systemd[1]: Started GlusterFS, a clustered file-system server.
- 配置防火墙
简单起见直接关闭了,以后补充开放具体网段
systemctl stop firewalld
systemctl disable firewalld
- 修改主机名以及/etc/hosts
每台机器执行,并修改/etc/hosts
hostnamectl set-hostname gfs1.cluster.com
- 添加存储
在每台glusterfs的server上加入一块存储盘,并进行初始化
fdisk /dev/sdb

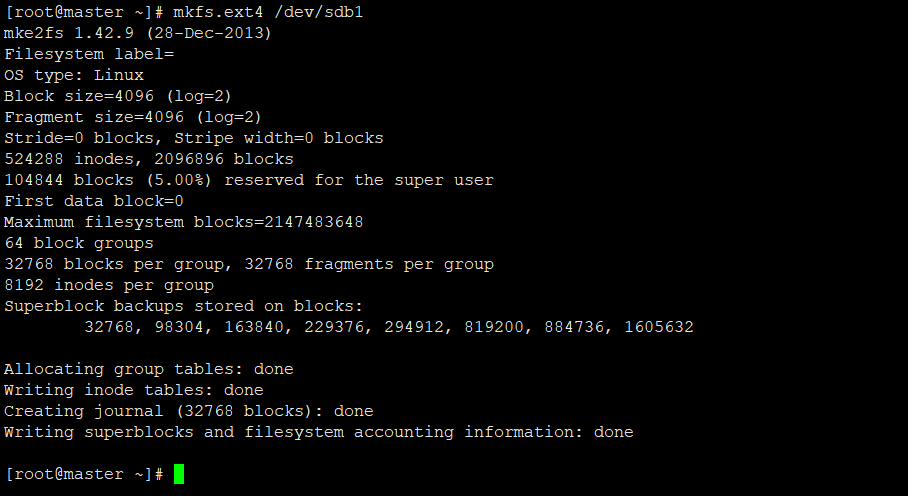
mkfs.ext4 /dev/sdb1
在每个节点上运行以下命令挂载
mkdir -p /data/gluster
mount /dev/sdb1 /data/gluster
echo "/dev/sdb1 /data/gluster ext4 defaults 0 0" | tee --append /etc/fstab
3.配置Glusterfs
在节点1上运行
gluster peer probe gfs2.cluster.com
验证
[root@gfs1 mnt]# gluster peer status
Number of Peers: 1Hostname: gfs2.cluster.com
Uuid: 818cc628-85a7-4f5e-bd4e-34932c05de97
State: Peer in Cluster (Connected)[root@gfs1 mnt]# gluster pool list
UUID                    Hostname            State
818cc628-85a7-4f5e-bd4e-34932c05de97    gfs2.cluster.com    Connected
dbcc01fc-3d2c-466f-9283-57c46a9974be    localhost           Connected
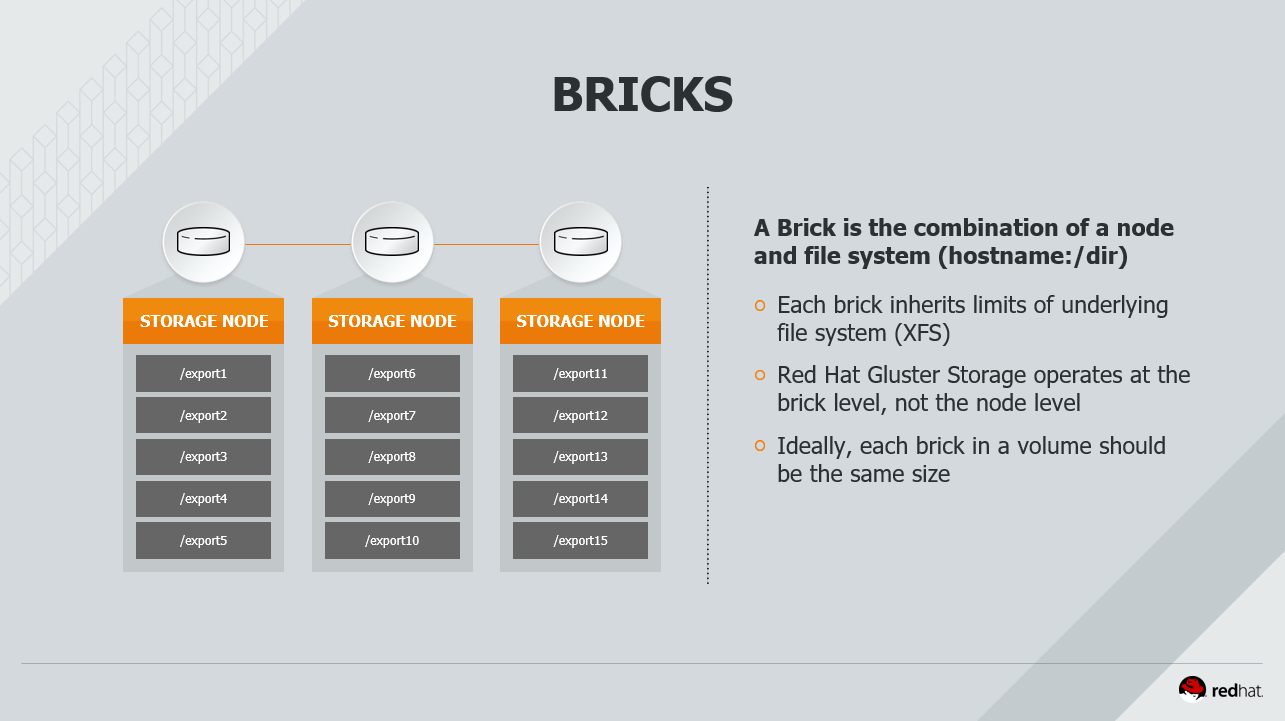
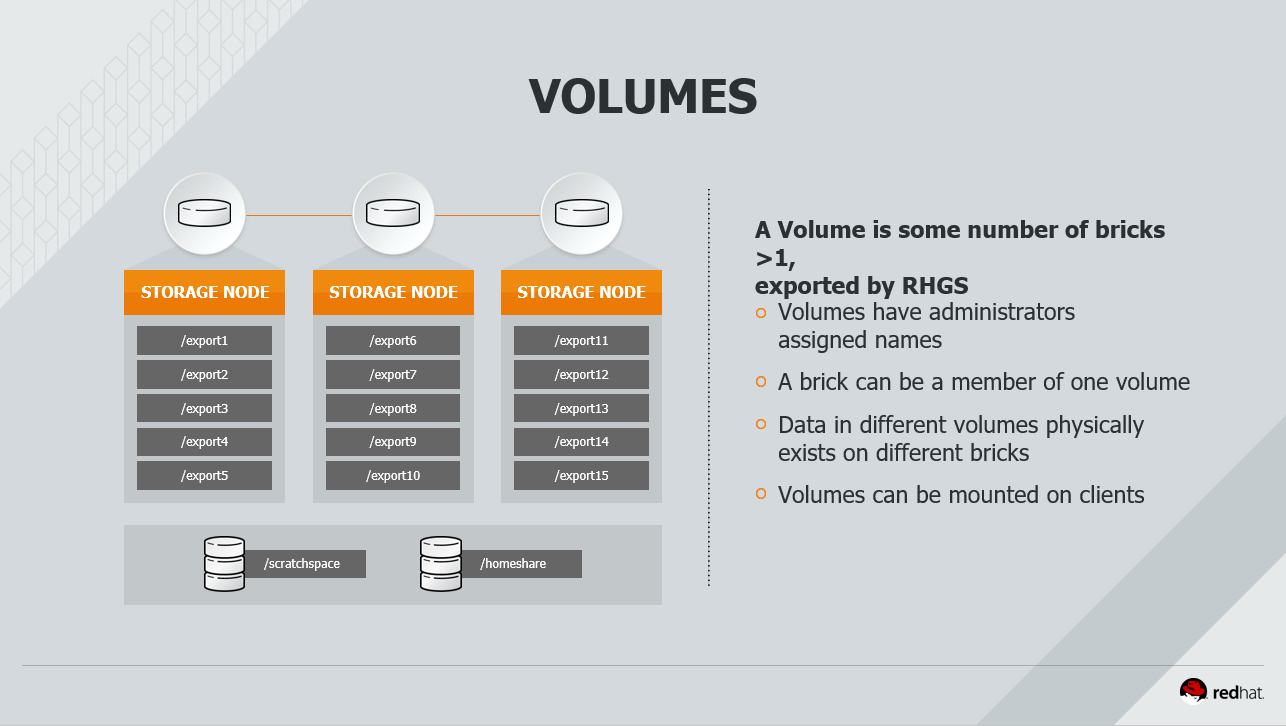
volume和brick的概念
3.1 复制卷
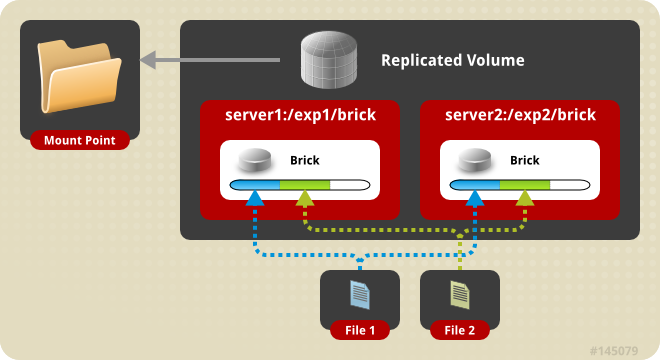
创建GFS卷gv0并配置复制模式
mkdir -p /data/gluster/gv0(在gfs1和gfs2上都建立brick)
gluster volume create gv0 replica 2 gfs1.cluster.local:/data/gluster/gv0 gfs2.cluster.local:/data/gluster/gv0
启动gv0卷
gluster volume start gv0
gluster volume info gv0
[root@gfs1 mnt]# gluster volume info gv0Volume Name: gv0 Type: Replicate Volume ID: 26d05ac6-0415-4041-ada4-5a423793fa20 Status: Started Snapshot Count: 0 Number of Bricks: 1 x 2 = 2 Transport-type: tcp Bricks: Brick1: gfs1.cluster.com:/data/gluster/gv0 Brick2: gfs2.cluster.com:/data/gluster/gv0 Options Reconfigured: performance.client-io-threads: off nfs.disable: on transport.address-family: inet
3.2 分布式卷(Distributed volume)
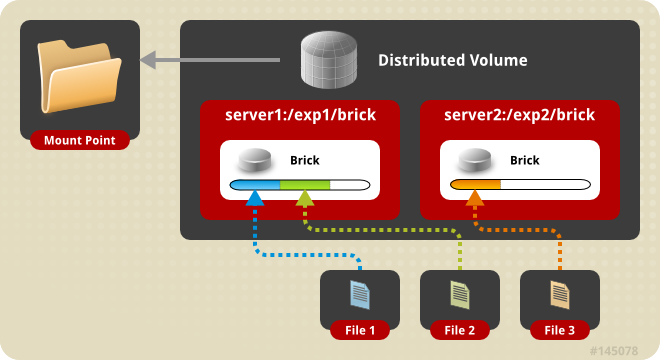
mkdir -p /data/gluster/brickgluster volume create gv1 gfs1.cluster.com:/data/gluster/brick gfs2.cluster.com:/data/gluster/brickgluster volume start gv1
[root@gfs1 mnt]# mkdir -p /data/gluster/brick
[root@gfs1 mnt]# gluster volume create gv1 gfs1.cluster.com:/data/gluster/brick gfs2.cluster.com:/data/gluster/brick
volume create: gv1: success: please start the volume to access data
[root@gfs1 mnt]# gluster volume start gv1
volume start: gv1: success
[root@gfs1 mnt]# gluster volume info gv1Volume Name: gv1
Type: Distribute
Volume ID: 4782dd87-a411-44b3-8621-70dfb072b5d0
Status: Started
Snapshot Count: 0
Number of Bricks: 2
Transport-type: tcp
Bricks:
Brick1: gfs1.cluster.com:/data/gluster/brick
Brick2: gfs2.cluster.com:/data/gluster/brick
Options Reconfigured:
transport.address-family: inet
nfs.disable: on
3.3 条带化卷(Stripe Volume)

mkdir -p /data/gluster/stripebrickgluster volume create gv3 stripe 2 transport tcp gfs1.cluster.com:/data/gluster/stripebrick gfs2.cluster.com:/data/gluster/stripebrickgluster volume start gv3
[root@gfs1 mnt]# mkdir -p /data/gluster/stripebrick
[root@gfs1 mnt]# gluster volume create gv3 stripe 2 transport tcp gfs1.cluster.com:/data/gluster/stripebrick  gfs2.cluster.com:/data/gluster/stripebrick
volume create: gv3: success: please start the volume to access data
[root@gfs1 mnt]# gluster volume start gv3
volume start: gv3: success
[root@gfs1 mnt]# gluster volume info gv3Volume Name: gv3
Type: Stripe
Volume ID: c25a10b8-a943-4c40-93be-088b972cbbaa
Status: Started
Snapshot Count: 0
Number of Bricks: 1 x 2 = 2
Transport-type: tcp
Bricks:
Brick1: gfs1.cluster.com:/data/gluster/stripebrick
Brick2: gfs2.cluster.com:/data/gluster/stripebrick
Options Reconfigured:
transport.address-family: inet
nfs.disable: on
3.4 分布式复制卷
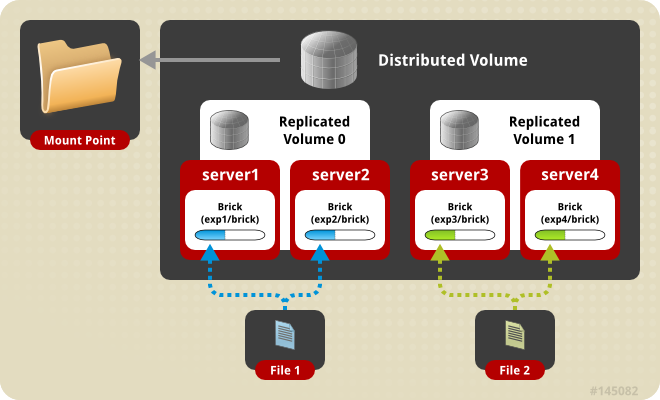
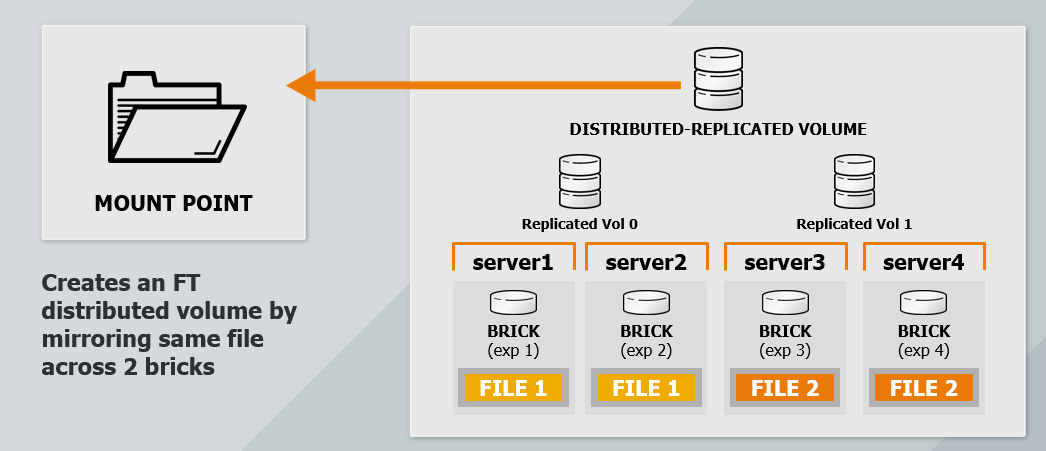
更详细拓扑结构和管理说明参考官方文档,值得你阅读
https://access.redhat.com/documentation/en-us/red_hat_gluster_storage/3/html/administration_guide/
4.客户端配置
支持的客户端协议

yum install -y glusterfs-client
mkdir -p /mnt/glusterfs
mount -t glusterfs gfs1.cluster.com:/gv0 /mnt/glusterfs
验证挂载
[root@master ~]# df -hP /mnt/glusterfs
Filesystem             Size  Used Avail Use% Mounted on
gfs1.cluster.com:/gv0  9.8G  136M  9.2G   2% /mnt/glusterfs
在node1和node2上也mount上glusterfs gv0,便于查看里面内容
[root@gfs1 ~]# mount -t glusterfs gfs2.cluster.com:/gv0 /mnt
[root@gfs2 ~]# mount -t glusterfs gfs1.cluster.com:/gv0 /mnt
然后基于客户端进行文件创建删除,同时将node1进行停机的高可用测试。

![[Android Pro] ant 编译android工程](http://pic.xiahunao.cn/[Android Pro] ant 编译android工程)

Mysql安装——编译安装)
)


![P1552 [APIO2012]派遣](http://pic.xiahunao.cn/P1552 [APIO2012]派遣)
)


)
:公网访问【web形式】)


