Seata的集成方式有:
1. Seata-All
2. Seata-Spring-Boot-Starter
3. Spring-Cloud-Starter-Seata
本案例使用Seata-Spring-Boot-Starter演示:
第一步:下载Seata
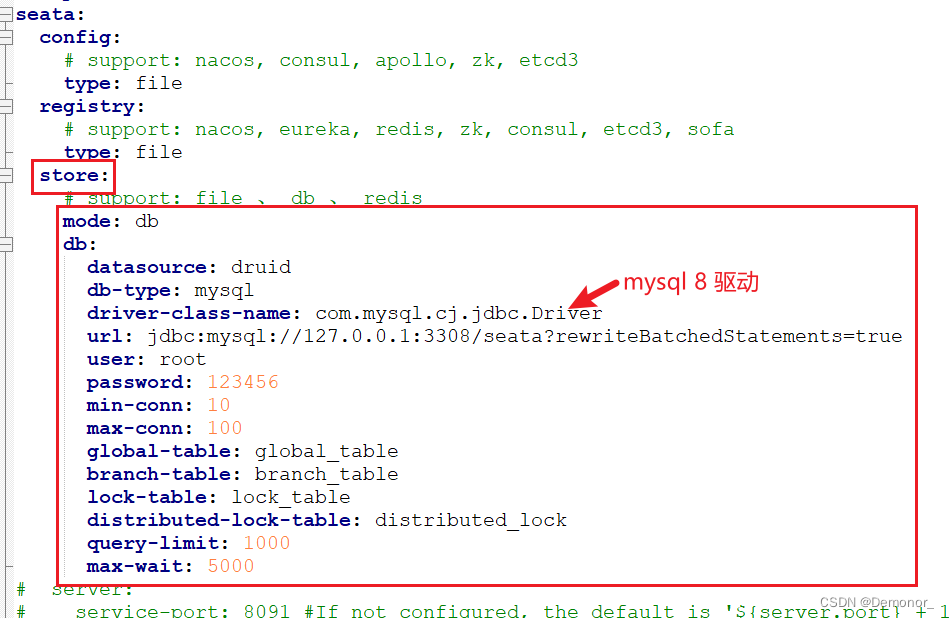
第二步:为了更好看到效果,我们将Seata的数据存储改为db
将seata\script\server\db\mysql.sql语句在mysql中执行,创建相关表


然后修改seata配置文件,相关配置可以参考application.example.yml,此处修改mode为db并且配置db相关配置

启动seata:

第三步:Spring Boot集成Seata
1.pom.xml导包:
<!--seata-->
<dependency><groupId>io.seata</groupId><artifactId>seata-spring-boot-starter</artifactId><version>1.4.2</version>
</dependency>
<dependency><groupId>com.esotericsoftware</groupId><artifactId>kryo</artifactId>
</dependency>
<dependency><groupId>de.javakaffee</groupId><artifactId>kryo-serializers</artifactId>
</dependency>
2.application.properties添加seata配置
#env
spring.profiles.active=devspring.application.name=coupon-service-provider
#dubbo.application.id=coupon-service
dubbo.application.name=coupon-service
dubbo.protocol.port=-1
dubbo.protocol.name=dubbo
#is simplified url
#dubbo.registry.simplified=true#registry
#dubbo.registry.id=zk-registry
#dubbo.registry.address=zookeeper://192.168.1.105:2181?timeout=20000
#dubbo.config-center.address=zookeeper://192.168.1.105:2181?timeout=20000
#dubbo.metadata-report.address=zookeeper://192.168.1.105:2181?timeout=20000#multi registries
#dubbo.registries.zk-registry.id=zk-registry
#dubbo.registries.zk-registry.address=zookeeper://192.168.1.105:2181?timeout=20000&blockUntilConnectedWait=30
dubbo.registries.nacos-registry.id=nacos-registry
dubbo.registries.nacos-registry.address=nacos://192.168.1.105:8848
#dubbo.registries.nacos-registry.address=nacos://192.168.1.105:8848?namespace=2e73933a-34d4-4fba-b21e-f08cd9b8adc9
dubbo.registry.use-as-config-center=false
dubbo.registry.use-as-metadata-center=false#nacos config
nacos.config.server-addr=192.168.1.105:8848#mybatis
mybatis.mapper-locations= classpath*:com/lee/demo/dubbo/demo/dao/*Mapper.xml
mybatis.type-aliases-package=com.lee.demo.dubbo.demo.entity#datasource
spring.datasource.url=jdbc:mysql://localhost:3308/coupon-platform?useUnicode=true&characterEncoding=utf8&useOldAliasMetadataBehavior=true&zeroDateTimeBehavior=convertToNull&allowMultiQueries=true&serverTimezone=UTC
spring.datasource.username=root
spring.datasource.password=Aa1225102411
spring.datasource.driver-class-name=com.mysql.cj.jdbc.Driver
spring.datasource.type=com.alibaba.druid.pool.DruidDataSource#========== seata config =============
seata.data-source-proxy-mode=AT
#tx group
seata.tx-service-group=demo-tx-default-group
seata.service.vgroup-mapping.demo-tx-default-group=default
#tx group cluster
seata.service.grouplist.default=192.168.1.105:8091
seata.client.undo.log-serialization=kryo
就两步完成Spring Boot集成Seata
测试:
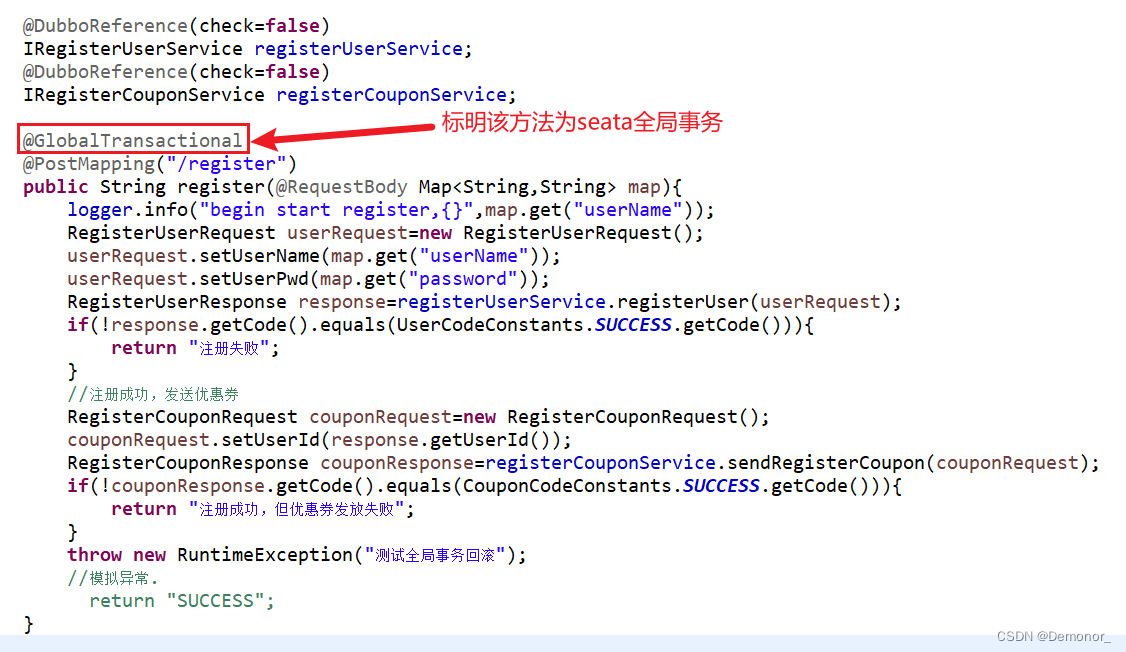
1.首先在portal标明分布式事务

2.postman调用

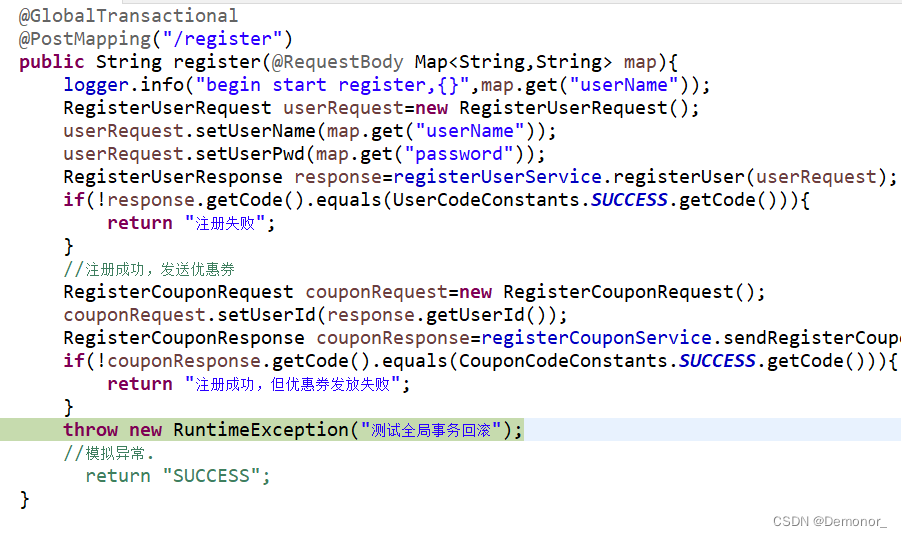
打断点调试

异常触发前,看到数据插入成功,且undo_log有两条数据

断点继续往下走,触发异常,,已插入的数据被回滚,且undo_log被清空,分布式事务回滚正常。

至此,Spring Boot集成Seata演示完毕
----汇编LED灯实验)


![[腾讯云Cloud Studio实战训练营]基于Cloud Studio完成图书管理系统](http://pic.xiahunao.cn/[腾讯云Cloud Studio实战训练营]基于Cloud Studio完成图书管理系统)
)


——工作台+Spring_Apche_POI+导出运营数据Excel报表)


)
