金翅大鹏盖世英,展翅金鹏盖世雄。
穿云燕子锡今鸽,踏雪无痕花云平。
---------------- 2023.7.31.101 -----------------
本文密钥:365
Elasticsearch 是一个分布式的 RESTful 风格的搜索和数据分析引擎,常用来进行全文检索、结构化搜索和数据分析。
Kibana是一个开源的分析和可视化平台,设计用于和Elasticsearch一起工作。你用Kibana来搜索,查看,并和存储在Elasticsearch索引中的数据进行交互。还可以轻松地执行高级数据分析,并且以各种图标、表格和地图的形式可视化数据。
本文描述了在macbook pro的macos上安装Elasticsearch/Kibana 的过程,也可以作为在任何类linux平台上安装Elasticsearch/Kibana 的借鉴。
安装Elasticsearch
环境
首先,Elastic 需要 Java17 环境,要保证环境变量JAVA_HOME正确设置,如果已经安装了Java8,可以特别地指定ES的Java版本(这样启动后就会使用java17):
在.bashrc中指定java17:
export ES_JAVA_HOME=/PATH/TO/JDK17
source ~/.bashrc
安装
接下来安装Elasticsearch。
采用tar包安装:
wget https://artifacts.elastic.co/downloads/elasticsearch/elasticsearch-8.1.2-linux-x86_64.tar.gz
tar -xzf elasticsearch-8.1.2-linux-x86_64.tar.gz
cd elasticsearch-8.1.2/
vi config/elasticsearch.yml# 可选:如需验证包
wget https://artifacts.elastic.co/downloads/elasticsearch/elasticsearch-8.1.2-linux-x86_64.tar.gz.sha512
shasum -a 512 -c elasticsearch-8.1.2-linux-x86_64.tar.gz.sha512
# 可选:在.bashrc中加入elasticsearch执行路径
export ELASTICSEARCH_HOME=/usr/local/elasticsearch
export PATH=$PATH:$ELASTICSEARCH_HOME/bin
# 之后就可以直接在命令行启动
# ./elasticsearch &
启动
cd /usr/local/elasticsearch
bin/elasticsearch &
访问:http://localhost:9200/
或者通过命令行:
curl localhost:9200

备注1:
网上很多推荐brew安装,事实证明已经不可用(可安装,启动错误):
brew install elasticsearch
brew services start elasticsearch
报错:
warning: no-jdk distributions that do not bundle a JDK are deprecated and will be removed in a future release
官方不支持,建议opensearch
备注2:
默认用户名为elastic,密码通过下面的命令重置:
./bin/elasticsearch-reset-password -u elastic
报错:ERROR: Failed to determine the health of the cluster.
curl --cacert /etc/elasticsearch/certs/http_ca.crt -u elastic https://localhost:9200
或者
curl --cacert /etc/elasticsearch/certs/http_ca.crt -u elastic -X POST "https://localhost:9200/_security/user/elastic/_password?pretty" -H 'Content-Type: application/json' -d '{ "password" : "elastic"}'
报错:curl: (35) error:1404B42E:SSL routines:ST_CONNECT:tlsv1 alert protocol version
如上所示,如果一直报错,就在配置文件config/elasticsearch.yml中关闭安全套件xpack:
xpack.ml:
enabled: false
验证Elasticsearch
Elasticsearch常见命令:
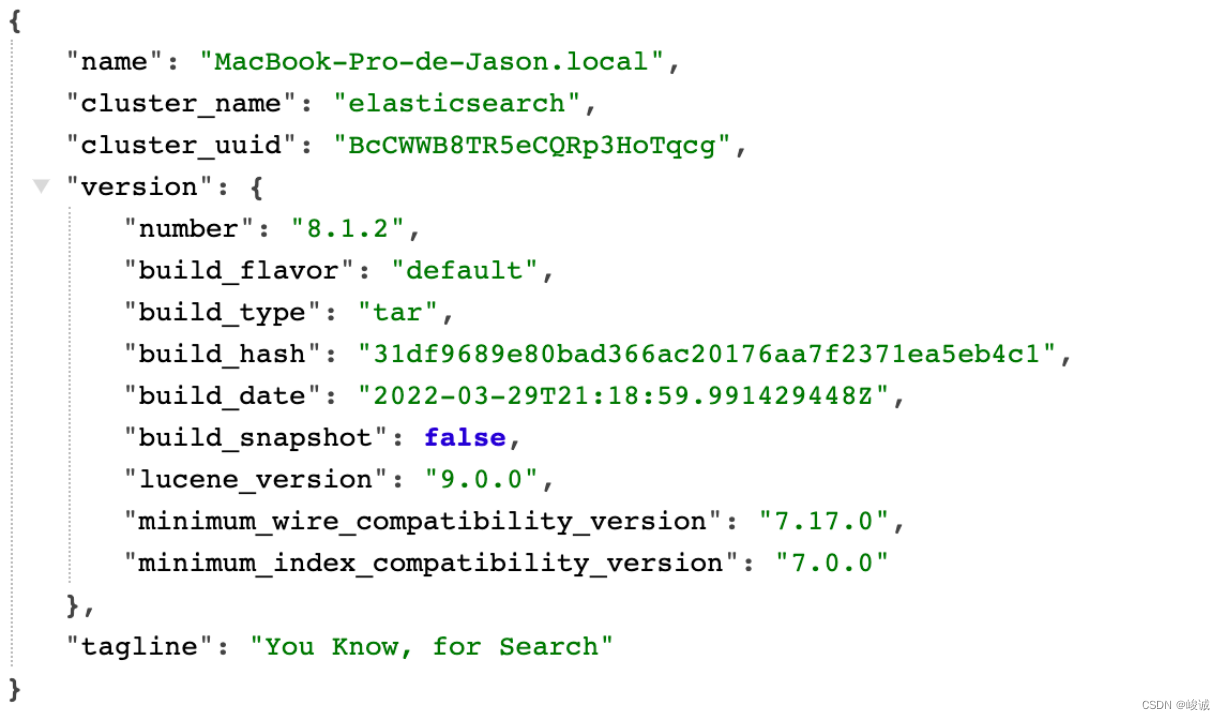
首页(集群、版本等)
curl localhost:9200
健康状态
curl -X GET "localhost:9200/_cat/health?v"
节点列表
curl -X GET "localhost:9200/_cat/nodes?v"
查看索引
curl -X GET "localhost:9200/_cat/indices?v"
添加索引
curl -X PUT "localhost:9200/customer?pretty"
添加数据
curl -X PUT "localhost:9200/customer/_doc/1?pretty" -H 'Content-Type: application/json' -d'{"name": "Zhang Fei"}'
返回
{ "_index" : "customer", "_id" : "1", "_version" : 1, "result" : "created", "_shards" : { "total" : 2, "successful" : 1, "failed" : 0 }, "_seq_no" : 0, "_primary_term" : 1 }
检索数据
curl -X GET "localhost:9200/customer/_doc/1?pretty"
删除索引
curl -X DELETE "localhost:9200/customer?pretty"
全部更新
curl -X PUT "localhost:9200/customer/_doc/1?pretty" -H 'Content-Type: application/json' -d'{ "name": "Zhang Fei", "age": 21 }'
部分更新
curl -X POST "localhost:9200/customer/_update/1?pretty" -H 'Content-Type: application/json' -d'
{
"doc": { "age": 20 }
}'
安装Kibana
下载:https://artifacts.elastic.co/downloads/kibana/kibana-8.1.2-darwin-x86_64.tar.gz
配置:
# 增加符号链接
ln -s kibana-8.1.2 kibana
# 在.bashrc中配置kibana路径
export KIBANA_HOME=/usr/local/kibana
export PATH=$PATH:$KIBANA_HOME/bin
验证Kibana
启动
kibana &
访问
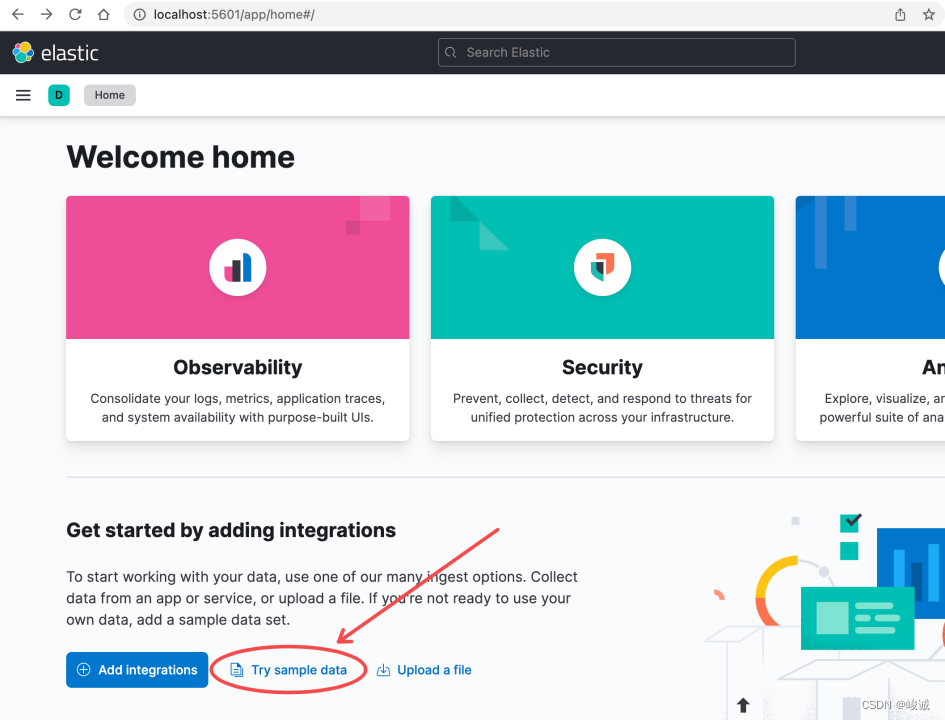
http://localhost:5601/

如果想体验数据图表和分析,可以添加下面的Try sample data(上图),浏览图表,分析数据,制作dashboard,定制数据报告,等等。
这里以航空示例数据为例:

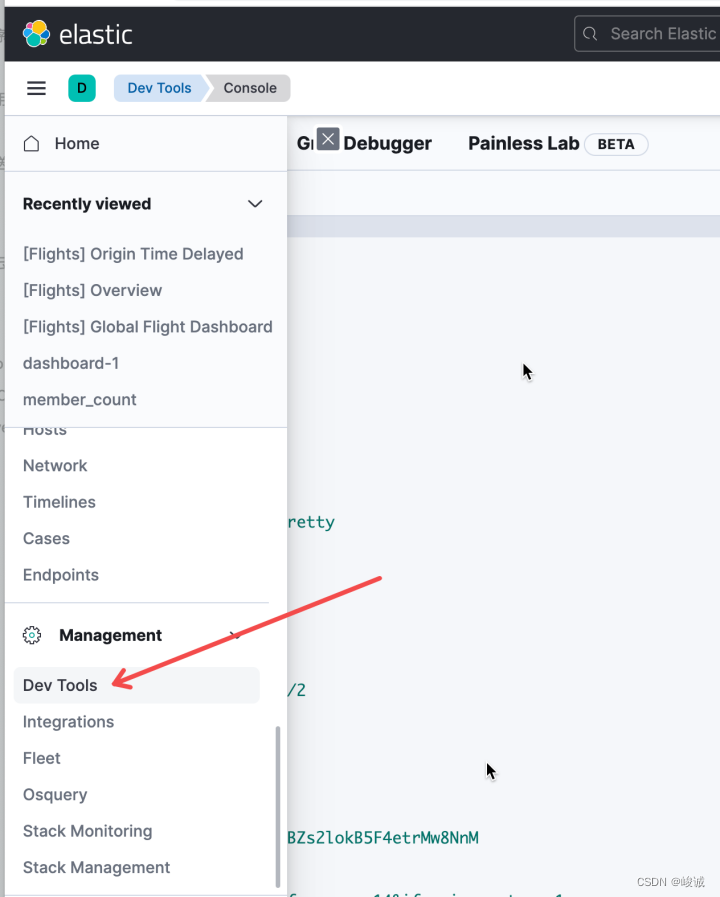
Kibana和Elasticsearch都属于一个产品系列,即使不在config/kibana.yml中配置,也会自动连接Elasticsearch。在Dev Tools中可以启动es控制台Console:

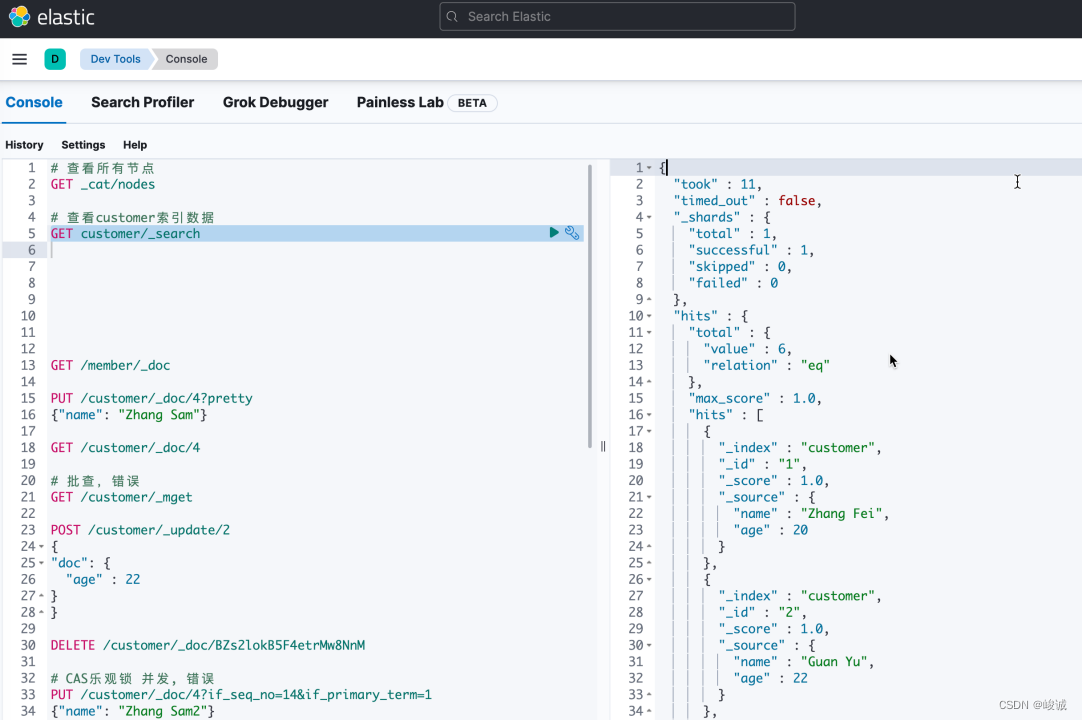
在Console中可以测试上述ES中的验证命令,由于已经连接了localhost:9200,所以这里只需要相对路径即可:
 文字版:
文字版:
# 查看所有节点
GET _cat/nodes# 查看customer索引数据
GET customer/_search
# 添加记录
PUT /customer/_doc/4?pretty
{"name": "Zhang Sam"}
# 检索记录
GET /customer/_doc/4
# 更新记录
POST /customer/_update/2
{
"doc": {"age" : 22
}
}
# 删除记录
# DELETE /customer/_doc/1# 批操作
POST customer/_bulk
{ "index":{} }
{"name": "Li Si3" }
{ "index":{} }
{"name": "Li Si4" }
{ "index":{} }
本文就到这里,好好学习,天天向上。


每篇10题)
:路由管理)
)
使用介绍)


)
)
)


