文章目录
- 概述
- 一、硬件系统
- 二、基础配置
- 设置主机名
- 配置主机名与IP地址解析
- 关闭防火墙与selinux
- 时间同步(ntp)
- 升级系统内核
- 配置内核转发及网桥过滤*
- 安装ipset及ipvsadm
- 关闭SWAP分区
- 三、Containerd准备
- Containerd获取
- 下载解压
- Containerd配置文件生成并修改
- Containerd启动及开机自启动
- runc获取
- ibseccomp获取
- ibseccomp编译安装
- runc安装
- 四、K8S集群部署
- K8S集群软件YUM源准备
- K8S集群软件安装
- 配置kubelet
- 五、修改kubeadm证书时间
- 获取kubernetes源码
- 修改kubernetes源码
- 安装go语言
- 安装rsync
- kubernetes源码编译
- 替换集群主机kubeadm证书为100年
- 获取kubernetes 1.28组件容器镜像
- 六、 集群初始化
- master节点初始化
- 工作节点加入集群
- 验证k8s集群是否加入
- 如kubectl get nodes执行如遇到报错
- 验证证书有效期
- 七、安装网络插件calico
- 获取calico
- 安装calico
- 查看pod运行信息
说明:除集群初始化外与worker加入集群,其余操作三台设备均都要执行。
概述
基于containerd容器运行时部署k8s 1.28集群。
一、硬件系统
| CPU | 内存 | 节点 |
|---|---|---|
| CPU 2u | 内存4G | k8s-master01 |
| CPU 1u | 内存4G | k8s-worker01 |
| CPU 1u | 内存4G | k8s-worker02 |
| / | / | / |
| 系统版本 | Centos7.9 | 全部一致 |
| 内核版本 | 5.4.260-1.el7.elrepo.x86_64 | 全部一致 |
二、基础配置
由于本次使用3台主机完成kubernetes集群部署,其中1台为master节点,名称为k8s-master01;其中2台为worker节点,名称分别为:k8s-worker01及k8s-worker02
| 节点名称 | 主机名 | IP地址 |
|---|---|---|
| master节点 | hostnamectl set-hostname k8s-master01 | 192.168.31.150 |
| worker01节点 | hostnamectl set-hostname k8s-worker01 | 192.168.31.151 |
| worker02节点 | hostnamectl set-hostname k8s-worker02 | 192.168.31.152 |
设置主机名
hostnamectl set-hostname xxx,三台对应的设备分别执行:
master节点
hostnamectl set-hostname k8s-master01worker01节点
hostnamectl set-hostname k8s-worker01worker02节点
hostnamectl set-hostname k8s-worker02
配置主机名与IP地址解析
PS一些小细节:
1、从此处开始,以下大部分命令,所有集群主机均需要配置,如无需配置,文档会说明。2、使用SSH软件远程,可以批量操作控制台,如果使用的是crt可以参考我另一篇文章:SecureCrt使用小技巧---->发送交互到所有会话,其他软件(xshell等设置都很简单)可以自行百度一下,节省时间,不用每条命令复制到三个终端分别执行。
设置系统主机名以及 Host 文件的相互解析,小集群环境使用修改host,大型环境使用dns方式使他们用户名和ip能相互解析
给每台虚拟机添加hosts
cat >> /etc/hosts << EOF
192.168.31.150 k8s-master01
192.168.31.151 k8s-worker01
192.168.31.152 k8s-worker02
EOF
关闭防火墙与selinux
#关闭防火墙
systemctl disable firewalld && systemctl stop firewalld && firewall-cmd --state#关闭selinux
sed -ri 's/SELINUX=enforcing/SELINUX=disabled/' /etc/selinux/config        && getenforce 0
时间同步(ntp)
所有主机
#安装ntp
yum install -y ntpdate #配置ntp自动更新时间
crontab -e    #写入同步的计划任务
0 */1 * * * /usr/sbin/ntpdate time1.aliyun.com
升级系统内核
所有主机均需升级
#导入elrepo gpg key
rpm --import https://www.elrepo.org/RPM-GPG-KEY-elrepo.org#安装elrepo YUM源仓库
yum -y install https://www.elrepo.org/elrepo-release-7.0-4.el7.elrepo.noarch.rpm#安装kernel-ml版本,ml为最新稳定版本,lt为长期维护版本
yum --enablerepo="elrepo-kernel" -y install kernel-lt.x86_64#设置grub2默认引导为0
echo 'GRUB_DEFAULT="0"' | tee -a /etc/default/grub#重新生成grub2引导文件
grub2-mkconfig -o /boot/grub2/grub.cfg#重启系统
reboot
重启后,需要验证内核是否为更新对应的版本
uname -r
5.4.260-1.el7.elrepo.x86_64
配置内核转发及网桥过滤*
所有主机均需要操作。
#添加网桥过滤及内核转发配置文件
cat > /etc/sysctl.d/k8s.conf << EOF
net.bridge.bridge-nf-call-ip6tables = 1
net.bridge.bridge-nf-call-iptables = 1
net.ipv4.ip_forward = 1
vm.swappiness = 0
EOF#加载br_netfilter模块
modprobe br_netfilter查看是否加载执行命令lsmod | grep br_netfilter
lsmod | grep br_netfilterbr_netfilter           22256  0
bridge                151336  1 br_netfilter
安装ipset及ipvsadm
yum -y install ipset ipvsadm
配置ipvsadm模块加载方式,添加需要加载的模块
cat > /etc/sysconfig/modules/ipvs.modules <<EOF
#!/bin/bash
modprobe -- ip_vs
modprobe -- ip_vs_rr
modprobe -- ip_vs_wrr
modprobe -- ip_vs_sh
modprobe -- nf_conntrack
EOF
授权、运行、检查是否加载
chmod 755 /etc/sysconfig/modules/ipvs.modules && bash /etc/sysconfig/modules/ipvs.modules && lsmod | grep -e ip_vs -e nf_conntrack
关闭SWAP分区
修改完成后需要重启操作系统,如不重启服务器,可临时关闭,命令为:
swapoff -a
永远关闭swap分区,需要重启操作系统
sed -ri 's/.*swap.*/#&/' /etc/fstab
重启系统
reboot
三、Containerd准备
Containerd获取
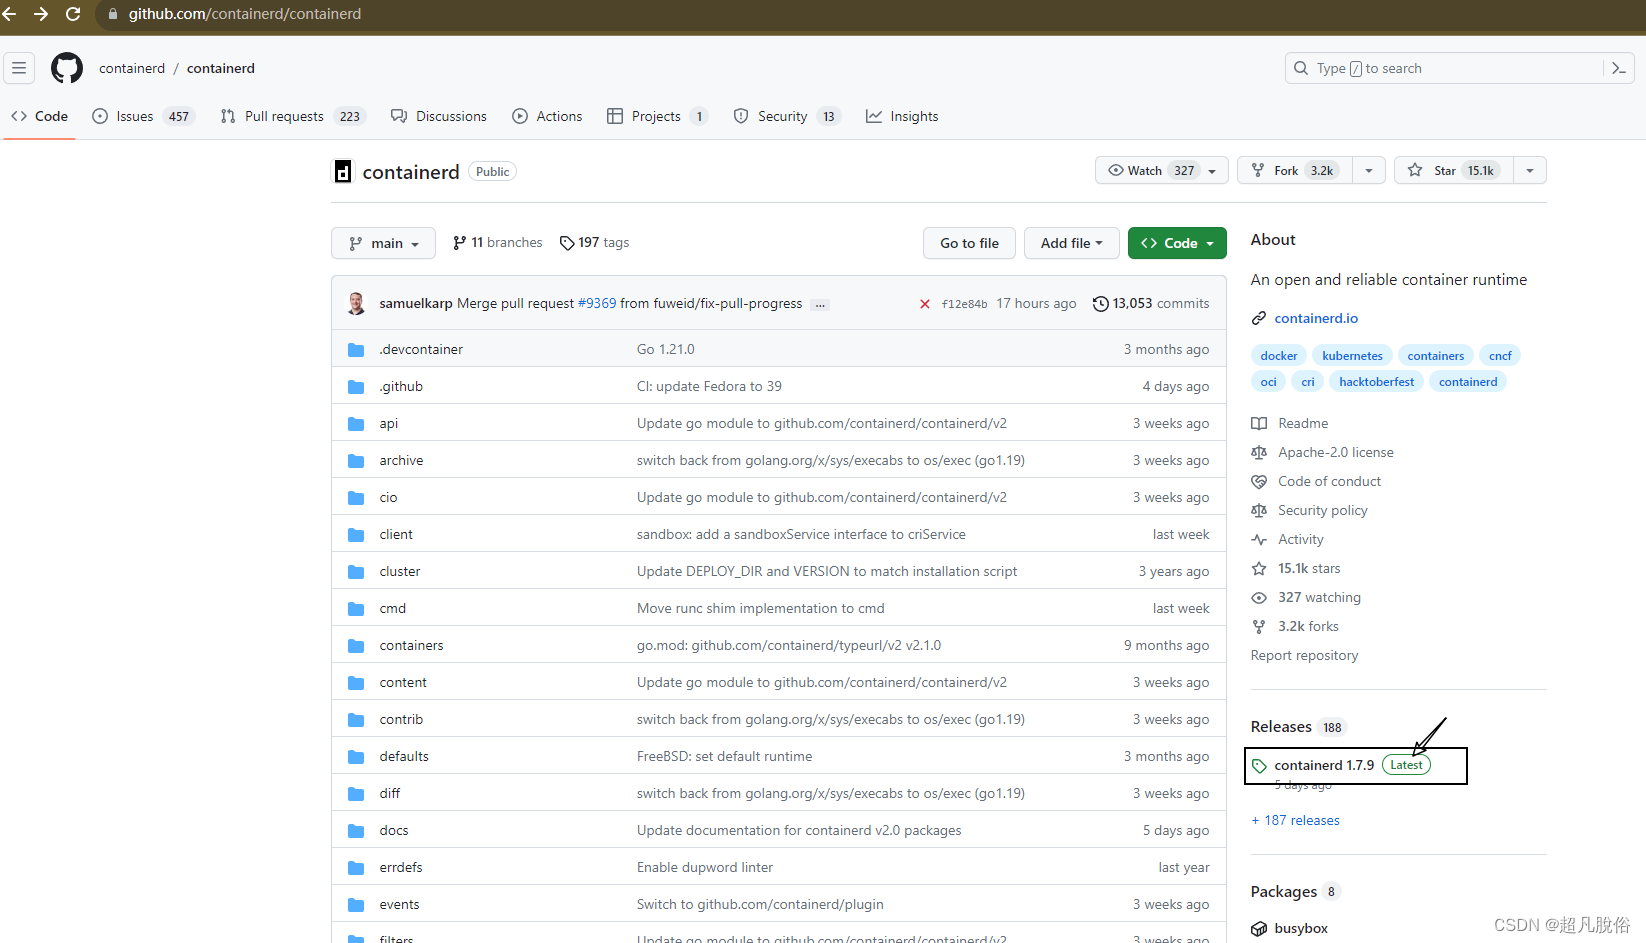
Containerd获取部署文件,访问 github,搜索Containerd

选择历史版本,本次安装版本:1.7.3
下载解压
选择containerd对应版本,复制链接,使用wget进行下载,
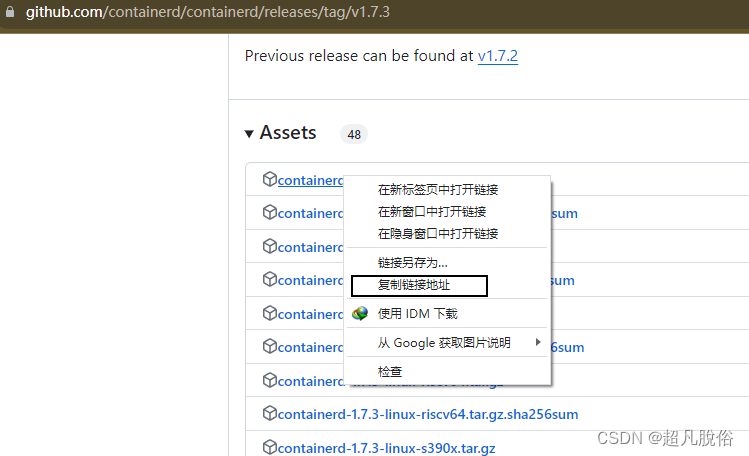
下载
wget https://github.com/containerd/containerd/releases/download/v1.7.3/cri-containerd-1.7.3-linux-amd64.tar.gz解压
tar zxvf cri-containerd-1.7.3-linux-amd64.tar.gz -C /
Containerd配置文件生成并修改
mkdir /etc/containerdcontainerd config default > /etc/containerd/config.tomlvim /etc/containerd/config.toml
#编辑config.toml,修改如下内容:
sandbox_image = "registry.k8s.io/pause:3.9" 由3.8修改为3.9
Containerd启动及开机自启动
# 设置Containerd开机自启动
systemctl enable --now containerd# 验证其版本
containerd --version
runc获取
本步骤可跳过,底下有提供wget的链接命令,
访问github.com,搜索以获取runc

获取历史版本的runc,本次安装使用:runc1.1.5
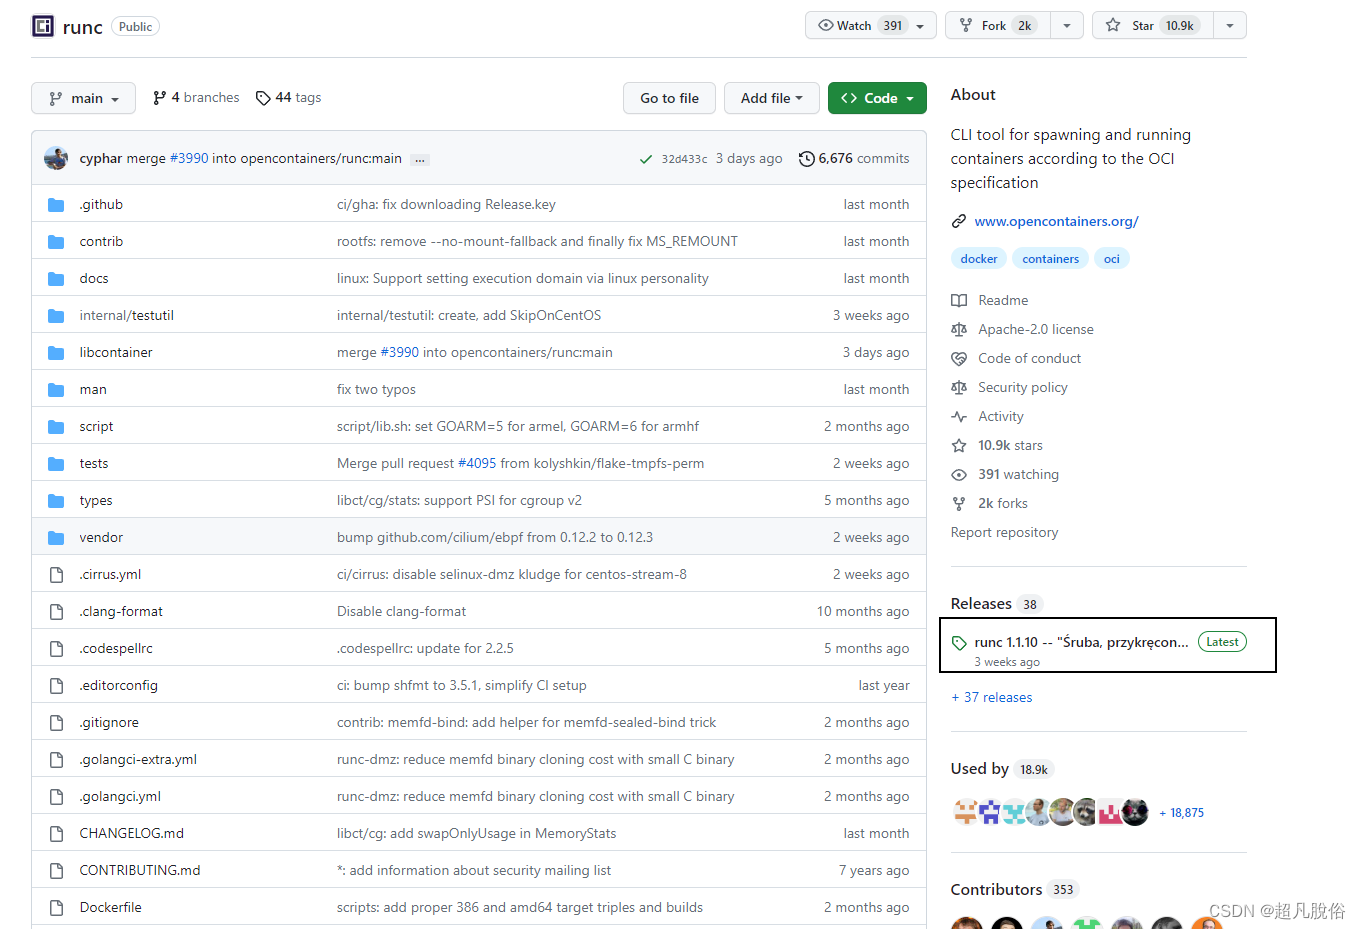
鼠标右击,选择对安装包,复制下载链接,

ibseccomp获取
本步骤可跳过,底下有提供wget的链接命令
访问github,搜索libseccomp,下载安装包

ibseccomp编译安装
本步骤必须按照,不安装 ibseccomp,直接安装runc会报错缺少依赖
#安装 gcc,编译需要
yum install gcc -y#下载libseccomp-2.5.4.tar.gz
wget https://github.com/opencontainers/runc/releases/download/v1.1.5/libseccomp-2.5.4.tar.gz#解压
tar xf libseccomp-2.5.4.tar.gz#进入解压文件夹
cd libseccomp-2.5.4/#安装gperf
yum install gperf -y#编译
./configure# 安装
make && make install#查看该文件是否存在,检查是否安装成功
find / -name "libseccomp.so"
runc安装
#下载runc安装包
wget https://github.com/opencontainers/runc/releases/download/v1.1.9/runc.amd64#赋权
chmod +x runc.amd64#查找containerd安装时已安装的runc所在的位置,然后替换
which runc#替换containerd安装已安装的runc
mv runc.amd64 /usr/local/sbin/runc#执行runc命令,如果有命令帮助则为正常
runc
如果运行runc命令时提示:runc:
error while loading shared libraries:libseccomp.so.2: cannot open shared object file: No such file or directory
则表明runc没有找到libseccomp,需要检查libseccomp是否安装,本次安装默认就可以查询到。
四、K8S集群部署
K8S集群软件YUM源准备
使用google提供的YUM源 或者使用阿里云的都可以。
cat > /etc/yum.repos.d/k8s.repo <<EOF
[kubernetes]
name=Kubernetes
baseurl=https://packages.cloud.google.com/yum/repos/kubernetes-el7-x86_64
enabled=1
gpgcheck=1
repo_gpgcheck=1
gpgkey=https://packages.cloud.google.com/yum/doc/yum-key.gpghttps://packages.cloud.google.com/yum/doc/rpm-package-key.gpg
EOF
K8S集群软件安装
#本次使用默认安装
yum -y install  kubeadm  kubelet kubectl#查看指定版本(可忽略)
# yum list kubeadm.x86_64 --showduplicates | sort -r
# yum list kubelet.x86_64 --showduplicates | sort -r
# yum list kubectl.x86_64 --showduplicates | sort -r#安装指定版本(可忽略)
# yum -y install  kubeadm-1.28.X-0  kubelet-1.28.X-0 kubectl-1.28.X-0
配置kubelet
为了实现docker使用的cgroupdriver与kubelet使用的cgroup的一致性,建议修改如下文件内容。
#编辑/etc/sysconfig/kubelet文件
vim /etc/sysconfig/kubelet#写入如下配置:
KUBELET_EXTRA_ARGS="--cgroup-driver=systemd"# 设置kubelet为开机自启动即可,由于没有生成配置文件,集群初始化后自动启动
systemctl enable kubelet
五、修改kubeadm证书时间
配置证书在实验环境中非必须步骤(可以跳过)
执行命令which kubeadm,查看是否有kubeadm命令
which kubeadm
#/usr/bin/kubeadm
获取kubernetes源码
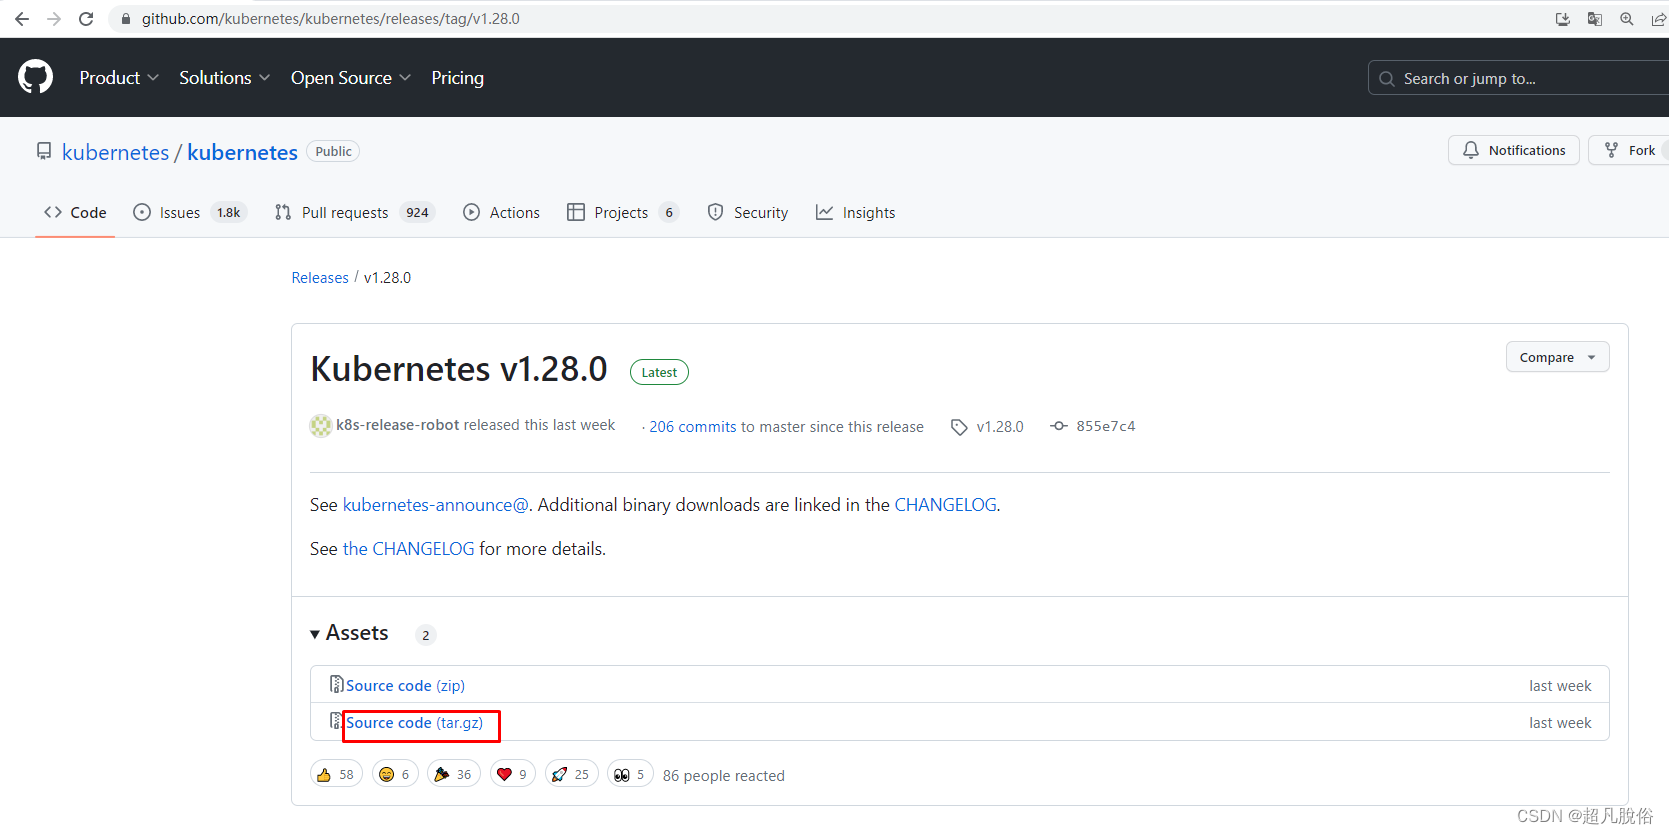
访问github,搜索kubernetes

选择该项

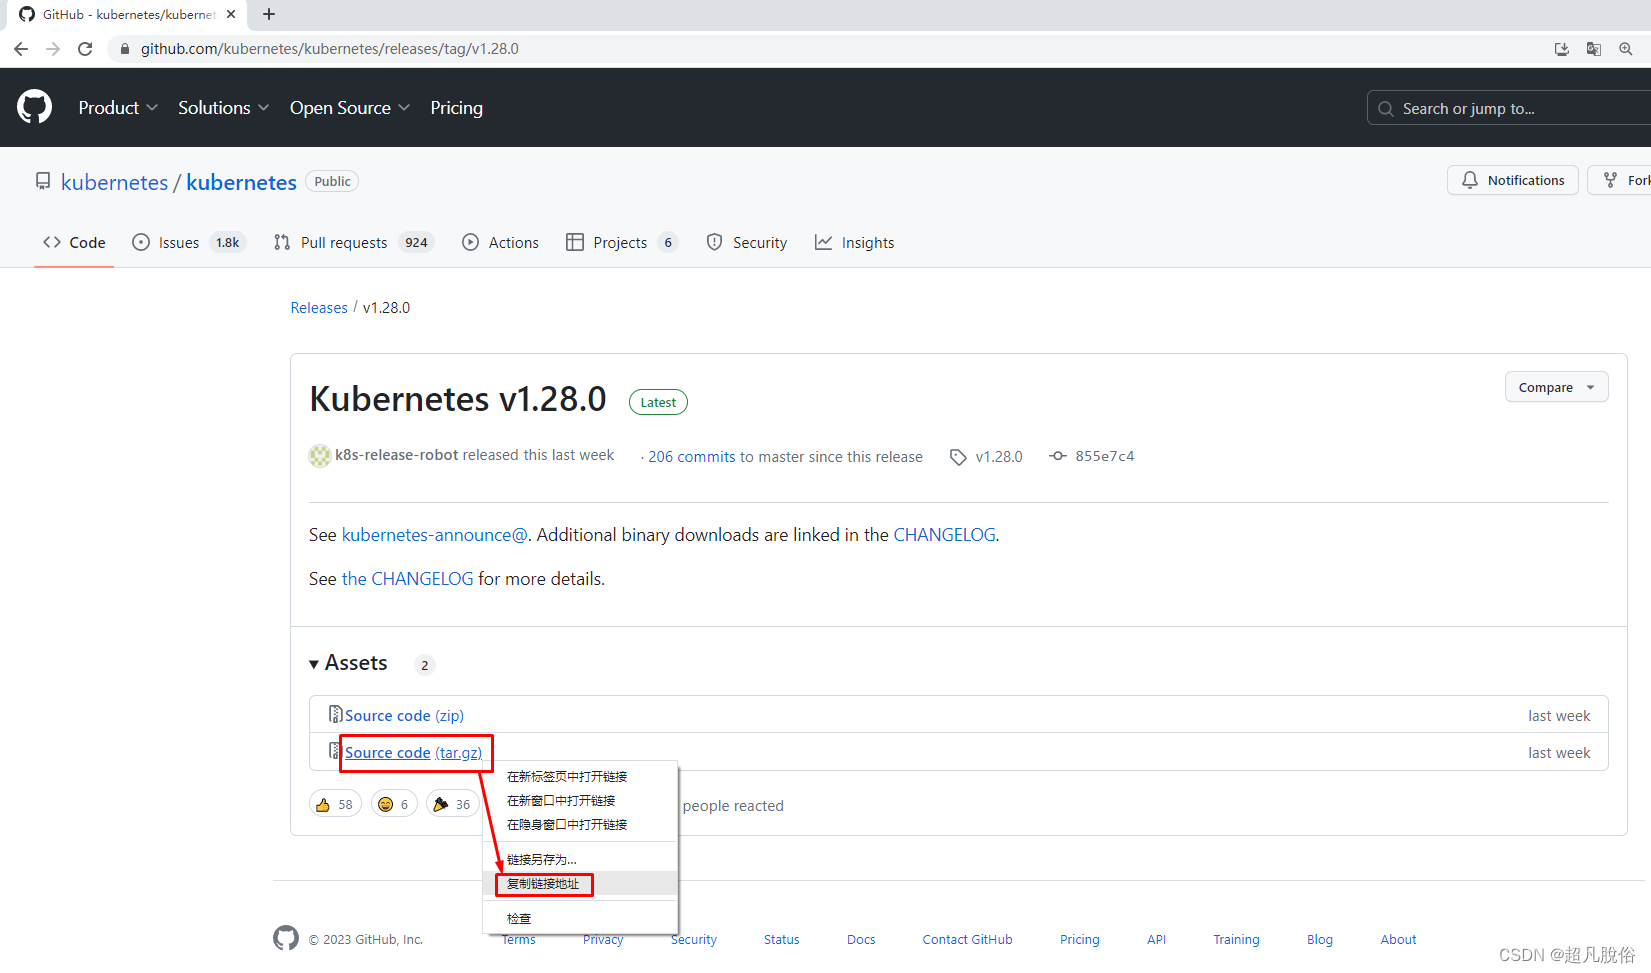
根据需要选择版本,此处使用:v1.28.0.tar.gz
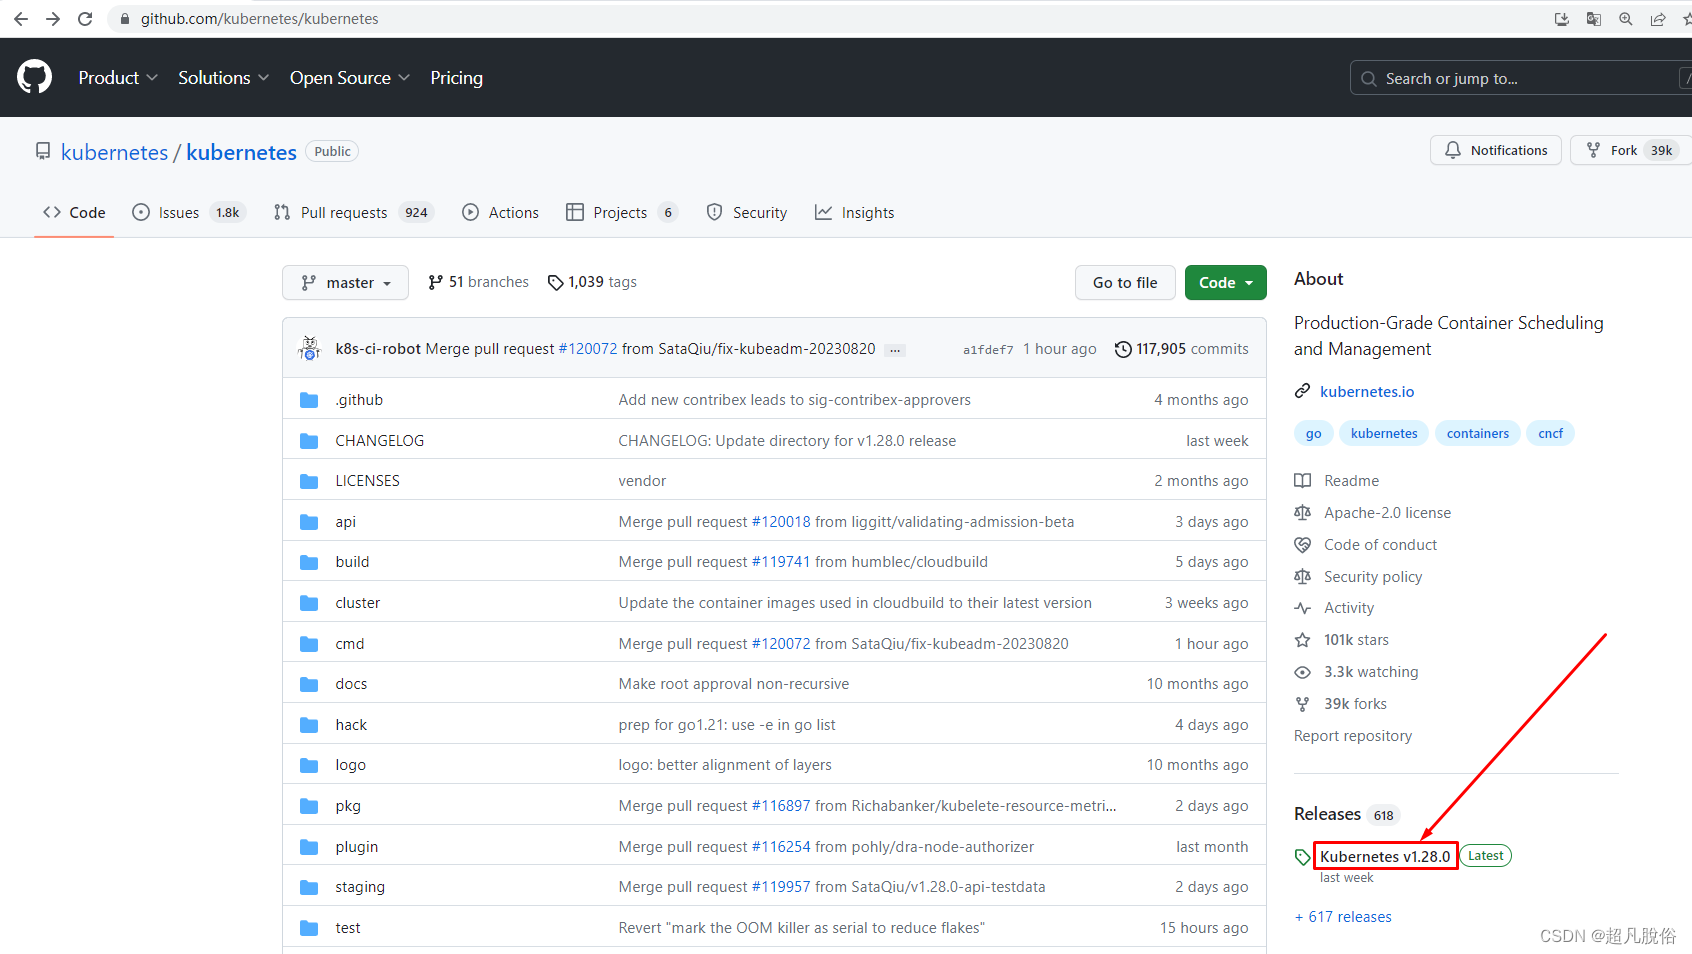
复制下载链接
# 下载
wget https://github.com/kubernetes/kubernetes/archive/refs/tags/v1.28.0.tar.gz#ls查看该包
ls
v1.28.0.tar.gz#剪切到目录
mv v1.28.0.tar.gz  /usr/local/src/#进入目录
cd /usr/local/src/# 解压
tar zxvf v1.28.0.tar.gz#通过ls再查看解压后的包名:kubernetes-1.28.0
kubernetes-1.28.0
修改kubernetes源码
修改CA证书为100年有效期(默认为10年)
[root@k8s-master01 ~]# vim kubernetes-1.28.0/staging/src/k8s.io/client-go/util/cert/cert.go72 tmpl := x509.Certificate{73 SerialNumber: serial,74 Subject: pkix.Name{75 CommonName: cfg.CommonName,76 Organization: cfg.Organization,77 },78 DNSNames: []string{cfg.CommonName},79 NotBefore: notBefore,80 NotAfter: now.Add(duration365d * 100).UTC(),81 KeyUsage: x509.KeyUsageKeyEncipherment | x509.KeyUsageDigitalSignature | x509.KeyUsageCertSign,82 BasicConstraintsValid: true,83 IsCA: true,84 }
修改说明:
把文件中80行,10修改为100即可 。
修改kubeadm证书有效期为100年(默认为1年)
[root@k8s-master01 ~]# vim kubernetes-1.28.0/cmd/kubeadm/app/constants/constants.go......37 const (38 // KubernetesDir is the directory Kubernetes owns for storing various configuration files39 KubernetesDir = "/etc/kubernetes"40 // ManifestsSubDirName defines directory name to store manifests41 ManifestsSubDirName = "manifests"42 // TempDirForKubeadm defines temporary directory for kubeadm43 // should be joined with KubernetesDir.44 TempDirForKubeadm = "tmp"4546 // CertificateBackdate defines the offset applied to notBefore for CA certificates generated by kubeadm47 CertificateBackdate = time.Minute * 548 // CertificateValidity defines the validity for all the signed certificates generated by kubeadm49 CertificateValidity = time.Hour * 24 * 365 * 100
修改说明:
把CertificateValidity = time.Hour * 24 * 365 修改为:CertificateValidity = time.Hour * 24 * 365 * 100
安装go语言
因为kubernetes是go语言写的,所以安装go语言环境用作编译
访问官网下载go
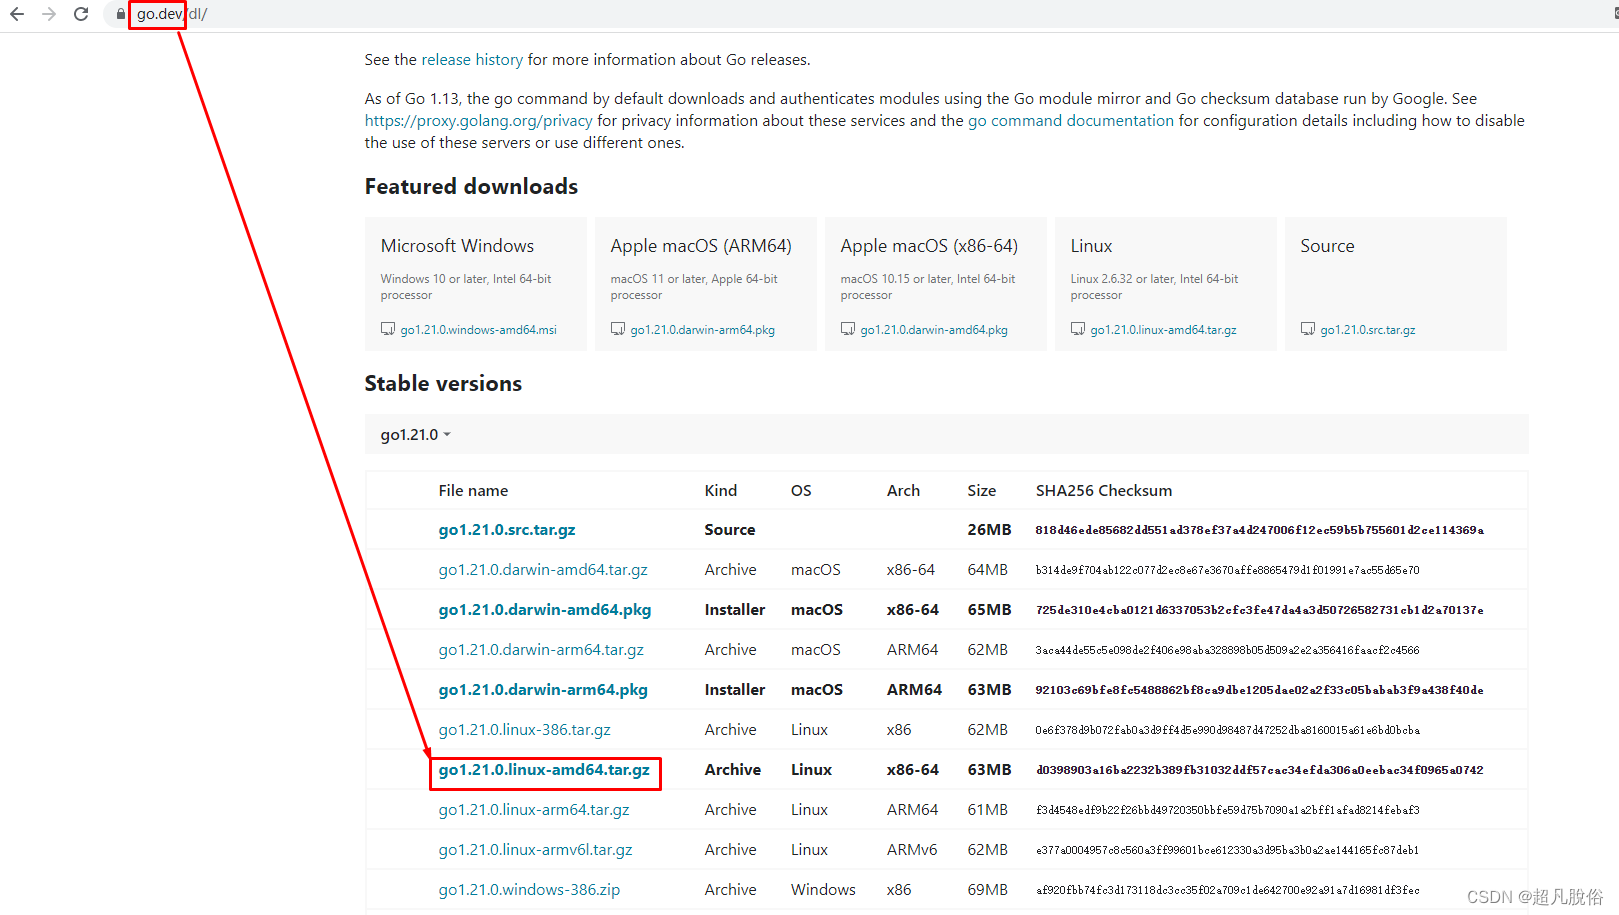
选择安装包,复制链接,进行下载

#下载
wget https://go.dev/dl/go1.21.0.linux-amd64.tar.gz#解压
tar zxvf go1.21.0.linux-amd64.tar.gz#移动文件夹
mv go /usr/local/go#添加全局变量:export PATH=$PATH:/usr/local/go/bin
vim /etc/profile
export PATH=$PATH:/usr/local/go/bin#使变量生效
source /etc/profile#测试go是否安装成功
go version
安装rsync
,编译要用rsync,安装rsync命令:yum install rsync -y
yum install rsync -y
kubernetes源码编译
[root@k8s-master01 ~]# cd kubernetes-1.28.0/
[root@k8s-master01 kubernetes-1.28.0]# make all WHAT=cmd/kubeadm GOFLAGS=-v[root@k8s-master01 kubernetes-1.28.0]# ls
_output[root@k8s-master01 kubernetes-1.28.0]# ls _output/
bin  local
[root@k8s-master01 kubernetes-1.28.0]# ls _output/bin/
kubeadm  ncpu
替换集群主机kubeadm证书为100年
[root@k8s-master01 kubernetes-1.28.0]# which kubeadm
/usr/bin/kubeadm
[root@k8s-master01 kubernetes-1.28.0]# rm -rf `which kubeadm`
[root@k8s-master01 kubernetes-1.28.0]# cp _output/bin/kubeadm /usr/bin/kubeadm
[root@k8s-master01 kubernetes-1.28.0]# which kubeadm
/usr/bin/kubeadmworker01和worker02删除
[root@k8s-worker01 ~]# rm -rf `which kubeadm`
[root@k8s-worker02 ~]# rm -rf `which kubeadm`复制文件到worker01 和 worker02
[root@k8s-master01 kubernetes-1.28.0]# scp _output/bin/kubeadm 192.168.31.151:/usr/bin/kubeadm
[root@k8s-master01 kubernetes-1.28.0]# scp _output/bin/kubeadm 192.168.31.152:/usr/bin/kubeadm
获取kubernetes 1.28组件容器镜像
执行kubeadm config images list会列出所有镜像
kubeadm config images list#列出的镜像列表
registry.k8s.io/kube-apiserver:v1.28.0
registry.k8s.io/kube-controller-manager:v1.28.0
registry.k8s.io/kube-scheduler:v1.28.0
registry.k8s.io/kube-proxy:v1.28.0
registry.k8s.io/pause:3.9
registry.k8s.io/etcd:3.5.9-0
registry.k8s.io/coredns/coredns:v1.10.1
拉取全部镜像kubeadm config images pull
kubeadm config images pull#拉去完成的提示:
[config/images] Pulled registry.k8s.io/kube-apiserver:v1.28.3
[config/images] Pulled registry.k8s.io/kube-controller-manager:v1.28.3
[config/images] Pulled registry.k8s.io/kube-scheduler:v1.28.3
[config/images] Pulled registry.k8s.io/kube-proxy:v1.28.3
[config/images] Pulled registry.k8s.io/pause:3.9
[config/images] Pulled registry.k8s.io/etcd:3.5.9-0
[config/images] Pulled registry.k8s.io/coredns/coredns:v1.10.1
等待…可能会很长时间,网速快好很多。
六、 集群初始化
镜像拉取完成后,进行集群初始化,初始化只有Master需要执行
master节点初始化
master节点执行初始化命令:bash kubeadm init --kubernetes-version=v1.28.0 --pod-network-cidr=10.244.0.0/16 --apiserver-advertise-address=192.168.31.150 --cri-socket unix:///var/run/containerd/containerd.sock
如果只用Containerd,不用docker,可以不加–cri-socket unix:///var/run/containerd/containerd.sock
在Kubernetes(通常简称为K8s)中,–cri-socket 参数用于指定容器运行时(Container Runtime Interface,CRI)的套接字地址。CRI是Kubernetes与容器运行时之间的接口,允许Kubernetes与不同的容器运行时进行通信,如Docker、containerd等。
[root@k8s-master01 ~]# kubeadm init --kubernetes-version=v1.28.0 --pod-network-cidr=10.244.0.0/16 --apiserver-advertise-address=192.168.31.150  --cri-socket unix:///var/run/containerd/containerd.sock#初始化结果输出内容:
[init] Using Kubernetes version: v1.28.0
[preflight] Running pre-flight checks
[preflight] Pulling images required for setting up a Kubernetes cluster
[preflight] This might take a minute or two, depending on the speed of your internet connection
[preflight] You can also perform this action in beforehand using 'kubeadm config images pull'
[certs] Using certificateDir folder "/etc/kubernetes/pki"
[certs] Generating "ca" certificate and key
[certs] Generating "apiserver" certificate and key
[certs] apiserver serving cert is signed for DNS names [k8s-master01 kubernetes kubernetes.default kubernetes.default.svc kubernetes.default.svc.cluster.local] and IPs [10.96.0.1 192.168.31.150]
[certs] Generating "apiserver-kubelet-client" certificate and key
[certs] Generating "front-proxy-ca" certificate and key
[certs] Generating "front-proxy-client" certificate and key
[certs] Generating "etcd/ca" certificate and key
[certs] Generating "etcd/server" certificate and key
[certs] etcd/server serving cert is signed for DNS names [k8s-master01 localhost] and IPs [192.168.31.150 127.0.0.1 ::1]
[certs] Generating "etcd/peer" certificate and key
[certs] etcd/peer serving cert is signed for DNS names [k8s-master01 localhost] and IPs [192.168.31.150 127.0.0.1 ::1]
[certs] Generating "etcd/healthcheck-client" certificate and key
[certs] Generating "apiserver-etcd-client" certificate and key
[certs] Generating "sa" key and public key
[kubeconfig] Using kubeconfig folder "/etc/kubernetes"
[kubeconfig] Writing "admin.conf" kubeconfig file
[kubeconfig] Writing "kubelet.conf" kubeconfig file
[kubeconfig] Writing "controller-manager.conf" kubeconfig file
[kubeconfig] Writing "scheduler.conf" kubeconfig file
[etcd] Creating static Pod manifest for local etcd in "/etc/kubernetes/manifests"
[control-plane] Using manifest folder "/etc/kubernetes/manifests"
[control-plane] Creating static Pod manifest for "kube-apiserver"
[control-plane] Creating static Pod manifest for "kube-controller-manager"
[control-plane] Creating static Pod manifest for "kube-scheduler"
[kubelet-start] Writing kubelet environment file with flags to file "/var/lib/kubelet/kubeadm-flags.env"
[kubelet-start] Writing kubelet configuration to file "/var/lib/kubelet/config.yaml"
[kubelet-start] Starting the kubelet
[wait-control-plane] Waiting for the kubelet to boot up the control plane as static Pods from directory "/etc/kubernetes/manifests". This can take up to 4m0s
[kubelet-check] Initial timeout of 40s passed.
[apiclient] All control plane components are healthy after 103.502051 seconds
[upload-config] Storing the configuration used in ConfigMap "kubeadm-config" in the "kube-system" Namespace
[kubelet] Creating a ConfigMap "kubelet-config" in namespace kube-system with the configuration for the kubelets in the cluster
[upload-certs] Skipping phase. Please see --upload-certs
[mark-control-plane] Marking the node k8s-master01 as control-plane by adding the labels: [node-role.kubernetes.io/control-plane node.kubernetes.io/exclude-from-external-load-balancers]
[mark-control-plane] Marking the node k8s-master01 as control-plane by adding the taints [node-role.kubernetes.io/control-plane:NoSchedule]
[bootstrap-token] Using token: 2n0t62.gvuu8x3zui9o8xnc
[bootstrap-token] Configuring bootstrap tokens, cluster-info ConfigMap, RBAC Roles
[bootstrap-token] Configured RBAC rules to allow Node Bootstrap tokens to get nodes
[bootstrap-token] Configured RBAC rules to allow Node Bootstrap tokens to post CSRs in order for nodes to get long term certificate credentials
[bootstrap-token] Configured RBAC rules to allow the csrapprover controller automatically approve CSRs from a Node Bootstrap Token
[bootstrap-token] Configured RBAC rules to allow certificate rotation for all node client certificates in the cluster
[bootstrap-token] Creating the "cluster-info" ConfigMap in the "kube-public" namespace
[kubelet-finalize] Updating "/etc/kubernetes/kubelet.conf" to point to a rotatable kubelet client certificate and key
[addons] Applied essential addon: CoreDNS
[addons] Applied essential addon: kube-proxyYour Kubernetes control-plane has initialized successfully!To start using your cluster, you need to run the following as a regular user:mkdir -p $HOME/.kubesudo cp -i /etc/kubernetes/admin.conf $HOME/.kube/configsudo chown $(id -u):$(id -g) $HOME/.kube/configAlternatively, if you are the root user, you can run:export KUBECONFIG=/etc/kubernetes/admin.confYou should now deploy a pod network to the cluster.
Run "kubectl apply -f [podnetwork].yaml" with one of the options listed at:https://kubernetes.io/docs/concepts/cluster-administration/addons/Then you can join any number of worker nodes by running the following on each as root:kubeadm join 192.168.31.150:6443 --token 2n0t62.gvuu8x3zui9o8xnc \--discovery-token-ca-cert-hash sha256:d294c082cc7e0d5f620fb10e527a8a7cb4cb6ccd8dc45ffaf2cddd9bd3016695
工作节点加入集群
在master节点初始化完成后,worker或node节点需要加入集群,通过master初始化生成的token作为命令。
如上述master初始化完成最后两行,复制到worker节点执行 kubeadm join 192.168.31.150:6443 --token 2n0t62.gvuu8x3zui9o8xnc \ --discovery-token-ca-cert-hash sha256:d294c082cc7e0d5f620fb10e527a8a7cb4cb6
验证k8s集群是否加入
worker工作节点加入集群后,稍微等待,可以在master节点通过kubectl get nodes获取worker节点是否加入,如下,可以看到master和worker都存在即为正常现象。
[root@k8s-master01 ~]# kubectl get nodes
NAME           STATUS     ROLES           AGE   VERSION
k8s-master01   NotReady   control-plane   30m   v1.28.2
k8s-worker01   NotReady   <none>          19m   v1.28.2
k8s-worker02   NotReady   <none>          18m   v1.28.2
如kubectl get nodes执行如遇到报错
master执行kubectl get nodes报错

master执行如下配置,修正配置文件的路径:
配置 Kubernetes 客户端,使其能够连接到你的 Kubernetes 集群,并使用相应的管理员权限进行操作
mkdir -p $HOME/.kube
cp -i /etc/kubernetes/admin.conf $HOME/.kube/config
chown $(id -u):$(id -g) $HOME/.kube/config
完毕后,再次执行kubectl get nodes验证
验证证书有效期
如有配置修改证书,可以通过以下方式验证证书的有效期:
[root@k8s-master01 ~]# openssl x509 -in /etc/kubernetes/pki/apiserver.crt -noout -text | grep ' Not 'Not Before: Nov 14 08:10:42 2023 GMTNot After : Oct 21 08:15:42 2123 GMT[root@k8s-master01 ~]# kubeadm certs check-expiration
[check-expiration] Reading configuration from the cluster...
[check-expiration] FYI: You can look at this config file with 'kubectl -n kube-system get cm kubeadm-config -o yaml'CERTIFICATE                EXPIRES                  RESIDUAL TIME   CERTIFICATE AUTHORITY   EXTERNALLY MANAGED
admin.conf                 Oct 21, 2123 08:15 UTC   99y             ca                      no
apiserver                  Oct 21, 2123 08:15 UTC   99y             ca                      no
apiserver-etcd-client      Oct 21, 2123 08:15 UTC   99y             etcd-ca                 no
apiserver-kubelet-client   Oct 21, 2123 08:15 UTC   99y             ca                      no
controller-manager.conf    Oct 21, 2123 08:15 UTC   99y             ca                      no
etcd-healthcheck-client    Oct 21, 2123 08:15 UTC   99y             etcd-ca                 no
etcd-peer                  Oct 21, 2123 08:15 UTC   99y             etcd-ca                 no
etcd-server                Oct 21, 2123 08:15 UTC   99y             etcd-ca                 no
front-proxy-client         Oct 21, 2123 08:15 UTC   99y             front-proxy-ca          no
scheduler.conf             Oct 21, 2123 08:15 UTC   99y             ca                      no      CERTIFICATE AUTHORITY   EXPIRES                  RESIDUAL TIME   EXTERNALLY MANAGED
ca                      Oct 21, 2123 08:15 UTC   99y             no
etcd-ca                 Oct 21, 2123 08:15 UTC   99y             no
front-proxy-ca          Oct 21, 2123 08:15 UTC   99y             no
七、安装网络插件calico
获取calico
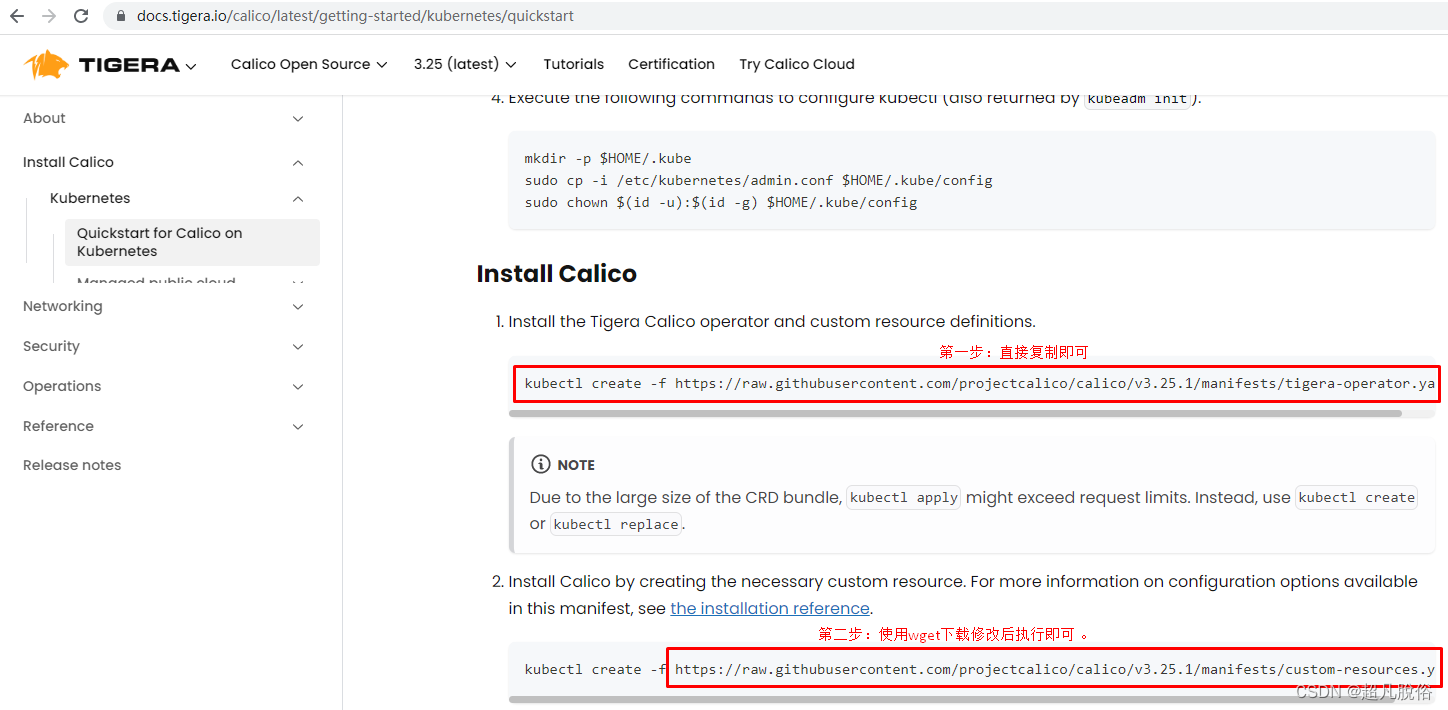
calico访问链接:https://projectcalico.docs.tigera.io/about/about-calico
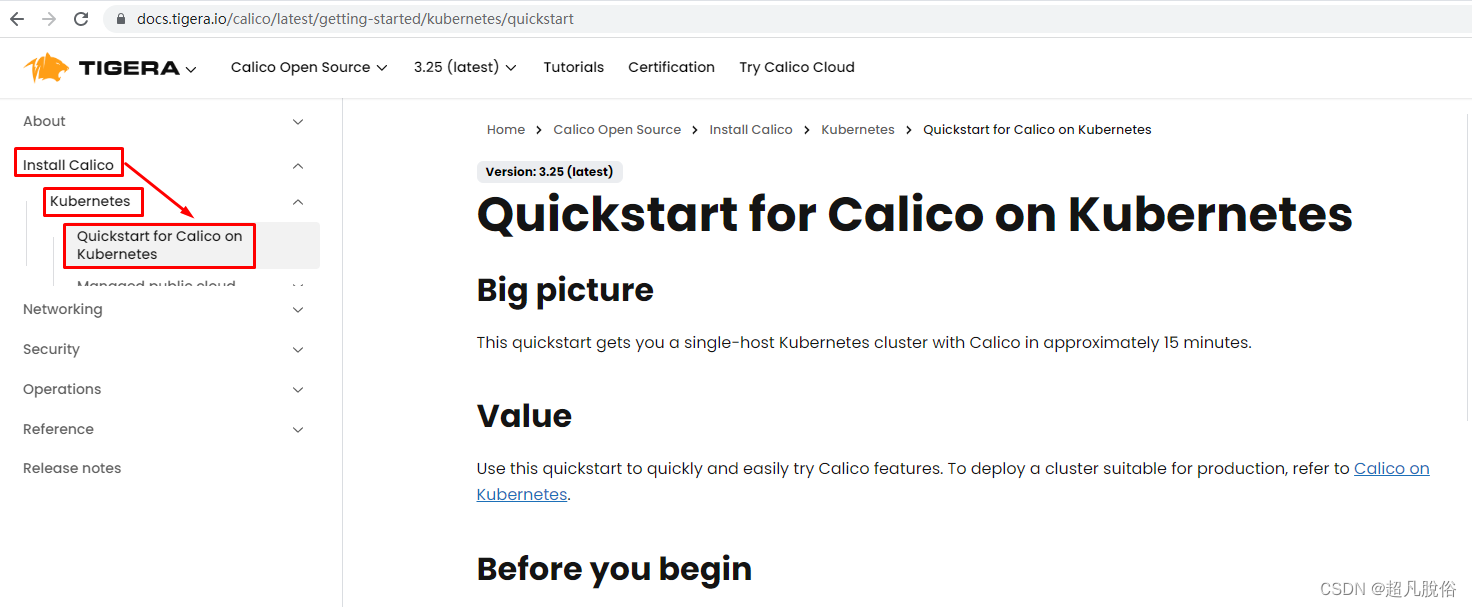
安装calico
下载安装和配置Calico,使其能够为集群提供网络功能。
kubectl create -f https://raw.githubusercontent.com/projectcalico/calico/v3.26.1/manifests/tigera-operator.yaml
下载Calico 安装的配置信息,YAML 文件通常包含 :例如网络CIDR、节点选择器、Encapsulation设置等
wget https://raw.githubusercontent.com/projectcalico/calico/v3.26.1/manifests/custom-resources.yaml
vim custom-resources.yaml 修改Calico安装配置文件中的cidr字段,将其更改为初始Pod网络CIDR。以下是修改后的YAML配置示例:
# This section includes base Calico installation configuration.
# For more information, see: https://projectcalico.docs.tigera.io/master/reference/installation/api#operator.tigera.io/v1.Installation
apiVersion: operator.tigera.io/v1
kind: Installation
metadata:name: default
spec:# Configures Calico networking.calicoNetwork:# Note: The ipPools section cannot be modified post-install.ipPools:- blockSize: 26cidr: 10.244.0.0/16 修改此行内容为初始化时定义的pod network cidrencapsulation: VXLANCrossSubnetnatOutgoing: EnablednodeSelector: all()
---# This section configures the Calico API server.
# For more information, see: https://projectcalico.docs.tigera.io/master/reference/installation/api#operator.tigera.io/v1.APIServer
apiVersion: operator.tigera.io/v1
kind: APIServer
metadata:name: default
spec: {}使用kubectl create -f custom-resources.yaml命令创建了两个Kubernetes自定义资源(Custom Resource,CR)的实例
kubectl create -f custom-resources.yamlinstallation.operator.tigera.io/default created
apiserver.operator.tigera.io/default created
查看pod运行信息
kubectl get pods -n calico-system查看calico-system 命名空间中运行的所有 Pod 的信息
所有 Pod 都处于 Running 状态,表示它们都正常运行。如果有 Pod 处于 Pending 或 Error 状态,可能需要进一步调查和解决问题。
[root@k8s-master01 ~]# kubectl get pods -n calico-system
NAME                                       READY   STATUS    RESTARTS       AGE
calico-kube-controllers-7dbdcfcfcb-gv74j   1/1     Running   0              120m
calico-node-7k2dq                          1/1     Running   7 (107m ago)   120m
calico-node-bf8kk                          1/1     Running   7 (108m ago)   120m
calico-node-xbh6b                          1/1     Running   7 (107m ago)   120m
calico-typha-9477d4bb6-lcv9f               1/1     Running   0              120m
calico-typha-9477d4bb6-wf4hn               1/1     Running   0              120m
csi-node-driver-44vt4                      2/2     Running   0              120m
csi-node-driver-6867q                      2/2     Running   0              120m
csi-node-driver-x96sz                      2/2     Running   0              120m
以下是calico-system 命名空间各个 Pod 的解释:
calico-kube-controllers-7dbdcfcfcb-gv74j
#Calico 的控制器 Pod,负责处理网络策略和其他控制平面功能。calico-node-7k2dq, calico-node-bf8kk, calico-node-xbh6b
#这些是 Calico 的节点 Pod,负责在每个节点上运行的工作负载。
#在这里,有三个节点 (calico-node-7k2dq, calico-node-bf8kk, calico-node-xbh6b)。calico-typha-9477d4bb6-lcv9f, calico-typha-9477d4bb6-wf4hn
#这是 Typha Pod,用于处理 Calico 网络中的数据平面流量。csi-node-driver-44vt4, csi-node-driver-6867q, csi-node-driver-x96sz
#这些是 CSI(Container Storage Interface)节点驱动程序的 Pods。它们可能与存储卷相关的功能有关。
完结~emmm


 输出)


![[Docker]八.Docker 容器跨主机通讯](http://pic.xiahunao.cn/[Docker]八.Docker 容器跨主机通讯)


:Linux 磁盘与文件管理系统)


