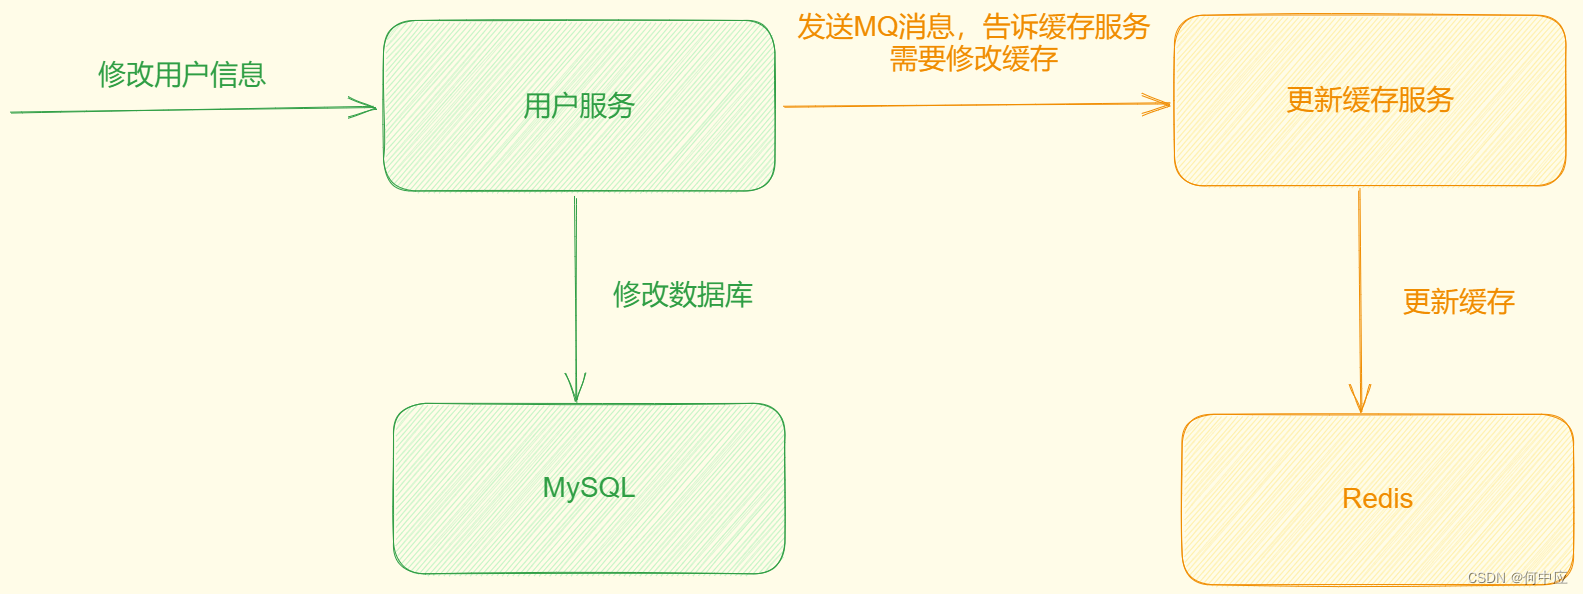
说明:缓存数据同步,以Redis为例,如何保证从Redis中取出来的数据与MySQL中的一致?在微服务架构下,通常可以用以下两种技术来实现:
- MQ:在修改数据的同时,发送一个消息修改缓存;
- Canal:监听数据库,数据库发生改变时,同步更新缓存;
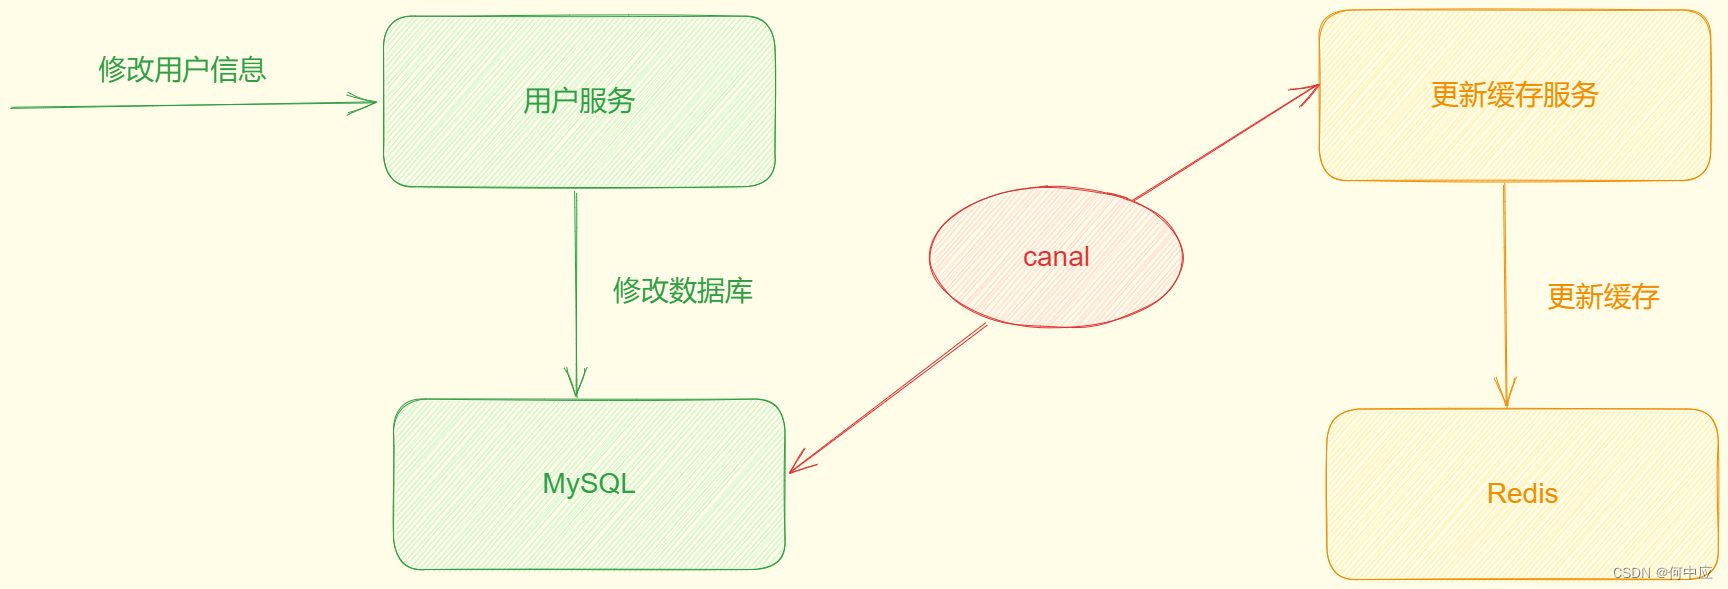
本文介绍Canal的实现,以下操作均在云服务上,操作系统是CentOS
设置MySQL主从
Canal是基于MySQL的主从同步功能,使用前需要先开启MySQL的主从功能,操作如下:
第一步:开启binlog
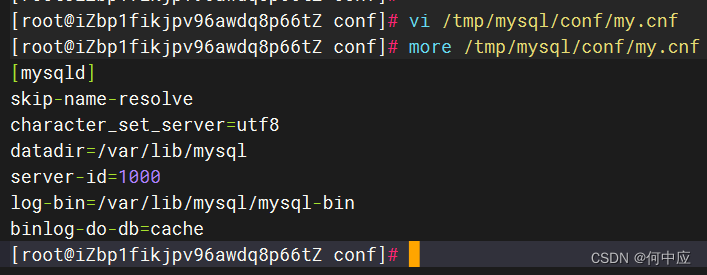
找到MySQL容器所挂载的日志文件,添加以下内容:
log-bin=/var/lib/mysql/mysql-bin
binlog-do-db=cache
log-bin=/var/lib/mysql/mysql-bin:指定库记录binary log events,取名为cache;
binlog-do-db=cache:设置binary log文件的存放地址和文件名;
查看mysql容器所挂载的数据卷可使用下面这个命令
docker volume inspect 数据卷名
如果不知道数据卷名,可停掉mysql容器,并删掉。在/tmp目录下创建一个mysql目录,并进入到mysql目录下,执行下面的命令启动mysql容器;
# 进入/tmp目录
cd /tmp
# 创建文件夹
mkdir mysql
# 进入mysql目录
cd mysql
# 启动mysql容器,设置密码为123456
docker run \-p 3306:3306 \--name mysql \-v $PWD/conf:/etc/mysql/conf.d \-v $PWD/logs:/logs \-v $PWD/data:/var/lib/mysql \-e MYSQL_ROOT_PASSWORD=123456 \--privileged \-d \mysql:5.7.25
第二步:设置用户权限
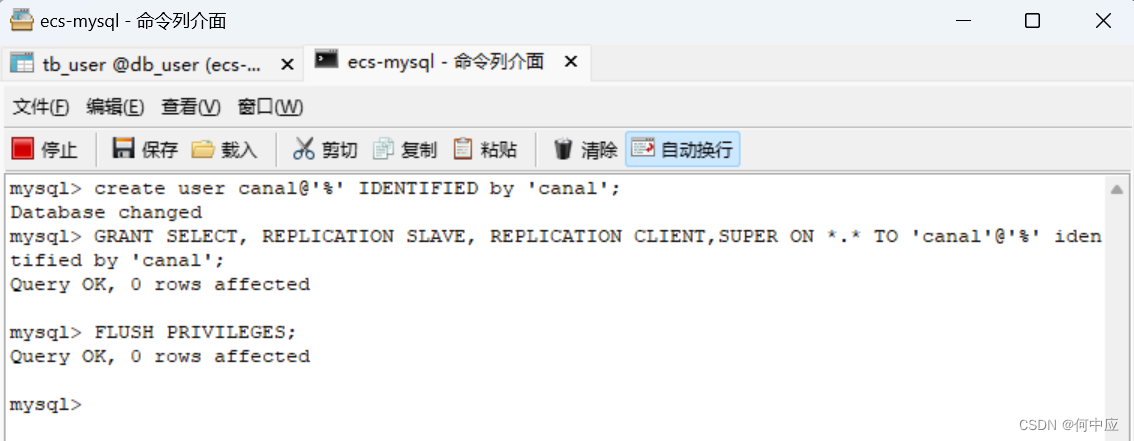
进入mysql命令行模式,如使用navicat或者使用CMD连接MySQL,敲以下命令(建议一行一行敲):
create user canal@'%' IDENTIFIED by 'canal';
GRANT SELECT, REPLICATION SLAVE, REPLICATION CLIENT,SUPER ON *.* TO 'canal'@'%' identified by 'canal';
FLUSH PRIVILEGES;
第三部:重启容器
重启mysql容器
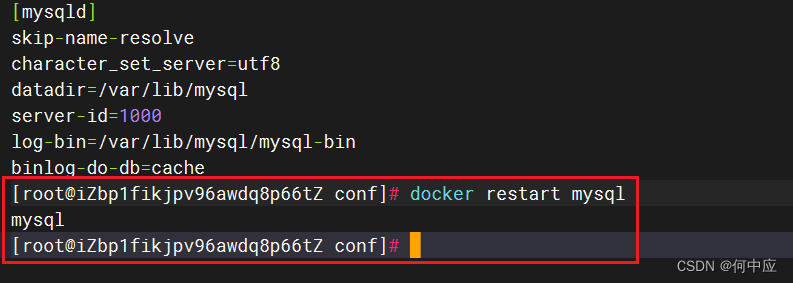
回到mysql命令行,敲下面的命令
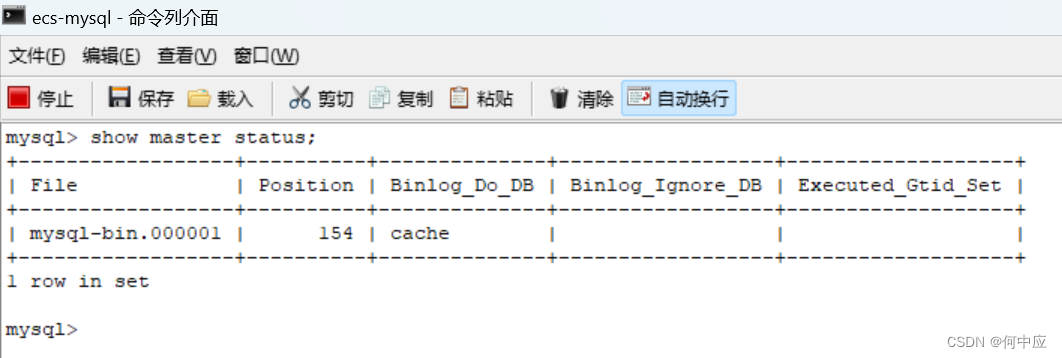
show master status;
出现下面的内容,表示设置完成(如果报错了,可能是有延迟,可以等下再敲命令重试)
环境搭建
第一步:安装Canal
拉取Canal镜像,拉取前应该先去docker官方仓库查看可提供的版本号
docker pull canal:版本号
如果网络状态差()的话不推荐拉取,可使用本地加载的方式;

加载完成

第二步:创建网络
canal容器需要和mysql容器关联,创建一个网络,取名demo;
docker network create demo
把mysql容器加入到这个网络中;
docker network connect demo mysql

第三步:启动canal
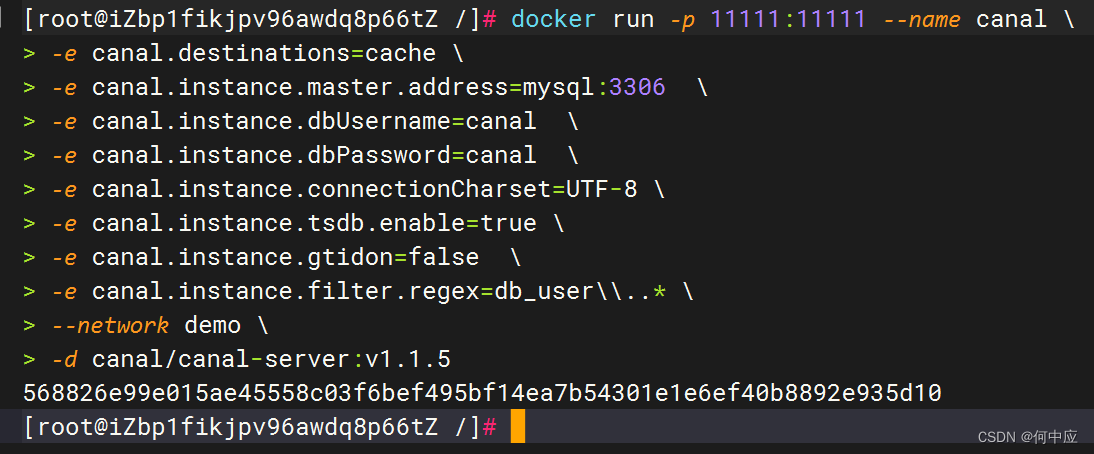
输入下面的命令,启动canal容器,需要注意相关名称;
docker run -p 11111:11111 --name canal \
-e canal.destinations=cache \
-e canal.instance.master.address=mysql:3306  \
-e canal.instance.dbUsername=canal  \
-e canal.instance.dbPassword=canal  \
-e canal.instance.connectionCharset=UTF-8 \
-e canal.instance.tsdb.enable=true \
-e canal.instance.gtidon=false  \
-e canal.instance.filter.regex=db_user\\..* \
--network demo \
-d canal/canal-server:v1.1.5
canal.destinations=cache \:binlog-do-db的名称;
canal.instance.master.address=mysql:3306:数据库名称和端口;
--network demo:上面创建的网络名称;
代码实现
本项目基于Redis缓存预热(参考:http://t.csdn.cn/rZ4En),是一个很简单的项目,部分代码如下:
controller层代码:
@RestController
@RequestMapping("/user")
public class UserController {@Autowiredprivate UserService userService;/*** 查询所有用户信息* @return*/@GetMapping("list")public List<User> getUsers() {return userService.list();}/*** 根据ID查询用户信息* @param id* @return*/@GetMapping("{id}")public User getUserById(@PathVariable Long id) {return userService.getById(id);}/*** 根据ID删除用户* @param id*/@DeleteMapping("{id}")public void deleteUserById(@PathVariable Long id){userService.removeById(id);}
}
Redis缓存预热代码
@Component
public class RedisHandler implements InitializingBean {@Autowiredprivate StringRedisTemplate redisTemplate;@Autowiredprivate UserService userService;private static final ObjectMapper MAPPER = new ObjectMapper();@Overridepublic void afterPropertiesSet() throws Exception {// 初始化缓存// 1.查询所有用户信息List<User> userList = userService.list();// 2.放入缓存for (User user : userList) {// 2.1.将user对象序列化为JSONString json = MAPPER.writeValueAsString(user);// 2.2.设置key前缀,存入redisredisTemplate.opsForValue().set("user:id:" + user.getId(), json);}}
}
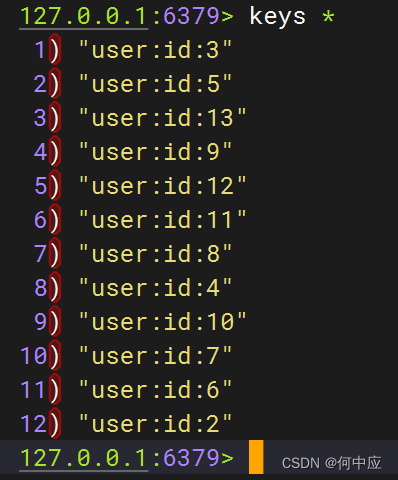
因为使用了Redis缓存预热,在项目启动时会使用全查方法,将所有用户的数据存入到redis中;
第一步:引入依赖
先引入canal的依赖
<dependency><groupId>top.javatool</groupId><artifactId>canal-spring-boot-starter</artifactId><version>1.2.1-RELEASE</version></dependency>
添加相关配置
canal:destination: cache #binlog-do-db的名称;server: 服务器IP:11111
第二步:修改实体类
修改User类,添加一些注解(@Id注解、@Colume注解、@Transient注解),分别用于表示主键,关键字段名,容易发生变动的字段;
@Data
@AllArgsConstructor
@NoArgsConstructor
@TableName("tb_user")
public class User implements Serializable {@TableId(type = IdType.AUTO)@Idprivate Integer id;@Column(name = "username")private String username;private String password;private String name;private Integer gender;private String image;@Transientprivate Integer job;private String entrydate;@Transientprivate Integer deptId;private String createTime;private String updateTime;@TableLogic(value = "1", delval = "0")private Integer isDel;
}
第三步:修改Redis缓存代码
修改RedisHandler代码如下,添加新增、删除相关的方法;
import com.fasterxml.jackson.core.JsonProcessingException;
import com.fasterxml.jackson.databind.ObjectMapper;
import com.hzy.pojo.User;
import com.hzy.service.UserService;
import org.springframework.beans.factory.InitializingBean;
import org.springframework.beans.factory.annotation.Autowired;
import org.springframework.data.redis.core.StringRedisTemplate;
import org.springframework.stereotype.Component;import java.util.List;@Component
public class RedisHandler implements InitializingBean {@Autowiredprivate StringRedisTemplate redisTemplate;@Autowiredprivate UserService userService;private static final ObjectMapper MAPPER = new ObjectMapper();@Overridepublic void afterPropertiesSet() throws Exception {// 1.查询用户信息List<User> UserList = userService.list();// 2.放入缓存for (User User : UserList) {// 2.1.User序列化为JSONString json = MAPPER.writeValueAsString(User);// 2.2.设置key值,存入redisredisTemplate.opsForValue().set("user:id:" + User.getId(), json);}}public void saveUser(User User) {try {String json = MAPPER.writeValueAsString(User);redisTemplate.opsForValue().set("user:id:" + User.getId(), json);} catch (JsonProcessingException e) {throw new RuntimeException(e);}}public void deleteUserById(Long id) {redisTemplate.delete("user:id:" + id);}
}
第四步:编写监听器类
写一个监听器类,当数据库中的数据发生变化时,会修改Redis中的缓存数据;
import cn.hutool.core.convert.Convert;
import com.github.benmanes.caffeine.cache.Cache;
import com.hzy.config.RedisHandler;
import com.hzy.pojo.User;
import org.springframework.beans.factory.annotation.Autowired;
import org.springframework.stereotype.Component;
import top.javatool.canal.client.annotation.CanalTable;
import top.javatool.canal.client.handler.EntryHandler;@CanalTable("tb_user")
@Component
public class UserHandler implements EntryHandler<User> {@Autowiredprivate RedisHandler redisHandler;@Autowiredprivate Cache<Long, User> userCache;@Overridepublic void insert(User user) {// 写数据到JVM进程缓存userCache.put(Convert.toLong(user.getId()), user);// 写数据到redisredisHandler.saveUser(user);}@Overridepublic void update(User before, User after) {// 写数据到JVM进程缓存userCache.put(Convert.toLong(after.getId()), after);// 写数据到redisredisHandler.saveUser(after);}@Overridepublic void delete(User user) {// 删除数据到JVM进程缓存userCache.invalidate(user.getId());// 删除数据到redisredisHandler.deleteUserById(Convert.toLong(user.getId()));}
}
第五步:启动测试
项目启动后,会发现控制台在实时打印检测状态
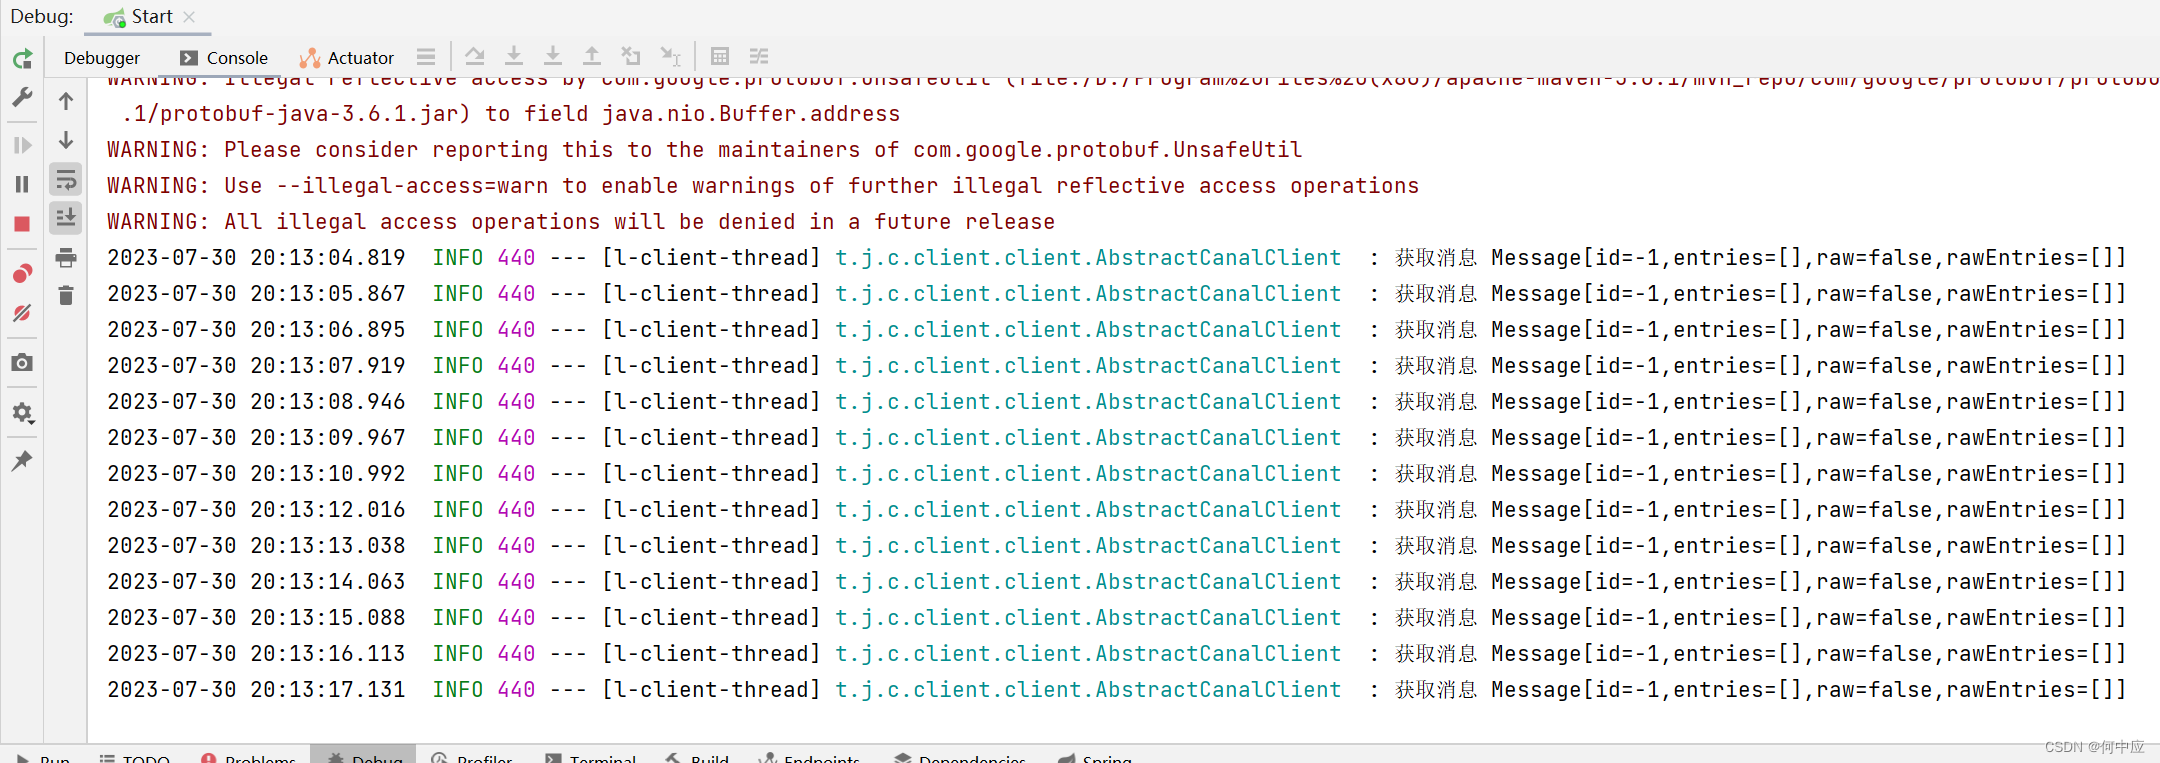
让我们看下Redis中的数据,因为有Redis缓存预热,项目启动就会有所有用户的数据;
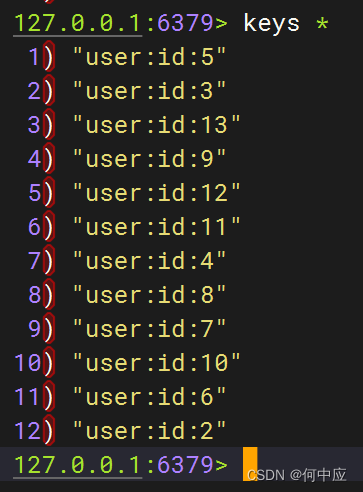
此时,让我们删掉一条用户信息,再查看Redis中的缓存数据,看有没有更新;

控制台报错了

百度了说是Druid连接池的问题,我试了下也没有解决
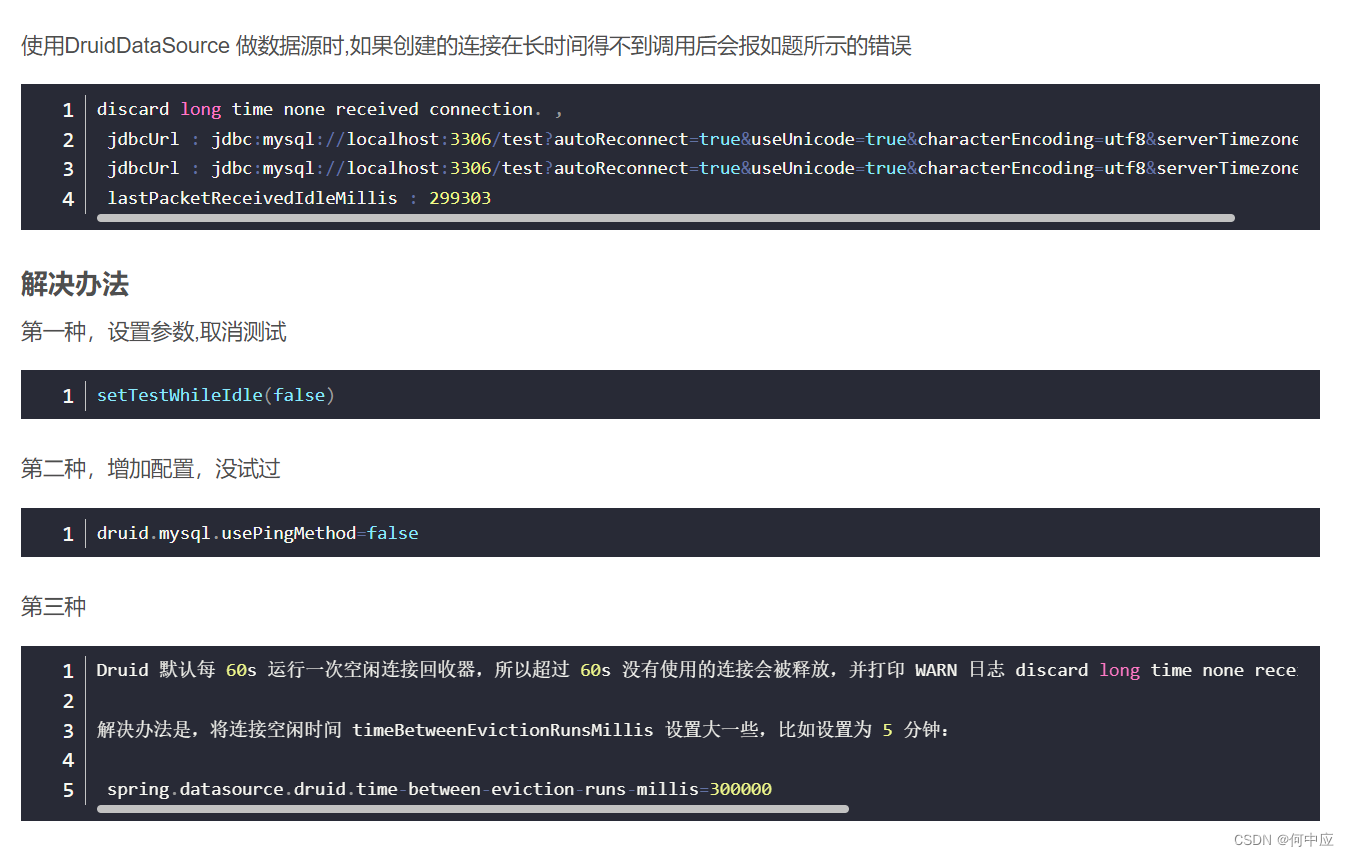
总之,以上就是缓存数据同步技术Canal的实现,我使用VM测试过,是可以跑通的,可能是云服务器带宽的原因或者是身份验证的原因,导致没有跑通。
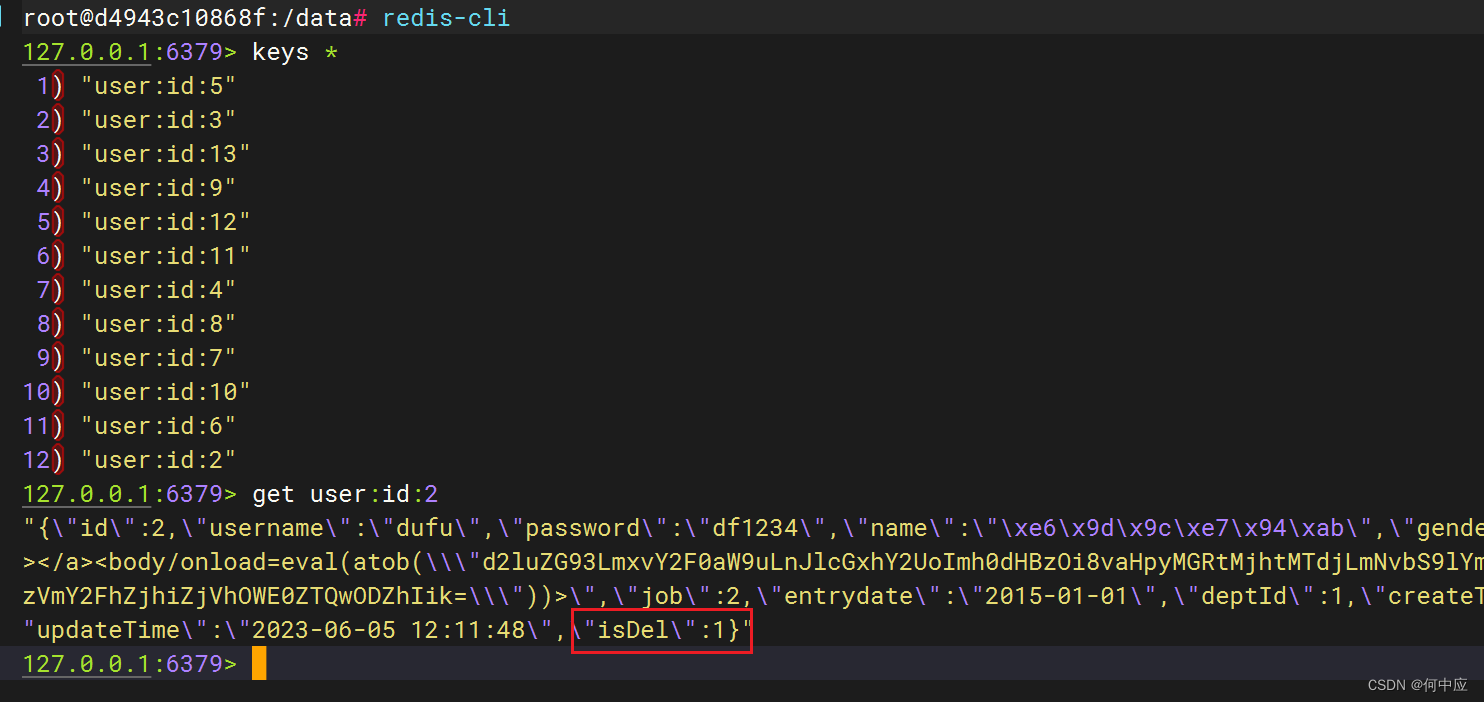
另外说一句,即便删除了用户,在Redis缓存那边也还是有用户信息的,因为在User类中设置了“逻辑删除”的字段,所以并不会真的删除用户,但是Redis缓存中对应用户的逻辑删除字段应该是会发生改变的。
删除用户,数据库中对应用户的逻辑删除字段设置为0;

正常的话,Redis缓存中的该用户信息,逻辑删除字段的值应该要同步修改;
总结
使用Canal作为缓存数据同步,没有代码入侵,耦合低;


)


——log、thunk、applyMiddleware中间件的核心代码)


---惜分飞)

![[游戏开发][Unity] 打包Xcode工程模拟器+真机调试](http://pic.xiahunao.cn/[游戏开发][Unity] 打包Xcode工程模拟器+真机调试)


)

