http://wed.xjx100.cn/news/139397.html?action=onClick
https://www.bilibili.com/read/cv23429835/
https://www.php.cn/faq/498307.html
安装iis

选择卸载程序
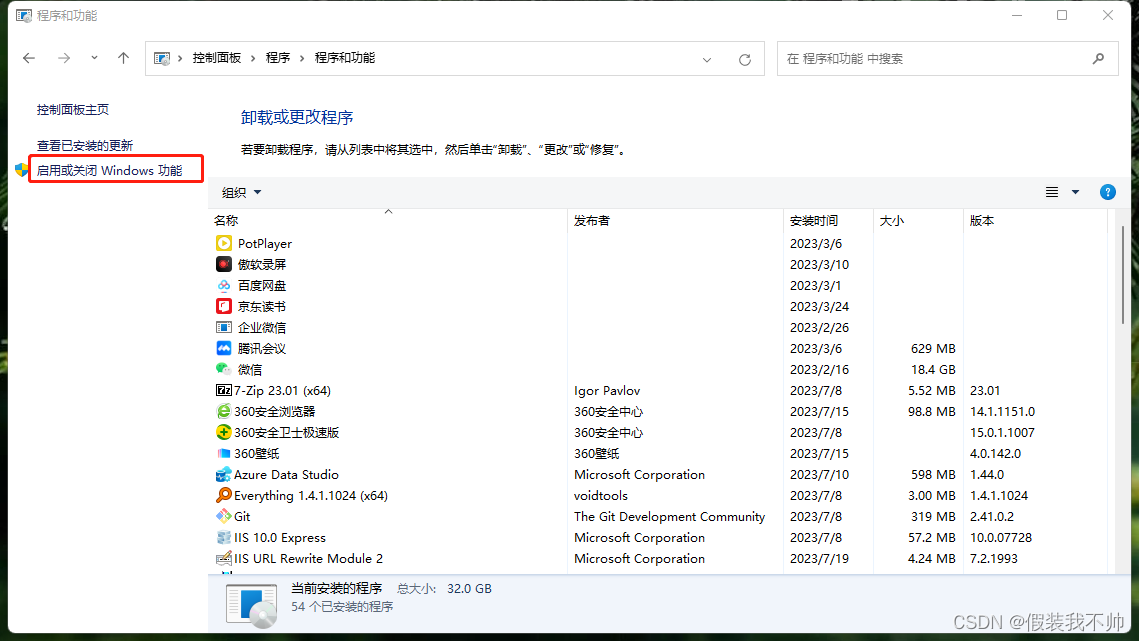
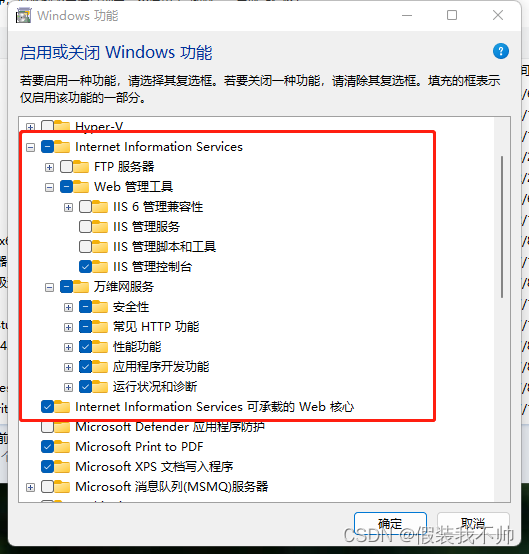
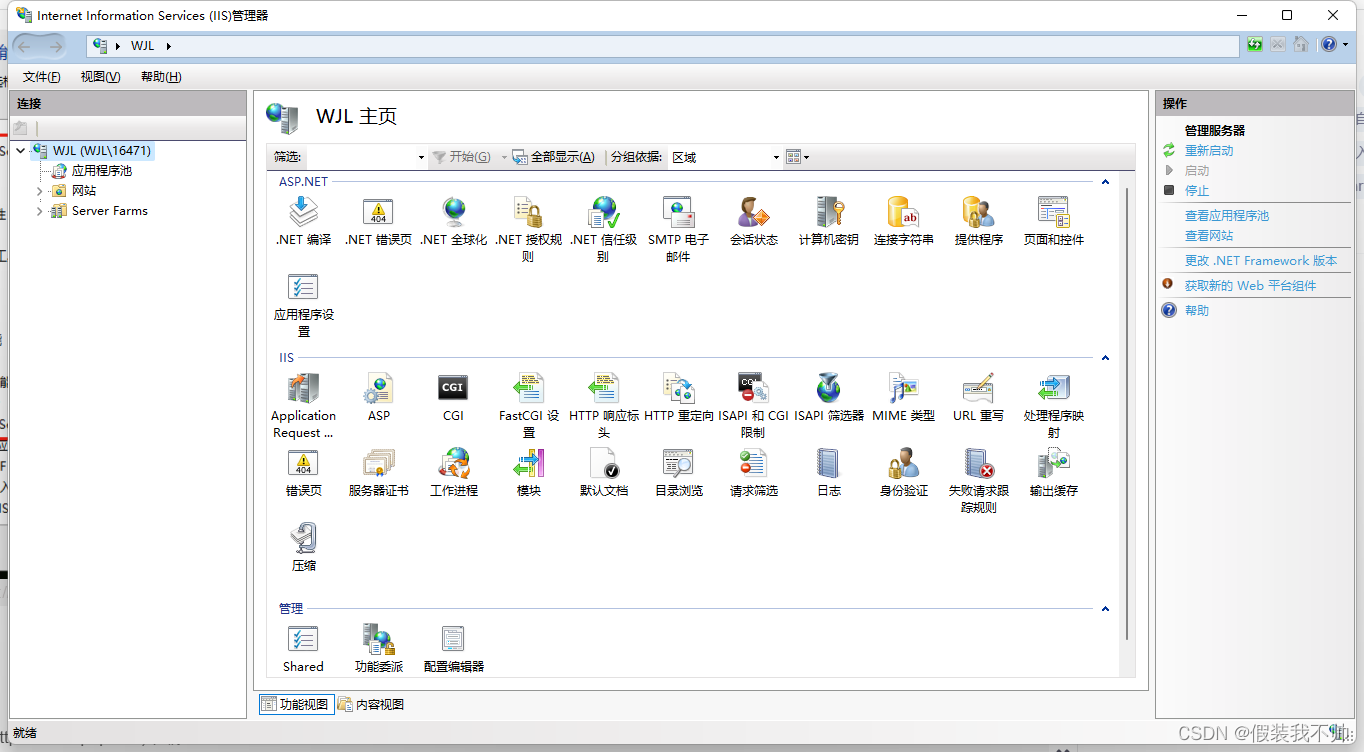
安装php
官网https://www.php.net/下载
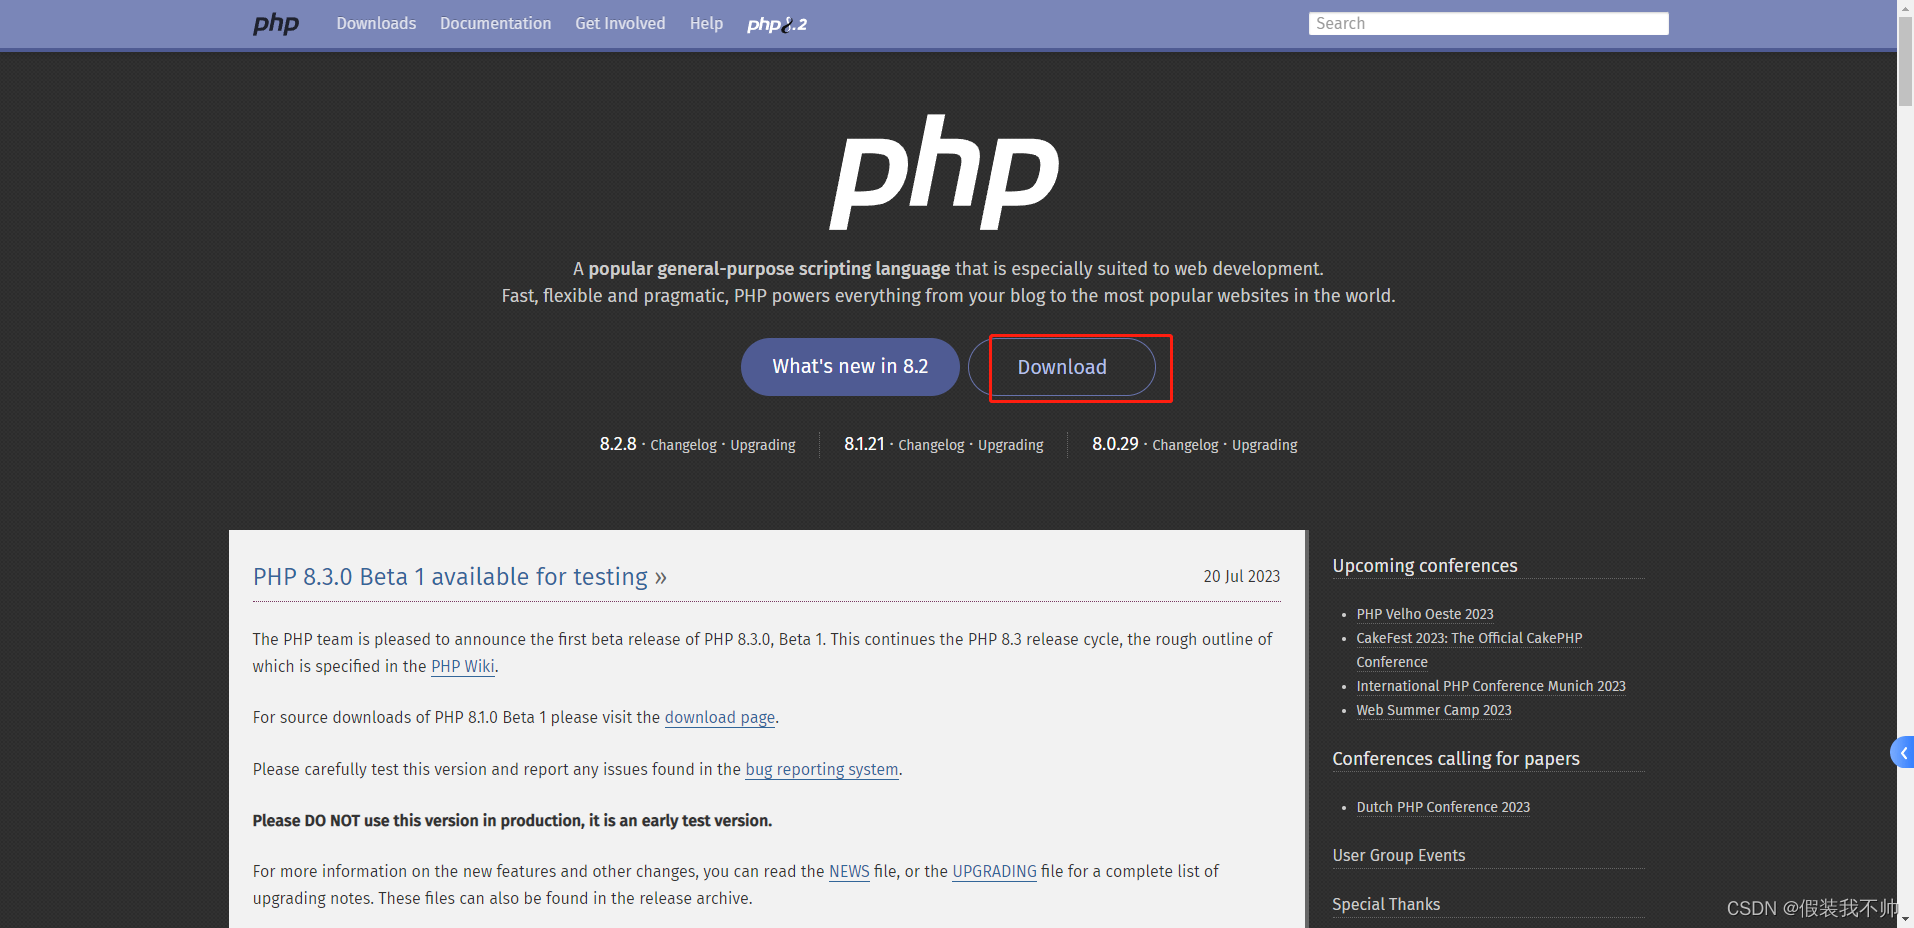

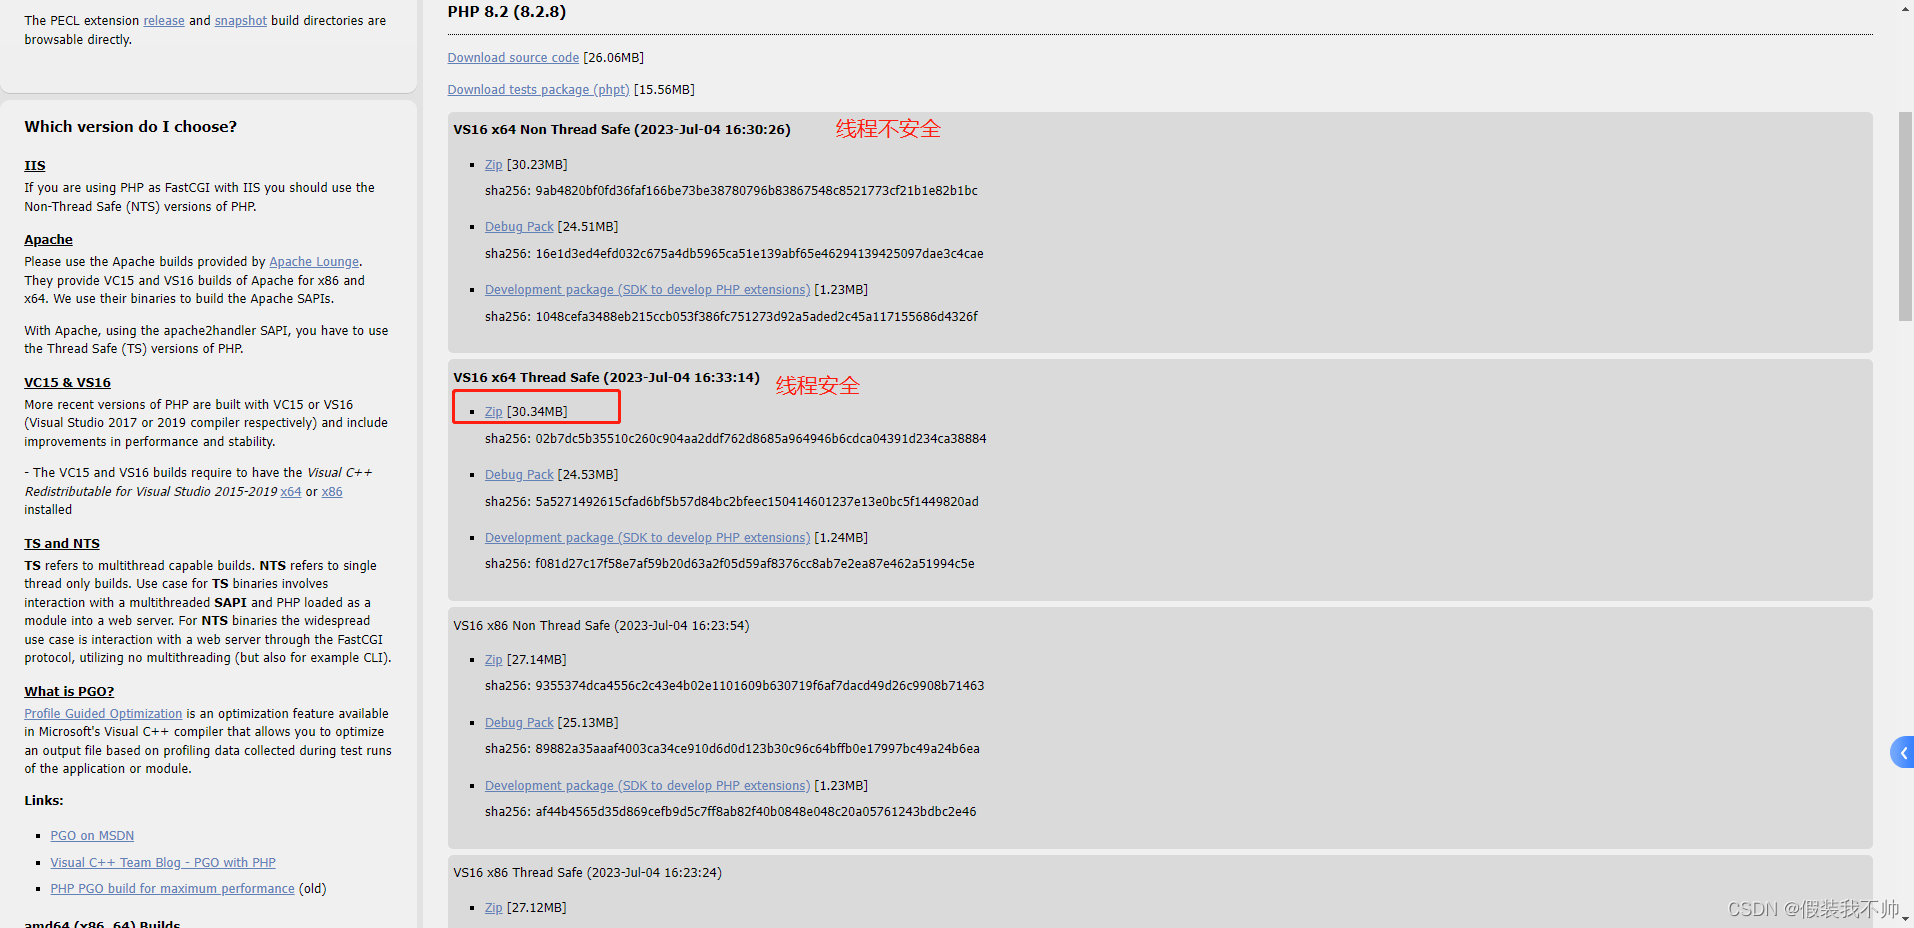
选择线程安全
国内地址
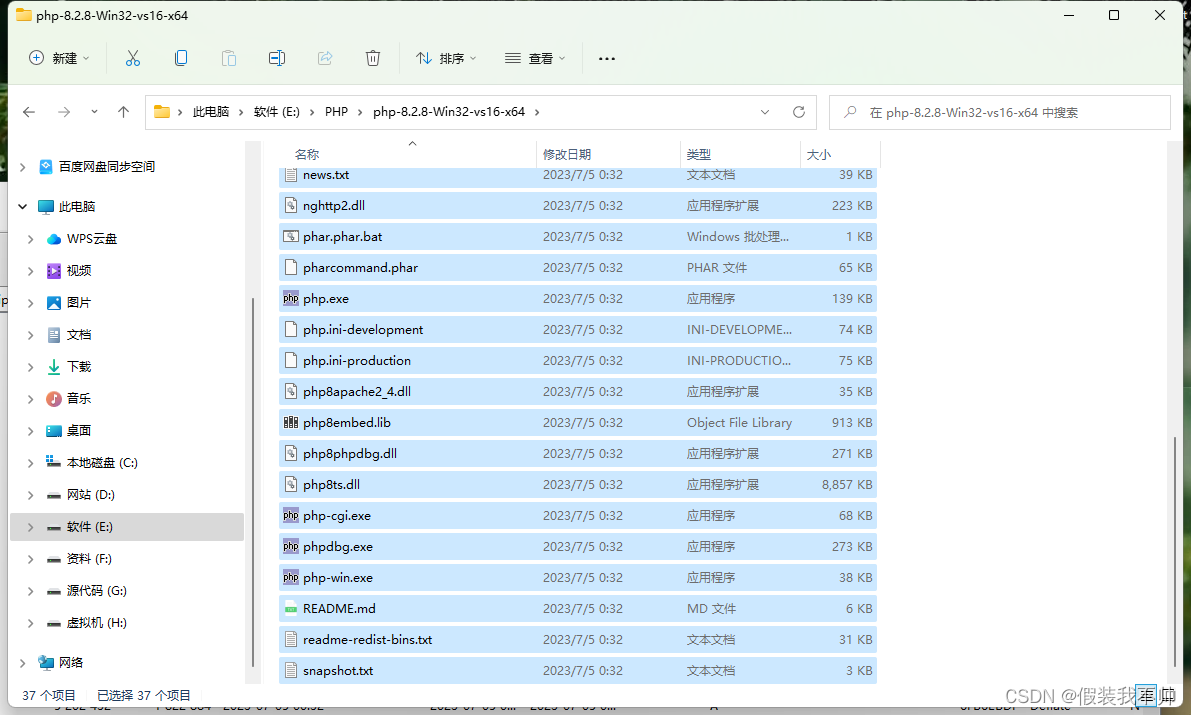
下载完成后解压放到想存放的路径
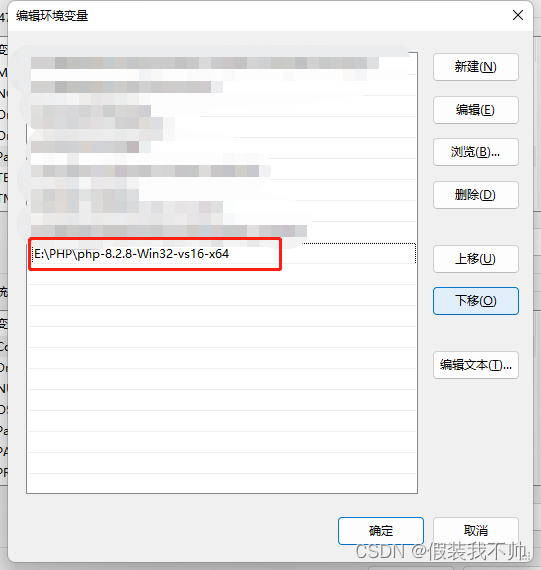
添加path环境变量
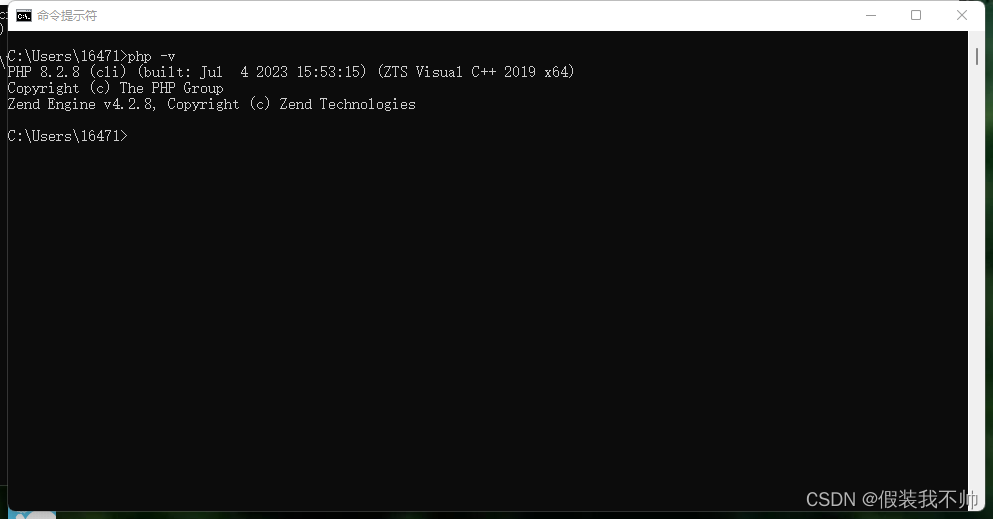
命令行中输入php -v
安装xdebug
Xdebug 要下载与 php 对应的版本,我们下载的 php 版本为 8.2.8,而且是 thread safe 版本,对应的是带 TS 的版本。
xdebug官网
github
下载页面
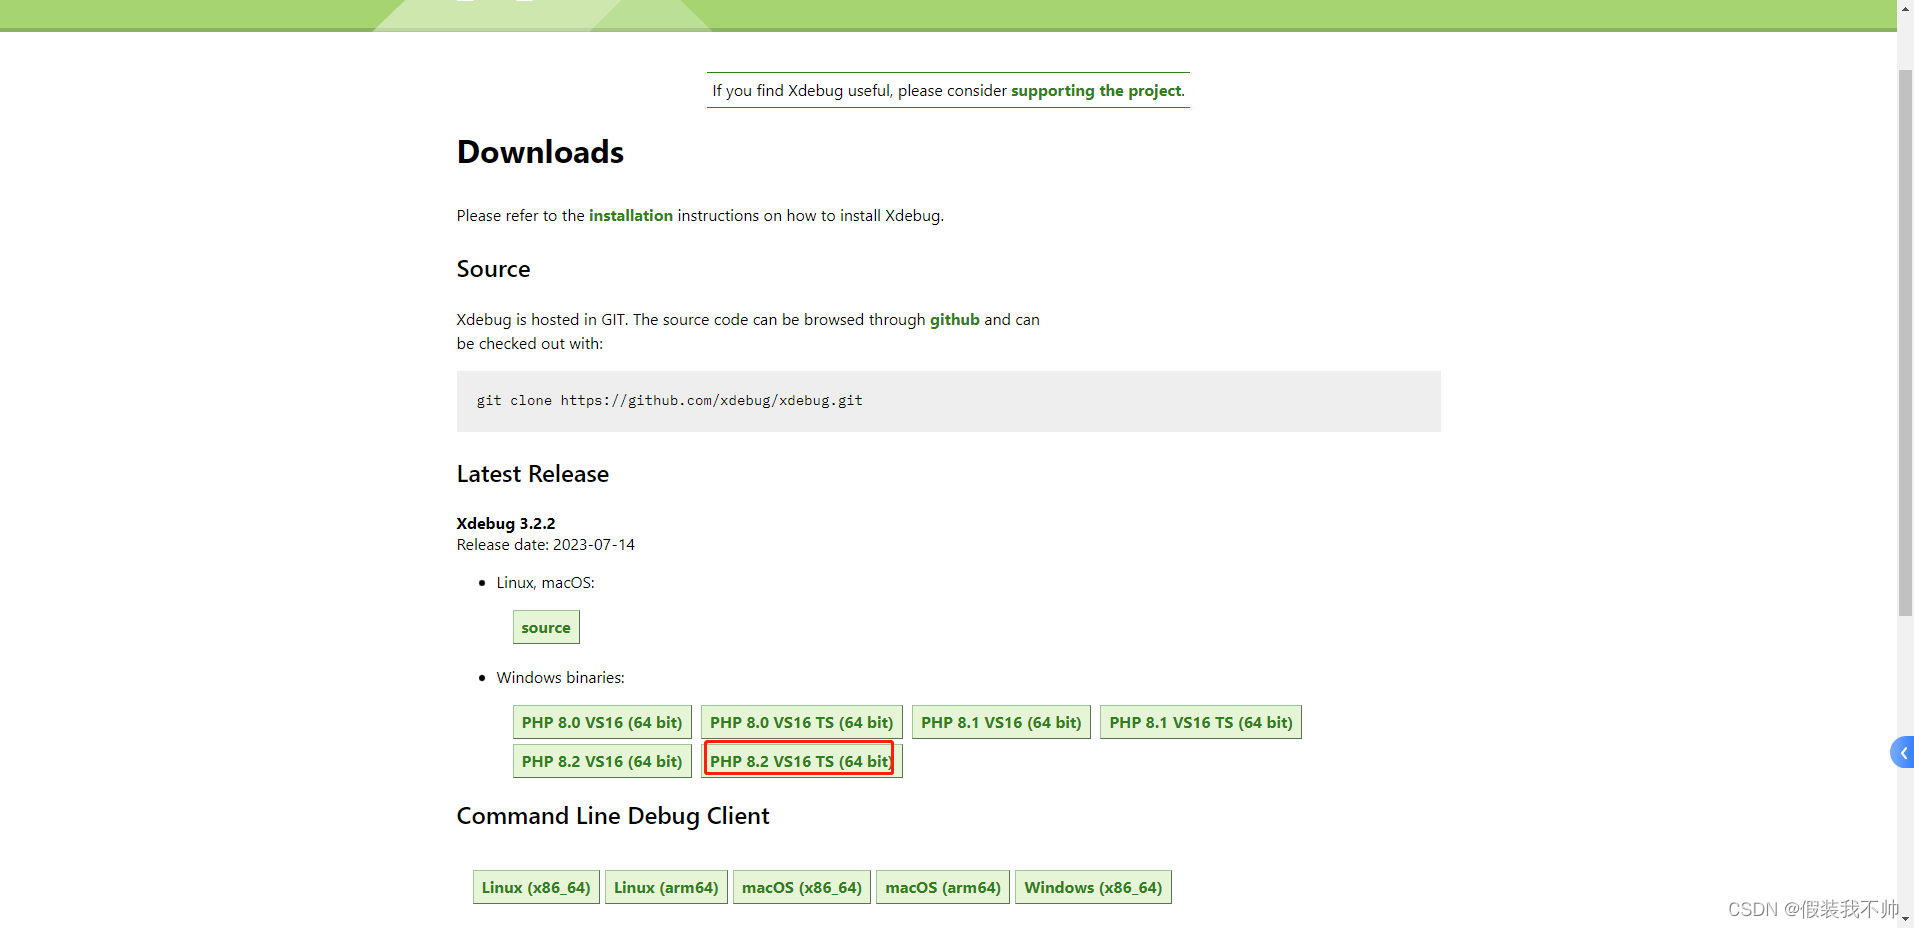
把下载的 php_xdebug-3.2.2-8.2-vs16-x86_64.dll 文件,复制到 php 根目录下的 ext 目录中,然后在 php 根目录下找到 php.ini 文件,有如下两种情况。
有 php.ini 文件
直接在 php 目录的 php.ini 的文件末尾添加如下配置即可(记得修改路径)。
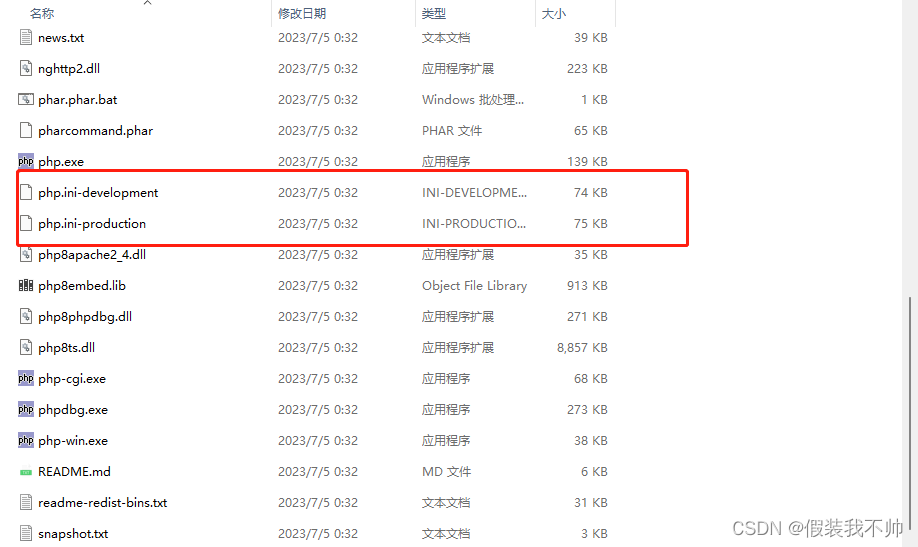
没有php.ini文件
这里我们可以在 php 根目录下找到 php.ini-development (开发环境用)与 php.ini-production(生产环境用)两个文件。这里虽然没有 php.ini 文件,而 php 还是会去加载 php.ini 作为配置文件的。我们只要选择其中一个,把它备份,然后重命名为php.ini,最后加入自己个性化的配置即可。这里建议将 php.ini-development 文件备份重命名为 php.ini 就行,如下图所示:
开启扩展

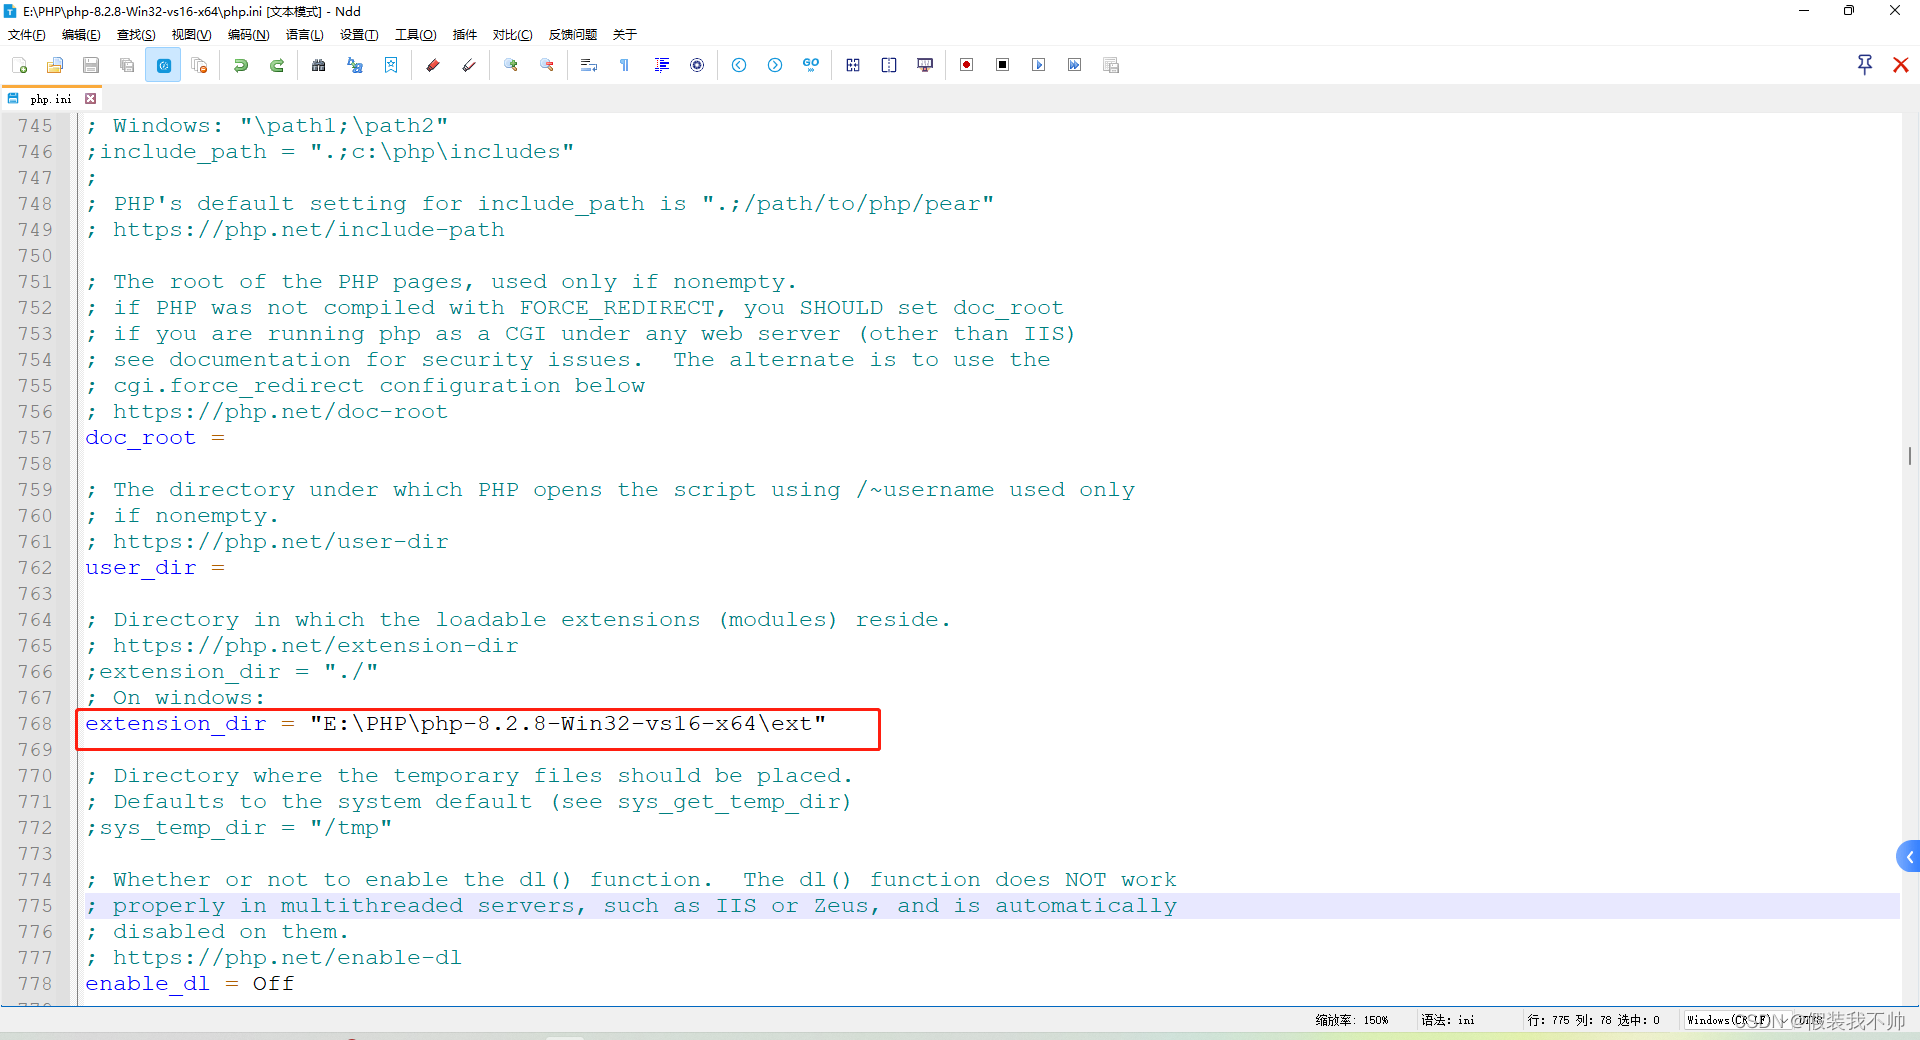
;指定xdebug扩展位置
zend_extension=php_xdebug-3.2.2-8.2-vs16-x86_64.dll;配置xdebug
[xdebug]
;配置xdebug主机地址
xdebug.client_host = localhost
;监听端口
xdebug.client_port = 9103
;idekey
xdebug.idekey = VSCODE
;调试模式建议设置成debug可以打断点调试,默认是default
xdebug.mode = debug,trace
以上就是最少的xdebug配置了,想知道更多xdebug配置介绍可以去官网看看 Xdebug: Documentation » All settings ,里面都有介绍什么配置有什么功能。
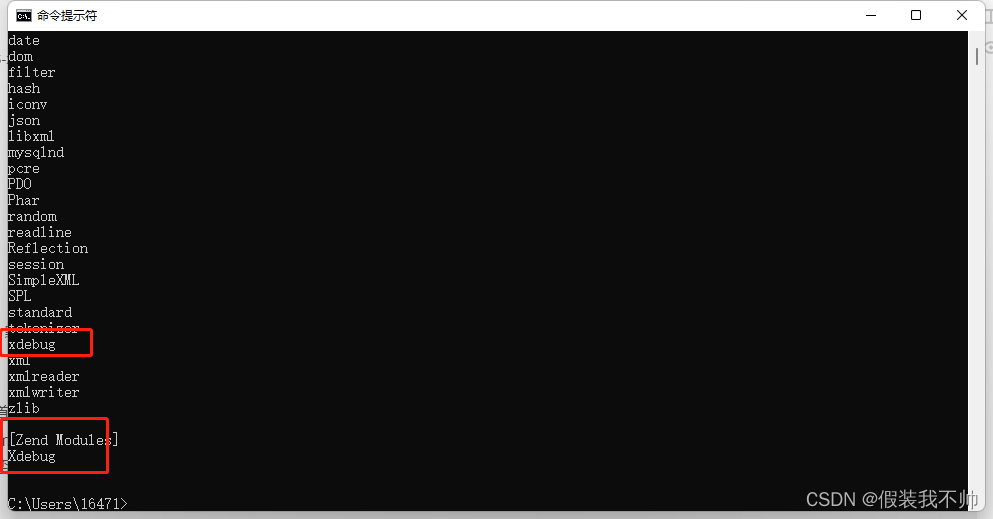
最后可以在命令行输入php -m 查看是否安装xdebug成功
iis开启php支持
新建网站
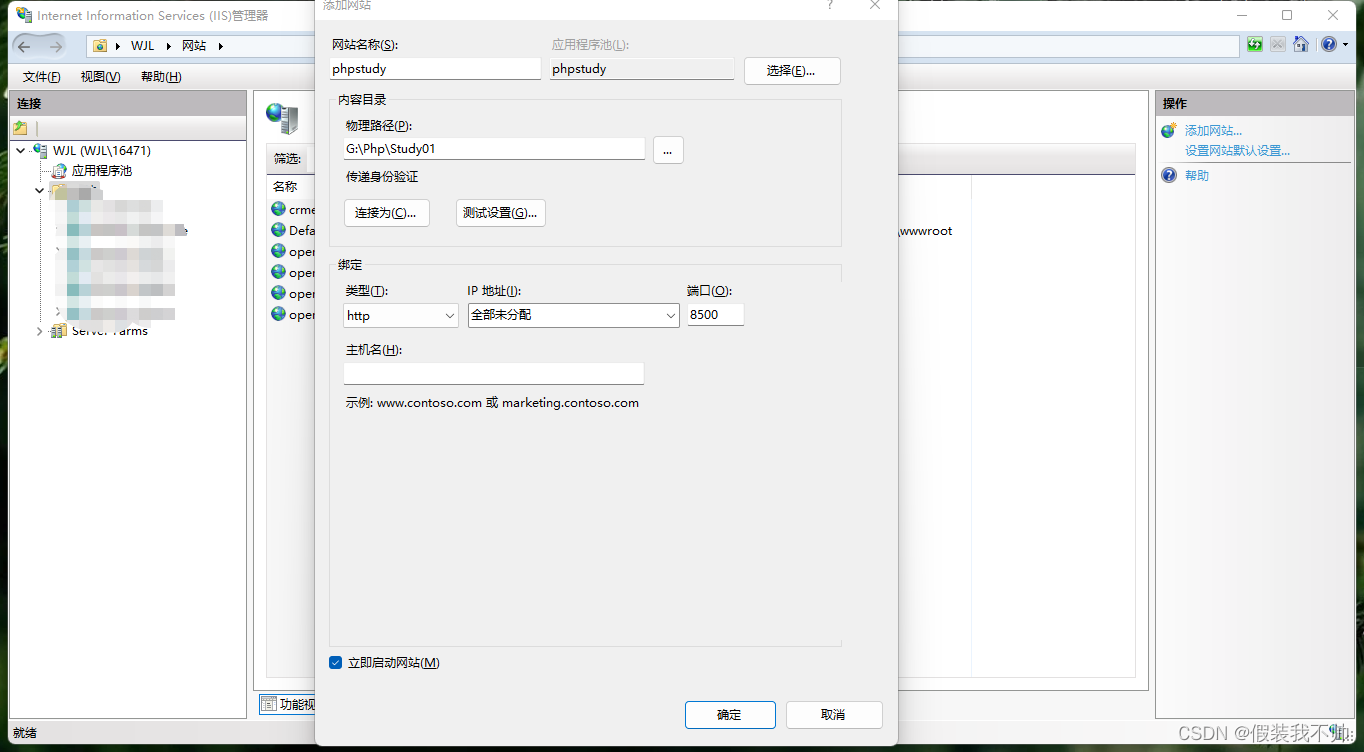
Windows默认自带的Web服务器是IIS(Internet Information Services),支持ASP和.Net(aspx),如果要支持对PHP文件的解析,可以通过以下两种方式:
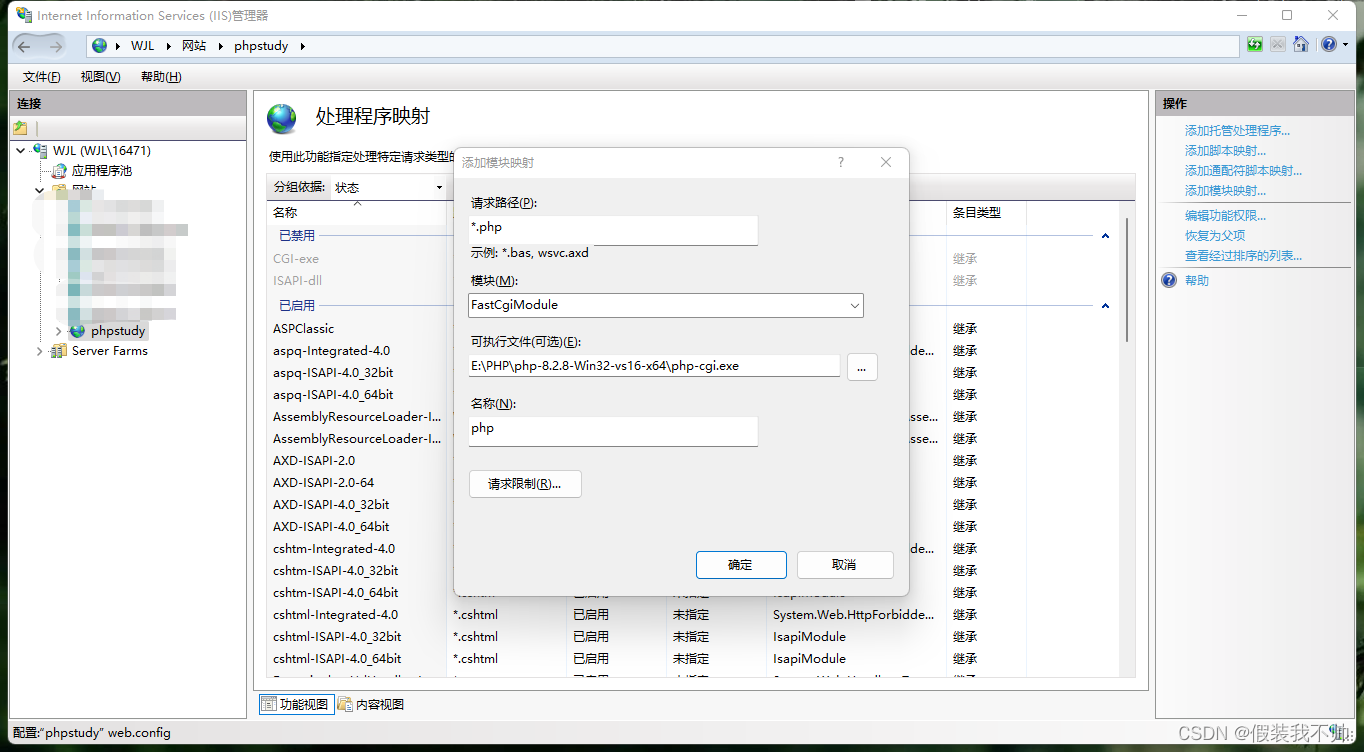
(1)通过FastCGI,将扩展名为.php的文件指定到PHP官方的fast CGI引擎中去解析。
(2)使用反向代理,将指定网站反向代理到Apache服务商,或者php-fpm服务进程中。
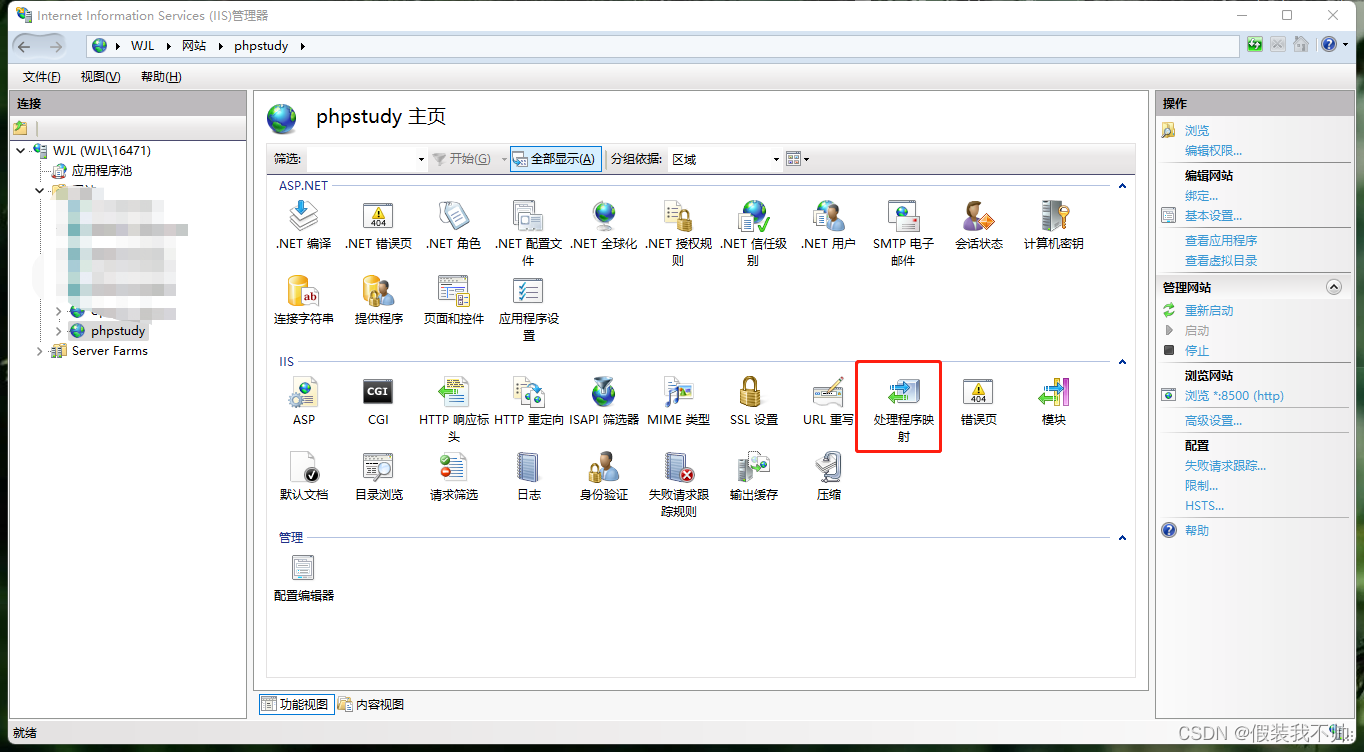
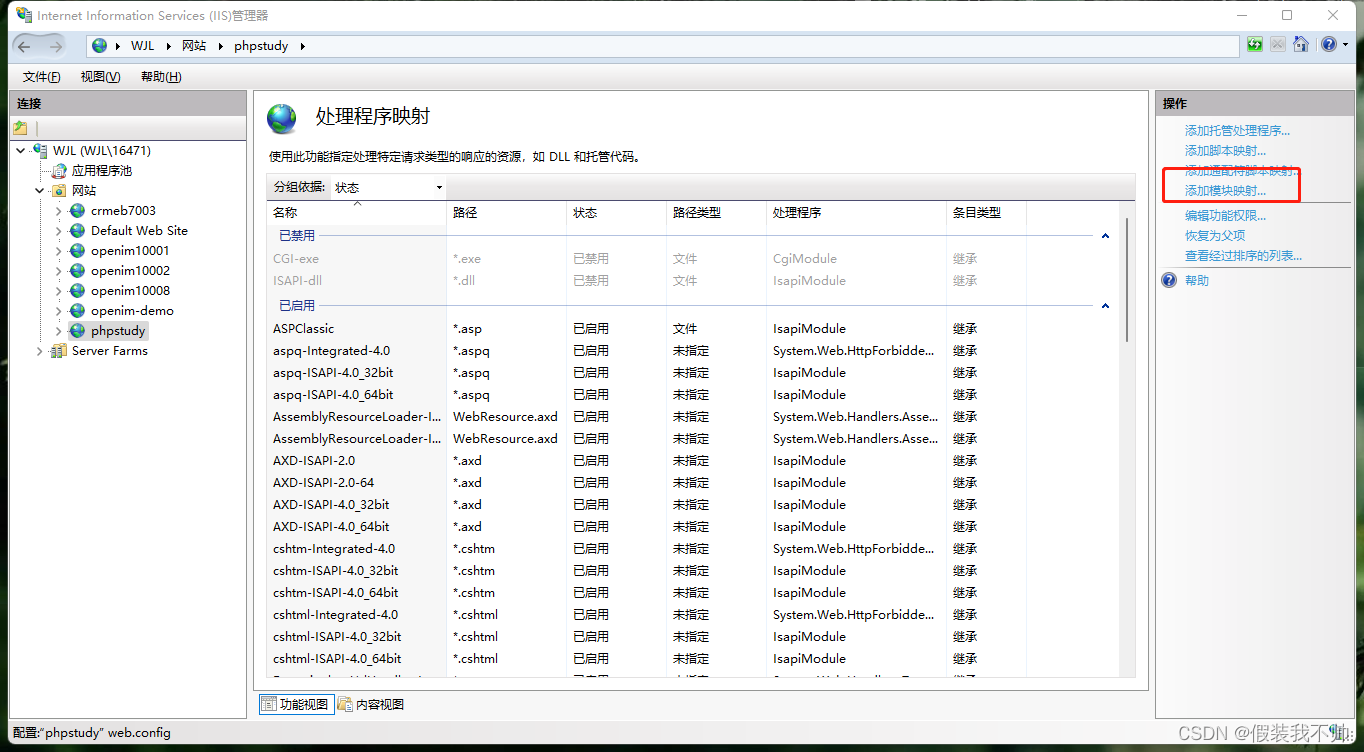
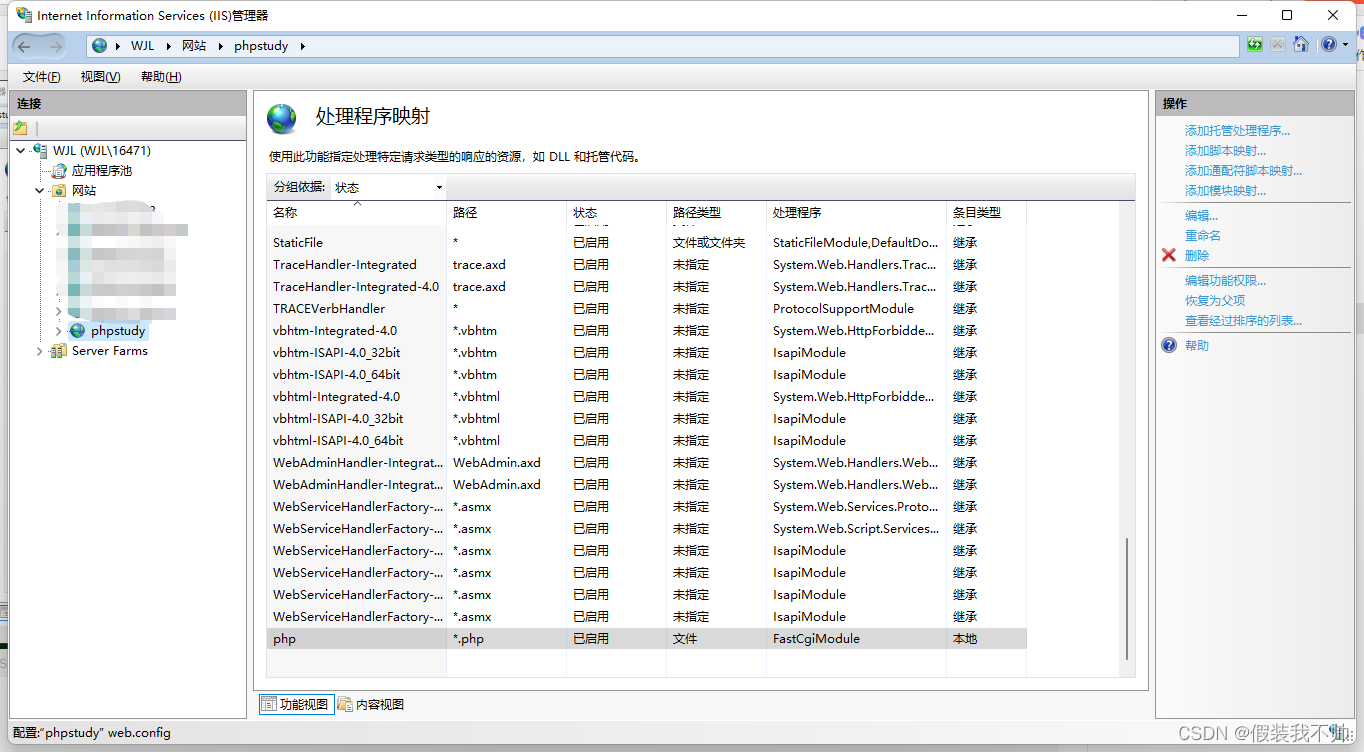
我们这里通过第一种方式,即FastCGI,在IIS的全局,或者指定网站,选择“处理程序映射”这个功能模块。
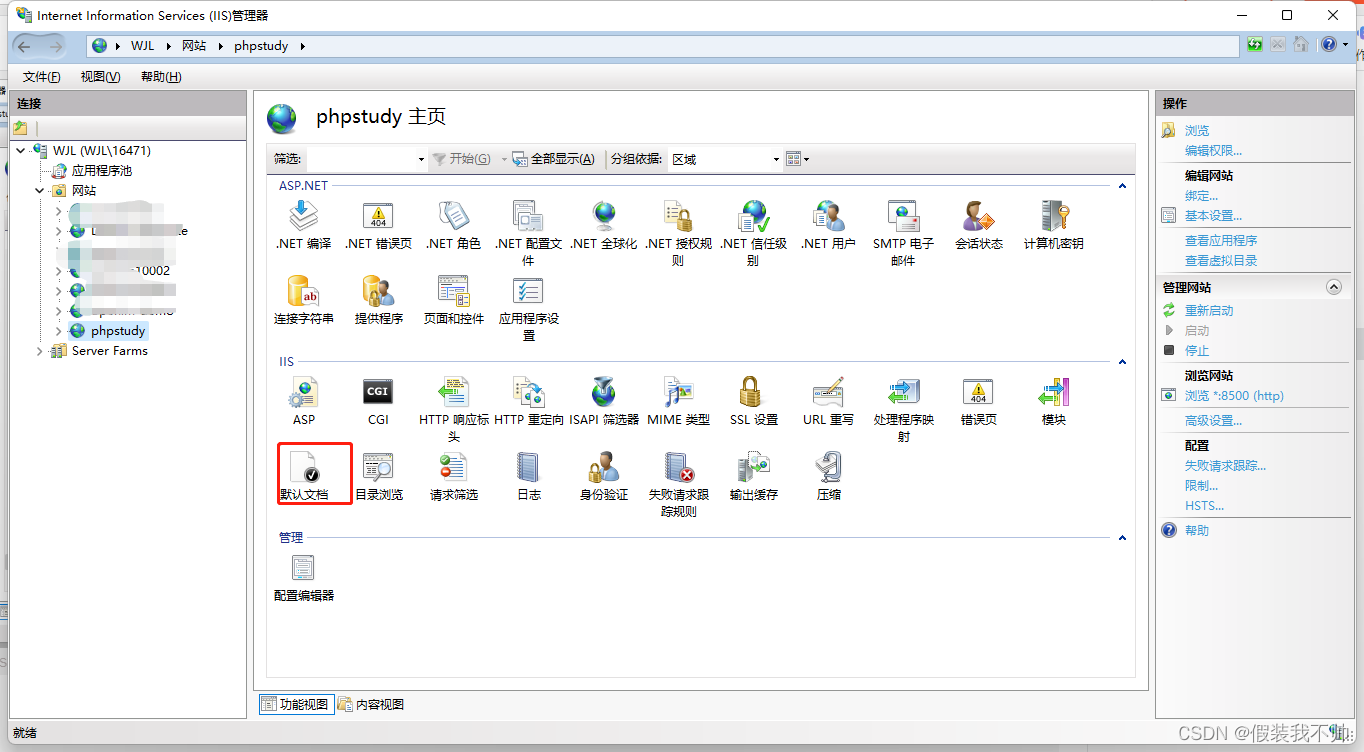
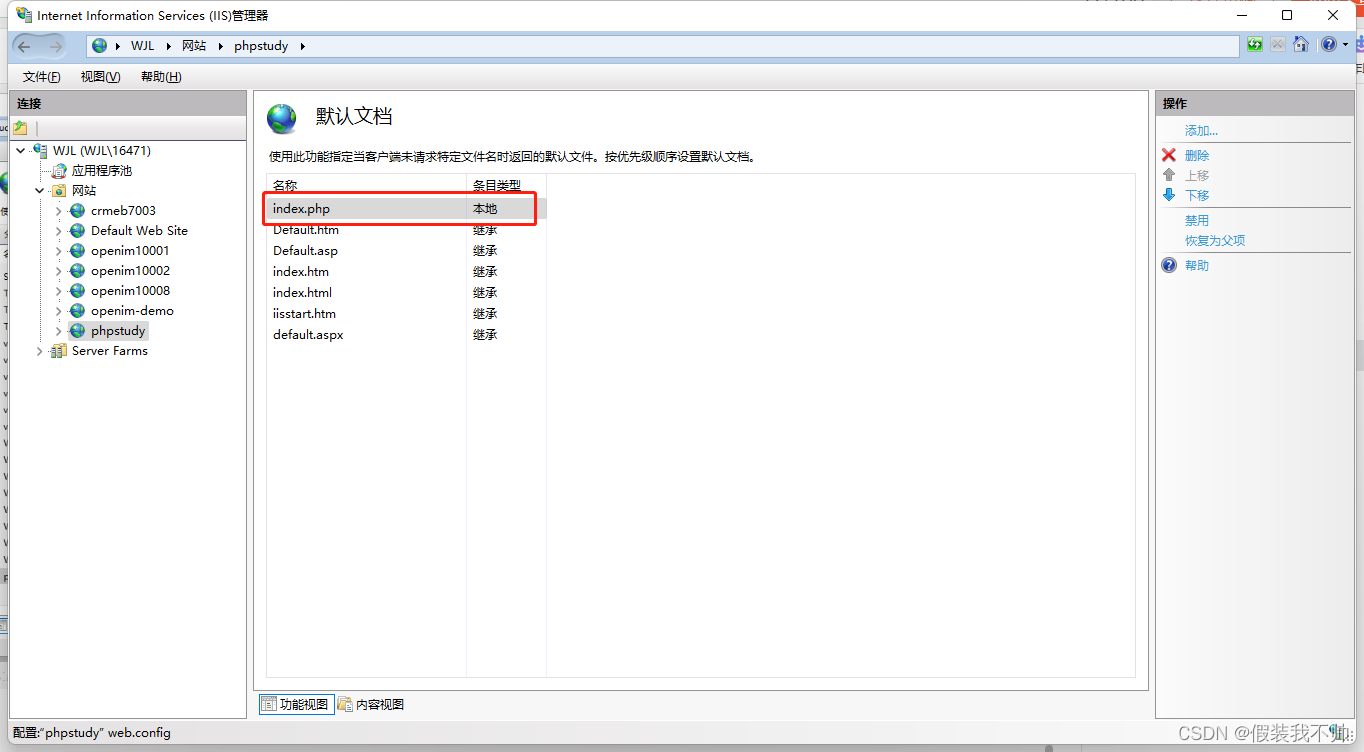
设置默认页面
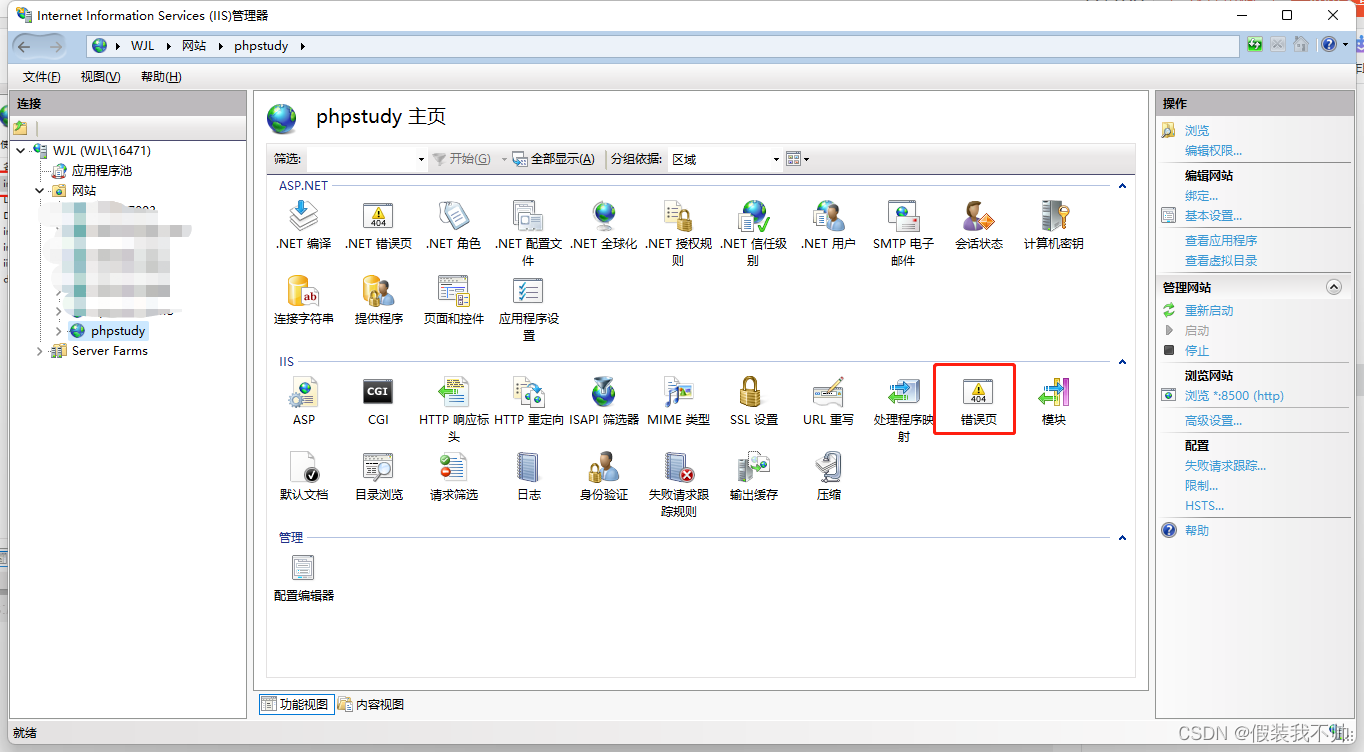
处理500错误
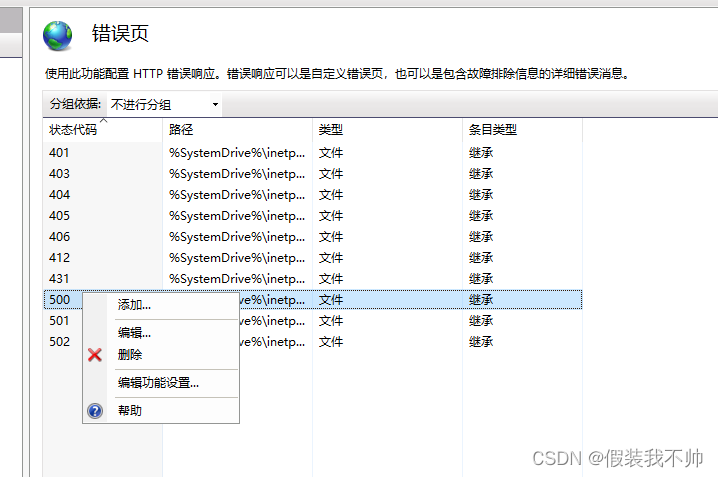
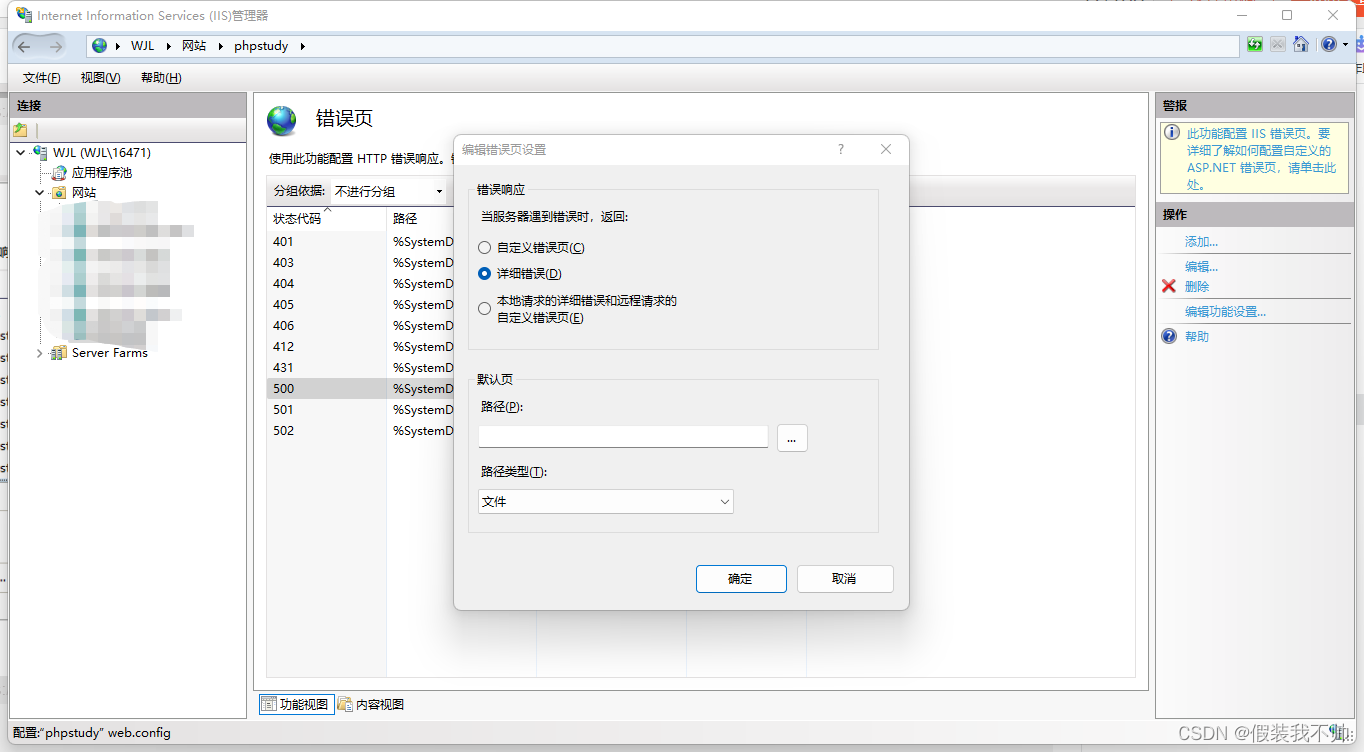
新建index.php内容如下
<?php
phpinfo();
开启php.ini下
short_open_tag = On
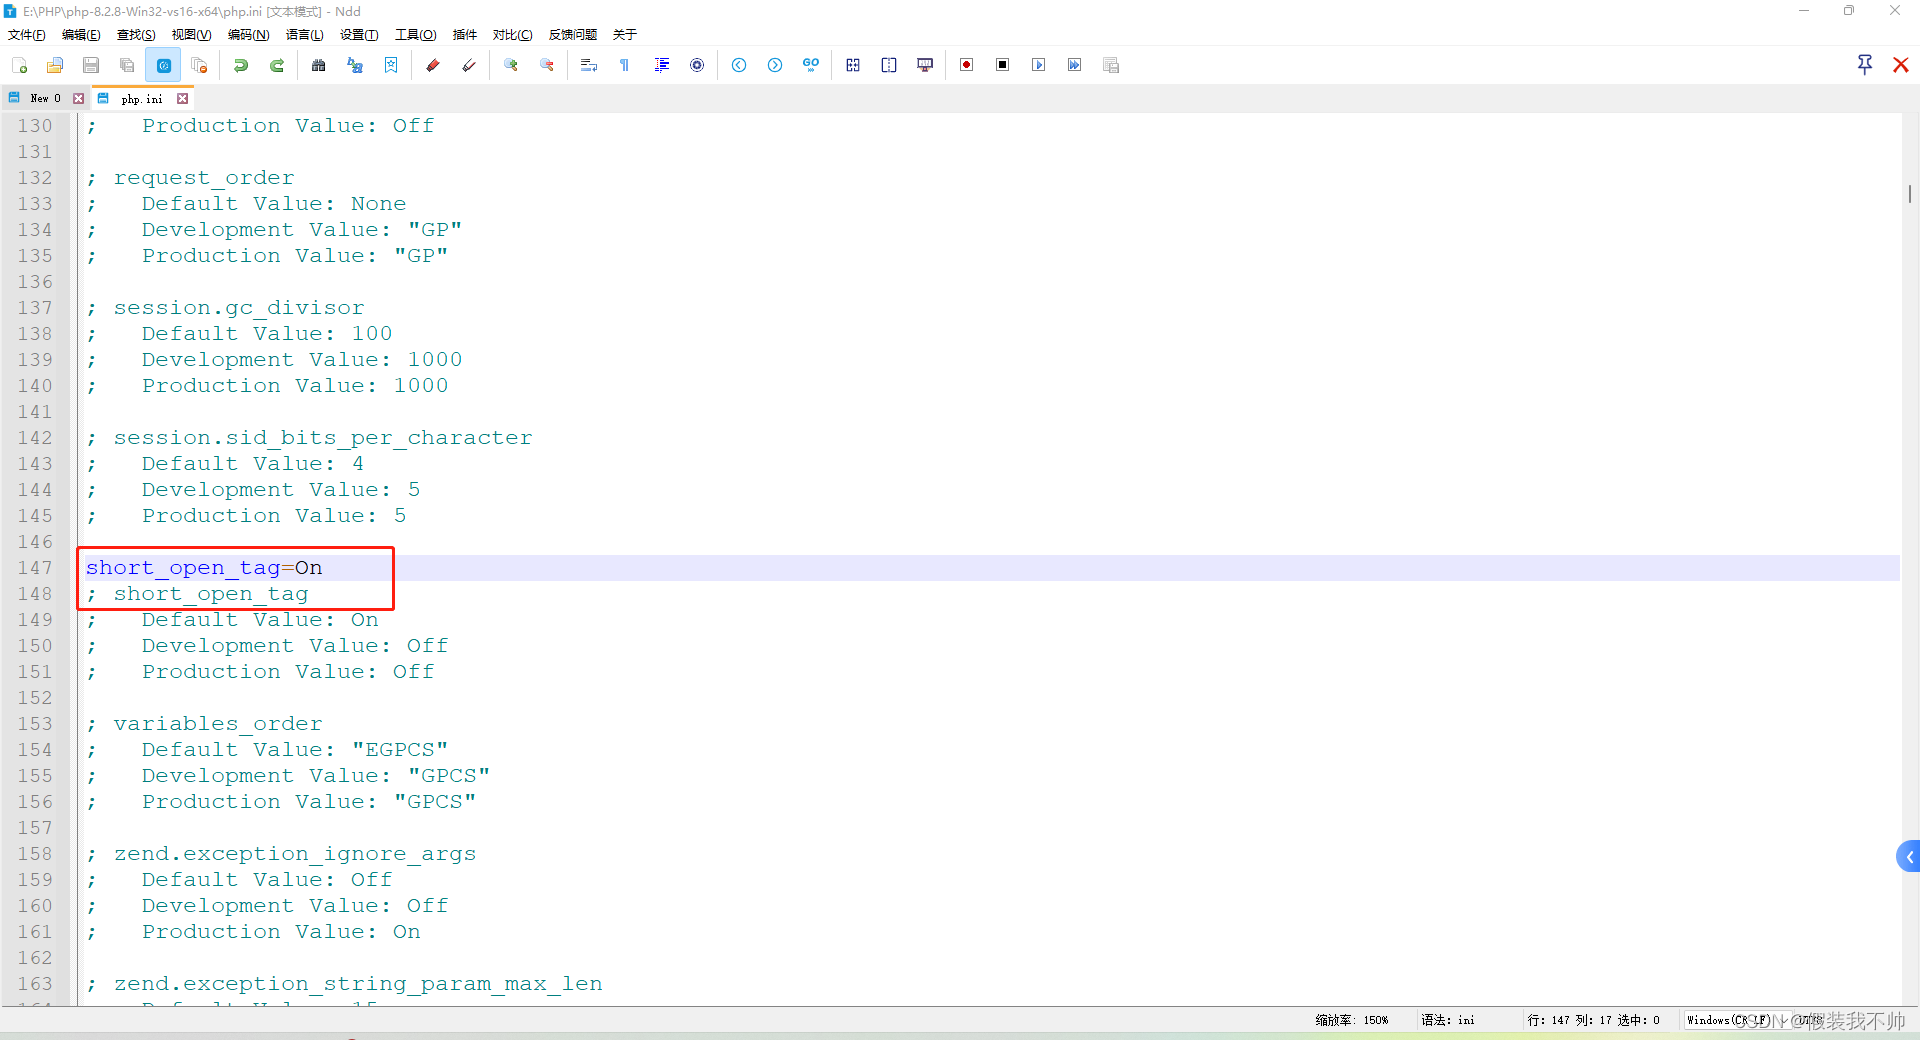
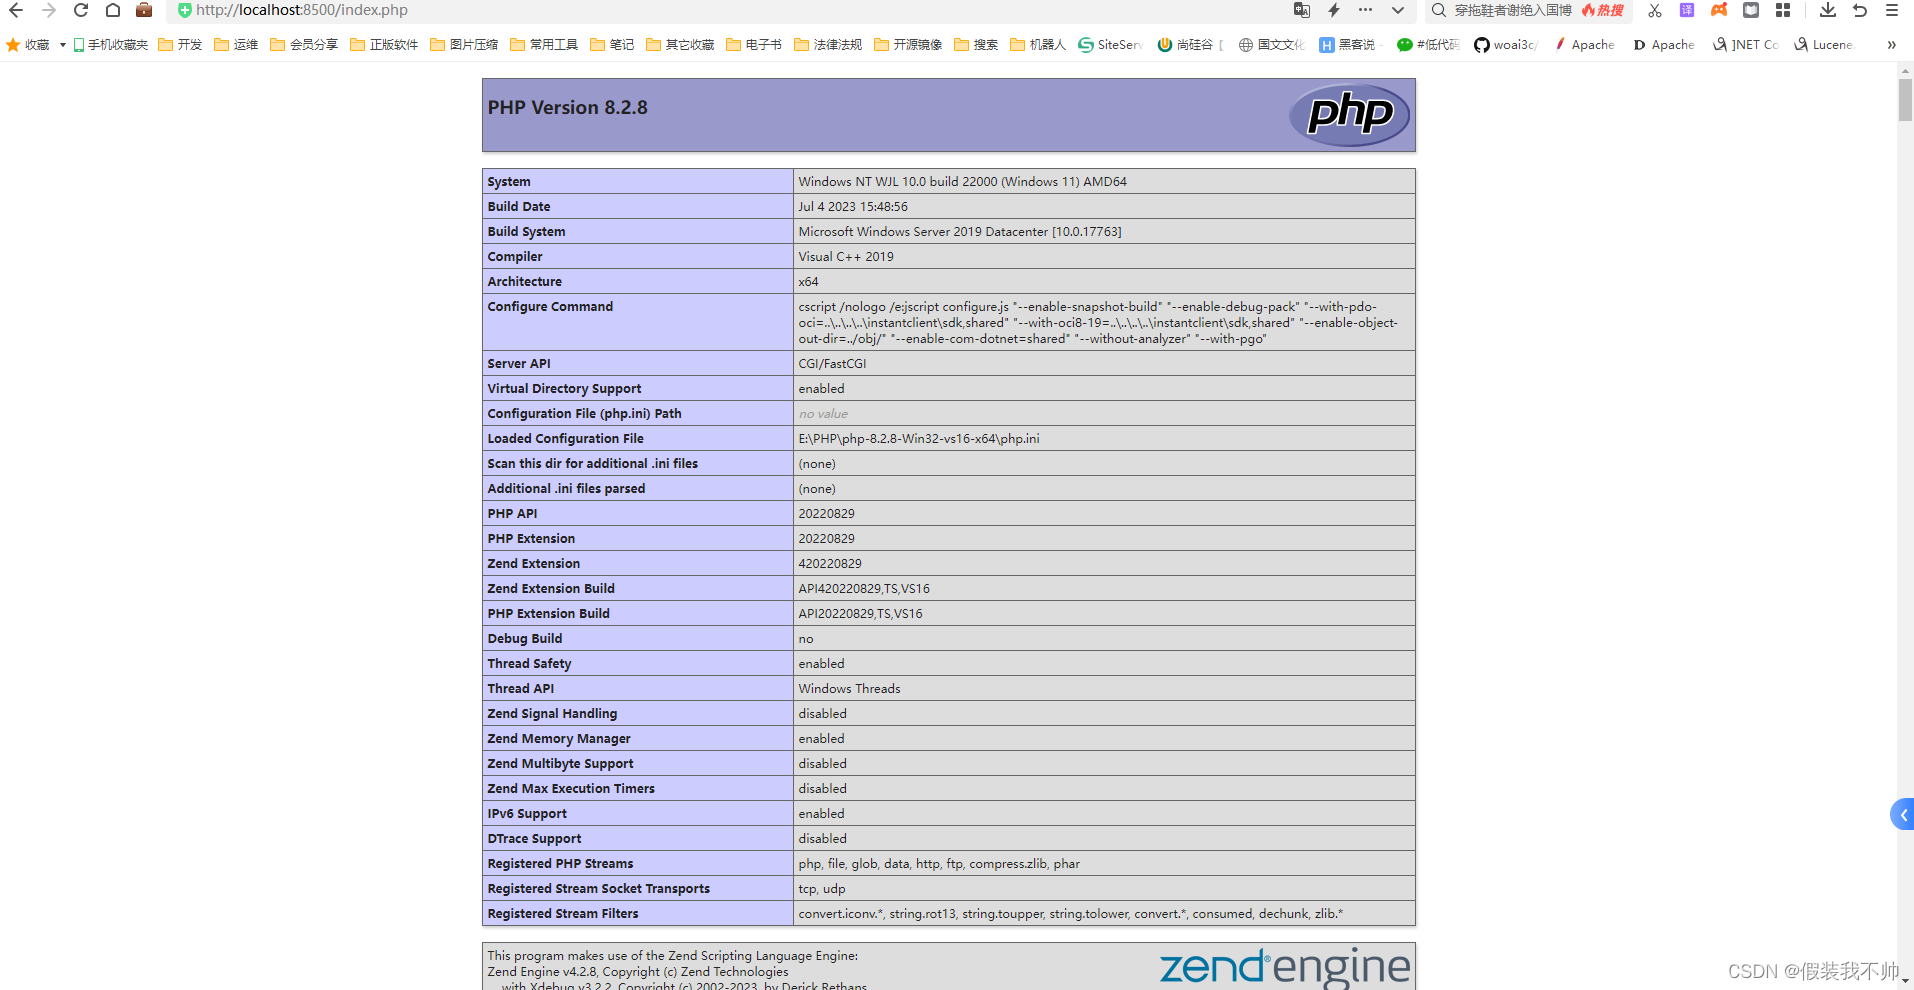
重新启动iis应用程序池
访问
vscode
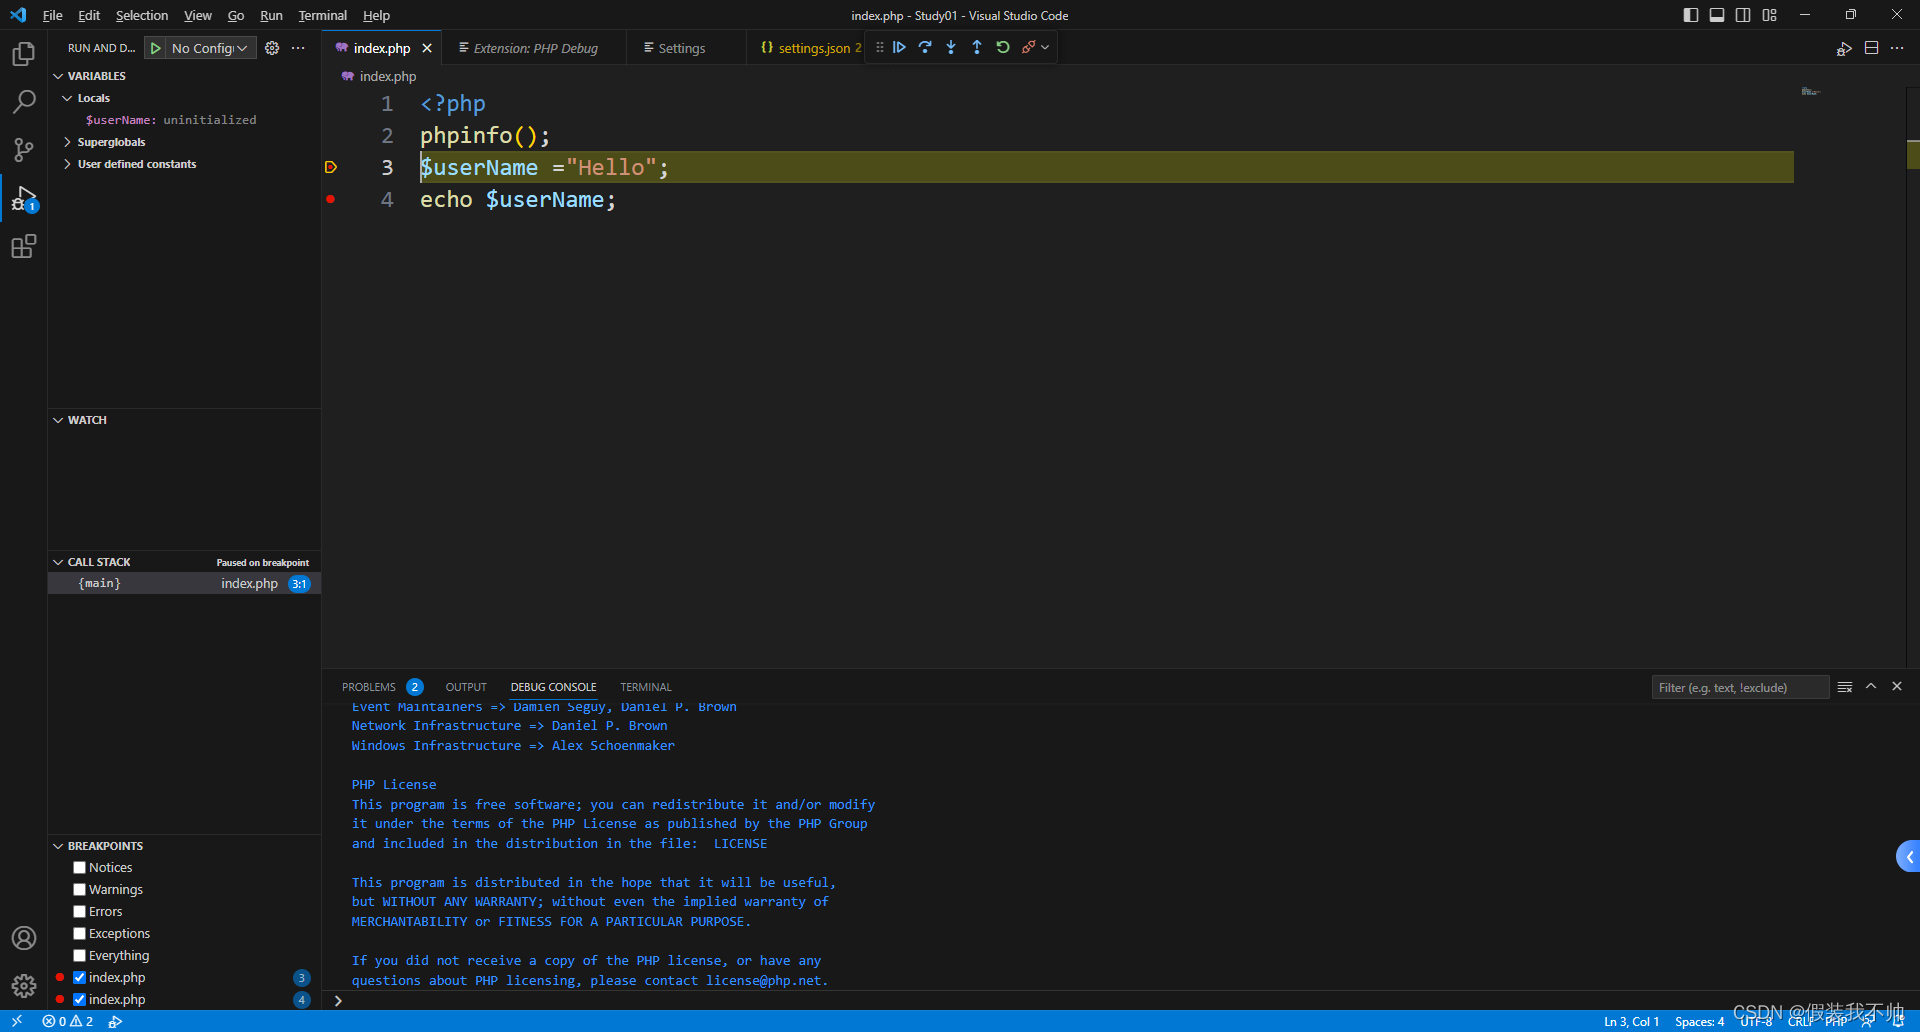
安装vscode,安装phpdebug插件
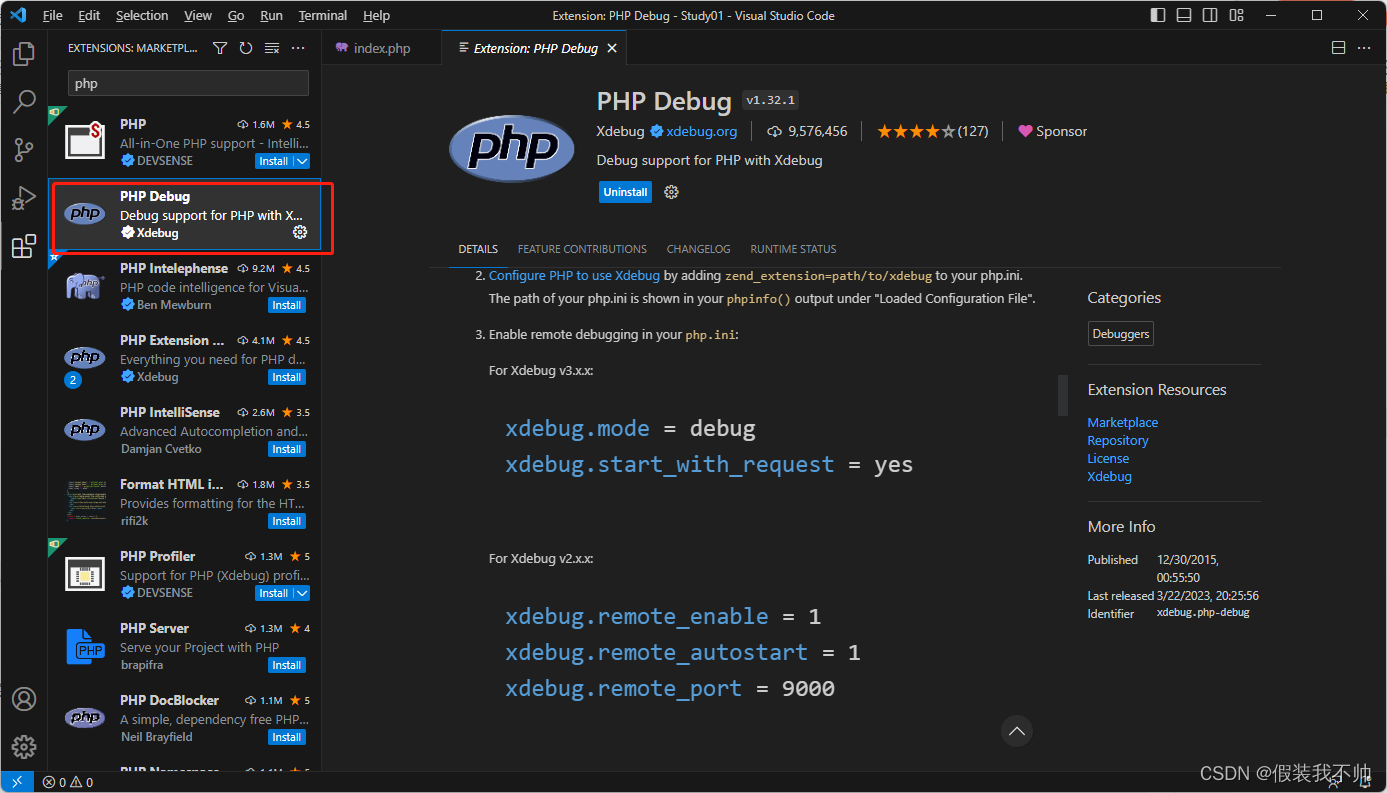
修改php.ini
;配置xdebug
[xdebug]
;配置xdebug主机地址
xdebug.client_host = localhost
;监听端口
xdebug.client_port = 9103
;idekey
xdebug.idekey = VSCODE
;调试模式建议设置成debug可以打断点调试,默认是default
xdebug.mode = debug,trace
xdebug.start_with_request = yes
重启应用程序池
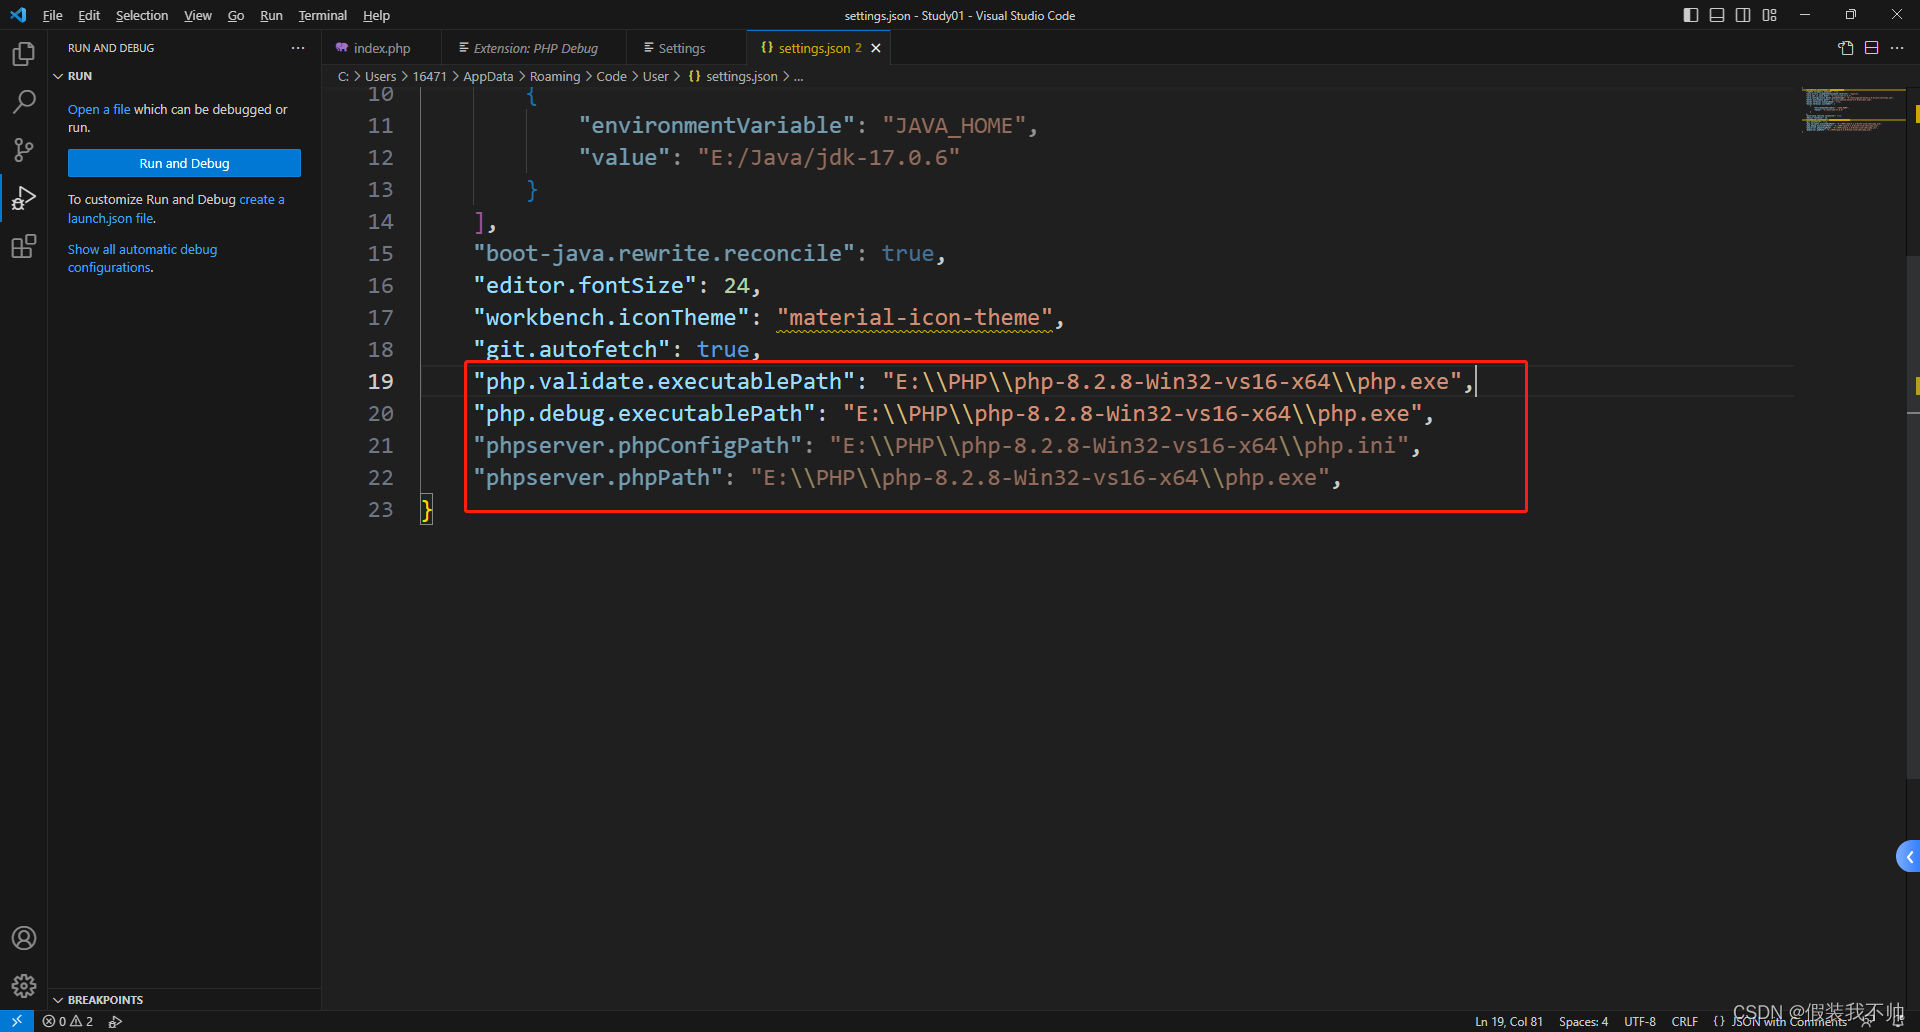
vscode增加配置
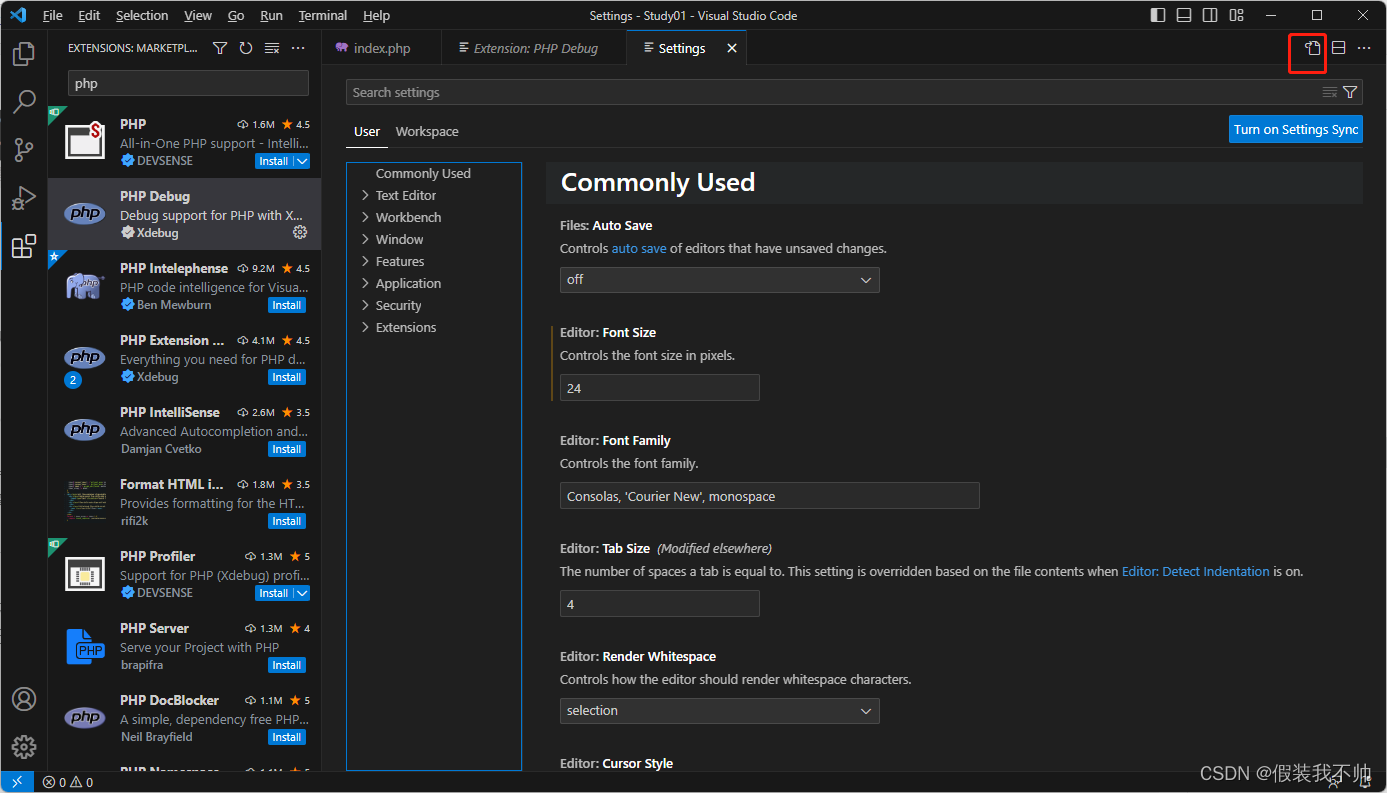
"php.validate.executablePath": "E:\\PHP\\php-8.2.8-Win32-vs16-x64\\php.exe",
"php.debug.executablePath": "E:\\PHP\\php-8.2.8-Win32-vs16-x64\\php.exe",
"phpserver.phpConfigPath": "E:\\PHP\\php-8.2.8-Win32-vs16-x64\\php.ini",
"phpserver.phpPath": "E:\\PHP\\php-8.2.8-Win32-vs16-x64\\php.exe",
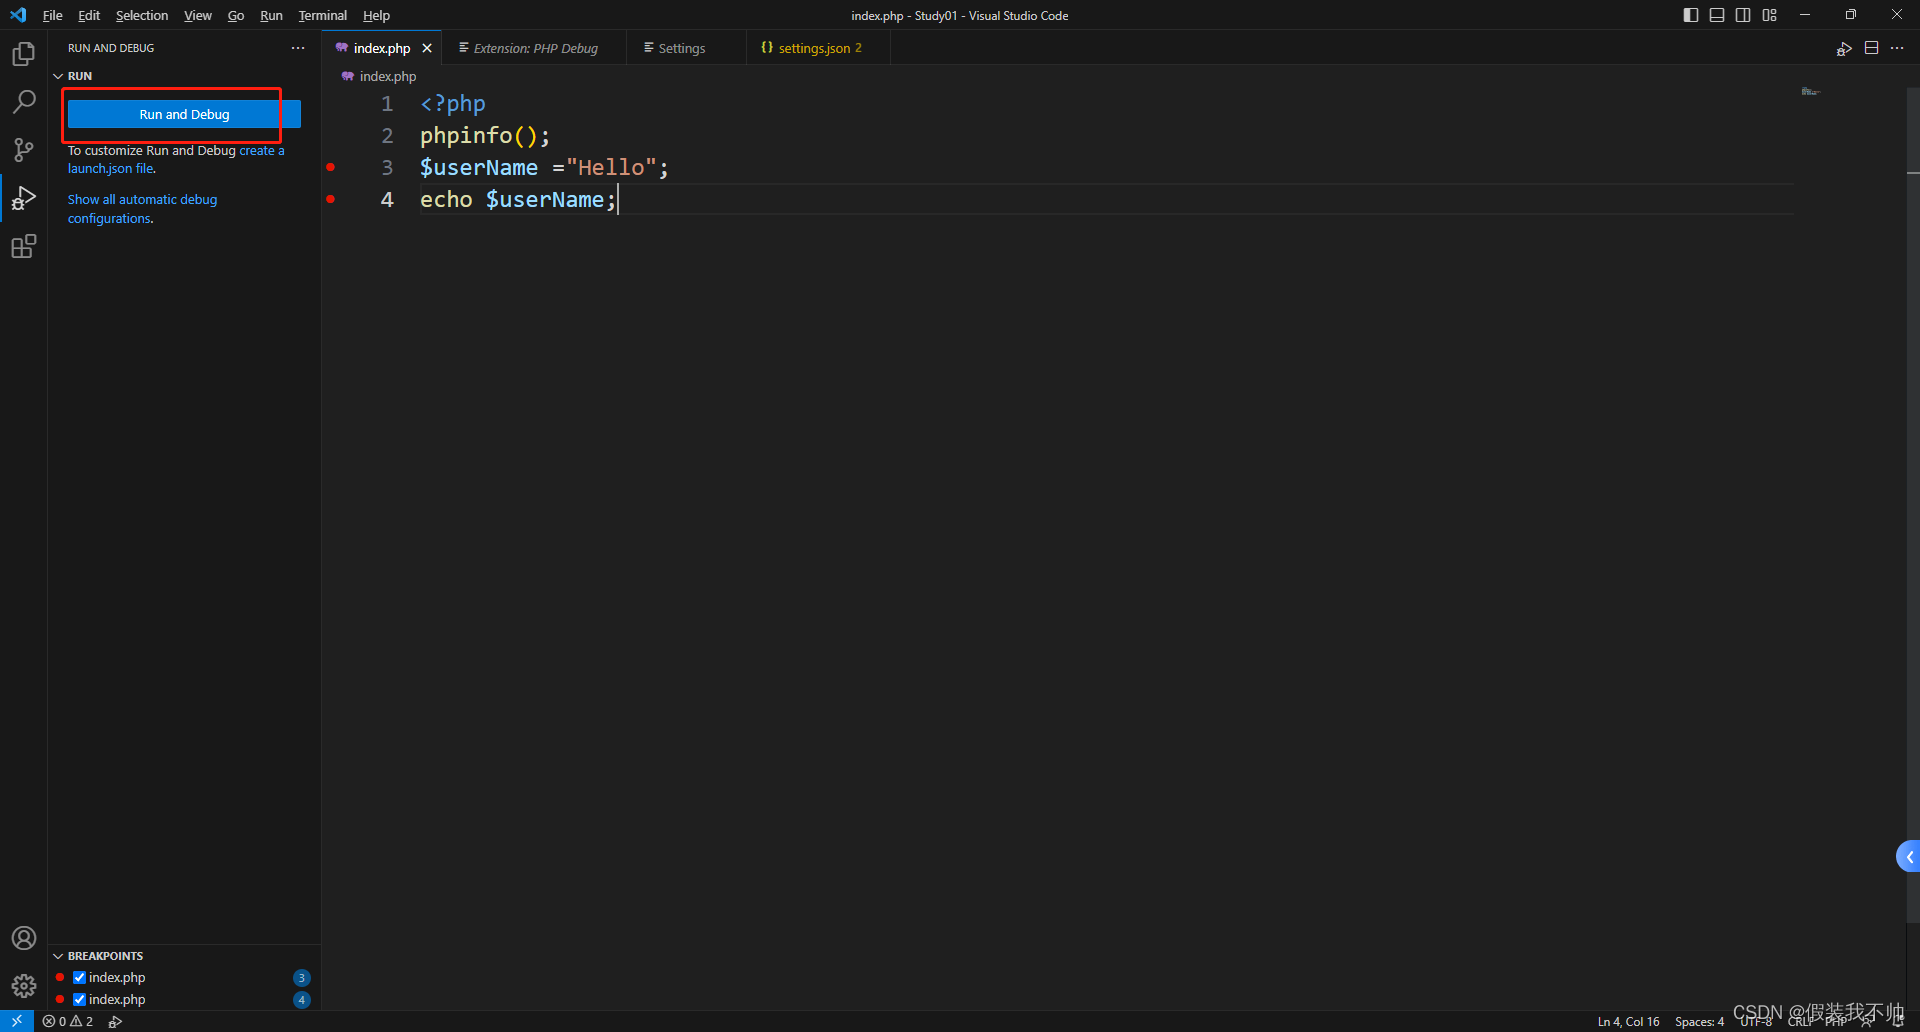
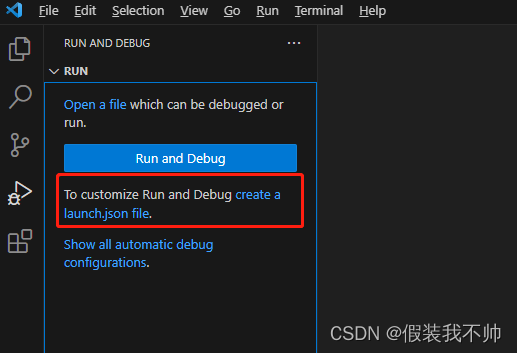
创建json配置文件
内容如下:
{// Use IntelliSense to learn about possible attributes.// Hover to view descriptions of existing attributes.// For more information, visit: https://go.microsoft.com/fwlink/?linkid=830387"version": "0.2.0","configurations": [{"name": "Listen for Xdebug","type": "php","request": "launch","port": 9003},{"name": "Launch currently open script","type": "php","request": "launch","program": "${file}","cwd": "${fileDirname}","port": 0,"runtimeArgs": ["-dxdebug.start_with_request=yes"],"env": {"XDEBUG_MODE": "debug,develop","XDEBUG_CONFIG": "client_port=${port}"}},{"name": "Launch Built-in web server","type": "php","request": "launch","runtimeArgs": ["-dxdebug.mode=debug","-dxdebug.start_with_request=yes","-S","localhost:0"],"program": "","cwd": "${workspaceRoot}","port": 9003,"serverReadyAction": {"pattern": "Development Server \\(http://localhost:([0-9]+)\\) started","uriFormat": "http://localhost:%s","action": "openExternally"}}]
}
因为xdebug配置的是监听9103所以需要修改配置文件
{// Use IntelliSense to learn about possible attributes.// Hover to view descriptions of existing attributes.// For more information, visit: https://go.microsoft.com/fwlink/?linkid=830387"version": "0.2.0","configurations": [{"name": "Listen for Xdebug","type": "php","request": "launch","port": 9103},{"name": "Launch currently open script","type": "php","request": "launch","program": "${file}","cwd": "${fileDirname}","port": 0,"runtimeArgs": ["-dxdebug.start_with_request=yes"],"env": {"XDEBUG_MODE": "debug,develop","XDEBUG_CONFIG": "client_port=${port}"}},{"name": "Launch Built-in web server","type": "php","request": "launch","runtimeArgs": ["-dxdebug.mode=debug","-dxdebug.start_with_request=yes","-S","localhost:0"],"program": "","cwd": "${workspaceRoot}","port": 9103,"serverReadyAction": {"pattern": "Development Server \\(http://localhost:([0-9]+)\\) started","uriFormat": "http://localhost:%s","action": "openExternally"}}]
}
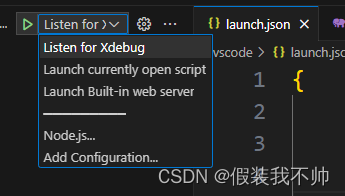
这里配置了三种方式
- Listen for xdebug是监听服务器请求的时候触发
- 直接访问当前的页面
- 启动一个web服务,然后监听断点
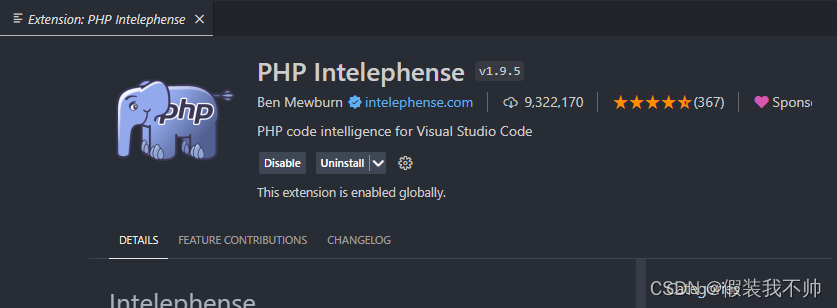
再推荐一款插件:PHP Intelephense


神经网络的初步认识:基于pytorch搭建自己的神经网络)


![[React]常见Hook实现之useUpdateLayoutEffect](http://pic.xiahunao.cn/[React]常见Hook实现之useUpdateLayoutEffect)

|第二节:超高产文本生成机,传媒营销人必备神器)