1.分片上传技术
为了处理大文件上传并保证性能,前后端可以使用分片上传(也称为分块上传)技术。
1.选择原因
分片上传(也称为分块上传)是一种处理大文件上传的技术,主要目的是提高上传的可靠性和效率。
网络稳定性和可靠性:
断点续传:在上传大文件时,网络中断是一个常见的问题。如果没有分片上传,整个文件上传过程必须重新开始,这样不仅浪费时间,还增加了失败的可能性。而分片上传允许在网络恢复后从中断的地方继续上传,从而提高了上传的可靠性。
错误恢复:上传过程中,如果某个分片上传失败,只需重新上传这个分片,而不需要重新上传整个文件。
资源管理:
内存消耗:上传大文件时,如果一次性读取整个文件,会占用大量内存,甚至可能导致内存溢出。而分片上传每次只读取和上传一个小块,内存消耗更可控。
带宽优化:分片上传可以更好地利用带宽资源,特别是在网络不稳定的情况下,分片上传可以避免带宽的浪费。
大文件支持:
文件大小限制:一些浏览器和服务器对单个文件的上传大小有限制。通过分片上传,可以绕过这些限制,使上传大文件成为可能。
服务器处理压力:一次性上传大文件会给服务器带来很大的压力,分片上传可以减轻服务器的负担,因为服务器可以逐片处理和存储文件。
2.前端处理
1.文件分片:将大文件分成多个小块,每个块的大小可以根据需求设定。
2.上传分片:逐个上传分片,每个分片上传成功后上传下一个分片。
3.上传进度:可以通过计算已上传分片的大小来展示上传进度。
4.合并分片:所有分片上传完成后,通知后端合并分片。
3.后端处理
1.接收分片:后端接收每个分片并存储。
2.合并分片:在接收到所有分片后,将分片合并成完整文件。
3.处理上传进度和失败重传:记录上传进度,支持失败重传。
2.整合particles.js
particles.js 是一个轻量级的 JavaScript 库,用于在网页上创建交互性和美观的粒子效果。它能够生成各种各样的粒子动画,例如气泡、雪花、星星等,并且可以响应用户的鼠标移动和点击事件,增加网页的动态效果和吸引力。
1.主要特性
- 轻量级:
particles.js体积小,加载速度快。 - 高效:使用 HTML5 的
canvas元素进行渲染,性能优越。 - 高度可定制:提供丰富的配置选项,可以自定义粒子的数量、颜色、形状、大小、速度等。
- 交互性:支持鼠标事件,例如悬停和点击,从而实现粒子的交互效果。
- 响应式:能够适应不同屏幕大小,确保在各种设备上的显示效果。
2.安装与使用
1. 引入 particles.js
你可以通过 CDN 或者下载文件的方式引入 particles.js。
使用 CDN:
<!-- 使用 CDN 引入 -->
<script src="https://cdn.jsdelivr.net/particles.js/2.0.0/particles.min.js"></script>
下载文件:
你可以从 GitHub 下载 particles.js 文件,并将其放置在项目中,然后使用以下方式引用:
<script src="path/to/particles.min.js"></script>
2. 创建粒子容器
在 HTML 中创建一个容器,用于显示粒子效果:
<div id="particles-js"></div>
3. 初始化 particles.js
在 JavaScript 中初始化 particles.js 并进行配置:
<script>
particlesJS('particles-js', {"particles": {"number": {"value": 80,//粒子数量"density": {"enable": true,"value_area": 800 //粒子活动区域}},"color": {"value": "#333333" //粒子颜色},"shape": {"type": "circle", //粒子形状"stroke": { //粒子的描边"width": 0,"color": "#000000"},"polygon": {"nb_sides": 5}},"opacity": { //粒子透明度"value": 0.5,"random": false,"anim": {"enable": false, //是否开启"speed": 1,//动画速度"opacity_min": 0.1,"sync": false}},"size": {"value": 5,"random": true,"anim": {"enable": false,"speed": 40,"size_min": 0.1,"sync": false}},"line_linked": {//粒子之间的连线配置"enable": true,//是否开启连线"distance": 150,//连线距离"color": "#333333",//连线的颜色"opacity": 0.4,"width": 1 //连线宽度},"move": {"enable": true, //粒子是否移动"speed": 6,//粒子移动速度"direction": "none",//粒子移动方向"random": true,//是否随机移动"straight": false,//是否直线移动"out_mode": "out","bounce": false,//是否开启碰撞弹跳"attract": {"enable": false,"rotateX": 600,"rotateY": 1200}}},"interactivity": {"detect_on": "canvas","events": {"onhover": {//鼠标悬浮效果"enable": true,"mode": "repulse"},"onclick": {//鼠标点击效果"enable": true,"mode": "push"},"resize": true},"modes": {"grab": {"distance": 400,"line_linked": {"opacity": 1}},"bubble": {"distance": 400,"size": 40,"duration": 2,"opacity": 8,"speed": 3},"repulse": {"distance": 200,"duration": 0.4},"push": {"particles_nb": 4},"remove": {"particles_nb": 2}}},"retina_detect": true //是否启动视网膜屏检测});
</script>
3.配置选项
- number: 粒子的数量及密度。
- color: 粒子的颜色。
- shape: 粒子的形状,可以是
circle(圆形)、edge(边缘)、triangle(三角形)、polygon(多边形)或image(图片)。 - opacity: 粒子的透明度。
- size: 粒子的大小。
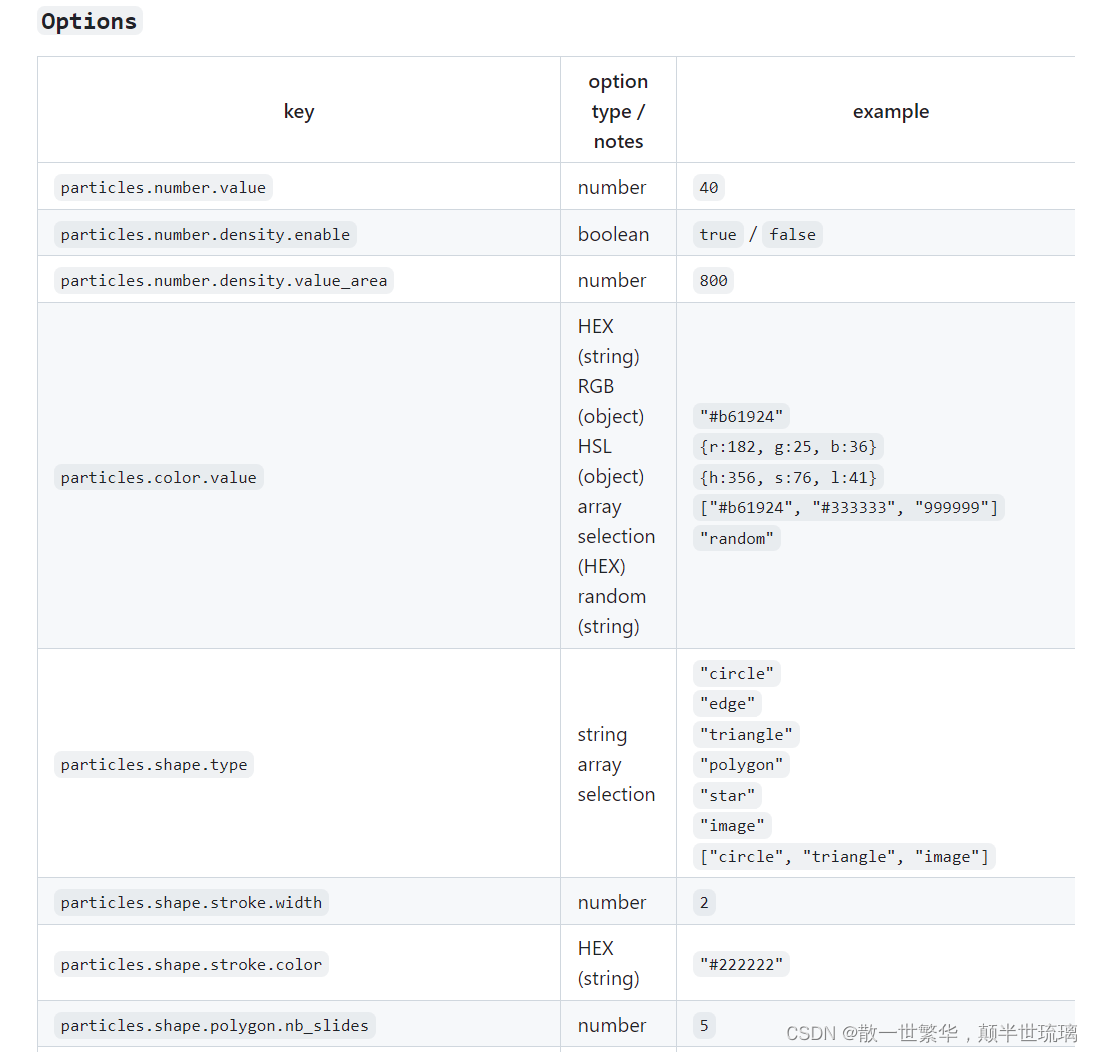
具体的配置可以在Github中查看,如下所示:

3.前端代码
<!DOCTYPE html>
<html lang="en">
<head><meta charset="UTF-8"><meta name="viewport" content="width=device-width, initial-scale=1.0"><title>File Upload with Particles.js Background</title><style>body {font-family: Arial, sans-serif;background-color: #f4f4f9;margin: 0;padding: 20px;display: flex;justify-content: center;align-items: center;height: 100vh;overflow: hidden;}.container {background-color: #fff;padding: 20px;border-radius: 8px;box-shadow: 0 0 10px rgba(0, 0, 0, 0.1);text-align: center;z-index: 1;position: relative;}h1 {color: #333;}input[type="file"] {margin: 10px 0;}button {background-color: #007bff;color: #fff;border: none;padding: 10px 20px;border-radius: 4px;cursor: pointer;font-size: 16px;}button:hover {background-color: #0056b3;}progress {width: 100%;height: 20px;margin-top: 10px;border-radius: 4px;}#particles-js {position: absolute;width: 100%;height: 100%;top: 0;left: 0;z-index: 0;}</style><!-- 使用 CDN 引入 --><script src="https://cdn.jsdelivr.net/particles.js/2.0.0/particles.min.js"></script>
</head>
<body><div id="particles-js"></div><div class="container"><h1>File Upload</h1><input type="file" id="fileInput" /><button onclick="uploadFile()">Upload</button><progress id="progressBar" value="0" max="100"></progress></div><script>particlesJS('particles-js', {"particles": {"number": {"value": 80,//粒子数量"density": {"enable": true,"value_area": 800 //粒子活动区域}},"color": {"value": "#333333" //粒子颜色},"shape": {"type": "circle", //粒子形状"stroke": { //粒子的描边"width": 0,"color": "#000000"},"polygon": {"nb_sides": 5}},"opacity": { //粒子透明度"value": 0.5,"random": false,"anim": {"enable": false, //是否开启"speed": 1,//动画速度"opacity_min": 0.1,"sync": false}},"size": {"value": 5,"random": true,"anim": {"enable": false,"speed": 40,"size_min": 0.1,"sync": false}},"line_linked": {//粒子之间的连线配置"enable": true,//是否开启连线"distance": 150,//连线距离"color": "#333333",//连线的颜色"opacity": 0.4,"width": 1 //连线宽度},"move": {"enable": true, //粒子是否移动"speed": 6,//粒子移动速度"direction": "none",//粒子移动方向"random": true,//是否随机移动"straight": false,//是否直线移动"out_mode": "out","bounce": false,//是否开启碰撞弹跳"attract": {"enable": false,"rotateX": 600,"rotateY": 1200}}},"interactivity": {"detect_on": "canvas","events": {"onhover": {//鼠标悬浮效果"enable": true,"mode": "repulse"},"onclick": {//鼠标点击效果"enable": true,"mode": "push"},"resize": true},"modes": {"grab": {"distance": 400,"line_linked": {"opacity": 1}},"bubble": {"distance": 400,"size": 40,"duration": 2,"opacity": 8,"speed": 3},"repulse": {"distance": 200,"duration": 0.4},"push": {"particles_nb": 4},"remove": {"particles_nb": 2}}},"retina_detect": true //是否启动视网膜屏检测});const CHUNK_SIZE = 1024 * 1024; // 1MB per chunkasync function uploadFile() {const fileInput = document.getElementById('fileInput');const file = fileInput.files[0];const totalChunks = Math.ceil(file.size / CHUNK_SIZE);// 将大文件分片上传for (let i = 0; i < totalChunks; i++) {const start = i * CHUNK_SIZE;const end = Math.min(start + CHUNK_SIZE, file.size);const chunk = file.slice(start, end);const formData = new FormData();formData.append('chunkFile', chunk);formData.append('index', i);await fetch('http://127.0.0.1:8080/upload', {method: 'POST',body: formData});document.getElementById('progressBar').value = (i + 1) / totalChunks * 100;}// Notify server to merge chunksawait fetch('http://127.0.0.1:8080/merge', {method: 'POST',body: JSON.stringify({ fileName: file.name }),headers: { 'Content-Type': 'application/json' }});}</script>
</body>
</html>
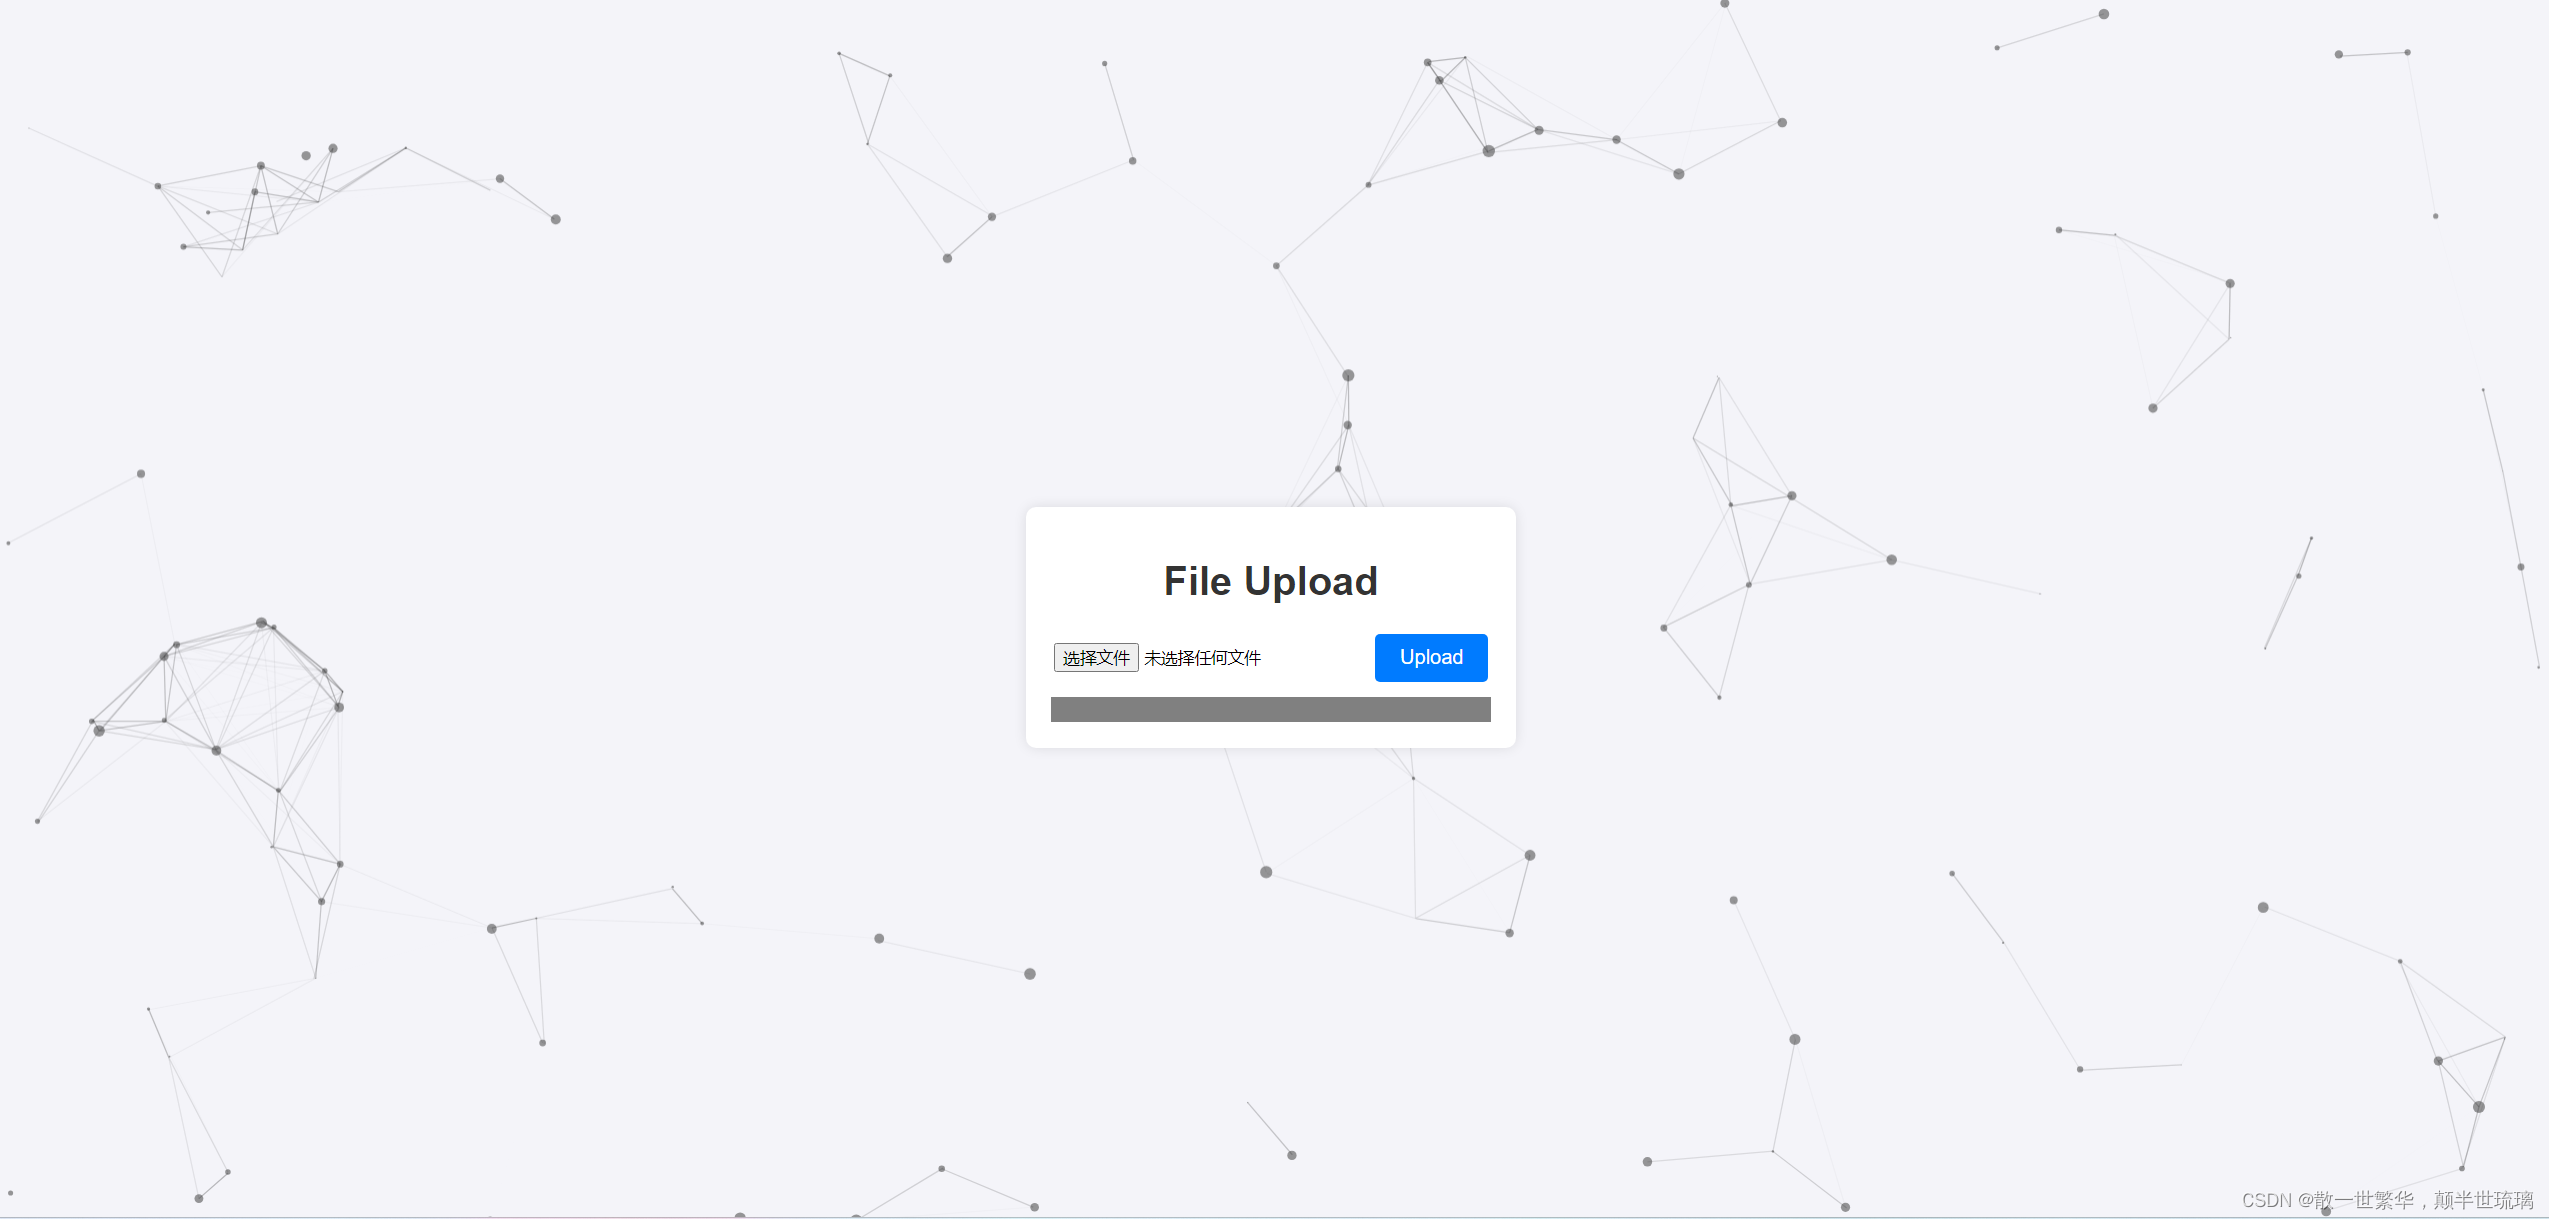
对应的界面效果如下所示:

4.后端代码
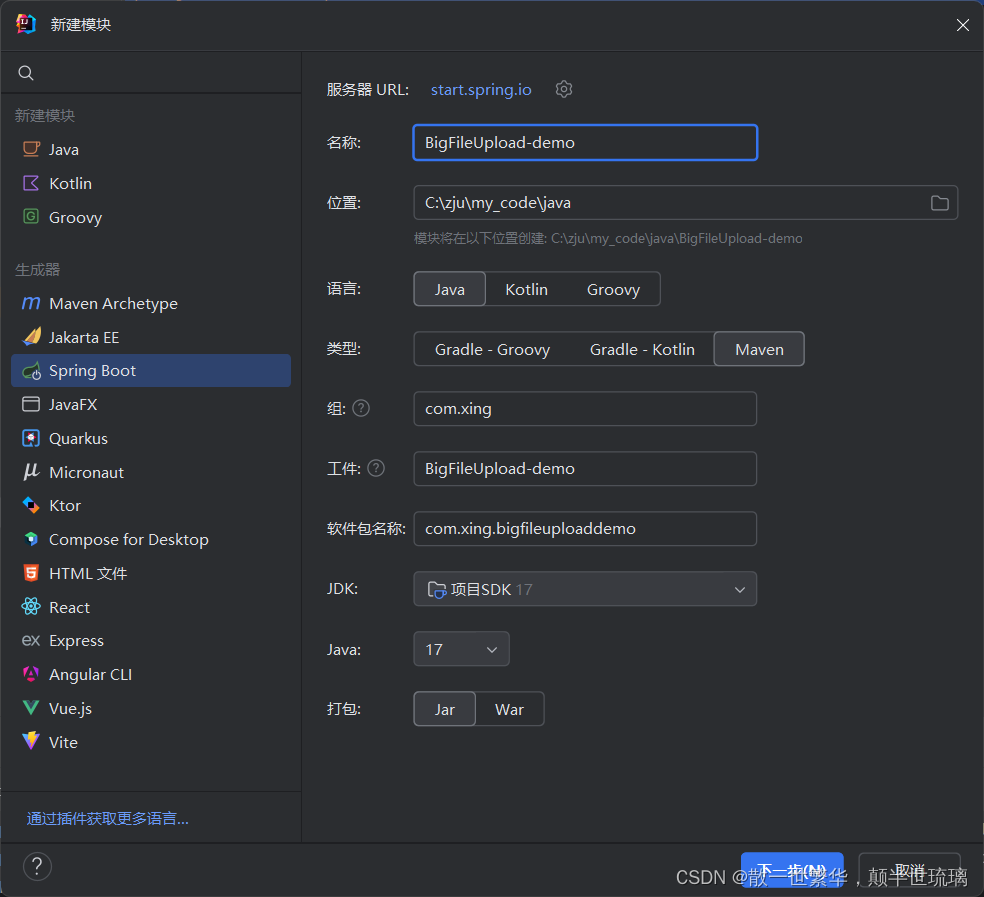
1.创建一个SpringBoot项目(模块)

后面只需要导入Spring Web模块即可!
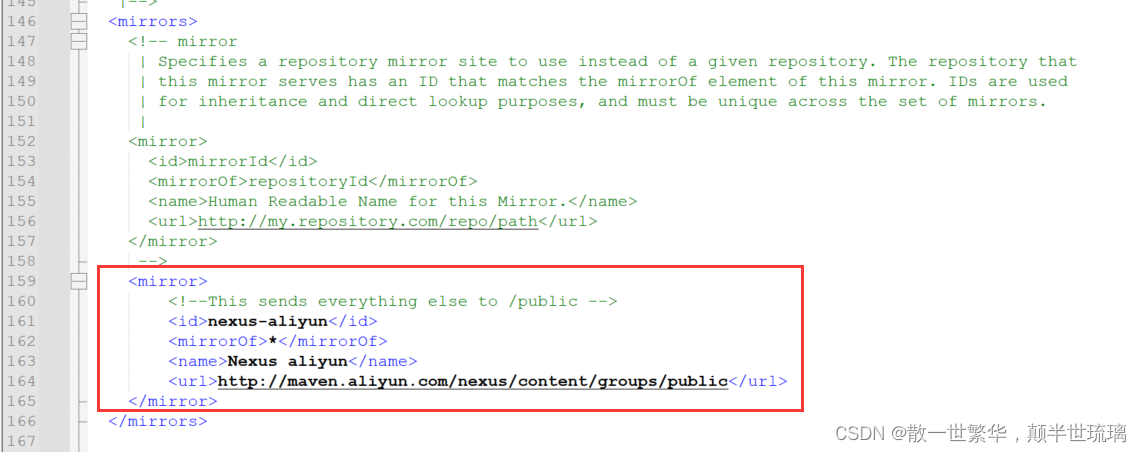
这里创建项目或者模块后,如果发现maven始终无法下载对应的依赖,那就需要更新maven的镜像仓库配置。
可以找到maven中的conf目录下的setting.xml文件,修改里面的mirror标签的内容,具体如下所示:
<mirror><!--This sends everything else to /public --><id>nexus-aliyun</id><mirrorOf>*</mirrorOf><name>Nexus aliyun</name><url>http://maven.aliyun.com/nexus/content/groups/public</url>
</mirror>

2.文件上传配置
需要在resources下的application.properties写一些配置项,来保证文件的正常上传等功能!具体如下所示:
spring.servlet.multipart.enabled=true
spring.servlet.multipart.max-file-size=10MB
spring.servlet.multipart.max-request-size=10MB
3.控制层代码
这里在类的层级下通过 @CrossOrigin 设置的跨域,也可以通过写配置文件在全局设置跨域!
package com.xing.bigfileuploaddemo.controller;
import org.springframework.web.bind.annotation.*;
import org.springframework.web.multipart.MultipartFile;
import java.io.File;
import java.io.FileNotFoundException;
import java.io.FileOutputStream;
import java.io.IOException;
import java.nio.file.Files;
import java.util.Map;@RestController
@CrossOrigin
public class BigFileUploadController {// 获取资源文件夹的路径private static final String UPLOAD_DIR = System.getProperty("user.dir") + "/upload/";@GetMapping("/hello")public String hello(){return "hello BigFileUpload";}@PostMapping("/upload")public String uploadChunk(@RequestParam("chunkFile") MultipartFile chunkFile,@RequestParam("index") int index) {File uploadDir = new File(UPLOAD_DIR);if (!uploadDir.exists()) {uploadDir.mkdirs();}File file = new File(UPLOAD_DIR + "chunk_" + index);try {chunkFile.transferTo(file);} catch (IOException e) {throw new RuntimeException(e);}return ("Chunk " + index + " uploaded");}@PostMapping("/merge")public String mergeChunks(@RequestBody Map<String, String> request) throws FileNotFoundException {String filename = request.get("fileName");File mergedFile = new File(UPLOAD_DIR + filename);try (FileOutputStream fos = new FileOutputStream(mergedFile)) {for(int i=0;;i++){File chunkFile = new File(UPLOAD_DIR + "chunk_" + i);if(!chunkFile.exists()){break;}Files.copy(chunkFile.toPath(), fos);chunkFile.delete();}} catch (IOException e) {throw new RuntimeException(e);}return "File merged successfully";}
}


)


)


![[环境搭建] 使用nginx搭建 hls 媒体服务器](http://pic.xiahunao.cn/[环境搭建] 使用nginx搭建 hls 媒体服务器)


