1、简单介绍
Open-GroundingDino是GroundingDino的第三方实现训练流程的代码,因为官方GroundingDino没有提供训练代码,只提供了demo推理代码。
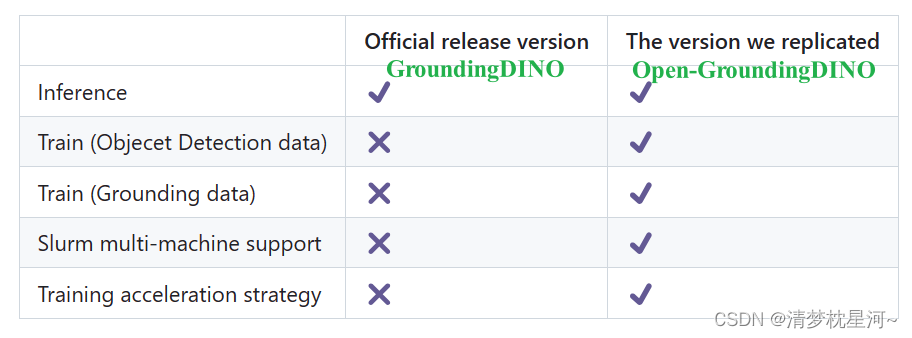
关于GroundingDino的介绍可以看论文:https://arxiv.org/pdf/2303.05499.pdf
GroundingDino的Github网址:https://github.com/IDEA-Research/GroundingDINO
Open-GroundingDino的Github网址: https://github.com/longzw1997/Open-GroundingDino/tree/main
要跑起来Open-GroundingDino,需要解决环境安装,数据集制作,网络配置等问题,下面大致从这几个方面进行介绍。
2、训练Open-GroundingDino
2.1、环境安装
建议把GroundingDino下载下来,把环境装好,再来装Open-GroundingDino,最好可以先跑通GroundingDino的demo再来弄Open-GroundingDino,我之前跑推理的时候先弄的Open-GroundingDino结果环境有问题,缺少编译代码,没有生成groundingdino库。
关于cuda、pytorch的环境安装就不具体介绍了。主要是安装好显卡驱动(别太老,至少能CUDA12及以下),然后是conda环境安装pytorch,这直接去pytorch官网安装就行,装完了测试一下显卡能不能被调用。可以就接着装相关的库。
git clone https://github.com/IDEA-Research/GroundingDINO.git
cd GroundingDINO/
编译GroundingDino,本质和 python setup.py develop 是一样的
pip install -e .
执行上面的命令会自动安装 requirements.txt里的库,这个也可以手动安装
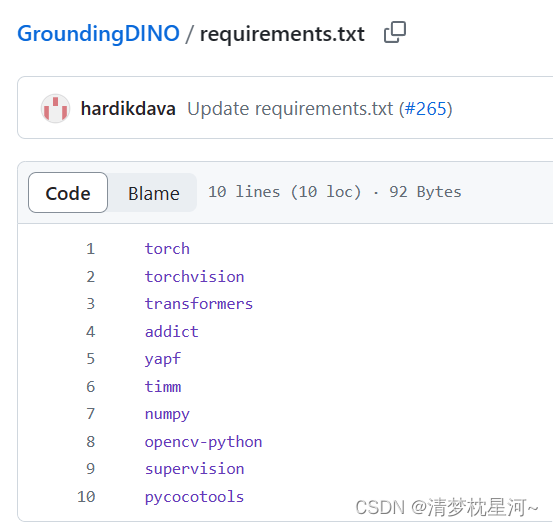
上面基本上就完成了 GroundingDino 的环境安装,可以开始测试环境可不可以用,跑一下demo,注意下载好预训练模型
CUDA_VISIBLE_DEVICES={GPU ID} python demo/inference_on_a_image.py \
-c groundingdino/config/GroundingDINO_SwinT_OGC.py \
-p weights/groundingdino_swint_ogc.pth \
-i image_you_want_to_detect.jpg \
-o "dir you want to save the output" \
-t "chair"[--cpu-only] # open it for cpu mode
或
CUDA_VISIBLE_DEVICES={GPU ID} python demo/inference_on_a_image.py \
-c groundingdino/config/GroundingDINO_SwinT_OGC.py \
-p ./groundingdino_swint_ogc.pth \
-i .asset/cat_dog.jpeg \
-o logs/1111 \
-t "There is a cat and a dog in the image ." \
--token_spans "[[[9, 10], [11, 14]], [[19, 20], [21, 24]]]"[--cpu-only] # open it for cpu mode
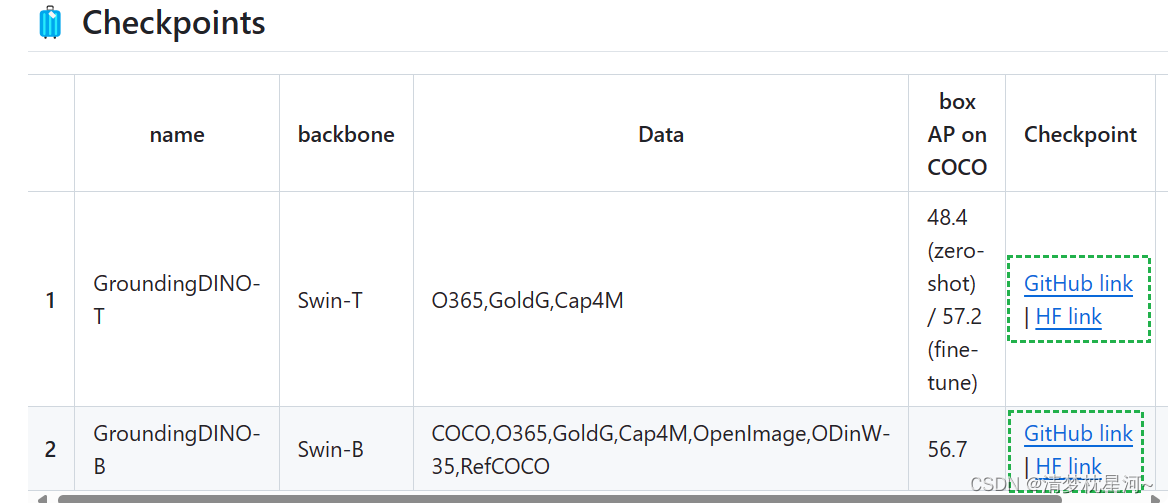
预训练模型下载:
mkdir weights
cd weights
wget -q https://github.com/IDEA-Research/GroundingDINO/releases/download/v0.1.0-alpha/groundingdino_swint_ogc.pth
cd ..
或者找网址直接下载也行
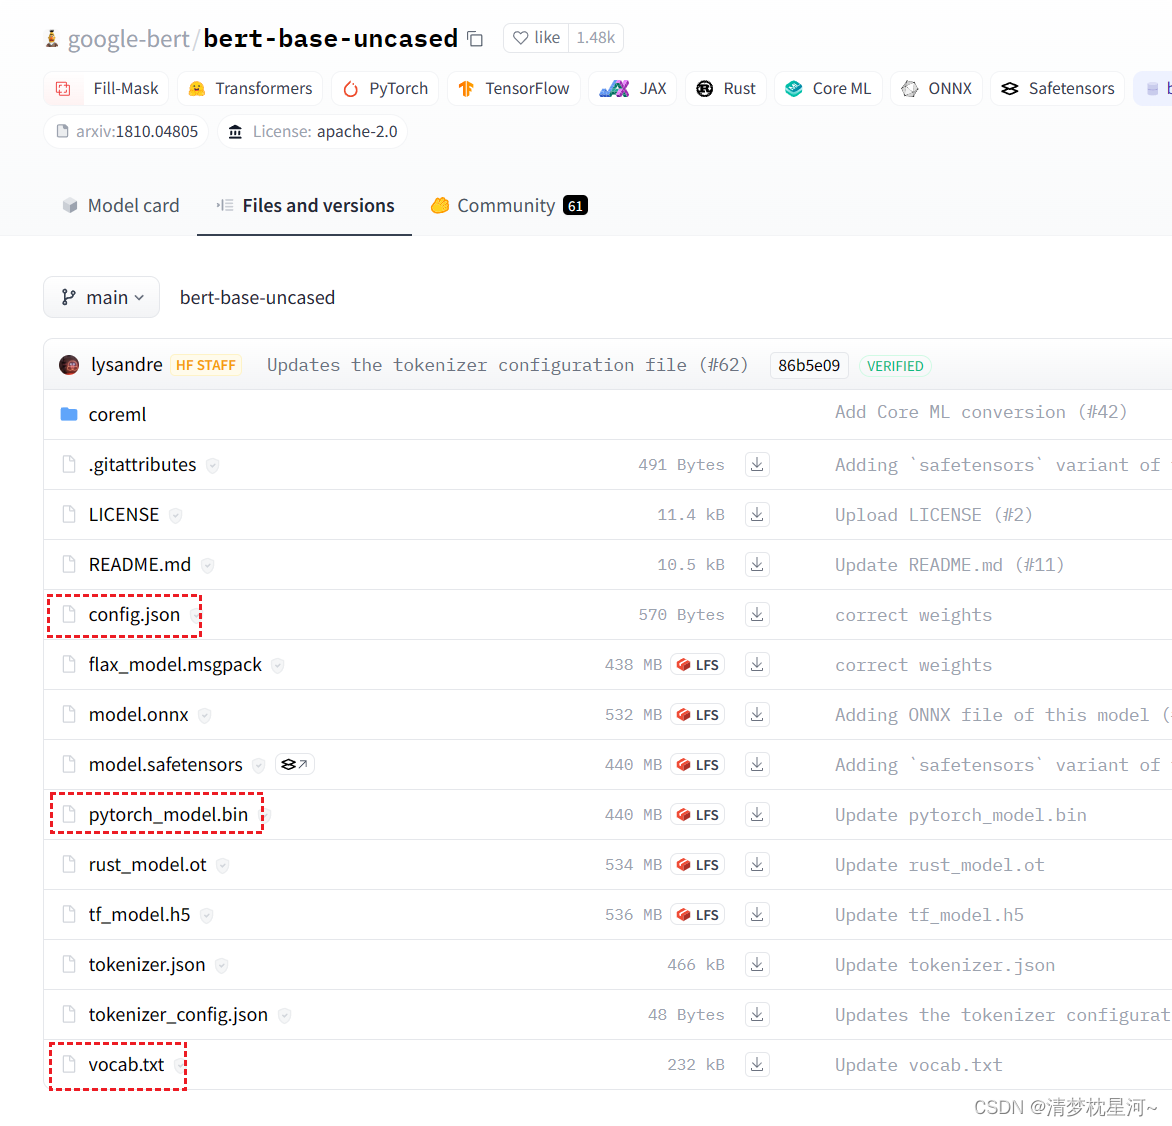
还有文本解码的 bert-base-uncased 也需要下载,网址:https://huggingface.co/google-bert/bert-base-uncased/tree/main
主要下载以下几个文件,把路径加到 text_encoder_type,关于推理可以看我上一篇:
Open-GroundingDino和GroundingDino的推理流程实现
上面是在 GroundingDino 中的环境安装和推理准备,后续需要在Open-GroundingDino中安装环境操作:
git clone https://github.com/longzw1997/Open-GroundingDino.git && cd Open-GroundingDino/
pip install -r requirements.txt
cd models/GroundingDINO/ops
python setup.py build install
python test.py
cd ../../..
再把 预训练模型 和 bert的文本模型路径 也加到 Open-GroundingDino 基本上就完成了环境安装。
2.2、数据集制作
不说细节了,主要是一些注意的地方。官方给的数据集格式:
# For OD
{"filename": "000000391895.jpg", "height": 360, "width": 640, "detection": {"instances": [{"bbox": [359.17, 146.17, 471.62, 359.74], "label": 3, "category": "motorcycle"}, {"bbox": [339.88, 22.16, 493.76, 322.89], "label": 0, "category": "person"}, {"bbox": [471.64, 172.82, 507.56, 220.92], "label": 0, "category": "person"}, {"bbox": [486.01, 183.31, 516.64, 218.29], "label": 1, "category": "bicycle"}]}}
{"filename": "000000522418.jpg", "height": 480, "width": 640, "detection": {"instances": [{"bbox": [382.48, 0.0, 639.28, 474.31], "label": 0, "category": "person"}, {"bbox": [234.06, 406.61, 454.0, 449.28], "label": 43, "category": "knife"}, {"bbox": [0.0, 316.04, 406.65, 473.53], "label": 55, "category": "cake"}, {"bbox": [305.45, 172.05, 362.81, 249.35], "label": 71, "category": "sink"}]}}# For VG
{"filename": "014127544.jpg", "height": 400, "width": 600, "grounding": {"caption": "Homemade Raw Organic Cream Cheese for less than half the price of store bought! It's super easy and only takes 2 ingredients!", "regions": [{"bbox": [5.98, 2.91, 599.5, 396.55], "phrase": "Homemade Raw Organic Cream Cheese"}]}}
{"filename": "012378809.jpg", "height": 252, "width": 450, "grounding": {"caption": "naive : Heart graphics in a notebook background", "regions": [{"bbox": [93.8, 47.59, 126.19, 77.01], "phrase": "Heart graphics"}, {"bbox": [2.49, 1.44, 448.74, 251.1], "phrase": "a notebook background"}]}}
我实践后的理解是,上面两种格式是独立的,就是你可以整一个OD格式的jsonl,也可以整一个VG格式的jsonl,然后可以把这几种格式的数据集放到一起训练,写到数据集配置文件 datasets_mixed_odvg.json:
{"train": [{"root": "path/V3Det/","anno": "path/V3Det/annotations/v3det_2023_v1_all_odvg.jsonl","label_map": "path/V3Det/annotations/v3det_label_map.json","dataset_mode": "odvg"},{"root": "path/LVIS/train2017/","anno": "path/LVIS/annotations/lvis_v1_train_odvg.jsonl","label_map": "path/LVIS/annotations/lvis_v1_train_label_map.json","dataset_mode": "odvg"},{"root": "path/Objects365/train/","anno": "path/Objects365/objects365_train_odvg.json","label_map": "path/Objects365/objects365_label_map.json","dataset_mode": "odvg"},{"root": "path/coco_2017/train2017/","anno": "path/coco_2017/annotations/coco2017_train_odvg.jsonl","label_map": "path/coco_2017/annotations/coco2017_label_map.json","dataset_mode": "odvg"},{"root": "path/GRIT-20M/data/","anno": "path/GRIT-20M/anno/grit_odvg_620k.jsonl","dataset_mode": "odvg"}, {"root": "path/flickr30k/images/flickr30k_images/","anno": "path/flickr30k/annotations/flickr30k_entities_odvg_158k.jsonl","dataset_mode": "odvg"}],"val": [{"root": "path/coco_2017/val2017","anno": "config/instances_val2017.json","label_map": null,"dataset_mode": "coco"}]
}
但是。验证集的格式必须使用COCO格式,因为代码采用的是COCO数据集的计算方法。这就是Open-GroundingDino给出的数据集制作方法。
在实践过程中发现的问题:
①给出的格式不够清晰 是不是可以把 OD、VG 在一个数据集中生成,既有detection内容又有grounding内容;
②只给了一条数据集格式,当有两张图的时候数据集格式是怎样的不清楚,我一开始是直接列表里面放字典,字典之间用逗号隔开,我转化了v3det数据集后发现不是这样的,之所以一开始没这么做,是因为v3det的数据集比较大,操作之后不好打开,不好看格式,太吃内存了。
实际上的格式是一个字典挨着一个字典:
{
}{
}{
}
}{
}
而且自己生成的时候尽量采用提供的格式,不然训练时读数据容易报 jsondecodeerror,参考tools/v3det2odvg.py,使用jsonlines 库生成 jsonl文件,训练集最好是这样,采用如下格式将个人的数据信息生成对应格式的数据集。
metas = []
instance_list = []
instance_list.append({"bbox": bbox_xyxy,"label": label - 1,       # make sure start from 0"category": category})metas.append({"filename": img_info["file_name"],"height": img_info["height"],"width": img_info["width"],"detection": {"instances": instance_list}})with jsonlines.open(args.output, mode="w") as writer:writer.write_all(metas)
报错信息:json.decoder.JSONDecodeError:Expecting property name enclosed in double quotes: line 1 column 2 (char 1),这是训练时读取ODVG格式数据集的函数, 在datasets/odvg.py里面
def _load_metas(self, anno):with open(anno, 'r')as f:self.metas = [json.loads(line) for line in f]
验证集直接采用COCO格式就行了,这个格式比较清晰,可以找到的信息也多。
完成数据集制作,接下来是网络配置。
2.3、网络配置
网络训练需要配置好网络参数和数据集信息才能开始训练,配置文件:
config/cfg_odvg.py                   # for backbone, batch size, LR, freeze layers, etc.
config/datasets_mixed_odvg.json      # support mixed dataset for both OD and VG
第一个是网络结构配置文件:
data_aug_scales = [480, 512, 544, 576, 608, 640, 672, 704, 736, 768, 800]
data_aug_max_size = 1333
data_aug_scales2_resize = [400, 500, 600]
data_aug_scales2_crop = [384, 600]
data_aug_scale_overlap = None
batch_size = 4
modelname = 'groundingdino'
backbone = 'swin_T_224_1k'
position_embedding = 'sine'
pe_temperatureH = 20
pe_temperatureW = 20
return_interm_indices = [1, 2, 3]
enc_layers = 6
dec_layers = 6
pre_norm = False
dim_feedforward = 2048
hidden_dim = 256
dropout = 0.0
nheads = 8
num_queries = 900
query_dim = 4
num_patterns = 0
num_feature_levels = 4
enc_n_points = 4
dec_n_points = 4
two_stage_type = 'standard'
two_stage_bbox_embed_share = False
two_stage_class_embed_share = False
transformer_activation = 'relu'
dec_pred_bbox_embed_share = True
dn_box_noise_scale = 1.0
dn_label_noise_ratio = 0.5
dn_label_coef = 1.0
dn_bbox_coef = 1.0
embed_init_tgt = True
dn_labelbook_size = 91
max_text_len = 256
text_encoder_type = "bert-base-uncased"
use_text_enhancer = True
use_fusion_layer = True
use_checkpoint = True
use_transformer_ckpt = True
use_text_cross_attention = True
text_dropout = 0.0
fusion_dropout = 0.0
fusion_droppath = 0.1
sub_sentence_present = True
max_labels = 50                               # pos + neg
lr = 0.0001                                   # base learning rate
backbone_freeze_keywords = None               # only for gdino backbone
freeze_keywords = ['bert']                    # for whole model, e.g. ['backbone.0', 'bert'] for freeze visual encoder and text encoder
lr_backbone = 1e-05                           # specific learning rate
lr_backbone_names = ['backbone.0', 'bert']
lr_linear_proj_mult = 1e-05
lr_linear_proj_names = ['ref_point_head', 'sampling_offsets']
weight_decay = 0.0001
param_dict_type = 'ddetr_in_mmdet'
ddetr_lr_param = False
epochs = 15
lr_drop = 4
save_checkpoint_interval = 1
clip_max_norm = 0.1
onecyclelr = False
multi_step_lr = False
lr_drop_list = [4, 8]
frozen_weights = None
dilation = False
pdetr3_bbox_embed_diff_each_layer = False
pdetr3_refHW = -1
random_refpoints_xy = False
fix_refpoints_hw = -1
dabdetr_yolo_like_anchor_update = False
dabdetr_deformable_encoder = False
dabdetr_deformable_decoder = False
use_deformable_box_attn = False
box_attn_type = 'roi_align'
dec_layer_number = None
decoder_layer_noise = False
dln_xy_noise = 0.2
dln_hw_noise = 0.2
add_channel_attention = False
add_pos_value = False
two_stage_pat_embed = 0
two_stage_add_query_num = 0
two_stage_learn_wh = False
two_stage_default_hw = 0.05
two_stage_keep_all_tokens = False
num_select = 300
batch_norm_type = 'FrozenBatchNorm2d'
masks = False
aux_loss = True
set_cost_class = 1.0
set_cost_bbox = 5.0
set_cost_giou = 2.0
cls_loss_coef = 2.0
bbox_loss_coef = 5.0
giou_loss_coef = 2.0
enc_loss_coef = 1.0
interm_loss_coef = 1.0
no_interm_box_loss = False
mask_loss_coef = 1.0
dice_loss_coef = 1.0
focal_alpha = 0.25
focal_gamma = 2.0
decoder_sa_type = 'sa'
matcher_type = 'HungarianMatcher'
decoder_module_seq = ['sa', 'ca', 'ffn']
nms_iou_threshold = -1
dec_pred_class_embed_share = Truematch_unstable_error = True
use_ema = False
ema_decay = 0.9997
ema_epoch = 0
use_detached_boxes_dec_out = False
use_coco_eval = True
dn_scalar = 100
根据教程,主要是做如下修改:
- use_coco_eval = True
+ use_coco_eval = False
+ label_list=['dog', 'cat', 'person']
把 use_coco_eval改为 False,把自己训练集的类别 加进去 label_list。
然后是 datasets_mixed_odvg.json 文件:
{"train": [{"root": "mypath/mydata/","anno": "path/mydata/annotations/mydata_v1_all_od.jsonl","label_map": "path/mydata/annotations/my_label_map.json","dataset_mode": "odvg"},{"root": "path/mydata/images/my_images/","anno": "path/mydata/annotations/my_vg.jsonl","dataset_mode": "odvg"}],"val": [{"root": "path/mydata/val","anno": "config/instances_val.json","label_map": null,"dataset_mode": "coco"}]
}
把个人数据集的 图片路径 jsonl 文件路径,labelmap路径加进去,就可以了,后面可以开始训练
2.4、开始训练
训练命令:
sh train_dist.sh
train_dist.sh的内容如下:
GPU_NUM=$1
CFG=$2
DATASETS=$3
OUTPUT_DIR=$4
NNODES=${NNODES:-1}
NODE_RANK=${NODE_RANK:-0}
PORT=${PORT:-29500}
MASTER_ADDR=${MASTER_ADDR:-"127.0.0.1"}# Change ``pretrain_model_path`` to use a different pretrain.
# (e.g. GroundingDINO pretrain, DINO pretrain, Swin Transformer pretrain.)
# If you don't want to use any pretrained model, just ignore this parameter.python -m torch.distributed.launch  --nproc_per_node=${GPU_NUM} main.py \--output_dir ${OUTPUT_DIR} \-c ${CFG} \--datasets ${DATASETS}  \--pretrain_model_path /path/to/groundingdino_swint_ogc.pth \--options text_encoder_type=/path/to/bert-base-uncased
上面是多卡的,单卡命令:
python -m torch.distributed.launch --nproc_per_node=1 main.py \--output_dir ./my_output \-c config/cfg_odvg.py \--datasets ./config/datasets_mixed_odvg.json \--pretrain_model_path /path/to/groundingdino_swint_ogc.pth \--options text_encoder_type=/path/to/bert-base-uncased
--pretrain_model_path 是预训练模型路径,--options text_encoder_type是bert文本解码模型路径。
跑起来的界面:
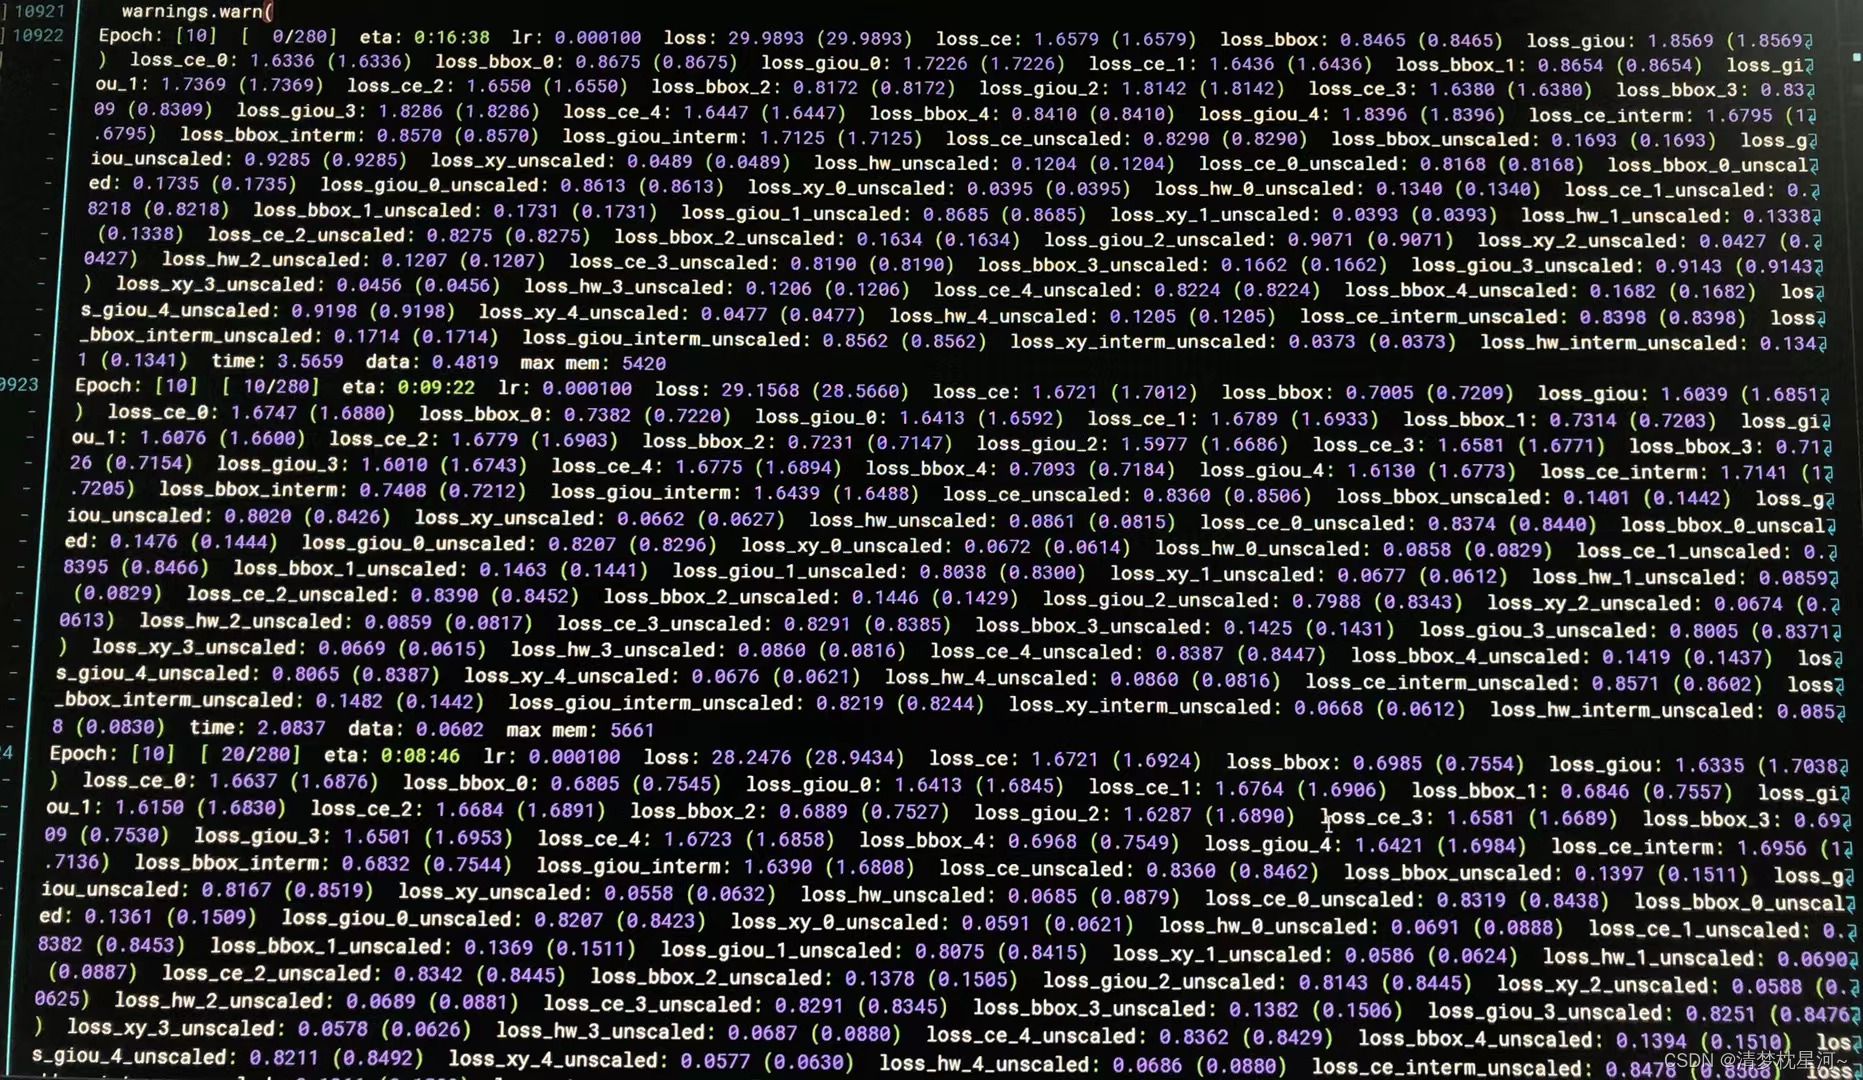
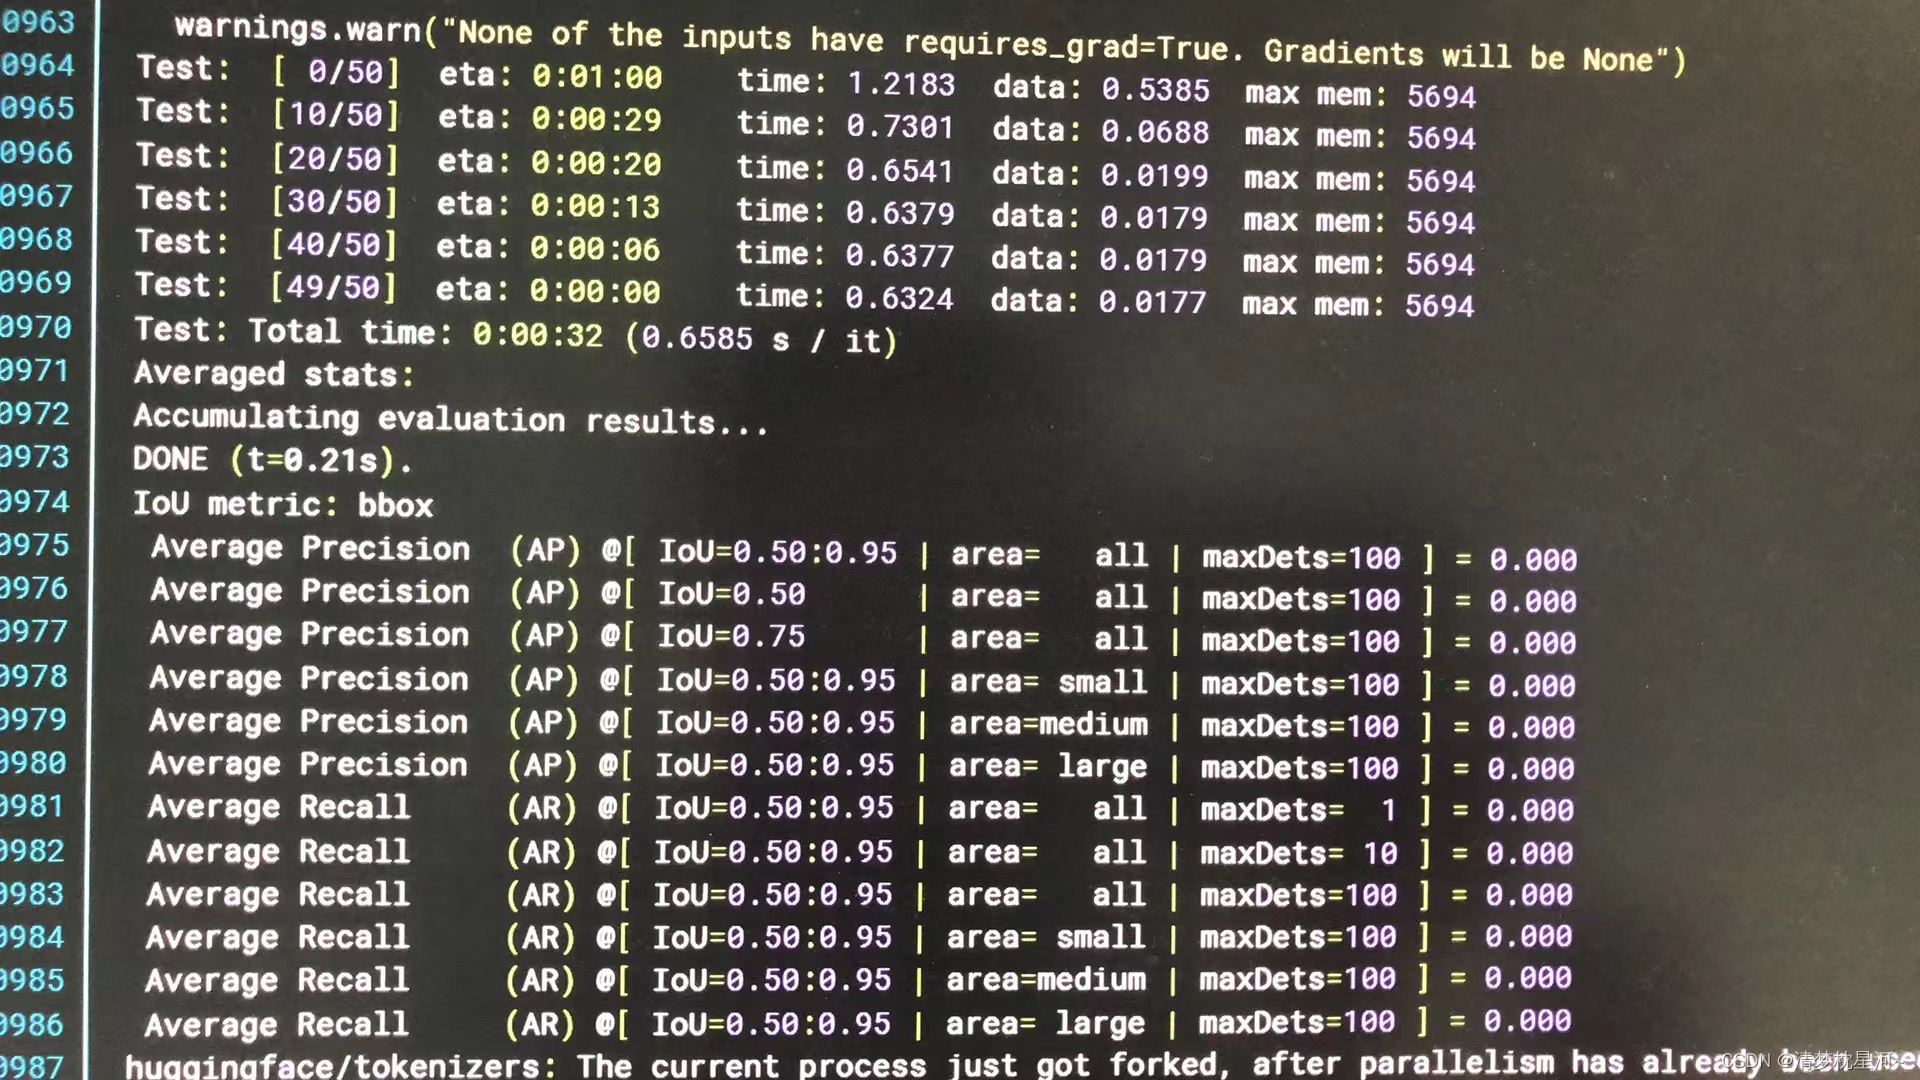
但是,我碰到一个问题,就是训练过程中的验证阶段没有精度指标,基本上是0,不知道怎么回事,是因为没采用预训练模型吗?希望碰到类似问题的一同交流一下,或者跑起来结果正常的,也希望能一起交流一下,非常感谢!


全景解析)

投稿到录用过程中的经历和心得体会)

)


函数、sorted()函数的用法深入讲解(具体实例:蓝桥杯数位排序))
)