目录
- 前言
- 下载方式
- 安装命令
- 使用方式及小技巧
- 一些常用的命令
- 安装软件小技巧
- 一些关于conda环境的建议
- 最后
前言
相信大家在用conda的时候都遇到过各种各样的问题吧,比如创建环境非常缓慢、安装软件并解析依赖的速度非常感人等,有时候等待半小时甚至更久最后还不一定能安装成功。
除此之外,conda本身包含的软件比较多,文件数目和空间占用较大,即使是miniconda也存在同样的问题。
为了解决这些问题,Wolf Vollprecht开发了mamba(其推出mamba的blog:https://medium.com/@QuantStack/open-software-packaging-for-science-61cecee7fc23),并将其称为conda的”drop-in replacement”,浅浅翻译为即时替代产品或者普适性替代产品,总之就是用来替换conda的,各方面都比conda要好。
下载方式
安装mamba的方式见:https://mamba.readthedocs.io/en/latest/installation/mamba-installation.html
该教程推荐安装miniforge3,因为miniforge3包含了conda和mamba,并且使用conda-forge作为默认channel。
miniforge的官网:https://github.com/conda-forge/miniforge
点击该网站,往下滑找到Download,并选择适合自己操作系统的链接:

比如我的系统是x86,那么就下载x86对应的那个脚本,下载命令如下:
wget https://github.com/conda-forge/miniforge/releases/latest/download/Miniforge3-Linux-x86_64.sh
注意:由于该软件是存放在github上的,可能需要使用魔法才可以下载。
下载完成以后就准备安装!
安装命令
安装命令很简单(和conda类似),直接通过bash运行刚刚下载的脚步即可:
bash Miniforge3-Linux-x86_64.sh
接下来会出现一些信息说明安装的步骤,通常来说只需要一直按回车即可,这样该软件就会安装到用户的主目录(home)下面。
下面是详细的安装记录:
-
在这一步直接按回车

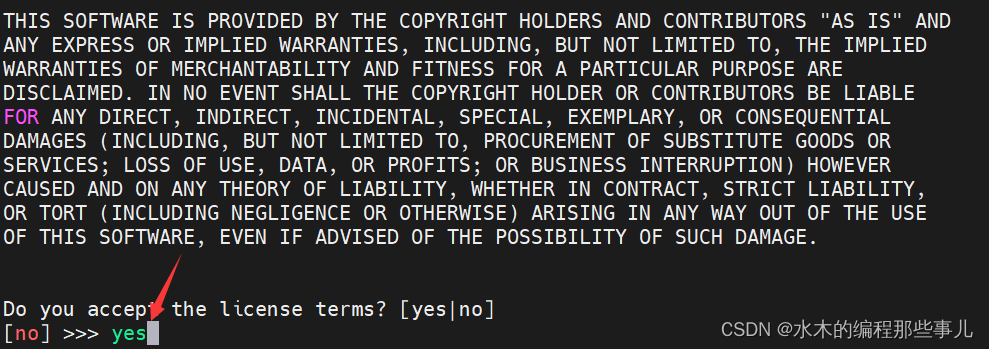
-
在这一步输入yes

-
这一步不需要修改,它会将miniforge安装到主目录下,如果想安装到别的目录,则需要输入目录全称

-
最后输入Yes来激活conda环境。

使用方式及小技巧
安装完miniforge3退出当前shell,再打开一个新的shell(这一步的目的是激活miniforge3),然后输入conda或mamba,就会出现它们的帮助文档,如下:
$ conda
usage: conda [-h] [-v] [--no-plugins] [-V] COMMAND ...conda is a tool for managing and deploying applications, environments and packages.options:-h, --help          Show this help message and exit.-v, --verbose       Can be used multiple times. Once for detailed output, twice for INFO logging, thrice for DEBUG logging, four times for TRACE logging.--no-plugins        Disable all plugins that are not built into conda.-V, --version       Show the conda version number and exit.commands:The following built-in and plugins subcommands are available.COMMANDactivate          Activate a conda environment.clean             Remove unused packages and caches.compare           Compare packages between conda environments.config            Modify configuration values in .condarc.create            Create a new conda environment from a list of specified packages.deactivate        Deactivate the current active conda environment.doctor            Display a health report for your environment.export            Export a given environmentinfo              Display information about current conda install.init              Initialize conda for shell interaction.install           Install a list of packages into a specified conda environment.list              List installed packages in a conda environment.notices           Retrieve latest channel notifications.package           Create low-level conda packages. (EXPERIMENTAL)remove (uninstall)Remove a list of packages from a specified conda environment.rename            Rename an existing environment.repoquery         Advanced search for repodata.run               Run an executable in a conda environment.search            Search for packages and display associated information using the MatchSpec format.update (upgrade)  Update conda packages to the latest compatible version.$ mamba
usage: mamba [-h] [-v] [--no-plugins] [-V] COMMAND ...conda is a tool for managing and deploying applications, environments and packages.options:-h, --help          Show this help message and exit.-v, --verbose       Can be used multiple times. Once for detailed output, twice for INFO logging, thrice for DEBUG logging, four times for TRACE logging.--no-plugins        Disable all plugins that are not built into conda.-V, --version       Show the conda version number and exit.commands:The following built-in and plugins subcommands are available.COMMANDactivate          Activate a conda environment.clean             Remove unused packages and caches.compare           Compare packages between conda environments.config            Modify configuration values in .condarc.create            Create a new conda environment from a list of specified packages.deactivate        Deactivate the current active conda environment.doctor            Display a health report for your environment.export            Export a given environmentinfo              Display information about current conda install.init              Initialize conda for shell interaction.install           Install a list of packages into a specified conda environment.list              List installed packages in a conda environment.notices           Retrieve latest channel notifications.package           Create low-level conda packages. (EXPERIMENTAL)remove (uninstall)Remove a list of packages from a specified conda environment.rename            Rename an existing environment.repoquery         Advanced search for repodata.repoquery         Query repositories using mamba.run               Run an executable in a conda environment.search            Search for packages and display associated information using the MatchSpec format.update (upgrade)  Update conda packages to the latest compatible version.
一些常用的命令
- 查看所有的环境:
mamba info -e - 创建新环境:
mamba create -n env-name,其中env-name是新的环境名 - 激活环境:
mamba activate env-name,其中env-name是新的环境名 - 安装软件:这里以安装R为例,命令为:
mamba install conda-forge::r-base,即后面接对应的软件名即可
安装软件小技巧
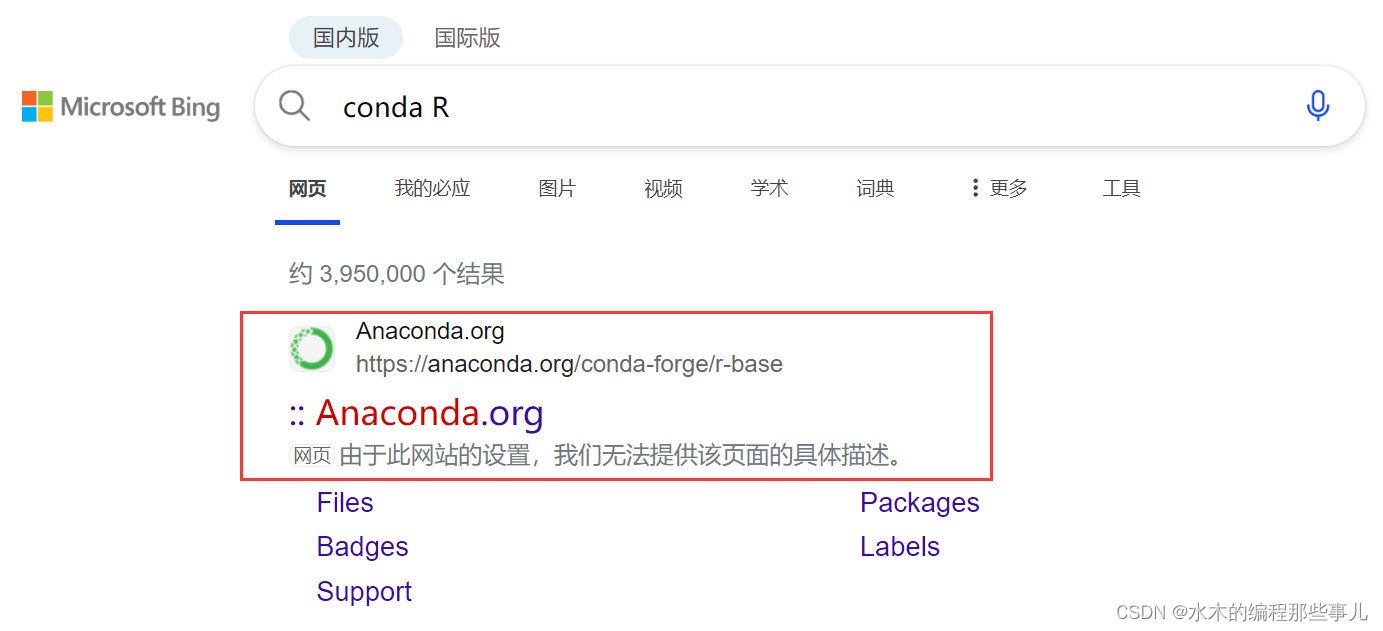
想要知道某个软件是否可以用conda安装,可以在搜索引擎搜索”软件名 conda”,然后点击Anaconda.org网站的那个结果,进去以后就会显示安装该软件的命令。
比如我想安装R,那么去Bing搜索,结果如下:

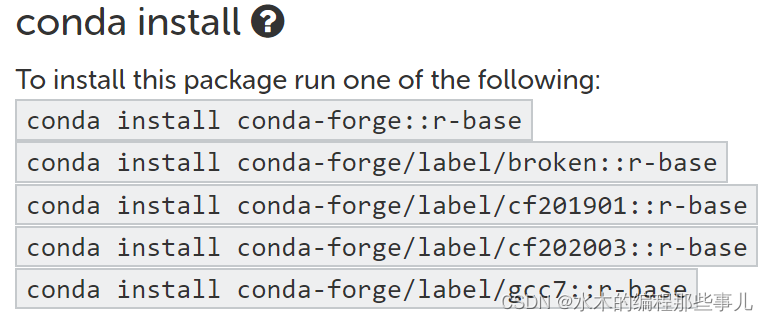
通常来说第一个结果就是Anaconda的官网,点击进去以后可以发现安装命令有很多:

选择第一条即可,并将conda换成mamba。
如果搜索软件名+conda时搜不到Anaconda官网的结果,则说明Anaconda官网并未收录该软件,那么则无法通过conda或mamba安装。
一些关于conda环境的建议
生信分析通常需要用到很多软件,也会有很多流程,比如RNA-seq、ChIP-seq、GWAS、variant calling等流程,那么大部分情况下都需要建立多个conda环境,因为不同流程用到的软件可能并不兼容。
如果每个流程都建立一个单独的环境的话,就会面临一个问题,即不同的流程用到了相同的软件,这样许多流程中的软件就会存在冗余,而每个环境所占的空间以及文件数目会很多(文件数目在几万左右),从而导致性能下降或者服务器存储告急。
因为建议严格控制conda环境的数目,并且不要根据流程建立环境,而是根据软件名或编程语言名称来建立。
举例来说,生信分析大多数都需要用到R语言和python语言,那么就可以建立一个R环境,并加上版本号,例如r4.3,该环境仅安装r 4.3版本以及相应的R包;用到python包时可以建立一个py3.10环境,其中安装3.10版本的python;有些软件可能依赖python 2.7,那么可以建立一个py2.7环境。
这样做的好处是可以保证软件之间的独立性,并且会最大程度降低软件的冗余。
下面是我目前的环境:
$ mamba info -emamba version : 1.5.8
# conda environments:
#
base                     /public/home/fan_lab/wangjie/miniforge3
gcc                      /public/home/fan_lab/wangjie/miniforge3/envs/gcc
py2.7                    /public/home/fan_lab/wangjie/miniforge3/envs/py2.7
py3.10                   /public/home/fan_lab/wangjie/miniforge3/envs/py3.10
r4.3                     /public/home/fan_lab/wangjie/miniforge3/envs/r4.3
其中gcc环境是因为有些C++软件安装时需要高版本的gcc,而服务器自带的gcc版本较低,便单独建立了gcc环境。
有的流程可能既需要用python又需要用R,那么可以在不同的环境之间切换,只需要将该环境的bin路径加入到环境变量PATH中即可。
当我需要使用py3.10环境中的软件时,便可以运行下面命令:
export PATH=/public/home/fan_lab/wangjie/miniforge3/envs/py3.10/bin/:$PATH
最后
本文同步发表于微信公众号:水木的生信与编程世界,如果觉得本文对您有帮助欢迎关注公众号,我会持续分享更多关于生信的分析经验和实用技巧。


)


)
)


