背景
前面搭建好了 Kubernetes 集群与私有镜像仓库,终于要进入服务编排的实践环节了。本系列拿 ruoyi-cloud 项目进行练手,按照 MySQL , Nacos , Redis , Nginx , Gateway , Auth , System 的顺序来部署 ruoyi-cloud 微服务应用。
部署一个服务前,需要明确它是有状态服务还是无状态服务,这里 MySQL , Nacos , Redis , Nginx 当做有状态服务(StatefulSet)来部署;而 Gateway , Auth , System 这些微服务作为无状态服务(Deployment)来部署。
这一次对全部服务采用 YAML 文件的方式来进行部署,这有助于理解K8S组织管理资源的风格,后续我们可以借助开源的容器平台,eg: KubeSphere 来进行可视化的服务部署。不过,手动编写 YAML 文件有一个问题,那就是当面对较多的微服务时,工作量较大,基本成了体力活;有个好消息是,我们可以使用 Kubernetes 官方提供的 kompose 工具,实现对 dokcer-compose 的 yaml 到 K8S 的 yaml 的转换。
另外,为了保证后续在实际生产环境下各组件的稳定与可靠,我们限定了所有基础镜像的版本。
- MySQL: 8.0
- Nacos: 2.2.3
- Redis: 7.2.3
- Nginx: 1.25.3
部署 Nginx 与前面几个依赖服务( MySQL , Nacos , Redis )不同的是:
- 基于Nginx基础镜像,将前端的打包文件dist放到了镜像中;
- 用到了私有镜像仓库,将上一步得到的新Nginx镜像Push到私有镜像仓库,方便在K8S集群内部的不同实例之间进行镜像共享;
- 由于私有镜像仓库配置了认证信息,则在其他的节点拉取镜像时,需要配置
imagePullSecrets。
虚机资源
共用到了三台虚机,1台作为 Master 节点,2台 Worker 节点。
| 主机名 | IP | 说明 |
|---|---|---|
| k8s-master | 172.16.201.25 | 主节点 |
| k8s-node1 | 172.16.201.26 | 工作节点 |
| k8s-node2 | 172.16.201.27 | 工作节点 |
[root@k8s-master ~]# kubectl get nodes
NAME         STATUS   ROLES                  AGE   VERSION
k8s-master   Ready    control-plane,master   37h   v1.20.9
k8s-node1    Ready    <none>                 35h   v1.20.9
k8s-node2    Ready    <none>                 35h   v1.20.9
系统环境
[root@k8s-master ~]# uname -a
Linux k8s-master 3.10.0-1160.71.1.el7.x86_64 #1 SMP Tue Jun 28 15:37:28 UTC 2022 x86_64 x86_64 x86_64 GNU/Linux
[root@k8s-master ~]# cat /proc/version
Linux version 3.10.0-1160.71.1.el7.x86_64 (mockbuild@kbuilder.bsys.centos.org) (gcc version 4.8.5 20150623 (Red Hat 4.8.5-44) (GCC) ) #1 SMP Tue Jun 28 15:37:28 UTC 2022
[root@k8s-master ~]# cat /etc/redhat-release
CentOS Linux release 7.9.2009 (Core)
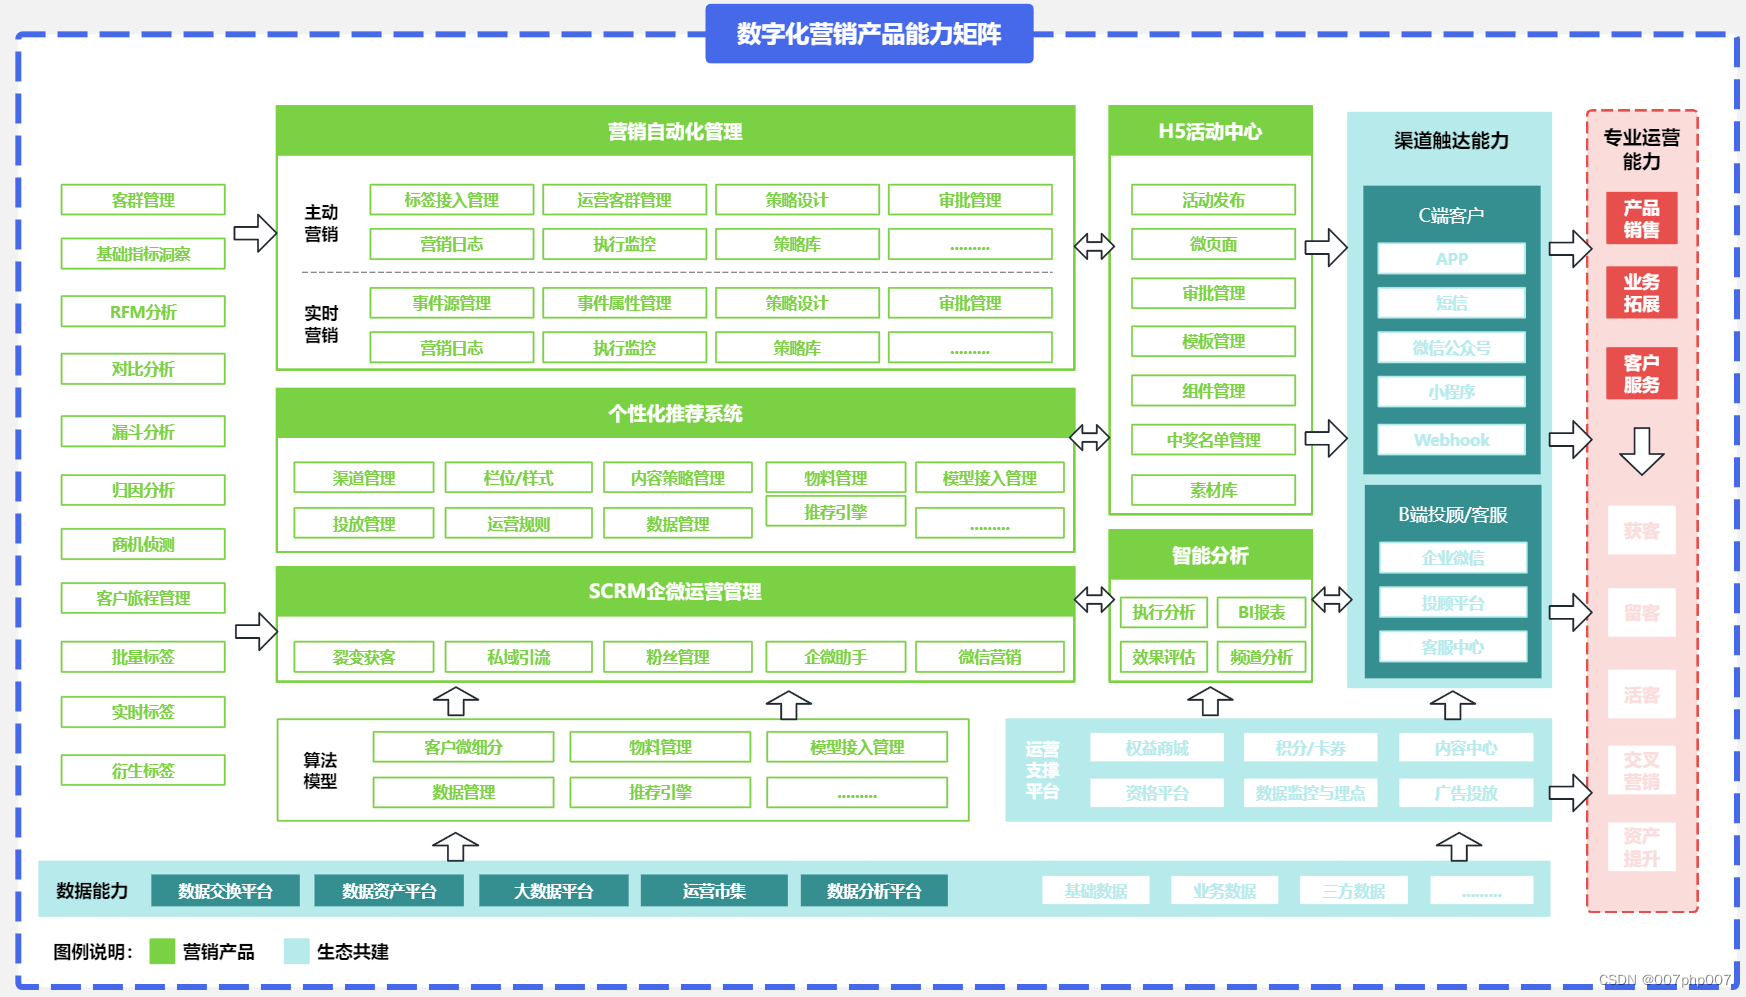
部署示意
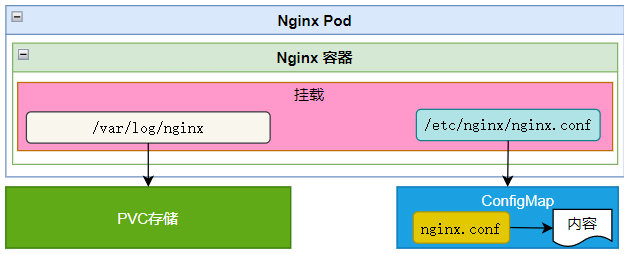
YAML转换
ruoyi-cloud 项目本身提供了一个使用 docker-compose 部署的配置文件以及所有依赖服务镜像的构建脚本,是在项目根目录的 docker 目录下,可参考Docker容器化部署若依微服务ruoyi-cloud项目。
先将这个 docker 目录上传到 Kubernetes 的主节点,然后使用 kompose 将 dokcer-compose 的 yaml 转换为 K8S 的 yaml 。
curl -L https://github.com/kubernetes/kompose/releases/download/v1.26.0/kompose-linux-amd64 -o kompose
chmod +x kompose
mv ./kompose /usr/local/bin/kompose
[root@k8s-master docker]# cd /opt/docker
[root@k8s-master docker]# kompose convert
对于自动转换后的 YAML ,我们做简单的修改后即可应用部署。下面是 Nginx 的 YAML 配置文件(做了合并和微调)。
- ruoyi-nginx-pv-pvc-cm.yaml
apiVersion: v1
kind: PersistentVolume
metadata:name: ruoyi-nginx-log-pvlabels:pv: ruoyi-nginx-log-pv
spec:capacity: storage: 5GiaccessModes:- ReadWriteOncepersistentVolumeReclaimPolicy: RetainstorageClassName: local-storagelocal:path: /data/nginx/lognodeAffinity:required:nodeSelectorTerms:- matchExpressions:- key: kubernetes.io/hostnameoperator: Invalues:- k8s-node1---apiVersion: v1
kind: PersistentVolumeClaim
metadata:name: ruoyi-nginx-log-pvcnamespace: ruoyi-basic
spec:accessModes:- ReadWriteOnceresources:requests:storage: 200MistorageClassName: local-storageselector:matchLabels:pv: ruoyi-nginx-log-pv---apiVersion: v1
kind: ConfigMap
metadata:name: ruoyi-nginx-configmapnamespace: ruoyi-basic
data:nginx.conf: |worker_processes  1;events {worker_connections  1024;}http {include       mime.types;default_type  application/octet-stream;sendfile        on;keepalive_timeout  65;server {listen       80;server_name  localhost;location / {root   /home/ruoyi/projects/ruoyi-ui;try_files $uri $uri/ /index.html;index  index.html index.htm;}location /prod-api/{proxy_set_header Host $http_host;proxy_set_header X-Real-IP $remote_addr;proxy_set_header REMOTE-HOST $remote_addr;proxy_set_header X-Forwarded-For $proxy_add_x_forwarded_for;proxy_pass http://ruoyi-gateway.ruoyi-service:8081/;}# 避免actuator暴露if ($request_uri ~ "/actuator") {return 403;}error_page   500 502 503 504  /50x.html;location = /50x.html {root   html;}}}
Note: 这里使用 local-storage 的 StorageClass ,并使用本地磁盘的方式创建使用 PV ,实际建议使用 NFS 。另外, Nginx 中配置的 proxy_pass ,采用服务名的方式访问。
- ruoyi-nginx-statefulset.yaml
apiVersion: apps/v1
kind: StatefulSet
metadata:annotations:kompose.cmd: kompose convertkompose.version: 1.26.0 (40646f47)labels:io.kompose.service: ruoyi-nginxname: ruoyi-nginxnamespace: ruoyi-basic
spec:serviceName: ruoyi-nginxreplicas: 1selector:matchLabels:io.kompose.service: ruoyi-nginxtemplate:metadata:annotations:kompose.cmd: kompose convertkompose.version: 1.26.0 (40646f47)labels:io.kompose.service: ruoyi-nginxspec:imagePullSecrets:- name: ruoyi-registry-secretcontainers:- image: 10.96.198.223:5000/ruoyi-nginx:1name: ruoyi-nginxports:- containerPort: 80volumeMounts:- mountPath: /var/log/nginxname: ruoyi-nginx-log-pvc- mountPath: /etc/nginx/nginx.confname: ruoyi-nginx-configsubPath: nginx.confrestartPolicy: Alwaysvolumes:- name: ruoyi-nginx-log-pvcpersistentVolumeClaim:claimName: ruoyi-nginx-log-pvc- name: ruoyi-nginx-configconfigMap:name: ruoyi-nginx-configmap
Note:
- 先基于Nginx基础镜像构建自己部署了前端静态资源包的镜像;
- 这里
ruoyi-nginx:1是我通过IDEA结合Dockerfile直接构建到虚机的,具体操作可参考:云原生之容器编排实践-通过IDEA连接Docker服务。当然,也可以将若依项目的docker目录上传虚机上,在Nginx的Dockerfile所在目录执行docker build -t ruoyi-nginx:1 .。
# 登录至私有镜像仓库
docker login -uusername -ppassword 10.96.198.223:5000
# 对nginx打标签
docker tag ruoyi-nginx:1 10.96.198.223:5000/ruoyi-nginx:1
docker push 10.96.198.223:5000/ruoyi-nginx:1
curl -u username:password http://10.96.198.223:5000/v2/_catalog
[root@k8s-master ~]# curl -u username:password http://10.96.198.223:5000/v2/_catalog
{"repositories":["hello-world","ruoyi-nginx"]}
此外,为了在不同的节点上可以拉取到 Nginx 镜像,需要配置:
spec:imagePullSecrets:- name: ruoyi-registry-secret
- ruoyi-nginx-service.yaml
apiVersion: v1
kind: Service
metadata:annotations:kompose.cmd: kompose convertkompose.version: 1.26.0 (40646f47)labels:io.kompose.service: ruoyi-nginxname: ruoyi-nginxnamespace: ruoyi-basic
spec:ports:- name: "80"port: 80targetPort: 80nodePort: 30080selector:io.kompose.service: ruoyi-nginxtype: NodePort
部署Nginx
Note:与 MySQL 、 Nacos 、 Redis 使用相同的 NameSpace 和 StorageClass 。
# 创建PV、PVC、CM
[root@k8s-master nginx]# kubectl apply -f ruoyi-nginx-pv-pvc-cm.yaml
persistentvolume/ruoyi-nginx-data-pv created
persistentvolume/ruoyi-nginx-log-pv created
persistentvolumeclaim/ruoyi-nginx-data-pvc created
persistentvolumeclaim/ruoyi-nginx-log-pvc created
configmap/ruoyi-nginx-configmap created# 部署Nginx
[root@k8s-master nginx]# kubectl apply -f ruoyi-nginx-statefulset.yaml
statefulset.apps/ruoyi-nginx created# 创建Nginx服务
[root@k8s-master nginx]# kubectl apply -f ruoyi-nginx-service.yaml
service/ruoyi-nginx created# 获取配置信息
[root@k8s-master nginx]# kubectl get cm -n ruoyi-basic
NAME                   DATA   AGE
kube-root-ca.crt       1      32h
ruoyi-mysql-configmap   1      32h
ruoyi-nacos-configmap   1      21h
ruoyi-nginx-configmap   1      6s
ruoyi-redis-configmap   1      7h48m# 查看所有Pod,Nginx就绪
[root@k8s-master nginx]# kubectl get pod -A
NAMESPACE              NAME                                         READY   STATUS    RESTARTS   AGE
default                busybox                                      1/1     Running   446        18d
docker-registry        docker-registry-9bc898786-l477q              1/1     Running   2          19d
kube-system            calico-kube-controllers-577f77cb5c-hv29w     1/1     Running   3          22d
kube-system            calico-node-4fkrs                            1/1     Running   2          22d
kube-system            calico-node-d4tqq                            1/1     Running   3          22d
kube-system            calico-node-sdmm6                            1/1     Running   6          22d
kube-system            coredns-9545f45dc-tf9wd                      1/1     Running   1          18d
kube-system            etcd-k8s-master                              1/1     Running   10         24d
kube-system            kube-apiserver-k8s-master                    1/1     Running   10         24d
kube-system            kube-controller-manager-k8s-master           1/1     Running   10         24d
kube-system            kube-proxy-4789z                             1/1     Running   2          24d
kube-system            kube-proxy-7mt7k                             1/1     Running   6          24d
kube-system            kube-proxy-lqtpz                             1/1     Running   3          24d
kube-system            kube-scheduler-k8s-master                    1/1     Running   11         24d
kubernetes-dashboard   dashboard-metrics-scraper-79c5968bdc-j9bnv   1/1     Running   3          22d
kubernetes-dashboard   kubernetes-dashboard-658485d5c7-pq7z8        1/1     Running   2          22d
ruoyi-basic             ruoyi-mysql-8c779d94c-b7r9n                   1/1     Running   1          18d
ruoyi-basic             ruoyi-nacos-0                                 1/1     Running   1          18d
ruoyi-basic             ruoyi-redis-0                                 1/1     Running   0          17d
ruoyi-basic             ruoyi-nginx-0                                 1/1     Running   0          16d# Nginx对外暴露了端口,用于测试
[root@k8s-master nginx]# kubectl get svc -n ruoyi-basic -o wide
NAME         TYPE       CLUSTER-IP      EXTERNAL-IP   PORT(S)                                        AGE   SELECTOR
ruoyi-mysql   NodePort   10.96.58.67     <none>        3306:30306/TCP                                 24h   io.kompose.service=ruoyi-mysql
ruoyi-nacos   NodePort   10.96.31.220    <none>        8848:30848/TCP,9848:31623/TCP,9849:30012/TCP   13h   io.kompose.service=ruoyi-nacos
ruoyi-redis   NodePort   10.96.166.191   <none>        6379:30379/TCP                                 11s   io.kompose.service=ruoyi-redis
ruoyi-nginx   NodePort   10.96.113.16    <none>        80:30080/TCP                                   12s   io.kompose.service=ruoyi-nginx
验证Nginx服务
由于暴露了服务端口 30080 ,直接通过浏览器访问验证 Nginx 是否部署成功。
小总结
这次我们先是借助 kompose 工具,实现对 dokcer-compose 的 yaml 到 K8S 的 yaml 的转换,经过简单的加工后即可应用部署;通过以上操作,成功将 Nginx 1.25.3 部署到了 K8S 集群,下一步我们部署 网关服务 、 认证服务 、 系统服务 。
If you have any questions or any bugs are found, please feel free to contact me.
Your comments and suggestions are welcome!


