一、项目介绍

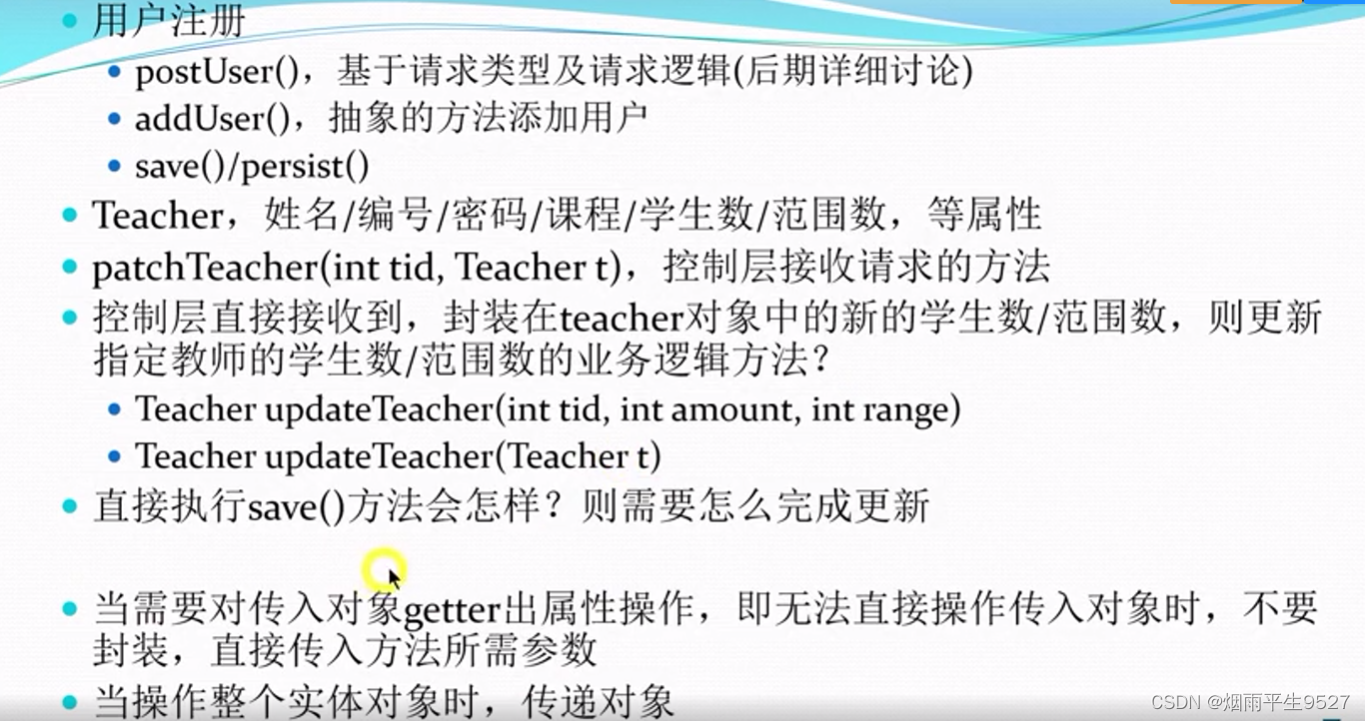
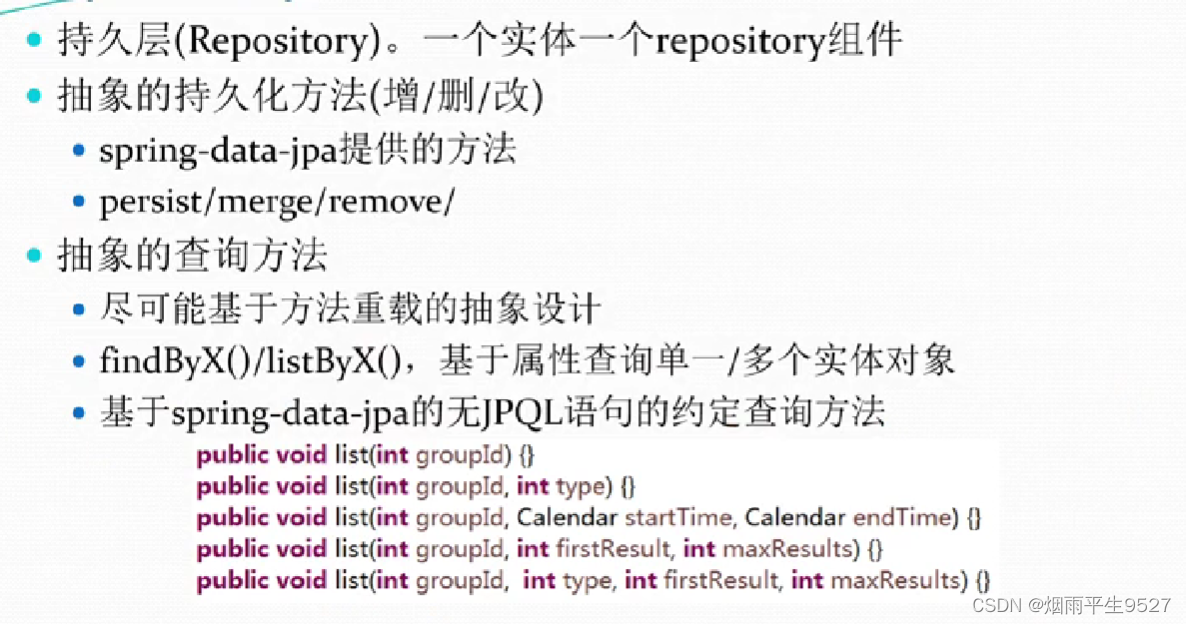
二、项目设计原则
2.1整体原则

2.2持久层
2.3业务逻辑层

具体分析
 三、实战
三、实战
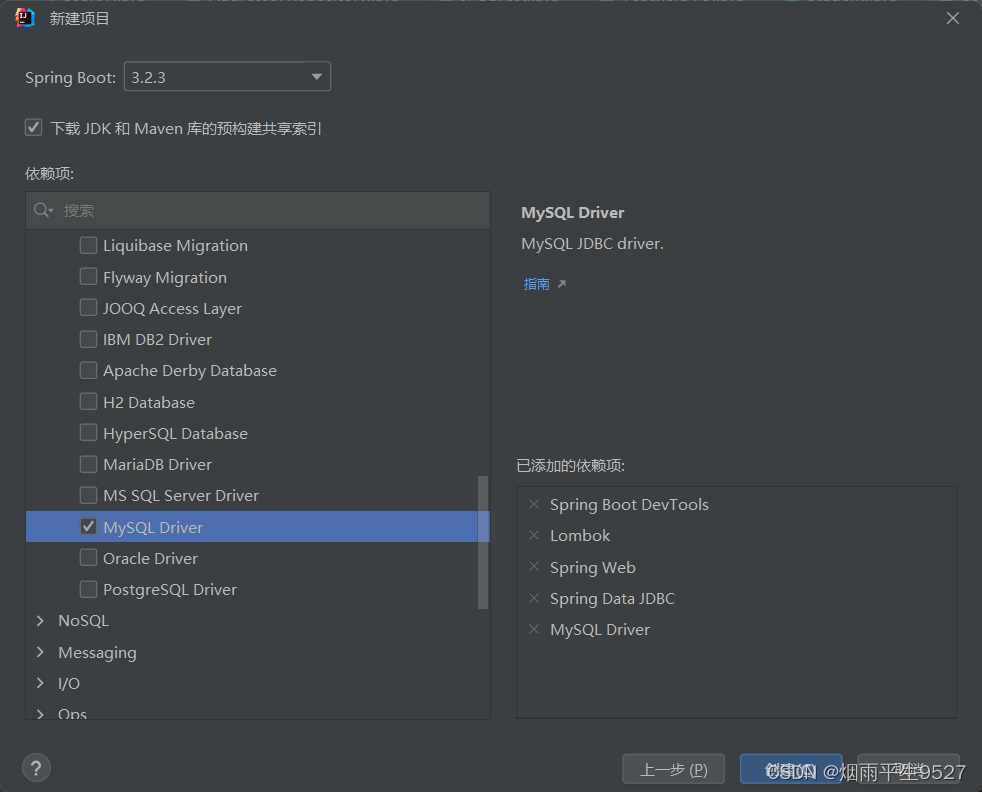
3.1项目搭建

<dependency><groupId>org.springframework.security</groupId><artifactId>spring-security-crypto</artifactId></dependency><dependency><groupId>com.auth0</groupId><artifactId>java-jwt</artifactId><version>3.19.2</version></dependency><dependency><groupId>org.junit.platform</groupId><artifactId>junit-platform-launcher</artifactId><scope>test</scope></dependency>3.2yml配置
spring:datasource:url: 'jdbc:mysql://'username: rootpassword: sql:init:mode: alwaysjackson: #表示在序列化过程中,只有非空的属性才会被包含在JSON输出中。default-property-inclusion: non_nulljpa:show-sql: truehibernate:ddl-auto: updateproperties:hibernate:dialect: org.hibernate.dialect.MySQL8Dialectlogging:level:sql: debugcom:example: debugpattern:console: '%-5level %C.%M[%line] - %msg%n'
server:port: 8080my:secretkey: R28K42ZEJ8LWRHU5salt: 636eac2534bcfcb0
3.3创建业务码VO
package com.yanyu.vo;public enum Code {LOGIN_ERROR(400, "用户名密码错误"),BAD_REQUEST(400, "请求错误"),UNAUTHORIZED(401, "未登录"),TOKEN_EXPIRED(403, "过期请重新登录"),FORBIDDEN(403, "无权限");private final int code;private final String message;Code(int code, String message) {this.code = code;this.message = message;}public int getCode() {return code;}public String getMessage() {return message;}
}
NoArgsConstructor
@Getter
@Setter
@Builder
@AllArgsConstructor
@NoArgsConstructor
public class ResultVO {// 定义状态码字段private int code;// 定义消息字段private String message;// 定义数据字段,用于存储返回给前端的数据private Map<String, Object> data;// 用于构建成功的结果对象public static ResultVO success(Map<String, Object> data) {// 使用Builder模式构建ResultVO对象,并设置状态码为200,以及传入的数据return ResultVO.builder().code(200).data(data).build();}// 用于构建错误的结果对象public static ResultVO error(int code, String msg) {// 使用Builder模式构建ResultVO对象,并设置状态码和错误信息return ResultVO.builder().code(code).message(msg).build();}// 用于构建错误的结果对象,传入的参数为枚举类型Codepublic static ResultVO error(Code code) {// 使用Builder模式构建ResultVO对象,并设置状态码和错误信息,从Code枚举中获取return ResultVO.builder().code(code.getCode()).message(code.getMessage()).build();}
}
3.4创建自定义异常
package com.yanyu.exception;import com.yanyu.vo.Code;
import lombok.Builder;
import lombok.Getter;@Getter
@Builder
public class XException extends RuntimeException{private final Code code;public XException(Code code) {this.code = code;}
}
package com.yanyu.exception;import com.yanyu.vo.ResultVO;
import lombok.extern.slf4j.Slf4j;
import org.springframework.web.bind.annotation.ExceptionHandler;
import org.springframework.web.bind.annotation.RestControllerAdvice;@Slf4j
@RestControllerAdvice
public class ExceptionController {@ExceptionHandler(XException.class)public ResultVO handleValidException(XException exception) {return ResultVO.error(exception.getCode());}@ExceptionHandler(Exception.class)public ResultVO handleException(Exception exception) {return ResultVO.error(400, "请求错误: " + exception.getMessage());}
}
3.5创建基础工具
配置密码编码器
package com.example.backendjdbcexamples.component;import org.springframework.context.annotation.Bean;
import org.springframework.context.annotation.Configuration;
import org.springframework.security.crypto.bcrypt.BCryptPasswordEncoder;
import org.springframework.security.crypto.password.PasswordEncoder;// 配置类,用于定义密码编码器的 Bean
@Configuration
public class PasswordEncoderConfig {// 声明一个名为 getPasswordEncoder 的 Bean,用于提供密码编码器@Beanpublic PasswordEncoder getPasswordEncoder() {// 返回一个 BCryptPasswordEncoder 实例作为密码编码器return new BCryptPasswordEncoder();}
}
JWT编码
@Component // 将该类标记为Spring组件,使其能够被自动扫描并注入到其他类中
public class JWTComponent {// 私钥,从配置文件中获取@Value("${my.secretkey}")private String secretkey;// 编码方法,将传入的map转换为JWT字符串public String encode(Map<String, Object> map) {LocalDateTime time = LocalDateTime.now().plusMonths(1); // 设置过期时间为一个月后return JWT.create() // 创建一个新的JWT对象.withPayload(map) // 设置载荷(payload).withIssuedAt(new Date()) // 设置签发时间.withExpiresAt(Date.from(time.atZone(ZoneId.systemDefault()).toInstant())) // 设置过期时间.sign(Algorithm.HMAC256(secretkey)); // 使用HMAC256算法和私钥进行签名}// 解码方法,验证并解析JWT字符串public DecodedJWT decode(String token) {try {return JWT.require(Algorithm.HMAC256(secretkey)).build().verify(token); // 验证并解析JWT字符串} catch (TokenExpiredException | SignatureVerificationException | JWTDecodeException e) {Code code = e instanceof TokenExpiredException ? Code.TOKEN_EXPIRED : Code.FORBIDDEN; // 根据异常类型设置错误码throw XException.builder().code(code).build(); // 抛出自定义异常}}
}
JWT(JSON Web Token)是一种基于JSON的开放标准,用于在网络上安全地传输信息。它通常用于身份验证和授权。一个JWT由三部分组成:头部(Header)、载荷(Payload)和签名(Signature)。
- 头部(Header):包含描述JWT的元数据,如加密算法。
- 载荷(Payload):包含所需要传递的数据,如用户ID、过期时间等。
- 签名(Signature):用于验证发送者的身份,防止数据被篡改。
雪花算法
@Configuration // 标记为配置类
@EnableJdbcAuditing // 启用Jdbc审计功能
public class SnowflakeGenerator {@Bean // 定义一个Bean,用于生成AuditorAware实例AuditorAware<String> auditorAware() {Snowflake s = new Snowflake();return () -> Optional.of(String.valueOf(s.nextId()));}private static class Snowflake {private static final int UNUSED_BITS = 1; // 未使用的位数,始终设置为0private static final int EPOCH_BITS = 41; // 时间戳位数private static final int NODE_ID_BITS = 10; // 节点ID位数private static final int SEQUENCE_BITS = 12; // 序列号位数private static final long maxNodeId = (1L << NODE_ID_BITS) - 1; // 最大节点ID值private static final long maxSequence = (1L << SEQUENCE_BITS) - 1; // 最大序列号值// 自定义纪元(2015年1月1日午夜UTC)private static final long DEFAULT_CUSTOM_EPOCH = 1420070400000L;private final long nodeId; // 节点IDprivate final long customEpoch; // 自定义纪元private volatile long lastTimestamp = -1L; // 上一次的时间戳private volatile long sequence = 0L; // 当前序列号// 使用节点ID和自定义纪元创建Snowflake实例public Snowflake(long nodeId, long customEpoch) {if(nodeId < 0 || nodeId > maxNodeId) {throw new IllegalArgumentException(String.format("NodeId must be between %d and %d", 0, maxNodeId));}this.nodeId = nodeId;this.customEpoch = customEpoch;}// 使用节点ID创建Snowflake实例public Snowflake(long nodeId) {this(nodeId, DEFAULT_CUSTOM_EPOCH);}// 让Snowflake生成一个节点IDpublic Snowflake() {this.nodeId = createNodeId();this.customEpoch = DEFAULT_CUSTOM_EPOCH;}// 生成下一个IDpublic synchronized long nextId() {long currentTimestamp = timestamp();if(currentTimestamp < lastTimestamp) {throw new IllegalStateException("Invalid System Clock!");}if (currentTimestamp == lastTimestamp) {sequence = (sequence + 1) & maxSequence;if(sequence == 0) {// 序列号耗尽,等待到下一个毫秒currentTimestamp = waitNextMillis(currentTimestamp);}} else {// 重置序列号,以便下一个毫秒从零开始sequence = 0;}lastTimestamp = currentTimestamp;long id = currentTimestamp << (NODE_ID_BITS + SEQUENCE_BITS)| (nodeId << SEQUENCE_BITS)| sequence;return id;}// 获取当前时间戳(毫秒)并调整为自定义纪元private long timestamp() {return Instant.now().toEpochMilli() - customEpoch;}// 阻塞并等待到下一个毫秒private long waitNextMillis(long currentTimestamp) {while (currentTimestamp == lastTimestamp) {currentTimestamp = timestamp();}return currentTimestamp;}// 生成节点IDprivate long createNodeId() {long nodeId;try {StringBuilder sb = new StringBuilder();Enumeration<NetworkInterface> networkInterfaces = NetworkInterface.getNetworkInterfaces();while (networkInterfaces.hasMoreElements()) {NetworkInterface networkInterface = networkInterfaces.nextElement();byte[] mac = networkInterface.getHardwareAddress();if (mac != null) {for(byte macPort: mac) {sb.append(String.format("%02X", macPort));}}}nodeId = sb.toString().hashCode();} catch (Exception ex) {nodeId = (new SecureRandom().nextInt());}nodeId = nodeId & maxNodeId;return nodeId;}// 解析ID,返回包含时间戳、节点ID和序列号的数组public long[] parse(long id) {long maskNodeId = ((1L << NODE_ID_BITS) - 1) << SEQUENCE_BITS;long maskSequence = (1L << SEQUENCE_BITS) - 1;long timestamp = (id >> (NODE_ID_BITS + SEQUENCE_BITS)) + customEpoch;long nodeId = (id & maskNodeId) >> SEQUENCE_BITS;long sequence = id & maskSequence;return new long[]{timestamp, nodeId, sequence};}@Overridepublic String toString() {return "Snowflake Settings [EPOCH_BITS=" + EPOCH_BITS + ", NODE_ID_BITS=" + NODE_ID_BITS+ ", SEQUENCE_BITS=" + SEQUENCE_BITS + ", CUSTOM_EPOCH=" + customEpoch+ ", NodeId=" + nodeId + "]";}}
}
3.6设计数据库表‘
-- 全部角色用户的公共表
-- ID/role需经常使用的信息加密置于token
create table if not exists user
(id bigint(19) not null primary key ,name varchar(8) not null ,number varchar(12) not null ,password varchar(65) not null ,role int not null default 1,create_time datetime not null default current_timestamp,update_time datetime not null default current_timestamp on update current_timestamp,-- 对number字段添加唯一约束,确保每个用户的number值都是唯一的UNIQUE (number),-- 对number字段添加索引,提高查询效率INDEX (number)
);
-- 与user一对一,因此使用共用主键。非组合关系,利于维护
-- 即,添加一个教师时,先提取出user数据加入user表,并获取返回的id;再将id和其他信息存教师表
create table if not exists teacher
(id bigint(19) not null primary key ,title varchar(8),create_time datetime not null default current_timestamp,update_time datetime not null default current_timestamp on update current_timestamp
);
-- 与user为共用主键
create table if not exists student
(id bigint(19) not null primary key ,clazz varchar(8),create_time datetime not null default current_timestamp,update_time datetime not null default current_timestamp on update current_timestamp
);
-- 每门可以有1位授课教师,索引非外键
create table if not exists course
(id bigint(19) not null primary key ,name varchar(45) not null ,teacher_id bigint(19) not null ,create_time datetime not null default current_timestamp,update_time datetime not null default current_timestamp on update current_timestamp,index (teacher_id)
);
-- 学生课程双向多对多。中间表
create table if not exists student_course
(id bigint(19) not null primary key ,student_id bigint(19) not null ,course_id bigint(19) not null ,create_time datetime not null default current_timestamp,update_time datetime not null default current_timestamp on update current_timestamp,index (course_id),index (student_id)
);
3.7实体类
package com.yanyu.dox;import com.fasterxml.jackson.annotation.JsonProperty;
import lombok.AllArgsConstructor;
import lombok.Builder;
import lombok.Data;
import lombok.NoArgsConstructor;
import org.springframework.data.annotation.CreatedBy;
import org.springframework.data.annotation.Id;
import org.springframework.data.annotation.ReadOnlyProperty;import java.time.LocalDateTime;@Data
@AllArgsConstructor
@NoArgsConstructor
@Builder
public class User {public static final int USER = 1;public static final int ADMIN = 9;@Id@CreatedByprivate String id;private String name;private String number;@JsonProperty(access = JsonProperty.Access.WRITE_ONLY)private String password;private Integer level;@ReadOnlyPropertyprivate LocalDateTime createTime;@ReadOnlyPropertyprivate LocalDateTime updateTime;}
@JsonProperty是一个 Java 注解,用于指定 JSON 对象属性的名称。它通常与 Jackson 库一起使用,以便在将 Java 对象转换为 JSON 字符串或将 JSON 字符串转换为 Java 对象时,自定义属性名称。该属性将仅在序列化(将 Java 对象转换为 JSON 字符串)过程中使用,而在反序列化(将 JSON 字符串转换为 Java 对象)过程中将被忽略。
@CreatedBy
`@CreatedBy` 注解用于自动设置创建对象的用户名称。当使用此注解时,在将对象保存到数据库时,会自动将当前用户的用户名设置为该对象的 `createdBy` 属性值。这样可以避免手动设置创建者的名称,提高代码的可维护性和可读性。
3.8持久层
@Repository
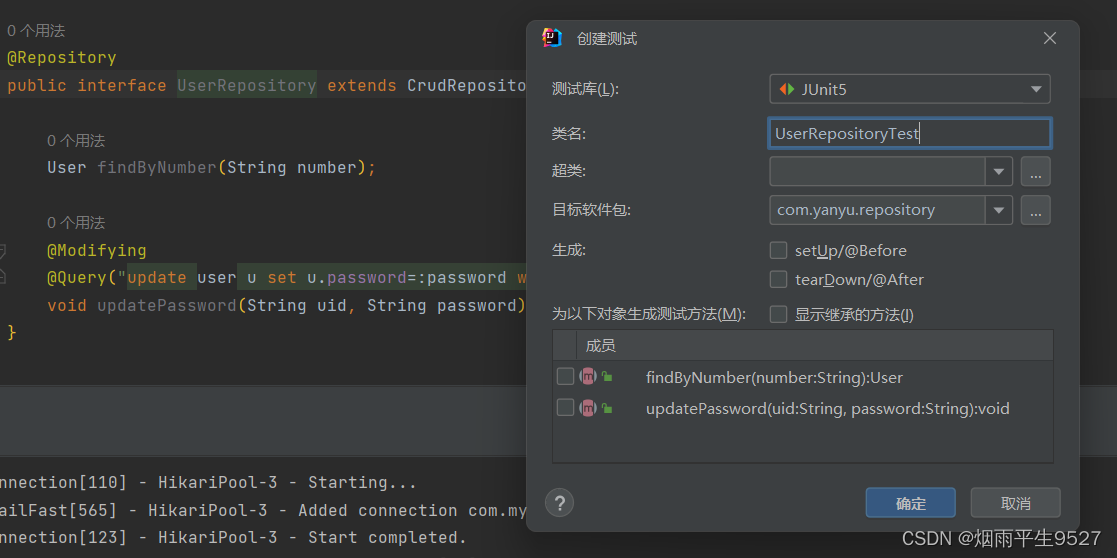
public interface UserRepository extends CrudRepository<User, String> {User findByNumber(String number);@Modifying@Query("update user u set u.password=:password where u.id=:uid")void updatePassword(String uid, String password);
}
测试
@SpringBootTest
@Slf4j
class UserRepositoryTest {@Autowiredprivate UserRepository userRepository;@Testvoid findByNumber() {User u = userRepository.findByNumber("admin");log.debug("{}", u.getId());}@Testvoid updatePassword() {userRepository.updatePassword("1120010882327330816", "aaa");}
}
3.9业务逻辑层
@Service
@RequiredArgsConstructor
public class UserService {private final UserRepository userRepository;private final PasswordEncoder passwordEncoder;public User getUserByNumber(String number) {return userRepository.findByNumber(number);}public User getUser(String uid) {return userRepository.findById(uid).orElse(null);}
}
模拟数据@MockBean
@SpringBootTest
@Slf4j
public class UserServiceMockTest {@Autowiredprivate UserService userService;// 会在测试容器注入模拟组件,不能与整合测试用例混用@MockBeanprivate UserRepository userRepositoryMock;@Testpublic void getUserByNumberTest() {Mockito.when(userRepositoryMock.findByNumber("admin")).thenReturn(User.builder().number("admin").id("101").name("aaa").build());User user = userService.getUserByNumber("admin");log.debug("{}", user.getId());}}
@MockBean是 Spring Boot 测试框架中的一个注解,用于在单元测试中创建模拟对象(mock objects)。它通常与@SpringBootTest或@WebMvcTest等注解一起使用,以便在测试环境中自动注入模拟对象。
3.10控制层组件
@RequiredArgsConstructor
@RestController
@RequestMapping("/api/")
@Slf4j
public class LoginController {private final UserService userService; // 用户服务private final PasswordEncoder passwordEncoder; // 密码编码器private final JWTComponent jwtComponent; // JWT组件@PostMapping("login")public ResultVO postLogin(@RequestBody User user, HttpServletResponse response) {User u = userService.getUserByNumber(user.getNumber()); // 根据用户编号获取用户信息if (u == null || !passwordEncoder.matches(user.getPassword(), u.getPassword())) { // 验证用户名和密码return ResultVO.error(Code.LOGIN_ERROR); // 登录失败,返回错误信息}String code = switch(u.getLevel()) { // 根据用户等级生成对应的codecase User.USER -> "Yo87M";case User.ADMIN -> "nU0vt";default -> "";};String token = jwtComponent.encode(Map.of("uid", u.getId(), "role", u.getLevel())); // 生成JWT令牌response.addHeader("role", code); // 将code添加到响应头中response.addHeader("token", token); // 将token添加到响应头中return ResultVO.success(Map.of()); // 登录成功,返回成功信息}
}
@RequiredArgsConstructor
@RequiredArgsConstructor是 Lombok 库中的一个注解,用于自动生成一个包含所有final和@NonNull字段的构造函数。
3.11拦截器组件
@Component // 将该类标记为Spring组件,使其能够被自动扫描并实例化
@Slf4j // 使用Lombok提供的日志功能,简化日志记录操作
@RequiredArgsConstructor // 使用Lombok提供的构造器生成器,自动生成包含final字段的构造函数
public class LoginInterceptor implements HandlerInterceptor { // 实现Spring MVC中的拦截器接口private final JWTComponent jwtComponent; // JWT组件,用于处理JWT令牌的编码和解码private final ResponseHelper responseHelper; // 响应助手,用于构建响应结果@Overridepublic boolean preHandle(HttpServletRequest request, HttpServletResponse response, Object handler) throws Exception {// 在请求处理之前执行,返回true则继续处理,返回false则中断请求处理String token = request.getHeader("token"); // 从请求头中获取tokenif (token == null) {responseHelper.response(response, Code.UNAUTHORIZED); // 如果token为空,返回未授权错误return false;//throw XException.builder().code(Code.UNAUTHORIZED).build();}String uid = jwtComponent.decode(token).getClaim("uid").asString(); // 解密token,获取用户IDint role = jwtComponent.decode(token).getClaim("role").asInt(); // 解密token,获取用户角色// 拦截解密出用户真实数据后,置于request供后续使用request.setAttribute("uid", uid);request.setAttribute("role", role);return true; // 继续处理请求}
}
3.12路由
@Configuration // 表示这是一个配置类
@RequiredArgsConstructor // 自动生成包含所有 final 和 @NonNull 字段的构造函数
public class WebMvcConfig implements WebMvcConfigurer { // 实现 WebMvcConfigurer 接口,用于自定义 Spring MVC 的配置private final LoginInterceptor loginInterceptor; // 登录拦截器private final AdminInterceptor adminInterceptor; // 管理员拦截器@Overridepublic void addInterceptors(InterceptorRegistry registry) { // 重写 addInterceptors 方法,添加自定义拦截器registry.addInterceptor(loginInterceptor) // 添加登录拦截器.addPathPatterns("/api/**") // 拦截以 /api/ 开头的所有请求路径.excludePathPatterns("/api/login", "/api/welcome"); // 排除登录和欢迎页面的请求路径registry.addInterceptor(adminInterceptor) // 添加管理员拦截器.addPathPatterns("/api/admin/**"); // 拦截以 /api/admin/ 开头的所有请求路径}
}
3.13管理员注入
@Service // 表示这是一个服务类,用于处理业务逻辑
@RequiredArgsConstructor // 自动生成包含所有 final 和 @NonNull 字段的构造函数
public class InitialService {private final UserRepository userRepository; // 用户仓库,用于操作数据库中的用户数据private final PasswordEncoder passwordEncoder; // 密码编码器,用于对密码进行加密@EventListener(classes = ApplicationReadyEvent.class) // 监听应用程序启动完成事件@Transactional // 开启事务支持public void onApplicationEvent() { // 当应用程序启动完成后执行该方法long count = userRepository.count(); // 查询数据库中用户的数量if (count == 0) { // 如果用户数量为0,即数据库中没有用户数据User user = User.builder() // 使用建造者模式创建用户对象.name("admin") // 设置用户名为 admin.level(9) // 设置用户等级为 9.number("admin") // 设置用户编号为 admin.password(passwordEncoder.encode("admin")) // 对密码进行加密后设置用户密码.build(); // 构建用户对象userRepository.save(user); // 将用户对象保存到数据库中}}
}

)


![Android Selinux详解[一]---整体介绍](http://pic.xiahunao.cn/Android Selinux详解[一]---整体介绍)


![BUUCTF-MISC-[HDCTF2019]信号分析1](http://pic.xiahunao.cn/BUUCTF-MISC-[HDCTF2019]信号分析1)
)

-----你好,三角形)

![macos m1 arm芯片 使用jpype报错 FileNotFoundError: [Errno 2] JVM DLL not found](http://pic.xiahunao.cn/macos m1 arm芯片 使用jpype报错 FileNotFoundError: [Errno 2] JVM DLL not found)
