在当今的云计算和微服务架构盛行的时代,分布式系统已成为软件开发的重要组成部分。随着系统规模的扩大和业务的复杂化,对数据一致性和唯一性的要求也越来越高,尤其是在全局唯一标识符(ID)的生成上。因此,分布式ID生成系统应运而生,成为保证数据唯一性和提高系统可扩展性的关键技术之一。雪花算法(Snowflake)是Twitter开源的一种算法,用于生成64位的全局唯一ID,非常适用于分布式系统中生成唯一标识符。下面我们将深入探讨雪花算法的原理、结构和实现方式。

分布式ID的需求背景
在单体应用中,生成唯一ID相对简单,如数据库的自增ID、UUID等方法可以轻易满足需求。然而,在分布式系统中,由于数据可能分布在不同的节点上,传统的ID生成方法面临着多方面的挑战:
- 高可用性:系统任何一个部分的故障都不能影响ID的生成和使用。
- 高并发:在大规模并发的场景下,ID生成系统必须能够快速响应。
- 有序性:在某些业务场景中,需要ID具有一定的可排序性,以便于后续处理。
- 低延迟:ID生成的延迟必须足够低,以满足实时性要求。
推特的雪花系统
Twitter开源的Snowflake算法是目前最流行的分布式ID生成方案之一。它通过结合时间戳、机器标识和序列号来生成64位的长整型ID,既保证了全局唯一性,又具有良好的有序性,非常适合高并发的场景。
如下展示了一个64为ID的构成:

每个部分的含义如下:
-
符号位(1位)
始终为0,预留位,将来有可能用来区分有符号数和无符号数。
-
时间戳(41位)
它是纪元或者自定义纪元开始以来的毫秒数,Snowflake使用的是2010-11-04 01:42:54 的时间戳作为默认纪元的,我们也可以自定义。即时间戳为当前时间的毫秒数 - 自定义的纪元的毫秒数。
-
数据中心id(5位)
最多可以有 2 5 2^5 25个数据中心,取值范围为 0~31。
-
机器id(5位)
最多可以有 2 5 2^5 25台机器,取值范围为 0~31。
-
序列号(12位)
对于某个服务,每一个毫秒内生成一个id,序列号就加1,这个数字在每毫秒开始时都会被重置为0。即一个毫秒内单个服务可以生成 2 12 2^{12} 212即4096个id。
我们可以根据服务的具体情况调整下id各部分的长度,比如,对于并发量低,单次生成id数量大的应用,我们可以适当减少数据中心id和机器id的位数,增加序列号位数来提高每个毫秒内id的生成数量。
Java实现雪花雪花系统
使用Java语言实现雪花算法的ID生成器,可以参考以下代码。这个实现同样遵循了雪花算法的基本结构,包括1位符号位、41位时间戳、10位机器标识(5位数据中心ID和5位工作机器ID)以及12位序列号。我们将这些位数放在了配置文件中,家人们可以根据实际情况进行调整。在这个代码中,我们提供了单id生成接口和批量id生成接口。代码如下:
- 配置信息 application.yml
server:port: 8000snowflake:#数据中心id位数datacenterBits: 5# 机器id位数workerBits: 5# 序列id所占位数sequenceBits: 12# 数据中心id,范围0-2^5-1datacenterId: 1# 机器id,范围0-2^5-1workerId: 1# 时间戳起始点(2024-01-01 00::00:00 的毫秒数)twepoch: 1704038400000#单次批量生成id的最大数量 默认10万maxBatchCount: 100000
- SnowflakeProperties
import lombok.Data;
import org.springframework.boot.context.properties.ConfigurationProperties;
import org.springframework.stereotype.Component;@Component
@ConfigurationProperties(prefix ="snowflake")
@Data
public class SnowflakeProperties {//数据中心idprivate Long datacenterId;//数据中心id位数private Long datacenterBits;//机器idprivate Long workerId;//机器id位数private Long workerBits;//序列id所占位数private Long sequenceBits;// 时间戳起始点(毫秒)private  Long twepoch;//单次批量生成id的最大数量private Integer maxBatchCount;
}- SnowflakeIdGenerator
package cn.xj.snowflake.generator;import cn.xj.snowflake.config.SnowflakeProperties;
import org.springframework.stereotype.Component;import java.util.ArrayList;
import java.util.List;@Component
public class SnowflakeIdGenerator {//数据中心idprivate final long datacenterId;//数据中心id位数private final long datacenterBits;//机器idprivate final long workerId;//机器id位数private final long workerBits;//序列id所占位数private final  long sequenceBits;// 时间戳起始点(毫秒)private final long twepoch;//数据中心最大idprivate final long maxDatacenterId;//机器最大idprivate final long maxWorkerId;//最大序列号private final long maxSequence;//机器id左移位数private final long workerIdShift;//数据中心id左移位数private final long datacenterIdShift;//毫秒数左移位数private final long timestampLeftShift;//单次批量生成id的最大数量private final int maxBatchCount;// 序列号private long sequence = 0L;// 上一次时间戳private long lastTimestamp = -1L;public SnowflakeIdGenerator(SnowflakeProperties properties) {//数据中心idthis.datacenterId = properties.getDatacenterId();//数据中心id位数this.datacenterBits = properties.getDatacenterBits();//机器idthis.workerId = properties.getWorkerId();//机器id位数this.workerBits = properties.getWorkerBits();//序列id所占位数this.sequenceBits = properties.getSequenceBits();// 时间戳起始点(毫秒)this.twepoch = properties.getTwepoch();//数据中心最大idthis.maxDatacenterId = -1L ^ (-1L << properties.getDatacenterBits());//机器最大idthis.maxWorkerId = -1L ^ (-1L << properties.getWorkerBits());//最大序列号this.maxSequence = -1L ^ (-1L << properties.getSequenceBits());this.workerIdShift = properties.getSequenceBits();//数据中心id左移位数this.datacenterIdShift = properties.getSequenceBits() + properties.getWorkerBits();//毫秒数左移位数this.timestampLeftShift = properties.getSequenceBits() + properties.getWorkerBits() + properties.getSequenceBits();//单次批量生成id的最大数量this.maxBatchCount = properties.getMaxBatchCount();// 校验datacenterId和workerId是否超出最大值if (datacenterId > maxDatacenterId || datacenterId < 0) {throw new IllegalArgumentException(String.format("数据中心Id不能大于%d或小于0", maxDatacenterId));}if (workerId > maxWorkerId || workerId < 0) {throw new IllegalArgumentException(String.format("机器Id不能大于%d或小于0", maxWorkerId));}}/*** id生成方法(单个)* @return*/public synchronized long nextId() {//获取当前时间的毫秒数long timestamp = currentTime();//判断时钟是否回拨if (timestamp < lastTimestamp) {throw new RuntimeException(String.format("时钟回拨,回拨毫秒数:%d", lastTimestamp - timestamp));}//设置序列号if (lastTimestamp == timestamp) {//设置序列号递增,如果当前毫秒内序列号已经达到最大值,则直到下一毫秒在重新从0开始计算序列号sequence = (sequence + 1) & maxSequence;if (sequence == 0) {timestamp = tilNextMillis(lastTimestamp);}} else {sequence = 0L;}lastTimestamp = timestamp;//计算idreturn ((timestamp - twepoch) << timestampLeftShift) |(datacenterId << datacenterIdShift) |(workerId << workerIdShift) |sequence;}/*** id生成方法(批量)* @return*/public synchronized List<Long> nextIds(int count) {if (count > maxBatchCount || count < 0) {throw new IllegalArgumentException(String.format("批量生成id的数量不能大于%d或小于0", maxBatchCount));}List<Long> ids = new ArrayList<>(count);for (int i = 0; i < count; i++) {ids.add(nextId());}return ids;}/*** 循环等待直至获取到新的毫秒时间戳* 确保生成的时间戳总是向前移动的,即使在相同的毫秒内请求多个ID时也能保持唯一性。*/private long tilNextMillis(long lastTimestamp) {long timestamp = currentTime();// 循环等待直至获取到新的毫秒时间戳while (timestamp <= lastTimestamp) {timestamp = currentTime();}return timestamp;}/*** 获取当前时间的毫秒数*/private long currentTime() {return System.currentTimeMillis();}}
这个Java类SnowflakeIdWorker封装了雪花算法的核心逻辑。它允许通过构造函数指定数据中心ID和机器ID,并提供了nextId()和nextIds()方法用于生成唯一的ID。该方法通过同步关键字synchronized保证了线程安全。
- SnowflakeApi
import cn.xj.snowflake.generator.SnowflakeIdGenerator;
import jakarta.annotation.Resource;
import org.springframework.web.bind.annotation.PostMapping;
import org.springframework.web.bind.annotation.RequestBody;
import org.springframework.web.bind.annotation.RestController;import java.util.List;@RestController
public class SnowflakeApi {@Resourceprivate SnowflakeIdGenerator snowflakeIdGenerator;@PostMapping("/snowflake/api/nextId")public Long nextId(){return snowflakeIdGenerator.nextId();}@PostMapping("/snowflake/api/nextIds")public List<Long> nextIds(@RequestBody int count){return snowflakeIdGenerator.nextIds(count);}
}
接口调用详情
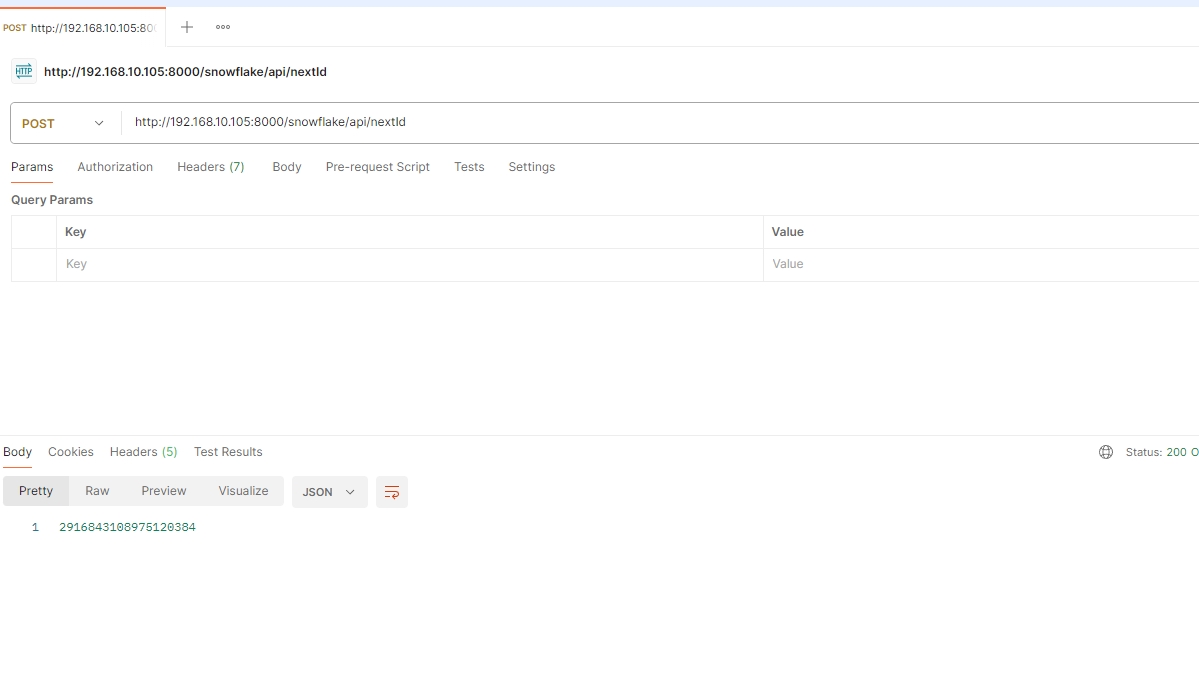
单个id生成接口nextId:

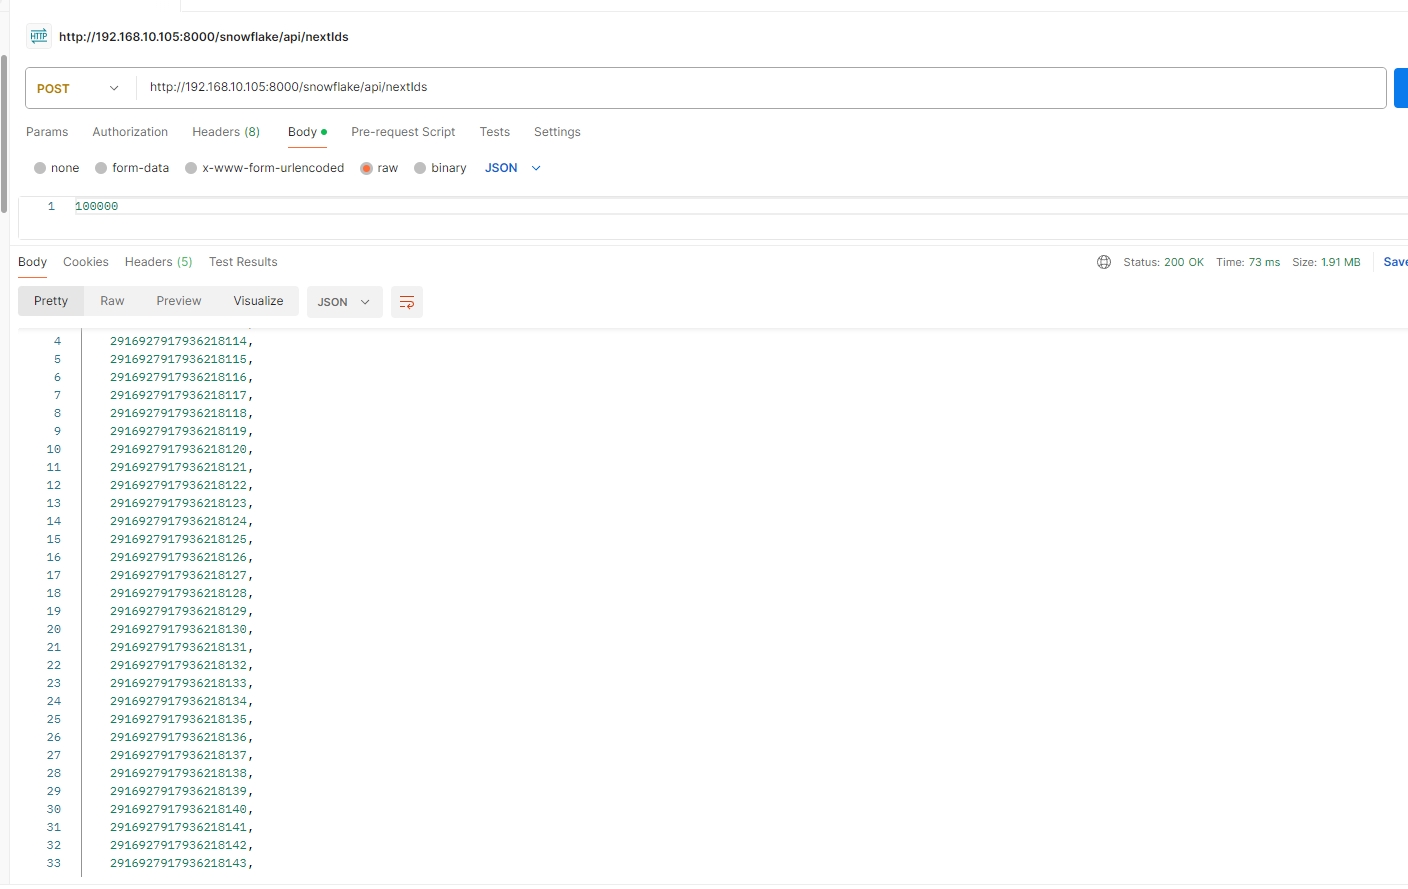
批量id生成接口nextIds:我们此处生成了10万条id,响应时长不到1s

雪花算法的开源代码或者优秀代码示例有很多,但思想基本是一样的。这有篇美团的文章,大家也可以参考下美团的leaf [Leaf——美团点评分布式ID生成系统: https://tech.meituan.com/2017/04/21/mt-leaf.html](https://tech.meituan.com/2017/04/21/mt-leaf.html)
总结
雪花算法作为一种高效、简单的分布式系统ID生成方案,已经被广泛应用于各种互联网产品和系统中。它解决了分布式环境下ID生成的唯一性、时序性和高性能的问题。随着互联网技术的不断进步和发展,分布式ID生成系统将继续演化,但雪花算法作为其中的经典之作,其核心思想和设计理念将长久影响这一领域。


安装篇)


-- 详解)

(黑马 ))
