目录
Android TextView 文本框
TextView 基础属性
范例
带阴影的TextView
范例
带边框的TextView
范例
带图片(drawableXxx)的TextView
范例1
范例2
使用autoLink属性识别链接类型
范例
TextView 显示简单的 HTML
范例1
范例2
SpannableString & SpannableStringBuilder 定制文本
范例1
范例2
跑马灯效果的 TextView
范例
TextView 的几个重要属性
参考文档
Android TextView 文本框
Android 中的 TextView 是用来显示不需要编辑的文本的基本 UI 元素。它非常适合用于显示静态文本内容,比如标题、描述、指导信息等。TextView 具有很强的自定义能力,可以通过 XML 中的属性或者在代码中动态设置属性来改变文本的外观和样式,比如字体大小、颜色、对齐方式等。TextView 还支持富文本,可以显示不同样式的文本,如粗体、斜体、下划线等。
除了显示简单的文本内容外,TextView 也可以显示一些基本的 HTML 标记文本,比如超链接、图像等。这使得它在显示一些富有表现力的文本内容时非常有用。
总的来说,TextView 是 Android 开发中常用的一个重要控件,用来展示各种类型的静态文本信息,使得应用界面更加丰富和易读。
TextView 基础属性
1、android:id:为 TextView 设置一个唯一的组件 id,方便在 Java 或 Kotlin 代码中通过 findViewById() 方法获取到该对象,从而对其进行操作。
2、android:layout_width 和 android:layout_height:分别设置 TextView 的宽度和高度。常用的值有:
- wrap_content:控件显示的内容有多大,控件就有多大。
- match_parent(或 fill_parent):填满该控件所在的父容器。
- 也可以设置成特定的大小,比如 200dp。
3、android:gravity:设置控件中内容的对齐方向,可以控制文本在 TextView 中的水平和垂直方向上的位置。该属性与布局中的 gravity 相同。
4、android:text:设置显示的文本内容。一般建议将字符串写入 strings.xml 文件,然后通过 @string/xxx 来引用,以便进行国际化和易于维护。
5、android:textColor:设置字体颜色。通常将颜色写入 colors.xml 文件,然后通过 @color/xxx 来引用。
6、android:textStyle:设置字体风格,可以使用竖线 | 叠加多个值。常见的值包括:
- normal:正常字体风格(无效果)。
- bold:加粗。
- italic:斜体。
7、android:textSize:设置字体大小,单位一般使用 sp(与 dp 类似,但会根据用户的字体大小首选项进行缩放)。
8、android:background:设置 TextView 的背景颜色,也可以是图片或者其他 drawable 资源。
范例
<?xml version="1.0" encoding="utf-8"?>
<LinearLayoutxmlns:android="http://schemas.android.com/apk/res/android"android:layout_width="match_parent"android:layout_height="match_parent"android:orientation="vertical"android:padding="16dp"><!-- 一个简单的 TextView 显示静态文本内容 --><TextViewandroid:id="@+id/simpleTextView"android:layout_width="wrap_content"android:layout_height="wrap_content"android:text="Hello, World!"android:textSize="20sp"android:textColor="@android:color/black"/><!-- 另一个 TextView 设置不同的文本和样式 --><TextViewandroid:id="@+id/styledTextView"android:layout_width="match_parent"android:layout_height="wrap_content"android:text="@string/email"android:textSize="16sp"android:textColor="#ED0F0F"android:textStyle="bold|italic"android:gravity="center_horizontal"android:paddingTop="8dp"android:paddingBottom="8dp"/></LinearLayout>
运行结果如下

带阴影的TextView
这些是设置 TextView 阴影效果时常用的属性,简要总结如下:
- android:shadowColor:设置阴影颜色。需要与shadowRadius一起使用。
- android:shadowRadius:设置阴影的模糊程度,建议使用大于 0 的值,通常推荐使用 3.0。
- android:shadowDx:设置阴影在水平方向的偏移,即阴影在水平方向开始的位置。
- android:shadowDy:设置阴影在竖直方向的偏移,即阴影在竖直方向开始的位置。
这些属性一起使用可以为 TextView 创建出具有阴影效果的文本显示。
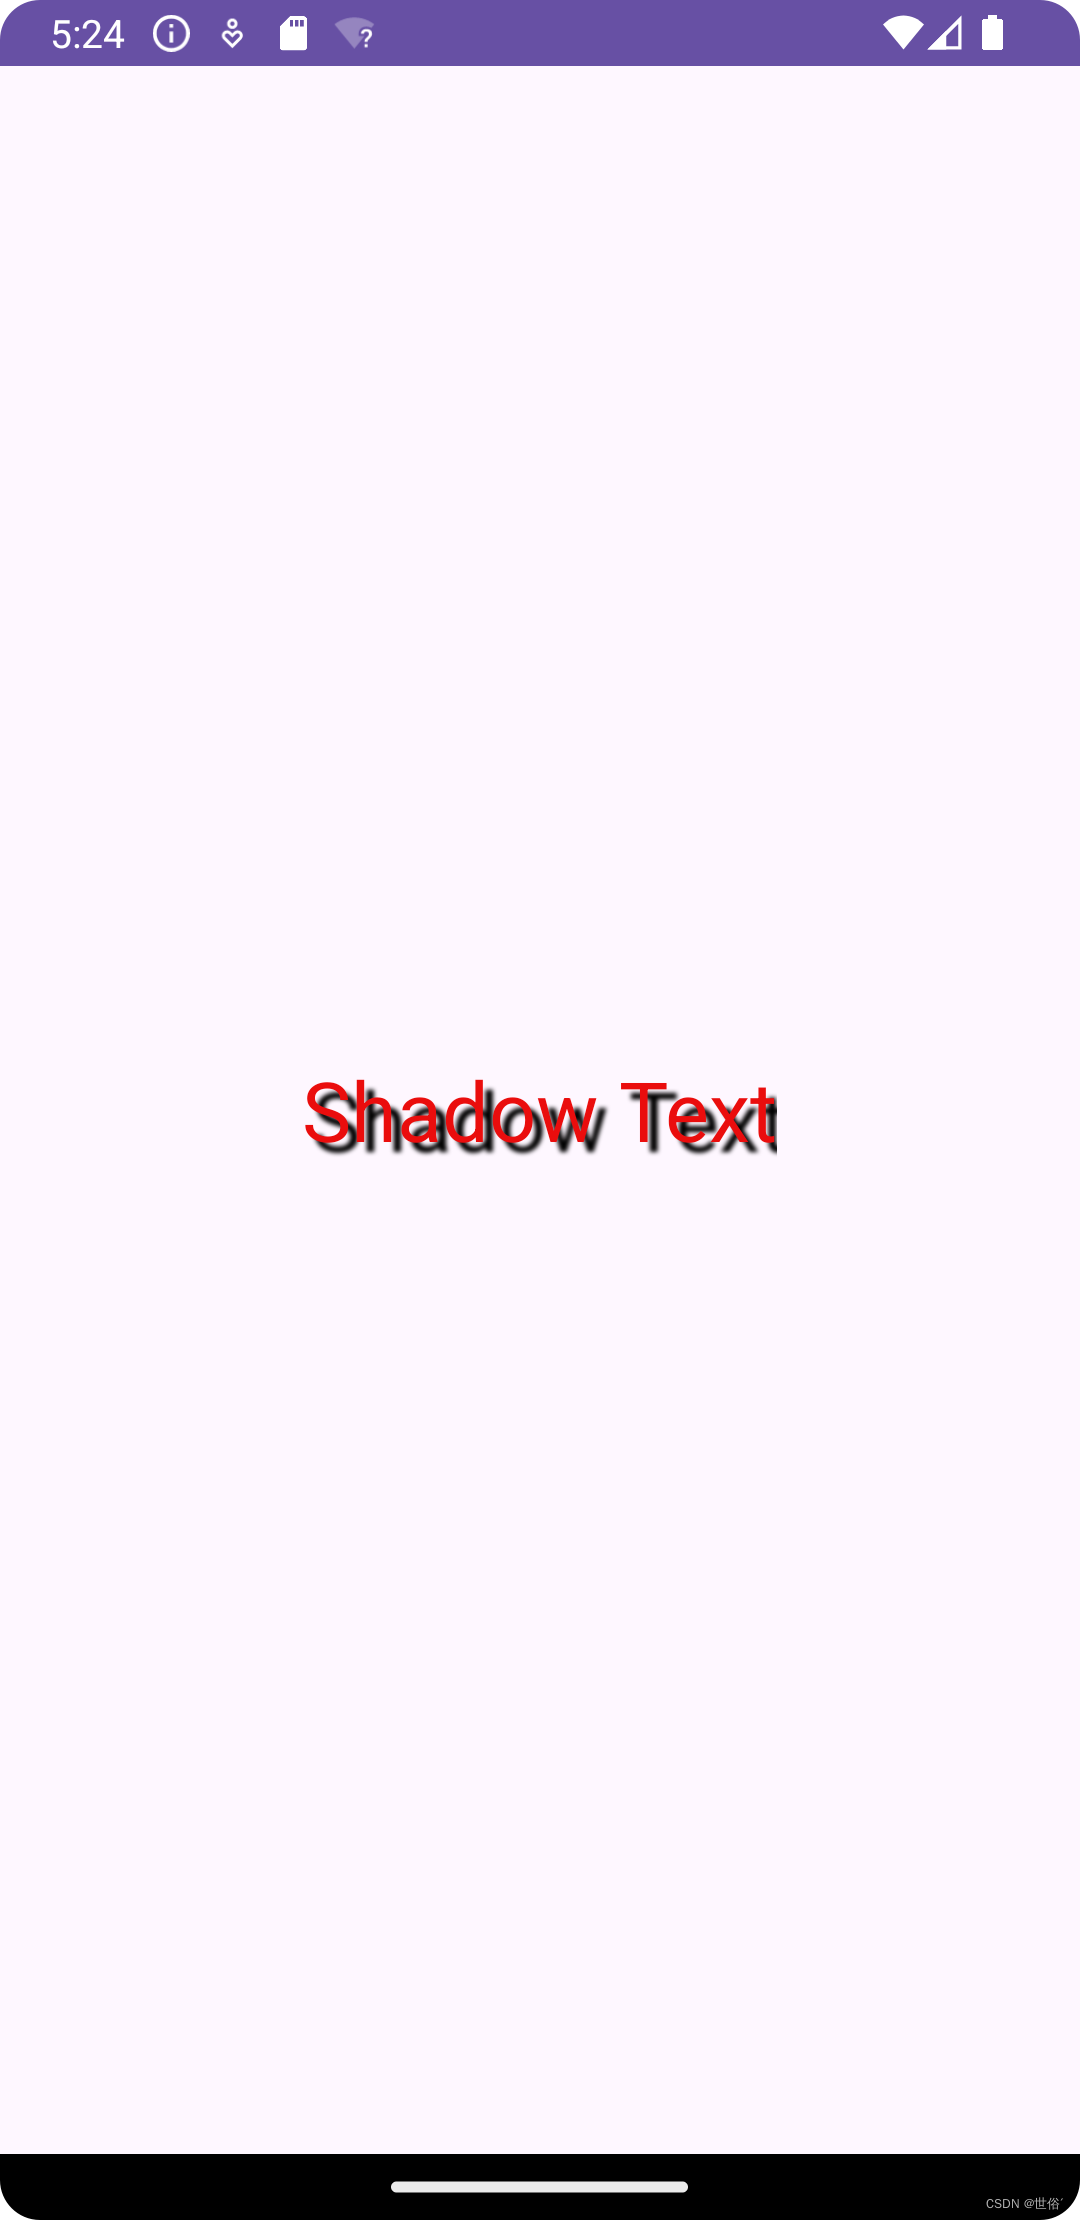
范例
<?xml version="1.0" encoding="utf-8"?>
<LinearLayoutxmlns:android="http://schemas.android.com/apk/res/android"android:layout_width="match_parent"android:layout_height="match_parent"android:orientation="vertical"android:gravity="center"android:padding="16dp"><TextViewandroid:id="@+id/shadowTextView"android:layout_width="wrap_content"android:layout_height="wrap_content"android:text="Shadow Text"android:textSize="30sp"android:textColor="#EA0D0D"android:shadowColor="#000000"android:shadowRadius="3.0"android:shadowDx="10.0"android:shadowDy="10.0"/></LinearLayout>
运行结果如下

带边框的TextView
想要创建一个带有边框的 TextView,可以使用 ShapeDrawable 资源文件。
ShapeDrawable 资源文件定义了形状绘制的样式,以下是常用节点和属性的简单说明:
1、<solid>:设置背景颜色。
- android:color:指定背景颜色。
2、<stroke>:设置边框的样式。
- android:width:指定边框的粗细。
- android:color:指定边框的颜色。
3、<padding>:设置内容与边界的边距。
- android:left:左边距。
- android:top:上边距。
- android:right:右边距。
- android:bottom:下边距。
4、<corners>:设置圆角。
- android:radius:指定圆角的半径。
5、<gradient>:设置渐变色。
- android:startColor:起始颜色。
- android:endColor:结束颜色。
- android:centerColor:中间颜色。
- android:angle:方向角度,从起始颜色到结束颜色的方向。0 度表示从左到右,90 度表示从下到上。
- android:type:渐变的类型,如线性渐变、径向渐变等。
这些节点和属性可以根据需求组合使用,来创建各种形状和样式的背景。
范例
1、首先,在 res/drawable 目录下创建两个 XML 文件,比如 border_bg.xml和border_fillet.xml,用于定义 ShapeDrawable 资源:
<?xml version="1.0" encoding="utf-8"?>
<!--    border_bg.xml-->
<shape xmlns:android="http://schemas.android.com/apk/res/android" ><!-- 设置一个黑色边框 --><stroke android:width="2px" android:color="#000000"/><!-- 渐变 --><gradientandroid:angle="270"android:endColor="#C0C0C0"android:startColor="#FCD209" /><!-- 设置一下边距,让空间大一点 --><paddingandroid:left="5dp"android:top="5dp"android:right="5dp"android:bottom="5dp"/></shape>
<?xml version="1.0" encoding="utf-8"?>
<!-- border_fillet-->
<shape xmlns:android="http://schemas.android.com/apk/res/android"><!-- 设置透明背景色 --><solid android:color="#87CEEB" /><!-- 设置一个黑色边框 --><strokeandroid:width="2px"android:color="#000000" /><!-- 设置四个圆角的半径 --><cornersandroid:bottomLeftRadius="50px"android:bottomRightRadius="50px"android:topLeftRadius="50px"android:topRightRadius="50px" /><!-- 设置一下边距,让空间大一点 --><paddingandroid:bottom="5dp"android:left="5dp"android:right="5dp"android:top="5dp" /></shape>2、然后,在布局文件中使用这两个 ShapeDrawable 资源作为 TextView 的背景:
<?xml version="1.0" encoding="utf-8"?>
<LinearLayoutxmlns:android="http://schemas.android.com/apk/res/android"android:layout_width="match_parent"android:layout_height="match_parent"android:orientation="vertical"android:gravity="center"android:padding="16dp"><TextViewandroid:id="@+id/borderTextView"android:layout_width="wrap_content"android:layout_height="wrap_content"android:text="矩形边框的TextView"android:textSize="20sp"android:textColor="#000000"android:background="@drawable/border_bg"/><TextViewandroid:id="@+id/txtTwo"android:layout_width="200dp"android:layout_height="64dp"android:layout_marginTop="10dp"android:textSize="18sp"android:gravity="center"android:background="@drawable/border_fillet"android:text="圆角边框的TextView" /></LinearLayout>
带图片(drawableXxx)的TextView
基本用法:
设置图片的核心其实就是:drawableXxx;
可以设置四个方向的图片:drawableTop(上),drawableButtom(下),drawableLeft(左),drawableRight(右) 另外,你也可以使用drawablePadding来设置图片与文字间的间距!
范例1
<?xml version="1.0" encoding="utf-8"?>
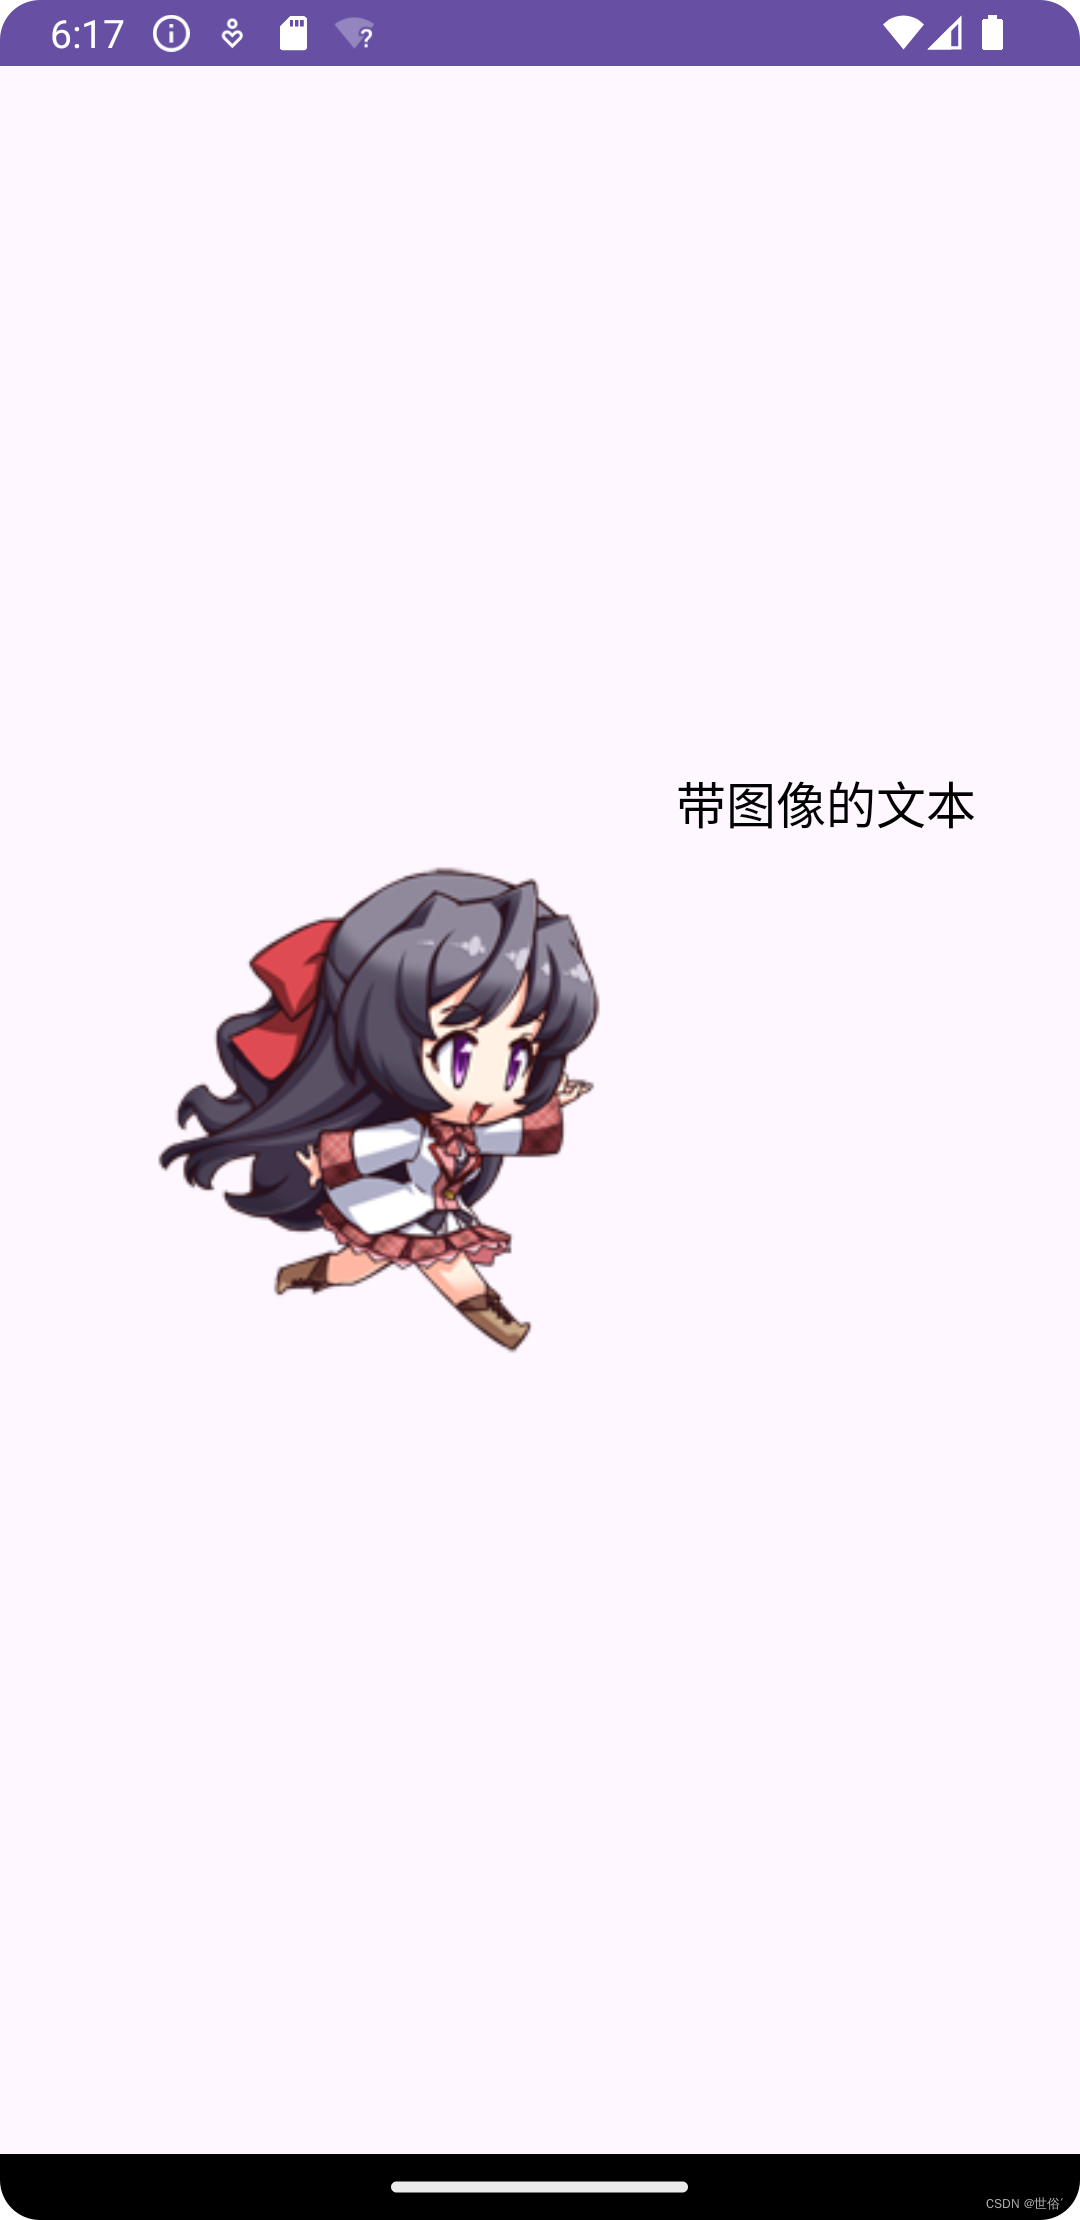
<LinearLayoutxmlns:android="http://schemas.android.com/apk/res/android"android:layout_width="match_parent"android:layout_height="match_parent"android:orientation="vertical"android:gravity="center"android:padding="16dp"><TextViewandroid:id="@+id/imageTextView"android:layout_width="wrap_content"android:layout_height="wrap_content"android:text="带图像的文本"android:textSize="18sp"android:textColor="#000000"android:drawableLeft="@drawable/meimei"android:drawablePadding="8dp"/></LinearLayout>
运行效果图:

问题: 我们这样设置的drawable并不能自行设置大小,在XML是无法直接设置的,所以我们采用
范例2的方法设置带图片的TextView
范例2
<?xml version="1.0" encoding="utf-8"?>
<LinearLayoutxmlns:android="http://schemas.android.com/apk/res/android"android:layout_width="match_parent"android:layout_height="match_parent"android:orientation="vertical"android:gravity="center"android:padding="16dp"><TextViewandroid:id="@+id/imageTextView"android:layout_width="wrap_content"android:layout_height="wrap_content"android:text="带图像的文本"android:textSize="18sp"android:textColor="#000000"android:drawablePadding="8dp"/></LinearLayout>
package com.example.myapplication;import androidx.appcompat.app.AppCompatActivity;import android.graphics.drawable.BitmapDrawable;
import android.graphics.drawable.Drawable;
import android.os.Bundle;
import android.view.ViewGroup;
import android.widget.LinearLayout;
import android.widget.TextView;
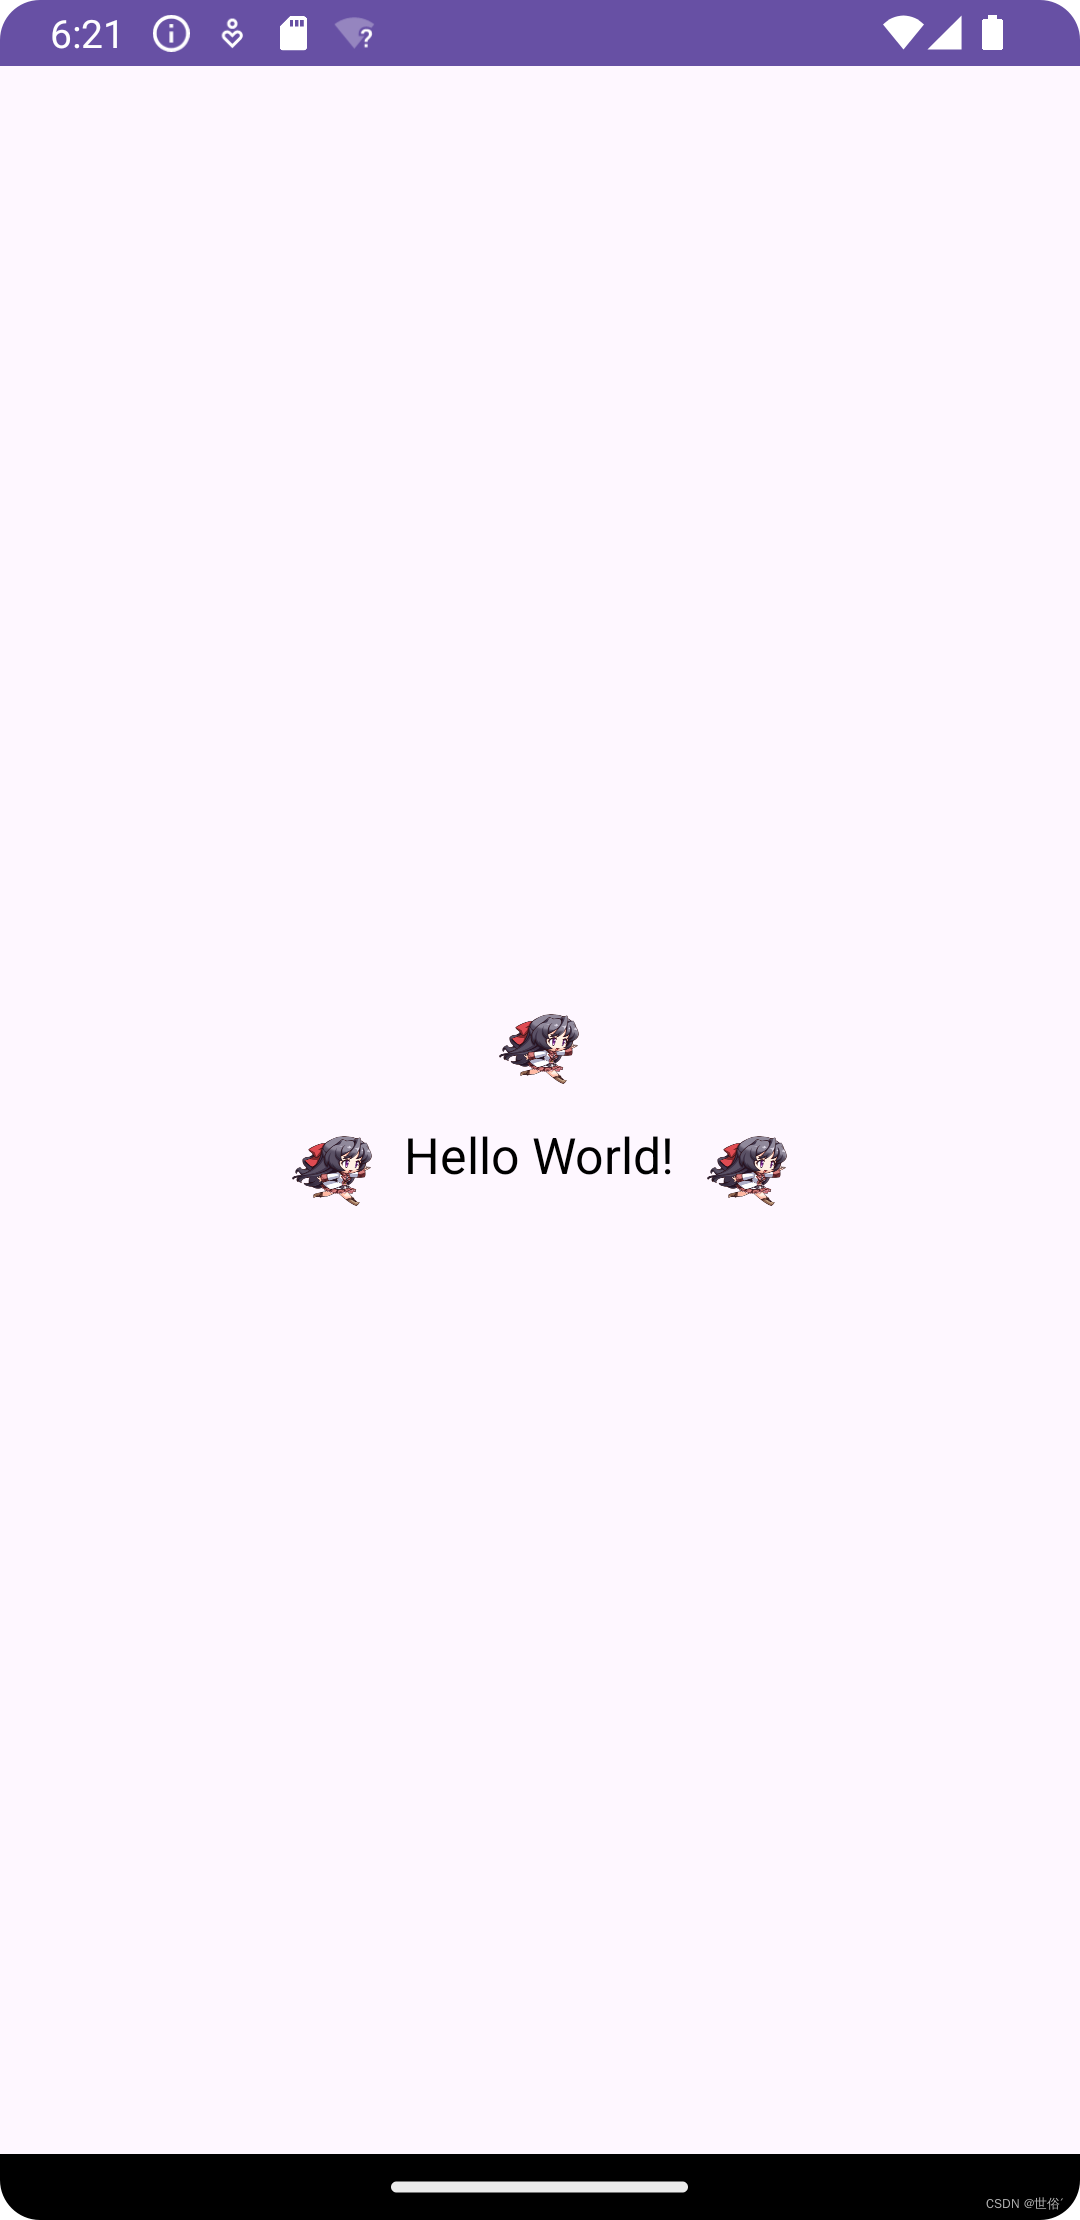
import android.widget.ViewAnimator;public class MainActivity extends AppCompatActivity {@Overrideprotected void onCreate(Bundle savedInstanceState) {super.onCreate(savedInstanceState);setContentView(R.layout.activity_main);// 获取图像资源Drawable drawable = getResources().getDrawable(R.drawable.meimei);TextView textView = findViewById(R.id.imageTextView);// 将图像资源转换为 BitmapDrawableBitmapDrawable bitmapDrawable = (BitmapDrawable) drawable;// 设置图像资源的大小bitmapDrawable.setBounds(0, 0, 100, 100); // 设置宽高为 100 像素// 将设置后的 BitmapDrawable 设置给 TextViewtextView.setCompoundDrawables(bitmapDrawable, bitmapDrawable, bitmapDrawable, null);//可以将其他的bitmapDrawable换成null看看效果// 设置 TextView 的文本textView.setText("Hello World!");}
}
运行效果图:

使用autoLink属性识别链接类型
autoLink 属性可以用于在 TextView 中自动识别并链接特定类型的文本,比如电话号码、网址、电子邮件地址等。当用户点击这些链接时,系统会启动相关的应用来处理这些链接,比如拨打电话、打开浏览器等。
autoLink 属性支持的值:
- web:表示要识别和链接网址。
- none:不进行链接识别。
- phone:识别并链接电话号码。
- email:识别并链接电子邮件地址。
- map:识别并链接地图地址(如经纬度)。
- all:识别并链接所有类型的链接。
范例
<?xml version="1.0" encoding="utf-8"?>
<LinearLayoutxmlns:android="http://schemas.android.com/apk/res/android"android:layout_width="match_parent"android:layout_height="match_parent"android:orientation="vertical"android:gravity="center"android:padding="16dp"><TextViewandroid:id="@+id/linkTextView"android:layout_width="wrap_content"android:layout_height="wrap_content"android:text="这是一个csdn的链接: https://www.csdn.net/"android:autoLink="web"/></LinearLayout>
TextView 显示简单的 HTML
除了显示普通文本外,TextView 还预定义了一些类似于 HTML 的标签,通过这些标签,我们可以使 TextView 显示不同的字体颜色,大小,字体,甚至是显示图片,或者链接等
当然,并不是支持所有的 HTML 标签,常用的有下述这些
| 支持的标签 | 说明 |
|---|---|
| <font> | 设置颜色和字体 |
| <big> | 设置字体大号 |
| <small> | 设置字体小号 |
| <i><b> | 斜体粗体 |
| <a> | 连接网址 |
| <img> | 图片 |
范例1
<?xml version="1.0" encoding="utf-8" ?>
<RelativeLayout xmlns:android="http://schemas.android.com/apk/res/android"android:layout_width="match_parent"android:layout_height="match_parent" ><TextViewandroid:id="@+id/hello"android:layout_width="wrap_content"android:layout_height="wrap_content"android:textSize="20sp"android:layout_centerInParent="true" /></RelativeLayout>
package com.example.myapplication;import androidx.appcompat.app.AppCompatActivity;import android.graphics.drawable.BitmapDrawable;
import android.graphics.drawable.Drawable;
import android.os.Bundle;
import android.text.Html;
import android.text.method.LinkMovementMethod;
import android.view.ViewGroup;
import android.widget.LinearLayout;
import android.widget.TextView;
import android.widget.ViewAnimator;public class MainActivity extends AppCompatActivity {@Overrideprotected void onCreate(Bundle savedInstanceState) {super.onCreate(savedInstanceState);setContentView(R.layout.activity_main);TextView hello = (TextView)findViewById(R.id.hello);//创建要显示的 HTML 文本String s1 = "<font color='blue'><b>CSDN</b></font><br>";s1 += "<a href = 'https://www.csdn.net/'>https://www.csdn.net/</a>";// 调用 HTML.fromHTML() 方法创建 HTML 格式文本// 调用 setText() 方法将 HTML 格式文本显示到 TextViewhello.setText(Html.fromHtml(s1));// 设置点击会跳转到默认处理的 APPhello.setMovementMethod(LinkMovementMethod.getInstance());}
}范例2
<?xml version="1.0" encoding="utf-8" ?>
<RelativeLayout xmlns:android="http://schemas.android.com/apk/res/android"android:layout_width="match_parent"android:layout_height="match_parent" ><TextViewandroid:id="@+id/hello"android:layout_width="wrap_content"android:layout_height="wrap_content"android:textSize="20sp"android:layout_centerInParent="true" /></RelativeLayout>
package com.example.myapplication;import androidx.appcompat.app.AppCompatActivity;import android.graphics.drawable.BitmapDrawable;
import android.graphics.drawable.Drawable;
import android.os.Bundle;
import android.text.Html;
import android.text.method.LinkMovementMethod;
import android.view.ViewGroup;
import android.widget.LinearLayout;
import android.widget.TextView;
import android.widget.ViewAnimator;import java.lang.reflect.Field;public class MainActivity extends AppCompatActivity {@Overrideprotected void onCreate(Bundle savedInstanceState) {super.onCreate(savedInstanceState);setContentView(R.layout.activity_main);TextView hello = (TextView) findViewById(R.id.hello);// 创建要显示的 HTML 文本String s1 = "<font color='blue'><b>CSDN</b></font><br>";s1 += "<a href = 'https://www.csdn.net/'>https://www.csdn.net/</a>";s1 += "<br/><br/>";s1 += "欢迎关注微信公众号:<br/>";s1 += "图片:<br/>";s1 += "<img src = 'meimei'/><br/>";// 调用 HTML.fromHTML() 方法创建 HTML 格式文本// 调用 HTML.Html.ImageGetter() 处理对 img 图片的处理// 调用 setText() 方法将 HTML 格式文本显示到 TextViewhello.setText(Html.fromHtml(s1, new Html.ImageGetter() {@Overridepublic Drawable getDrawable(String source) {Drawable draw = null;try {Field field = R.drawable.class.getField(source);int resourceId = Integer.parseInt(field.get(null).toString());draw = getResources().getDrawable(resourceId);draw.setBounds(0, 0, draw.getIntrinsicWidth(), draw.getIntrinsicHeight());} catch (Exception e) {e.printStackTrace();}return draw;}}, null));// 设置点击会跳转到默认处理的 APPhello.setMovementMethod(LinkMovementMethod.getInstance());}
}SpannableString & SpannableStringBuilder 定制文本
SpannableString 和 SpannableStringBuilder 是 Android 中用于定制文本样式的类,它们允许你在文本中应用不同的样式和效果,比如设置字体颜色、背景色、下划线、删除线、点击事件等。
以下是 SpannableString 可用的一些子类及其说明:
- BackgroundColorSpan: 设置背景色。
- ClickableSpan: 使文本可点击,可设置点击事件。
- ForegroundColorSpan: 设置文本颜色(前景色)。
- MaskFilterSpan: 应用修饰效果,如模糊或浮雕。
- RasterizerSpan: 应用光栅效果。
- StrikethroughSpan: 给文本添加删除线(中划线)。
- SuggestionSpan: 相当于占位符。
- UnderlineSpan: 给文本添加下划线。
- AbsoluteSizeSpan: 设置绝对大小(文本字体大小)。
- DynamicDrawableSpan: 设置图片,可基于文本基线或底部对齐。
- ImageSpan: 设置图片。
- RelativeSizeSpan: 设置相对大小(文本字体相对于默认大小的倍数)。
- ReplacementSpan: 父类,一般不直接使用。
- ScaleXSpan: 在 x 轴方向上缩放文本。
- StyleSpan: 设置字体样式,如粗体、斜体等。
- SubscriptSpan: 设置下标(数学公式中会用到)。
- SuperscriptSpan: 设置上标(数学公式中会用到)。
- TextAppearanceSpan: 设置文本外观,包括字体、大小、样式和颜色。
- TypefaceSpan: 设置文本字体。
- URLSpan: 设置文本超链接。
范例1
<?xml version="1.0" encoding="utf-8" ?>
<RelativeLayout xmlns:android="http://schemas.android.com/apk/res/android"android:layout_width="match_parent"android:layout_height="match_parent" ><TextViewandroid:id="@+id/hello"android:layout_width="wrap_content"android:layout_height="wrap_content"android:textSize="20sp"android:layout_centerInParent="true" /></RelativeLayout>
package com.example.myapplication;import androidx.appcompat.app.AppCompatActivity;import android.graphics.Color;
import android.graphics.Typeface;
import android.graphics.drawable.BitmapDrawable;
import android.graphics.drawable.Drawable;
import android.os.Bundle;
import android.text.Html;
import android.text.Spannable;
import android.text.SpannableString;
import android.text.Spanned;
import android.text.method.LinkMovementMethod;
import android.text.style.ForegroundColorSpan;
import android.text.style.ImageSpan;
import android.text.style.StrikethroughSpan;
import android.text.style.StyleSpan;
import android.text.style.URLSpan;
import android.text.style.UnderlineSpan;
import android.view.ViewGroup;
import android.widget.LinearLayout;
import android.widget.TextView;
import android.widget.ViewAnimator;import java.lang.reflect.Field;public class MainActivity extends AppCompatActivity {@Overrideprotected void onCreate(Bundle savedInstanceState) {super.onCreate(savedInstanceState);setContentView(R.layout.activity_main);TextView hello = (TextView) findViewById(R.id.hello);SpannableString span = new SpannableString("红色打电话斜体删除线绿色下划线图片:.");//1. 设置背景色,setSpan 时需要指定的 flag,Spanned.SPAN_EXCLUSIVE_EXCLUSIVE (前后都不包括)span.setSpan(new ForegroundColorSpan(Color.RED), 0, 2, Spanned.SPAN_EXCLUSIVE_EXCLUSIVE);//2. 用超链接标记文本span.setSpan(new URLSpan("tel:1234567890"), 2, 5, Spanned.SPAN_EXCLUSIVE_EXCLUSIVE);//3. 用样式标记文本(斜体)span.setSpan(new StyleSpan(Typeface.BOLD_ITALIC), 5, 7, Spanned.SPAN_EXCLUSIVE_EXCLUSIVE);//4. 用删除线标记文本span.setSpan(new StrikethroughSpan(), 7, 10, Spanned.SPAN_EXCLUSIVE_EXCLUSIVE);//5. 用下划线标记文本span.setSpan(new UnderlineSpan(), 10, 16, Spanned.SPAN_EXCLUSIVE_EXCLUSIVE);//6. 用颜色标记span.setSpan(new ForegroundColorSpan(Color.GREEN), 10, 13,Spanned.SPAN_EXCLUSIVE_EXCLUSIVE);// 7. 获取 Drawable 资源Drawable d = getResources().getDrawable(R.drawable.meimei);//左上空出一点距离d.setBounds(16, 16, d.getIntrinsicWidth(), d.getIntrinsicHeight());//8. 创建 ImageSpan,然后用 ImageSpan 来替换文本ImageSpan imgspan = new ImageSpan(d, ImageSpan.ALIGN_BASELINE);span.setSpan(imgspan, 18, 19, Spannable.SPAN_INCLUSIVE_EXCLUSIVE);hello.setText(span);// 设置点击会跳转到默认处理的 APPhello.setMovementMethod(LinkMovementMethod.getInstance());}
}范例2
<?xml version="1.0" encoding="utf-8" ?>
<RelativeLayout xmlns:android="http://schemas.android.com/apk/res/android"android:layout_width="match_parent"android:layout_height="match_parent" ><TextViewandroid:id="@+id/hello"android:layout_width="wrap_content"android:layout_height="wrap_content"android:textSize="20sp"android:layout_centerInParent="true" /></RelativeLayout>
package com.example.myapplication;import androidx.appcompat.app.AppCompatActivity;import android.content.DialogInterface;
import android.graphics.Color;
import android.graphics.Typeface;
import android.graphics.drawable.BitmapDrawable;
import android.graphics.drawable.Drawable;
import android.os.Bundle;
import android.text.Html;
import android.text.Spannable;
import android.text.SpannableString;
import android.text.SpannableStringBuilder;
import android.text.Spanned;
import android.text.TextPaint;
import android.text.method.LinkMovementMethod;
import android.text.style.ClickableSpan;
import android.text.style.ForegroundColorSpan;
import android.text.style.ImageSpan;
import android.text.style.StrikethroughSpan;
import android.text.style.StyleSpan;
import android.text.style.URLSpan;
import android.text.style.UnderlineSpan;
import android.view.View;
import android.view.ViewGroup;
import android.widget.LinearLayout;
import android.widget.TextView;
import android.widget.Toast;
import android.widget.ViewAnimator;import java.lang.reflect.Field;public class MainActivity extends AppCompatActivity {@Overrideprotected void onCreate(Bundle savedInstanceState) {super.onCreate(savedInstanceState);setContentView(R.layout.activity_main);TextView hello = findViewById(R.id.hello);String[] likeUsers = generateLikeUsers(20);SpannableStringBuilder ssb = addClickPart(likeUsers);hello.setMovementMethod(LinkMovementMethod.getInstance());hello.setText(ssb, TextView.BufferType.SPANNABLE);}// 生成模拟的好友列表private String[] generateLikeUsers(int count) {String[] likeUsers = new String[count];for (int i = 0; i < count; i++) {likeUsers[i] = "好友" + i;}return likeUsers;}// 定义一个点击每个部分文字的处理方法private SpannableStringBuilder addClickPart(String[] likeUsers) {// 赞的图标SpannableString spanStr = new SpannableString("p");spanStr.setSpan(new ImageSpan(this, R.drawable.baseline_favorite_24), 0, 1, Spannable.SPAN_INCLUSIVE_EXCLUSIVE);// 创建一个 SpannableStringBuilder 对象,连接多个字符串SpannableStringBuilder ssb = new SpannableStringBuilder(spanStr);if (likeUsers.length > 0) {for (String name : likeUsers) {final int start = ssb.length();ssb.append(name);final int end = ssb.length();ssb.setSpan(new ClickableSpan() {@Overridepublic void onClick(View widget) {Toast.makeText(MainActivity.this, name, Toast.LENGTH_SHORT).show();}@Overridepublic void updateDrawState(TextPaint ds) {super.updateDrawState(ds);// 删除下划线,设置字体颜色为蓝色ds.setColor(Color.BLUE);ds.setUnderlineText(false);}}, start, end, Spannable.SPAN_EXCLUSIVE_EXCLUSIVE);ssb.append(",");}// 删除最后一个逗号ssb.delete(ssb.length() - 1, ssb.length());}// 添加点赞总数return ssb.append("等").append(String.valueOf(likeUsers.length)).append("个人觉得很赞");}
}跑马灯效果的 TextView
要实现跑马灯效果的 TextView,你需要设置以下三个属性:
- android:singleLine: 设置是否单行显示,需要将其设置为 true。
- android:ellipsize: 设置文字超出控件宽度时的显示方式,需要将其设置为 marquee,表示跑马灯滚动显示。
- android:marqueeRepeatLimit: 设置跑马灯重复次数,可以设置为 marquee_forever 表示无限重复,或者具体的数字,如 2 表示重复两次。
范例
<?xml version="1.0" encoding="utf-8" ?>
<RelativeLayout xmlns:android="http://schemas.android.com/apk/res/android"android:layout_width="wrap_content"android:layout_height="wrap_content" ><TextViewandroid:id="@+id/marqueeTextView"android:layout_width="match_parent"android:layout_height="wrap_content"android:text="这是一个字幕文本视图示例。此文本将水平滚动。"android:singleLine="true"android:ellipsize="marquee"android:marqueeRepeatLimit="marquee_forever"android:focusable="true"android:focusableInTouchMode="true"android:scrollHorizontally="true"android:padding="10dp"android:textColor="@android:color/black"android:textSize="18sp" ><requestFocus></requestFocus></TextView></RelativeLayout>
TextView 的几个重要属性
1、设置 TextView 字间距
要设置 TextView 的字间距,可以使用属性 android:textScaleX 来控制字体水平方向的缩放。默认情况下,android:textScaleX 的值为 1.0f,表示正常大小,类型值是 float。你可以设置它为其他值来增加或减少字间距。
例如,将字间距设置为原来的两倍,可以这样做:
<TextViewandroid:id="@+id/textView"android:layout_width="wrap_content"android:layout_height="wrap_content"android:text="Hello World!"android:textScaleX="2.0" />
或者在 Java 代码中动态设置:
TextView textView = findViewById(R.id.textView);
textView.setText("Hello World!");
textView.setScaleX(2.0f);
2、设置 TextView 行间距
要设置 TextView 的行间距,可以使用属性 android:lineSpacingExtra 和 android:lineSpacingMultiplier。android:lineSpacingExtra 用于设置固定的行间距,单位可以是 dp 或者 px;android:lineSpacingMultiplier 用于设置行间距的倍数,
例如设置为 1.2 表示行间距增加 20%。
<TextViewandroid:id="@+id/textView"android:layout_width="wrap_content"android:layout_height="wrap_content"android:text="Hello World!"android:lineSpacingExtra="10dp"android:lineSpacingMultiplier="1.2" />
或者在 Java 代码中动态设置:
TextView textView = findViewById(R.id.textView);
textView.setText("Hello World!");
textView.setLineSpacing(10, 1.2f);
3、自动换行
关于自动换行,可以通过设置 android:singleLine 属性来控制。将 android:singleLine 设置为 false 会启用自动换行功能,而设置为 true 则表示在一行内显示完,不进行换行。如果希望多行显示但不超过指定行数,可以结合使用 android:maxLines 属性。
<?xml version="1.0" encoding="utf-8" ?>
<RelativeLayout xmlns:android="http://schemas.android.com/apk/res/android"android:layout_width="wrap_content"android:layout_height="wrap_content" ><TextViewandroid:id="@+id/textView"android:layout_width="wrap_content"android:layout_height="wrap_content"android:text="这是一个长文本,将自动换行为多行。这是一个长文本,将自动换行为多行。这是一个长文本,将自动换行为多行。这是一个长文本,将自动换行为多行。这是一个长文本,将自动换行为多行。这是一个长文本,将自动换行为多行。这是一个长文本,将自动换行为多行。这是一个长文本,将自动换行为多行。这是一个长文本,将自动换行为多行。这是一个长文本,将自动换行为多行。"android:singleLine="false"android:maxLines="6" /></RelativeLayout>
在这个示例中,TextView 将在不超过 6 行的情况下自动换行显示文本。
参考文档
Android TextView 官方文档

)
![[英语学习][28][Word Power Made Easy]的精读与翻译优化](http://pic.xiahunao.cn/[英语学习][28][Word Power Made Easy]的精读与翻译优化)


)


)


