局域网推流的简单方式
这里以ubuntu为例
一、先下载安装包 nginx、nginx-rtmp-module,再一起安装
# 下载nginx
# 这里我安装的是 nginx-1.10.3 版本
cd /usr/software
wget http://nginx.org/download/nginx-1.25.0.tar.gz
tar -zxvf nginx-1.25.0.tar.gz# 下载nginx-rtmp-module
cd /usr/software
git clone https://github.com/arut/nginx-rtmp-module.git
tar -zxvf nginx-rtmp-module可能github下载不了,网络问题,下载这个
git clone https://gitee.com/ISSiZheng/nginx-rtmp-module.git#编译
进入nginx目录:
cd /usr/software/nginx-1.25.0
./configure --add-module=/usr/nginx-rtmp-module/nginx-rtmp-module
或
./configure --add-module=/usr/software/nginx-rtmp-module-master --with-http_ssl_module安装
make && make install安装问题时,选装
# yum 安装 openssl
yum -y install openssl openssl-devel
# yum 安装 gcc环境
yum -y install gcc glibc glibc-devel make nasm pkgconfig lib-devel openssl-devel expat-devel gettext-devel libtool mhash.x86_64 perl-Digest-SHA1.x86_64
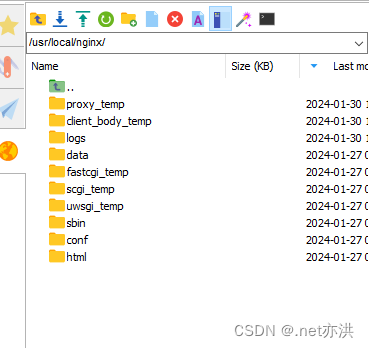
装好后,会生成/usr/local/nginx/目录

修改nginx配置文件 conf/nging.conf
#user  nobody;
worker_processes  1;#error_log  logs/error.log;
#error_log  logs/error.log  notice;
#error_log  logs/error.log  info;#pid        logs/nginx.pid;events {worker_connections  1024;
}http {include       mime.types;default_type  application/octet-stream;#log_format  main  '$remote_addr - $remote_user [$time_local] "$request" '#                  '$status $body_bytes_sent "$http_referer" '#                  '"$http_user_agent" "$http_x_forwarded_for"';#access_log  logs/access.log  main;sendfile        off;#tcp_nopush     on;#keepalive_timeout  0;keepalive_timeout  65;#gzip  on;server {listen       80;server_name  localhost;#charset koi8-r;#access_log  logs/host.access.log  main;location / {root   html;index  index.html index.htm;}#error_page  404              /404.html;# redirect server error pages to the static page /50x.html#error_page   500 502 503 504  /50x.html;location = /50x.html {root   html;}# http播放地址,新增的配置location /hls {types {application/vnd.apple.mpegurl m3u8;video/mp2t ts;}#访问权限开启,否则访问这个地址会报403autoindex on;root /usr/share/nginx/html;#视频流存放地址,与下面的hls_path相对应,这里root和alias的区别可自行百度expires -1;add_header Cache-Control no-cache;#防止跨域问题add_header 'Access-Control-Allow-Origin' '*';add_header 'Access-Control-Allow-Credentials' 'true';add_header 'Access-Control-Allow-Methods' 'GET, POST, OPTIONS';add_header 'Access-Control-Allow-Headers' 'DNT,X-CustomHeader,Keep-Alive,User-Agent,X-Requested-With,If-Modified-Since,Cache-Control,Content-Type';  }}}
#新增的配置
rtmp {server {listen 1935;chunk_size 4000;application vod {play /usr/share/nginx/html/vod/flvs/;#点播媒体存放目录}application live {live on;}application hls {live on;hls on;hls_path /usr/share/nginx/html/hls;#视频流存放地址hls_fragment 5;hls_playlist_length 30s;hls_continuous on; #连续模式。hls_cleanup on;    #对多余的切片进行删除。hls_nested on;     #嵌套模式。hls_fragment_naming system;hls_fragment_slicing aligned;}}
}
运行nginx
/usr/local/nginx/sbin/nginx
测试时用到,查看进程
ps axu
删除进程
kill xxx
二、安装ffmpeg
sudo apt-get install ffmpeg三、推流
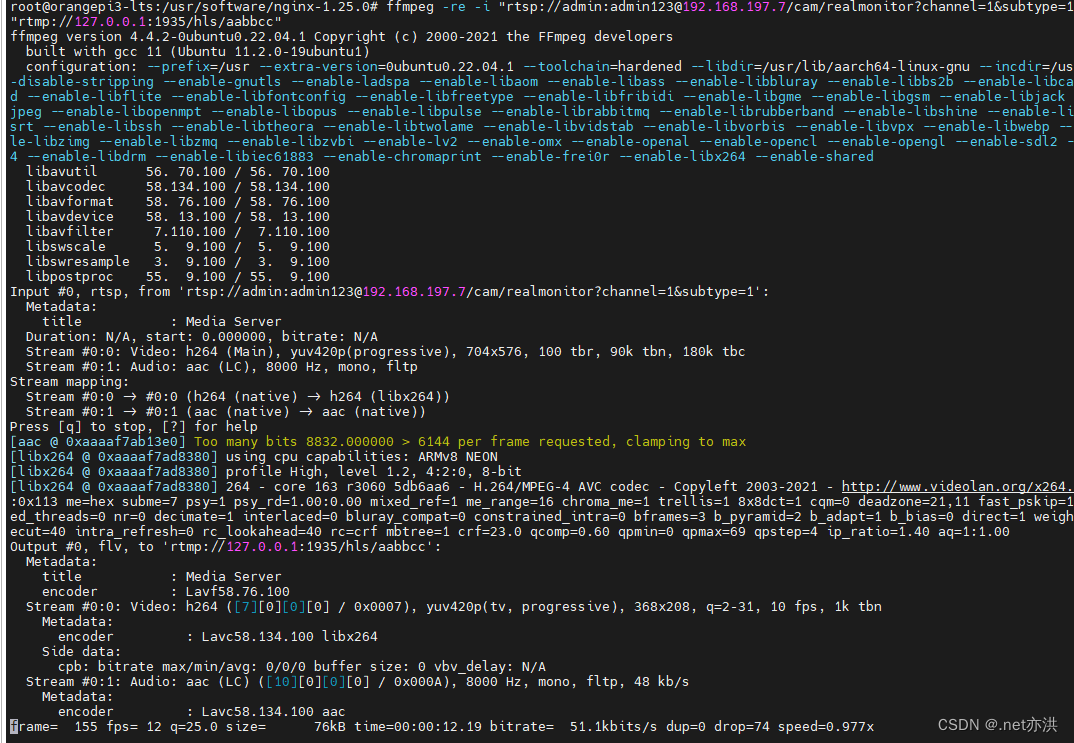
ffmpeg -re -i "rtsp://admin:admin123@192.168.197.9/cam/realmonitor?channel=1&subtype=1" -vcodec libx264 -acodec aac -s 368x208 -r 10 -f flv "rtmp://127.0.0.1:1935/hls/aabbcc"

查看播放结果
rtmp://10.8.0.12:1935/hls/aabbcc
http://10.8.0.12/hls/aabbcc/index.m3u8
参考文档
https://blog.csdn.net/zengliguang/article/details/129584090
nginx-rtmp-module: nginx-rtmp-module
)

机制之一:共享内存)

)
)


)

索引(2)存储结构)

制作的数字描字帖)


