文章目录
- 1、QQ邮箱如何设置授权码
- 2、具体代码
1、QQ邮箱如何设置授权码
QQ邮箱SMTP/IMAP服务
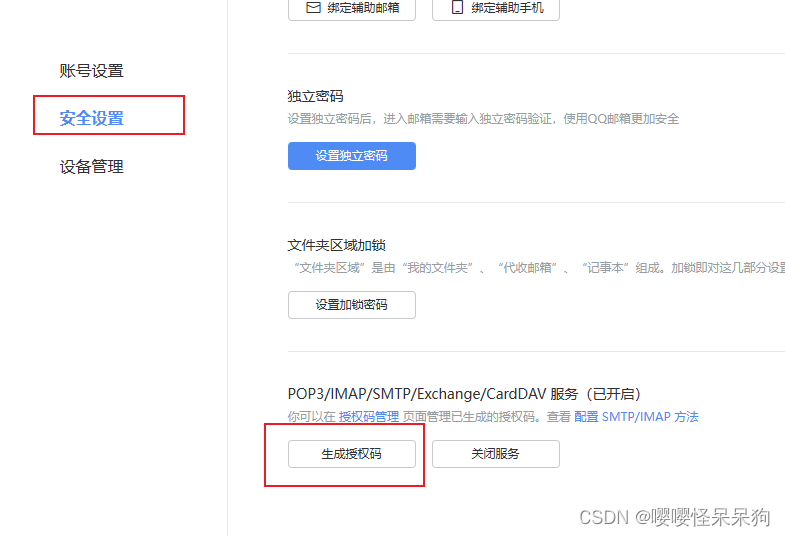
1、点击账号与安全

2、安全设置

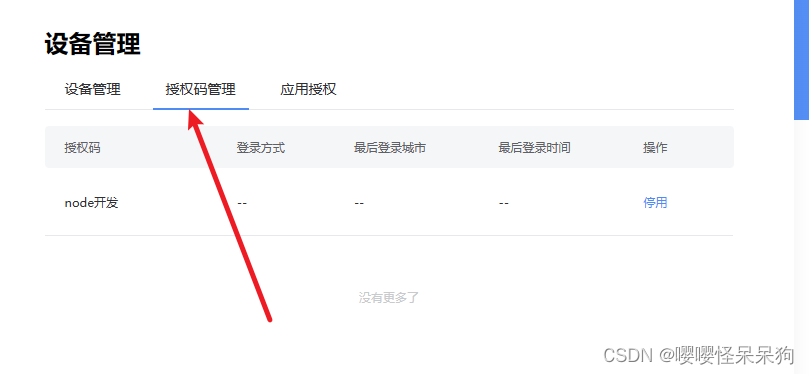
3、设备管理,可以查看有多少个授权码

2、具体代码
from 这个参数,有两种写法
qq号@qq.com"姓名"<qq号@qq.com>
- from :发件人的电子邮件地址
- to :以逗号分隔的收件人电子邮件地址列表或数组,将显示在“收件人”字段中
- cc :以逗号分隔的抄送人电子邮件地址列表或数组,将显示在“抄送”字段中。
- bcc:以逗号分隔的密送人电子邮件地址列表或数组,将显示在“密送”字段中
- subject :邮件的主题
- text :纯文本内容
- html :HTML类型的消息,但是和 text 冲突,后者会覆盖掉前者,
- attachments:附件的数组,每个附件包含以下属性:
- filename:附件的文件名。
- content:附件的内容,可以是 Buffer、流或文件路径。
- contentType:附件的 MIME 类型。
import nodemailder from "nodemailer";
import Koa from "koa";
import Router from "koa-router";const transPort = nodemailder.createTransport({service: "qq", // 服务商host: "smtp.qq.com", // 服务器地址auth: {pass: "xxxxxxxx", // 密码 或者 授权码user: "xxxxx@qq.com", // 邮箱账号},secure: true, // 加密发送
});const app = new Koa();
const router = new Router();// 处理 GET 请求
router.get("/sendMail", async (ctx) => {try {let { mailText, mailSubject, mainTo } = ctx.request.query;console.log(mailText, mailSubject, mainTo);let res = await transPort.sendMail({to: mainTo, // 发送给谁// from: "xxxx@qq.com", // 发送人;这种写法也可以from: `"傻瓜"<xxxxx@qq.com>`, // 发送人subject: mailSubject, // 主题text: mailText, // 内容html: `<h1>你好,您的邮件已收到!</h1><hr/><p><b>祝:</b><br/> 身体健康,工作顺利!</p>`,attachments: [// 附件{filename: "image-20231128063900411.png", // 名称// content: "hello world", // 文本/ buffer/相对路径/等等path: "http:xxxxx/image-20231128063900411.png",},{filename: "测试记事本格式.txt",content: "测试文本",},{filename: "测试Buffer.docx",content: Buffer.from("word文档,晚上好"),},],});transPort.close();console.log("发送成功:");ctx.set("Content-Type", "application/json");ctx.body = {state: "1",meg: "发送成功~",data: {sendMail: res,},};ctx.status = 200;} catch (error) {console.log(error, "错误信息");}
});app.use(router.routes());// 启动服务器
app.listen(3000, () => {console.log("Server is running on http://localhost:3000");
});
)


