puppeteer执行js
Hi guys! Today let's look at another powerful function of the puppeteer API using Node.js.
嗨,大家好! 今天,让我们看看使用Node.js的puppeteer API的另一个强大功能。
In the first part of this section, let's look at commands for keystroke control and typing as we'll normally do with an opened browser.
在本节的第一部分中,让我们看一下用于击键控制和键入的命令,就像我们通常在打开的浏览器中所做的那样。
Isn't it cool!!??
是不是很酷!
Take Note! You should have Node.js and puppeteer installed in your PC.
做记录! 您应该在PC中安装Node.js和puppeteer。
With Node.js and puppeteer already up and running, let's get started.
现在已经启动并运行了Node.js和puppeteer,让我们开始吧。
*NB: If you don't yet have Node.js/ puppeteer installed in your PC, read the article NODE & GOOGLE PUPPETEER API SERIES
*注意:如果您的PC尚未安装Node.js / puppeteer,请阅读文章NODE&GOOGLE PUPPETEER API SERIES
Imagine we can write a code that opens a website, fills the form and submits it automatically.
想象一下,我们可以编写一个代码来打开一个网站,填写表格并自动提交。
Wow... Just using some few lines of code, everything is done for us like a robot...
哇...只需使用几行代码,一切就像机器人一样为我们完成了...
Hahahaa...
哈哈哈...
Indeed, the puppeteer has made work easy for you and me.
的确,木偶使您和我的工作变得轻松。
Let's see how opening a web page and typing is done.
让我们看看如何打开网页并输入内容。
Now, let's get started.
现在,让我们开始吧。
As usual, the page.goto command helps us access a webpage.
和往常一样,page.goto命令可帮助我们访问网页。
Now we'll make use of ; await page.keyboard.type ('ENGINEER GODWILL') and await page.focus('#example-1-email') used to type into the form and focus on the input element respectively.
现在我们将利用; await page.keyboard.type('ENGINEER GODWILL')和await page.focus('#example-1-email')分别用于键入表单并专注于输入元素。
As we would normally do with an open browser, we first focus (or click) on the form field and then start typing..
就像通常使用打开的浏览器一样,我们首先将焦点放在(或单击)表单字段,然后开始键入。
Await.page.focus takes an obligatory parameter, which is the input element..
Await.page.focus具有一个强制性参数,它是输入元素。
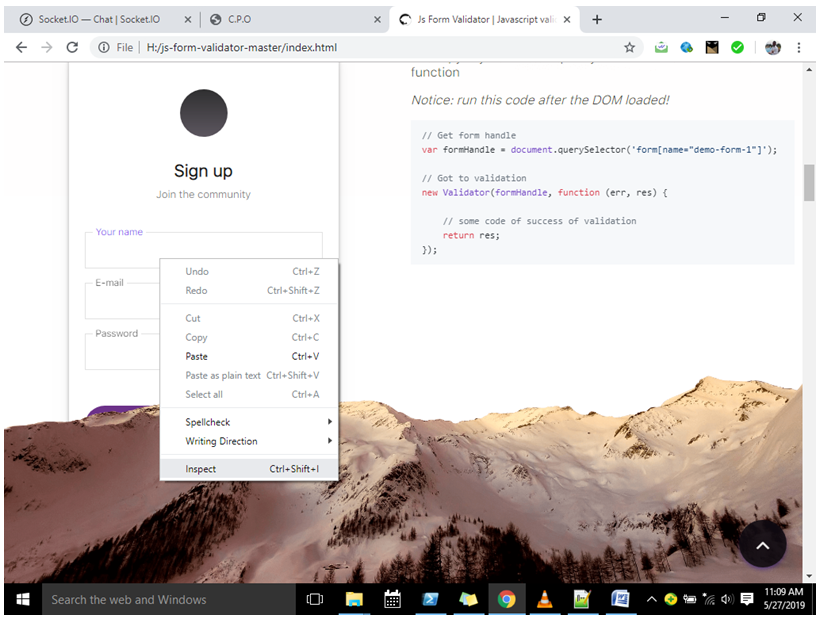
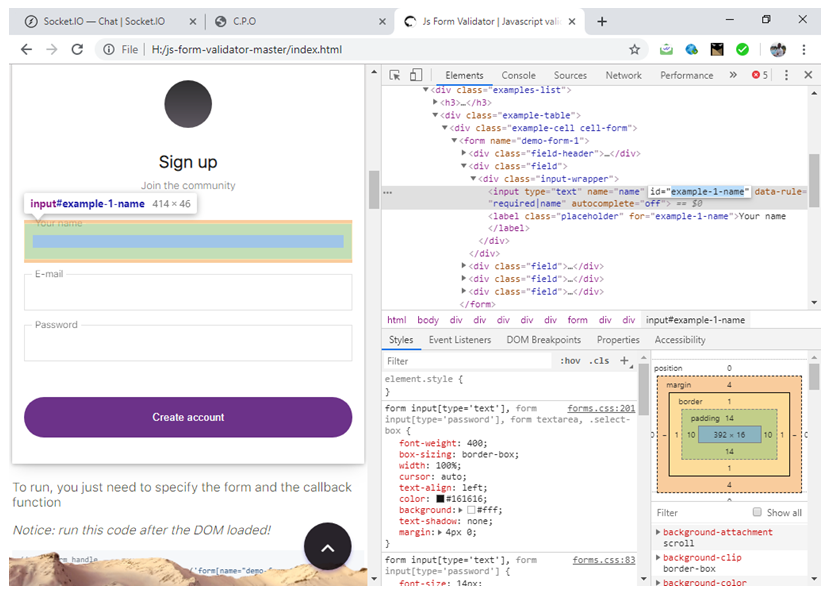
To get the input element, right click on the field and click on inspect, a new window will pop up, then copy the id/ class of the element.
要获取输入元素,请右键单击该字段并单击检查,将弹出一个新窗口,然后复制该元素的ID /类。


Open a text editor and type the following code and save it with the file name app.js:
打开一个文本编辑器,输入以下代码,并将其保存为文件名app.js :
The code below fills the form...
下面的代码填写表格...
const puppeteer = require('puppeteer');
(async () => {
const browser = await puppeteer.launch()
const page = await browser.newPage()
await page.goto('file:///H:/js-form-validator-master/index.html')
// focus on the element with id  specified in bracket
await page.focus('#example-1-name')
// types the sentence in bracket
await page.keyboard.type('ENGINEER GODWILL')
await page.focus('#example-1-email')
await page.keyboard.type('[email protected]')
await page.focus('#example-1-password')
await page.keyboard.type('admin123')
// captures a screenshot
await page.screenshot({ path: 'keyboard.png' })
console.log ('done');
await browser.close()
})()
NB: You can use any URL of your choice,
注意:您可以使用任何选择的URL,
I this example, I used a webpage that was already downloaded to facilitate the tutorial but if it concerns a URL on the www, internet connection is required to navigate to the website/web page.
在本示例中,我使用已经下载的网页来简化本教程,但是如果它涉及www上的URL,则需要互联网连接才能导航到该网站/网页。
** The hash symbol (#) is included because we used the id of the input element. If we were to use the class, we would use a dot.
**之所以包含井号(#),是因为我们使用了输入元素的ID。 如果要使用该类,则将使用点。
The file should be saved in your default Node.js directory.
该文件应保存在默认的Node.js目录中。
Run the code by initiating the file at the command prompt like a regular Node.js file.
通过在命令提示符处启动文件(如常规Node.js文件)来运行代码。
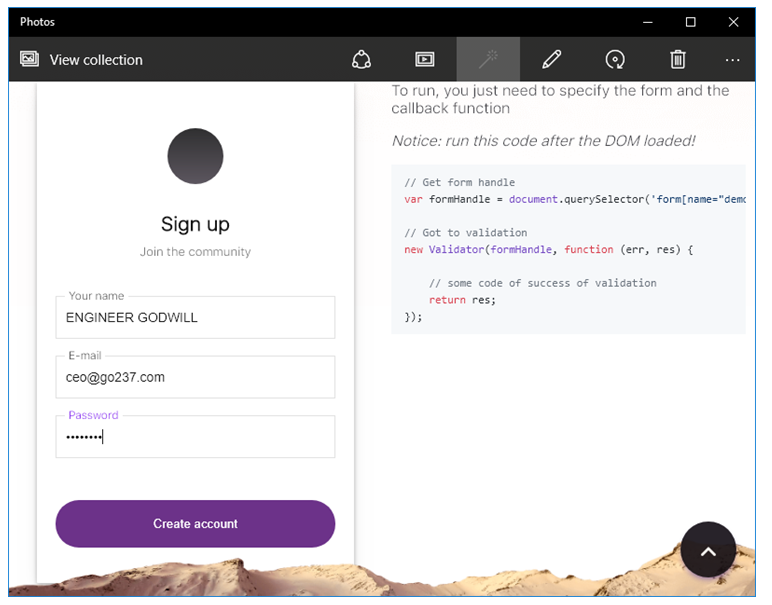
The Screenshot (image file) is then stored in the default Node.js directory with name keyboard.png
屏幕快照(图像文件)然后存储在名称为keyboard.png的默认Node.js目录中。
Output image file:
输出图像文件:

翻译自: https://www.includehelp.com/node-js/interacting-with-forms-and-web-pages-using-node-js-and-puppeteer-1.aspx
puppeteer执行js


中的数组及其常用功能)


)

![[下载]青岛交通旅游地图[download]](http://pic.xiahunao.cn/[下载]青岛交通旅游地图[download])