Visual Studio Code (VSCode)是一个轻量级但功能强大的源代码编辑器,可在桌面上运行,适用于Windows,macOS和Linux。 它内置了对JavaScript,TypeScript和Node.js的支持,并具有丰富的其他语言(如C++,C#,Java,Python,PHP,Go)和运行时(如.NET和Unity)的扩展生态系统。
使用这些介绍性视频开始使用VSCode开始您的旅程:https://code.visualstudio.com/docs/getstarted/introvideos
本文介绍如何使用VSCode进行PostgreSQL开发环境准备
安装VSCode
1. 下载VSCode
根据用户环境,下载合适的VSCode版本下载地址:https://code.visualstudio.com/download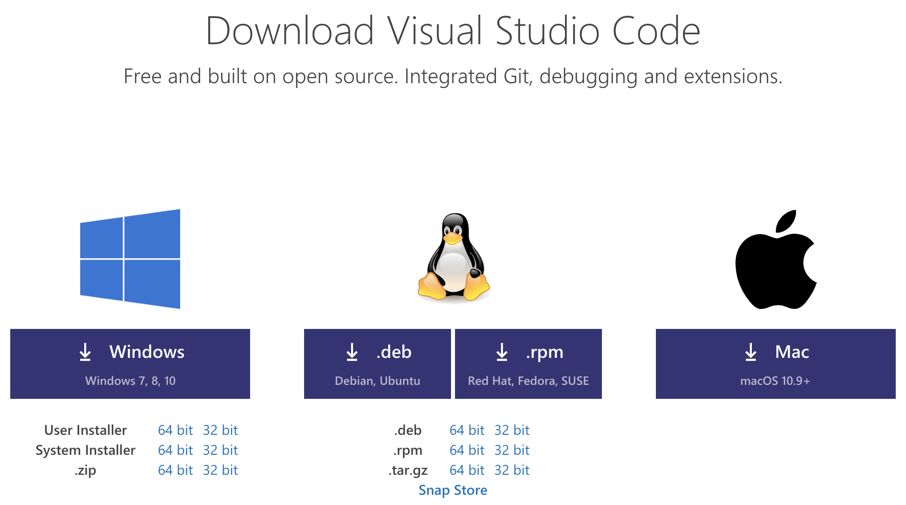
2. 安装VSCode
根据提示进行安装安装C/C++编程语言支持
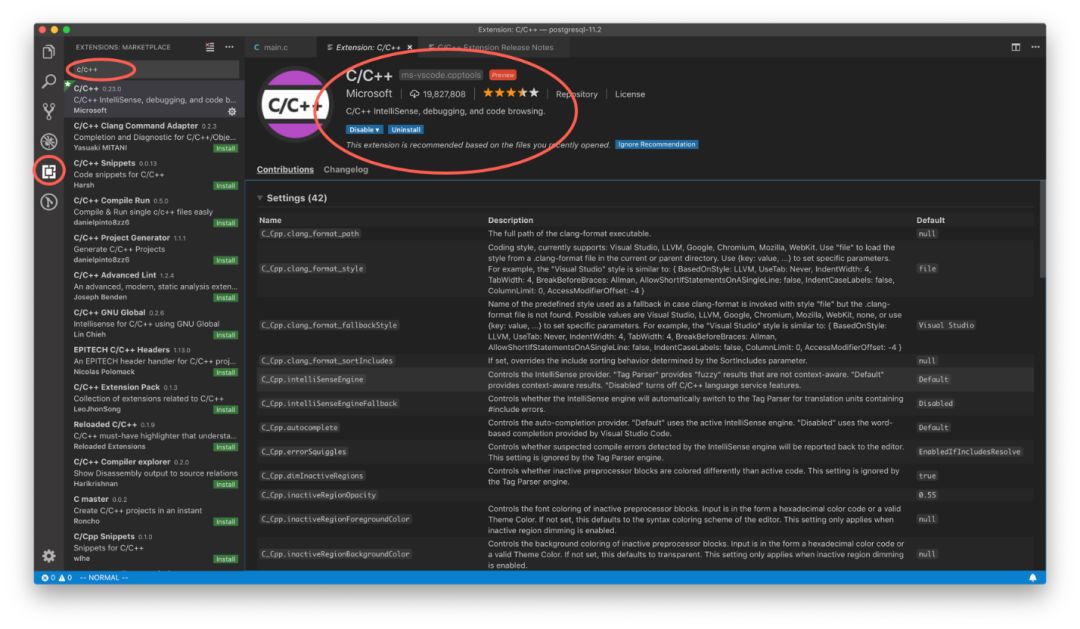
安装C/C++编程语言支持(C/C++ for Visual Studio Code)
微软的C/C++扩展**提供了对Visual Studio Code的C/C++支持,以便在Windows,Linux和macOS上使用VS Code进行C和C++开发。Note: C++ Intellisense也可以使用,根据个人喜欢选择。
可以在VSCode内的Extension中搜索C/C++,找到目标插件后进行安装。
下载PostgreSQL源代码
Git下载最新PG代码
确保您的计算机上安装了Git。Git的使用帮助网上随处可见,这里就不赘述了。
$ cd sandbox $ git clone https://github.com/postgres/postgres.git $ cd postgres ## 一般更改代码都在特定的Branch上进行 $ git checkout -b FEATTURE-NAME $ EDIT YOUR CODE $ git commit -a $ git diff --patience master my-feature > ../my-feature.patch
下载对应版本的PG代码 (Optional)
https://www.postgresql.org/ftp/source/运行VSCode
1.打开源代码目录
菜单 File --> Open
打开对应的目录,比如 ~/sandbox/postgres 2.配置命令
有许多工具来自动执行诸如linting,build,打包,测试或部署软件系统之类的任务。 比如TypeScript编译器,再比如ESLint和TSLint这样的linters以及Make,Ant,Gulp,Jake,Rake和MSBuild等build系统。
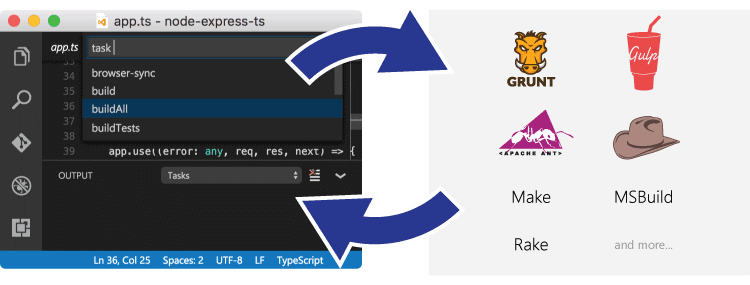
这些工具主要是通过命令行来运行的,并在内部软件开发过程(编辑,编译,测试和调试)内自动执行任务。 鉴于它们在开发生命周期中的重要性,能够运行工具并从VS Code中分析其结果非常有帮助。VSCode中的任务可以配置为运行脚本和启动进程,以便可以在VSCode中使用许多现有工具,而无需输入命令行或编写新代码。工作区或文件夹特定任务是从工作区的.vscode文件夹中的tasks.json文件配置的。
2.1 打开 View --> Command Palette
输入 Task: , 选择 Tasks: Configure Task

2.2 选择 Create tasks.json file from template

2.3 选择 Others Example to run the arbitrary external command

2.4 现在开始编辑 task.json 文件
到微软网站上 https://go.microsoft.com/fwlink/?LinkId=733558
查看关于 task.json 的格式文档注意 请根据个人需要编辑下面的任务配置文件
{// See https://go.microsoft.com/fwlink/?LinkId=733558// for the documentation about the tasks.json format"version": "2.0.0","presentation" : { "reveal": "always" },"tasks": [ {"label": "Configure","type": "shell","command": "./configure --enable-depend --enable-cassert --enable-debug","problemMatcher": ["$eslint-compact" ] }, {"label": "Make All","type": "shell","command": "make -j4 all","problemMatcher": ["$eslint-compact" ] }, {"label": "Make Clean All","type": "shell","command": "make clean","problemMatcher": ["$eslint-compact" ] }, {"label": "Make Install","type": "shell","command": "make install" } ]}
3.运行所配制的命令
打开 View --> Command Palette --> Tasks: Run Task
选择对应的 Configure、Make 或者 make install 命令来进行PostgreSQL的编译等任务。
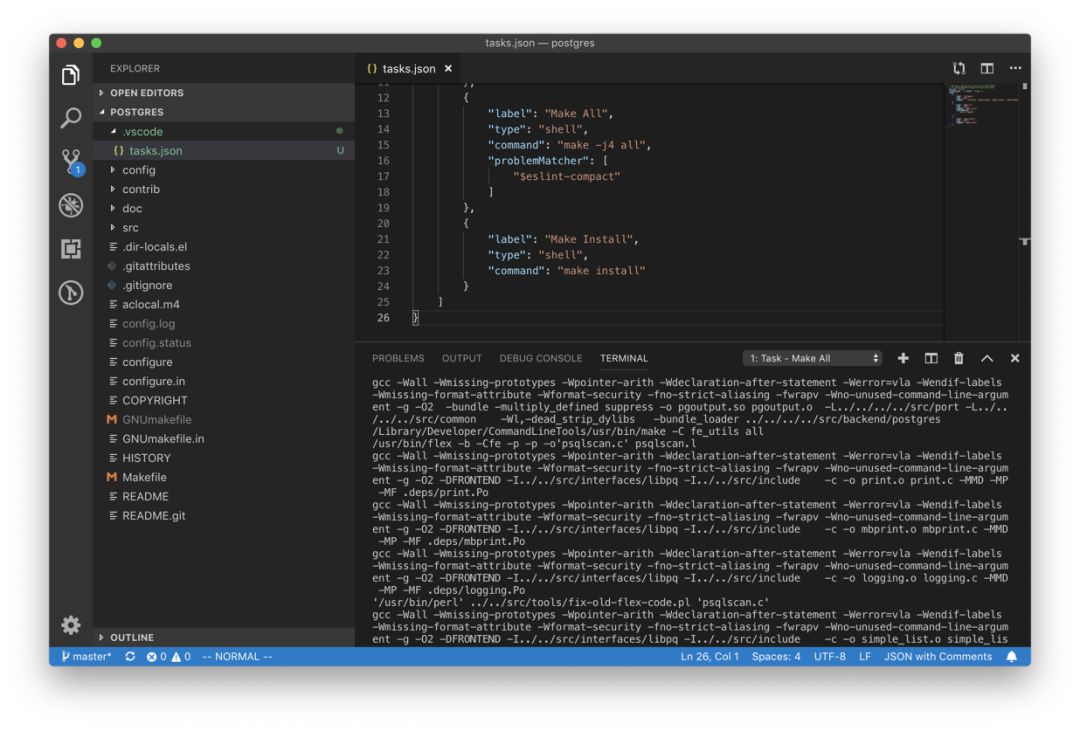
NOTE 可以配置一些快捷方式来方便工作使用VS Code调试PostgreSQL
这里以Mac环境下为例进行说明1.使用LLDB调试
LLDB是XCode下默认的调试工具,它和GDB有很多类似之处,如果你对GDB熟悉,使用LLDB不存在什么问题。这里是LLDB和GDB的一个命令对比(https://lldb.llvm.org/use/map.html)
注意 如果你的开发环境是Linux,请使用apt-get/yum 之间安装lldb在VS Code中调试PG打开lauch.json
菜单 View -> Command Palette,输入launch,选择 Debug: Open launch.json

选择 C++ (GDB/LLDB 编辑launch.json文件
注意:根据你的PG环境,修改下面 "args"里面的路径
{// Use IntelliSense to learn about possible attributes.// Hover to view descriptions of existing attributes.// For more information, visit: https://go.microsoft.com/fwlink/?linkid=830387"version": "0.2.0","configurations": [ {"name": "(lldb) pg Launch","type": "cppdbg","request": "launch","program": "${workspaceFolder}/src/backend/postgres","args": ["-D", "/Users/grantzhou/pgdata/data"],"stopAtEntry": false,"cwd": "${workspaceFolder}","environment": [],"externalConsole": true,"MIMode": "lldb" }, {"name": "(lldb) pg Launch help","type": "cppdbg","request": "launch","program": "${workspaceFolder}/src/backend/postgres","args": ["--help", ""],"stopAtEntry": false,"cwd": "${workspaceFolder}","environment": [],"externalConsole": true,"MIMode": "lldb" }, {"name": "(lldb) Launch","type": "cppdbg","request": "attach","program": "${workspaceFolder}/src/backend/postgres","MIMode": "lldb" } ]}
开始调试
1. 打开调试选项卡(或者 F5)
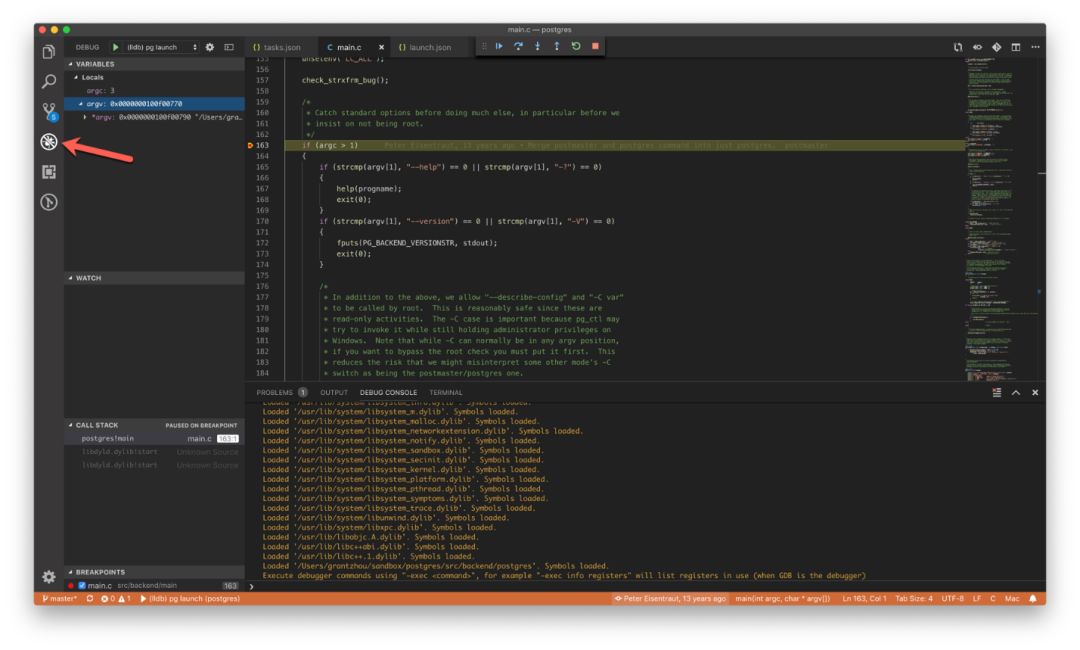
2. 调试
当调试会话开始后, 上面会出现调试工具栏.
 Continue/Pause F5
Step Over F10
Step Into F11
Step Out ⇧F11
Restart ⇧⌘F5
Stop ⇧F52.使用GDB调试 (Mac上不推荐使用)
注意:在最新版的Mac上,gdb 最新版本8.2的安装和执行非常的繁琐,并且存在很多无法工作且需要降级到8.0版本的情况,这里不推荐使用。MAC上安装GDB
与GCC一样,安装GDB的最简单方法是通过Homebrew。 在终端窗口中,运行命令 brew install gdb,并等待它完成。注意:我们需要对GDB可执行文件进行代码签名,从而可以根据调试器的需要控制其他进程。对gdb进行代码签名
在Keychain中创建一个新证书
1. 打开 Keychain Access 程序
2. 菜单选择 Certificate Assistant --> Create a Certificate
a. 确保Identity Type设置为Self Signed Root
b. 将证书类型更改为代码签名
c. 选中“覆盖默认值”复选框
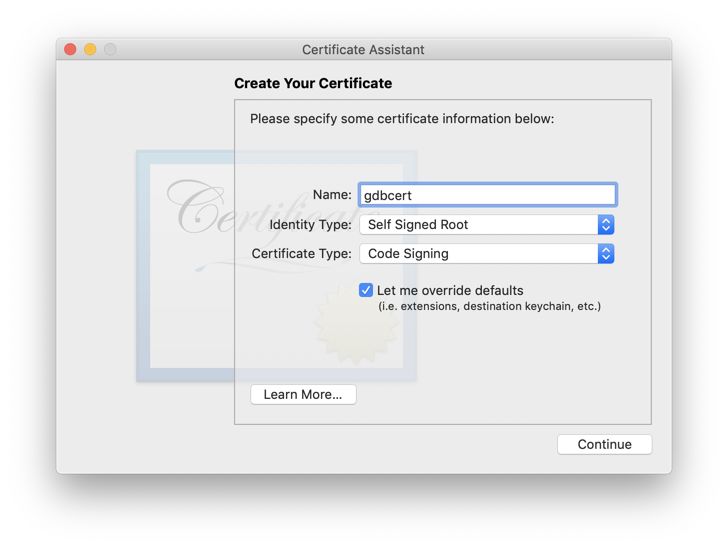
d. 选择 “Continue” (在弹出提示中再次单击继续)。
e. 在下一个页面
Security Number : 1,
Validity Period : 3650 (最长 20 年)
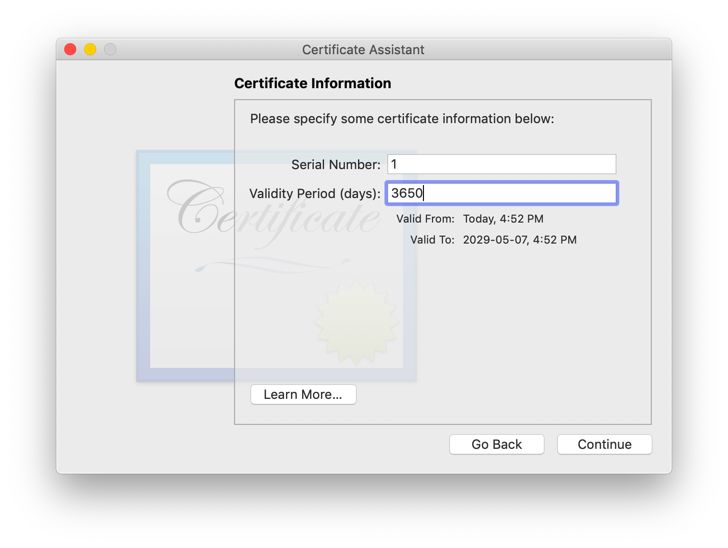
f. 点击继续
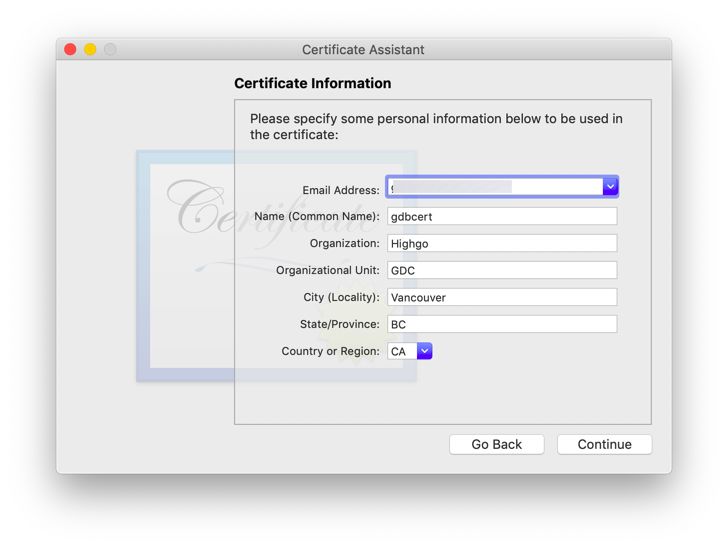
g. 一直继续,直到让你选择保存位置。选择System
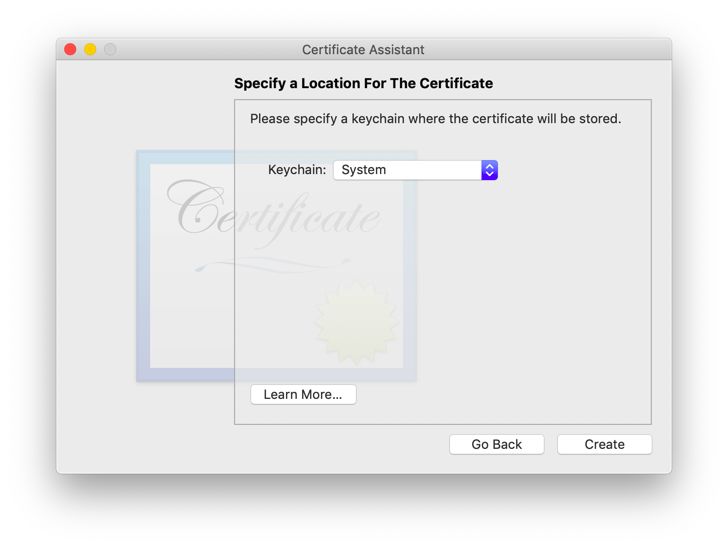
h. 根据提示输入密码,Done
3. 回到 Keychain Access 主窗口,选择左侧边栏中的System keychain,然后从列表中选择新创建的证书,右键选择 Get Info并设置为永远信任。
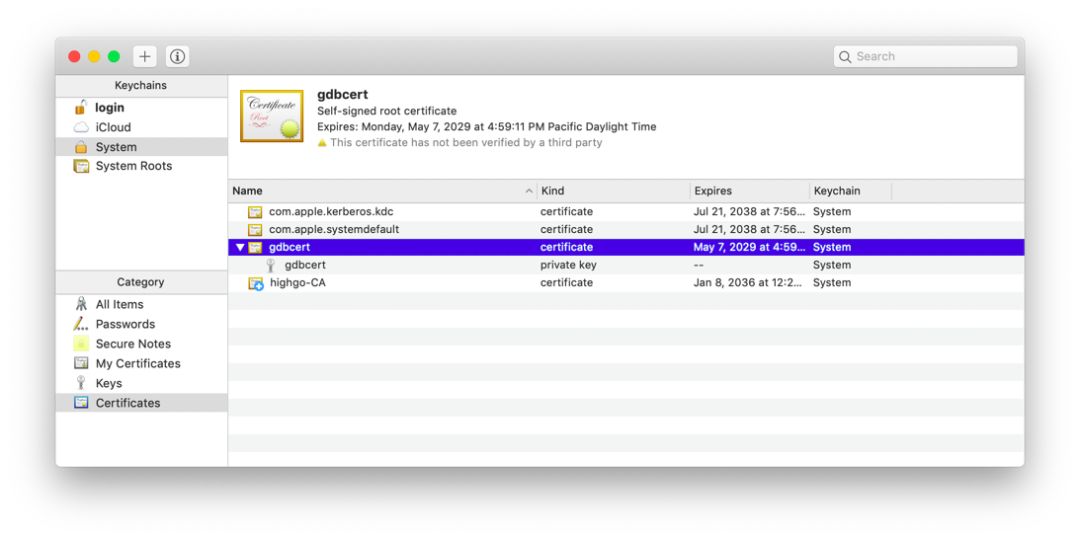
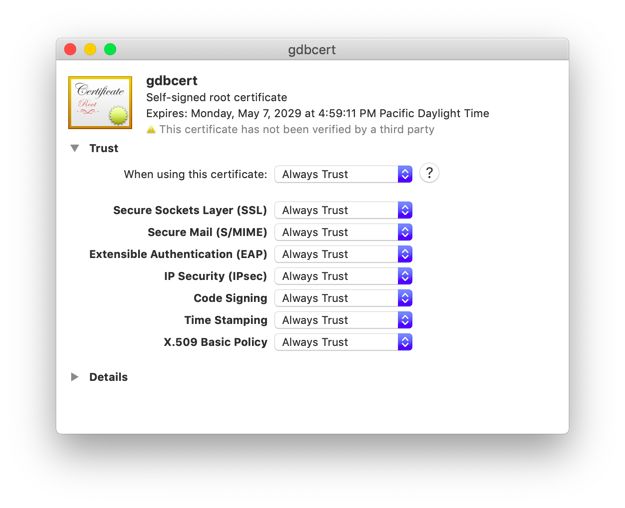
签名
1. 重新启动Taskgate access-control服务使用Activity Monitor服务)
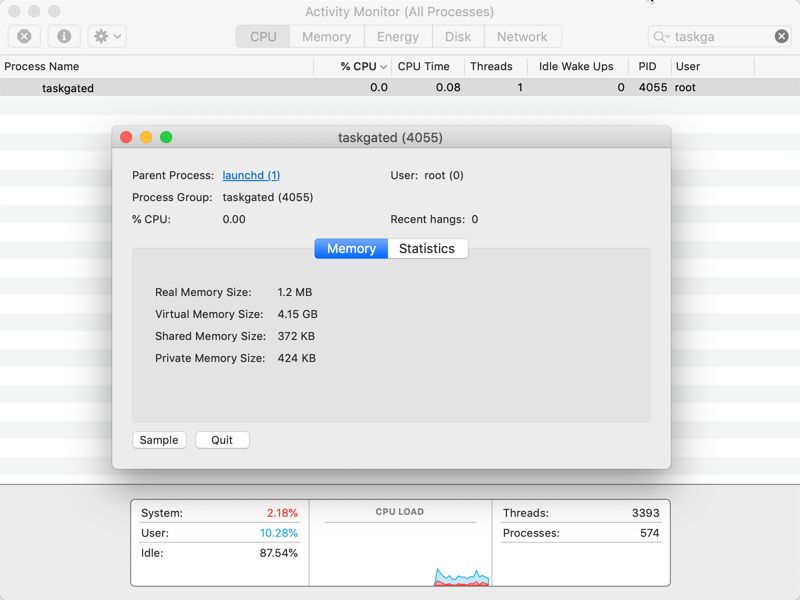
2. 点击Quit,并等待其退出,并重新显示在Activity Monitor中 (最多等待一到两分钟)
3. 签名完成调试签名问题
codesign -fs gdbcert /usr/local/bin/gdbRestart your mac and enablecsrutil enable --without debugsudo killall taskgated# Monitor logslog stream --predicate 'process == "taskgated" OR (process == "kernel" AND eventMessage CONTAINS "macOSTaskPolicy")' --info
其他
1. PostgreSQL后端主流程,初次PG开发人员建议多看一下
https://www.postgresql.org/developer/backend
2.Wiki.postgresql.org的开发人员部分 (如何进行代码贡献)
https://wiki.postgresql.org/wiki/Developer_and_Contributor_Resources
3. 新手从这里开始
https://wiki.postgresql.org/wiki/So,_you_want_to_be_a_developer%3F常用VS Code功能
内置快捷键参考Windows系统
https://code.visualstudio.com/shortcuts/keyboard-shortcuts-windows.pdfLinux系统
https://code.visualstudio.com/shortcuts/keyboard-shortcuts-linux.pdfMac系统
https://code.visualstudio.com/shortcuts/keyboard-shortcuts-macos.pdf配置自定义快捷键
VSCode提供了很多定制功能包括快捷键的定制。
注意:如果您安装了许多扩展程序或者已经自定义了键盘快捷键,则有时会出现键绑定冲突,其中相同的键盘快捷键映射到多个命令。 这可能会导致一些奇怪的现象,比如当您在编辑器中切换文件时,时常会导致进入和超出当前编辑范围的问题
File > Preferences > Keyboard Shortcuts (Windows)
Code > Preferences > Keyboard Shortcuts (MacOS)结束语
本篇日志只是为了让大家对如何使用VS Code开始PG编程有个初步的了解。
希望感兴趣的朋友 Enjoy VS Code, Enjoy PostgreSQL development

PostgreSQL中文社区欢迎广大技术人员投稿
投稿邮箱:press@postgres.cn


)


)的输出结果是)

...)
 如何用Apache POI操作Excel文件-----POI-3.10的一个和注解(comment)相关的另外一个bug...)

)


)