一、写在前面
自使用android studio开始,就被它独特的依赖方式:compile 'com.android.support:appcompat-v7:25.0.1'所深深吸引,自从有了它,麻麻再也不用担心依赖第三方jar包繁琐无趣啦。而,如果自己写一个开源库是一种怎样的体验,此乃利(装)国(逼)利(神)民(器)呀!
而一路装逼不易,你会发现如果你要发布你的开源库到官方的Bintray/Jcenter并非易事,所以先去网上一探究竟,简单的,难的,五花八门,全(误)面(人)具(子)备(弟)!
不得不感叹,学技术本身不难,难于达到一个目的的有多种方式,而各种方式参差不齐,给新手带来很大困惑。但是没办法,谁叫你是初学者呢,你所能做的,只能一步一步的折腾自己。
网上的帖子真多呀,五花八门,注册账号有问题,编写过程有问题,版本不一致有问题,install有问题....每个人的步骤都不一致,所以难于得到一个真正正确的东西,导致你错了,却不知道错在何处,这是最难受的,好吧,程序员加班就是因为这些细节末梢的事情导致的,所以,我们要细致!!!
其实,给个全面解析,楼主是诚惶诚恐,深怕一个小细节没有注意又去误人子弟,不过楼主也是折腾了很多时间才得以处理的,所以真心希望能给大家带来一点帮助,不足的地方,还请各位拍砖~
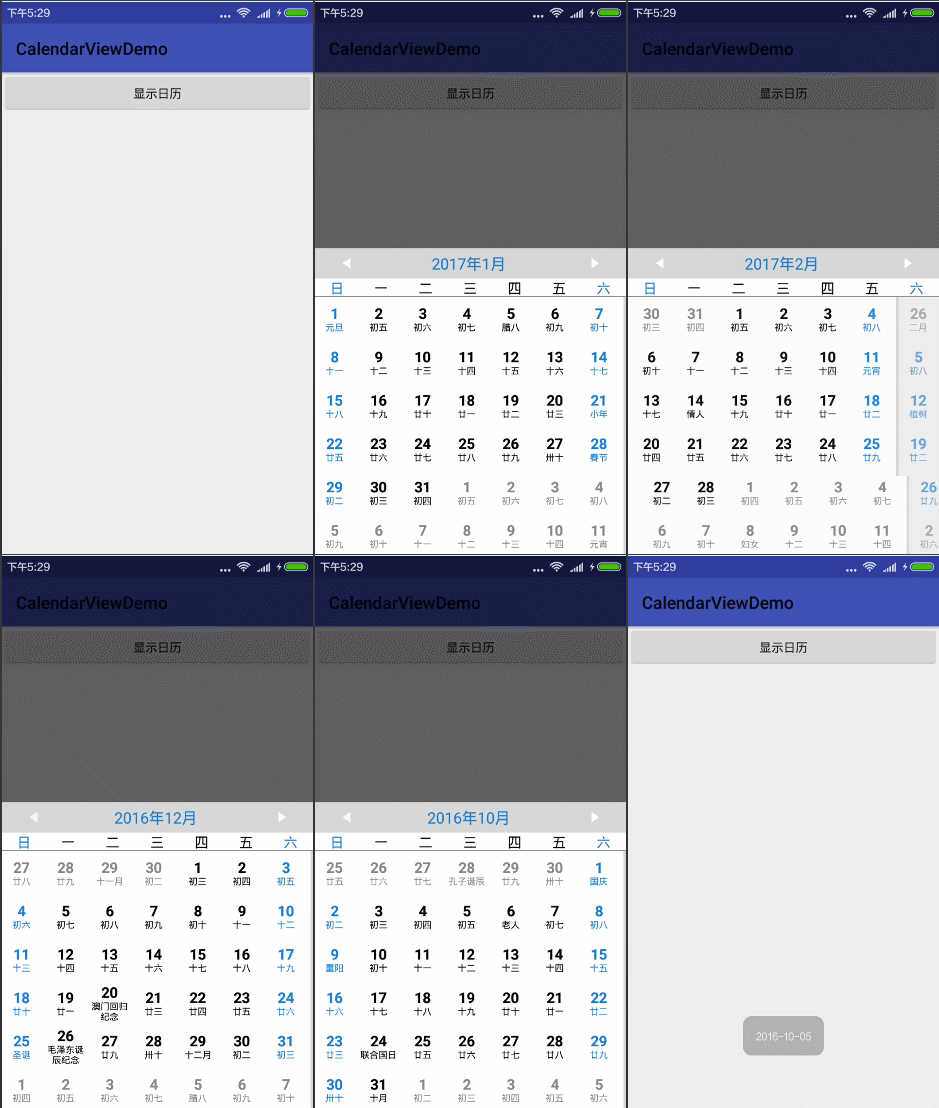
废话不多说,直接进入正题,这里拿我一个随便的开源库来做处理,git地址:https://github.com/nanchen2251/CalendarView,这是一个炫酷的日历选择控件(支持左右滑动,农历,节假日显示等)
演示效果:
二、注册账号
1)首先你的有开门的钥匙,先去https://bintray.com注册一个账号吧(你也可以使用第三方登录Github,Google,但楼主发现,如果你的github一直都不能成功,原来是邮箱地址不能用qq邮箱);

2)注册

3)提交注册信息

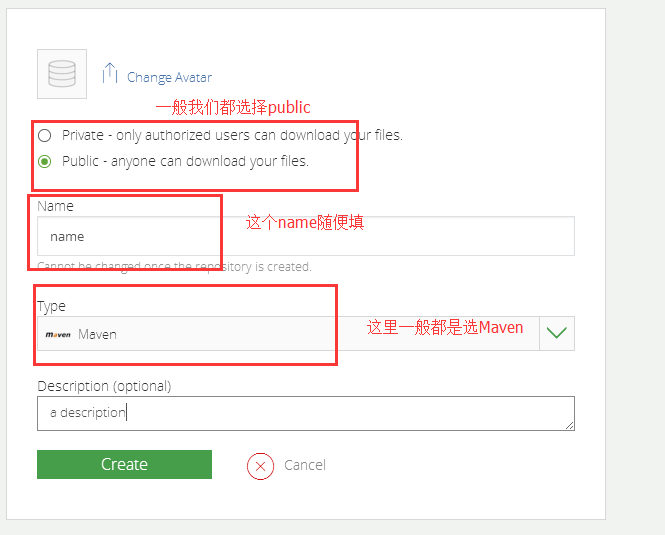
4)创建组织和仓库
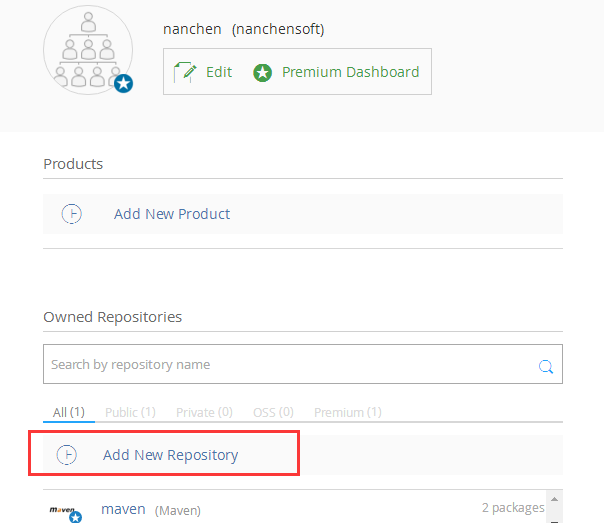
5)填写基本信息
三、配置项目相关
1)在project的build.grald添加
 classpath 'com.jfrog.bintray.gradle:gradle-bintray-plugin:1.4'
 classpath 'com.github.dcendents:android-maven-gradle-plugin:1.4.1'
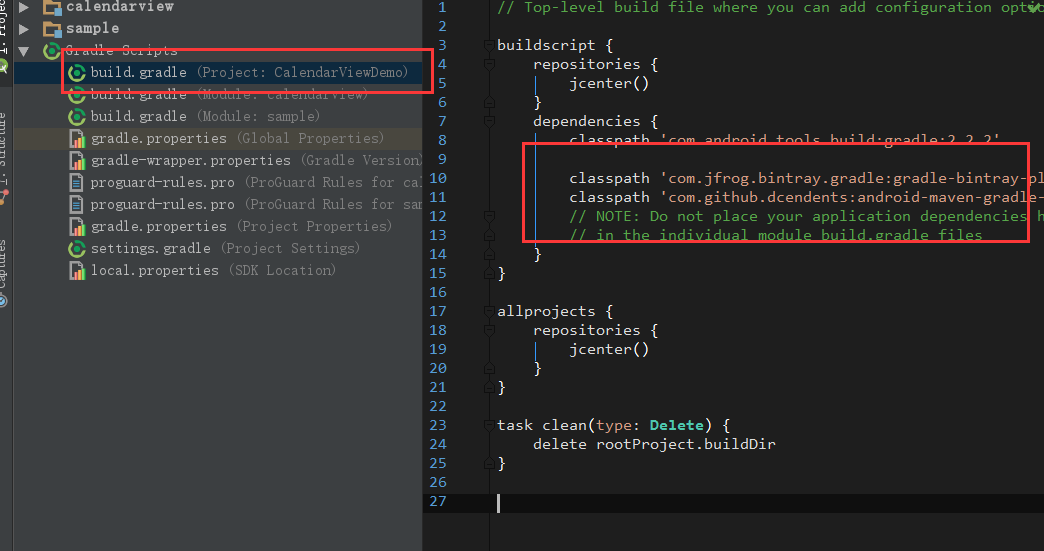
2)module里面添加
//配置插件
apply plugin: 'com.github.dcendents.android-maven'
apply plugin: 'com.jfrog.bintray'
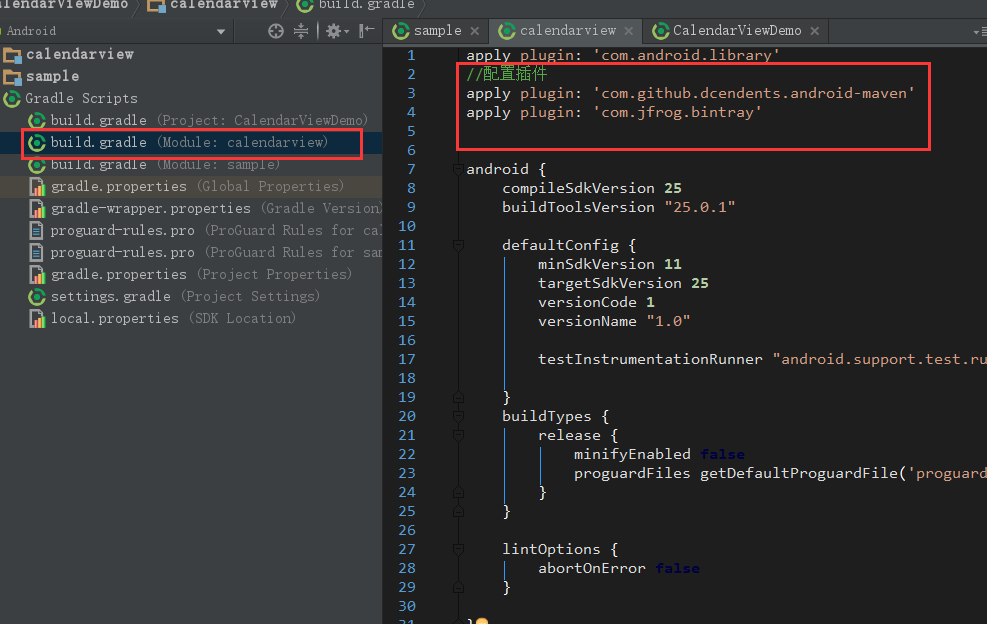
3)Module的build.gradle里面添加如下代码,注意注释
version = "1.0.7"    //这个是版本号,必须填写
def siteUrl = 'https://github.com/nanchen2251/CalendarView' // 项目的主页
def gitUrl = 'https://github.com/nanchen2251/CalendarView' // Git仓库的url

group = "com.nanchen.calendarview" // 这里是groupId ,必须填写  一般填你唯一的包名

install {repositories.mavenInstaller {// This generates POM.xml with proper parameters
        pom {project {packaging 'aar'// 项目描述,复制我的话,这里需要修改。name 'a view with the lunar calendar'   //项目描述
                url siteUrl// 软件开源协议,现在一般都是Apache License2.0吧,复制我的,这里不需要修改。
                licenses {license {name 'The Apache Software License, Version 2.0'url 'http://www.apache.org/licenses/LICENSE-2.0.txt'}}//填写开发者基本信息,复制我的,这里需要修改。
                developers {developer {id 'nanchen'            //你公司的idname 'nanchen2251'      //你的用户名email 'liushilin520@foxmail.com' // 你的邮箱
                    }}// SCM,复制我的,这里不需要修改。
                scm {connection gitUrldeveloperConnection gitUrlurl siteUrl}}}}
}
// 生成jar包的task,不需要修改。
task sourcesJar(type: Jar) {from android.sourceSets.main.java.srcDirsclassifier = 'sources'
}
// 生成javaDoc的jar,不需要修改
task javadoc(type: Javadoc) {options.encoding = "UTF-8"source = android.sourceSets.main.java.srcDirsclasspath += project.files(android.getBootClasspath().join(File.pathSeparator))
}
task javadocJar(type: Jar, dependsOn: javadoc) {classifier = 'javadoc'from javadoc.destinationDir
}//下面设置编码格式,重点注意,如果不设置可能会在gradlew install的时候出现GBK编码映射错误
javadoc {options {encoding "UTF-8"charSet 'UTF-8'author trueversion truelinks "http://docs.oracle.com/javase/7/docs/api"title 'A CalendarView Support Lunar Calendar For Android'   // 文档标题
    }
}artifacts {
//    archives javadocJar
    archives sourcesJar
}// 生成jar包
task releaseJar(type: Copy) {from( 'build/intermediates/bundles/release')into( '../jar')include('classes.jar')rename('classes.jar', 'okgo-' + version + '.jar')
}// 这里是读取Bintray相关的信息,我们上传项目到github上的时候会把gradle文件传上去,
// 所以不要把帐号密码的信息直接写在这里,写在local.properties中,这里动态读取。
Properties properties = new Properties()
properties.load(project.rootProject.file('local.properties').newDataInputStream())
bintray {//读取 local.properties 文件里面的 bintray.useruser = properties.getProperty("bintray.user")//读取 local.properties 文件里面的 bintray.apikeykey = properties.getProperty("bintray.apikey")configurations = ['archives']pkg {userOrg = "nanchen"        //发布到JCenter的组织,注意新版本的bintray是需要手动创建的repo = "maven"              //发布到JCenter上的仓库名称,注意新版本的bintray是需要手动创建的// 发布到Bintray上的项目名字name = "calendarview-library"websiteUrl = siteUrlvcsUrl = gitUrllicenses = ["Apache-2.0"]publish = true  // 是否是公开项目
    }
}
4)一些说明
注意把你的user和apikey信息放在项目的gradle.properties里面(当然这是最好的建议)
sdk.dir=C\:\\Users\\Administrator\\AppData\\Local\\Android\\Sdk1\\Sdk
bintray.user=***
bintray.apikey=***
注意:上面的userOrg是组织(organization)的id(上面创建过的),很多帖子都没有这个或者写的是用户名,新版本要使用你创建的组织名称,否则失败;repo是仓库(repository)的名称(上面创建的),我当初就是看的帖子这里说的不清楚怎么也不能成功。
如果忘记了,则可以这样查看,组织对应id,仓库对应repo,项目对应上面的name。

5)如果不出意外,这时候你已经可以在android studio的命令行操作Terminal工作空间输入gradlew install;
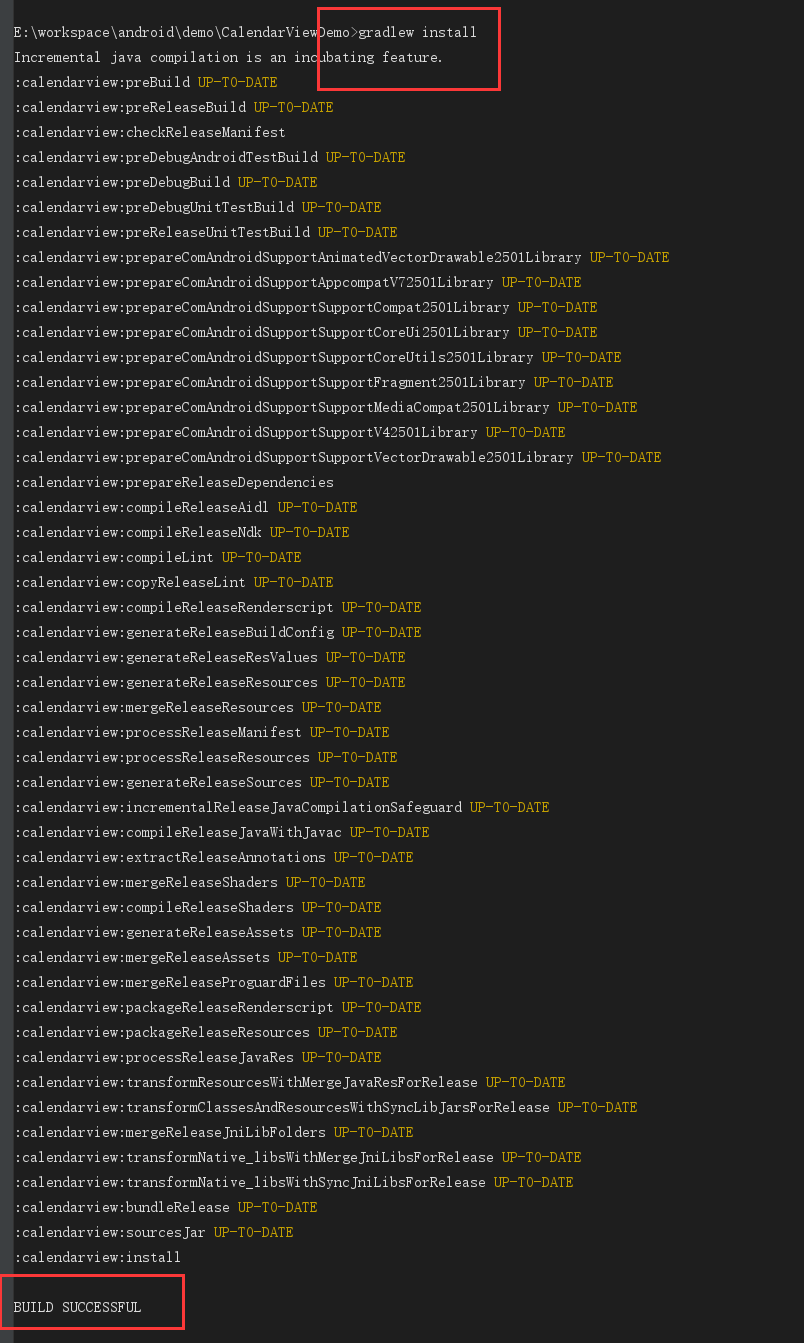
6)如果你成功了,则可以在module的build/outputs下面看到你的aar文件

7) 这时候你可以通过命令行输入gradlew bintrayUpload上传到bintray仓库。
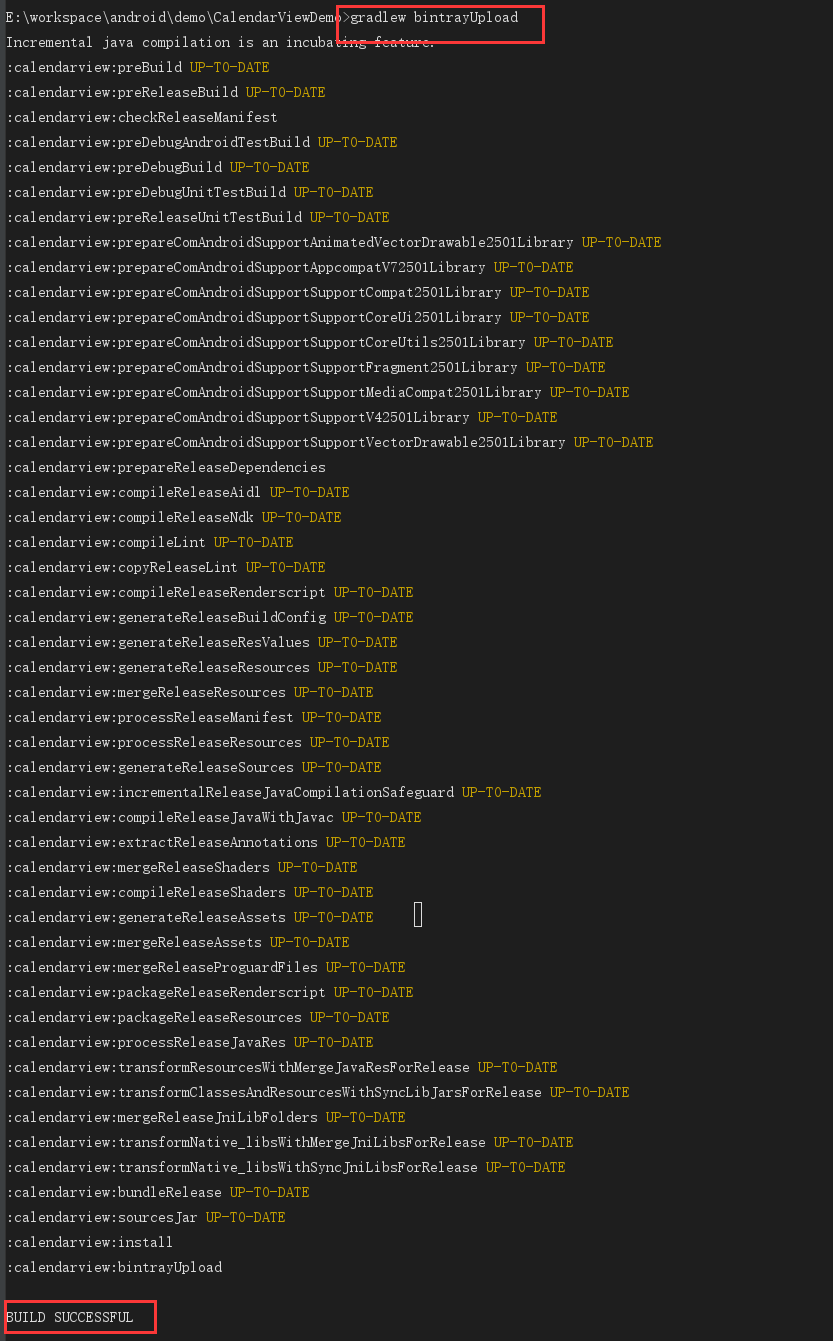
8)一切准备就绪,你这时候已经可以在bintray中看到你的库了,最后点击Add to Jcenter申请审核吧(一般2-3小时可以审核)
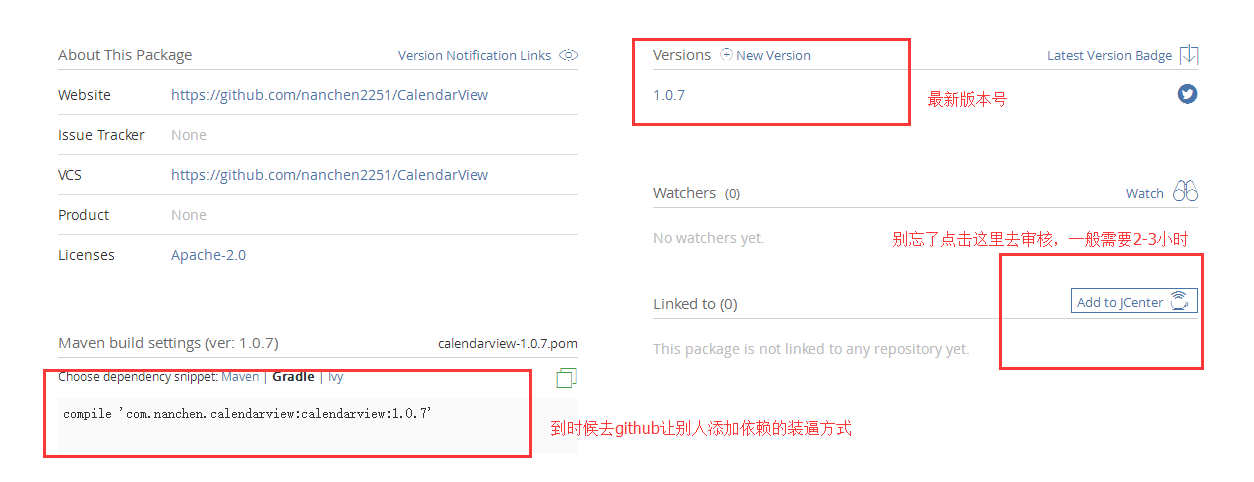
9)发送请求
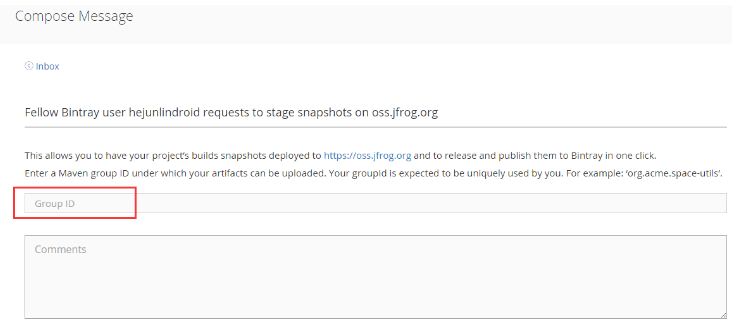
填下你的groupId,直接send,就会发起一个打包版本的请求,
过几个小时,通过jcenter那边的审核就会在bintray上收到jcenter那边的同意消息提醒。
恭喜你,你的类库上传到jcenter成功了!大家都可以用你的类库了。
10)开源库的后续更新
我们上传完成后,如果发现类库中出现类库中的一个bug,这就涉及到更新问题,那么怎么更新呢?
你只需要在,修改代码后,该本地build.gradle的版本号,按上面的操作,执行gradlew install,gradlew bintrayUpload,到bintray上点击Stage snapshots on oss.jfrog.org”同样发送一个请求,不用几分钟,就可以用了,升级,不像首次提交那样,非常快。马上就你可以更新github上的引用版本号,瞬间心情爽爽哒。
五、一些踩过的坑
1)Lint found errors in the project
Lint 检查默认是开启的,Lint 会检查项目中的语法错误,如果没有通过则无法继续。只需要在 Module 的 build.gradle 添加如下代码:
android {lintOptions {abortOnError false}
}
2)编码问题
也许你会遇到这样:
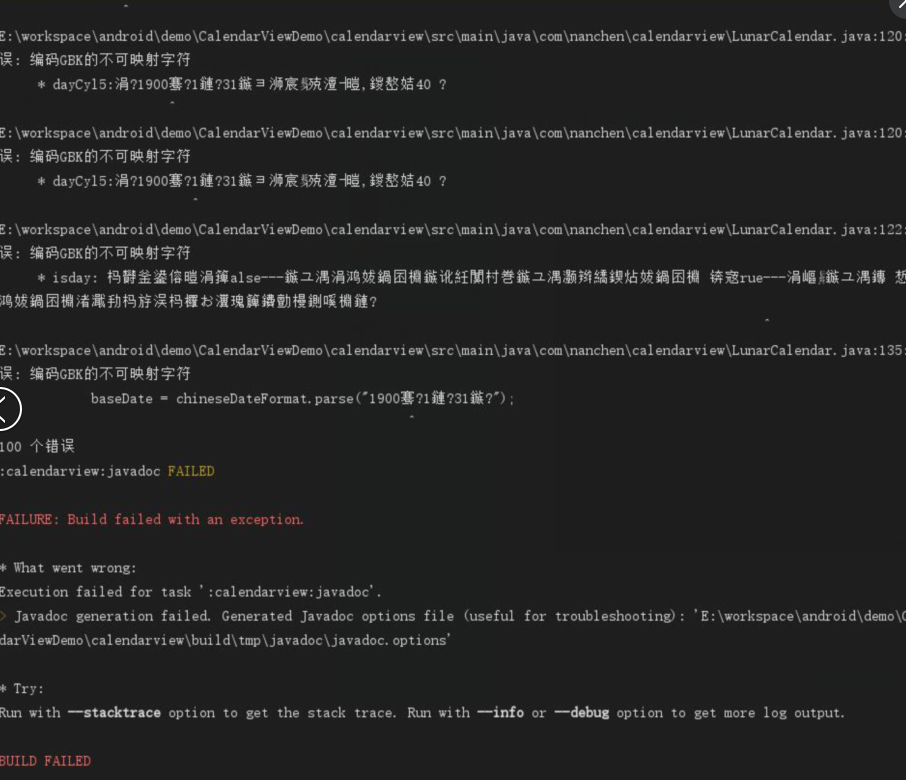
在 windows 下 javadoc 默认的是系统编码,Windows 就是 GBK 编码。所以一旦 java 文件中出现中文注释就会报错,提示无法映射的GBK编码。
task javadoc(type: Javadoc) {options.encoding = "utf-8"
}
如果还不行,则采用我上面的方式
//下面设置编码格式,重点注意,如果不设置可能会在gradlew install的时候出现GBK编码映射错误
javadoc {options {encoding "UTF-8"charSet 'UTF-8'author trueversion truelinks "http://docs.oracle.com/javase/7/docs/api"title 'A CalendarView Support Lunar Calendar For Android'   // 文档标题
    }
}


函数)

--P2P对等网络)


