文章目录
- 并发任务编排实现
- 不带返回值/参数传递任务
- 串行执行
- 并行执行
- 并行执行-自定义线程池
- 阻塞等待:多并行任务执行完再执行
- 任意一个任务并发执行完就执行下个任务
- 串并行任务依赖场景
- 带返回值/参数传递任务
- 带返回值实现
- 串行执行
- 多线程任务串行执行
- 对任务并行执行,返回值combine
- 写在最后
并发任务编排实现
其实Java8中提供了并发编程框架CompletableFuture,以下结合不同场景进行使用。
不带返回值/参数传递任务
模拟任务代码:
DateTimeFormatter formatter = DateTimeFormatter.ofPattern("yyyy-MM-dd HH:mm:ss");class TaskA implements Runnable{@SneakyThrows@Overridepublic void run() {Thread.sleep(2000);System.out.println(String.format("threadName: [%s] taskName:[%s] time:[%s]", Thread.currentThread().getName(), "任务A", LocalDateTime.now().format(formatter)));}}class TaskB implements Runnable{@SneakyThrows@Overridepublic void run() {Thread.sleep(1000);System.out.println(String.format("threadName: [%s] taskName:[%s] time:[%s]", Thread.currentThread().getName(), "任务B", LocalDateTime.now().format(formatter)));}}class TaskC implements Runnable{@SneakyThrows@Overridepublic void run() {Thread.sleep(50);System.out.println(String.format("threadName: [%s] taskName:[%s] time:[%s]", Thread.currentThread().getName(), "任务C", LocalDateTime.now().format(formatter)));}}
串行执行
A、B、C任务串行执行

CompletableFuture,runAsync():异步执行
thenRun():上个任务结束再执行(不带上一个返回值结果)下一个任务
get():阻塞等待任务执行完成
实现方式:
@Testvoid thenRunTest() throws ExecutionException, InterruptedException {CompletableFuture<Void> future = CompletableFuture.runAsync(new TaskA()).thenRun(new TaskB()).thenRun(new TaskC());future.get();}
输出:
threadName: [ForkJoinPool.commonPool-worker-1] taskName:[任务A] time:[2021-06-01 22:56:51]
threadName: [ForkJoinPool.commonPool-worker-1] taskName:[任务B] time:[2021-06-01 22:56:52]
threadName: [ForkJoinPool.commonPool-worker-1] taskName:[任务C] time:[2021-06-01 22:56:53]
从日志就能看出串行执行就是通过单线程执行多个任务。
并行执行
A、B、C任务并行执行

CompletableFuture.allOf():等待所有的CompletableFuture执行完成,无返回值
代码实现:
/*** 并发执行ABC任务*/@SneakyThrows@Testvoid SeqTest(){String start = LocalDateTime.now().format(formatter);System.out.println(String.format("start task [%s]", start));CompletableFuture[] futures = new CompletableFuture[3];futures[0] = CompletableFuture.runAsync(new TaskA());futures[1] = CompletableFuture.runAsync(new TaskB());futures[2] = CompletableFuture.runAsync(new TaskC());CompletableFuture.allOf(futures).get();String end = LocalDateTime.now().format(formatter);System.out.println(String.format("end task [%s]", end));}
输出:
start task [2021-06-01 23:03:49]
threadName: [ForkJoinPool.commonPool-worker-3] taskName:[任务C] time:[2021-06-01 23:03:49]
threadName: [ForkJoinPool.commonPool-worker-2] taskName:[任务B] time:[2021-06-01 23:03:50]
threadName: [ForkJoinPool.commonPool-worker-1] taskName:[任务A] time:[2021-06-01 23:03:51]
end task [2021-06-01 23:03:51]
上述这种方式执行可以看出CompletableFuture默认使用的是ForkJoinPool.commonPool线程池,居然用的默认线程池那线程数是如何配置的呢?后来找到源码发现commonPool线程池配置代码如下

- 先去看看java环境变量有没有制定线程数(如果没有特殊制定默认没有)
- 如果没有配置则通过操作系统的核心数减一来设置线程数(我理解的减一应该是为了给main thread执行)
- 这种默认配置方式适合用于CPU密集型任务,如果IO型需要我们自己去配置线程池
并行执行-自定义线程池
不是所有任务都是CPU密集型,为了解决上述问题,尤其是IO场景,我们需要根据业务场景配置合理线程数充分使其利用cpu资源。
如何合理配置线程数可以参考我之前文章
@SneakyThrows@Testvoid ParTestWithThreadPool(){String start = LocalDateTime.now().format(formatter);System.out.println(String.format("start task [%s]", start));ThreadPoolExecutor customThreadPool = new ThreadPoolExecutor(24, 32, 3, TimeUnit.SECONDS, new ArrayBlockingQueue<>(1000));CompletableFuture[] futures = new CompletableFuture[3];futures[0] = CompletableFuture.runAsync(new TaskA(), customThreadPool);futures[1] = CompletableFuture.runAsync(new TaskB(), customThreadPool);futures[2] = CompletableFuture.runAsync(new TaskC(), customThreadPool);CompletableFuture.allOf(futures).get();String end = LocalDateTime.now().format(formatter);System.out.println(String.format("end task [%s]", end));}
输出:
start task [2021-06-02 00:00:05]
threadName: [pool-1-thread-3] taskName:[任务C] time:[2021-06-02 00:00:05]
threadName: [pool-1-thread-2] taskName:[任务B] time:[2021-06-02 00:00:06]
threadName: [pool-1-thread-1] taskName:[任务A] time:[2021-06-02 00:00:07]
end task [2021-06-02 00:00:07]
阻塞等待:多并行任务执行完再执行
A、B并行都执行完后再执行C任务

@AfterTestvoid after(){String end = LocalDateTime.now().format(formatter);System.out.println(String.format("end task [%s]", end));}@Testvoid SeqAndParTest() throws ExecutionException, InterruptedException {ThreadPoolExecutor customThreadPool = new ThreadPoolExecutor(8, 16, 3, TimeUnit.SECONDS, new ArrayBlockingQueue<>(1000));CompletableFuture[] futures = new CompletableFuture[2];futures[0] = CompletableFuture.runAsync(new TaskA(), customThreadPool);futures[1] = CompletableFuture.runAsync(new TaskB(), customThreadPool);CompletableFuture.allOf(futures).get();CompletableFuture.runAsync(new TaskC(), customThreadPool).get();}
输出:
start task [2021-06-02 16:56:42]
threadName: [pool-1-thread-2] taskName:[任务B] time:[2021-06-02 16:56:43]
threadName: [pool-1-thread-1] taskName:[任务A] time:[2021-06-02 16:56:44]
threadName: [pool-1-thread-3] taskName:[任务C] time:[2021-06-02 16:56:44]
end task [2021-06-02 16:56:44]
从输出中能看出B、A任务并发执行完成以后再执行C任务
任意一个任务并发执行完就执行下个任务
A、B并发执行,只要有一个执行完就执行C任务

anyOf:只要有任意一个CompletableFuture结束,就可以做接下来的事情,而无须像AllOf那样,等待所有的CompletableFuture结束
@Testvoid anyOf() throws ExecutionException, InterruptedException {ThreadPoolExecutor customThreadPool = new ThreadPoolExecutor(8, 16, 3, TimeUnit.SECONDS, new ArrayBlockingQueue<>(1000));CompletableFuture[] futures = new CompletableFuture[2];futures[0] = CompletableFuture.runAsync(new TaskA(), customThreadPool);futures[1] = CompletableFuture.runAsync(new TaskB(), customThreadPool);CompletableFuture.anyOf(futures).get();CompletableFuture.runAsync(new TaskC(), customThreadPool).get();}
输出:
start task [2021-06-02 17:43:42]
threadName: [pool-1-thread-2] taskName:[任务B] time:[2021-06-02 17:43:43]
threadName: [pool-1-thread-3] taskName:[任务C] time:[2021-06-02 17:43:43]
-----------
end task [2021-06-02 17:43:43]
串并行任务依赖场景

@Testvoid multiSeqAndParTest() throws ExecutionException, InterruptedException {ThreadPoolExecutor customThreadPool = new ThreadPoolExecutor(8, 16, 3, TimeUnit.SECONDS, new ArrayBlockingQueue<>(1000));CompletableFuture.runAsync(new TaskA(), customThreadPool).get();CompletableFuture[] futures = new CompletableFuture[2];futures[0] = CompletableFuture.runAsync(new TaskB(), customThreadPool).thenRun(new TaskC());futures[1] = CompletableFuture.runAsync(new TaskD(), customThreadPool).thenRun(new TaskE());CompletableFuture.allOf(futures).get();CompletableFuture.runAsync(new TaskF(), customThreadPool).get();}
输出:
start task [2021-06-02 17:33:35]
threadName: [pool-1-thread-1] taskName:[任务A] time:[2021-06-02 17:33:37]
-----------
threadName: [pool-1-thread-3] taskName:[任务D] time:[2021-06-02 17:33:37]
threadName: [pool-1-thread-3] taskName:[任务E] time:[2021-06-02 17:33:37]
-----------
threadName: [pool-1-thread-2] taskName:[任务B] time:[2021-06-02 17:33:38]
threadName: [pool-1-thread-2] taskName:[任务C] time:[2021-06-02 17:33:38]
-----------
threadName: [pool-1-thread-4] taskName:[任务F] time:[2021-06-02 17:33:38]
end task [2021-06-02 17:33:38]
带返回值/参数传递任务
模拟任务
String taskA(){try {TimeUnit.SECONDS.sleep(3);} catch (InterruptedException e) {e.printStackTrace();}String v = String.format("threadName: [%s] taskName:[%s] time:[%s]", Thread.currentThread().getName(), "任务A", LocalDateTime.now().format(formatter));return v;}String taskB(){try {TimeUnit.SECONDS.sleep(2);} catch (InterruptedException e) {e.printStackTrace();}String v = String.format("threadName: [%s] taskName:[%s] time:[%s]", Thread.currentThread().getName(), "任务B", LocalDateTime.now().format(formatter));return v;}String taskC(){try {TimeUnit.SECONDS.sleep(1);} catch (InterruptedException e) {e.printStackTrace();}String v = String.format("threadName: [%s] taskName:[%s] time:[%s]", Thread.currentThread().getName(), "任务C", LocalDateTime.now().format(formatter));return v;}
带返回值实现
supplyAsync():异步执行并带返回值
@Testvoid supplyAsync() throws ExecutionException, InterruptedException {CompletableFuture<String> stringCompletableFuture = CompletableFuture.supplyAsync(() -> taskA());String result = stringCompletableFuture.get();System.out.println(result);}String taskA(){try {TimeUnit.SECONDS.sleep(3);} catch (InterruptedException e) {e.printStackTrace();}return "hello";}
串行执行

thenApply(): 后面跟的是一个有参数、有返回值的方法,称为Function。返回值是CompletableFuture类型。
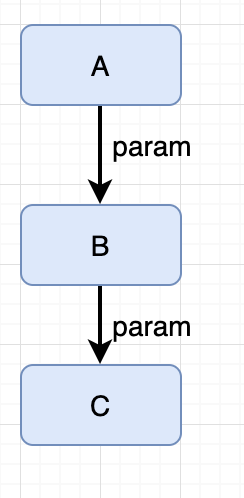
thenAccept():上个任务结束再执行(前面任务的结果作为下一个任务的入参)下一个任务
String taskA(){try {TimeUnit.SECONDS.sleep(3);} catch (InterruptedException e) {e.printStackTrace();}String v = String.format("threadName: [%s] taskName:[%s] time:[%s]", Thread.currentThread().getName(), "任务A", LocalDateTime.now().format(formatter));return v;}void taskC(String param){try {TimeUnit.SECONDS.sleep(1);} catch (InterruptedException e) {e.printStackTrace();}String v = String.format("threadName: [%s] taskName:[%s] time:[%s]", Thread.currentThread().getName(), "任务C", LocalDateTime.now().format(formatter));System.out.println(param + "\n ->" + v);}@Testvoid seqTest1() throws ExecutionException, InterruptedException {CompletableFuture<Void> completableFuture = CompletableFuture.supplyAsync(() -> taskA()).thenApply(param -> {String v = String.format("threadName: [%s] taskName:[%s] time:[%s]", Thread.currentThread().getName(), "任务B", LocalDateTime.now().format(formatter));return param + "\n ->" + v;}).thenAccept(param -> taskC(param));completableFuture.get();}
输出:
start task [2021-06-03 11:14:27]
threadName: [ForkJoinPool.commonPool-worker-1] taskName:[任务A] time:[2021-06-03 11:14:30]->threadName: [ForkJoinPool.commonPool-worker-1] taskName:[任务B] time:[2021-06-03 11:14:30]->threadName: [ForkJoinPool.commonPool-worker-1] taskName:[任务C] time:[2021-06-03 11:14:31]
end task [2021-06-03 11:14:31]
多线程任务串行执行
A、B、C任务在多个线程环境下执行,但是执行需要带要带参数传递A->B->C,感觉这种使用场景比较少

thenCompose():第1个参数是一个CompletableFuture类型,第2个参数是一个方法,并且是一个BiFunction,也就是该方法有2个输入参数,1个返回值。从该接口的定义可以大致推测,它是要在2个 CompletableFuture 完成之后,把2个CompletableFuture的返回值传进去,再额外做一些事情。
模拟任务:
String taskA(){try {TimeUnit.SECONDS.sleep(3);} catch (InterruptedException e) {e.printStackTrace();}String v = String.format("threadName: [%s] taskName:[%s] time:[%s]", Thread.currentThread().getName(), "任务A", LocalDateTime.now().format(formatter));return v;}String taskB(String param){try {TimeUnit.SECONDS.sleep(3);} catch (InterruptedException e) {e.printStackTrace();}String v = String.format("threadName: [%s] taskName:[%s] time:[%s]", Thread.currentThread().getName(), "任务B", LocalDateTime.now().format(formatter));return param + "\n ->" + v;}String taskC2(String param){try {TimeUnit.SECONDS.sleep(3);} catch (InterruptedException e) {e.printStackTrace();}String v = String.format("threadName: [%s] taskName:[%s] time:[%s]", Thread.currentThread().getName(), "任务C", LocalDateTime.now().format(formatter));return param + "\n ->" + v;}
实现一:
@Testvoid multiCompletableFutureSeqTest() throws ExecutionException, InterruptedException {CompletableFuture<String> future = CompletableFuture.supplyAsync(() -> taskA()).thenCompose(firstTaskReturn -> CompletableFuture.supplyAsync(() -> taskB(firstTaskReturn))).thenCompose(secondTaskReturn -> CompletableFuture.supplyAsync(() -> taskC2(secondTaskReturn)));System.out.println(future.get());}
输出:
start task [2021-06-03 15:04:45]
threadName: [ForkJoinPool.commonPool-worker-1] taskName:[任务A] time:[2021-06-03 15:04:48]->threadName: [ForkJoinPool.commonPool-worker-2] taskName:[任务B] time:[2021-06-03 15:04:51]->threadName: [ForkJoinPool.commonPool-worker-2] taskName:[任务C] time:[2021-06-03 15:04:54]
end task [2021-06-03 15:04:54]
对任务并行执行,返回值combine
如果希望返回值是一个非嵌套的CompletableFuture,可以使用thenCompose
@SneakyThrows@Testvoid multiCombineTest(){CompletableFuture<String> future = CompletableFuture.supplyAsync(() -> taskA()).thenCombine(CompletableFuture.supplyAsync(() -> taskB2()), (s1, s2) -> s1 + "\n" + s2 + "\n" + "combine: " + Thread.currentThread().getName()).thenCombine(CompletableFuture.supplyAsync(() -> taskC2()), (s1, s2) -> s1 + "\n" + s2 + "\n" + "combine: " + Thread.currentThread().getName());System.out.println(future.get());}
写在最后
推荐一个大佬的并发编程框架,文章思路是照着他的readme去写的


