
mac电脑该怎么重装系统?苹果电脑在长时间使用后,系统可能会变得比较慢,另外各种缓存垃圾也会越堆越多,影响电脑的反应速度。mac OS系统是苹果电脑独有的操作系统,重装mac系统过程和Win系统完全不同,所以第一次使用苹果电脑的用户都不知道如何重装mac系统。下面为大家带来超详细的mac苹果电脑重装系统图文教程,让重装系统不再是难题!
Mac重装系统图文教程
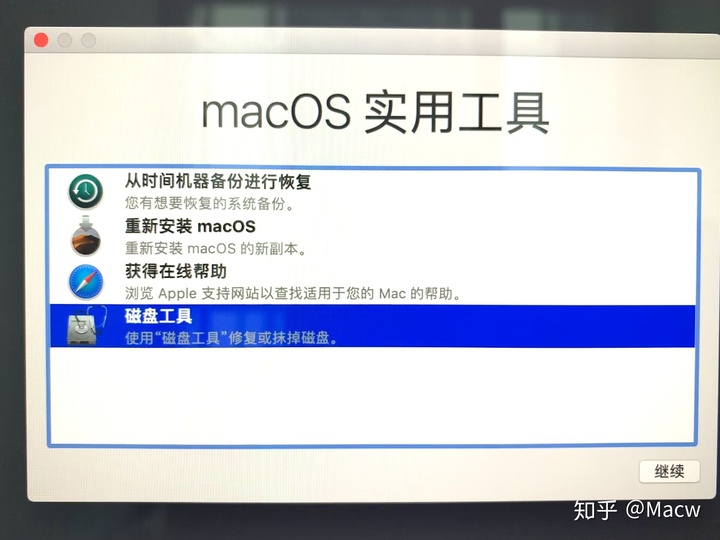
1、电脑关机状态下,按开机键,同时键盘长按command+R键不放,直到出现苹果标志进度条开始缓慢移动就可以松开手了,接下来会出现下面的界面,选择磁盘工具。
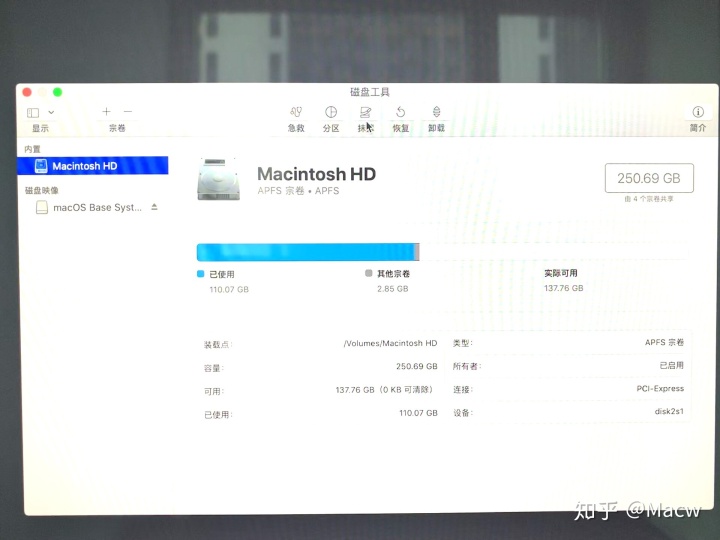
2、选择系统磁盘,点击抹掉。这里可以看到磁盘使用情况,以及剩余情况。
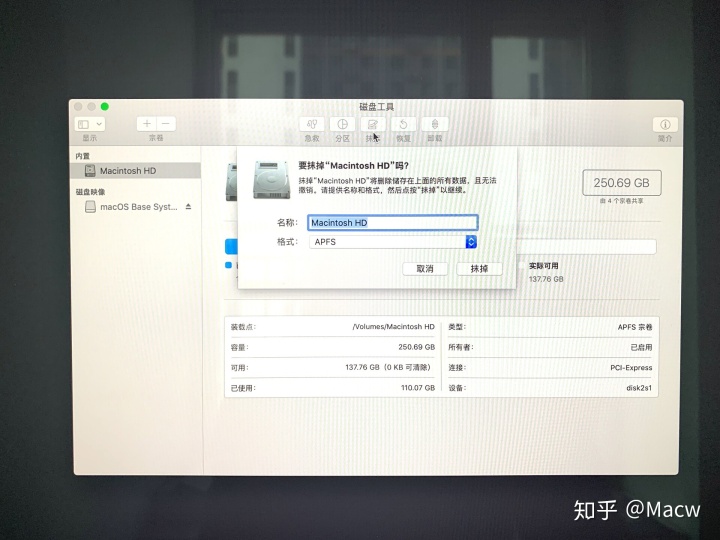
3、系统会弹出提示要抹掉“Macintosh HD”吗?,格式选择APFS格式后点击下方的抹掉按钮。(这里一定要注意!磁盘格式一定要选择APFS格式,这个很重要,其它的磁盘格式会对某些软件的安装库不兼容,如:Adobe的pkg格式等。)
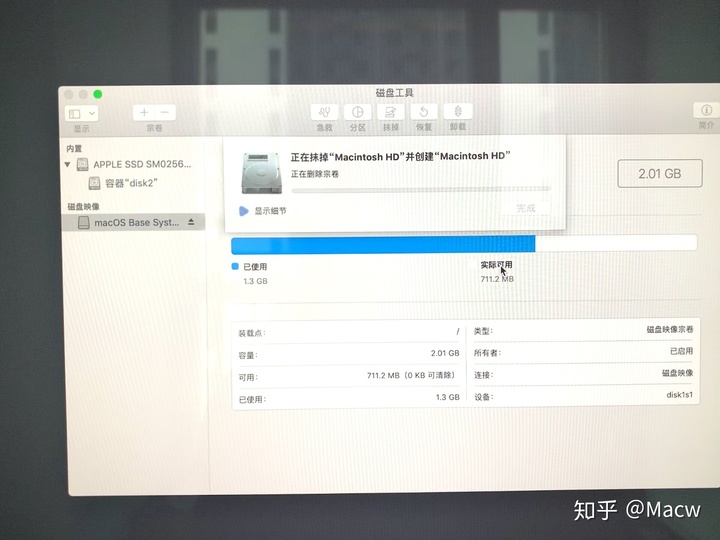
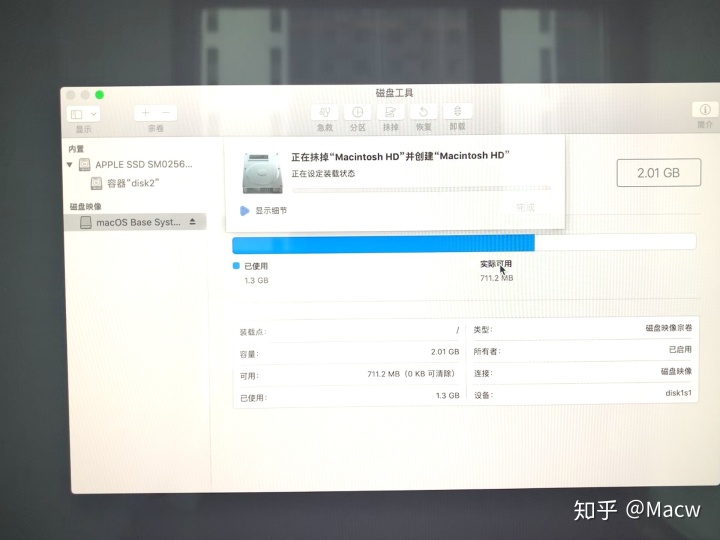
4、正在抹掉旧的磁盘,并创建新的磁盘。
5、正在设定装载状态,静心等待完成。
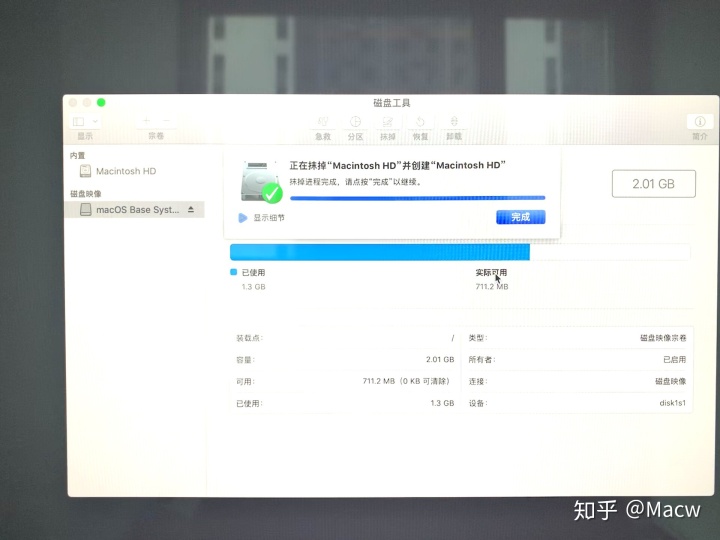
6、抹盘进程完成,点击完成。
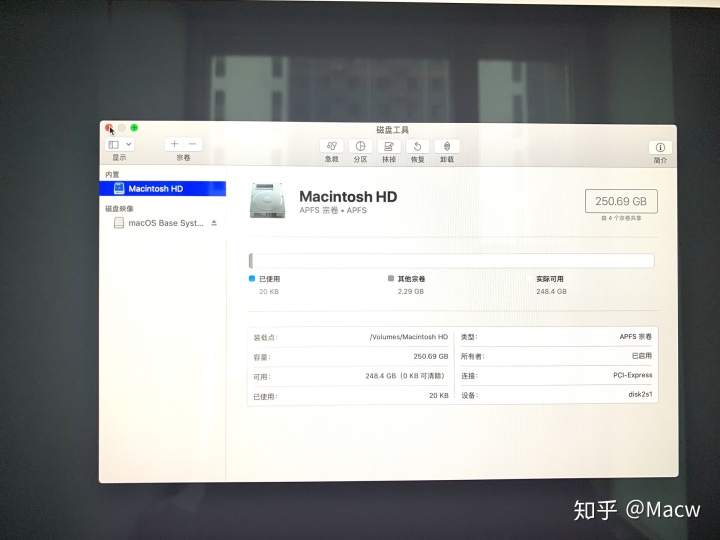
7、此时我们可以看到新的磁盘空空如也,旧磁盘里的东西已经全盘抹除,我们先关掉这个页面。
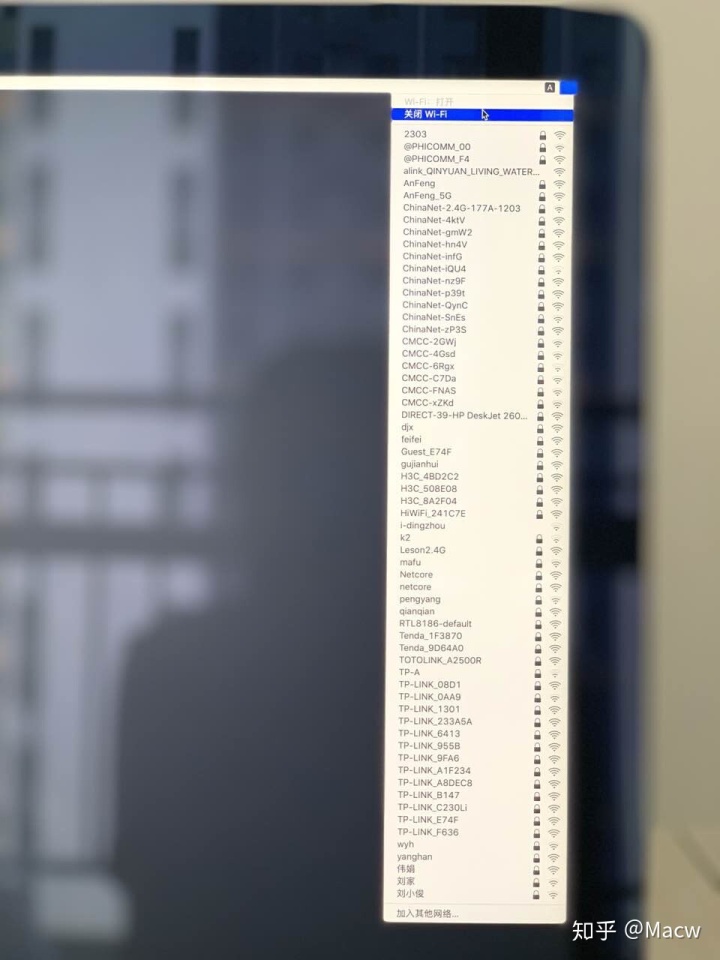
8、在线安装之前如果能用网线请关闭WiFi功能切换到网线。
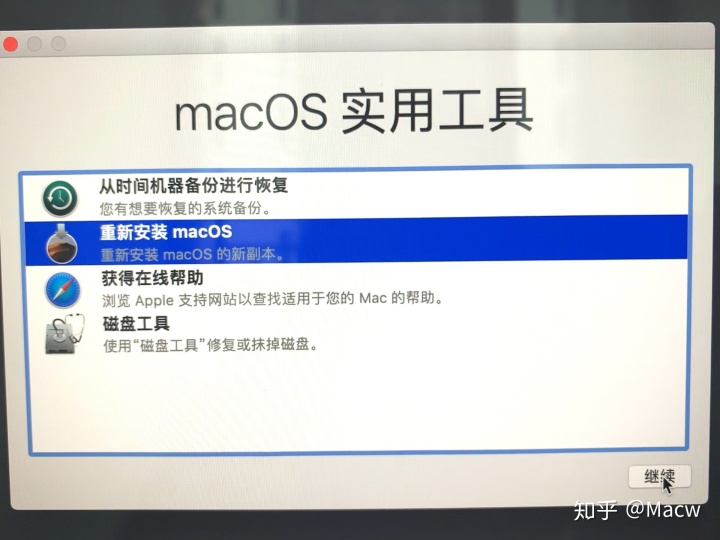
9、继续回到macOS实用工具界面,选择重新安装 macOS,点击继续。
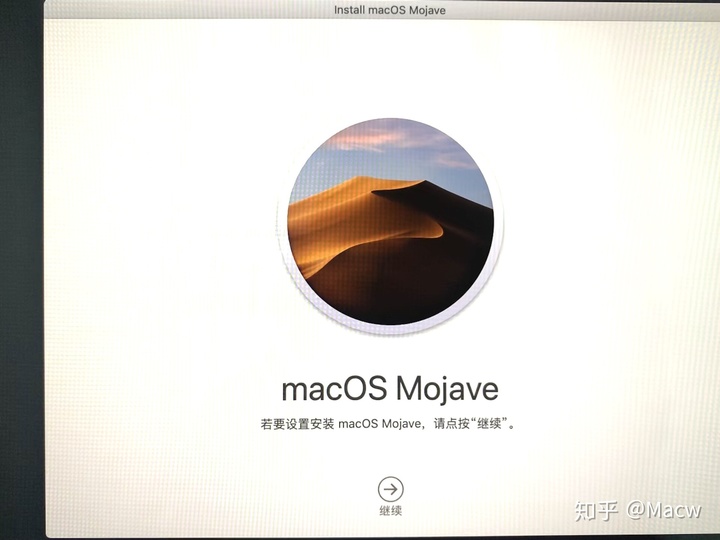
10、如图所示,点击继续。
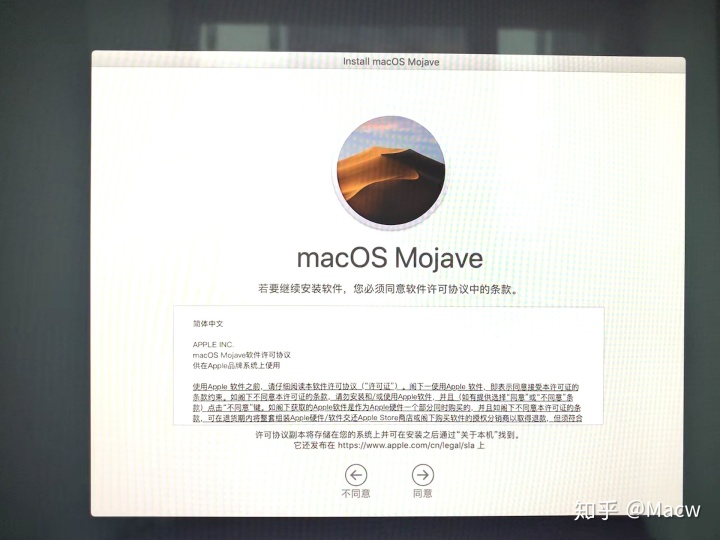
11、出现下图所示,点击同意按钮。
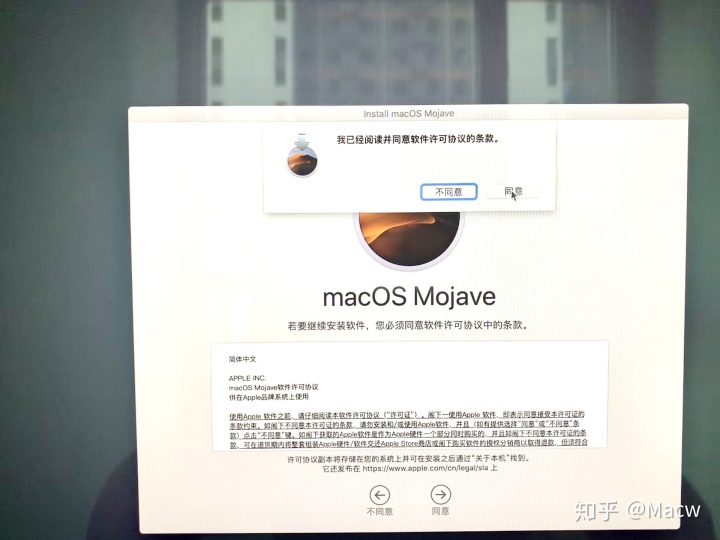
12、当系统弹出提示框时,点击同意。
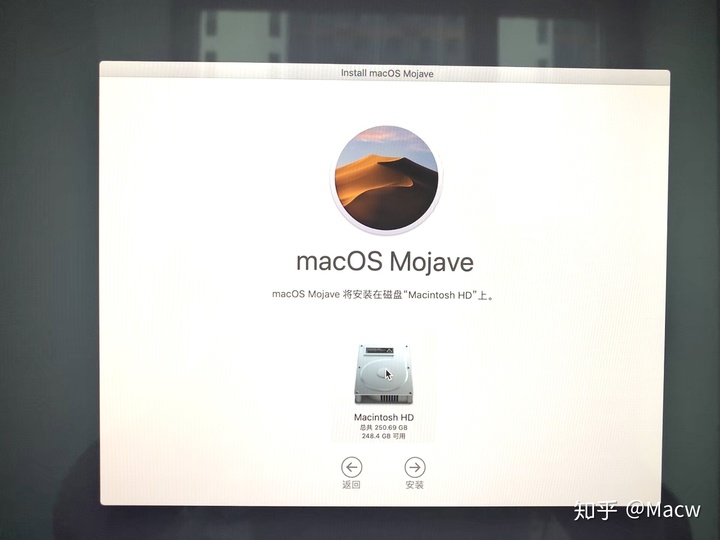
13、弹出提示,macOS Mojave 将安装在"Macintosh HD"上,选择“Macintosh HD”点击安装。
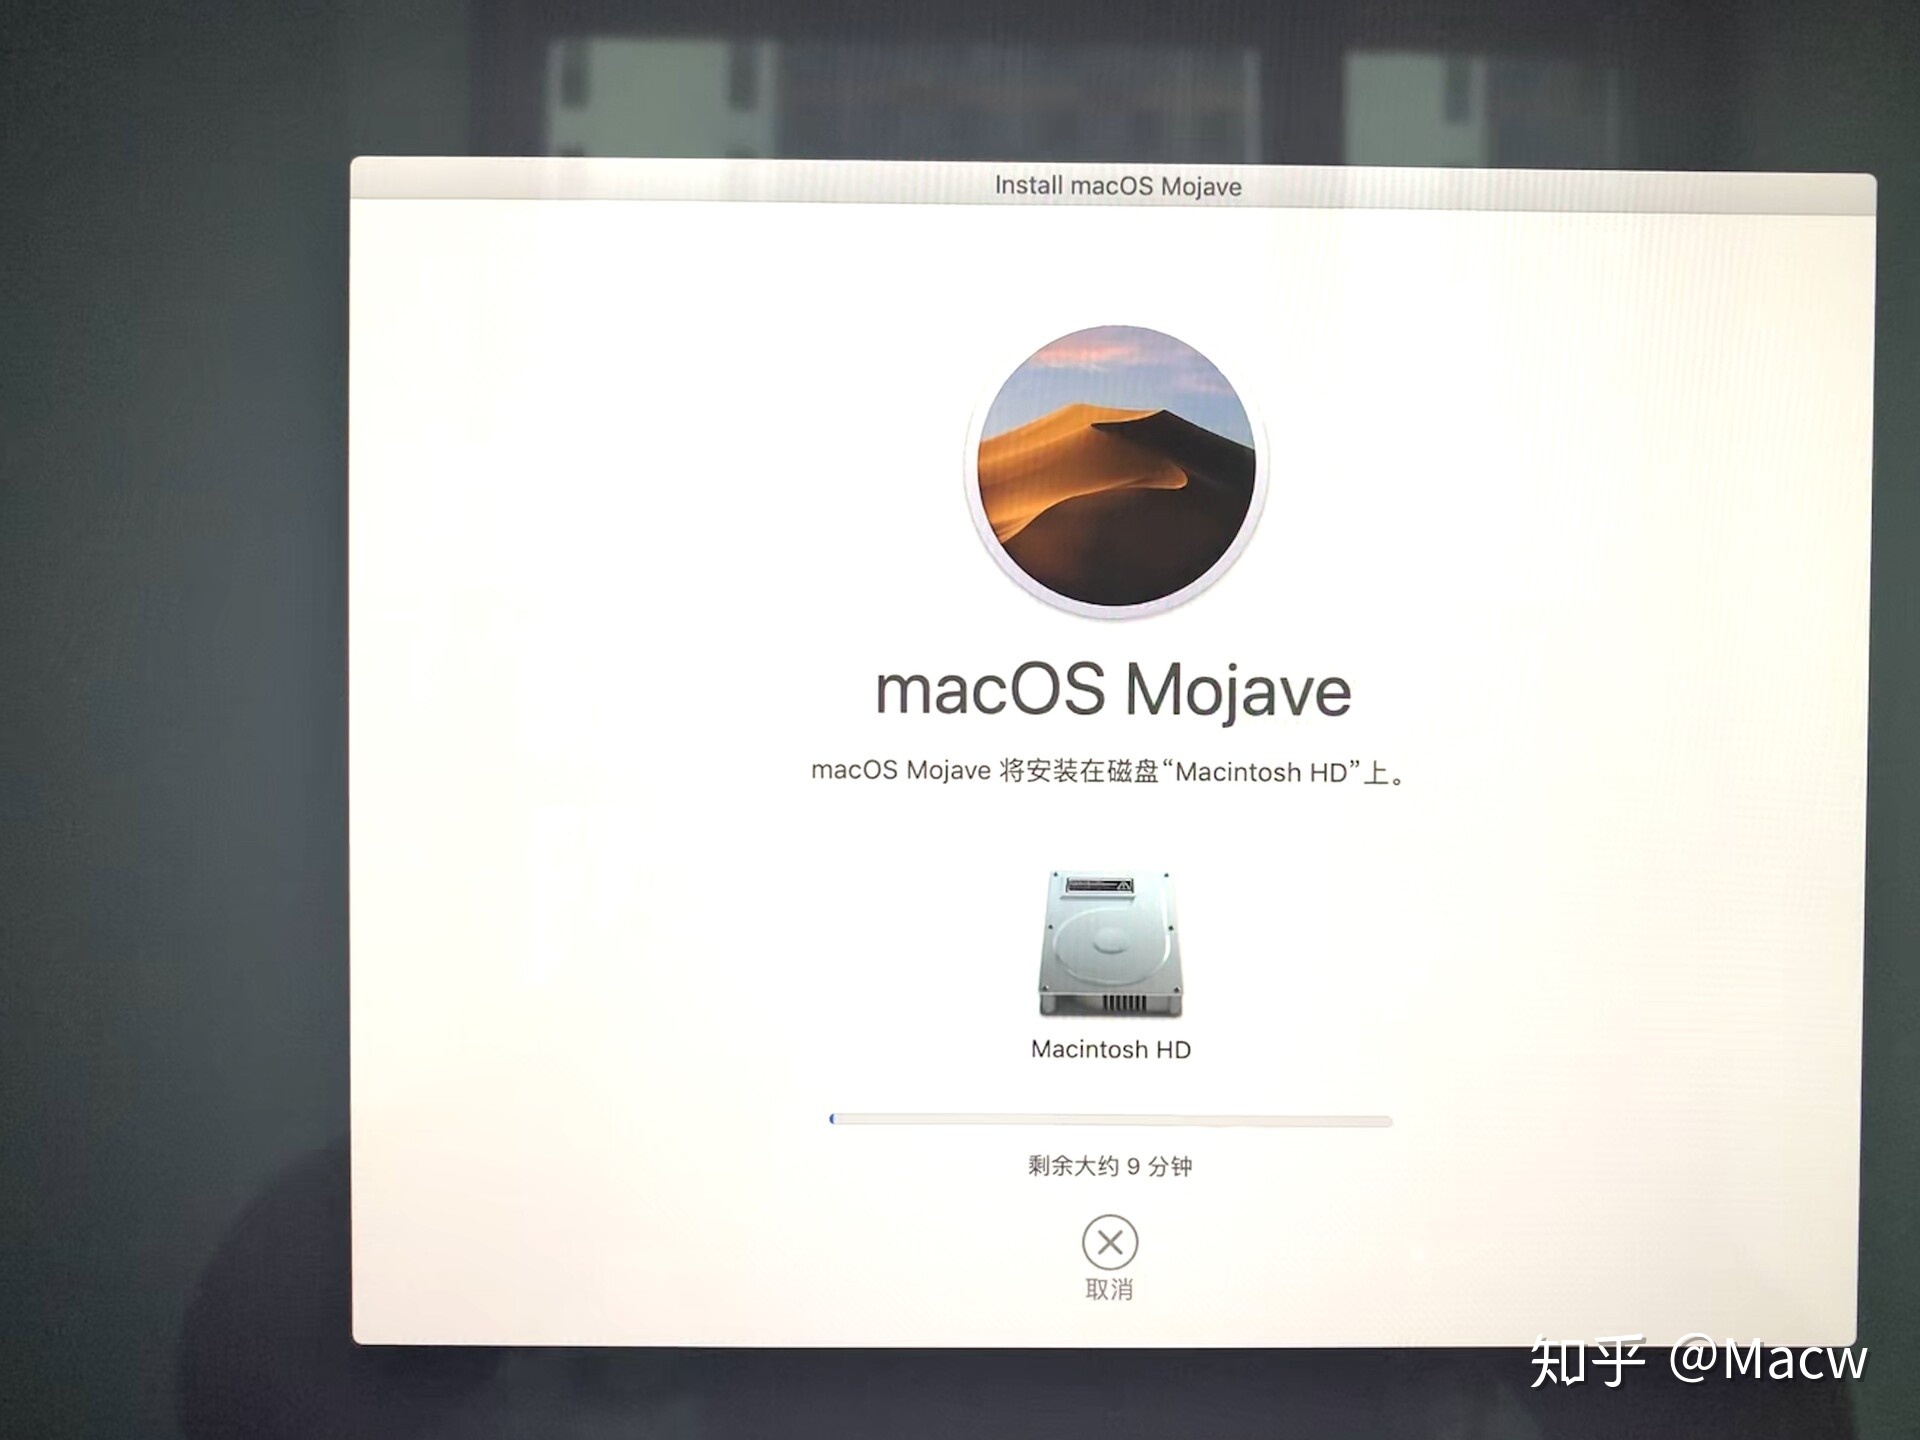
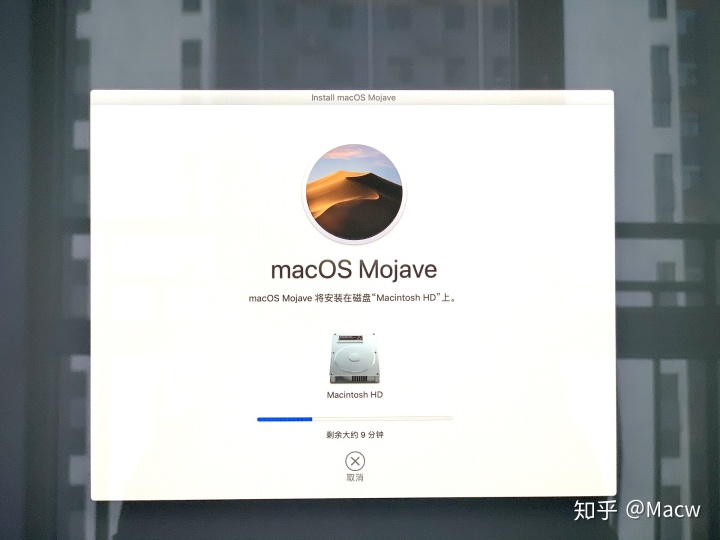
14、macOS Mojave将安装在磁盘“Macintosh HD”上,大约9分钟,请耐心等待。
15、系统提示正在安装macOS Mojave系统,请耐心等待。
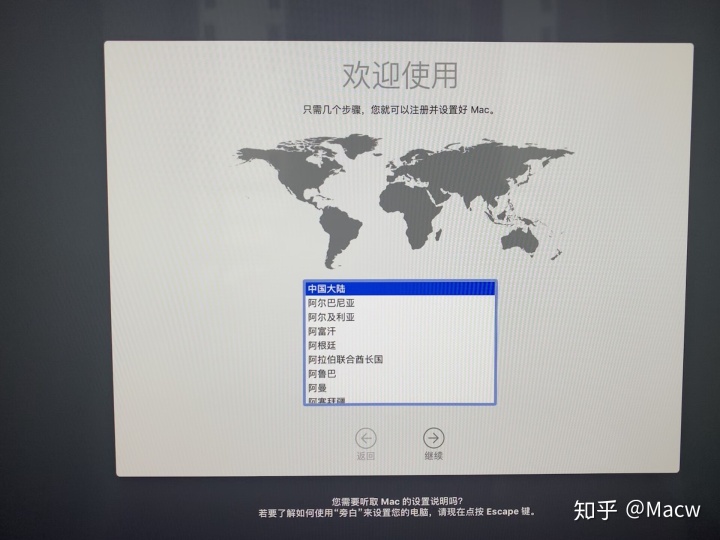
16、当出现欢迎使用,选择您的使用环境,点击继续。(这里建议选择一个国家的语言,中国)
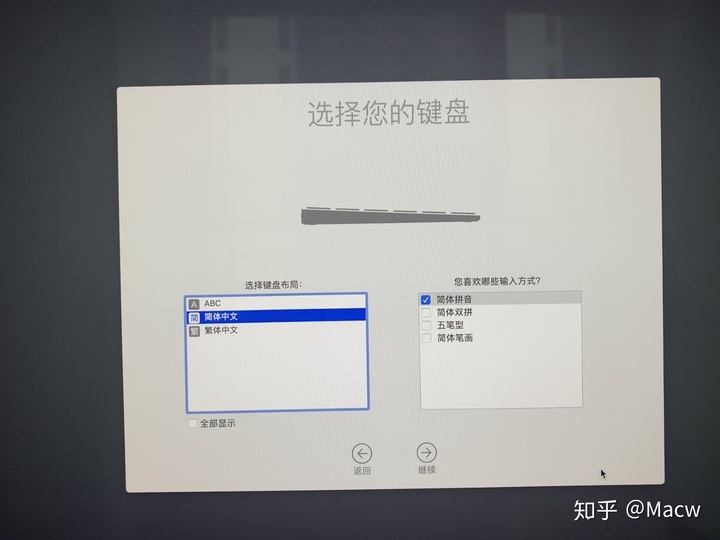
17、选择您的键盘,简体中文,简体拼音。
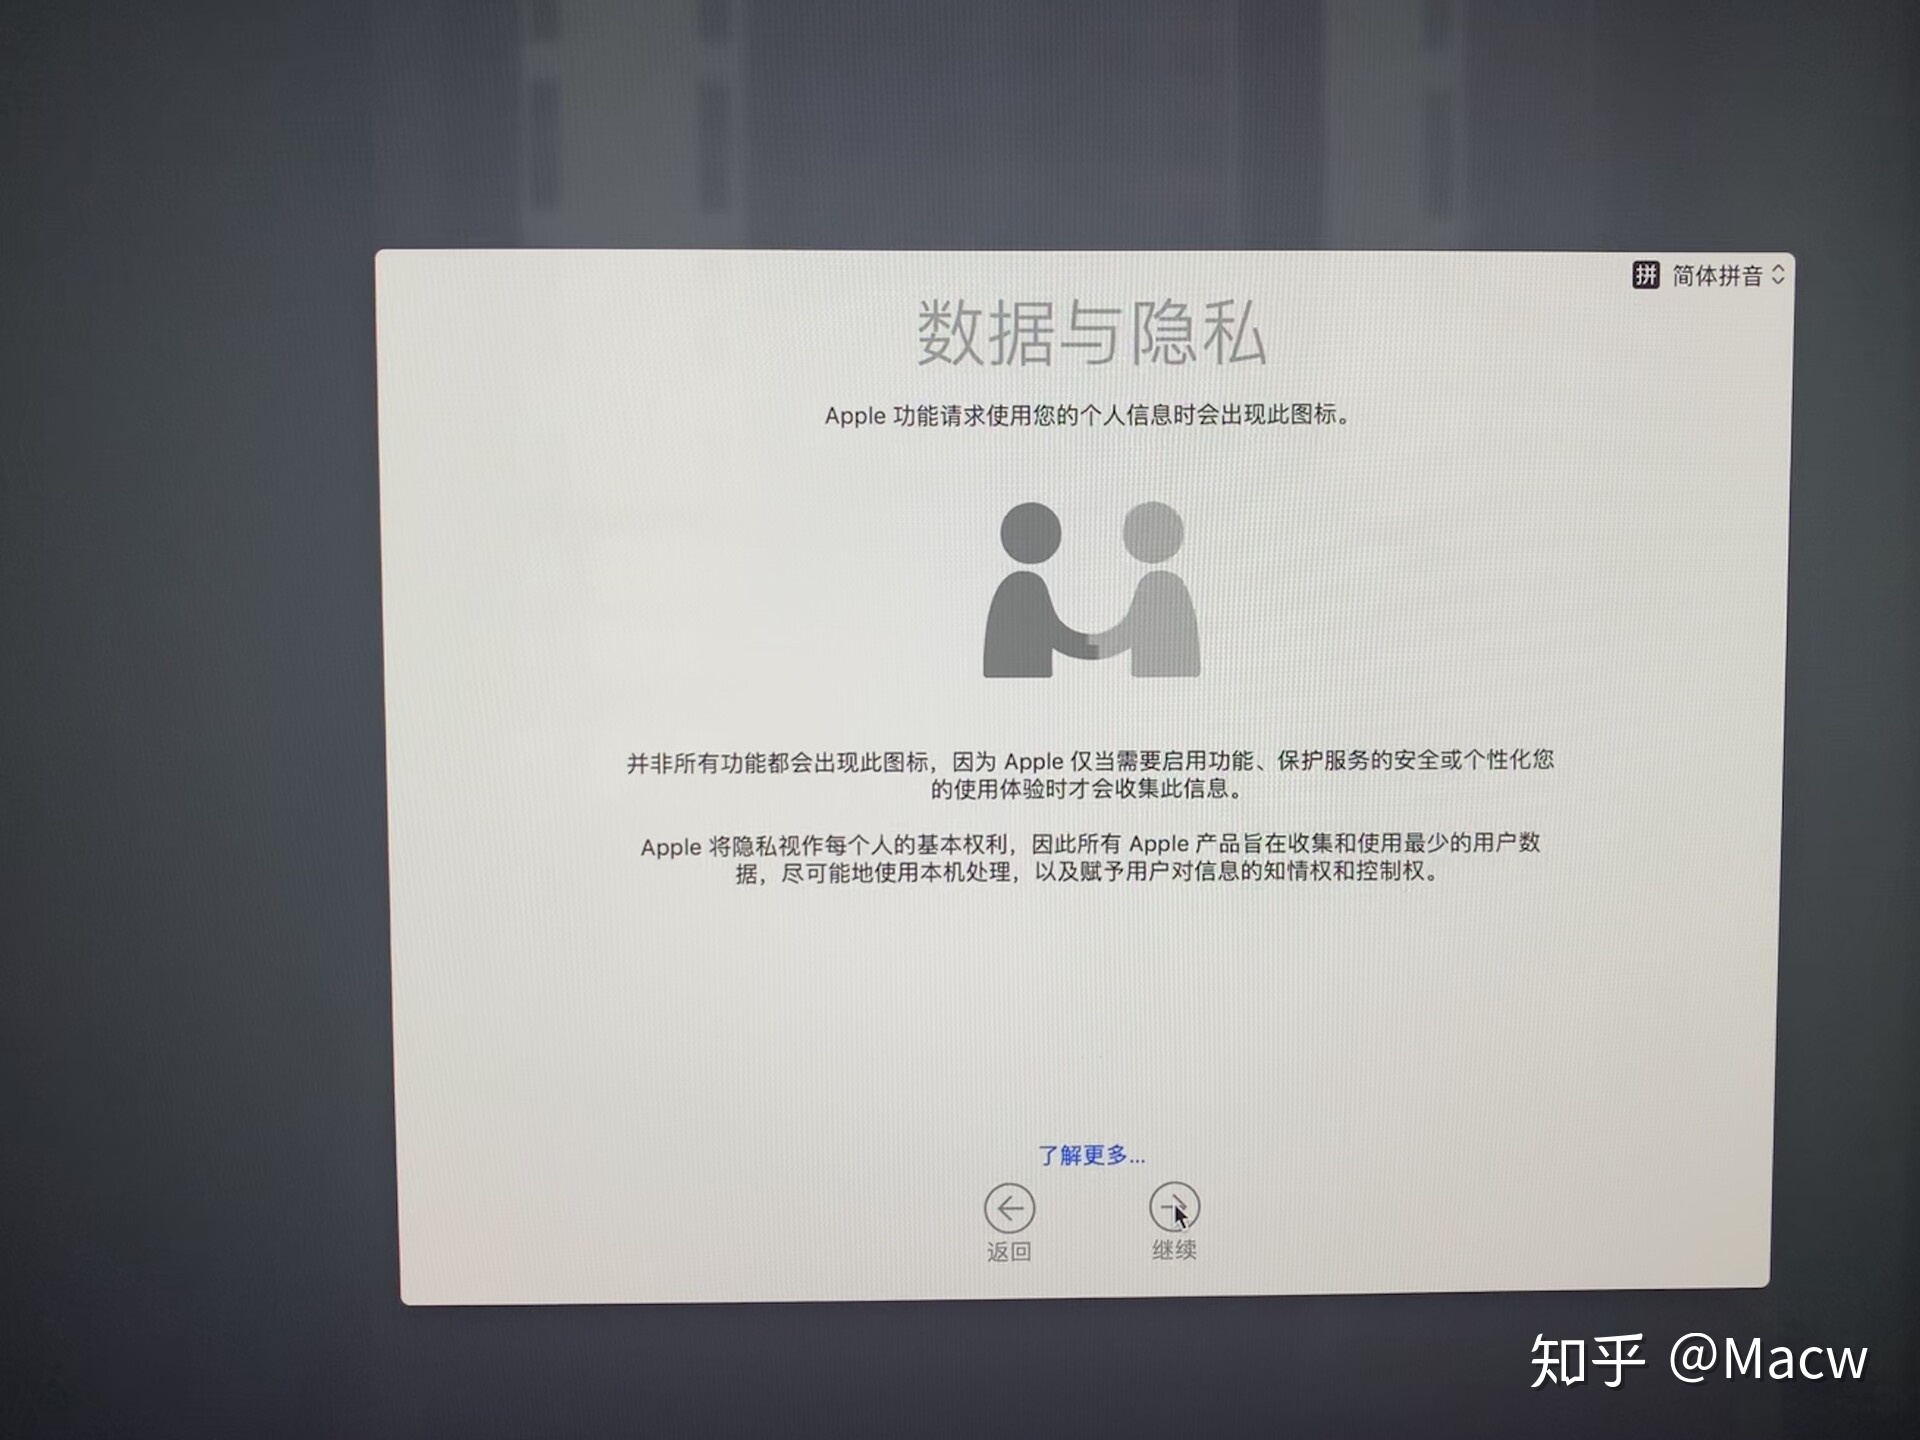
18、数据与隐私,点击继续。
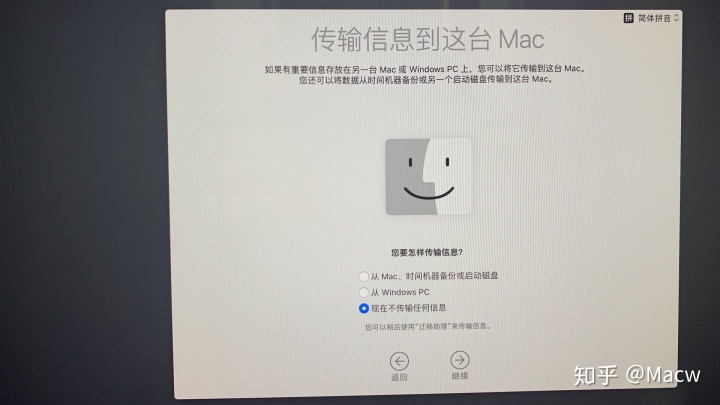
19、弹出提示,选择现在不传输任何信息。
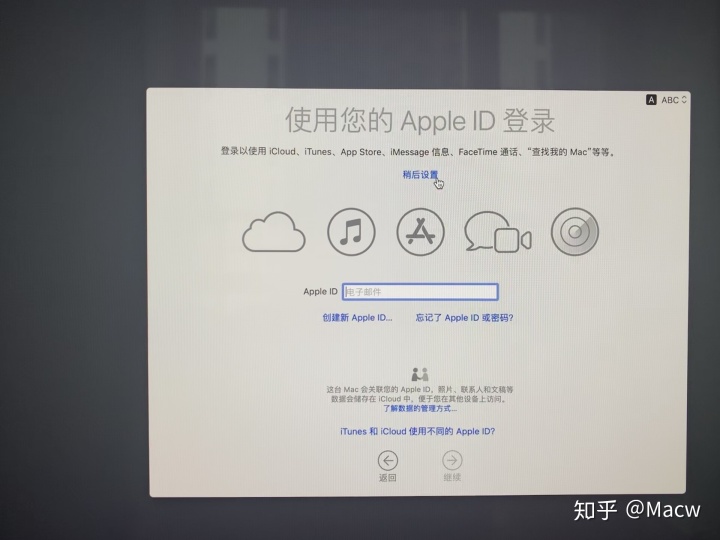
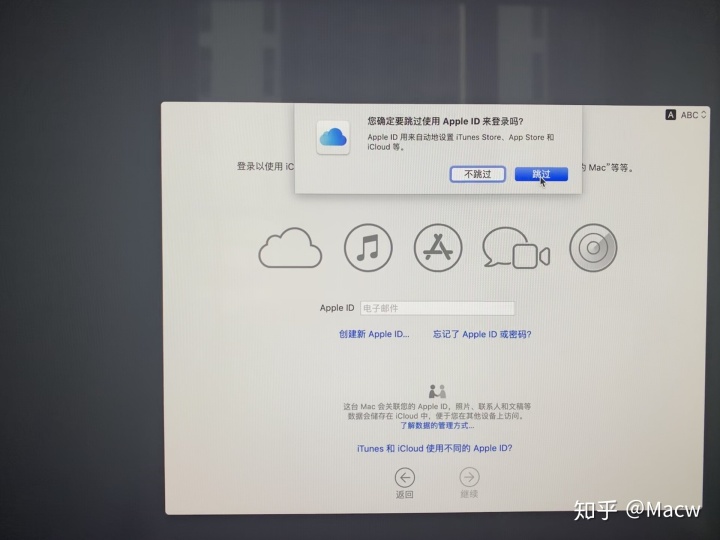
20、这里可以根据需求选择,我没有登录我的apple ID,选择稍后设置。
21、弹出提示框,点击跳过。
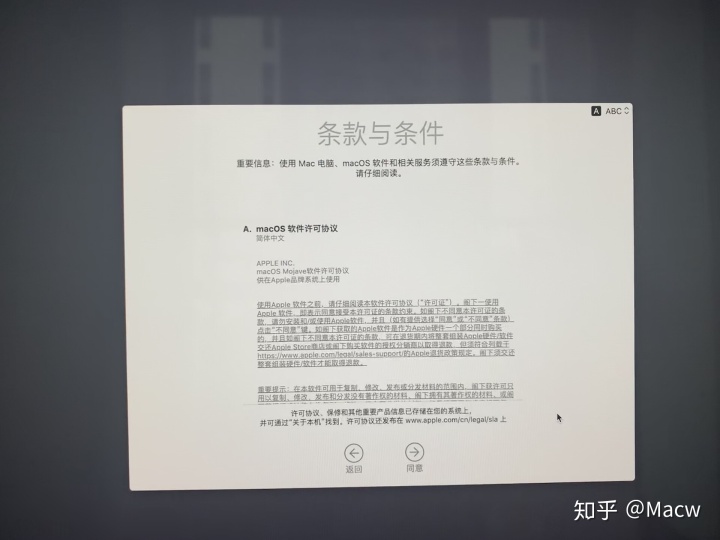
22、条款与条件,点击同意。
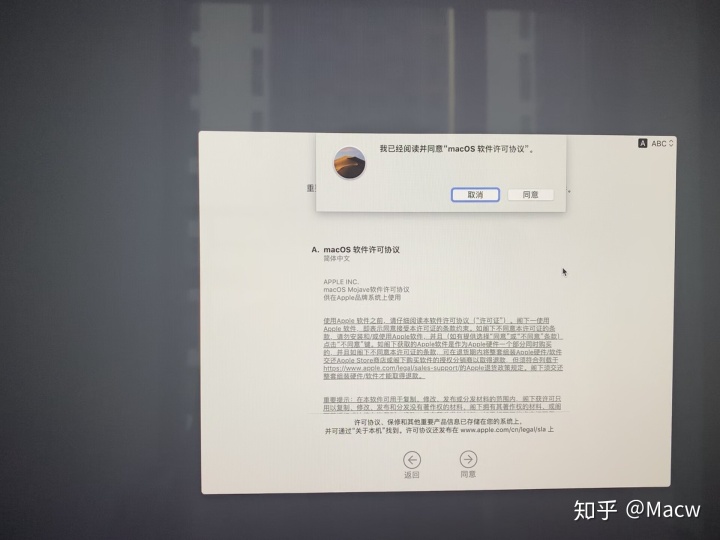
23、同意许可协议。
24、创建电脑账户,输入账户名称以及密码。

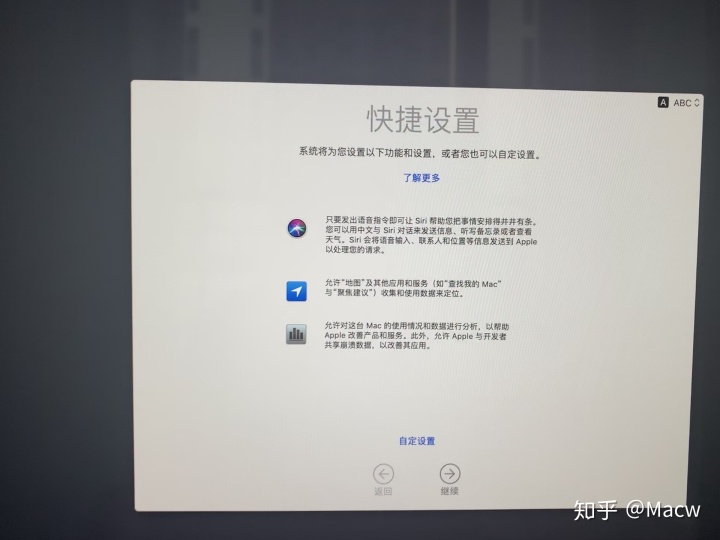
25、快捷设置,系统默认,点击继续。
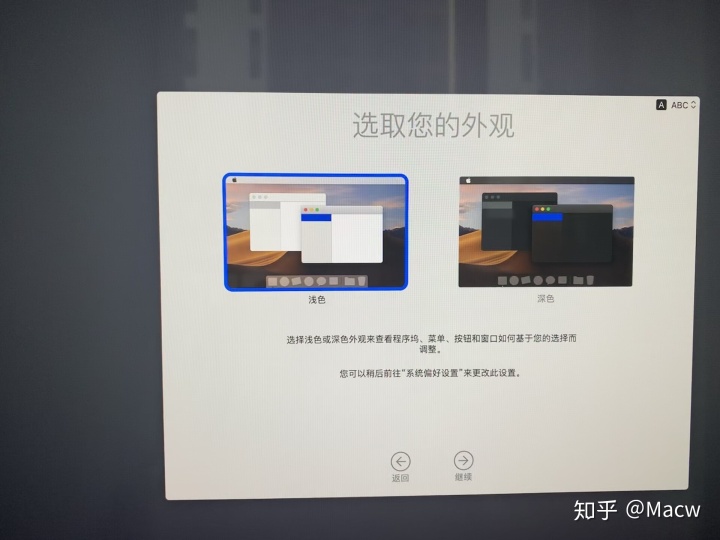
26、选取您的外观,这里选择浅色,点击继续。
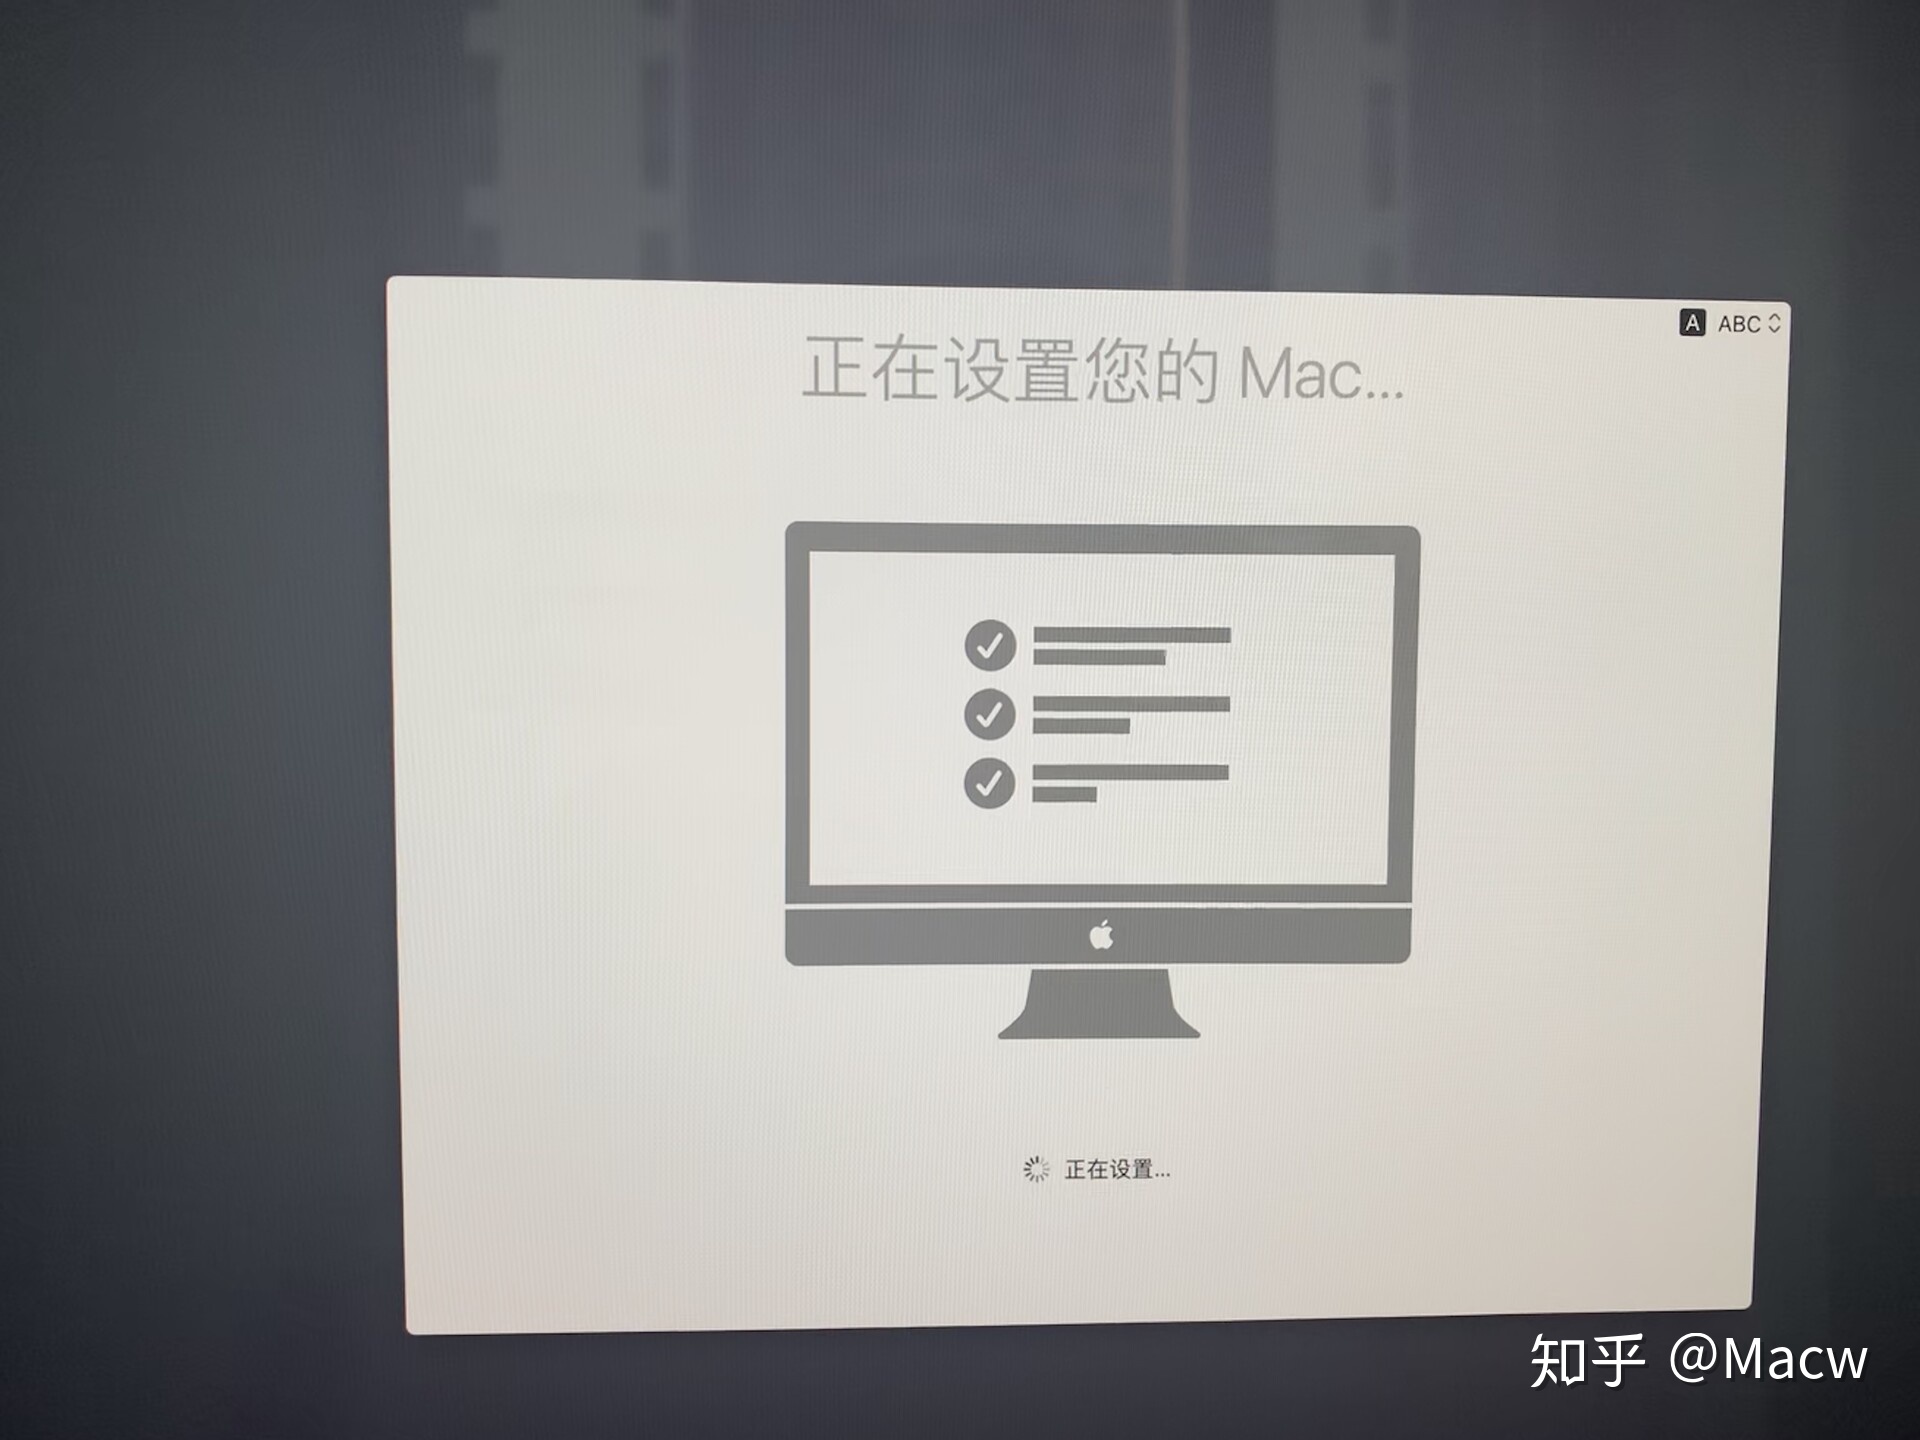
27、正在设置您的Mac......预示重装系统即将完成。
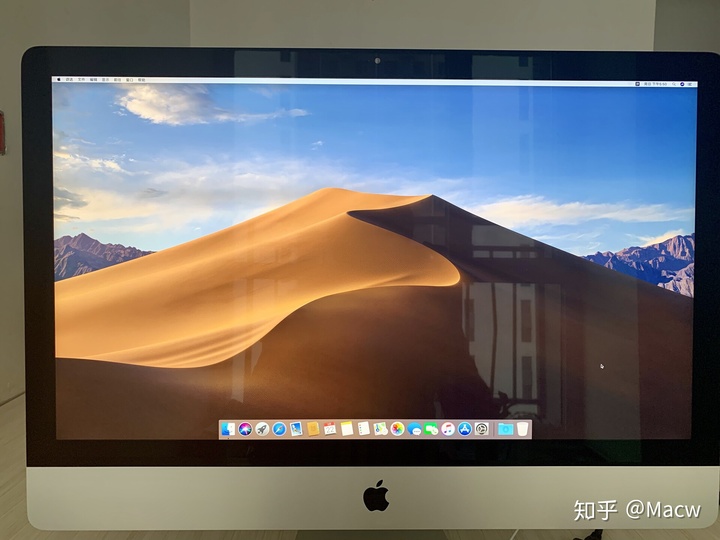
28、出现以下界面,系统重装就完成了,尽情享受一下新系统的流畅吧!
(本文转载自“http://Macv.com下载”,原文地址:超详细的Mac重装系统教程!让重装系统变得简单起来! - MacV,如需转载请标明出处)


)


)
当被NTR剧情虐到的时候怎么办)


