问题
- 接使用docker的方式来创建项目所报的错误
- 选中文件之后,界面不停的绕圈,显示不了对于图片的识别结果,并且监控界面上出现错误提示如下
- ImportError: libpython3.6m.so.1.0: cannot open shared object file: No such file or directory,这个问题目前无解,只好使用其余的方式来搭建Chineseocr_lite开源项目
第一步 安装Conda
安装
- 一共有两种方式,推荐使用从清华镜像站下载,速度快并且稳定
- 官方地址
- 清华镜像
- 使用如下命令进行安装,我使用的型号为Miniconda3-latest-Linux-x86_64.sh,读者需要基于自身的操作系统/64位还是32位,选择适合自己的版本
bash Miniconda3-latest-Linux-x86_64.sh-
执行上面命令之后,一路输入yes,安装过程很快就会完成
添加镜像
- 使用如下命令添加清华镜像源
conda config --add channels https://mirrors.tuna.tsinghua.edu.cn/anaconda/pkgs/free
conda config --add channels https://mirrors.tuna.tsinghua.edu.cn/anaconda/pkgs/main
- 使用如下命令添加中科大镜像源
conda config --add channels https://mirrors.ustc.edu.cn/anaconda/pkgs/main/
conda config --add channels https://mirrors.ustc.edu.cn/anaconda/pkgs/free/
conda config --add channels https://mirrors.ustc.edu.cn/anaconda/cloud/conda-forge/
conda config --add channels https://mirrors.ustc.edu.cn/anaconda/cloud/msys2/
conda config --add channels https://mirrors.ustc.edu.cn/anaconda/cloud/bioconda/
conda config --add channels https://mirrors.ustc.edu.cn/anaconda/cloud/menpo/- 使用如下命令使镜像源生效
conda config --set show_channel_urls yes创建环境
- 创建一个python3.6 的干净环境,命名为python3
conda create --name python3 python=3.6- 激活python3环境
conda activate python3第二步 安装配置相关插件
- 在pytorch 的官方找到 1.2 版本的conda对应的安装命令
- pytorch官方主页
conda install pytorch==1.2.0 torchvision==0.4.0 cpuonly -c pytorch- 注意事项1 pytorch镜像不在上面的镜像路径里,需要重新配置
conda config --add channels https://mirrors.tuna.tsinghua.edu.cn/anaconda/cloud/pytorch- 注意事项2 如果执行上面命令默认不使用设置的镜像源,需要将其改为
conda install pytorch==1.2.0 torchvision==0.4.0 cpuonly- 从GitHub下载chineseocr_lite项目,使用xftp工具,将项目上传到ubuntu操作系统里,我将其放到桌面的chineseocr文件夹下,使用命令解压之后,文件结构如下图所示

- PSENET 编译
cd chineseocr_lite/psenet/pse/
rm -rf pse.so
make
启动web 服务
- 绝对会失败,但是需要通过每次返回的错误提示来执行相应的操作
- 使用如下命令,启动web服务
python3 app.py 8080 ##8080端口号,可以设置任意端口- 第一个错误 缺失web 模块

conda install web.py==0.40- 再次启动,第二个错误,缺失PIL

- 网上搜了一下,才发现PIL仅支持到python2.7,所以在python3环境下使用conda安装PIL的时候,会出错。
PIL:Python Imaging Library是Python平台事实上的图像处理标准库,由于PIL仅支持到Python 2.7,加上年久失修,于是一群志愿者在PIL的基础上创建了兼容的版本,名字叫Pillow,支持最新Python 3.x,又加入了许多新特性,因此,我们可以直接安装使用pillow。但是在这里需要设定pillow的版本号,输入如下的命令
conda install 'pillow<7.0.0'
- 第三个错误 缺失scipy

conda install scipy- 第四个错误 缺失 cv2
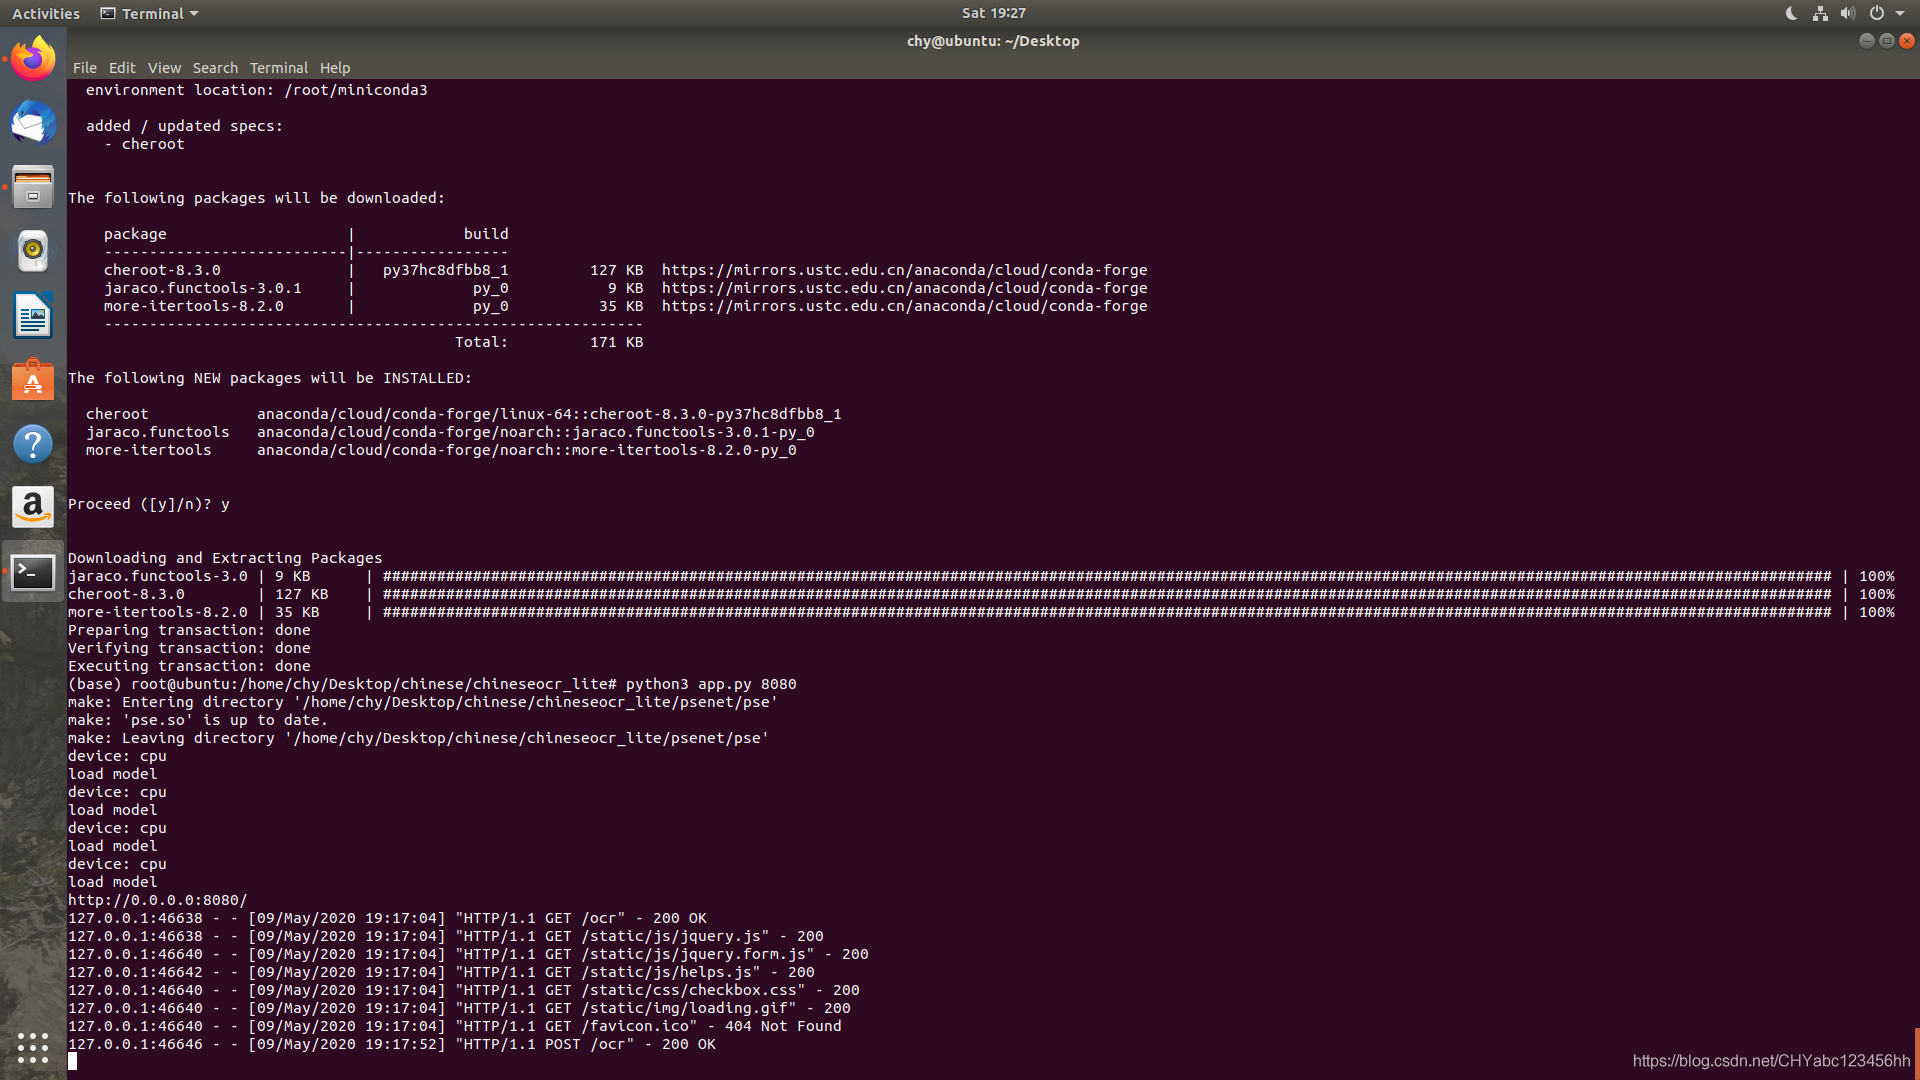
conda install opencv- 第五个错误 缺失 cheroot
conda install cheroot- 第六个错误 缺失torch

- 这个时候其实需要重装pytorch
conda install pytorch==1.2.0 torchvision==0.4.0 cpuonly- 这个时候总算不报错了 (>_<)
启动项目
- 输入命令
python3 app.py 8080 ##8080端口号,可以设置任意端口- 显示监听端口,如果出现如下页面就代表成功了

- 在浏览器输入 http://127.0.0.1:8080/ocr,勾选通用OCR,点击上传按钮,上传图片,大约16秒之后将输出的结果显示在右面,界面如下:


 winexec,shellexecute ,createprocess)


的排序)


