优美的应用体验 来自于细节的处理,更源自于码农的自我要求与努力,当然也需要码农年轻灵活的思维。
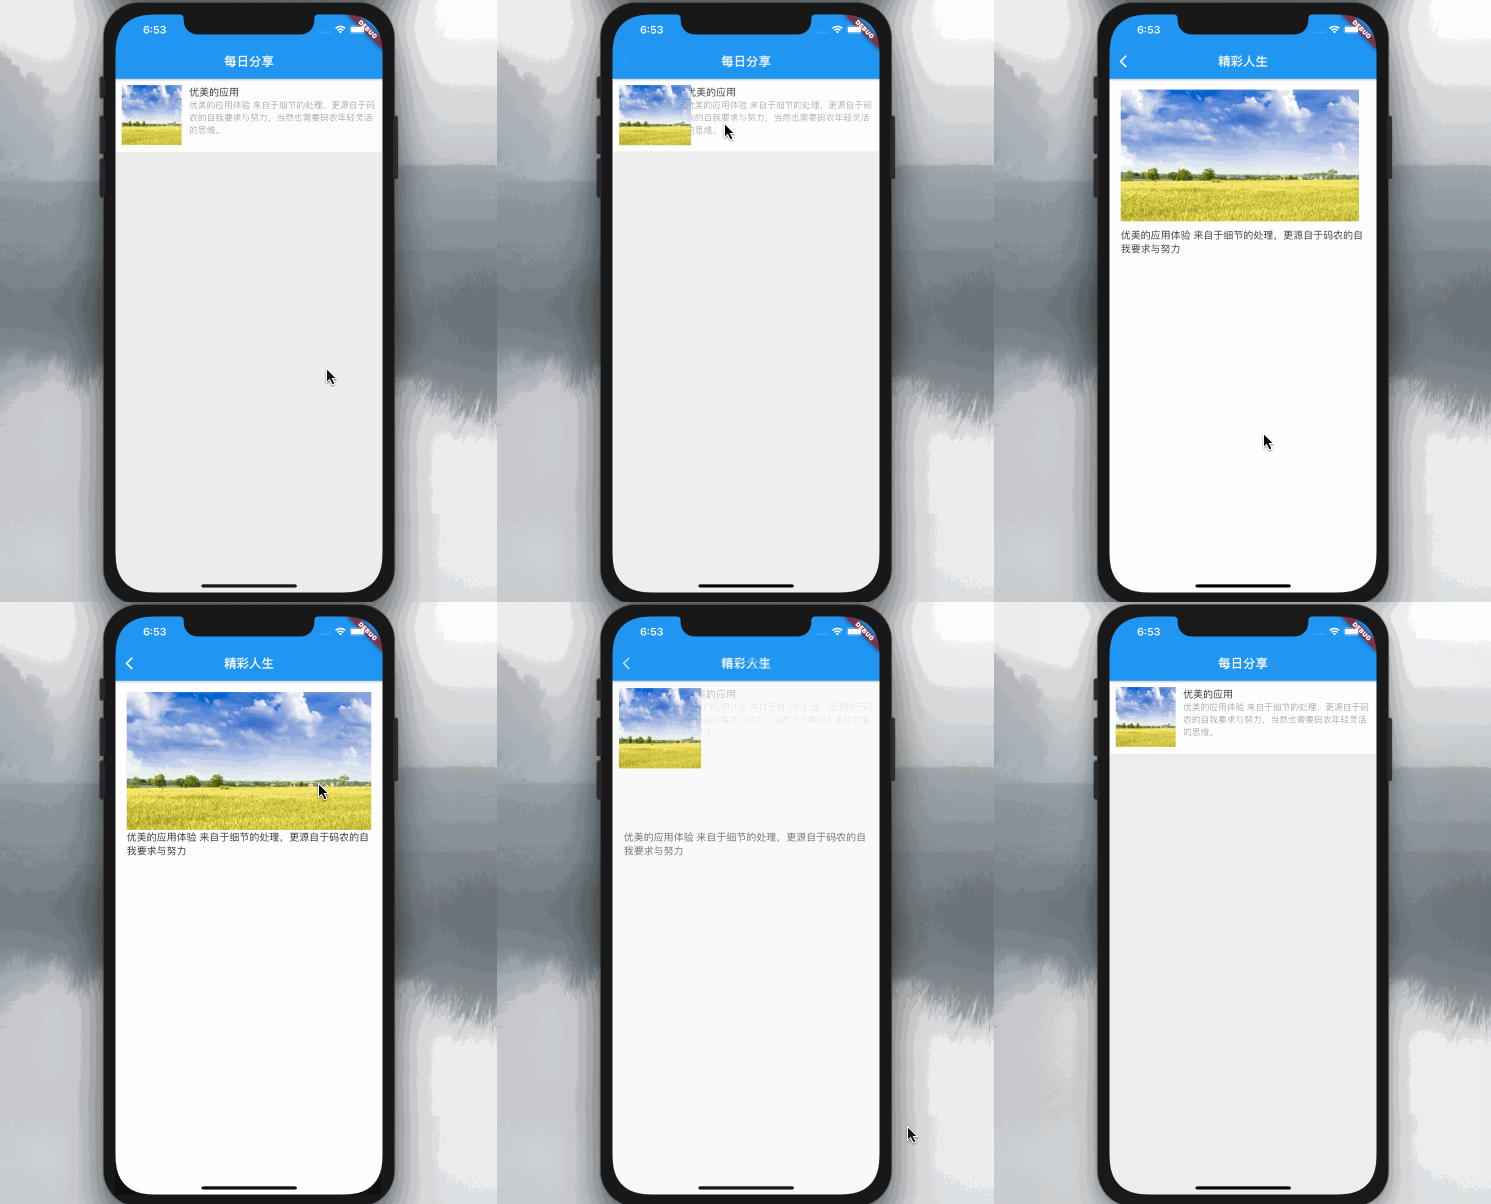
本文章实现的Demo效果,如下图所示:

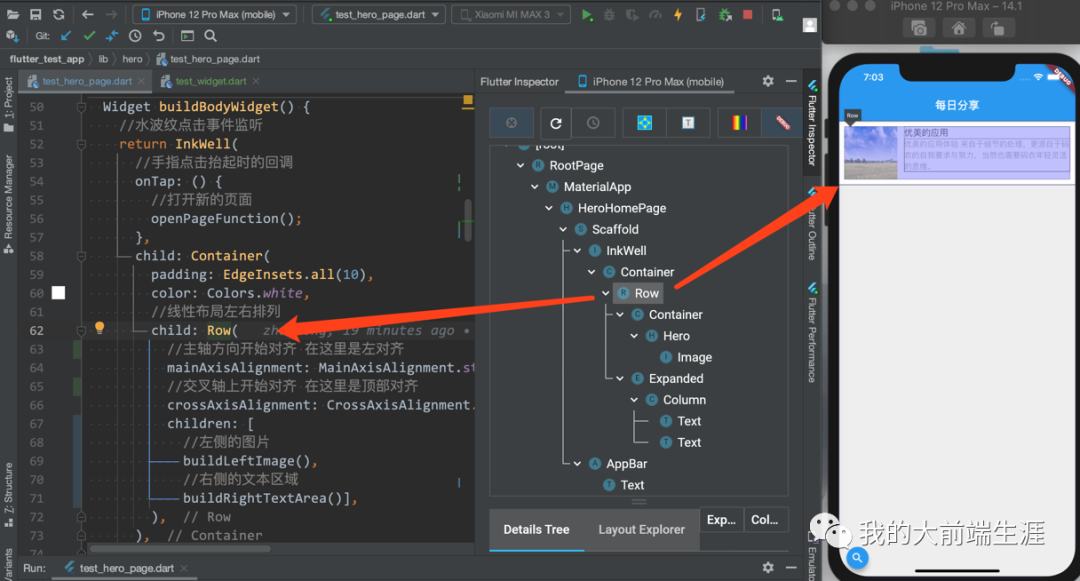
class HeroHomePage extends StatefulWidget { @override _TestPageState createState() => _TestPageState();}class _TestPageState extends State<HeroHomePage> { @override Widget build(BuildContext context) { return Scaffold( //背景 backgroundColor: Colors.grey[200], //标题 appBar: AppBar( title: Text("每日分享"), ), //页面主体 body: buildBodyWidget(), ); } ... }页面的主体就是这里显示的图文,使用Row来将图片与文本区域左右排列,代码如下:

Widget buildBodyWidget() { //水波纹点击事件监听 return InkWell( //手指点击抬起时的回调 onTap: () { //打开新的页面 openPageFunction(); }, child: Container( padding: EdgeInsets.all(10), color: Colors.white, //线性布局左右排列 child: Row( //主轴方向开始对齐 在这里是左对齐 mainAxisAlignment: MainAxisAlignment.start, //交叉轴上开始对齐 在这里是顶部对齐 crossAxisAlignment: CrossAxisAlignment.start, children: [ //左侧的图片 buildLeftImage(), //右侧的文本区域 buildRightTextArea()], ), ), ); }2 显示图片的构建
左侧的图片区域 需要 使用 Hero 来包裹,因为这里就是Hero动画触发的效果,代码如下:
///左侧的图片区域 Container buildLeftImage() { return Container( margin: EdgeInsets.only(right: 12), child: Hero( tag: "test", child: Image.asset( "images/banner3.webp", width: 96, fit: BoxFit.fill, height: 96, ), ), ); }3 右侧的文本区域

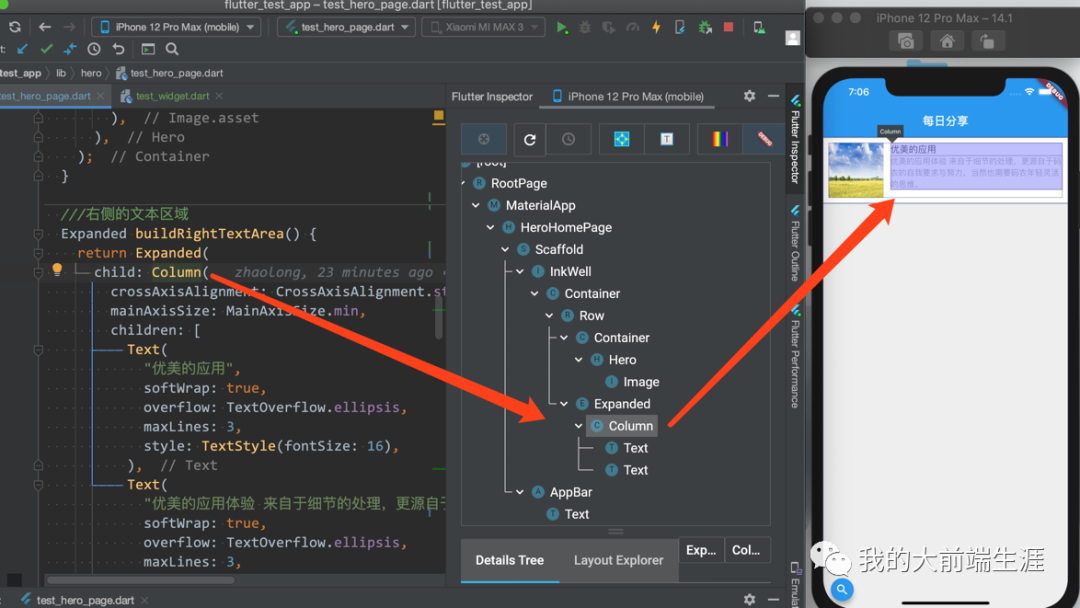
///右侧的文本区域 Expanded buildRightTextArea() { return Expanded( child: Column( crossAxisAlignment: CrossAxisAlignment.start, mainAxisSize: MainAxisSize.min, children: [ Text( "优美的应用", softWrap: true, overflow: TextOverflow.ellipsis, maxLines: 3, style: TextStyle(fontSize: 16), ), Text( "优美的应用体验 来自于细节的处理,更源自于码农的自我要求与努力,当然也需要码农年轻灵活的思维。", softWrap: true, overflow: TextOverflow.ellipsis, maxLines: 3, style: TextStyle(fontSize: 14, color: Colors.black38), ) ], ), ); }4 自定义透明过度动画路由
Hero达成两个页面之间共享元素的连动效果,但是页面的切换效果造成碍眼的体验,配合一个透明过度,达成舒适的体验,代码如下:
///自定义路由动画 void openPageFunction() { Navigator.of(context).push( PageRouteBuilder( pageBuilder: (BuildContext context, Animation<double> animation, Animation<double> secondaryAnimation) { //目标页面 return DetailsPage(); }, //打开新的页面用时 transitionDuration: Duration(milliseconds: 1800), //关半页岩用时 reverseTransitionDuration: Duration(milliseconds: 1800), //过渡动画构建 transitionsBuilder: ( BuildContext context, Animation<double> animation, Animation<double> secondaryAnimation, Widget child, ) { //渐变过渡动画 return FadeTransition( // 透明度从 0.0-1.0 opacity: Tween(begin: 0.0, end: 1.0).animate( CurvedAnimation( parent: animation, //动画曲线规则,这里使用的是先快后慢 curve: Curves.fastOutSlowIn, ), ), child: child, ); }, ), ); }5 最后就是点击图文信息打开的详情页面
class DetailsPage extends StatelessWidget { @override Widget build(BuildContext context) { return Scaffold( //背景透明 backgroundColor: Colors.white, appBar: AppBar( title: Text("精彩人生"), ), body: buildCurrentWidget(context), ); } Widget buildCurrentWidget(BuildContext context) { return Container( color: Colors.white, padding: EdgeInsets.all(8), margin: EdgeInsets.all(10), child: Column( crossAxisAlignment: CrossAxisAlignment.start, children: [ //图片区域 buildHero(context), SizedBox( width: 22, ), //文字区域 buildTextContainer(), ], ), ); }}页面分为两部分,第一部分的图片,使用Hero过渡 ,需要注意的是 目标 Hero 的直接子类必须是一个 Material包裹,代码如下:
///图片区域 Hero buildHero(BuildContext context) { return Hero( tag: "test", child: Material( color: Colors.blue, child: InkWell( onTap: () { Navigator.of(context).pop(); }, child: Image.asset( "images/banner3.webp", fit: BoxFit.fill, ), ), ), ); }第二部分就是一个普通的文本了
Container buildTextContainer() { return Container( child: Text( "优美的应用体验 来自于细节的处理,更源自于码农的自我要求与努力", softWrap: true, overflow: TextOverflow.ellipsis, maxLines: 3, style: TextStyle(fontSize: 16), ), ); }点击原文可获取源码。


GruntJS 在线重载 提升生产率至新境界)


