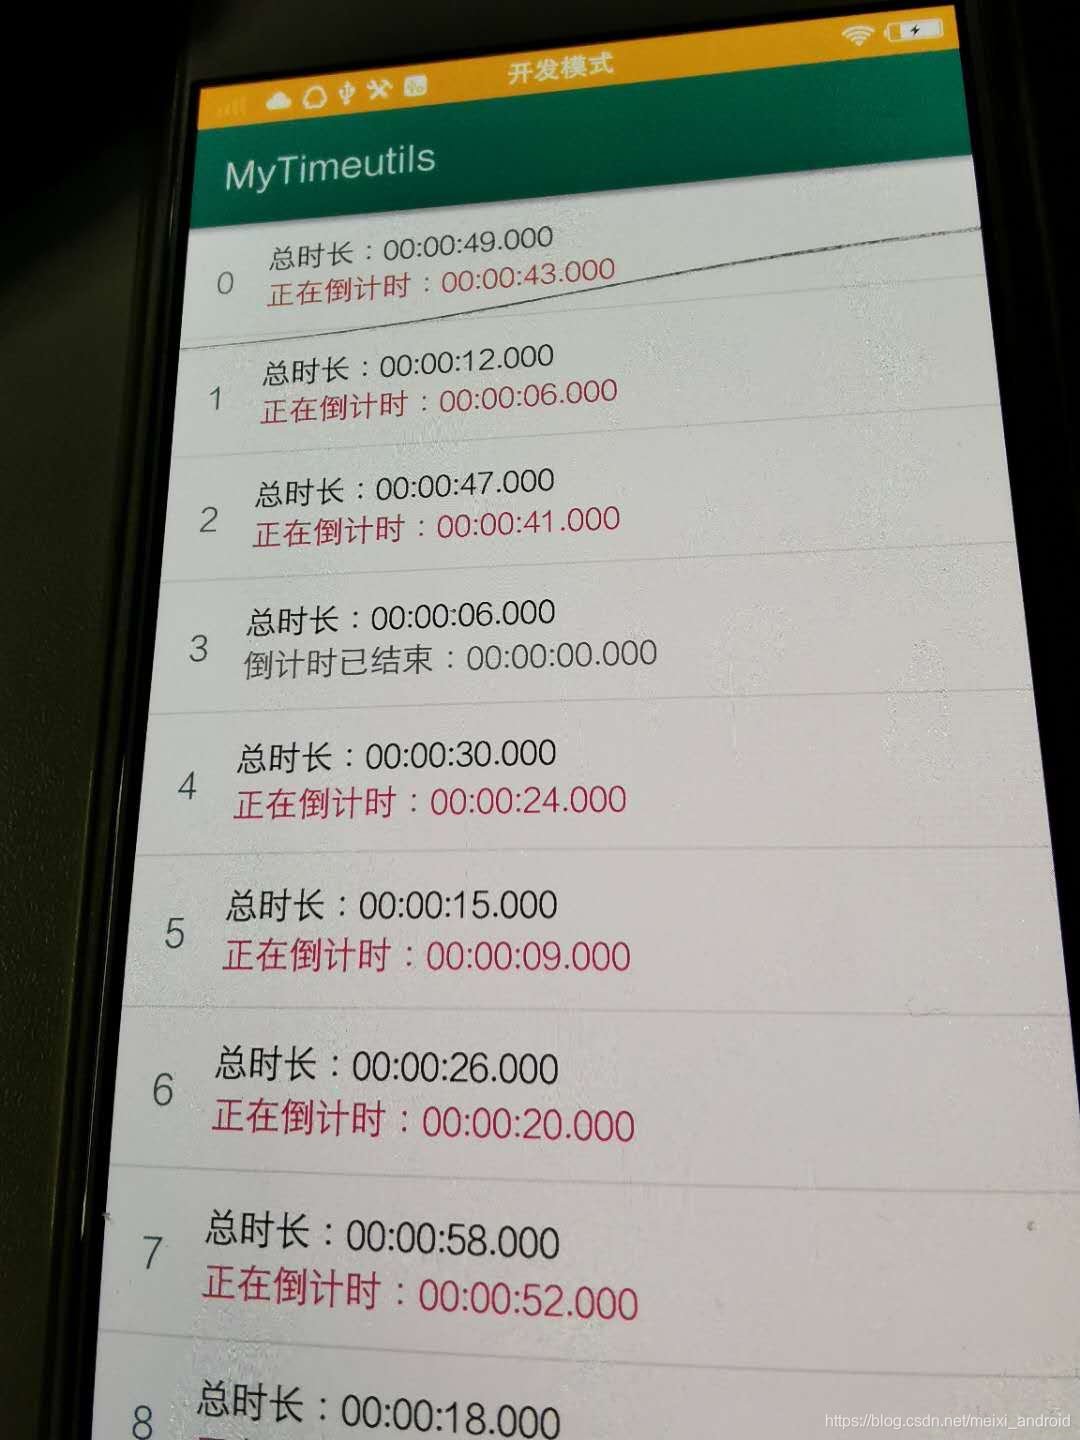
实现效果
单个倒计时功能 列表倒计时功能


自定义倒计时类
public class CountDownTimerSupport implements ITimerSupport {private Timer mTimer;private Handler mHandler;/*** 倒计时时间*/private long mMillisInFuture;/*** 间隔时间*/private long mCountDownInterval;/*** 倒计时剩余时间*/private long mMillisUntilFinished;private OnCountDownTimerListener mOnCountDownTimerListener;private TimerState mTimerState = TimerState.FINISH;@Deprecatedpublic CountDownTimerSupport() {this.mHandler = new Handler();}public CountDownTimerSupport(long millisInFuture, long countDownInterval) {this.setMillisInFuture(millisInFuture);this.setCountDownInterval(countDownInterval);this.mHandler = new Handler();}@Overridepublic void start() {//防止重复启动 重新启动要先reset再startif (mTimer == null && mTimerState != TimerState.START) {mTimer = new Timer();mTimer.scheduleAtFixedRate(createTimerTask(), 0, mCountDownInterval);mTimerState = TimerState.START;}}@Overridepublic void pause() {if (mTimer != null && mTimerState == TimerState.START) {cancelTimer();mTimerState = TimerState.PAUSE;}}@Overridepublic void resume() {if (mTimerState == TimerState.PAUSE) {start();}}@Overridepublic void stop() {if (mTimer != null) {cancelTimer();mMillisUntilFinished = mMillisInFuture;mTimerState = TimerState.FINISH;mHandler.post(new Runnable() {@Overridepublic void run() {if (mOnCountDownTimerListener != null) {mOnCountDownTimerListener.onFinish();}}});}}@Overridepublic void reset() {if (mTimer != null) {cancelTimer();}mMillisUntilFinished = mMillisInFuture;mTimerState = TimerState.FINISH;}private void cancelTimer() {mTimer.cancel();mTimer.purge();mTimer = null;}public boolean isStart() {return mTimerState == TimerState.START;}public boolean isFinish() {return mTimerState == TimerState.FINISH;}/*** @deprecated 使用构造方法* @param millisInFuture*/@Deprecatedpublic void setMillisInFuture(long millisInFuture) {this.mMillisInFuture = millisInFuture;this.mMillisUntilFinished = mMillisInFuture;}/*** @deprecated 使用构造方法* @param countDownInterval*/@Deprecatedpublic void setCountDownInterval(long countDownInterval) {this.mCountDownInterval = countDownInterval;}public void setOnCountDownTimerListener(OnCountDownTimerListener listener) {this.mOnCountDownTimerListener = listener;}public long getMillisUntilFinished() {return mMillisUntilFinished;}public TimerState getTimerState() {return mTimerState;}/*** @param millisInFuture* @param countDownInterval* @return* @deprecated 已更换Timer*/@Deprecatedprotected CountDownTimer createCountDownTimer(long millisInFuture, long countDownInterval) {return null;}protected TimerTask createTimerTask() {return new TimerTask() {private long startTime = -1;@Overridepublic void run() {if (startTime < 0) {//第一次回调 记录开始时间startTime = scheduledExecutionTime() - (mMillisInFuture - mMillisUntilFinished);mHandler.post(new Runnable() {@Overridepublic void run() {if (mOnCountDownTimerListener != null) {mOnCountDownTimerListener.onTick(mMillisUntilFinished);}}});} else {//剩余时间mMillisUntilFinished = mMillisInFuture - (scheduledExecutionTime() - startTime);mHandler.post(new Runnable() {@Overridepublic void run() {if (mOnCountDownTimerListener != null) {mOnCountDownTimerListener.onTick(mMillisUntilFinished);}}});if (mMillisUntilFinished <= 0) {//如果没有剩余时间 就停止stop();}}}};}}
2、初始化
private CountDownTimerSupport mTimer;mTimer = new CountDownTimerSupport(duration * 1000, 1000);
        mTimer.setOnCountDownTimerListener(new OnCountDownTimerListener() {@Overridepublic void onTick(long millisUntilFinished) {tv.setText(millisUntilFinished + "ms\n" + millisUntilFinished / 1000 + "s");//倒计时
//                    textView.setText((60 * 1000 - millisUntilFinished) / 1000 + "S");//正计时Log.d("CountDownTimerSupport", "onTick : " + millisUntilFinished + "ms");}@Overridepublic void onFinish() {tv.setText("已停止");Log.d("CountDownTimerSupport", "onFinish");}});
启动
mTimer.start();暂停
mTimer.pause();继续
mTimer.resume();停止
mTimer.stop();重复启动,重设时长
            mTimer.reset();//重复启动
//            mTimer.setMillisInFuture(30000);//重设时长mTimer.start();//重复启动
// 发送带有数据的广播
private void broadcastUpdate(final String action, String time) {final Intent intent = new Intent(action);intent.putExtra("time", time);sendBroadcast(intent);
}
// 发送广播方法——更新倒计时broadcastUpdate(IN_RUNNING, time / 1000 + "");// 关闭服务,停止倒计时Intent countDownIntent = new Intent(MainActivity.this, CodeTimerService.class);stopService(countDownIntent);finish();
实现demo: https://download.csdn.net/download/meixi_android/12484271
bug在线交流:QQ1085220040


:前端小程序学习之小程序发展历史)

:小程序开发前的环境搭建)
![[转]调试 smallcorgi/Faster-RCNN_TF 的demo过程遇到的问题](http://pic.xiahunao.cn/[转]调试 smallcorgi/Faster-RCNN_TF 的demo过程遇到的问题)


