此脚本是Linux一键部署Nexus 3私服仓库自动化脚本,有需要朋友可以参考,脚本内容如下:
环境准备:
操作系统:CentOS Linux release 7.8.2003
软件版本:
Docker:docker-ce-19.03.12
[root@localhost ~]# vim install_nexus3.sh
#!/bin/bash
#Date:2020-8-21 10:26:28
#Author Blog:
# https://www.yangxingzhen.com
# https://www.i7ti.cn
#Author WeChat:
# 微信公众号:小柒博客
#Author mirrors site:
# https://mirrors.yangxingzhen.com
#About the Author
# BY:YangXingZhen
# Mail:xingzhen.yang@yangxingzhen.com
# QQ:675583110
#Auto Install Docker-ce And Nexus 3
IPADDR=$(hostname -I |awk '{print $1}')
# 安装Docker-ce
rpm -qa |grep "docker-ce" >/dev/null 2>&1
if [ $? -ne 0 ];then
#curl -fsSL https://get.docker.com | bash -s docker --mirror Aliyun
yum -y install yum-utils device-mapper-persistent-data lvm2 >/dev/null
yum-config-manager --add-repo https://mirrors.aliyun.com/docker-ce/linux/centos/docker-ce.repo
yum -y install docker-ce-19.03.12 docker-ce-cli-19.03.12 containerd.io >/dev/null
fi
# 配置镜像加速器
mkdir -p /etc/docker
cat >/etc/docker/daemon.json <<EOF
{
"registry-mirrors": [
"https://hub-mirror.c.163.com",
"https://reg-mirror.qiniu.com",
"https://registry.docker-cn.com",
"https://lhbk6z9b.mirror.aliyuncs.com"
]
}
EOF
# 开启TCP管理端口
sed -i 's#/usr/bin/dockerd#& -H tcp://0.0.0.0:2375#' /usr/lib/systemd/system/docker.service
# 启动Docker
systemctl daemon-reload
systemctl enable docker
systemctl start docker
# 安装Nexus 3
# 拉取Nexus 3镜像
docker pull sonatype/nexus3
# 创建持久化数据目录
mkdir -p /data/nexus-data && chown -R 200 /data/nexus-data
# 启动Nexus 3
docker run -d -p 80:8081 --name nexus -v /data/nexus-data:/nexus-data sonatype/nexus3
#等待45秒,Nexus 3启动成功,生成密码文件
sleep 45
# 获取密码
User="admin"
Passwd=$(cat /data/nexus-data/admin.password)
echo -e "\033[32mNexus 3访问地址:http://${IPADDR}\n用户名:${User}\n密码:${Passwd}\033[0m"
脚本执行方式:
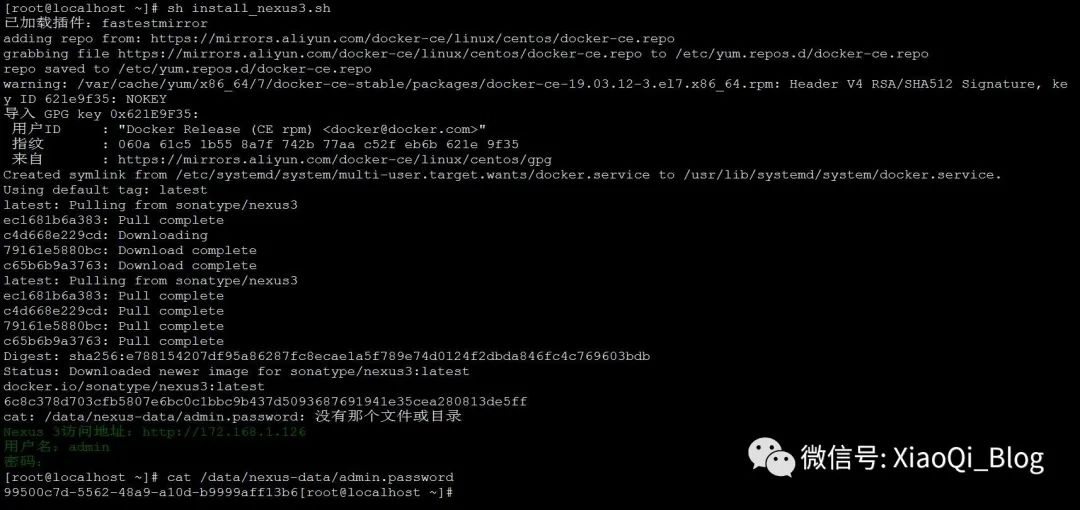
[root@localhost ~]# sh install_nexus3.sh
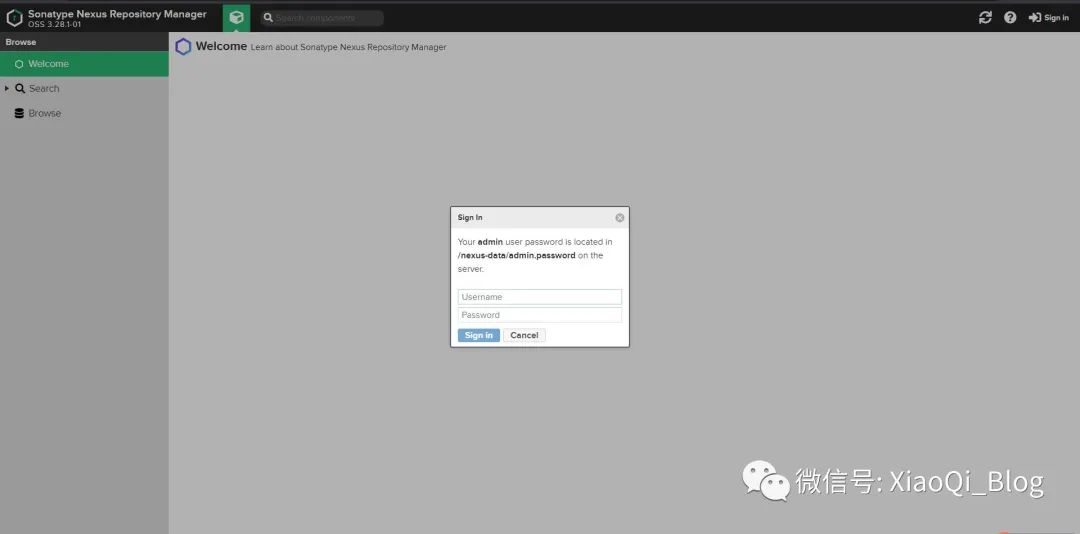
脚本执行过程截图如下


输入编号:7607,直达文章
输入m|M,直达目录列表

)


)


)


