
闪存驱动器
Portable applications are very useful for getting work done on the go, but how about portable servers? Here’s how you can turn your flash drive into a portable web server.
便携式应用程序对于在旅途中完成工作非常有用,但是便携式服务器呢? 这是将闪存驱动器转变为便携式Web服务器的方法。
Getting Started
入门
To put a full web server on our flash drive, we’re going to use XAMPP Lite. This lightweight, preconfigured server includes recent versions of Apache, MySQL, and PHP so you can run most websites and webapps directly from it. You could use the full XAMPP, which includes more features such as a FileZilla FTP server and OpenSSL, but for most purposes, the light version is plenty for a portable server.
要将完整的Web服务器放置在我们的闪存驱动器上,我们将使用XAMPP Lite。 这种轻巧的,预配置的服务器包括Apache,MySQL和PHP的最新版本,因此您可以直接从中运行大多数网站和Web应用程序。 您可以使用完整的XAMPP,其中包括更多功能,例如FileZilla FTP服务器和OpenSSL,但是对于大多数目的而言,轻量级版本对于便携式服务器来说已经足够了。
Download the latest version of XAMPP Lite (link below). In this tutorial, we used the self-extracting EXE version; you could choose the ZIP file and extract the files yourself, but we found it easier to use the executable.
下载最新版本的XAMPP Lite(下面的链接)。 在本教程中,我们使用了自解压EXE版本。 您可以选择ZIP文件并自己解压缩文件,但是我们发现使用可执行文件更加容易。

Run the installer, and click Browse choose where to install your server.
运行安装程序,然后单击“浏览”以选择服务器安装位置。
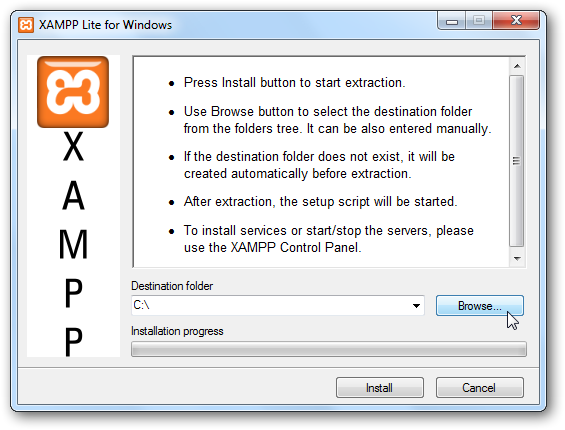
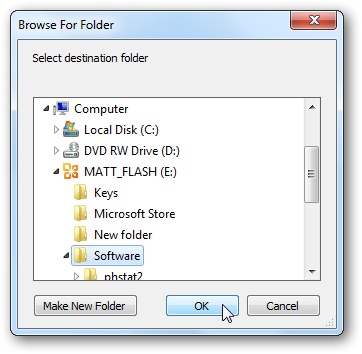
Select your flash drive, or a folder in it, and click Ok. Make sure your flash drive has at least 250MB of available storage space. XAMPP will create an xampplite folder and store all the files in it during the installation.
选择您的闪存驱动器或其中的一个文件夹,然后单击确定。 确保您的闪存驱动器至少有250MB的可用存储空间。 XAMPP将创建一个xampplite文件夹,并在安装过程中将所有文件存储在其中。
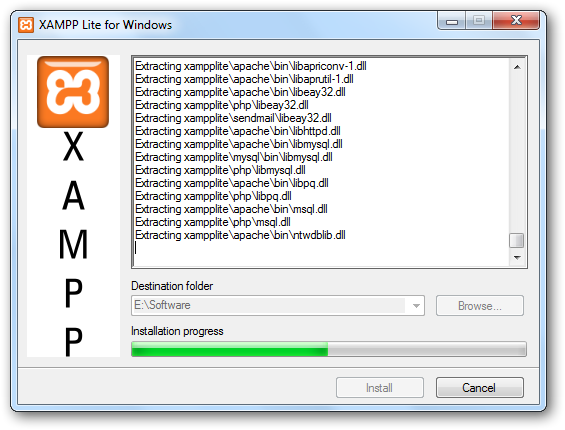
Click Install, and all of the files will be extracted to your flash drive. This may take a few moments depending on your flash drive’s speed.
单击安装,所有文件将被提取到您的闪存驱动器中。 这可能需要一些时间,具体取决于闪存驱动器的速度。
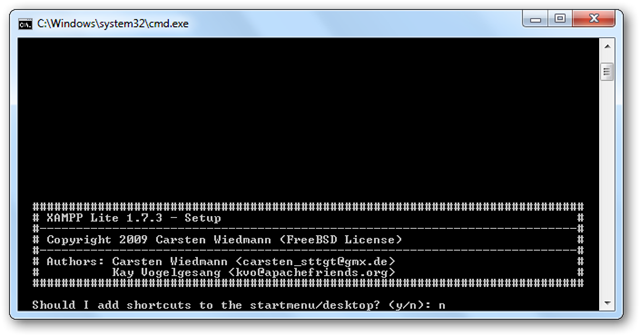
When the extraction process is finished, a Command Prompt window will open to finish the installation. The first prompt will ask if you want to add shortcuts to the start menu and desktop; enter “n” since we don’t want to create start menu links to our portable server.
提取过程完成后,将打开“命令提示符”窗口以完成安装。 第一个提示将询问您是否要在开始菜单和桌面上添加快捷方式。 输入“ n”,因为我们不想创建指向便携式服务器的开始菜单链接。
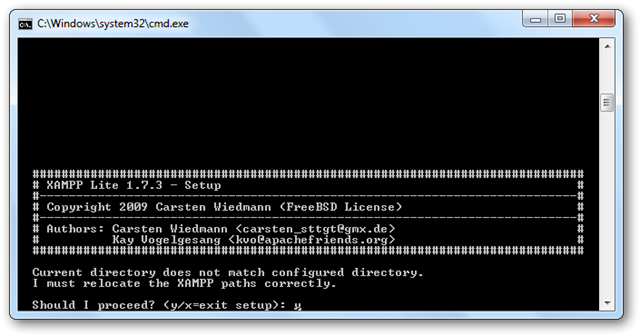
Now enter “y” to configure XAMPP’s directories automatically.
现在输入“ y”以自动配置XAMPP的目录。
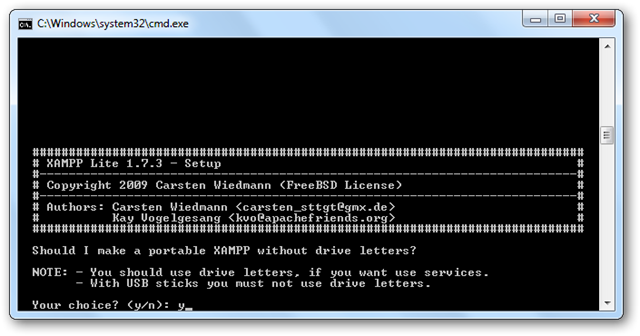
Finally, enter “y” to make XAMPP fully portable. It will set up the servers to run without specific drive letters so your server will run from any computer.
最后,输入“ y”使XAMPP完全可移植。 它将设置服务器在没有特定驱动器号的情况下运行,以便您的服务器可以在任何计算机上运行。
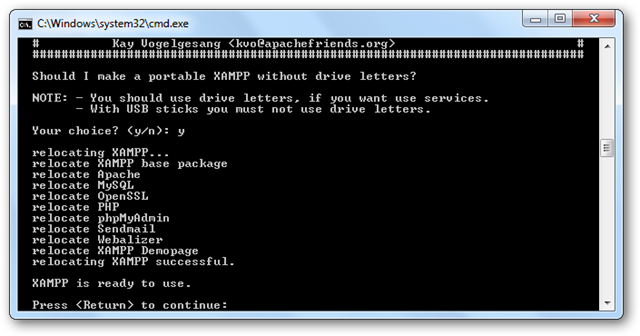
XAMPP will finalize your changes; press Enter when everything is completed.
XAMPP将最终确定您的更改; 一切完成后,按Enter键。
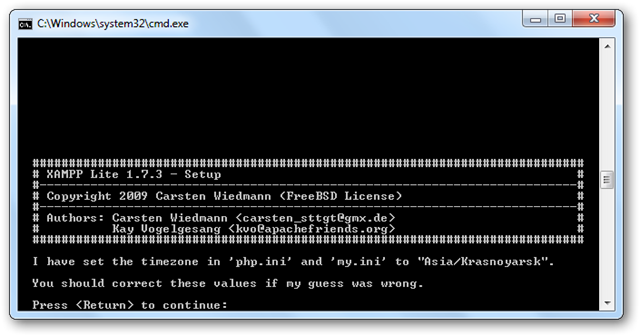
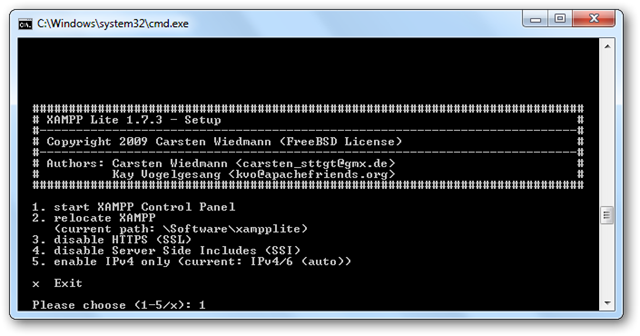
Setup will automatically launch the command line version of XAMPP. On first run, confirm that your time zone is correct.
安装程序将自动启动XAMPP的命令行版本。 首次运行时,请确认您的时区正确。
And that’s it! You can now run XAMPP’s control panel by entering 1, or you can exit and run XAMPP from any other computer with your flash drive.
就是这样! 现在,您可以通过输入1来运行XAMPP的控制面板,或者可以从任何其他装有闪存驱动器的计算机上退出并运行XAMPP。
To complete your portable webserver kit, you may want to install Portable Firefox or Iron Browser on your flash drive so you always have your favorite browser ready to use.
要完成您的便携式Web服务器工具包,您可能需要在闪存驱动器上安装Portable Firefox或Iron Browser ,以便始终可以使用喜欢的浏览器。
Running your portable server
运行您的便携式服务器
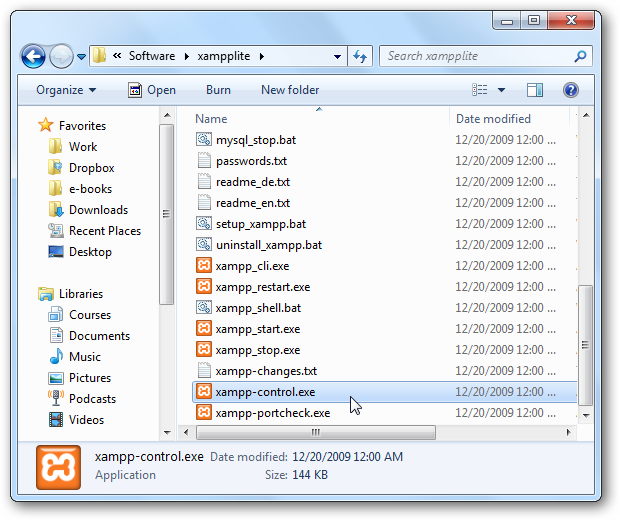
Using your portable server is very simple. Open the xampplite folder on your flash drive and launch xampp-control.exe.
使用便携式服务器非常简单。 打开闪存驱动器上的xampplite文件夹,然后启动xampp-control.exe。
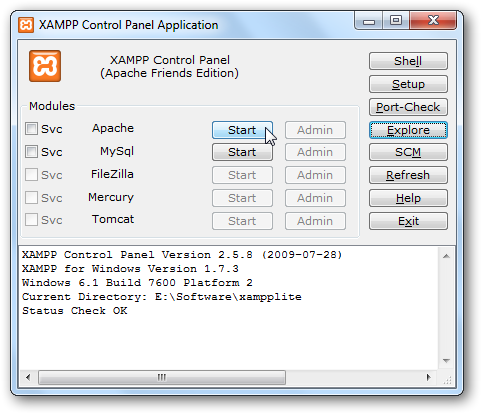
Click Start beside Apache and MySql to get your webserver running.
单击Apache和MySql旁边的“开始”以使您的Web服务器运行。
Please note: Do not check the Svc box, as this will run the server as a Windows service. To keep XAMPP portable, you do not want it running as a service!
请注意:请勿选中Svc框,因为这会将服务器作为Windows服务运行。 为了使XAMPP具有可移植性,您不希望它作为服务运行!
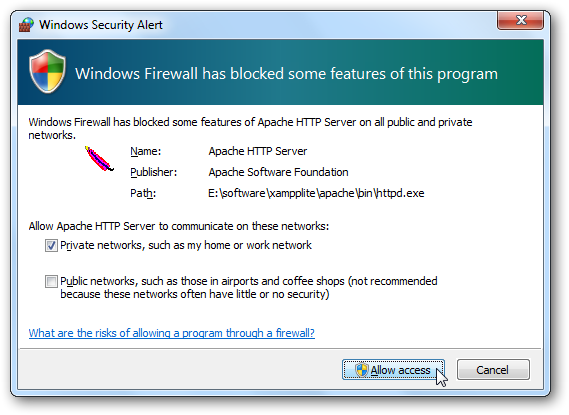
Windows Firewall may prompt you that it blocked the server; click Allow access to let your server run.
Windows防火墙可能会提示您阻止了服务器; 单击允许访问以使服务器运行。
Once they’re running, you can click Admin to open the default XAMPP admin page running from your local webserver. Or, you can view it by browsing to http://localhost/ or http://127.0.0.1/ in your browser.
它们运行之后,您可以单击“管理员”以打开从本地Web服务器运行的默认XAMPP管理员页面。 或者,您可以通过在浏览器中浏览到http:// localhost /或http://127.0.0.1/来查看它。
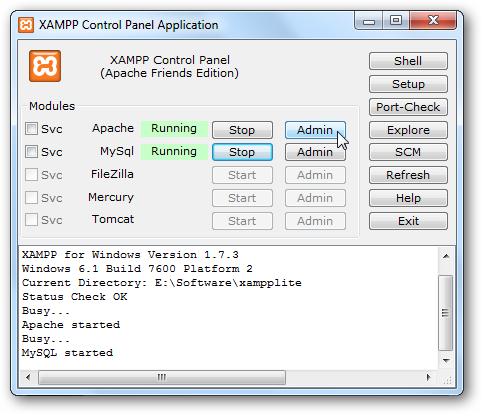
If everything is working correctly, you should see this page in your browser. Choose your default language…
如果一切正常,您应该在浏览器中看到此页面。 选择您的默认语言...
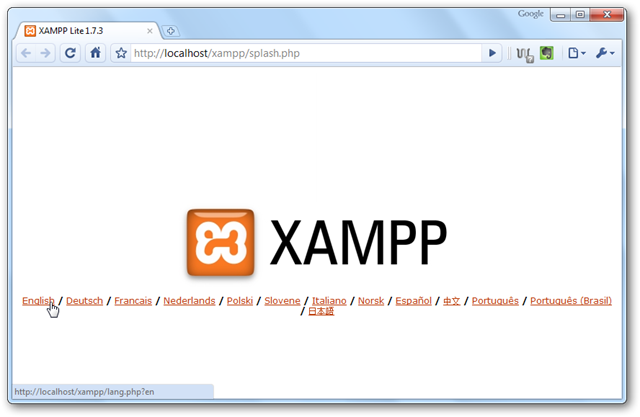
And then you’ll see the default XAMPP admin page.
然后,您将看到默认的XAMPP管理页面。
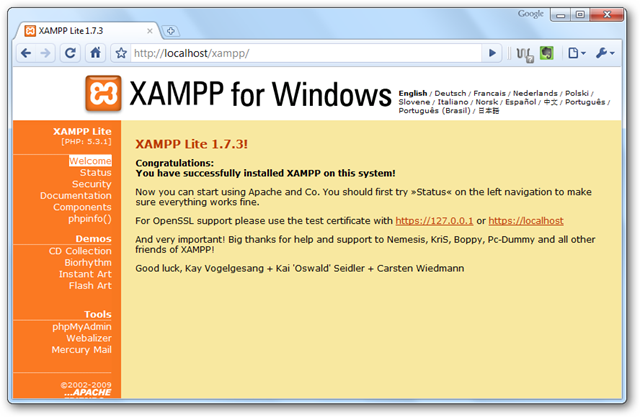
Click the Status link on the left sidebar to make sure everything is running correctly.
点击左侧栏中的状态链接,以确保一切正常运行。
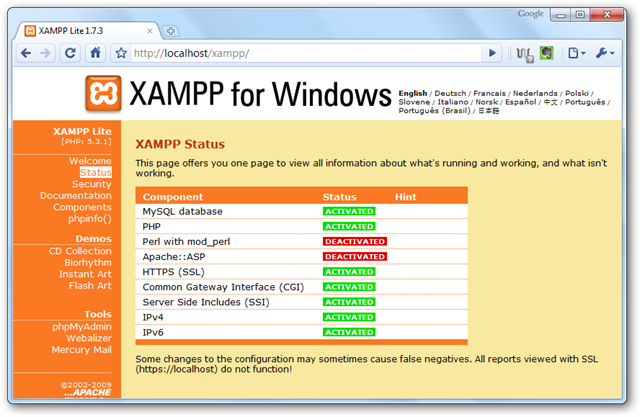
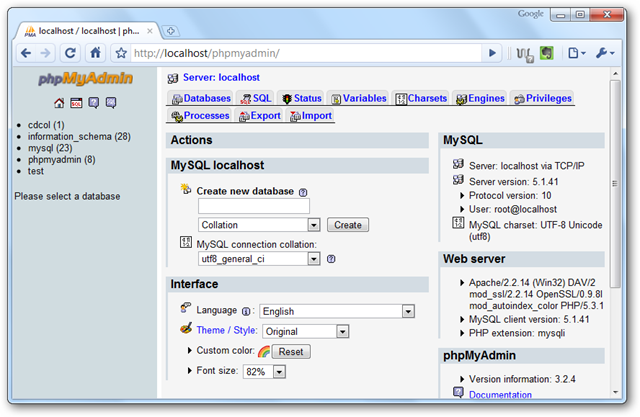
If you click the Admin button for MySql in the XAMPP Control Panel, it will open phpMyAdmin in your default browser. Alternately, you can open the MySql admin page by entering http://localhost/phpmyadmin/ or http://127.0.0.1/phpmyadmin/ in your favorite browser.
如果在XAMPP控制面板中单击MySql的管理按钮,它将在默认浏览器中打开phpMyAdmin。 或者,您可以通过在喜欢的浏览器中输入http:// localhost / phpmyadmin /或http://127.0.0.1/phpmyadmin/来打开MySql管理页面。
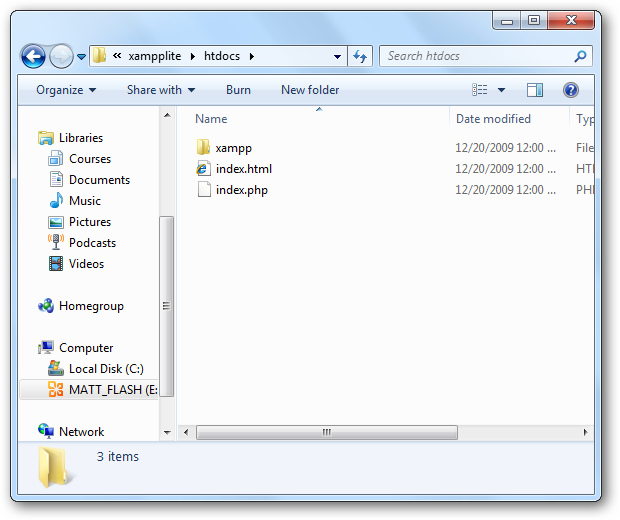
Now you can add your own webpages to your webserver. Save all of your web files in the \xampplight\htdocs\ folder on your flash drive.
现在,您可以将自己的网页添加到Web服务器。 将所有Web文件保存在闪存驱动器上的\ xampplight \ htdocs \文件夹中。
Install WordPress in your portable server
在便携式服务器中安装WordPress
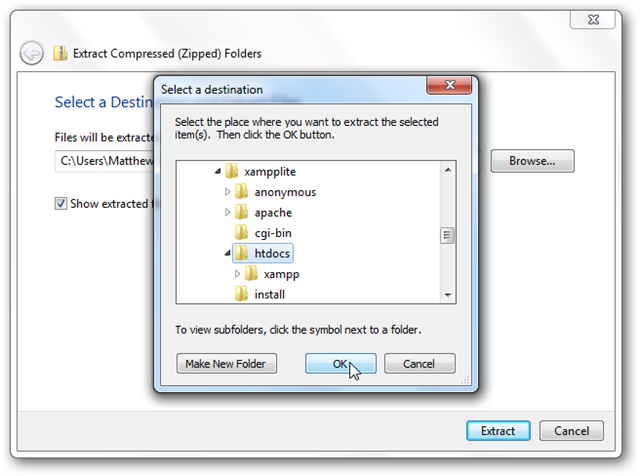
Since XAMPP Lite includes MySql and PHP, you can even run webapps such as WordPress, the popular CMS and blogging platform. Download WordPress (link below), and extract the files to the \xampplite\htdocs folder on your flash drive.
由于XAMPP Lite包含MySql和PHP,因此您甚至可以运行诸如WordPress,流行的CMS和博客平台之类的Web应用程序。 下载WordPress(下面的链接),然后将文件解压缩到闪存驱动器上的\ xampplite \ htdocs文件夹中。
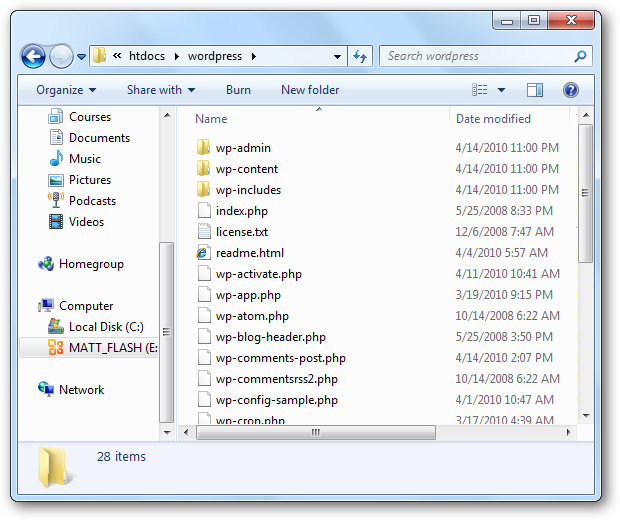
Now all of the WordPress files are stored in \xampplite\htdocs\wordpress on your flash drive.
现在,所有WordPress文件都存储在闪存驱动器上的\ xampplite \ htdocs \ wordpress中。
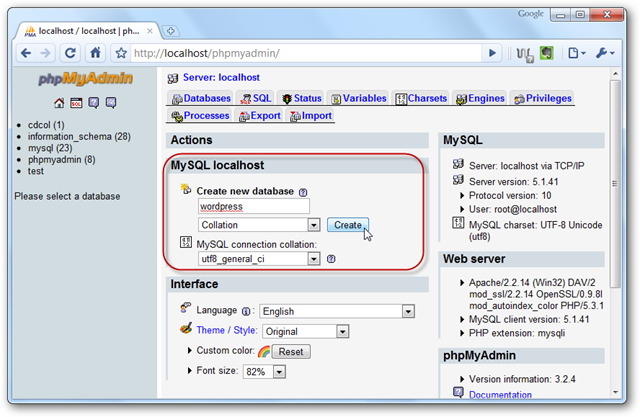
We still need to setup WordPress on our portable server. Open your MySql admin page http://localhost/phpmyadmin/ to create a new database for WordPress. Enter a name for your database in the “Create new database” box, and click Create.
我们仍然需要在便携式服务器上设置WordPress。 打开您的MySql管理页面http:// localhost / phpmyadmin /为WordPress创建一个新数据库。 在“创建新数据库”框中输入数据库的名称,然后单击“创建”。
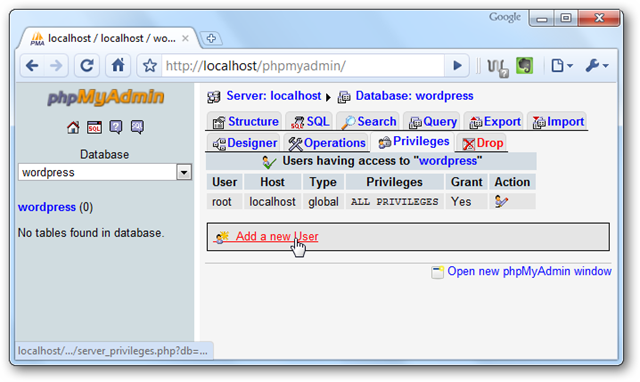
Click the Privileges tab on the top, and the select “Add a new User”.
单击顶部的权限选项卡,然后选择“添加新用户”。
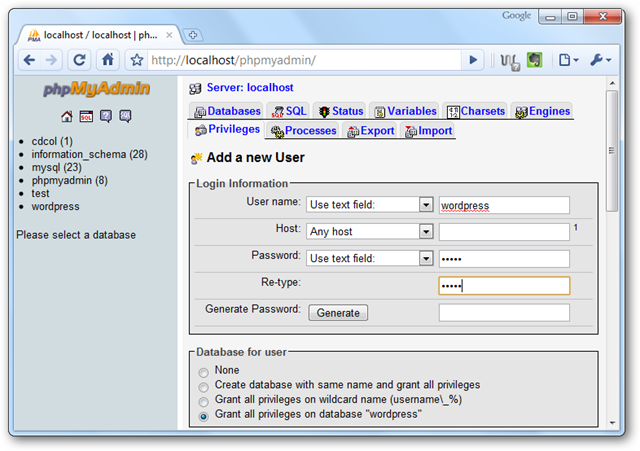
Enter a username and password for the database, and then click the Go button on the bottom of the page.
输入数据库的用户名和密码,然后单击页面底部的“执行”按钮。
Using WordPress
使用WordPress
Now, in your browser, enter http://localhost/wordpress/wp-admin/install.php. Click Create a Configuration File to continue.
现在,在浏览器中,输入http://localhost/wordpress/wp-admin/install.php 。 单击创建配置文件以继续。
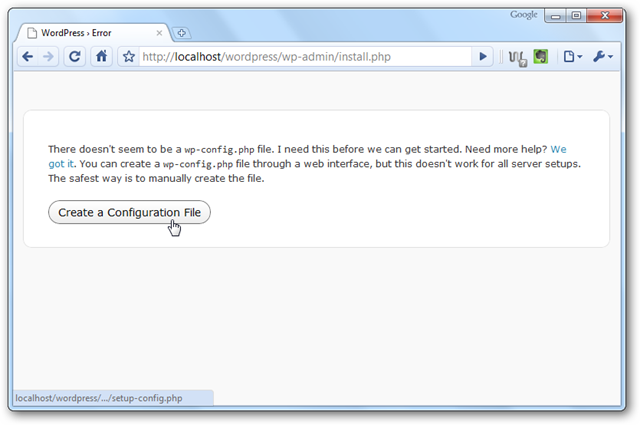
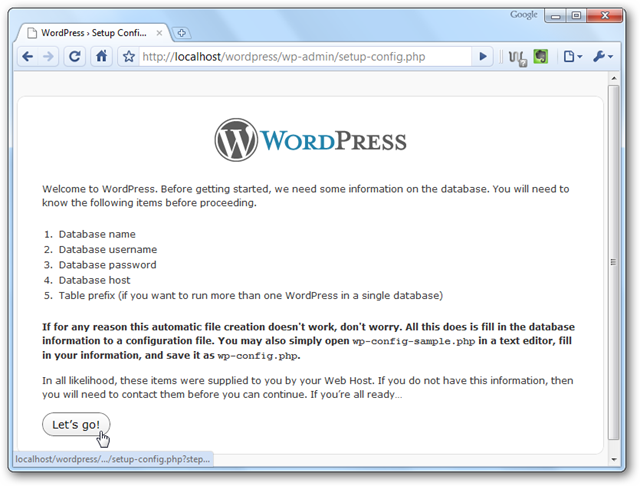
Make sure you have your Database name, username, and password we created previously, and click “Let’s Go!”
确保您拥有我们之前创建的数据库名称,用户名和密码,然后单击“ Let's Go!”。
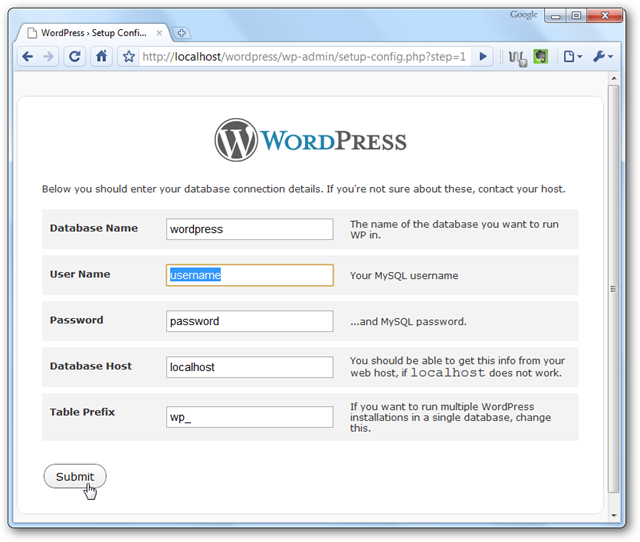
Enter your WordPress database name, username, and password, leave the other two entries as default, and click Submit.
输入您的WordPress数据库名称,用户名和密码,将其他两个条目保留为默认值,然后单击“提交”。
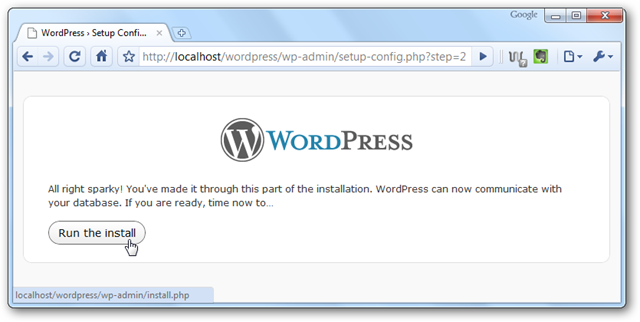
You should now have the database all ready to go. Click “Run the install” to finish installing WordPress.
现在,您应该已经准备好所有数据库。 单击“运行安装”以完成WordPress的安装。
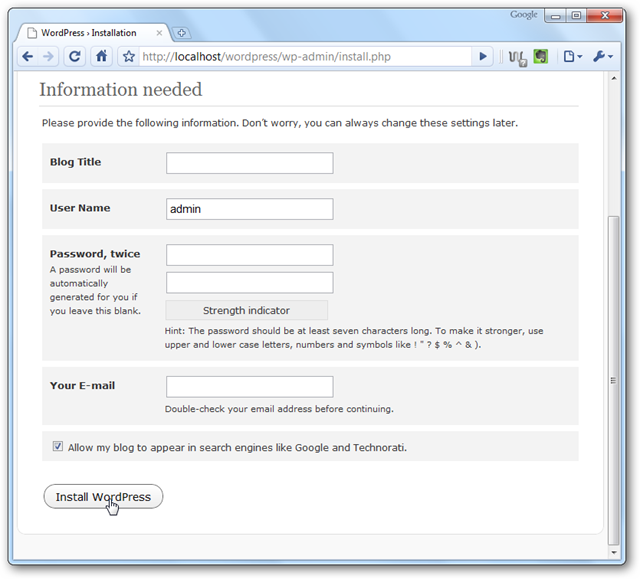
Enter a title, username, and password for your test blog, as well as your email address, and then click “Install WordPress”.
输入测试博客的标题,用户名和密码,以及您的电子邮件地址,然后单击“安装WordPress”。
You now have a portable install of WordPress. Click “Log In” to access your WordPress admin page. Enter your username and password, and click Log In.
现在,您可以便携式安装WordPress。 单击“登录”以访问您的WordPress管理页面。 输入您的用户名和密码,然后单击登录。
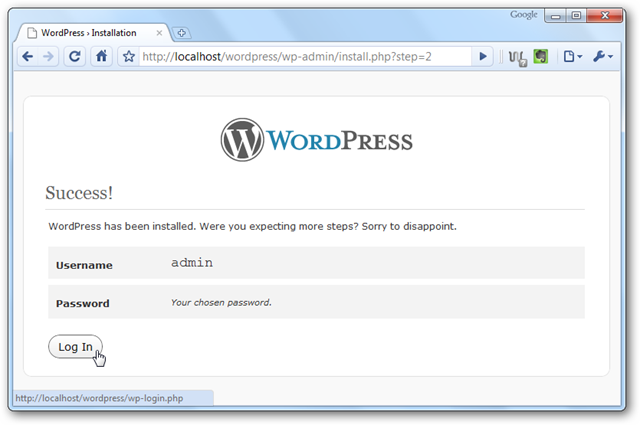
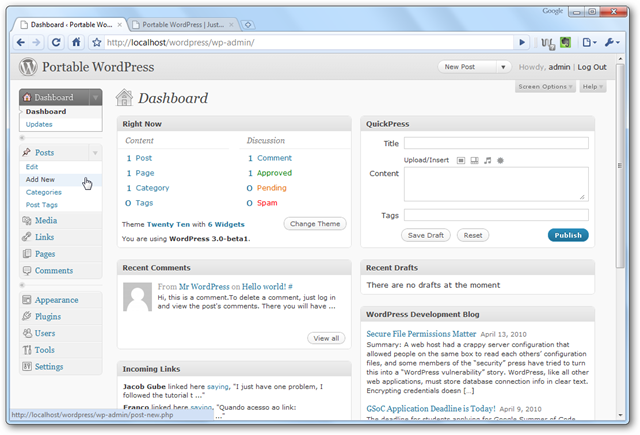
Here you can add pages, posts, themes, extensions, and anything else just like you would on a normal WordPress site. This is a great way to experiment with WordPress without messing up your real website.
在这里,您可以添加页面,帖子,主题,扩展名以及其他任何内容,就像在普通WordPress网站上一样。 这是在不弄乱您的真实网站的情况下试用WordPress的好方法。
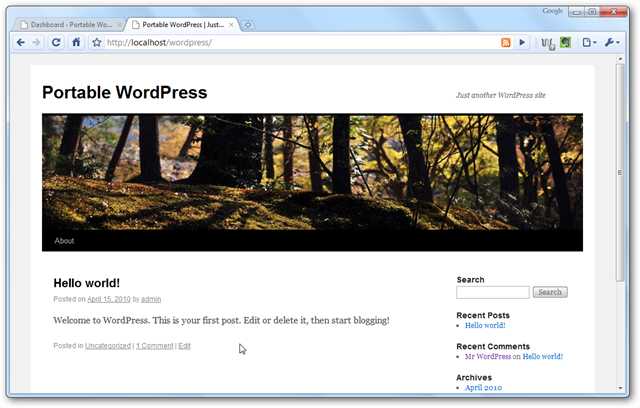
You can view your portable WordPress site by entering http://localhost/wordpress/ in your address bar.
您可以通过在地址栏中输入http:// localhost / wordpress /来查看可移植的WordPress网站。
Closing your server
关闭服务器
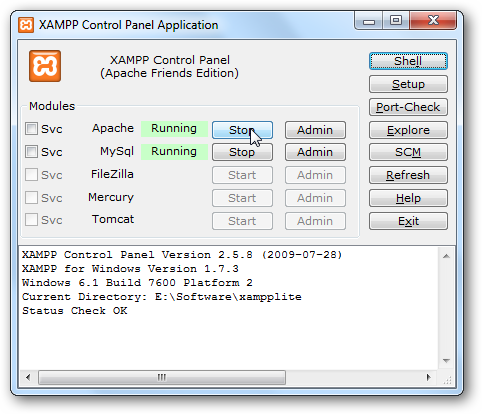
When you’re done running your test server, click the Stop button on each of the services and then click the Exit button in the XAMPP control panel. If you press the exit button on the top of the window, it will just minimize the control panel to the tray.
完成测试服务器的运行后,请单击每个服务上的“停止”按钮,然后单击XAMPP控制面板中的“退出”按钮。 如果按窗口顶部的退出按钮,则只会将控制面板最小化到托盘上。
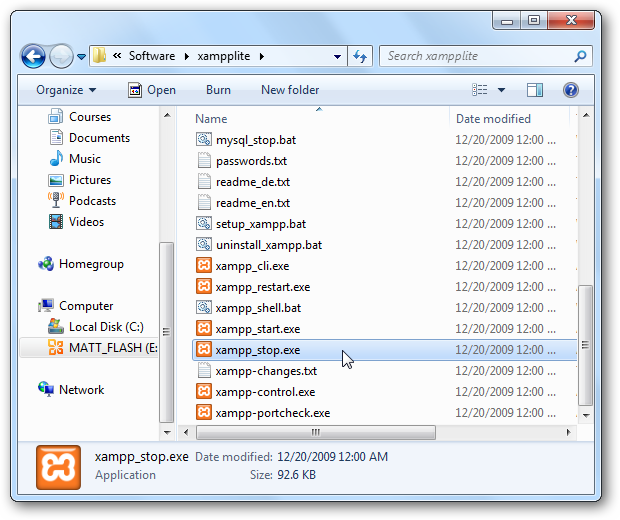
Alternately, you can shutdown your server by running xampp_stop.exe from your xampplite folder.
或者,您可以通过从xampplite文件夹运行xampp_stop.exe来关闭服务器。
Conclusion
结论
XAMPP Lite gives you a great way to run a full webserver directly from your flash drive. Now, anywhere you go, you can test and tweak your webpages and webapps from any Windows computer.
XAMPP Lite为您提供了一种直接从闪存驱动器运行完整Web服务器的好方法。 现在,无论您身在何处,都可以从任何Windows计算机上测试和调整网页和Web应用程序。
Links
链接
Download XAMPP Lite
下载XAMPP Lite
Download WordPress
下载WordPress
翻译自: https://www.howtogeek.com/howto/14998/turn-your-flash-drive-into-a-portable-web-server/
闪存驱动器


)
 HelloWorld)

)


