利用OpenCV实现实时图像识别和图像跟踪

图像识别
什么是图像识别
图像识别,是指利用计算机对图像进行处理、分析和理解,以识别各种不同模式的目标和对像的技术。根据观测到的图像,对其中的物体分辨其类别,做出有意义的判断。利用现代信息处理与计算技术来模拟和完成人类的认识、理解过程。一般而言,一个图像识别系统主要由三个部分组成,分别是:图像分割、图像特征提取以及分类器的识别分类。
其中,图像分割将图像划分为多个有意义的区域,然后将每个区域的图像进行特征提取,最后分类器根据提取的图像特征对图像进行相对应的分类。实际上,图像识别和图像分割并不存在严格的界限。从某种意义上,图像分割的过程就是图像识别的过程。图像分割着重于对象和背景的关系,研究的是对象在特定背景下所表现出来的整体属性,而图像识别则着重于对象本身的属性。
图像识别的研究现状
图像识别的发展经历了三个阶段:文字识别、数字图像处理与识别、物体识别。
图像识别作为计算视觉技术体系中的重要一环,一直备受重视。微软在两年前就公布了一项里程碑式的成果:它的图像系统识别图片的错误率比人类还要低。如今,图像识别技术又发展到一个新高度。这有赖于更多数据的开放、更多基础工具的开源、产业链的更新迭代,以及高性能的AI计算芯片、深度摄像头和优秀的深度学习算法等的进步,这些都为图像识别技术向更深处发展提供了源源不断的动力。
其实对于图像识别技术,大家已经不陌生,人脸识别、虹膜识别、指纹识别等都属于这个范畴,但是图像识别远不只如此,它涵盖了生物识别、物体与场景识别、视频识别三大类。发展至今,尽管与理想还相距甚远,但日渐成熟的图像识别技术已开始探索在各类行业的应用。

Android图像识别相关技术
- OpenCV
基于BSD许可(开源)发行的跨平台计算机视觉库,可以运行在Linux、Windows、Android和Mac OS操作系统上。
轻量级而且高效——由一系列 C 函数和少量 C++ 类构成,同时提供了Python、Ruby、MATLAB等语言的接口,实现了图像处理和计算机视觉方面的很多通用算法 - TensorFlow
TensorFlow是一个深度学习框架,支持Linux平台,Windows平台,Mac平台,甚至手机移动设备等各种平台。
TensorFlow提供了非常丰富的深度学习相关的API,可以说目前所有深度学习框架里,提供的API最全的,包括基本的向量矩阵计算、各种优化算法、各种卷积神经网络和循环神经网络基本单元的实现、以及可视化的辅助工具、等等。 - YOLO
YOLO (You Only Look Once)是一种快速和准确的实时对象检测算法。
YOLOv3 在 TensorFlow 中实现的完整数据管道。它可用在数据集上来训练和评估自己的目标检测模型。 - ……
基于OpenCV实现
介绍使用OpenCV来实现指定图像识别的DEMO:
实现思路
①打开应用的同时开启摄像头
②对实时摄像头拍摄的图像封装成MAT对象进行逐帧比对:
- 获取目标特征并针对各特征集获取描述符
- 获取两个描述符集合间的匹配项
- 获取参考图像和空间匹配图像间的单应性
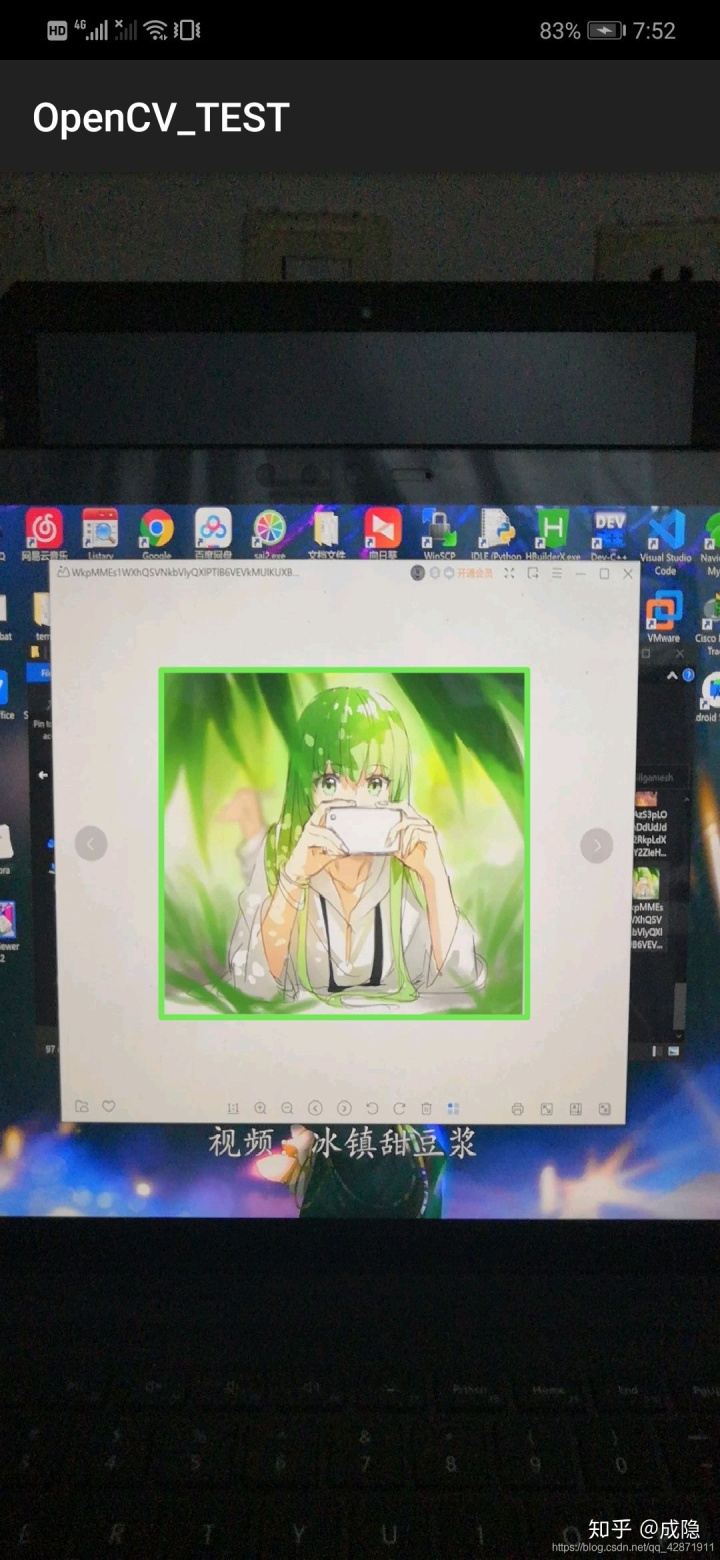
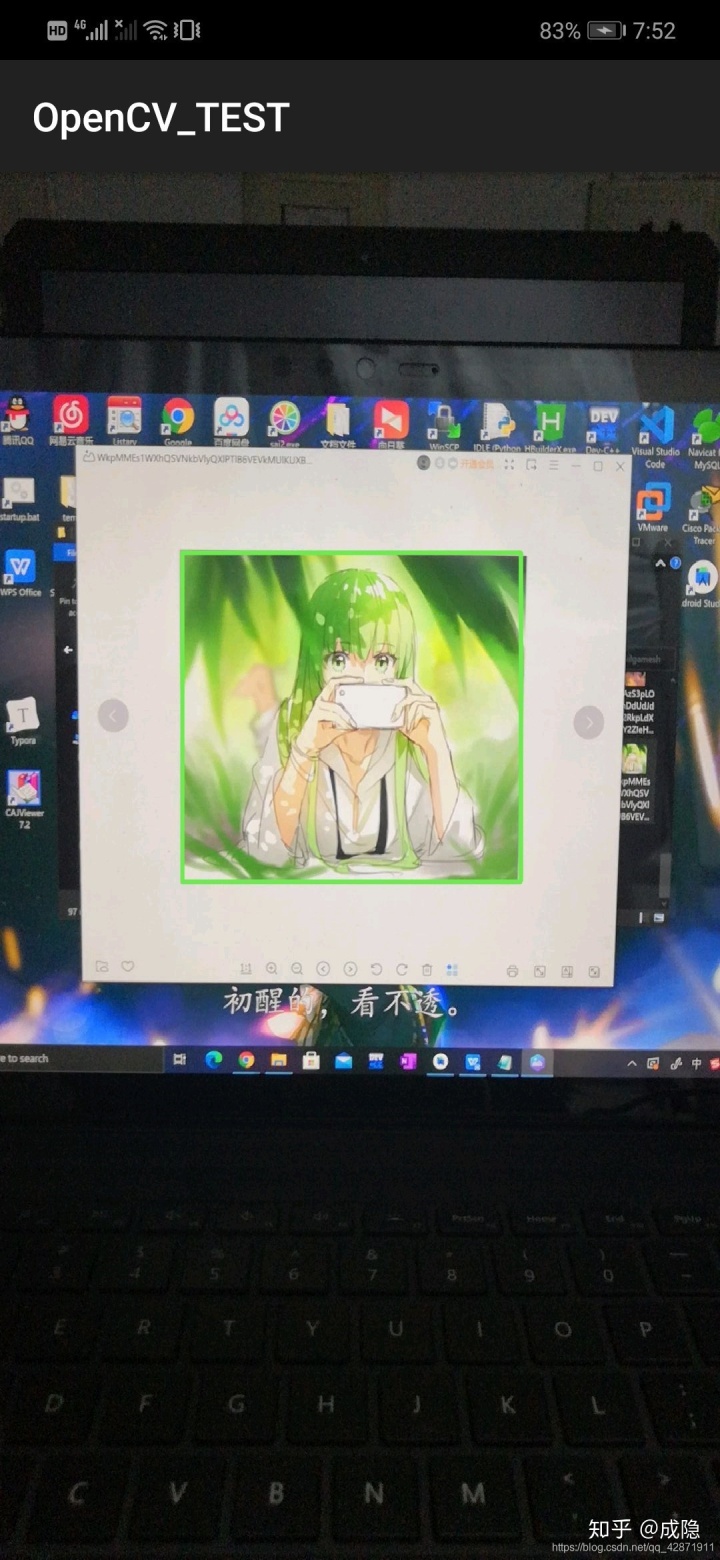
- 当图像矩阵符合单应性时,绘制跟踪图像的轮廓线
代码部分
权限设置
AndroidMainifest.xml
<uses-permission android:name="android.permission.CAMERA" />
<uses-permission android:name="android.permission.WRITE_EXTERNAL_STORAGE" />
<uses-permission android:name="android.permission.READ_EXTERNAL_STORAGE" />
<uses-feature android:name="android.hardware.camera" />
<uses-feature
android:name="android.hardware.camera.autofocus"
android:required="false" />
<uses-feature
android:name="android.hardware.camera.flash"
android:required="false" />
权限提示方法
private void requestPermissions() {
final int REQUEST_CODE = 1;
if (ContextCompat.checkSelfPermission(this, Manifest.permission.CAMERA) != PackageManager.PERMISSION_GRANTED) {
ActivityCompat.requestPermissions(this, new String[]{
Manifest.permission.CAMERA, Manifest.permission.WRITE_EXTERNAL_STORAGE},
REQUEST_CODE);
}
}
界面设计
activity_img_recognition.xml
<?xml version="1.0" encoding="utf-8"?>
<RelativeLayout xmlns:android="http://schemas.android.com/apk/res/android"
xmlns:opencv="http://schemas.android.com/apk/res-auto"
xmlns:tools="http://schemas.android.com/tools"
android:id="@+id/activity_img_recognition"
android:layout_width="match_parent"
android:layout_height="match_parent"
tools:context="com.sueed.imagerecognition.CameraActivity">
<org.opencv.android.JavaCameraView
android:id="@+id/jcv"
android:layout_width="match_parent"
android:layout_height="match_parent"
android:visibility="gone"
opencv:camera_id="any"
opencv:show_fps="true" />
</RelativeLayout>
主要逻辑代码
CameraActivity.java 【相机启动获取图像和包装MAT相关】
因为OpenCV中JavaCameraView继承自SurfaceView,若有需要可以自定义编写extends SurfaceView implements SurfaceHolder.Callback的xxxSurfaceView替换使用。
package com.sueed.imagerecognition;
import android.Manifest;
import android.content.Intent;
import android.content.pm.PackageManager;
import android.os.Bundle;
import android.util.Log;
import android.view.Menu;
import android.view.MenuItem;
import android.view.SurfaceView;
import android.view.View;
import android.view.WindowManager;
import android.widget.ImageView;
import android.widget.RelativeLayout;
import android.widget.Toast;
import androidx.appcompat.app.AppCompatActivity;
import androidx.core.app.ActivityCompat;
import androidx.core.content.ContextCompat;
import com.sueed.imagerecognition.filters.Filter;
import com.sueed.imagerecognition.filters.NoneFilter;
import com.sueed.imagerecognition.filters.ar.ImageDetectionFilter;
import com.sueed.imagerecognition.imagerecognition.R;
import org.opencv.android.CameraBridgeViewBase;
import org.opencv.android.CameraBridgeViewBase.CvCameraViewFrame;
import org.opencv.android.CameraBridgeViewBase.CvCameraViewListener2;
import org.opencv.android.JavaCameraView;
import org.opencv.android.OpenCVLoader;
import org.opencv.core.Mat;
import java.io.IOException;
// Use the deprecated Camera class.
@SuppressWarnings("deprecation")
public final class CameraActivity extends AppCompatActivity implements CvCameraViewListener2 {
// A tag for log output.
private static final String TAG = CameraActivity.class.getSimpleName();
// The filters.
private Filter[] mImageDetectionFilters;
// The indices of the active filters.
private int mImageDetectionFilterIndex;
// The camera view.
private CameraBridgeViewBase mCameraView;
@Override
protected void onCreate(final Bundle savedInstanceState) {
super.onCreate(savedInstanceState);
getWindow().addFlags(WindowManager.LayoutParams.FLAG_KEEP_SCREEN_ON);
//init CameraView
mCameraView = new JavaCameraView(this, 0);
mCameraView.setMaxFrameSize(size.MaxWidth, size.MaxHeight);
mCameraView.setCvCameraViewListener(this);
setContentView(mCameraView);
requestPermissions();
mCameraView.enableView();
}
@Override
public void onPause() {
if (mCameraView != null) {
mCameraView.disableView();
}
super.onPause();
}
@Override
public void onResume() {
super.onResume();
OpenCVLoader.initDebug();
}
@Override
public void onDestroy() {
if (mCameraView != null) {
mCameraView.disableView();
}
super.onDestroy();
}
@Override
public boolean onCreateOptionsMenu(final Menu menu) {
getMenuInflater().inflate(R.menu.activity_camera, menu);
return true;
}
@Override
public boolean onOptionsItemSelected(final MenuItem item) {
switch (item.getItemId()) {
case R.id.menu_next_image_detection_filter:
mImageDetectionFilterIndex++;
if (mImageDetectionFilters != null && mImageDetectionFilterIndex == mImageDetectionFilters.length) {
mImageDetectionFilterIndex = 0;
}
return true;
default:
return super.onOptionsItemSelected(item);
}
}
@Override
public void onCameraViewStarted(final int width, final int height) {
Filter Enkidu = null;
try {
Enkidu = new ImageDetectionFilter(CameraActivity.this, R.drawable.enkidu);
} catch (IOException e) {
e.printStackTrace();
}
Filter akbarHunting = null;
try {
akbarHunting = new ImageDetectionFilter(CameraActivity.this, R.drawable.akbar_hunting_with_cheetahs);
} catch (IOException e) {
Log.e(TAG, "Failed to load drawable: " + "akbar_hunting_with_cheetahs");
e.printStackTrace();
}
mImageDetectionFilters = new Filter[]{
new NoneFilter(),
Enkidu,
akbarHunting
};
}
@Override
public void onCameraViewStopped() {
}
@Override
public Mat onCameraFrame(final CvCameraViewFrame inputFrame) {
final Mat rgba = inputFrame.rgba();
if (mImageDetectionFilters != null) {
mImageDetectionFilters[mImageDetectionFilterIndex].apply(rgba, rgba);
}
return rgba;
}
}
ImageRecognitionFilter.java【图像特征过滤比对及绘制追踪绿框】
package com.nummist.secondsight.filters.ar;
import java.io.IOException;
import java.util.ArrayList;
import java.util.List;
import org.opencv.android.Utils;
import org.opencv.calib3d.Calib3d;
import org.opencv.core.Core;
import org.opencv.core.CvType;
import org.opencv.core.DMatch;
import org.opencv.core.KeyPoint;
import org.opencv.core.Mat;
import org.opencv.core.MatOfDMatch;
import org.opencv.core.MatOfKeyPoint;
import org.opencv.core.MatOfPoint;
import org.opencv.core.MatOfPoint2f;
import org.opencv.core.Point;
import org.opencv.core.Scalar;
import org.opencv.features2d.DescriptorExtractor;
import org.opencv.features2d.DescriptorMatcher;
import org.opencv.features2d.FeatureDetector;
import org.opencv.imgcodecs.Imgcodecs;
import org.opencv.imgproc.Imgproc;
import android.content.Context;
import com.nummist.secondsight.filters.Filter;
public final class ImageDetectionFilter implements Filter {
// The reference image (this detector's target).
private final Mat mReferenceImage;
// Features of the reference image.
private final MatOfKeyPoint mReferenceKeypoints = new MatOfKeyPoint();
// Descriptors of the reference image's features.
private final Mat mReferenceDescriptors = new Mat();
// The corner coordinates of the reference image, in pixels.
// CvType defines the color depth, number of channels, and
// channel layout in the image. Here, each point is represented
// by two 32-bit floats.
private final Mat mReferenceCorners = new Mat(4, 1, CvType.CV_32FC2);
// Features of the scene (the current frame).
private final MatOfKeyPoint mSceneKeypoints = new MatOfKeyPoint();
// Descriptors of the scene's features.
private final Mat mSceneDescriptors = new Mat();
// Tentative corner coordinates detected in the scene, in
// pixels.
private final Mat mCandidateSceneCorners = new Mat(4, 1, CvType.CV_32FC2);
// Good corner coordinates detected in the scene, in pixels.
private final Mat mSceneCorners = new Mat(0, 0, CvType.CV_32FC2);
// The good detected corner coordinates, in pixels, as integers.
private final MatOfPoint mIntSceneCorners = new MatOfPoint();
// A grayscale version of the scene.
private final Mat mGraySrc = new Mat();
// Tentative matches of scene features and reference features.
private final MatOfDMatch mMatches = new MatOfDMatch();
// A feature detector, which finds features in images.
private final FeatureDetector mFeatureDetector = FeatureDetector.create(FeatureDetector.ORB);
// A descriptor extractor, which creates descriptors of
// features.
private final DescriptorExtractor mDescriptorExtractor = DescriptorExtractor.create(DescriptorExtractor.ORB);
// A descriptor matcher, which matches features based on their
// descriptors.
private final DescriptorMatcher mDescriptorMatcher = DescriptorMatcher.create(DescriptorMatcher.BRUTEFORCE_HAMMINGLUT);
// The color of the outline drawn around the detected image.
private final Scalar mLineColor = new Scalar(0, 255, 0);
public ImageDetectionFilter(final Context context, final int referenceImageResourceID) throws IOException {
// Load the reference image from the app's resources.
// It is loaded in BGR (blue, green, red) format.
mReferenceImage = Utils.loadResource(context, referenceImageResourceID, Imgcodecs.CV_LOAD_IMAGE_COLOR);
// Create grayscale and RGBA versions of the reference image.
final Mat referenceImageGray = new Mat();
Imgproc.cvtColor(mReferenceImage, referenceImageGray, Imgproc.COLOR_BGR2GRAY);
Imgproc.cvtColor(mReferenceImage, mReferenceImage, Imgproc.COLOR_BGR2RGBA);
// Store the reference image's corner coordinates, in pixels.
mReferenceCorners.put(0, 0, new double[]{0.0, 0.0});
mReferenceCorners.put(1, 0, new double[]{referenceImageGray.cols(), 0.0});
mReferenceCorners.put(2, 0, new double[]{referenceImageGray.cols(), referenceImageGray.rows()});
mReferenceCorners.put(3, 0, new double[]{0.0, referenceImageGray.rows()});
// Detect the reference features and compute their
// descriptors.
mFeatureDetector.detect(referenceImageGray, mReferenceKeypoints);
mDescriptorExtractor.compute(referenceImageGray, mReferenceKeypoints, mReferenceDescriptors);
}
@Override
public void apply(final Mat src, final Mat dst) {
// Convert the scene to grayscale.
Imgproc.cvtColor(src, mGraySrc, Imgproc.COLOR_RGBA2GRAY);
// Detect the scene features, compute their descriptors,
// and match the scene descriptors to reference descriptors.
mFeatureDetector.detect(mGraySrc, mSceneKeypoints);
mDescriptorExtractor.compute(mGraySrc, mSceneKeypoints, mSceneDescriptors);
mDescriptorMatcher.match(mSceneDescriptors, mReferenceDescriptors, mMatches);
// Attempt to find the target image's corners in the scene.
findSceneCorners();
// If the corners have been found, draw an outline around the
// target image.
// Else, draw a thumbnail of the target image.
draw(src, dst);
}
private void findSceneCorners() {
final List<DMatch> matchesList = mMatches.toList();
if (matchesList.size() < 4) {
// There are too few matches to find the homography.
return;
}
final List<KeyPoint> referenceKeypointsList = mReferenceKeypoints.toList();
final List<KeyPoint> sceneKeypointsList = mSceneKeypoints.toList();
// Calculate the max and min distances between keypoints.
double maxDist = 0.0;
double minDist = Double.MAX_VALUE;
for (final DMatch match : matchesList) {
final double dist = match.distance;
if (dist < minDist) {
minDist = dist;
}
if (dist > maxDist) {
maxDist = dist;
}
}
// The thresholds for minDist are chosen subjectively
// based on testing. The unit is not related to pixel
// distances; it is related to the number of failed tests
// for similarity between the matched descriptors.
if (minDist > 50.0) {
// The target is completely lost.
// Discard any previously found corners.
mSceneCorners.create(0, 0, mSceneCorners.type());
return;
} else if (minDist > 25.0) {
// The target is lost but maybe it is still close.
// Keep any previously found corners.
return;
}
// Identify "good" keypoints based on match distance.
final ArrayList<Point> goodReferencePointsList = new ArrayList<Point>();
final ArrayList<Point> goodScenePointsList = new ArrayList<Point>();
final double maxGoodMatchDist = 1.75 * minDist;
for (final DMatch match : matchesList) {
if (match.distance < maxGoodMatchDist) {
goodReferencePointsList.add(referenceKeypointsList.get(match.trainIdx).pt);
goodScenePointsList.add(sceneKeypointsList.get(match.queryIdx).pt);
}
}
if (goodReferencePointsList.size() < 4 || goodScenePointsList.size() < 4) {
// There are too few good points to find the homography.
return;
}
// There are enough good points to find the homography.
// (Otherwise, the method would have already returned.)
// Convert the matched points to MatOfPoint2f format, as
// required by the Calib3d.findHomography function.
final MatOfPoint2f goodReferencePoints = new MatOfPoint2f();
goodReferencePoints.fromList(goodReferencePointsList);
final MatOfPoint2f goodScenePoints = new MatOfPoint2f();
goodScenePoints.fromList(goodScenePointsList);
// Find the homography.
final Mat homography = Calib3d.findHomography(goodReferencePoints, goodScenePoints);
// Use the homography to project the reference corner
// coordinates into scene coordinates.
Core.perspectiveTransform(mReferenceCorners, mCandidateSceneCorners, homography);
// Convert the scene corners to integer format, as required
// by the Imgproc.isContourConvex function.
mCandidateSceneCorners.convertTo(mIntSceneCorners, CvType.CV_32S);
// Check whether the corners form a convex polygon. If not,
// (that is, if the corners form a concave polygon), the
// detection result is invalid because no real perspective can
// make the corners of a rectangular image look like a concave
// polygon!
if (Imgproc.isContourConvex(mIntSceneCorners)) {
// The corners form a convex polygon, so record them as
// valid scene corners.
mCandidateSceneCorners.copyTo(mSceneCorners);
}
}
protected void draw(final Mat src, final Mat dst) {
if (dst != src) {
src.copyTo(dst);
}
if (mSceneCorners.height() < 4) {
// The target has not been found.
// Draw a thumbnail of the target in the upper-left
// corner so that the user knows what it is.
// Compute the thumbnail's larger dimension as half the
// video frame's smaller dimension.
int height = mReferenceImage.height();
int width = mReferenceImage.width();
final int maxDimension = Math.min(dst.width(), dst.height()) / 2;
final double aspectRatio = width / (double) height;
if (height > width) {
height = maxDimension;
width = (int) (height * aspectRatio);
} else {
width = maxDimension;
height = (int) (width / aspectRatio);
}
// Select the region of interest (ROI) where the thumbnail
// will be drawn.
final Mat dstROI = dst.submat(0, height, 0, width);
// Copy a resized reference image into the ROI.
Imgproc.resize(mReferenceImage, dstROI, dstROI.size(), 0.0, 0.0, Imgproc.INTER_AREA);
return;
}
// Outline the found target in green.
Imgproc.line(dst, new Point(mSceneCorners.get(0, 0)), new Point(mSceneCorners.get(1, 0)), mLineColor, 4);
Imgproc.line(dst, new Point(mSceneCorners.get(1, 0)), new Point(mSceneCorners.get(2, 0)), mLineColor, 4);
Imgproc.line(dst, new Point(mSceneCorners.get(2, 0)), new Point(mSceneCorners.get(3, 0)), mLineColor, 4);
Imgproc.line(dst, new Point(mSceneCorners.get(3, 0)), new Point(mSceneCorners.get(0, 0)), mLineColor, 4);
}
}
实现效果图
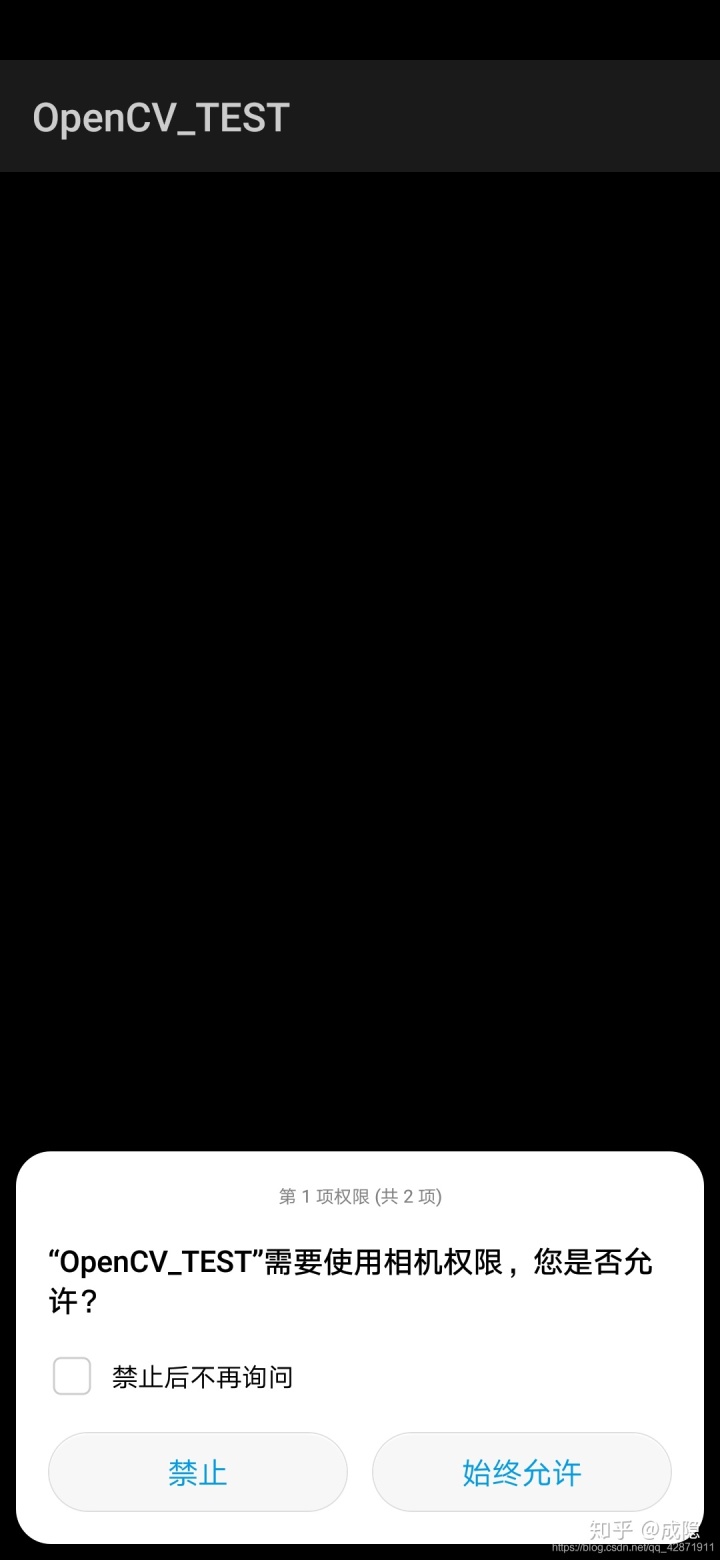
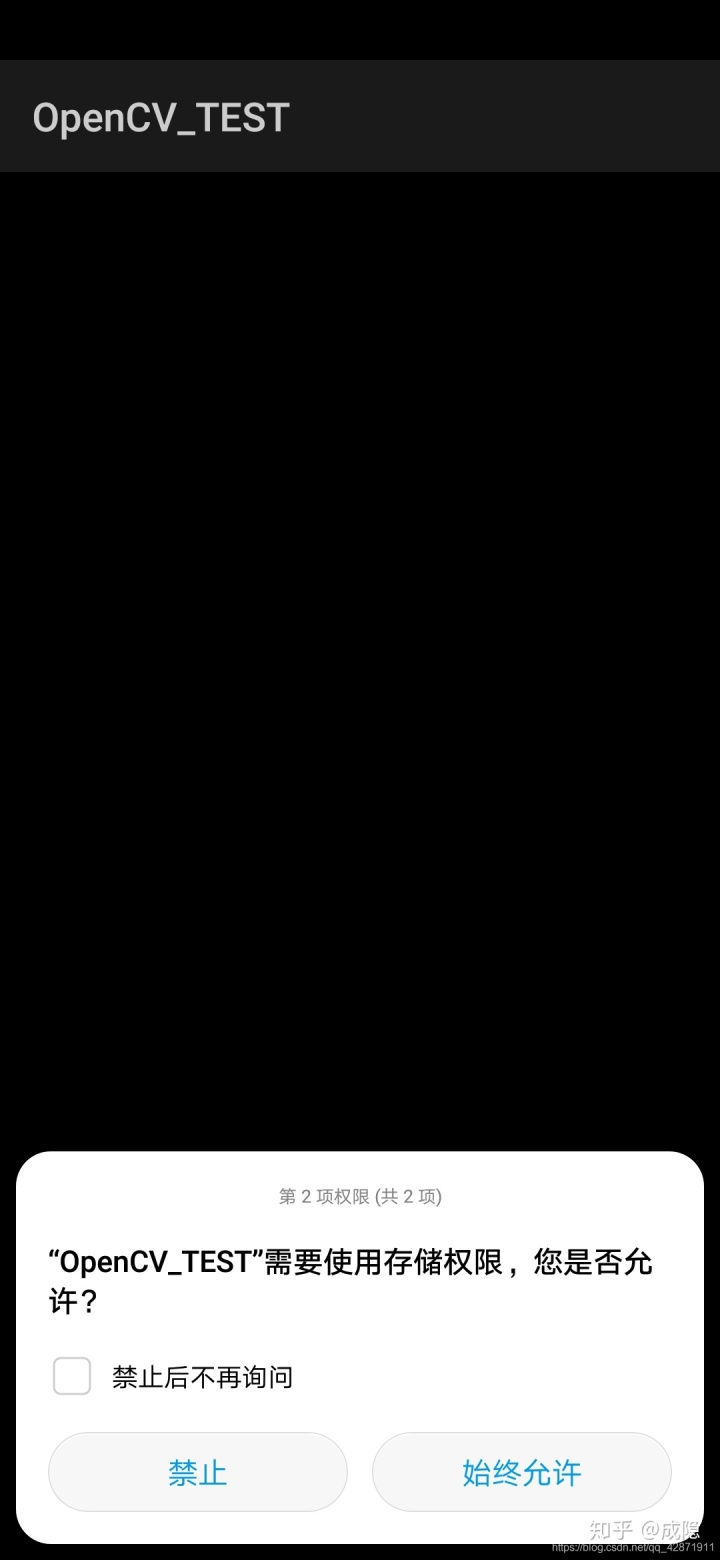
确认允许权限:


实时追踪指定图像


结语
本文只实现了需要提供完整原图进行比对才能实现图像识别,还有许多更加智能方便的识别技术和方法,比如:HOG、SIFT、SURF 等方法经由正负样本库进行训练后可以从图像中提取一些特征,并通过特征确定物体类别。OpenCV库中也仍有很大一部分的功能在本文中未能进行实践,亟待今后继续探索和研究。更多Python知识请关注我分享更多!
本文转载于:Android开发-基于OpenCV实现相机实时图像识别跟踪_Sueed-CSDN博客


)
| 视觉入门)
?)

)


