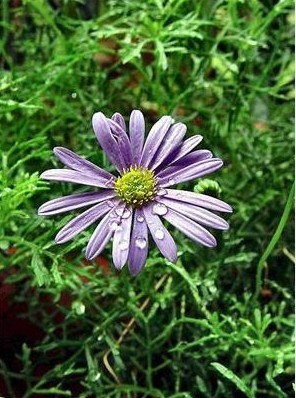
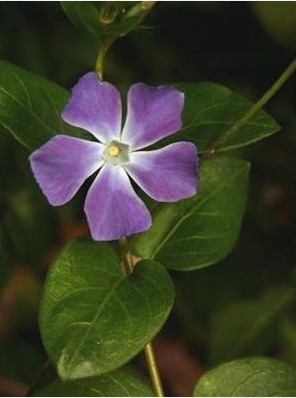
转摘的,修改了下程序,图像融合看不太懂 。。。。http://blog.csdn.net/abcjennifer/article/details/7628655#comments
// 转摘的别人的程序
// #include <stdio.h>
#include <cv.h>
#include <cxcore.h>
#include <highgui.h>
#include <opencv2/opencv.hpp>using namespace cv;// __func__ 和 __FUNCTION__ 一样的意思,描述当前所在的函数
#define ENABLE_DEBUG 1   //else, comment this line
#ifdef ENABLE_DEBUG
#define DEBUG_LOG(fmt,...) fprintf(stderr, "%s:%d: " fmt "\n",   \__FUNCTION__ , __LINE__, ## __VA_ARGS__)
#else
#define DEBUG_LOG(fmt, ...) do {} while (0)
#endif//
// disable stupid warning 4018 and etc...
#pragma warning(push)
#pragma warning(disable:4018)/************************************************************************/
/* 说明:
*金字塔从下到上依次为 [0,1,...,level-1] 层
*blendMask 为图像的掩模
*maskGaussianPyramid为金字塔每一层的掩模
*resultLapPyr 存放每层金字塔中直接用左右两图Laplacian变换拼成的图像
*/
/************************************************************************/
class LaplacianBlending {
private:Mat_<Vec3f> left;Mat_<Vec3f> right;Mat_<float> blendMask;vector<Mat_<Vec3f> > leftLapPyr,rightLapPyr,resultLapPyr;//Laplacian PyramidsMat leftHighestLevel, rightHighestLevel, resultHighestLevel;vector<Mat_<Vec3f> > maskGaussianPyramid; //masks are 3-channels for easier multiplication with RGBint levels;void buildPyramids() {buildLaplacianPyramid(left,leftLapPyr,leftHighestLevel);buildLaplacianPyramid(right,rightLapPyr,rightHighestLevel);buildGaussianPyramid();}void buildGaussianPyramid() {//金字塔内容为每一层的掩模assert(leftLapPyr.size()>0);maskGaussianPyramid.clear();Mat currentImg;cvtColor(blendMask, currentImg, CV_GRAY2BGR);//store color img of blend mask into maskGaussianPyramidmaskGaussianPyramid.push_back(currentImg); //0-levelcurrentImg = blendMask;for (int l=1; l<levels+1; l++) {Mat _down;if (leftLapPyr.size() > l)pyrDown(currentImg, _down, leftLapPyr[l].size());elsepyrDown(currentImg, _down, leftHighestLevel.size()); //lowest levelMat down;cvtColor(_down, down, CV_GRAY2BGR);maskGaussianPyramid.push_back(down);//add color blend mask into mask PyramidcurrentImg = _down;}}void buildLaplacianPyramid(const Mat& img, vector<Mat_<Vec3f> >& lapPyr, Mat& HighestLevel) {lapPyr.clear();Mat currentImg = img;for (int l=0; l<levels; l++) {Mat down,up;pyrDown(currentImg, down);pyrUp(down, up,currentImg.size());Mat lap = currentImg - up;lapPyr.push_back(lap);currentImg = down;}currentImg.copyTo(HighestLevel);}Mat_<Vec3f> reconstructImgFromLapPyramid() {//将左右laplacian图像拼成的resultLapPyr金字塔中每一层//从上到下插值放大并相加,即得blend图像结果Mat currentImg = resultHighestLevel;for (int l=levels-1; l>=0; l--) {Mat up;pyrUp(currentImg, up, resultLapPyr[l].size());currentImg = up + resultLapPyr[l];}return currentImg;}void blendLapPyrs() {//获得每层金字塔中直接用左右两图Laplacian变换拼成的图像resultLapPyrresultHighestLevel = leftHighestLevel.mul(maskGaussianPyramid.back()) +rightHighestLevel.mul(Scalar(1.0,1.0,1.0) - maskGaussianPyramid.back());for (int l=0; l<levels; l++) {Mat A = leftLapPyr[l].mul(maskGaussianPyramid[l]);Mat antiMask = Scalar(1.0,1.0,1.0) - maskGaussianPyramid[l];Mat B = rightLapPyr[l].mul(antiMask);Mat_<Vec3f> blendedLevel = A + B;resultLapPyr.push_back(blendedLevel);}}public:LaplacianBlending(const Mat_<Vec3f>& _left, const Mat_<Vec3f>& _right, const Mat_<float>& _blendMask, int _levels)://construct function, used in LaplacianBlending lb(l,r,m,4);left(_left),right(_right),blendMask(_blendMask),levels(_levels){assert(_left.size() == _right.size());assert(_left.size() == _blendMask.size());buildPyramids();	//construct Laplacian Pyramid and Gaussian PyramidblendLapPyrs();	//blend left & right Pyramids into one Pyramid};Mat_<Vec3f> blend() {return reconstructImgFromLapPyramid();//reconstruct Image from Laplacian Pyramid}
};Mat_<Vec3f> LaplacianBlend(const Mat_<Vec3f>& l, const Mat_<Vec3f>& r, const Mat_<float>& m) {LaplacianBlending lb(l,r,m,4);return lb.blend();
}// 图像融合处理
void process(char *sleft, char *sright, char *sresult/*结果保存*/)
{if (!sleft || !*sleft || !sright || !*sright){return;}Mat l8u = imread(sleft);Mat r8u = imread(sright);// check file sizeSize sz1 = l8u.size(),sz2 = r8u.size();if ( sz1 != sz2){DEBUG_LOG("left and the right image must be the same size");exit(0);}//imshow("left",l8u); imshow("right",r8u);Mat_<Vec3f> l; l8u.convertTo(l,CV_32F,1.0/255.0);//Vec3f表示有三个通道,即 l[row][column][depth]Mat_<Vec3f> r; r8u.convertTo(r,CV_32F,1.0/255.0);/*****************    void convertTo( OutputArray m, int rtype, double alpha=1, double beta=0 ) const;******************//* Performs linear transformation on every source array element:dst(x,y,c) = scale*src(x,y,alpha)+beta.Arbitrary combination of input and output array depths are allowed(number of channels must be the same), thus the function can be usedfor type conversion *///create blend mask matrix mMat_<float> m(l.rows,l.cols,0.0);					//将m全部赋值为0m(Range::all(),Range(0,m.cols/2)) = 1.0;	//取m全部行&[0,m.cols/2]列,赋值为1.0Mat_<Vec3f> blend = LaplacianBlend(l, r, m);imshow("blended",blend);// save result to png filestd::vector<int> qualityType;qualityType.push_back(CV_IMWRITE_JPEG_QUALITY);qualityType.push_back(90);    //png格式下,默认的参数为3.if(sresult != NULL){//build file namechar filename[255] = {0};sprintf(filename, "%s.jpg", sresult);try {imwrite(filename, cv::Mat(blend), qualityType);}catch (std::runtime_error& ex) {DEBUG_LOG("Exception converting image to PNG format: %s\n", ex.what());exit(1);}DEBUG_LOG("Saved PNG file with alpha data...");}waitKey(0);
}/*******************************************************************************主函数*******************************************************************************/
int main( int argc, char * argv[] )
{// 调试程序,选择菜单->项目->属性->调试->命令参数, if ( argc < 3 ) {printf( "Usage:\n" );printf( "LaplacianBlending LeftImage RightImage\n" );exit( 0 );}DEBUG_LOG("\nleft image = %s\nright image=%s\n\n", argv[1], argv[2]);if ( argc == 3 )process( argv[1], argv[2], NULL );else  // argc >= 4process( argv[1], argv[2],argv[3]);return 0;
}//
#pragma warning(pop)


![[转]GIS简介](http://pic.xiahunao.cn/[转]GIS简介)


